
After returning from grandma’s house, I kept thinking about sewing stitches. Seeing her hand stitches and talking about stitches piqued my curiosity. So, I decided to learn about the types of hand stitches in detail.
I know there are 20 types of stitches. But do you know What are the 4 basic hand stitching?
4 Basic Hand Stitches
But I want to learn more about them. So, let’s learn about all types of hand stitches with pictures and names.
Table of Contents
At A glance at Stitch Names:
- There are 4 basic types of hand stitch.
- There are 20 types of hand stitches.
- Running stitch is the most basic type of hand stitch.
7 Basic Hand Stitches
There are 20 main types of stitches, but there are seven basic stitches, which are also considered primary stitches, meaning they are the base of every decorative stitch by hand. And the most common Basic Embroidery Stitches,
- Back stitch
- Cross stitch
- Buttonhole stitch
- Blanket stitch
- Stain stitch
- Running stitch
- Tent stitch

But rather than that, there are other types of stitches sewing too. Today’s session is all about it.
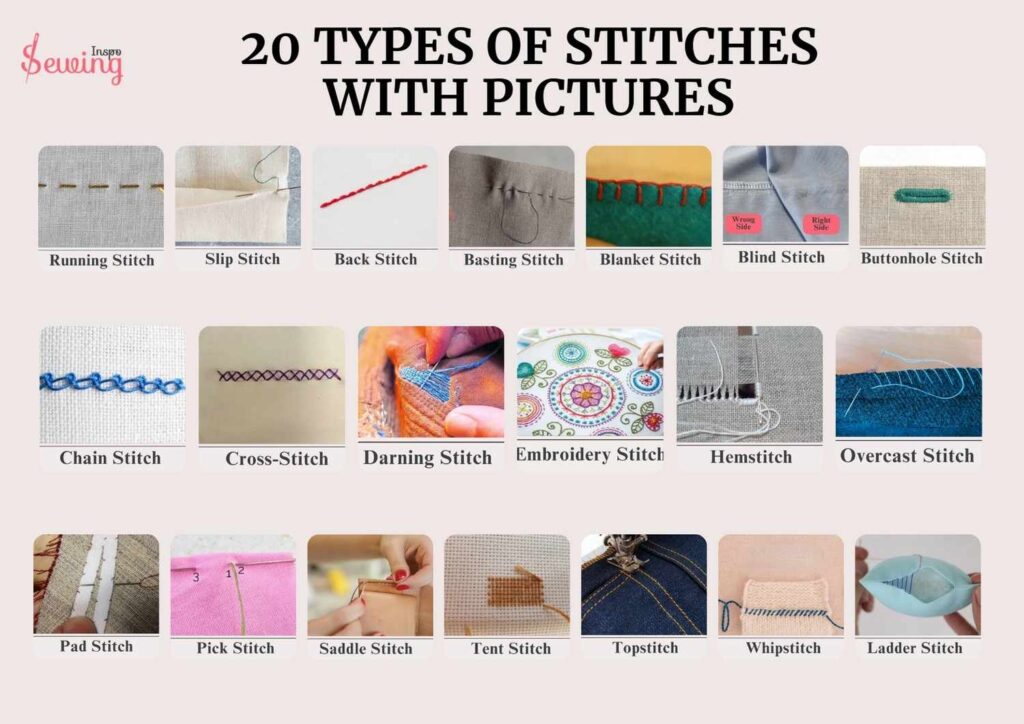
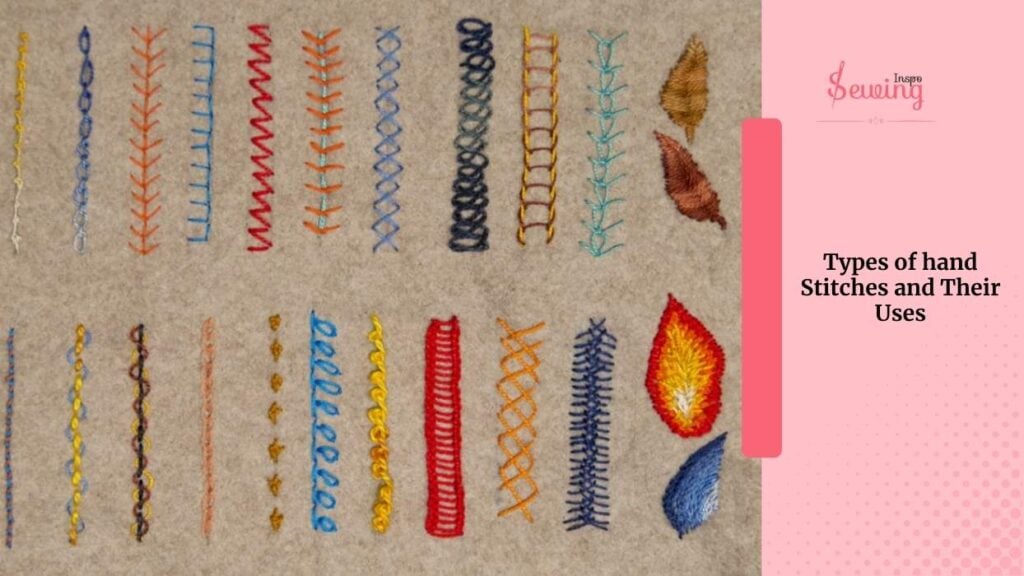
20 Types Of Hand Stitches With Pictures
I thought stitching was a complicated thing for a newbie like me. I mean, all those 20 types of hand stitches are quite difficult. But I need to know about them to learn how to sew decorative stitches by hand. And it seems so easy as I look into it more.
Here is most common used kinds of stitches with pictures and names:

Do you want to see 20 types of stitches with pictures?
Here it is different types of stitches!

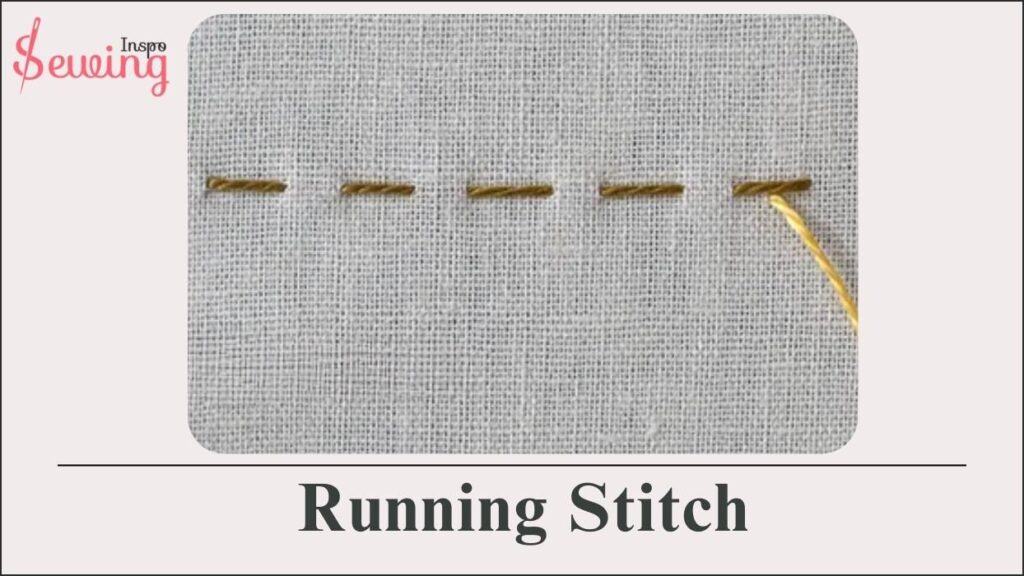
Running Stitch
A running stitch is a simple type of sewing where the needle goes in and out of the fabric in a straight line.
The running stitch is a straight thread line.
You need this stitch to start a stitch every hand sewing. Running a stitch is actually the first 1-3 thread footstep in all kinds of sewing projects.
Running stitch is a most common stitch. And every sewing project must start with a running stitch. So, if you want to learn how to sew different stitches by hand, then you gotta learn running stitches. This basically stitch for seams.
It’s easy. You just gotta have to go back and forth with the stitch.
-How long should a running stitch be grandma?
-The length of the stitch typically ranges from 1/8” to 1/4” but can vary between 1/16” to 1/2”
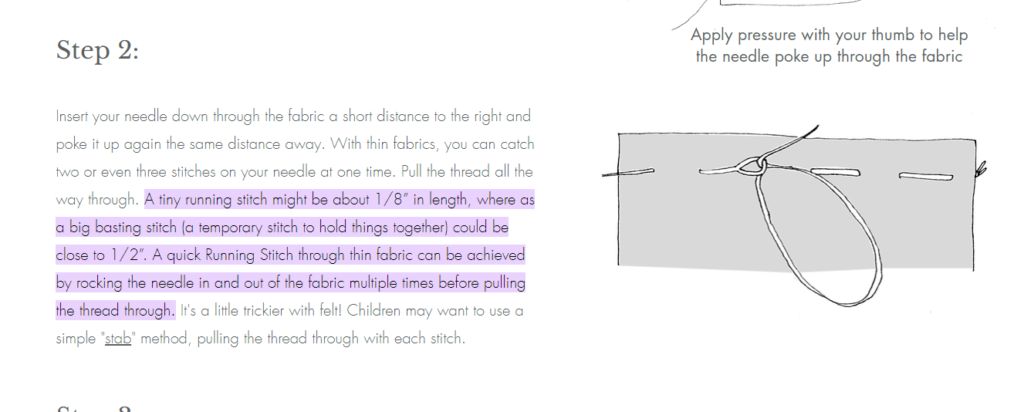
However, the length can depend on how long the pieces of fabric you are trying to stitch together is. Just because it is a basic stitch doesn’t mean you have to stay basic. There are 3 kinds of running stitches, too. Those are:
- Whipped Running Stitch
- Double Running Stitch
- Seed stitch
Slip Stitch
Slip stitching is a sewing trick to contact two folded edges together.
You use tiny, nearly invisible stitches that only grab a few threads of the fabric. It’s handy for sewing hems, binding edges, and finishing projects like clothes, quilts, or furniture.
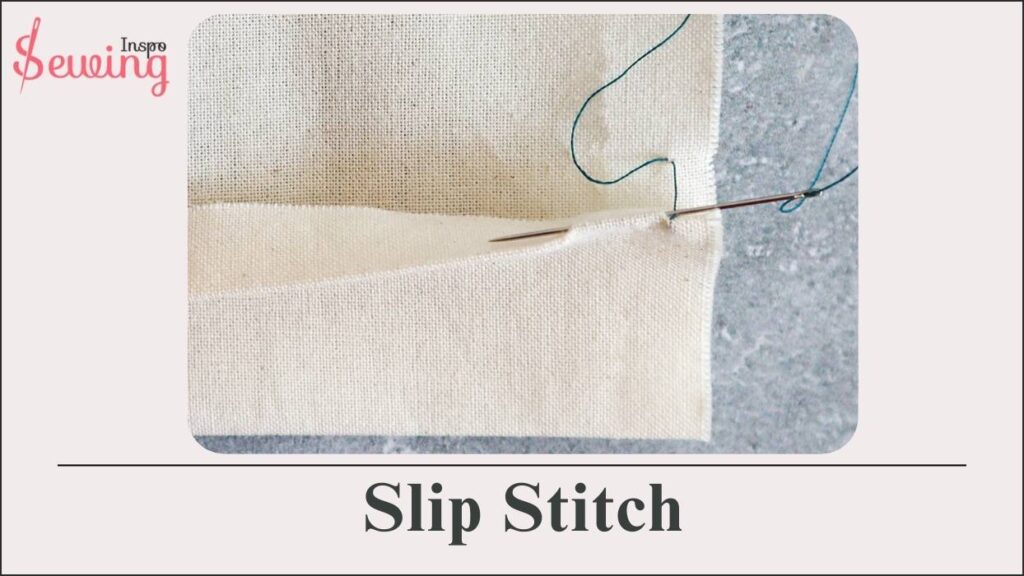
Because it’s hard to spot, it makes everything look really neat and clean.
First of all, use a needle threader and thread needle. You just need 2\3 stitch for a clean slip stitch. Also, if you can follow the 1\2,1\8 or 1\10 inch distance between each slip stitch, then you will have the clearest project.
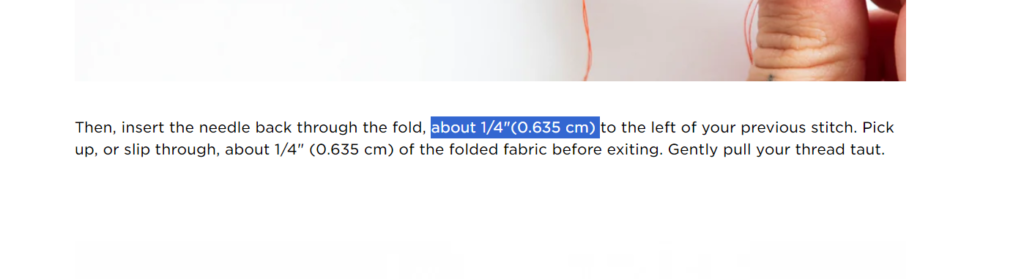
-It’s better to use 1/4 in (0.635 cm) 😊
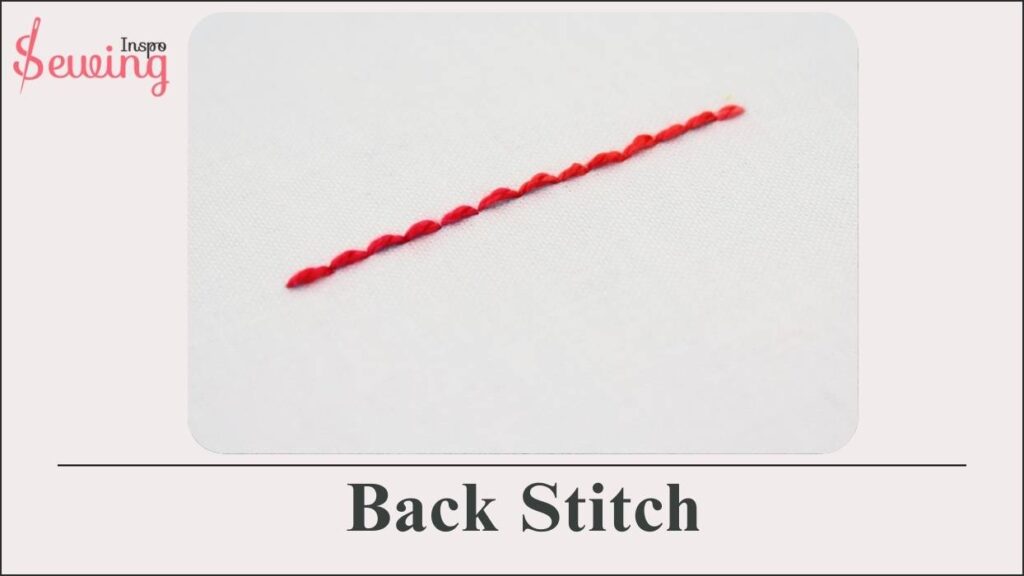
Backstitch
A backstitch is a strong type of sewing where the needle goes back into the last stitch before making a new one.
This is just a backward stitch.
Looking for what is the strongest hand sewing stitch? Then backstitch is your stop. You can do back stitches just by 4 to 5 raw stitches.
This stitch is stronger and more secure because it’s done with a single thread. 👊 That’s why this is my favorite among all 10 types of stitches.
You make a single stitch in and out of the fabric, then return with the needle to a spot before the previous stitch. After that, bring your needle one stitch ahead of the last one. The distance between these stitches can vary depending on what you’re making.
-I would like it to be better to maintain 1/4 – 1/8 inch long inch distance.

But the method stays the same: stitch forward, then backwards, always inserting the needle where the last stitch ends. Here are various kinds of backstitch:
- Brick stitch
- Open backstitch
- Split backstitch
- Double threaded backstitch
- Even Backstitch
- Half-Backstitch
- Prickstitch
- Pickstitch
And each of them is the strongest hand stitch. So use them whenever you need them.
Our Back Stitch Tutorial
Basting Stitch
A basting stitch is a loose, temporary stitch used to hold fabric pieces together before sewing them permanently.
A basting stitch is used to hold two fabrics with just 6 stitches.
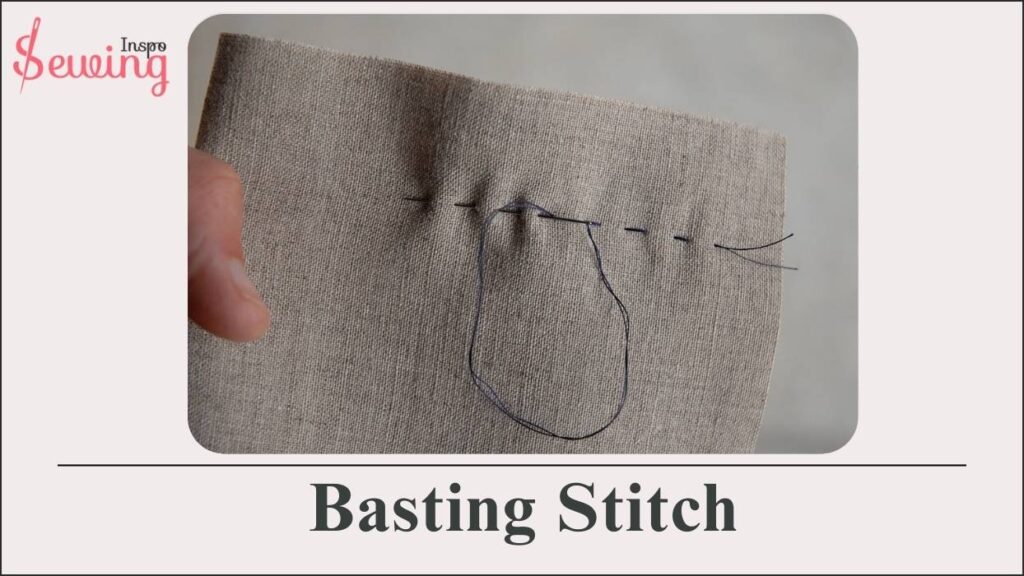
These are the most basic types of hand stitches for sewing.
-They are just long stitches about ¼” apart and 1/2″ (1.3 cm) to 3/4″ (2 cm) long.
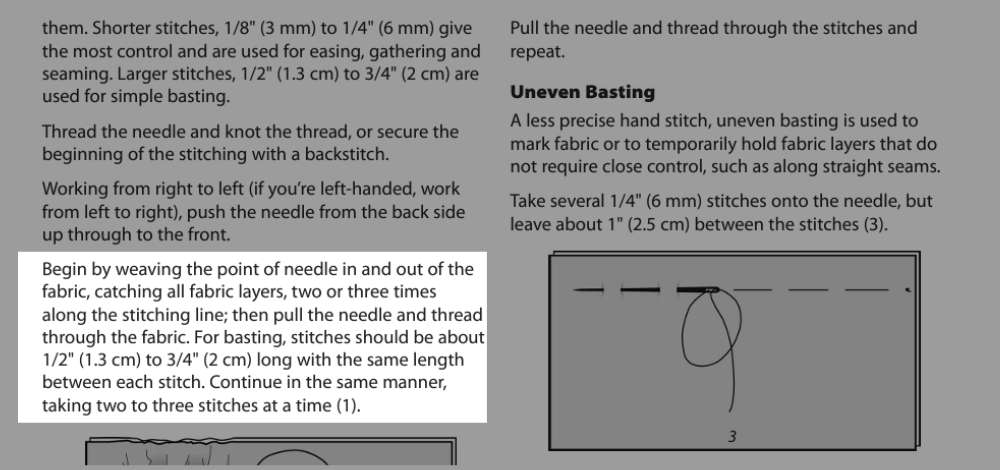
Depending on how easy the fabric is to work with, you can choose to leave the stitch without a knot. It is really important to learn this stitch—it’s used for hand-sewing fabric or marking patterns before using a sewing machine to sew hems or place pockets.
The fun fact is that-
You can easily remove it when you’re sewn without harming your fabric. You can also change the style as per your preference, such as:
- Hand Basting
- Machine Basting
- Pin Basting
- Basting Edges
Blanket Stitch
A blanket stitch is a type of sewing used to finish edges. The needle goes in and out along the edge, creating a looped border.
This is mainly used to make blankets.
To start a blanket stitch, you just need to start from the edge of blankets and bring the needle up about a quarter inch from where you want your stitch to start.
Pull the thread through to the front. Then, put the needle down very close to where you started and pull it through from the front to the back of your fabric. Loop the thread under the needle point and pull it through. You can even start with 10 kinds of styles:

- Arcade stitch
- Fly stitch
- Griddle stitch
- Alpine stitch
- Rose stitch
- Scallop stitch
- Boxed blanket stitch
- Ceylon stitch
- Picot stitch
- Straight stitch
Watch Our Blanket Stitch Tutorial
Blind Stitch
A blind stitch is a sewing technique that hides the thread. The needle takes small stitches to keep the seam invisible.
This stitch joins two stitches without showing a stitch.
Blind stitch is a straight line of 4 to 5 stitches used to join 2 fabrics. It is mostly used in garments. Start by hiding the thread knot between the folded hem.
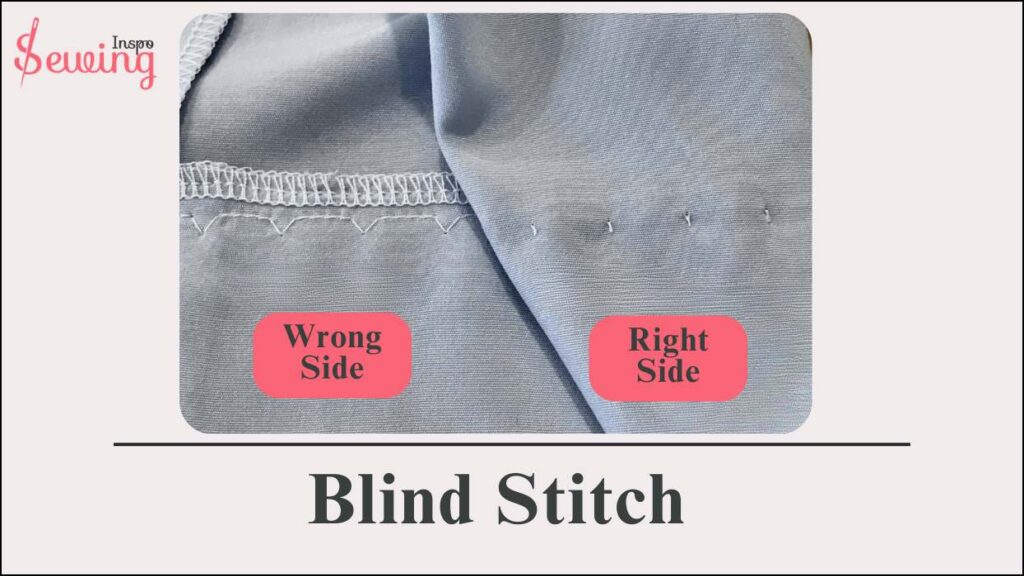
Make a small stitch on the main fabric, a bit to the left of the first stitch but close to the folded edge of the hem. Each stitch should maintain 1\8 or 1\4 inch. Since it is an invisible blind stitch, it won’t show in front of the fabric.
- Blind Hem Stitch
- Blind Hem Stitch
- Blind Catch Stitch
Watch My Blind Stitch Tutorial
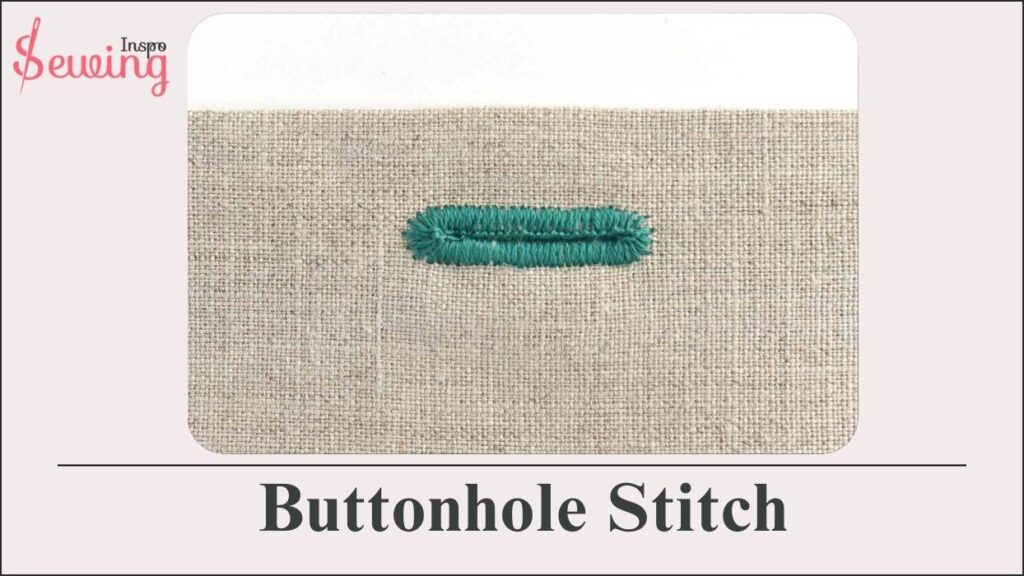
Buttonhole stitch
A buttonhole stitch is a type of sewing used to make strong edges around a buttonhole. The needle goes in and out to create tight loops along the edge.
As you can tell by the names, the buttonhole stitch is usually for buttons.
To secure a button on your shirt, it needs 14 to 16 stitches. It makes “L” shapes with bumps on top. Depending on your button size, you may need 24-30 inches of thread.
Then Start where you want the edge, go down and up, wrap the thread over the needle, pull it through, go back up over the thread, and pull the stitch tight. You can use different threads like silk for fancy clothes, nylon for tough jobs, or cotton for most things. If you are bored with the old style, then you can try those:
- Hand Sewn Buttonhole
- Faced Buttonhole
- Fabric loop buttonholes
- Shaped Buttonhole
Chain stitch
A chain stitch is a sewing method where the needle forms loops in a chain-like pattern. It’s often used for decorative purposes or to join pieces of fabric together.
This stitch looks like a fabric chain.
Chain stitch is usually used to make fany embroidery designs. It isn’t that hassle. You just have to put your thread through the eye of the needle and tie a knot at the thread’s end.
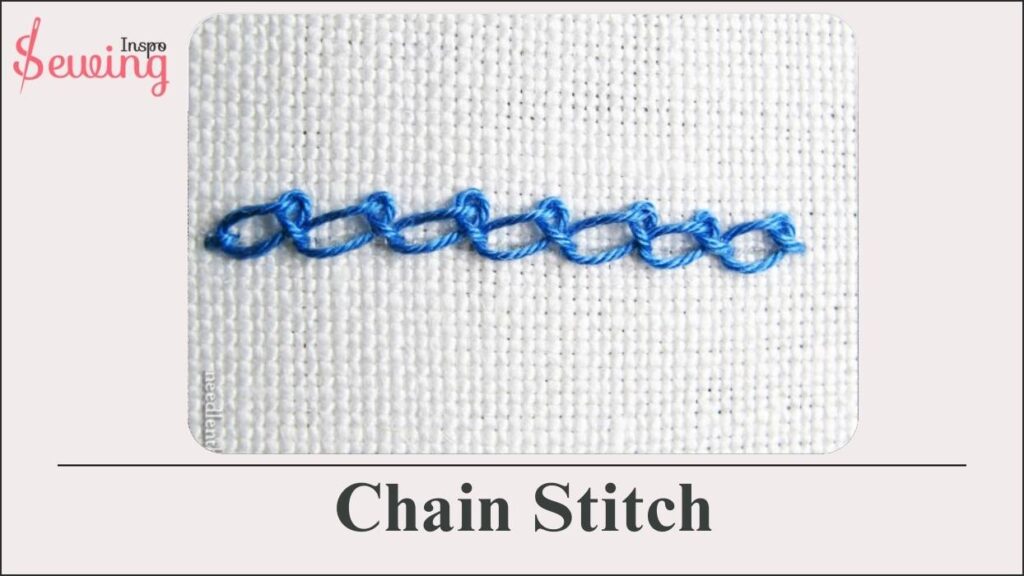
Make a small,1 straight line with your thread on the fabric. Pull your thread up from the underside of your fabric a 1-2 centimetre distance away from where you started, based on how long you want your chain part to be.
However, according to wil com you need to maintain 2.5-3.5 mm distance if you working with royn thread.
Then, you need to push your needle through the spot where your thread first came up and then down again to the place where your thread is currently coming out. Now, do it again, but this time, instead of going back to the first spot, move forward. Each time, go through the loop you made before and then down into the fabric right.
However, the process can be depending which kind of chain stitch you are doing:
- Chequered Chain stitch
- Open Chain Stitch
- Cable chain stitch
- Alternating Barred stitch
- Whipped chain stitch
- Chain stitch – Back stitched
- Twisted Chain stitch
- Heavy Braid chain stitch
- Chained Feather Stitch
- Chain stitch ( Double)
- Chain Stitch ( Filling )
- Chain Stitch overlapping
- Chain stitch Double variation
- Butterfly chain stitch
- Rosette chain stitch
- Wheat ear chain stitch
Cross-stitch
Cross-stitch is a type of embroidery that uses x shaped or zigzag stitches.
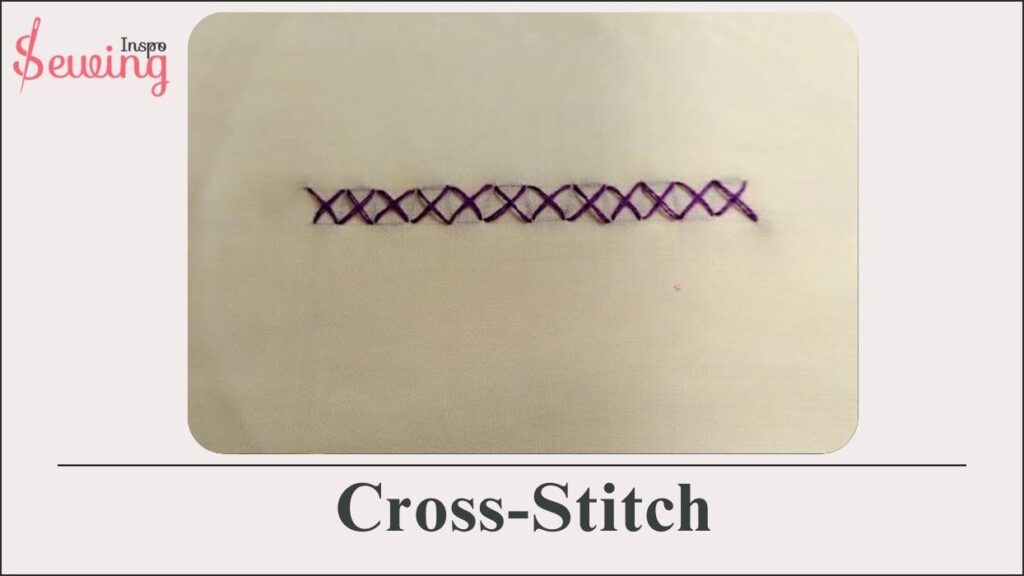
It has existed since the 500 AD and is still loved worldwide because of its easy pattern style. The style makes it easy to do sewing projects for beginners.
In cross-stitch, you make little X-shaped 75-100 stitches in a pattern to create a picture or design. You usually work on a fabric with tiny holes, like Aida cloth, to help guide your stitches.
To do cross-stitch, you follow a pattern that tells you which color to use and where to put each stitch. This is mainly used for decorative items like wall hangings or to add personal touches to clothes or home decorations. There are even 15 varieties in it:
- Basic cross stitch
- Long-armed cross stitch
- Double cross stitch
- Italian cross stitch
- Basket stitch
- Leaf stitch
- Herringbone stitch
- Closed herringbone stitch
- Tacked herringbone stitch
- Threaded herringbone stitch
- Tied herringbone stitch
- Montenegrin stitch
- Trellis stitch
- Thorn stitch
- Van Dyke stitch
Here Is Cross Stitch Tutorial
Darning stitch
In fact, according to Wikipedia,
Darning is a sewing technique for repairing holes or worn areas in fabric or knitting using needle and thread alone. It is often done by hand, but using a sewing machine is also possible. Hand darning employs the darning stitch, a simple running stitch in which the thread is “woven” in rows along the grain of the fabric.
Getting 1 or 2 inch holes in fabric is normal because fabric wears out over time. But that doesn’t mean you have to throw it away. That’s where Darning steps in to help you out. Begin by anchoring the thread with a small stitch near the edge of the hole to keep it in place.
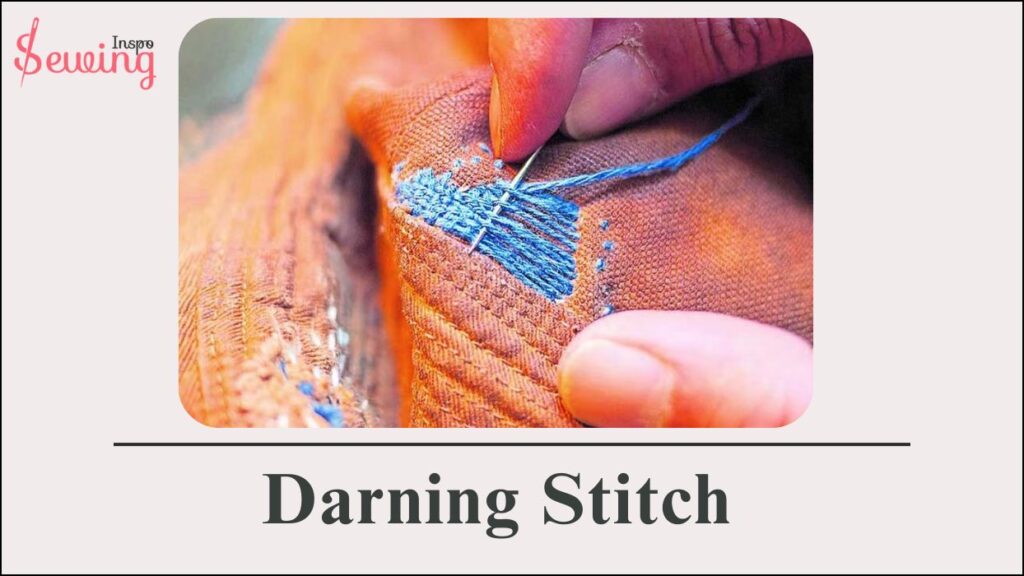
Then, weave the needle and thread horizontally across the hole, leaving at least 2\3 mm space. Next, change direction and weave vertically, interlocking the threads to create a sturdy patch. Continue weaving back and forth until the entire hole is covered. And that’s it! The hole in the fabric will be gone. There are 4 types of darning stitch also such as:
- Linen stitch
- Twill Stitch
- Damask Stitch
- Invisible stitch
Each type of darning by hand serves a different purpose so learn about it before starting stitching.
A Visual guide for Darning stitch
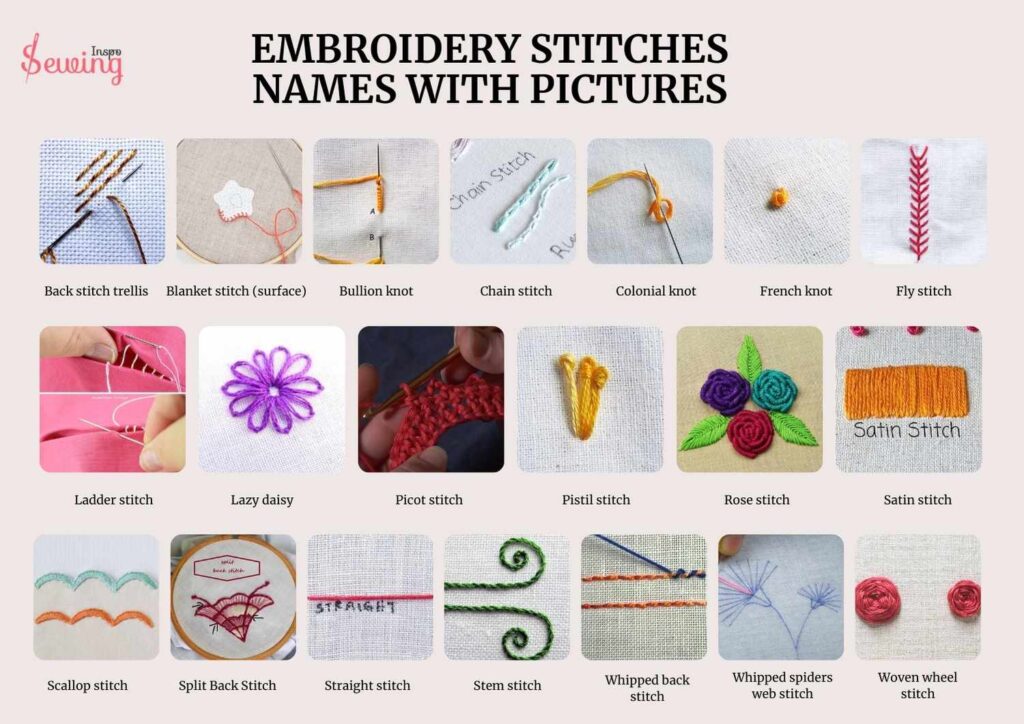
Embroidery Stitch
A technique to create fancy patterns on fabric.
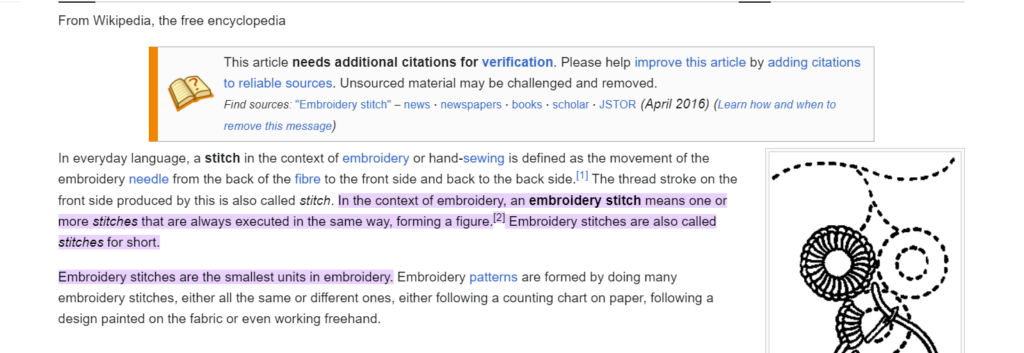
There are 400 Embroidery stitches and different ways to make pretty designs on fabric. They add texture, color, and a 3D look to the cloth. There are many types, from simple ones like the running stitch to fancier ones like the satin stitch or French knot.
Some stitches, like the backstitch or stem stitch, are good for making outlines, while others, like the chain stitch or feather stitch, fill in areas with patterns or textures. That’s the way people make beautiful embroidery dresses.

People usually do embroidery by hand with a needle and special thread, but nowadays, machines can also do it. Whether you’re decorating clothes, towels, or pictures, embroidery stitches show off your creativity and skill, carrying on a long tradition of making fabric look beautiful.
There are many ways to do embroidery stitches. Such as:
- Back stitch trellis
- Blanket stitch (surface)
- Bullion knot
- Chain stitch
- Colonial knot
- French knot
- Fly stitch
- Ladder stitch
- Lazy daisy
- Picot stitch
- Pistil stitch
- Rose stitch
- Satin stitch
- Scallop stitch
- Split Back Stitch
- Stem stitch
- Straight stitch
- Whipped back stitch
- Whipped spiders web stitch
- Woven wheel stitch
- Split Stitch
- Turkey Stitch
- Woven picot stitch
Do you want to know the names of embroidery stitches with pictures?
Here it is!
Embroidery Stitches Names With Pictures Pdf
Are you scared if you forget in mid-embroidery stitch? Well, then, download this PDF and save it for later.
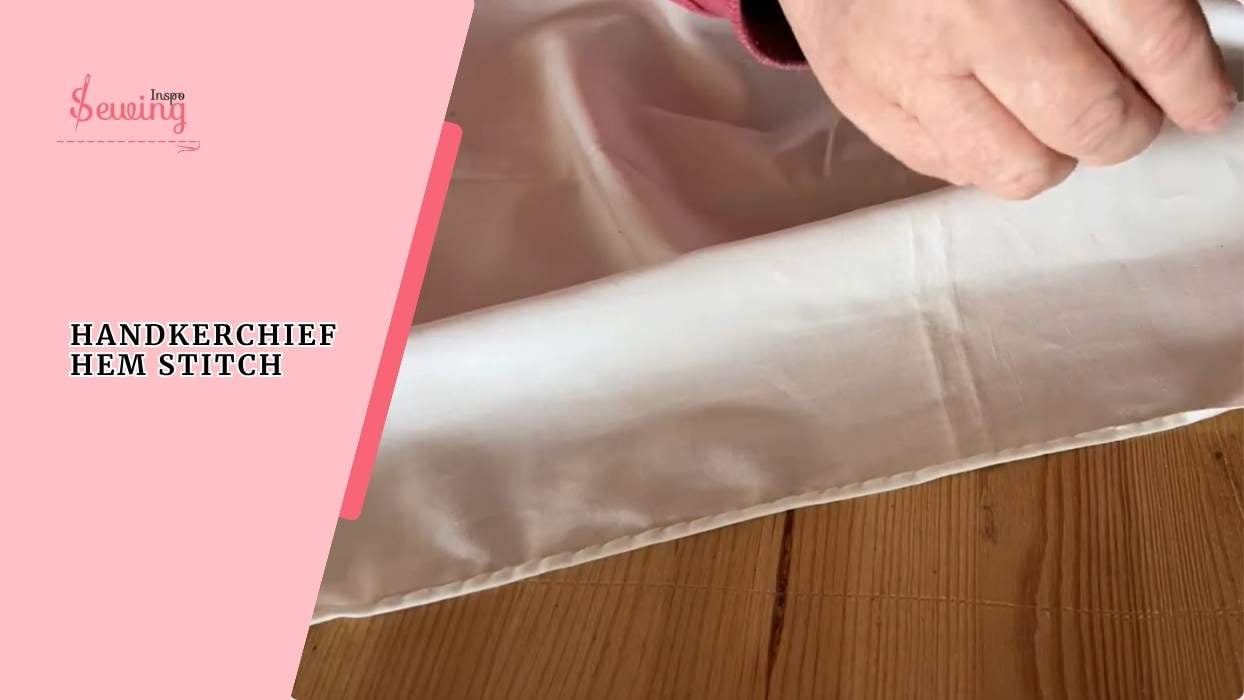
Hemstitch
Hemstich is basically a decorative stitch method.
In a 4/1 hemstitch, there are 4 warp threads in each group, and I stitch in 1 weft thread deep. You can use different numbers depending on what you want. It’s a way to secure the warp ends before taking your weaving off the loom.
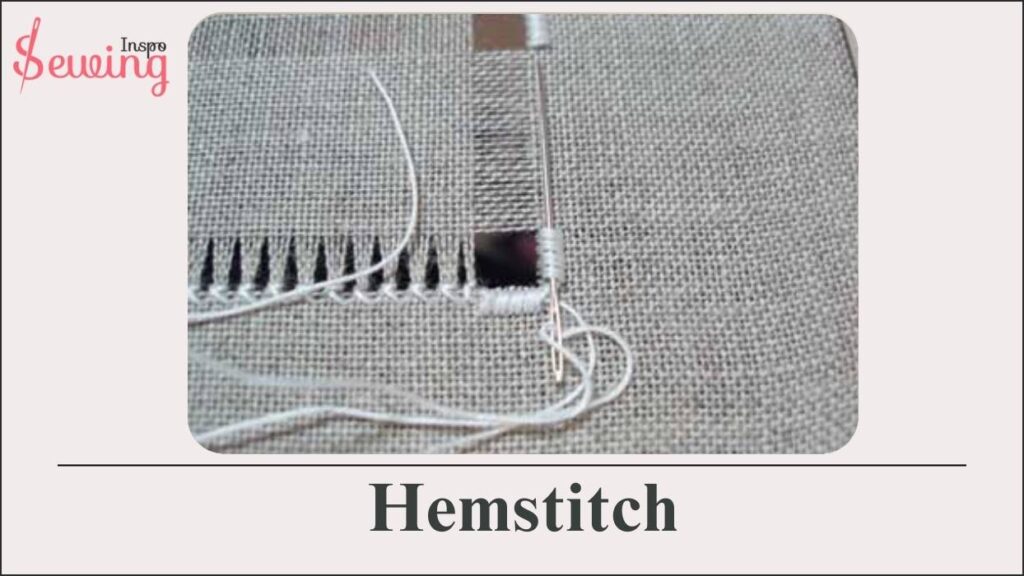
You need 14 size needle to hand stitch.
You do it by hand with a tapestry needle while your piece is still on the loom, which makes things easier. When you take your piece off the loom, the weaving starts to unravel, so you need to secure the warp ends either on the loom or right after removing them. There are various kinds of hemstitch, too.
- Blind hem
- Double fold hem
- Rolled hem
- Coverstitch hem
- Running stitch
- Blanket stitch
- Cuffed hem
- Faced hem
- Bound hem
- Catch stitch
- Narrow hem
- Piped hem
- Decorative embroidery
- Frayed hem
- Knit hems
- Scalloped hem
- Serged hem
Visual Guide to Hand Sewing a Hem Stitch
Overcast Stitch
Overcast stitch is used to finish fabric edges neatly so they don’t unravel.
You start by sewing diagonally over the edge of the fabric, starting about ¼ inch from the end. Then, you go back and forth, making sure the thread wraps around the raw edge.
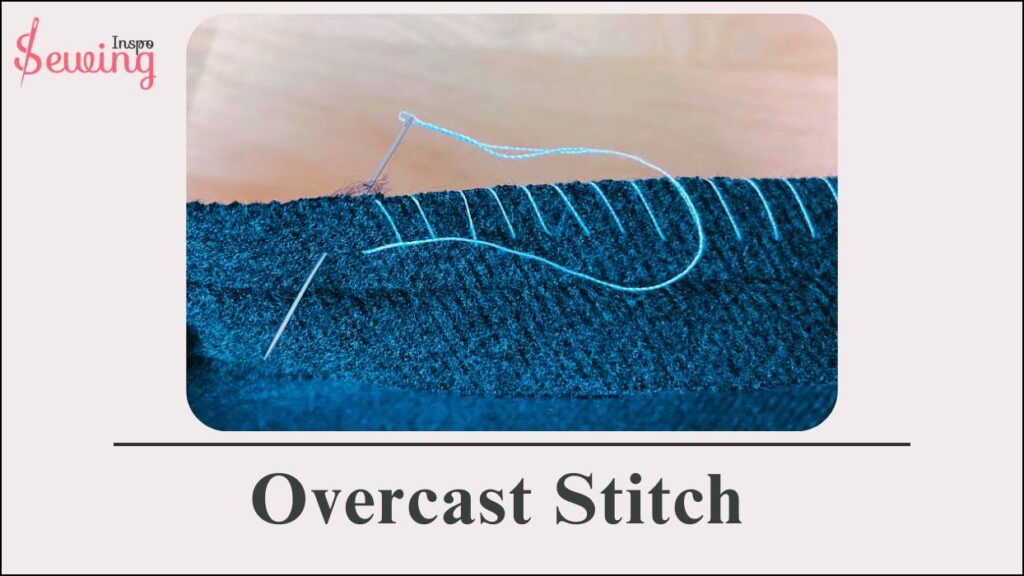
Keep the stitches evenly spaced and the same length. Double overcasting is when you cross the diagonal stitches to make little X shapes. This makes the fabric edges super smooth. To do it, you can try those 2 kind of stitches too:
- Small stitch
- Even stitch
Pad Stitch
Pad stitching is a sewing technique used in tailoring to add structure and shape to garments.
According to Wikipedia,
Pad stitches are a type of running stitch made by placing small stitches perpendicular to the line of stitching. Pad stitches secure two or more layers of fabric together and give the layers more firmness; smaller and denser stitches create more firmness. They may also be used to enforce an overall curvature of the layers.
Pad stitching, also called tailor’s stitch or stabstitch. This stitch is basically to attach 2 fabrics. It’s made by sewing small stitches perpendicular to the line of stitching, and tighter stitches make things firmer. This technique can also shape the layers.
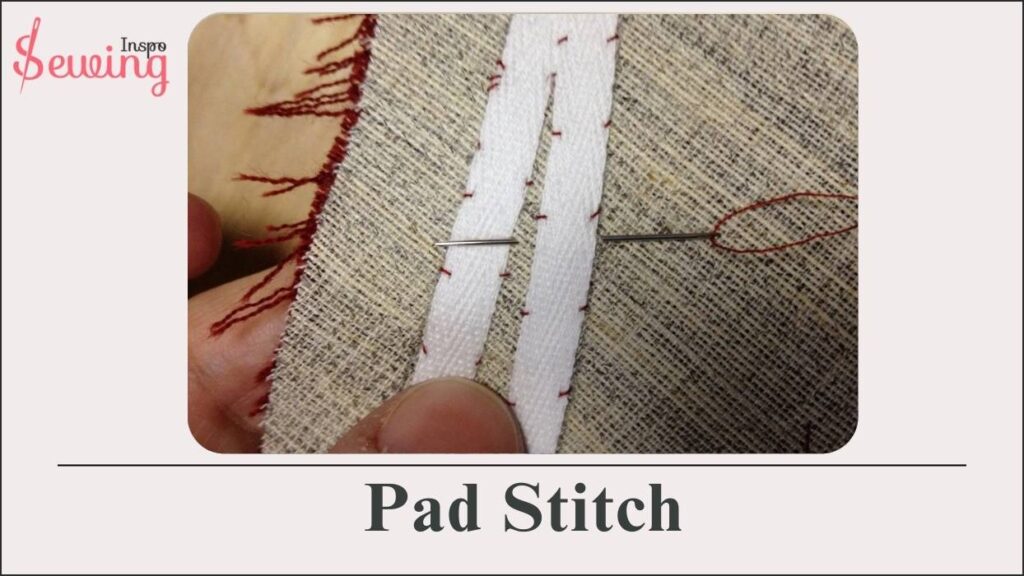
In tailoring, pad stitching is often used to attach hair canvas to an under-collar. The stitches go on the piece under the collar or lapel, so they’re hidden. You just need small stitches about a 1\4 inch long and an 8 inch wide. That’s it. You have a perfect collar.
Pick stitch
A pick stitch is like a small back stitch with short, nearly invisible stitches and long spaces between them.

When done repeatedly, it looks like a line of tiny stitches with big gaps in between. It is generally 2 stitches in every 3 raw. But it can vary on the situation.
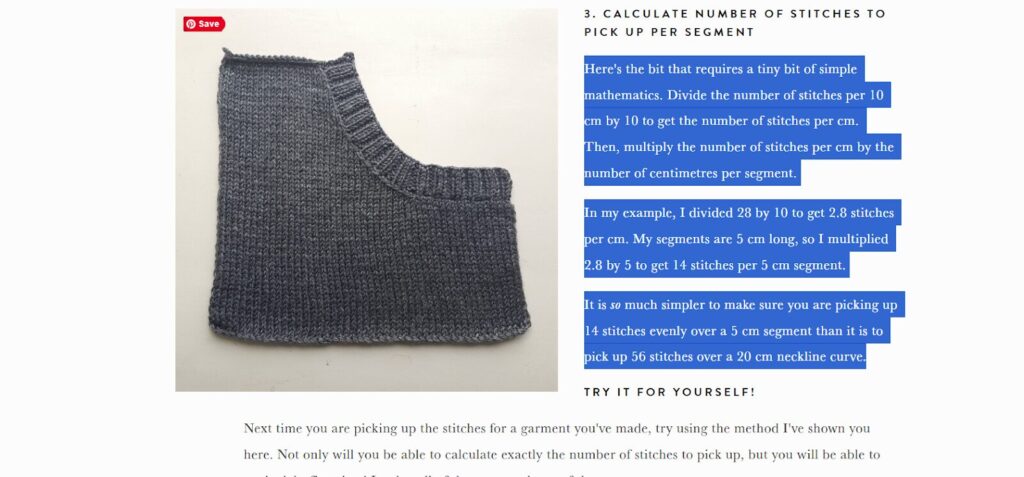
For example, To calculate the number of stitches per centimetre, divide the number of stitches per 10 cm by 10, then multiply by the number of centimetres per segment. If you have 28 stitches per 10 cm, divide 28 by 10 to get 2.8 stitches per cm. If your segments are 5 cm long, multiply 2.8 by 5 to get 14 stitches per 5 cm segment.
Saddle Stitch
Saddle stitch is a book or notebook-building stitching method. Saddle-stitch also use for stitching leather.
You must have used this method a lot in childhood. Remember sewing new books or new notebooks with thread and needles? That’s saddle stitch. If you forgot, then let me remind you.
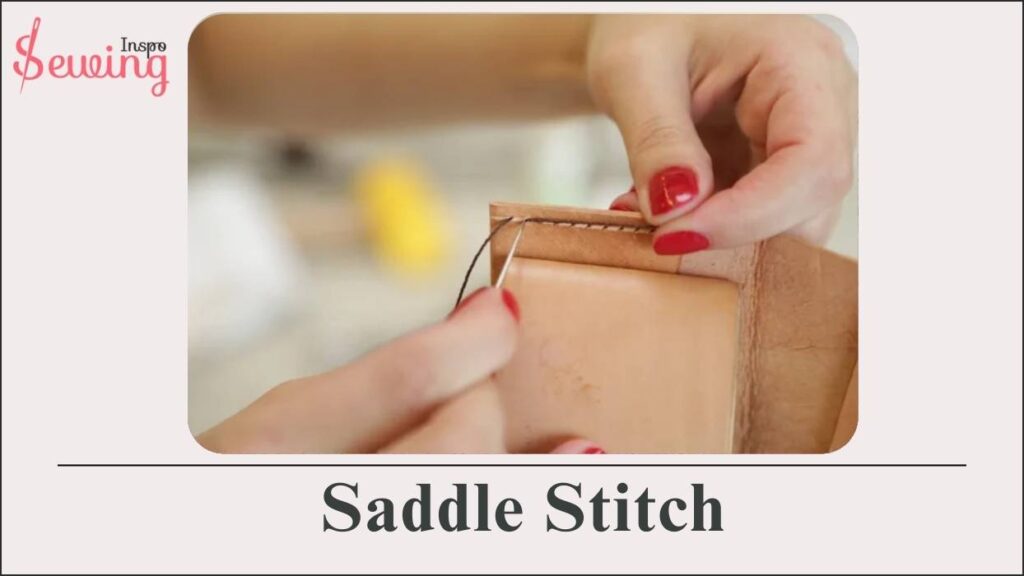
It takes more time than using a machine, but the result is stronger. Saddle stitching is good for making booklets, calendars, photo books, and programs.
For larger books, you may need more staples along the spine. It’s important that the pages come in multiples of four, so common page counts for saddle-stitched booklets are 4, 8, 12, 16, 20, 24, 28, 32 pages, and so on.
Tent Stitch
A tent looking stitch is a simple embroidery stitch used to fill in spaces in needlepoint.
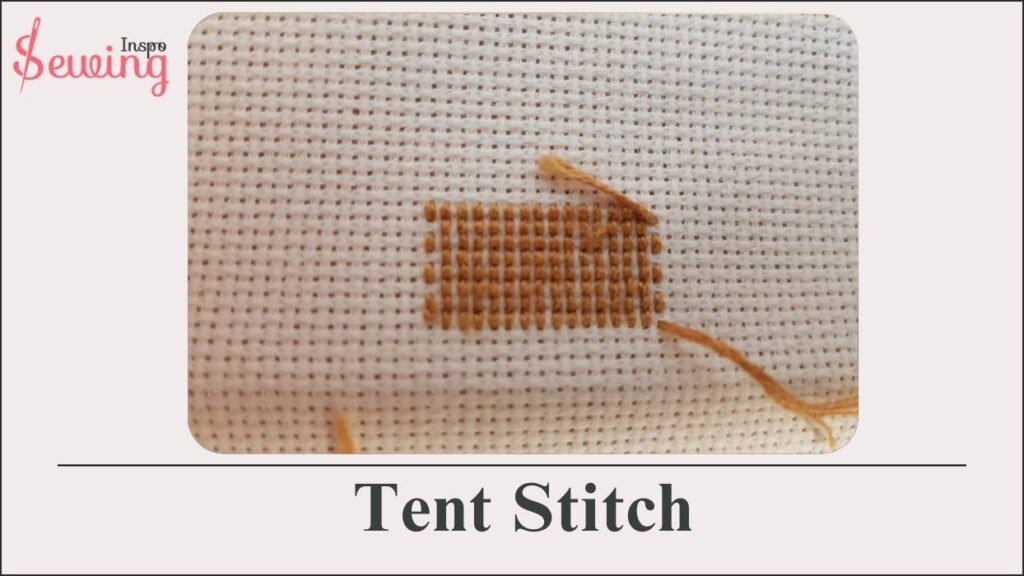
You start by threading a needle with embroidery floss or yarn and knotting the end. Then, you sew diagonal stitches over the fabric in a regular way. Covering 1 square at a time. Keep sewing until the whole area is filled with stitches.
Then, tie off the thread at the back of the fabric and trim any extra. There are 3 types of tent stitch such as:
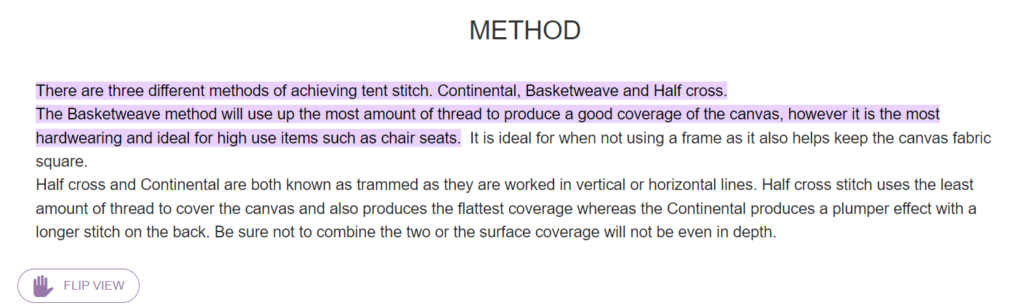
- Basketweave tent stitch
- Continental tent stitch
- Half cross tent stitch
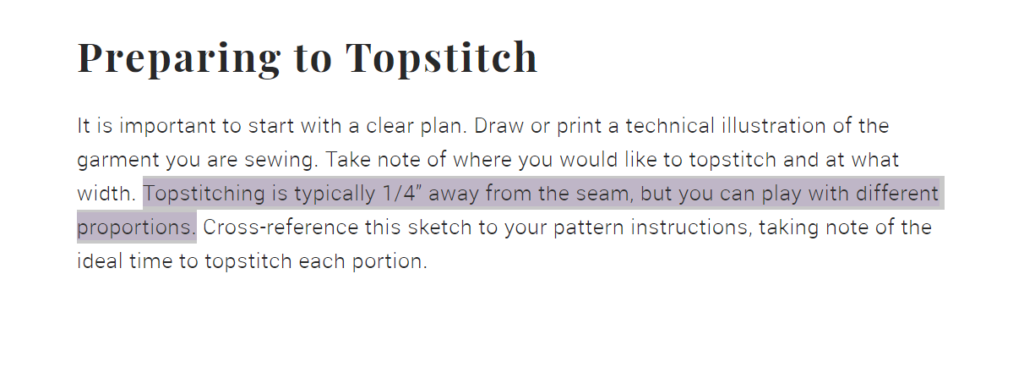
Topstitch
A topstitch is a fancy version of the basic straight stitch used in sewing.
Topstitching looks nice and can add strength to your sewing project. People often use it on clothes, bags, and quilts. Doing it is too easy, too.
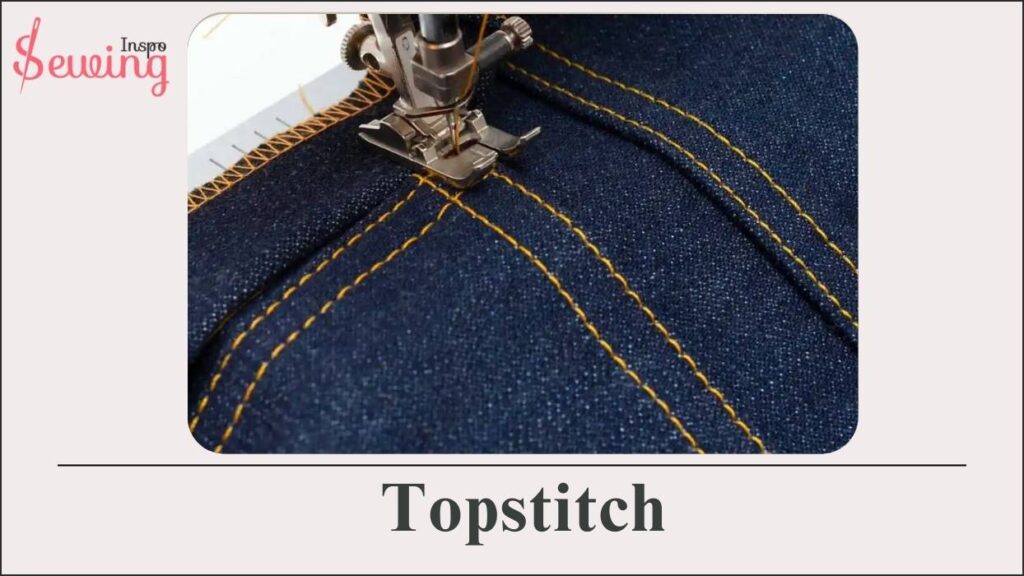
Turn the fabric the right way and iron the seam. Sew to the seam about ¼ inches away. Keep your sewing foot flat to keep the stitches even. Sew slowly.
Topstitching isn’t the same as edge stitching, which has shorter stitches and is closer to the edge. Topstitching has longer stitches and is a bit further from the edge, which helps you make fancy clothes. There 3 types of topstitch to choose from too. Such as:
- Single Topstitch
- Double Topstitch
- Triple topstitch
Whipstitch
A sewing stitch that goes along the edge.
A whipstitch is like your basic sewing stitch. You can use it to sew 2 pieces together, finish off seams, or even add decorations.
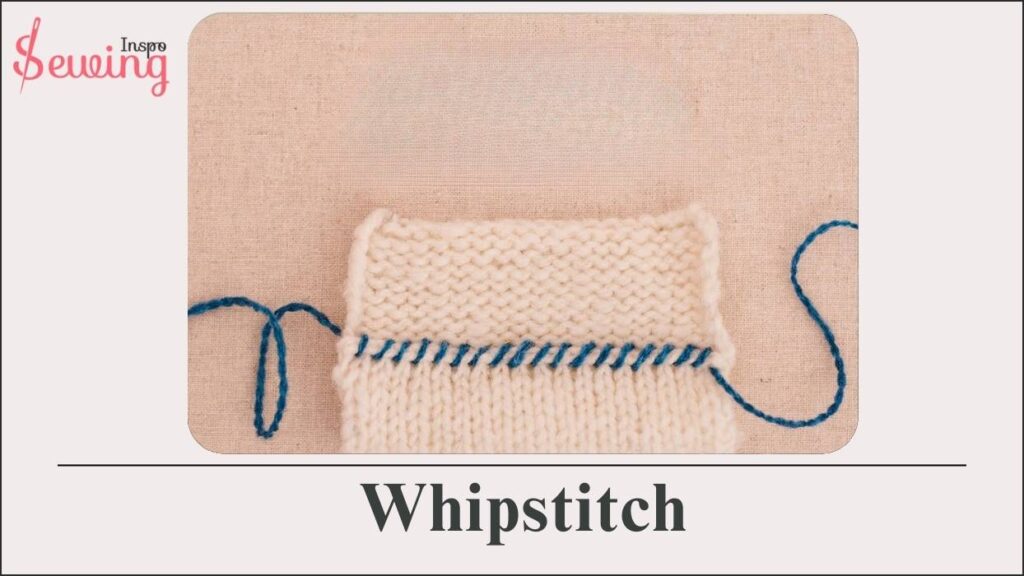
Just poke the needle through both layers of fabric in a straight line. Then, pick up a couple of threads from each piece of fabric and pull the thread through.
You can make it with a single 60 wt polyester thread., usually less than 0.75 cm long.
A whip stitch is about 10-12 stitches per inch. For sewing seams, closing holes, or hems, the stitches should be about 1/8 to 1/4 inch long. If you’re doing appliques, you can use small stitches close together with thread that matches the fabric.
Ladder Stitch
It looks like a ladder of thread.
You must use a pillow every day. Ever wonder how they made it? That’s how hand stitches work, too. They’re also often used to sew stuffed toys, pillows, or lined hems, where there’s no access to the back of the fabric after the stuffing is added. This is even the perfect types of basic hand stitches for leather. This stitch isn’t complicated, either.
You just need to make a strong stitch straight across, then another on the opposite side. Keep the stitches about 1/4 inch away from the fabric’s edge. As you make more stitches on each side, you’ll see the “rungs” of the ladder form. After a few stitches, pull the threads to tighten them and close the gap between the rungs. And that’s it! You got a pillow of your own.
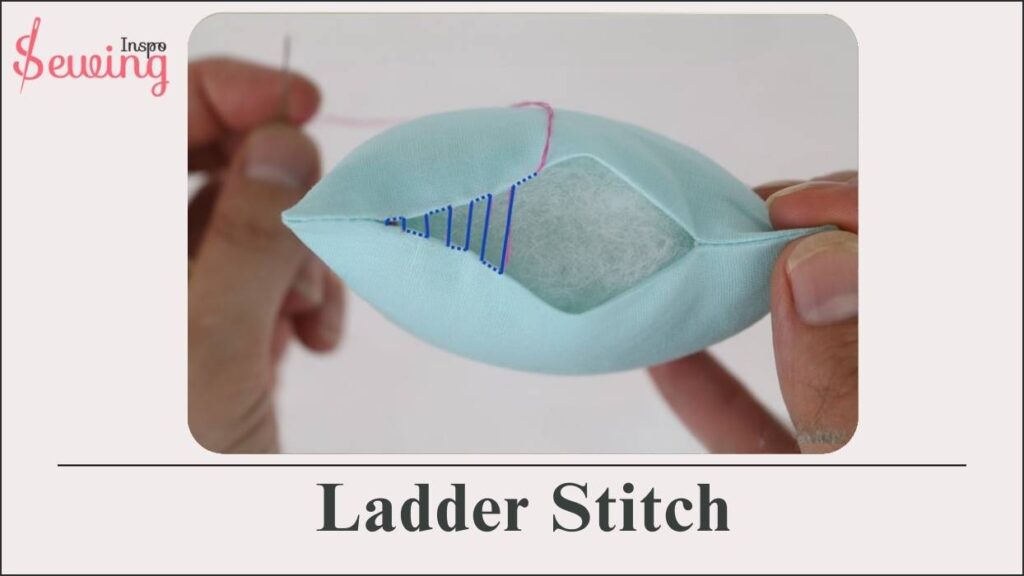
If you still do not get your head around it then check some ladder stitch diagram. I hope it will clear out your confusion.
20 Types of Stitches with Fabric Compatibility Notes
Every stitch has its own personality. Some are strong, some are stretchy, some are just plain pretty.
And the secret to clean, frustration-free sewing is knowing which stitch works best on which fabric. It’s like matching the right tool to the job so your seams don’t pucker, stretch out, or fall apart later.
- Straight Stitch – Best friend of woven fabrics; won’t stretch with knits.
- Zigzag Stitch – Designed to move with stretchy or knitted materials.
- Running Stitch – Quick for almost anything, but not built for strength.
- Backstitch – My go-to when I need a tough, secure seam on thick fabrics.
- Basting Stitch – Works on any fabric when you need a temporary hold.
- Overlock Stitch – Ideal for finishing edges on jersey and other knits.
- Coverstitch – Perfect for hemming T-shirts and any garments that stretch.
- Blind Hem Stitch – Great for discreet hems on lighter woven clothes.
- Buttonhole Stitch – Suits most fabrics — just tweak the density per thickness.
- Satin Stitch – Loves firmer fabrics; soft fabrics tend to wrinkle under it.
- Chain Stitch – Slightly stretchy, perfect for medium or heavier textiles.
- Ladder Stitch – Seam disappears beautifully on soft or stuffed items.
- Slip Stitch – Lovely for invisible hems on delicate materials.
- Whip Stitch – Works well on thick fabrics like felt or fleece.
- Blanket Stitch – Decorative edging that shines on wool, felt, and fleece.
- Stretch Stitch – Built for knits that need to expand without popping.
- Triple Straight Stitch – Heavy-duty seams on denim and canvas.
- Edge Stitch – Clean, crisp topstitching on wovens and leather.
- Feather Stitch – Pretty, decorative choice for medium-weight fabrics.
- Herringbone Stitch – Ideal for stable hems on woven garments.
Types Of Hand Stitches And Their Uses
I give you all the types of stitches with pictures & names. But what about uses? Where is the perfect? Here is a glance at it,
- Running Stitch – Basic stitch for seams, gathering, or outlining.
- Backstitch – Strong stitch for seams and outlines.
- Overcast/Whip Stitch – Finishes raw fabric edges to prevent fraying.
- Blanket Stitch – A decorative edge stitch that also prevents fraying.
Chain Stitch – Decorative stitch used for outlines and filling. - Satin Stitch – Fills shapes with smooth, solid coverage.
- French Knot – Creates tiny decorative knots, often for flowers.
- Herringbone Stitch – Decorative and good for hemming.
Types Of Stitches With Pictures—All in One Video!
Imagine seeing all the types of stitches in one place—no more searching! From basic to advanced, every kind of stitch is perfectly organized and ready for you to explore!
All different types of stitches and their names— learn them all in my short video tutorial!
Types Of Hand Stitches With Pictures Pdf/ Basic Hand Sewing Stitches Pdf
Uf that’s a lot, right? I know it is, and remembering it in one read is not an easy task. So download it and save it for later.
Types Of Joining Stitches
Among all those stitches, there are a few that are called joining stitches because they are used for joining. Some joining stitches are,

My Favorite Stitch Types
I always reach for the backstitch when I need strength, the zigzag stitch for anything stretchy, the blanket stitch for pretty edges, and the ladder stitch when I want an invisible finish. Simple, reliable, and they never let me down.
Kind Of Stitches Frequently Asked Questions (FAQ)
What Is The Best Stitch For Hand Sewing?
Running or basting stitch is the most used hand stitch.
What Is The Best Hand Stitch To Repair A Tear?
Backstiching is the best hand stitch to repair a tear of your fabric.
What is a kind of permanent stitch that has the strongest hand stitch?
One of the strongest hand stitches commonly used in sewing is the backstitch. It’s a durable and secure stitch that creates a solid line of stitching.
Warp Up
I hope i have clear types of hand stitches in detail. I know it’s kinda confusing to remember all of it. But if you keep learning about them, then it will become so much easier. Still have questions? Then comment down below. I will clear out your confusion with my level best.


Leave a Reply