
So, when I bought this bag, I noticed a tiny loop of thread poking out next to the zipper. Over time, it’s gotten worse, and now the stitching is practically coming undone.
In fact, one side is completely loose! Time for some repair work.
Some told me to throw that bag away but my heart wasn’t there to listen to it. I need to come up with some plan to fix it. That’s when the top stitch leather idea came to me.
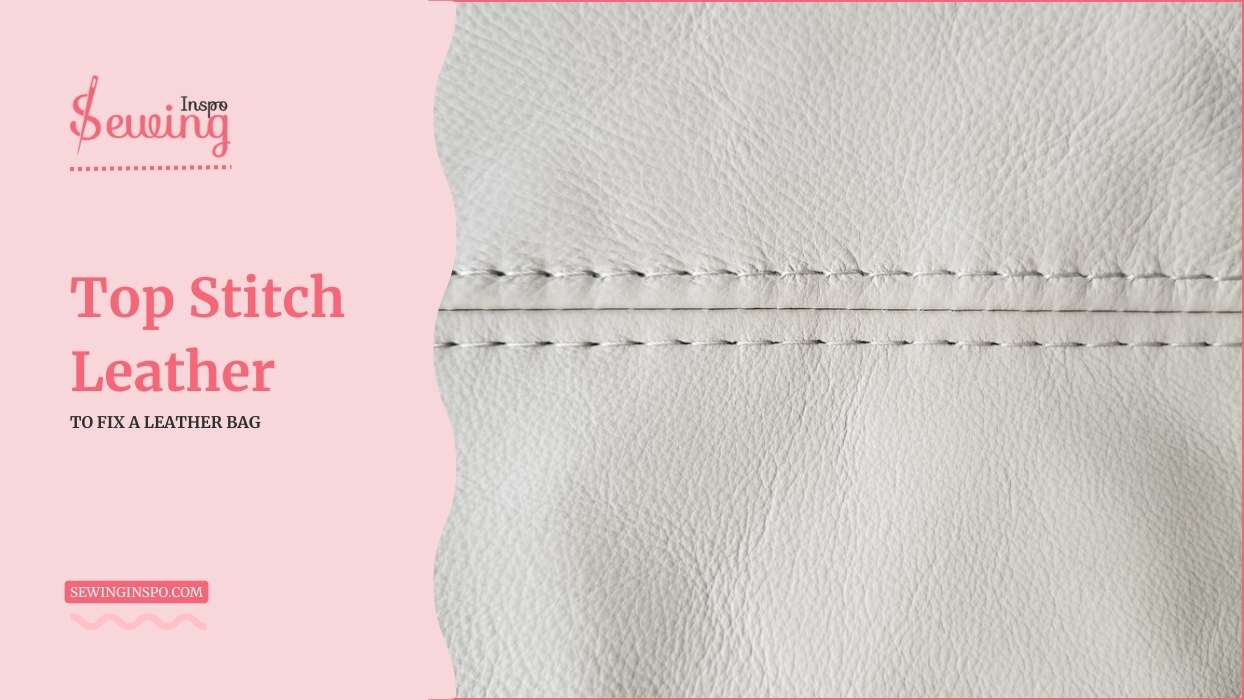
Table of Contents
What Stitch Is Best For Leather?
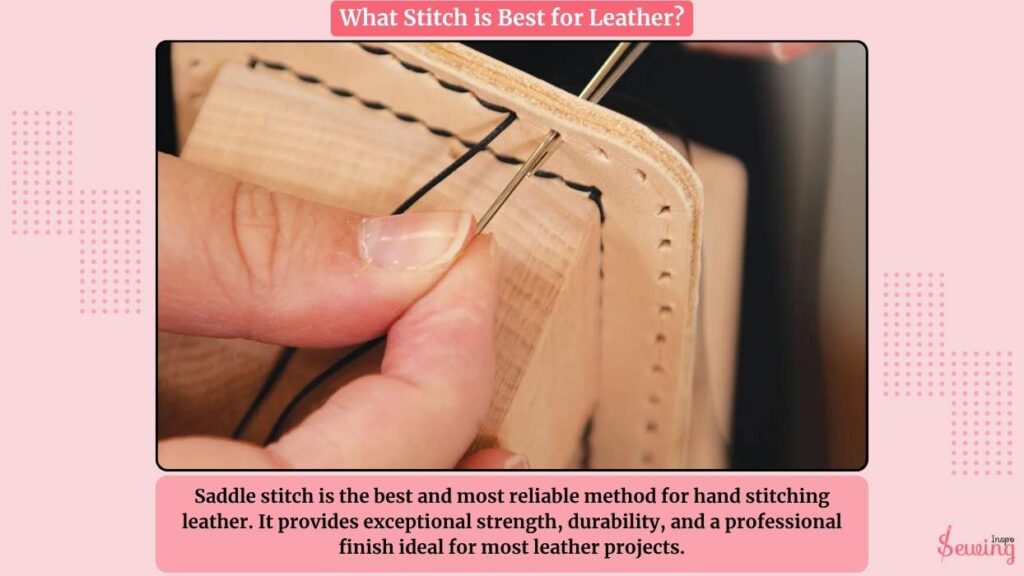
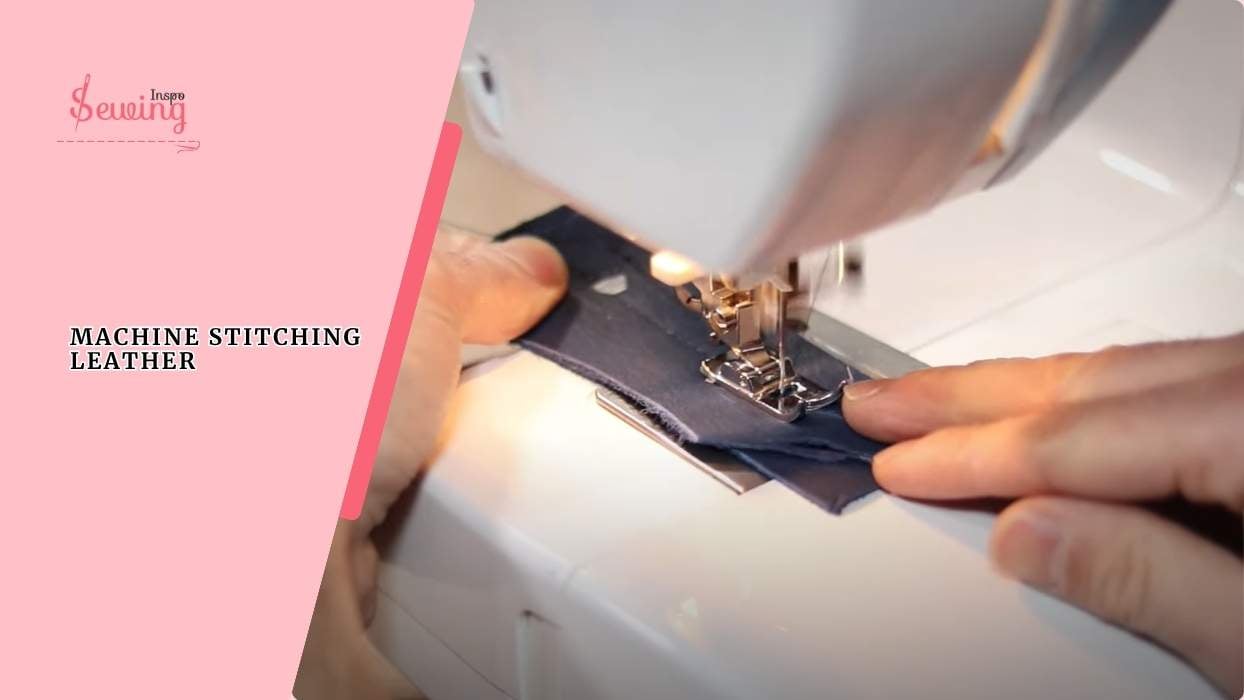
Topstitch is the best stitch for leather. Not only does it look sharp and polished, but it also adds extra strength to your seams, perfect for leather’s thick, tough nature.
Just pair it with a leather needle, strong thread, and a longer stitch length (around 3.5–4mm), and you’re good to go.
Best Thread For Stitching Leather For Topstitch By Hand
For topstitching leather by hand, the best thread is strong, durable, and designed to handle the resistance of leather. Here are your top options:
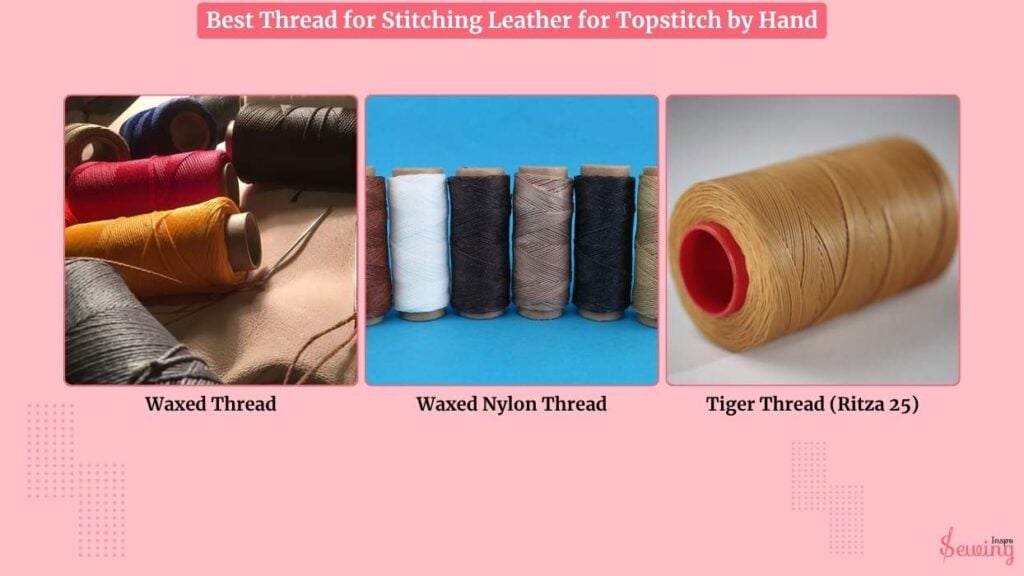
- Waxed Thread
- Waxed Nylon Thread
- Tiger Thread (Ritza 25)
So I Jump To Do Top Stitch Leather By Hand
Here’s the plan:
I could try to recover the existing threads, but since they’re already frayed. I’ll be stitching by hand through the original holes created by the manufacturer. I’ll also use the leftover threads to help secure the new stitching. This will help me do leather bag stitching.
I chose top stitching because I like it is easier than any other topstitching.
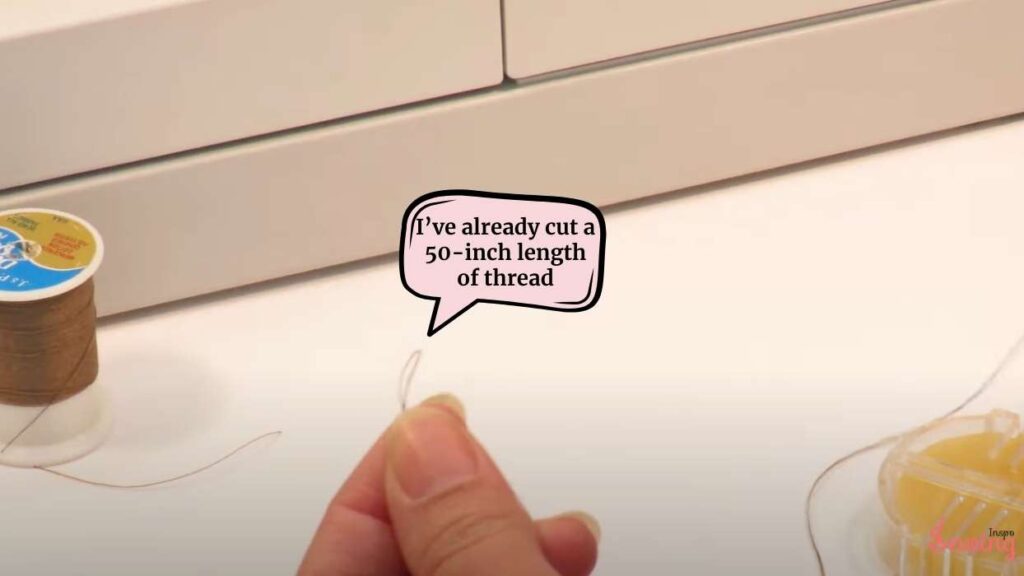
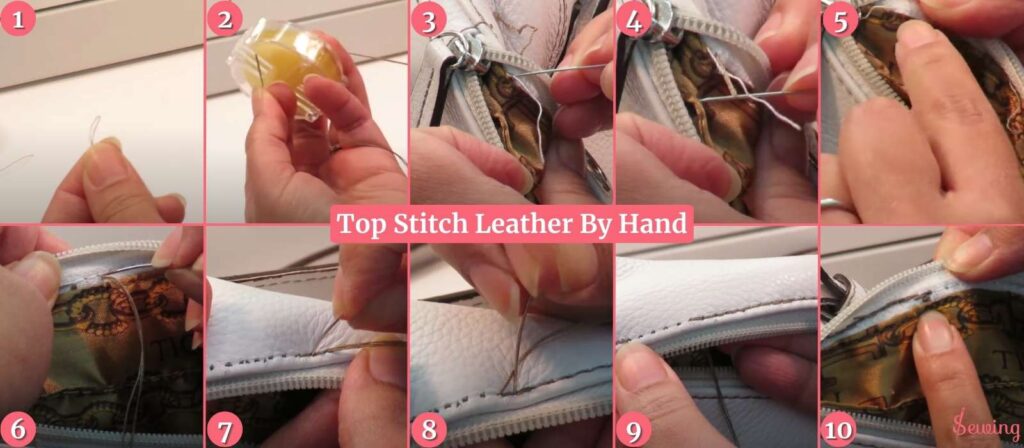
I’ve already cut a 50-inch length of thread, folded it in half, and knotted the ends to start stitching.
And I am using 2-point leather needle. That will be stitching leather goods.

Before I get started, I’m running the thread through beeswax. This helps me to stitch leather bags. It will prevent tangling such a helpful little step! I even use this for half loop top stitch too.
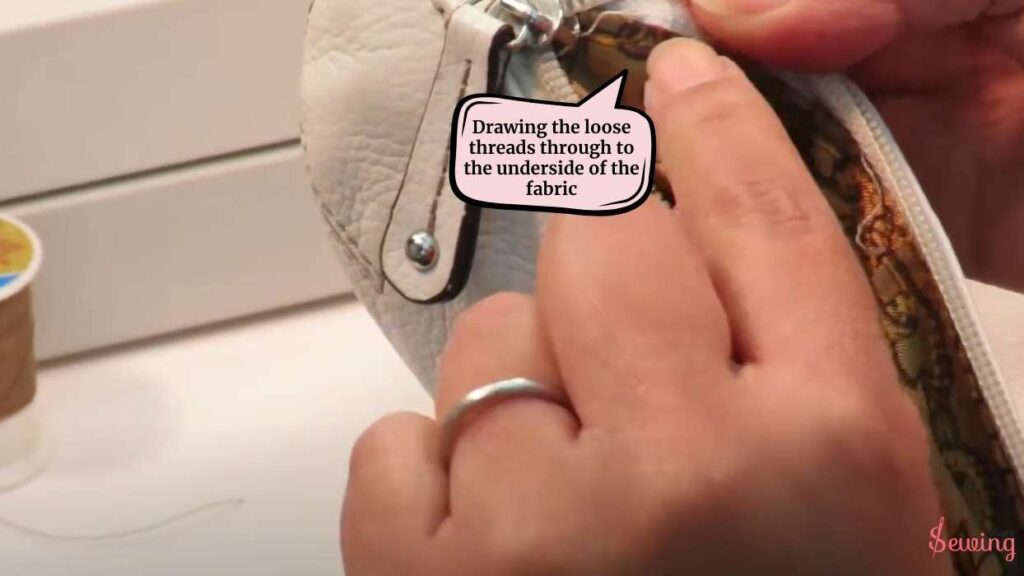
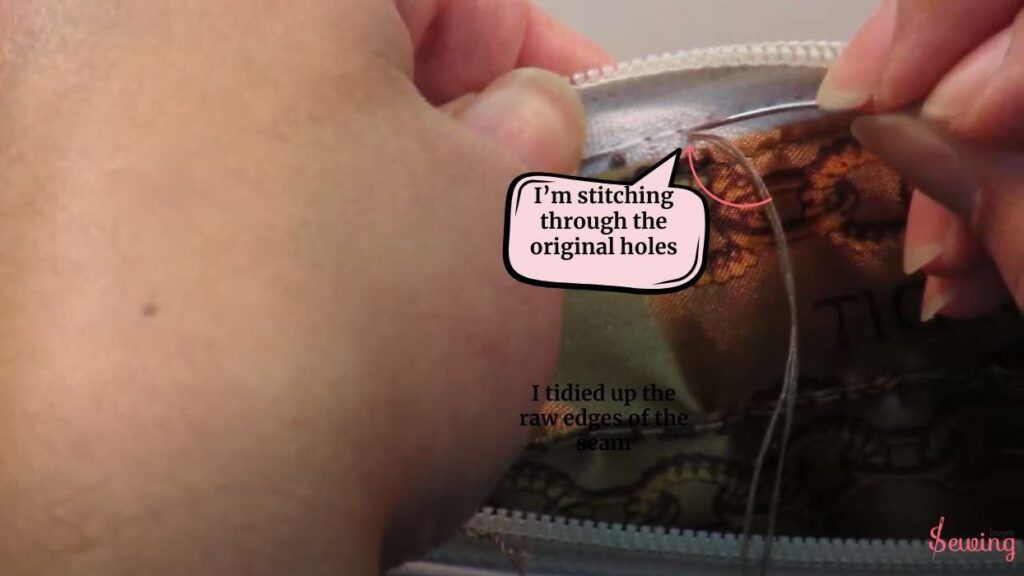
Now for the repair. The thread has pulled out along a section of the zipper. So, I’m carefully drawing the loose threads through to the underside of the fabric.
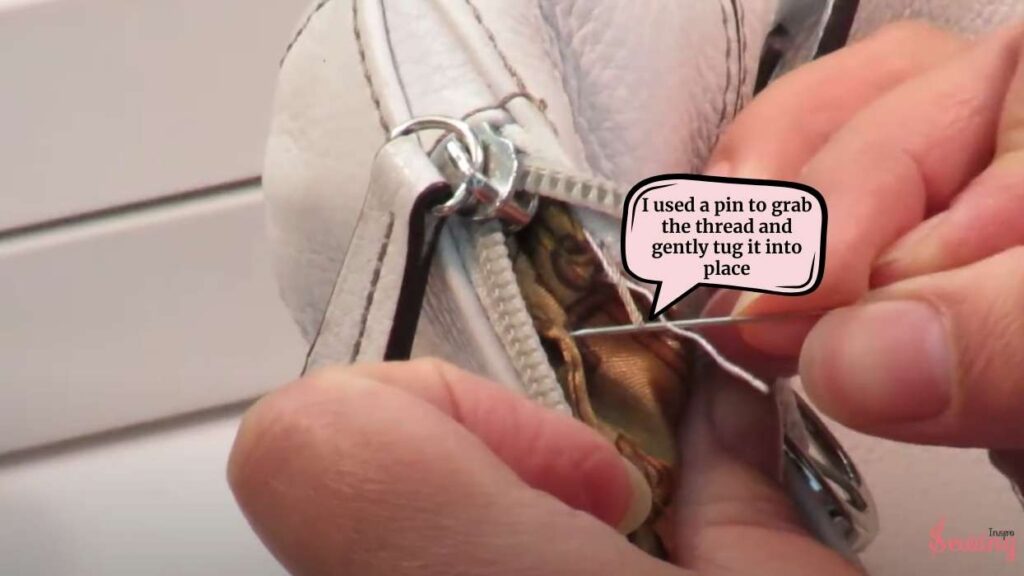
I used a pin to grab the thread and gently tug it into place. Once the loose threads are secure, I’ll bury my new stitches into the lining.
Starting at the broken section, I’m stitching through the original holes. It’s important to reuse these stitching holes. It saves wear on the fabric and makes it look seamless.
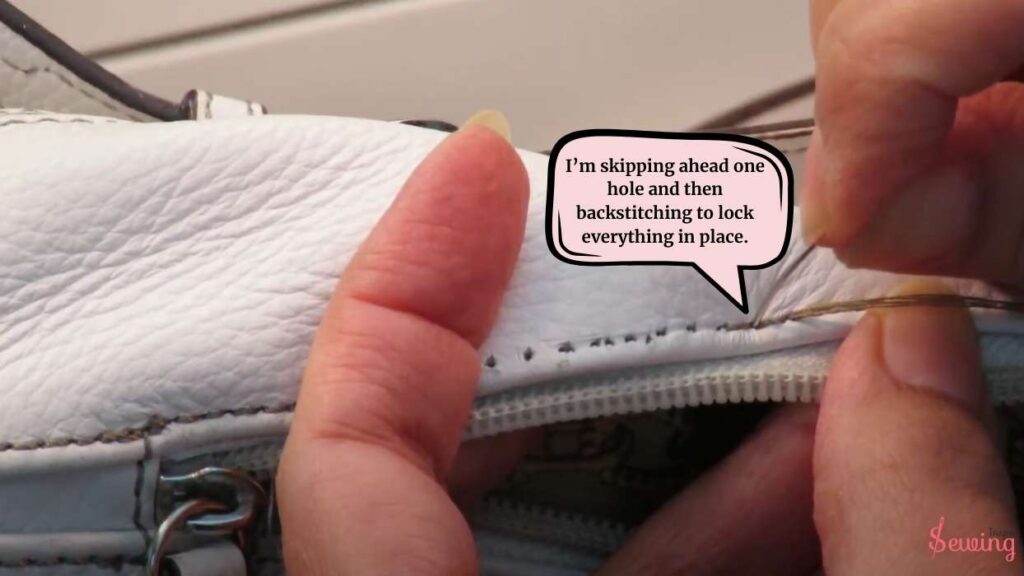
As I work, I’m skipping ahead one hole and then backstitching to lock everything in place.
A thimble comes in handy here, especially since the fabric and zipper are thick. I’m holding the old threads taut as I stitch to make sure everything stays aligned.
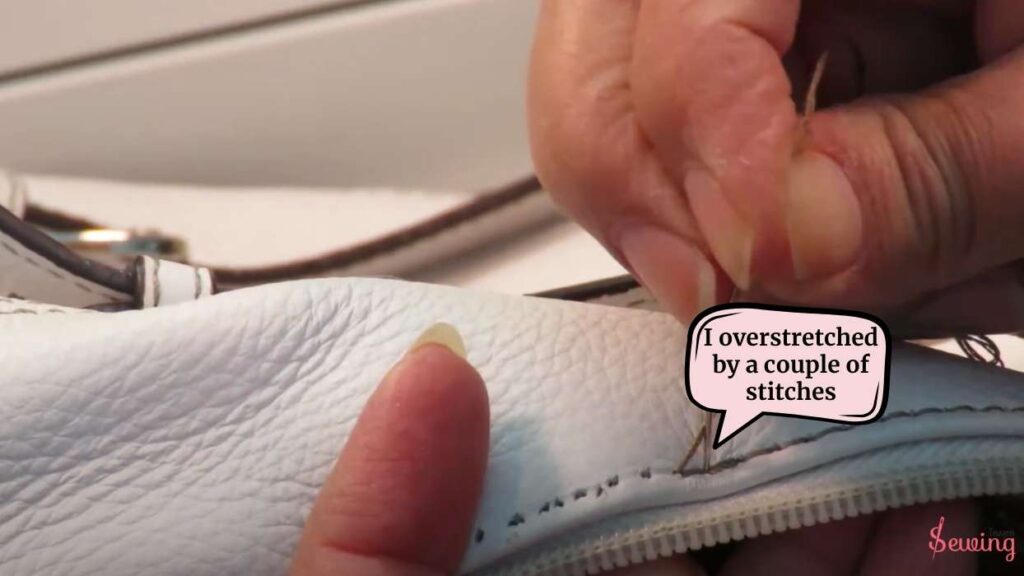
Once I’ve covered the damaged area, I overstretched by a couple of stitches at each end to secure the seam.
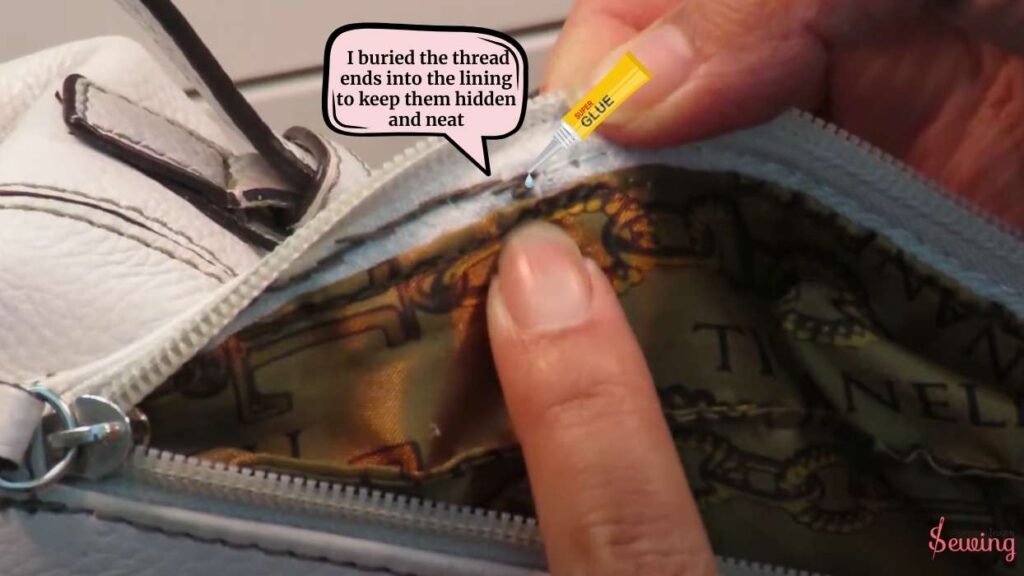
Then, I buried the thread ends into the lining to keep them hidden and neat. For extra durability, I added a little glue to the knots before tucking them away.
And that’s it! The repair is sturdy, and the stitches blend in nicely with the original ones. Now my backpack is as good as new and ready for more adventures. 😍😍
Double Top Stitch Leather
If you want double security, then just double the stitch. Here’s how you do it:
- Use a leather needle (size 100/16 works great) and heavy-duty polyester thread.
- Set your stitch length to 3.5–4mm—longer stitches look cleaner on leather.
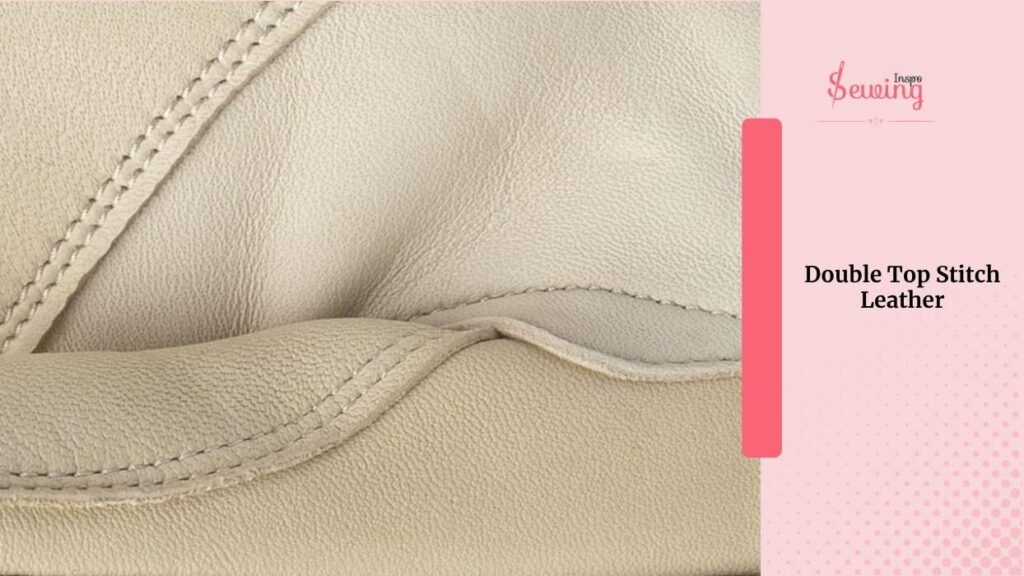
- First, sew your main seam, then press it open (gently, with your fingers or a roller).
- Next, sew a line of topstitching on one side of the seam—about 1/8″ from the edge.
- Then stitch the second line, matching the spacing on the opposite side—keep it even!
No need for backstitching—tie off threads by hand for a clean finish. Looks pro, lasts long, and makes your leather project pop.
Top Stitch Leather Jacket
Topstitching a leather jacket isn’t just for looks—it adds strength and gives that sharp, professional finish. Whether you’re sewing one from scratch or giving an old one a refresh, the right topstitch makes all the difference.
Here is how you can do it,
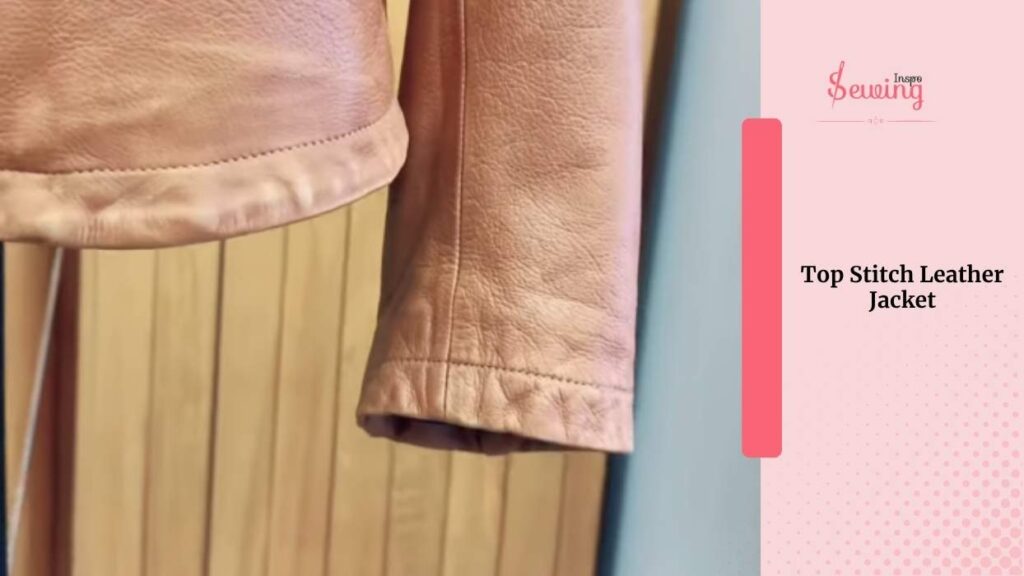
- Grab a leather needle (usually size 90/14 or 100/16).
- Use heavy-duty polyester thread—it’s strong and adds definition.
- Set your stitch length between 3.5 mm and 4.0 mm.
- Longer stitches look cleaner on leather and prevent tearing.
- A walking foot helps feed the leather evenly.
- If you have a Teflon foot, that’s great too—it glides over leather without sticking.
- Use a chalk pencil or leather marking tool—never pins!
- A seam guide or edge guide foot helps keep your lines straight.
- Stitch slowly and steadily.
- Don’t backstitch—use a few overlapping stitches or knot the thread on the back by hand.
- Use a pressing tool or hammer to flatten seams.
- If needed, press with a pressing cloth and low heat—but test first! Leather can scorch.
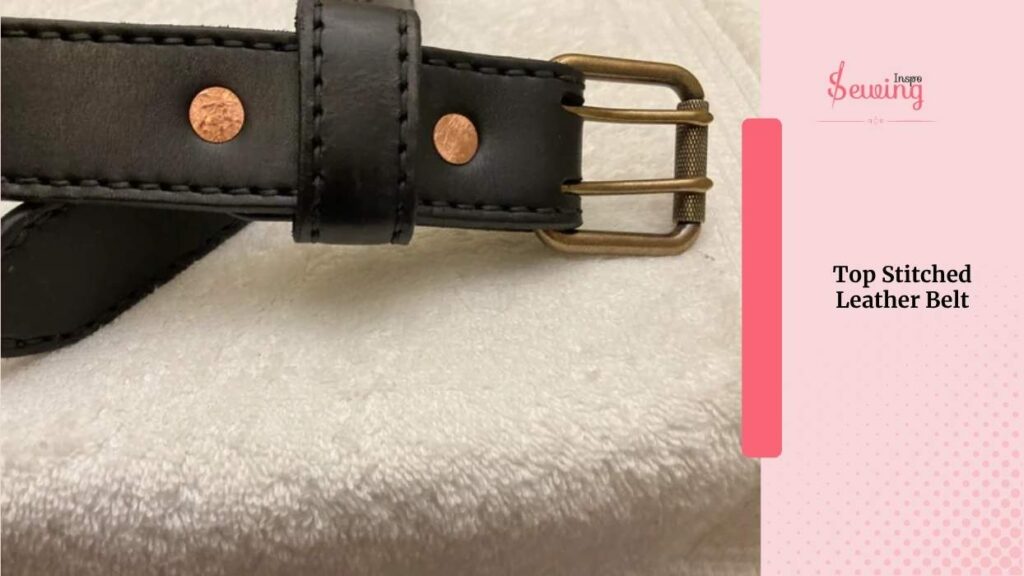
Top Stitched Leather Belt
After learning the technique to do a top stitch on leather. I kept doing it whenever I needed to. So I did the top stitch on my leather belt too. It doesn’t just hold everything together—it gives the belt that clean, pro finish.
You will need a strong polyester thread, a leather needle (size 90/14 or 100/16), and a longer stitch length—approximately 3.5 to 4mm. Mark your line, go slowly, and skip the backstitch; tie off by hand instead. Trust me, it’ll look sharp and last forever.
Top Stitch Leather Patterns
Topstitching leather adds a stylish and professional finish. Here are a few patterns you’ll love:
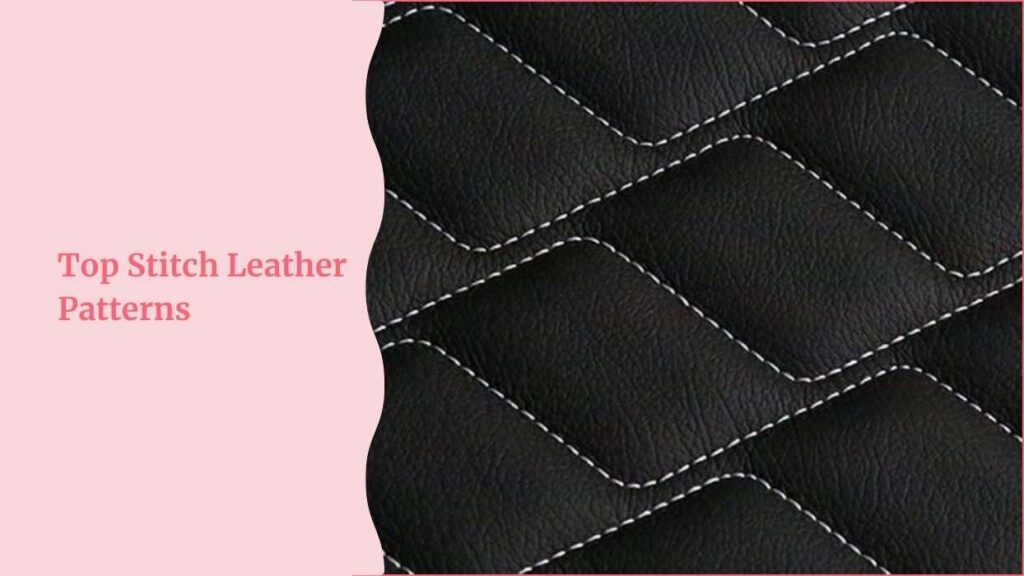
- Single Straight Stitch: Clean and simple perfect for bag straps, wallet edges, or jacket seams. Just go for a longer stitch length (3.5–4 mm).
- Double Topstitch: Two parallel lines of stitching? Yes, please! Great for belts, bag details, or reinforcing seams. Use a guide for even spacing.
- Zigzag Stitch: Want texture and flair? Try this for pockets, collars, or decorative panels.
- Decorative Stitch Patterns: Use specialty thread for cool designs, like waves or scallops, to make your work pop.
- Edge Stitching:Stitch close to the edge perfect for clean, polished lines on bags and wallets.
Top Stitch Leather By Hand Pdf
I am sure you must face this issue at least once in a while. And you may or may not find this article in the trouble time of yours. So I were you I would download this PDF and save it.
Closing Up
And there you have it! My mini backpack is all fixed up and ready to go. It feels so satisfying to tackle small repairs like this and extend the life of something I love.
Plus, knowing I did it myself makes it even more rewarding. If you’ve got a bag or any project with similar stitching issues.
I hope this inspires you to give it a try. Trust me, it’s totally worth the effort! 😊


Leave a Reply