I saw a cloth in Grandma with a stitch that looked like a blanket stitch, but it was kind of diagonal. I asked, ‘Did you sew a blanket stitch in the wrong way, Grandma?’
She said no, it was an overcast stitch.
Blanket stitch and overcast stitch by hand look kinda similar but quite different.
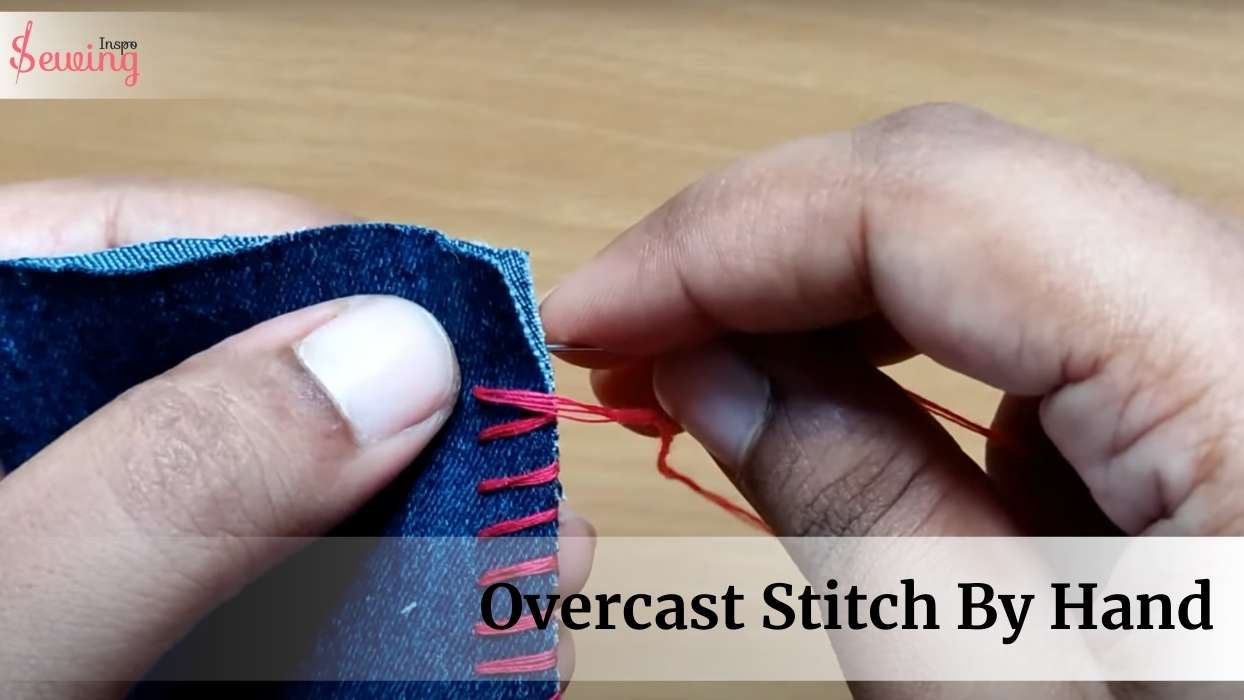
She even shows me blanket stitch step by step with pictures. Which clears out my doubts. But I asked her to explain the process.
To Sew An Overcast Stitch
To do an overcast stitch by hand, just loop your needle and thread around the fabric edges from back to front repeatedly, making sure each stitch catches the edge to prevent fraying.
What about the thread and needle, grandma?
Let’s talk about it and teach you how to do overcast stitch by hand.
Main Facts Of This Embroidery Project:
- Create dots with ¼ inch gaps for overcasting stitch.
- Use size 8 needle for overcast stitching
- Size 10 thread is ideal for overcast stitching
Table of Contents
What Is Overcasting Stitch By Hand?
An overcasting stitch is a hand stitch that wraps thread over the edge of the fabric. This stitch is often used on fabrics that tend to fray easily, like woven cotton or linen. That’s what overcast stitch by hand is about.
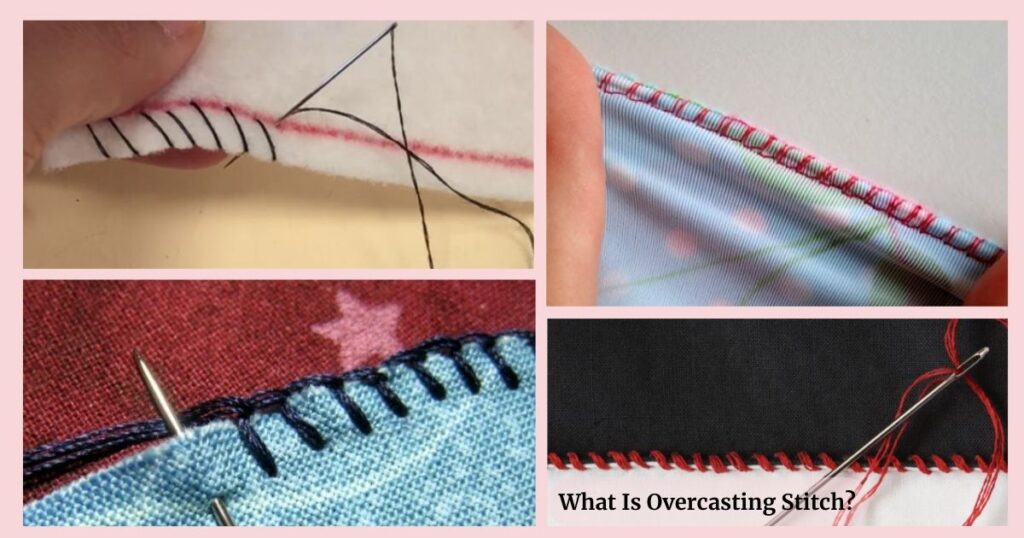
It’s kinda similar to the whip stitch picture. But if you look closely you will know. It is particularly useful when you don’t have a serger or want a quick, durable finish. Overcasting can also be done with a sewing machine using a zigzag stitch. However, the hand-sewn version is ideal for small projects or areas that require more control. After all it is the hand stitch to prevent fraying.
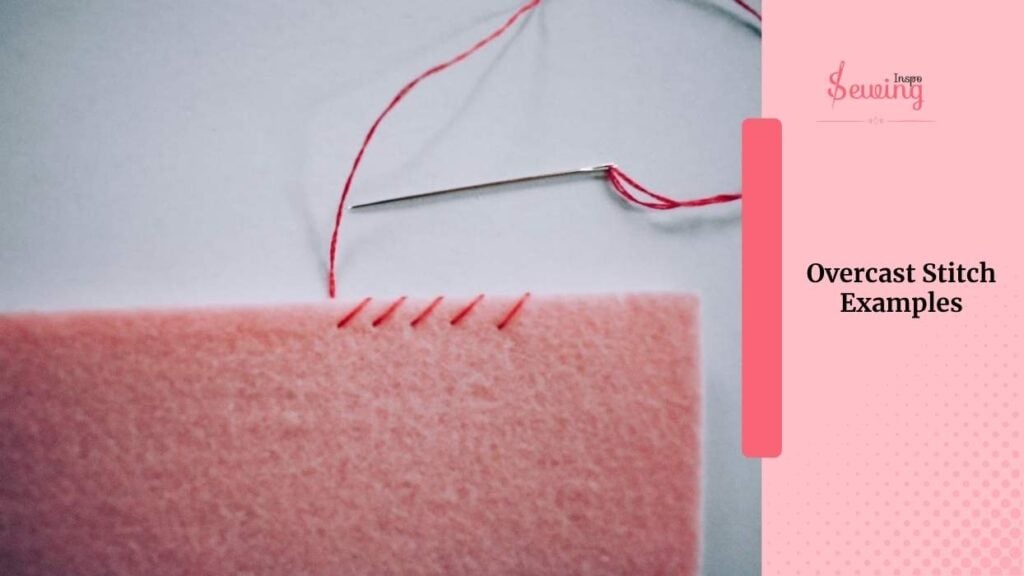
Overcast Stitch Examples
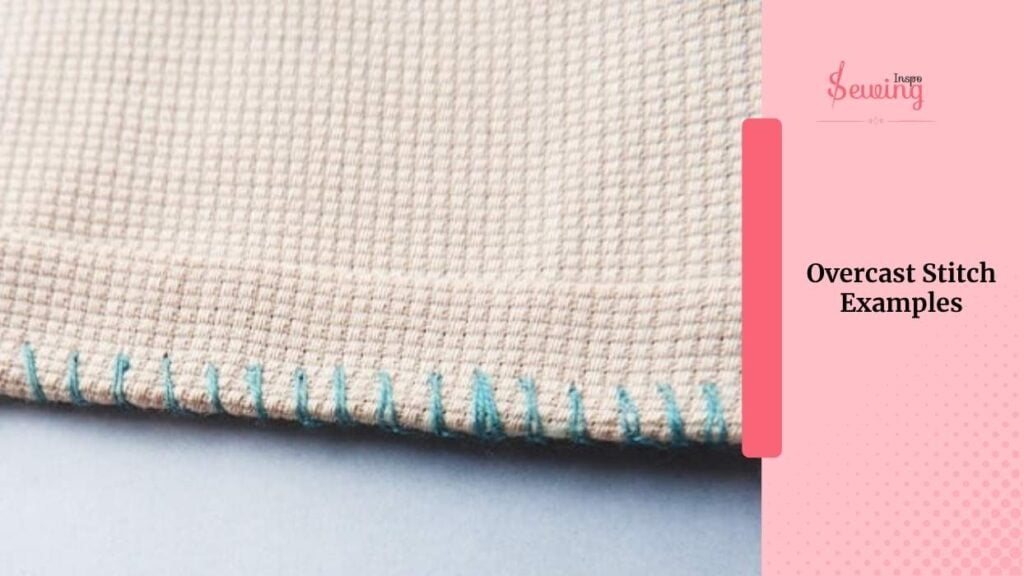
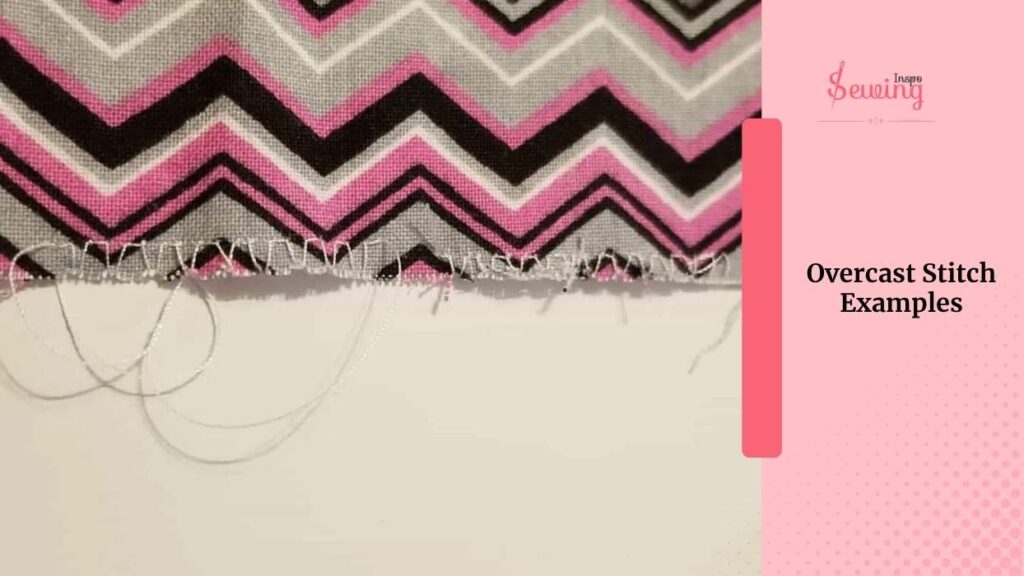
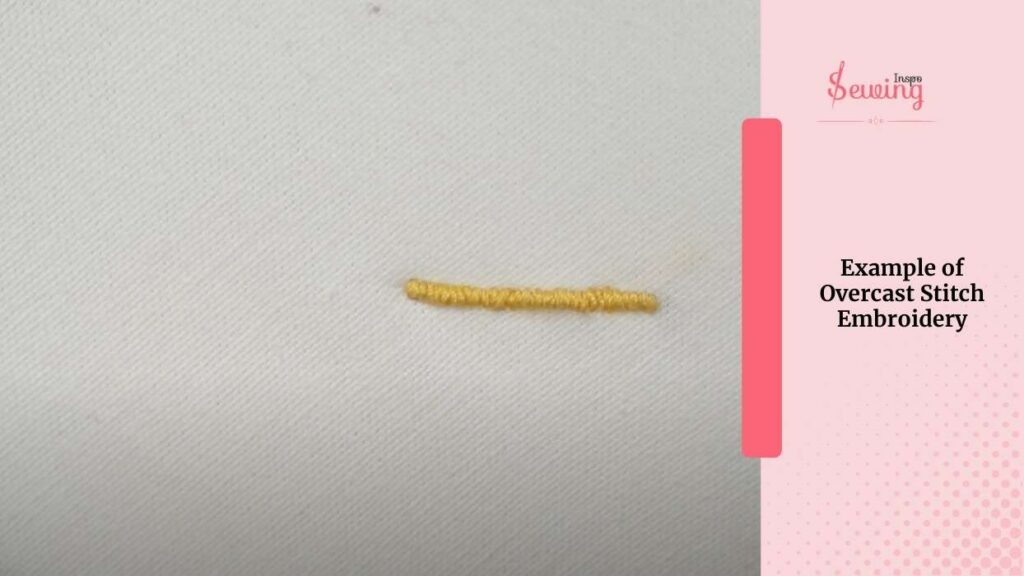
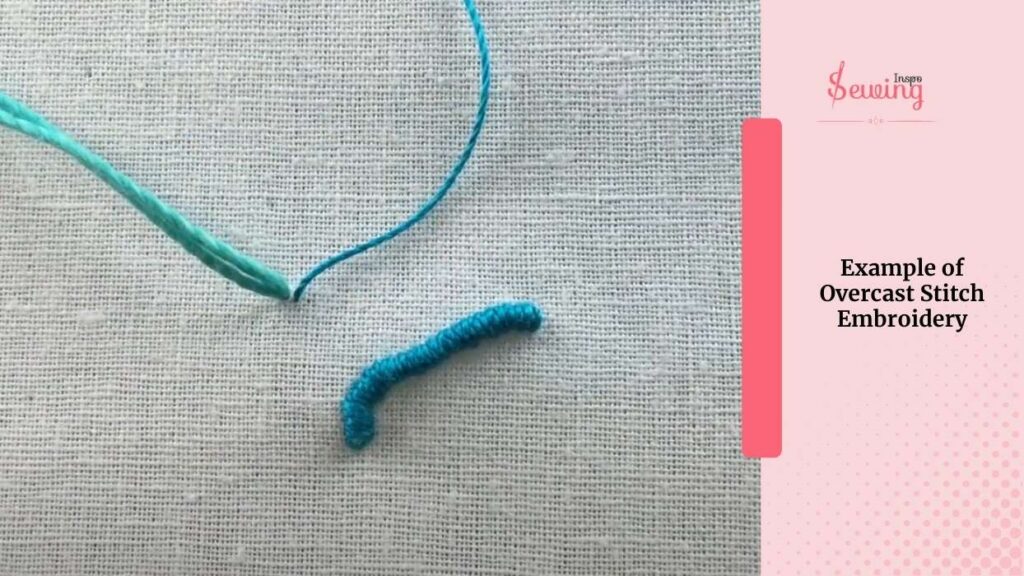
Here is what a over cast stitch looks like-
What Stitch To Use For Overcasting By Hand?
The overcast stitch is the main stitch for overcasting, but sometimes, sewers like to use the whip stitch, too, because it is easier and quicker than the overcast stitch This is a great alternative of overlock stitch by hand.

Overcast Stitch By Hand Symbol
The overcast stitch symbol is usually a series of diagonal lines, almost like little ticks or slashes. Sometimes paired in a zigzag pattern.
It’s a pretty straightforward sign, but when you know what it means, you’ll always spot it in patterns. This stitch to prevent fraying by hand

How To Do Overcast Stitch By Hand
To do overcast stitch by hand, you need to follow 3 steps.
- Draw Dots And Make A Loop Thread.
- Push The Needle For The First Stitch
- Secure The Overcast Stitch.
Let’s get into how to do an overcast stitch by hand.
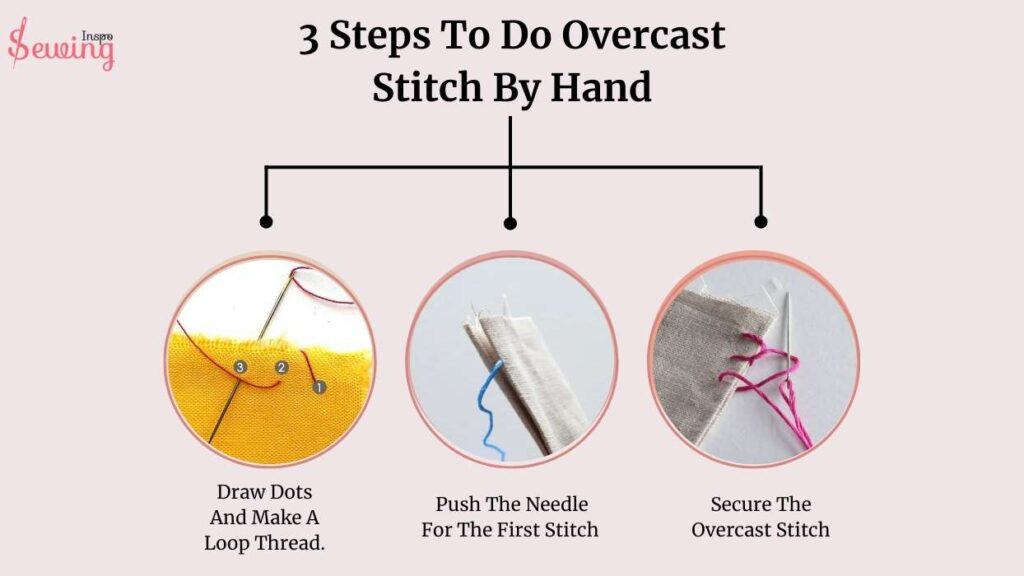
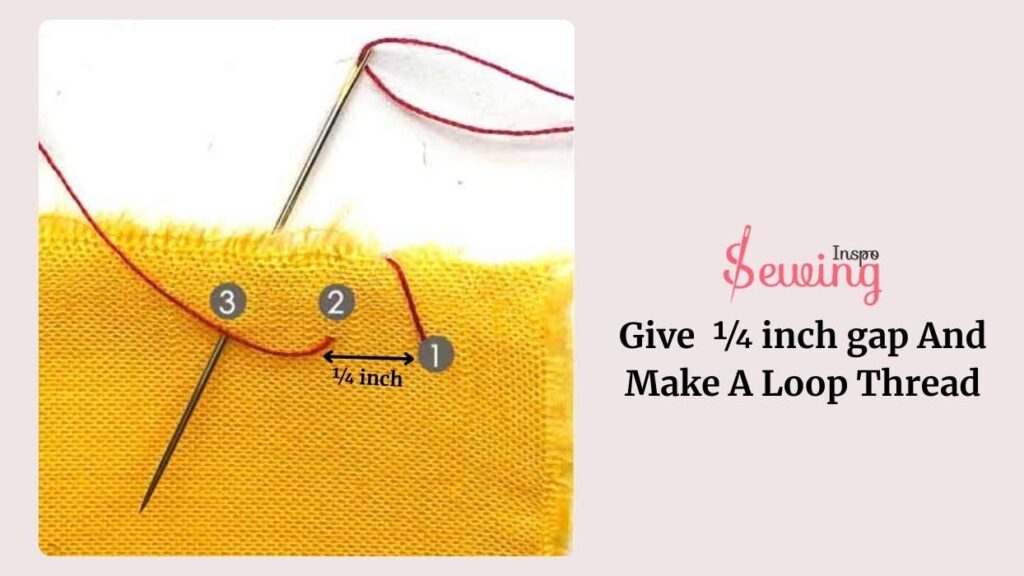
Draw Dots And Make A Loop Thread For Overcasting stitch by hand
You need to create dots, giving a ¼ inch gap. I even did this tricky for a straight stitch by hand.
After that, you gotta loop your thread. To secure the thread, loop it over the fabric edge and pass the needle through. The needle should be inserted through the fabric from back to front, slightly offset from the initial stitch. But don’t make it too tight like a ladder stitch, keep it gently.
Push The Needle For The First Stitch
Now, push the needle through the first dot for the first hand stitches. This whip stitch should be the length you want, which is usually between ¼ inches and ⅜ Inches. This length is perfect for stitch to prevent fraying by hand.
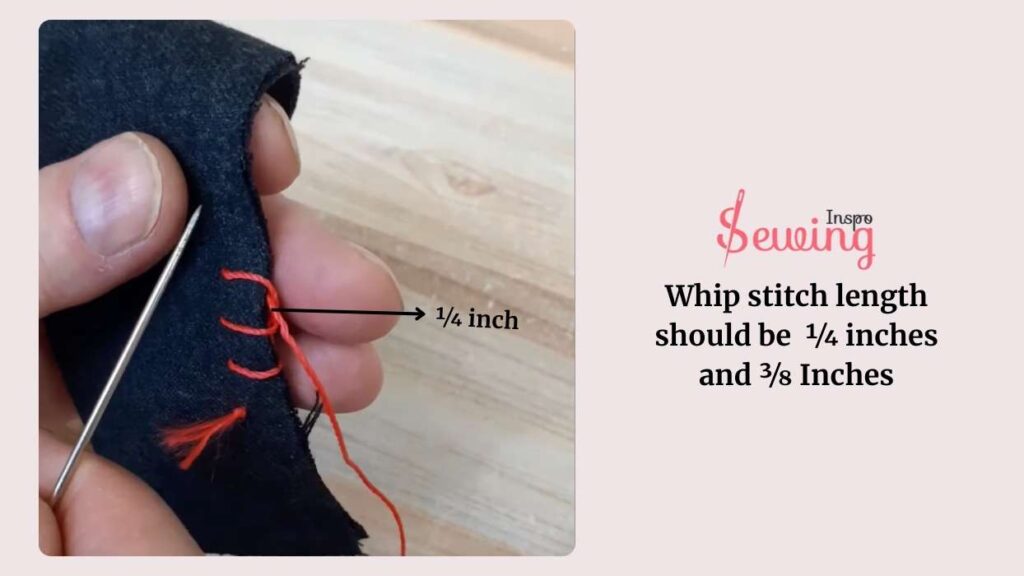
And usually 10-12 diagonal stitches per inch for most fabrics. This is perfect to stop fabric fraying.

-How much distance between satin stitches do you prefer, grandma?
– well, I usually like ⅛ inch gap between individual stitches for my overcast stitch. That’s perfect for a sewing project.
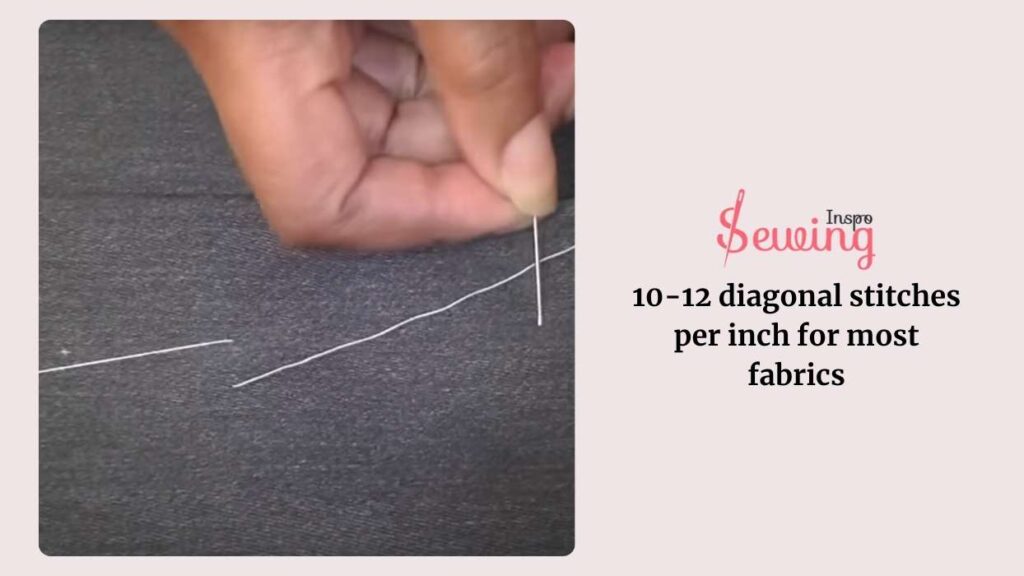
Next, insert the needle overcasting the fabric. This will help you to sew a circular hole too.
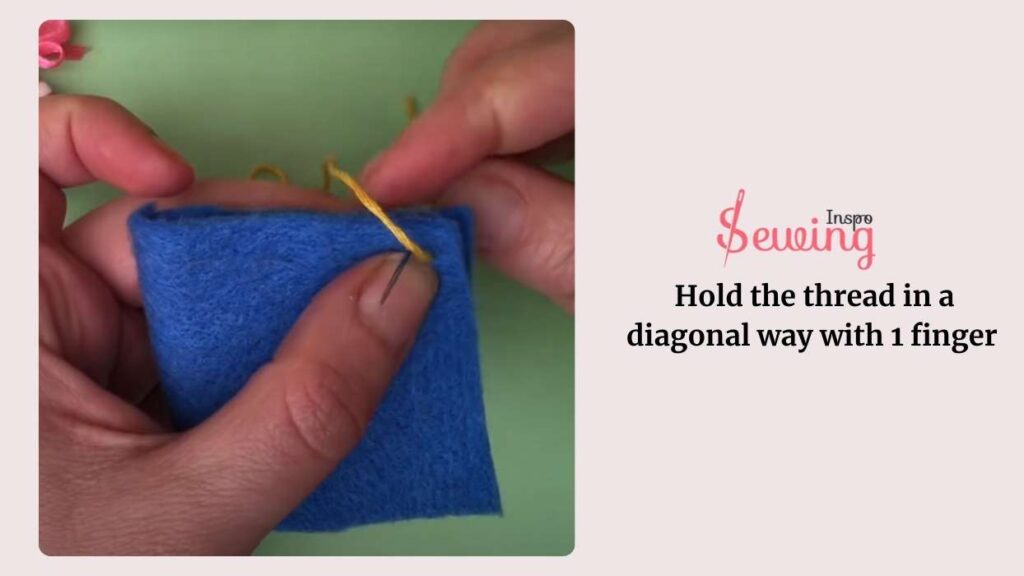
Then, hold the thread in a diagonal way with 1 finger then push through the needle from the 2 dots and make couple of stitches.
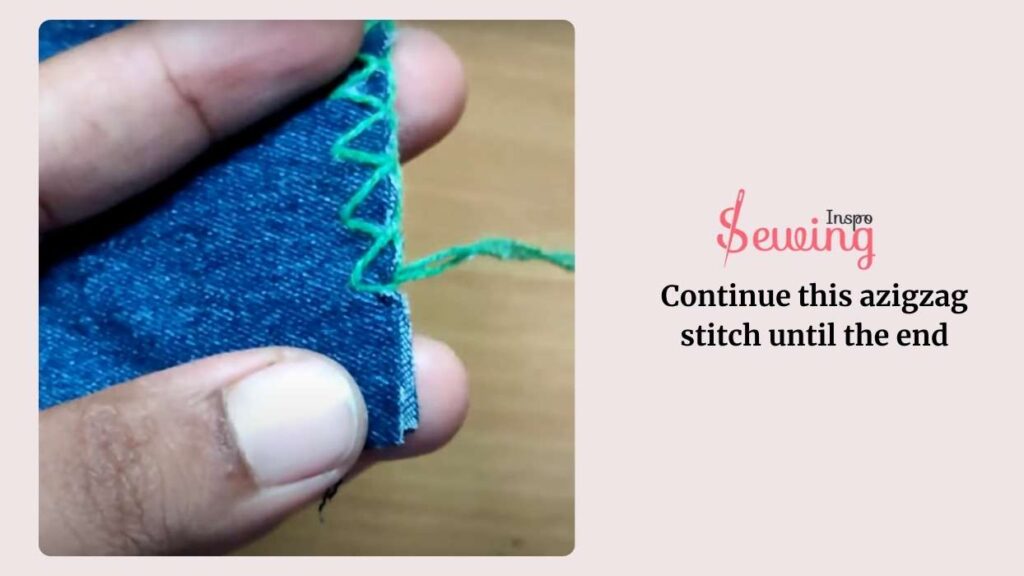
Continue this azigzag stitch until the end. You can do some fancy decorative stitches.
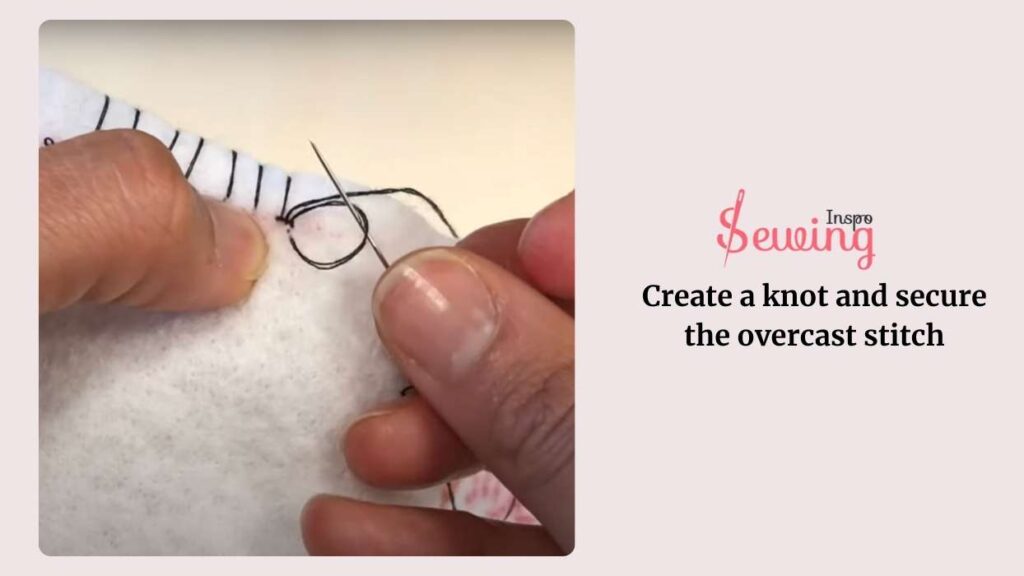
How do you tie off an overcast stitch/ Secure The Overcast Stitch.
To secure the overcast stitch, grab the thread and overcast it on the wrong side of the fabric. Hold the thread, push through the needle under the last straight stitch, pull through it and then again push the needle through the thread and tighten it. This will create a knot and secure the overcast stitch.
That’s how to make overcast stitch by hand. If you have read my sewing book, then you can understand it better.
And that’s the end of overcast stitch methods! You can even do embroidery stitch with help of overcast stitch. The hand overcast stitch is easy but strong enough to hand stitch to prevent fraying.
I know the process may have reminded you of the blanket stitch. So, do know how to do a blanket stitch by hand? If not then read out our article.
How To Make Overcast Stitch Video Tutorial
Overcast stitch hand sewing can be difficult for new stitchers. So here is the video watch this, it will make your stitching easy.
Overcast Stitch
Basic overcast stitch for hand sewing and project.
Overcast Stitch By Hand Patterns Name
The overcast stitch, commonly known as the whip stitch, is frequently used in patterns such as the blanket stitch, buttonhole stitch, crazy quilt stitch, and appliqué stitch. These patterns utilize the overcast stitch for decorative edges, seam finishing, and securing fabric pieces in hand embroidery and quilting projects.
Overcast Stitch Patterns
When I use the overcast stitch, it’s like wrapping a snug little blanket around the edge of my fabric. It’s kind of therapeutic, really just a series of neat, even stitches wrapping around the edge. I sometimes like doing double overcast stitches on the edge.
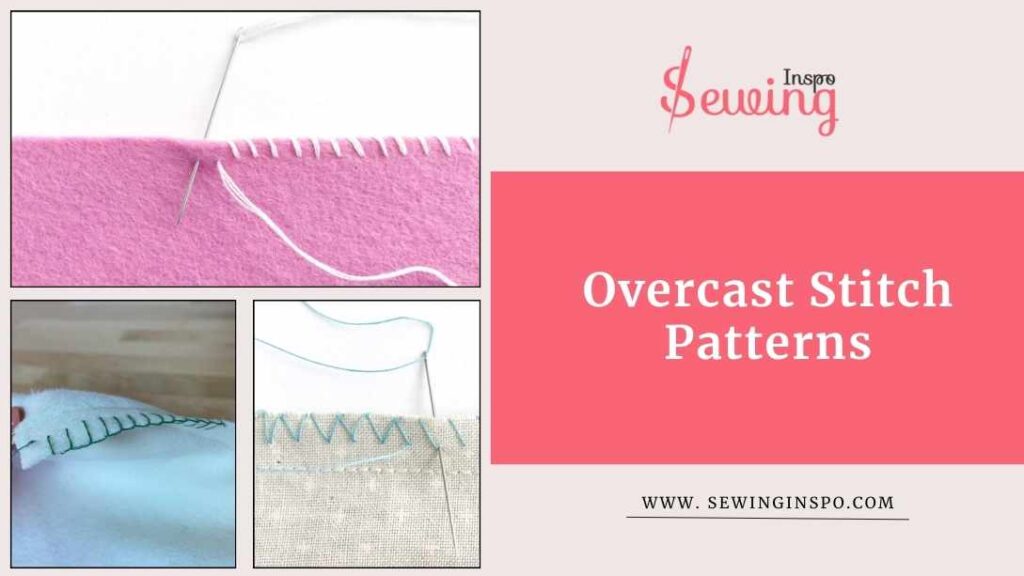
It’s almost like I’m tucking the fabric in for bed. I love using the overcast stitch on projects like hemming or reinforcing seams. Especially when I want something that looks simple but effective. The result? A strong, tidy edge that adds a handmade touch. Here few of my overcast stitch patterns: every Overcast stitch by hand patterns is so worth looking at.
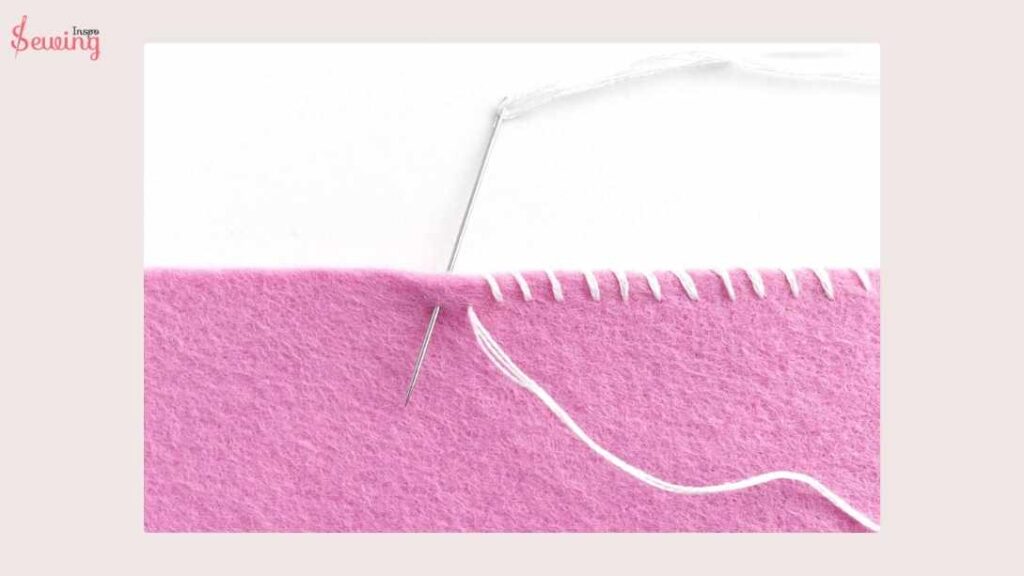
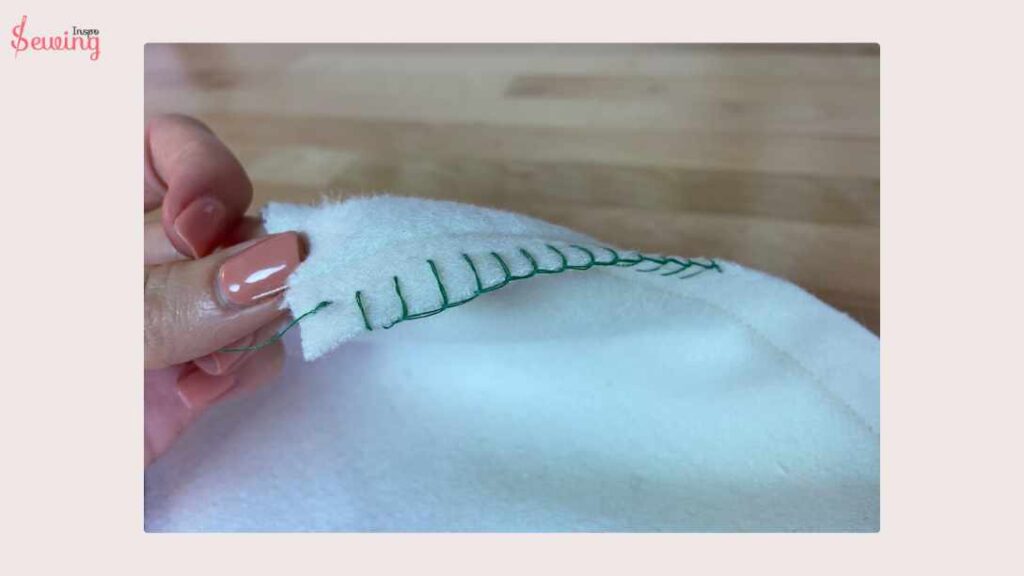
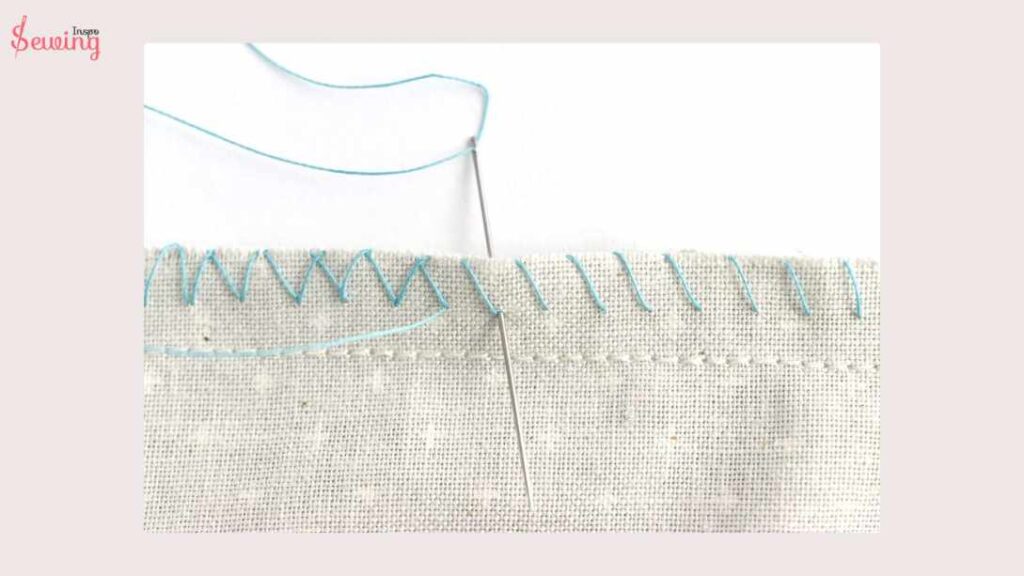
Overcasting Stitch Design
I know after seeing a few overcast stitch diagrams or designs, you might think it is only for an edge. But it’s not reality.
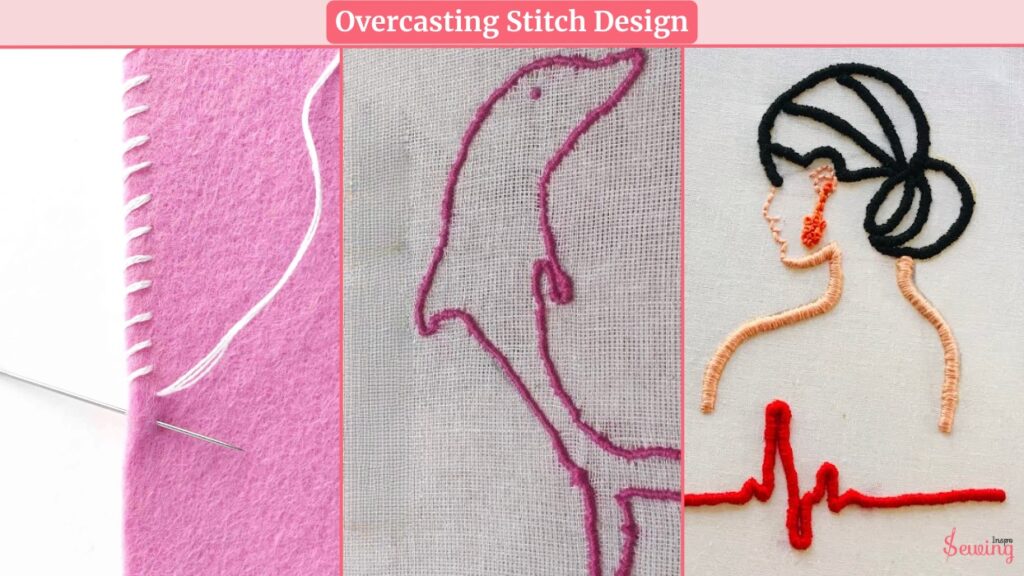
You can do some overcasting stitch embroidery designs with it, too. Here are a few I did it,
Overcast Stitch By Hand Embroidery
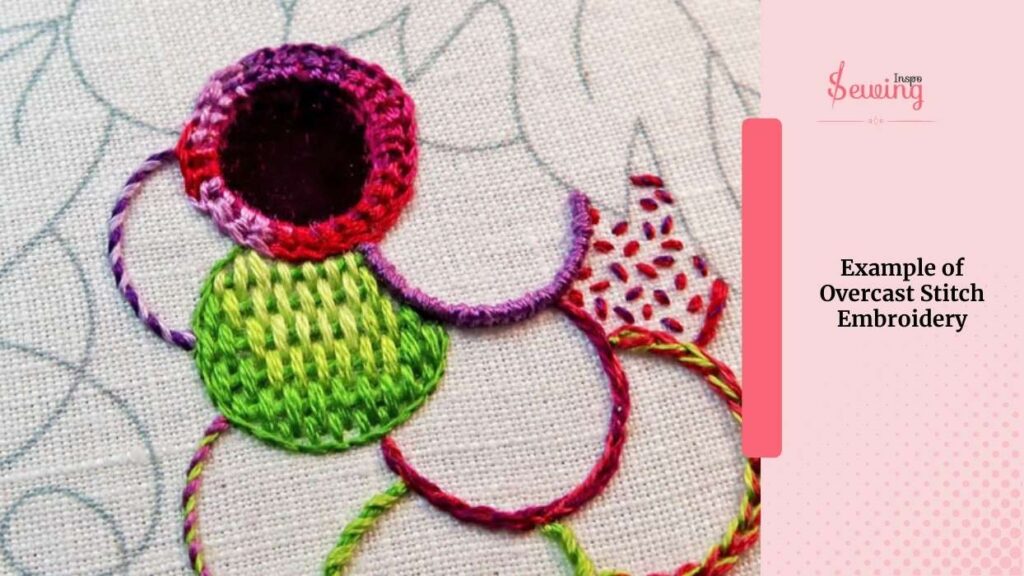
When I use the overcast stitch in embroidery, I’m adding texture and depth to my designs. Instead of just stitching around the edge for a clean finish, I use it to outline shapes or give borders a slightly raised effect. It looks so stunning😍 Have a look at my overcast stitch embroidery:

Example of overcast stitch embroidery
Overcast Stitch Thread And Needle
When choosing a needle size for hand overcast stitching. It’s important to match the needle to the weight of the fabric you’re working with. Sharps are a common, all-purpose needle that comes in sizes ranging from 2 to 12. Sizes 2 to 4 are perfect for medium to heavy layers of fabric, while sizes 5 to 10 are best suited to sewing stitches light to medium fabrics. That needle also can help you out doing buttonhole stitches by hand.
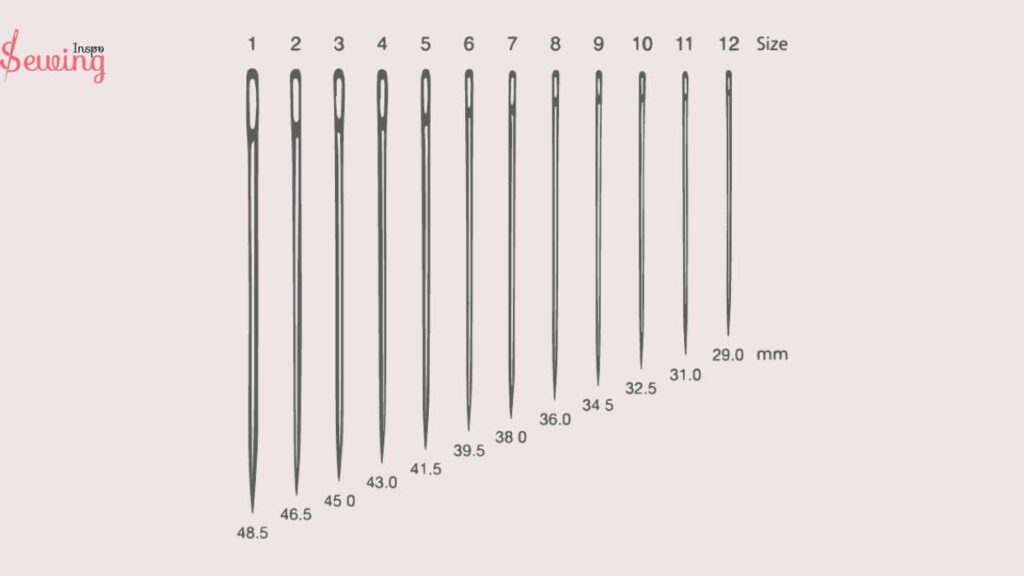
However. For overcast parallel stitches 8 size needle is perfect to do overcast stitch by hand.

And for the thread-
Size 5 is great for wool and felt fabrics, while the thicker size 3 is perfect for couching. When I’m stitching fused art quilts or doing free-form embroideries.
However, I like to use sizes 10 thread for overcast stitching.
How To Use Overcast Stitch Thread And Needle
To use the overcast stitch with thread and needle, start by threading your needle and tying a knot at the end of the thread. Place the needle at the edge of the fabric and push it through from the back to the front. Pull the thread through and bring the needle around the edge of the fabric, inserting it back through the fabric near the initial stitch. Repeat this process along the edge, keeping the stitches evenly spaced to create a neat and secure overcast stitch.
How To Do Overcast Stitch By Hand PDF
Save this PDF in case you forgot any steps along the way.
Frequently Asked Questions(FAQ’S)
What Hand Stitch Stops Fraying?
The overcast hand stitch is an excellent hand stitch for preventing fabric edges from fraying. This stitch wraps around the raw overcast edge stitch of the fabric, creating a protective barrier that prevents the threads from unraveling.
Are Overcast And Overlock The Same?
Overcast and overlock are not the same, though they serve similar purposes. Overcast stitching is a hand-sewing technique used to finish fabric layers and prevent fraying by wrapping thread around the edge. Overlock, on the other hand, is a machine-sewing technique that uses matching threads to trim.
Why Would You Use A Overcast Stitch?
An overcast stitch foot prevents fabric edges from fraying and gives seam finish a neat, finished look. It’s particularly useful on fabrics that tend to unravel easily.
Final Thought
So, yes overcast stitch by hand is a very interesting kind of stitch. It is kinda similar to blanket stitch. But you can do overcast stitch not just on the edge of fabric but also anywhere you want.


Leave a Reply