
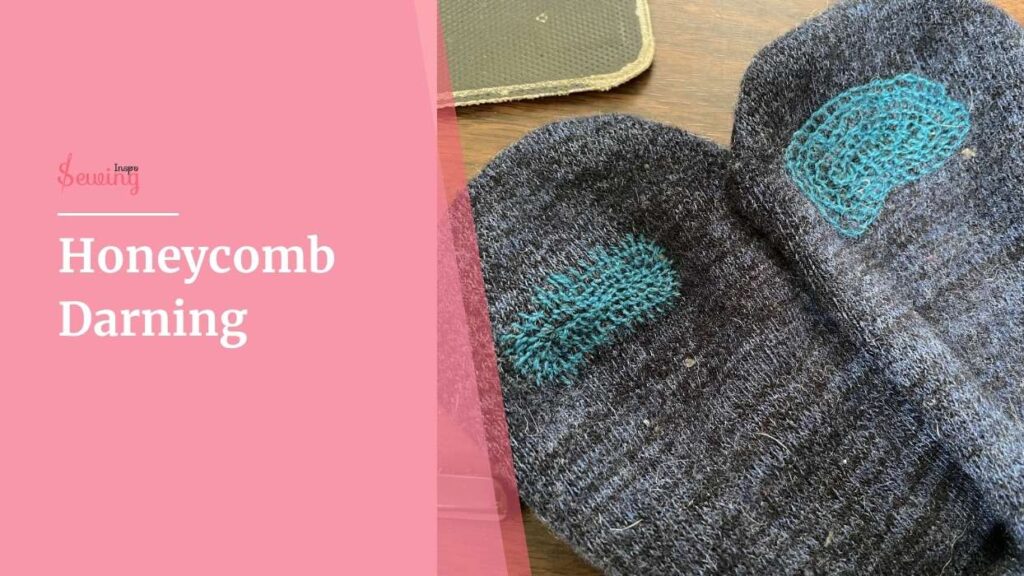
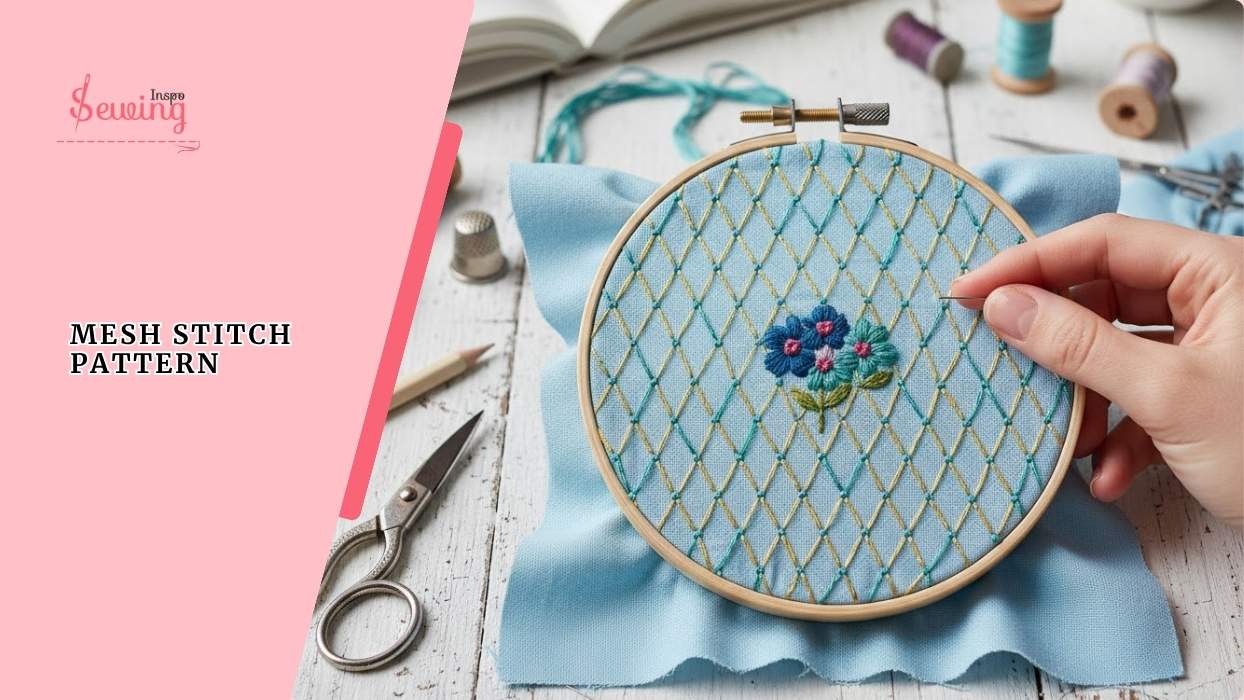
At grandma’s home, I saw some pieces of cloth with a thread spreading like a honeycomb. 🐝 I laughed and said, ‘What is it? Is some bea building their home in?’
Grandma laughed and said, ‘Well, it is Honeycomb darning, a beautiful form of darning stitch. Just like invisible & woven darn’
I was like, ‘What is honeycomb darning? 🤔 grandma said,
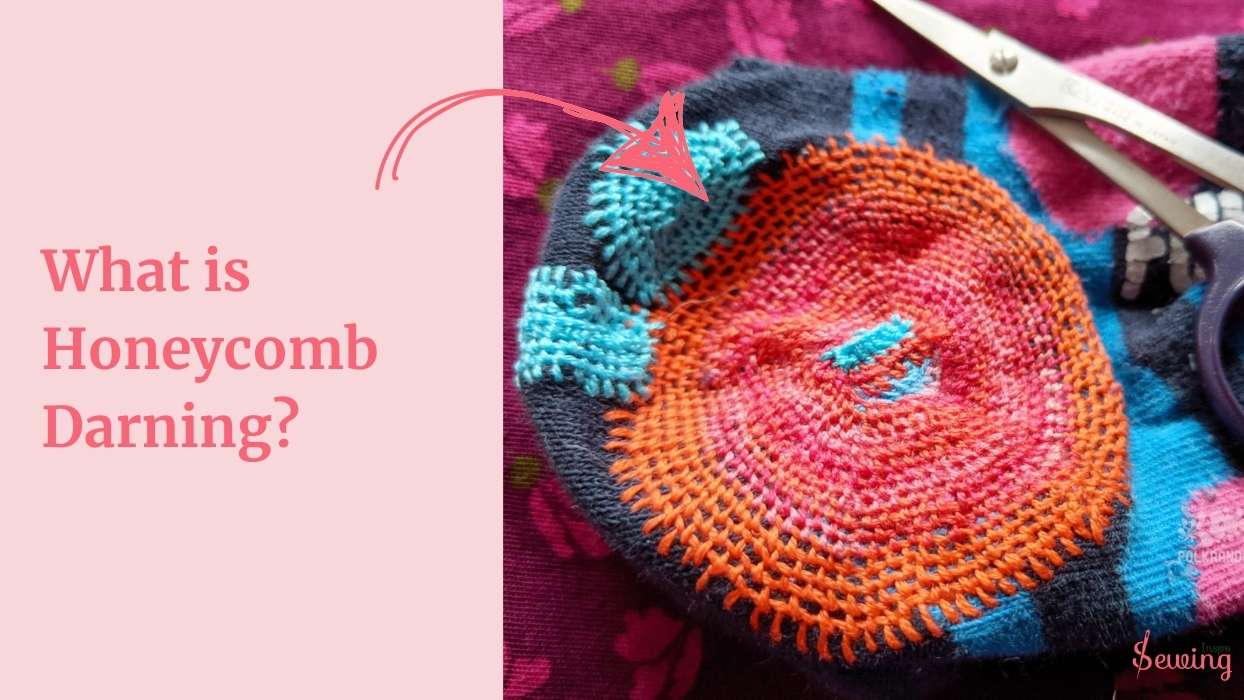
Honeycomb darning is a basic pulled-thread stitch made up of alternating angled stitches that create a honeycomb-like pattern together. This is basically another darning stitch pattern. You can even use this to repair moth holes, too.
I asked a few questions about it and left. But even after getting home, the beautiful stitch hasn’t left my mind. So I had to try it just like another type of stitch. So I took out my damaged clothes and started stitching them. You can use this stitch for patching, too.
How To Do Honeycomb Darning?
To do honeycomb darning, follow the steps below, and do a honeycomb darn,
Set Up The Fabric Under A Darning Mushroom
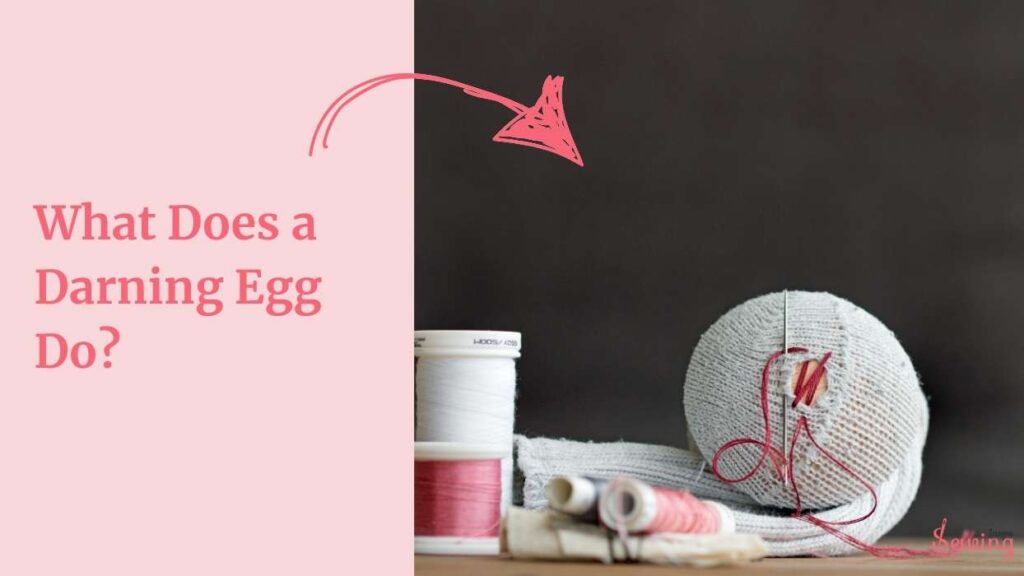
First, I grab my darning mushroom. You can even use a darning egg. You must be thinking, What does a darning egg do? 🤔
Well,
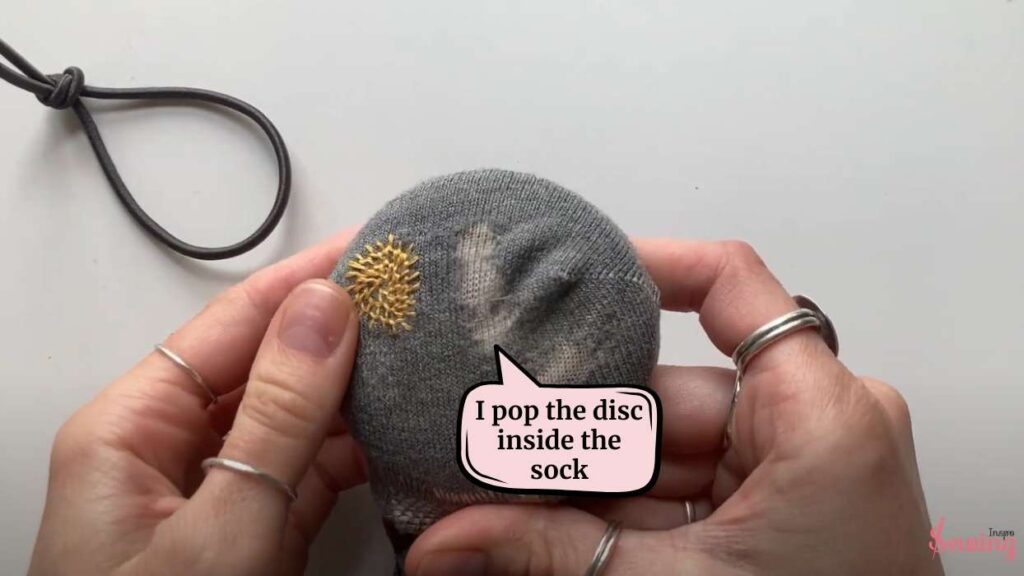
Darning ball and egg serve the same purpose.It’s like a little wooden helper that stretches the fabric out while I work. So, I pop the disc inside the sock, ensuring the thin area is centered. Now it’s ready for darn stitching!
Pull The Thread Around The Edge
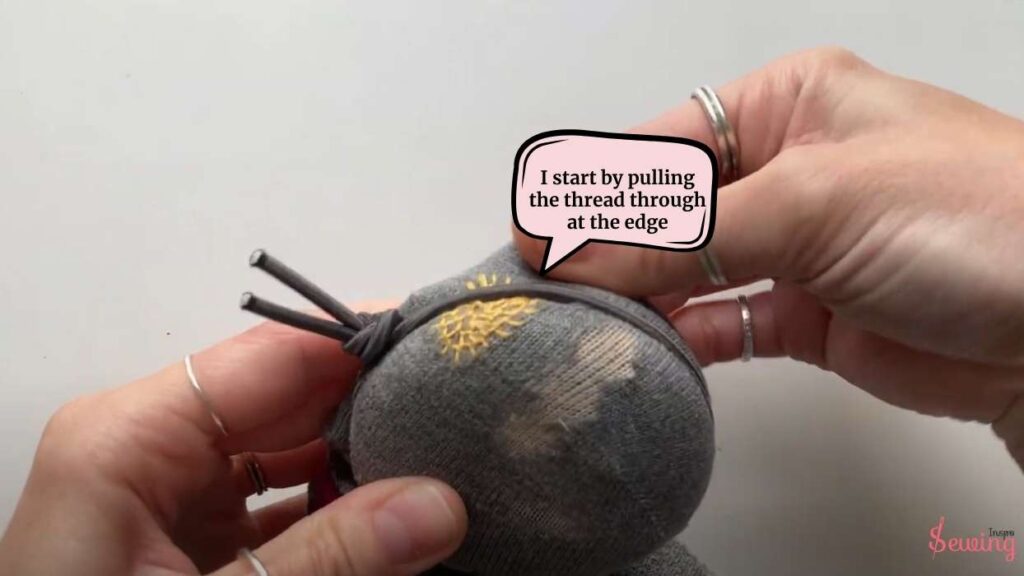
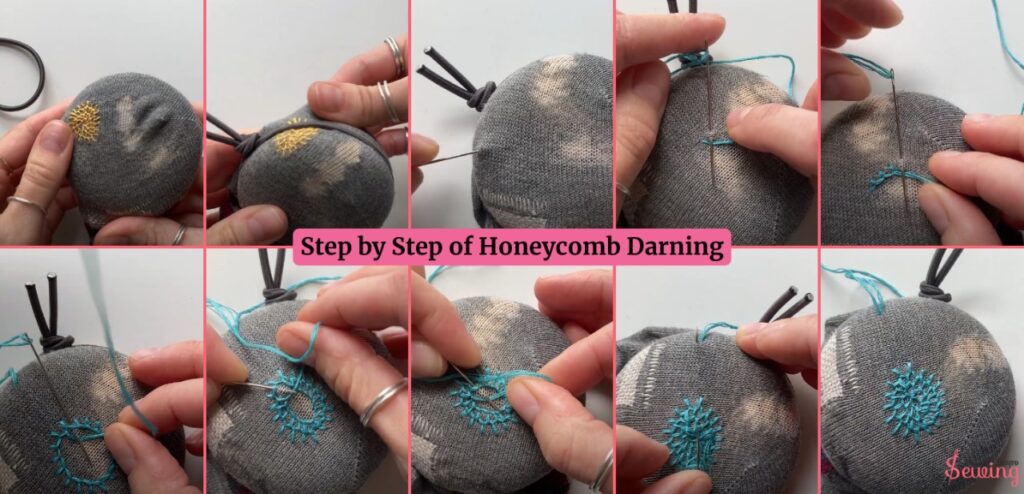
With my needle threaded, I start by pulling the thread through at the edge of the thin spot. For a smooth process I like to use darning cotton.
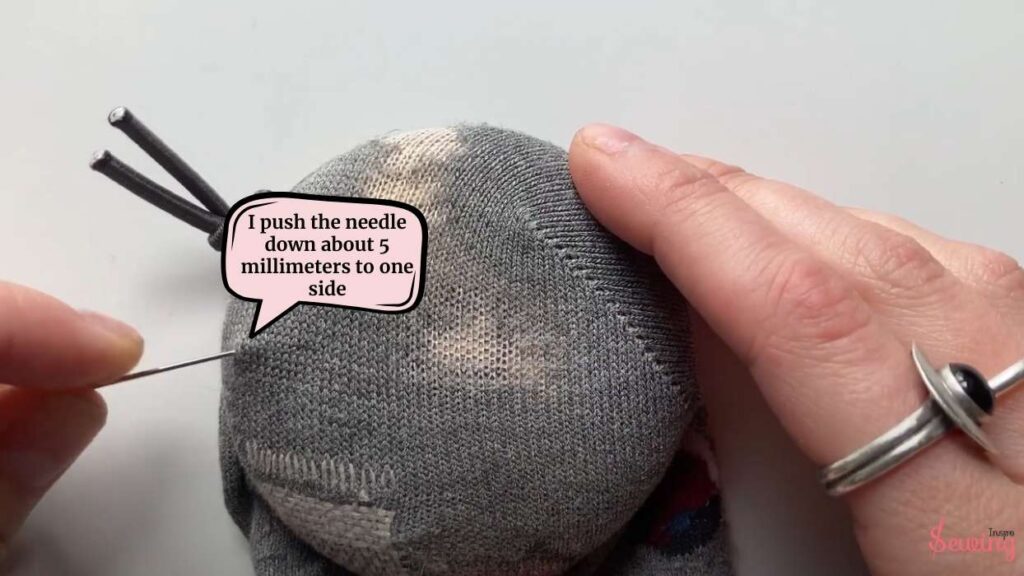
To make the first stitch, I push the needle down about 5 millimeters to one side, then back up near where I started. You can apply this technique to needlepoint, too.
To Get A Perfect Honeycomb Darn, Loop The Thread Under The Needle

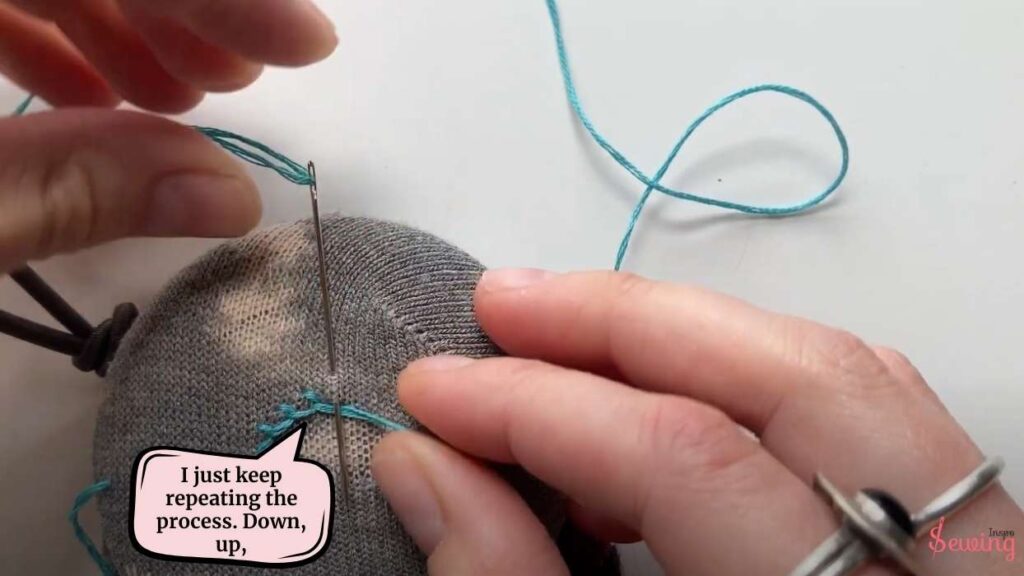
Before I pull the thread through, I loop it under the needle. This locks the stitch in place and starts the honeycomb pattern. This isn’t easy like diagonal darning, so be careful.
From here, I just keep repeating the process. Down, up, and loop the thread under the needle, making a perfect darning stitch. It’s like doing a blanket stitch, but I’m working in a circle around the thin fabric instead of going along an edge. I ensure the stitches are evenly spaced and stay outside the weak area. So it covers the whole area like woven darning.
Line Up The Last Stitch For The Honeycomb Darn
Once I’ve gone all the way around the honeycomb stitching, I line up my last stitch with the first one to complete the circle. That’s the first row done for honeycomb darning!
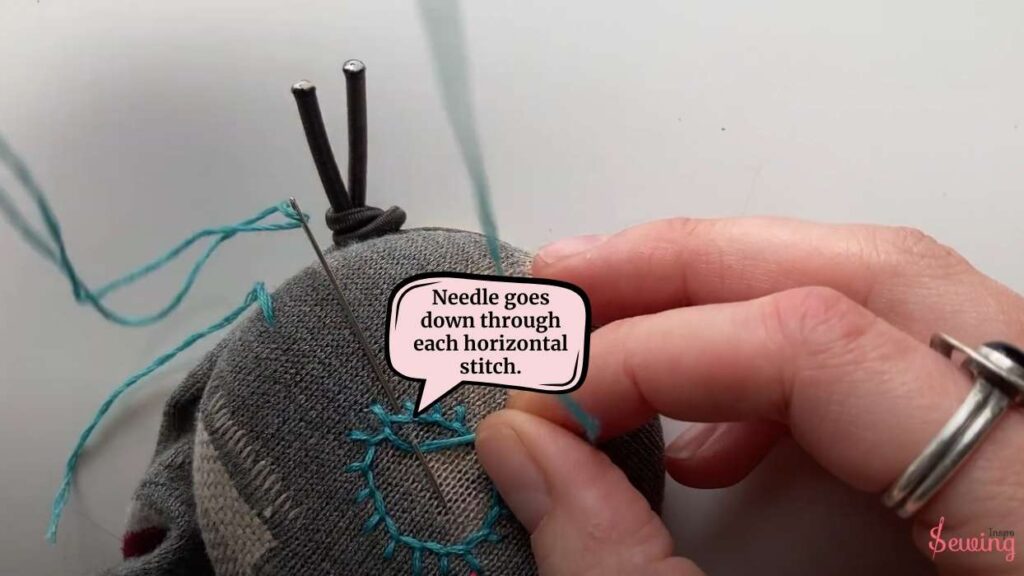
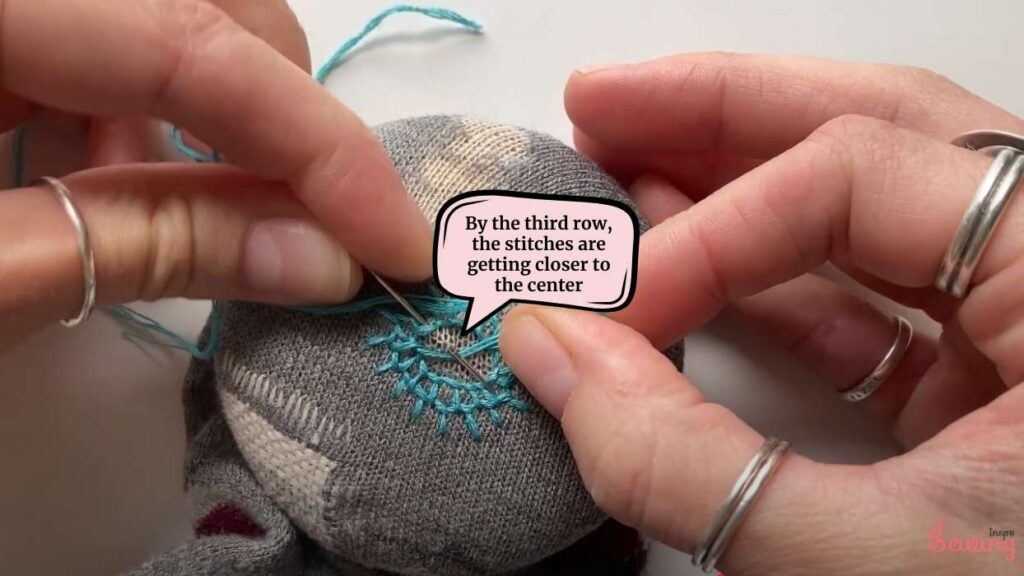
Now, I move inward to start the second row. This time, I use the stitches from the first row as a guide, making sure my needle goes down through each horizontal stitch. It’s the same process: down, up, and loop, just following the circle inward.
Keep Repeating The Honeycomb Darnin Rhythm
As I keep going, the honeycomb darning patterns start to come together. By the third row, the stitches are getting closer to the center, and the thin fabric is almost completely reinforced. That will create the perfect honeycomb stitch sewing.
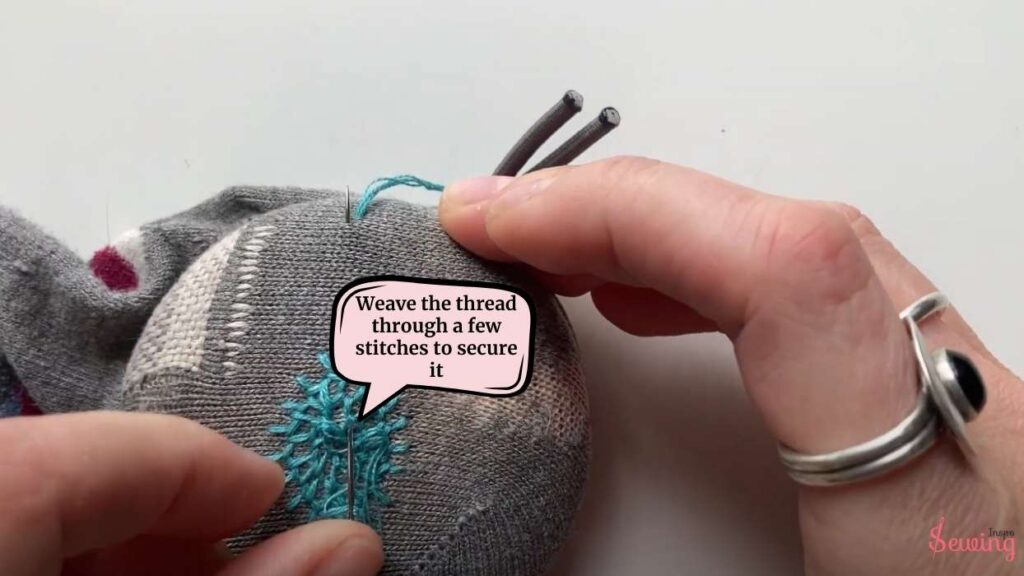
When I reach the very middle, I make a final stitch, weave the thread through a few stitches to secure it, and trim the excess thread. You got a beautiful honeycomb darning.
That’s it! The honeycomb darn is finished. It looks sturdy and neat, with a cool textured pattern on one side and a smooth finish on the other. It’s my favorite after linen darning.
Honeycomb Darning Pdf
Honestly, it feels so satisfying to give this sock a new lease on life! If you are confused about anything, then download this Honeycomb darning pdf.
Try this method if you’ve got a piece of clothing that’s starting to wear thin. It’s easier than it looks and a great way to keep your clothes going strong. like twill darning stitch.


Leave a Reply