
You can do bookbinding with chain stitch.
I was like, “Wait… WHAT!?” 😲
Isn’t chain stitch just for embroidery and cute flower petals?
This little loop-loving stitch has a second life, not just in fabric.
In bookbinding, chain stitch is a super strong and flexible way to sew pages together without glue or staples. And the best part? It creates this gorgeous braided spine that looks like something from a vintage wizard’s journal. 🪄📖
Chain stitch isn’t just for thread-and-hoop fans; it’s also for DIY fans. I have always loved to try new things, so how could I ignore this chance?

Table of Contents
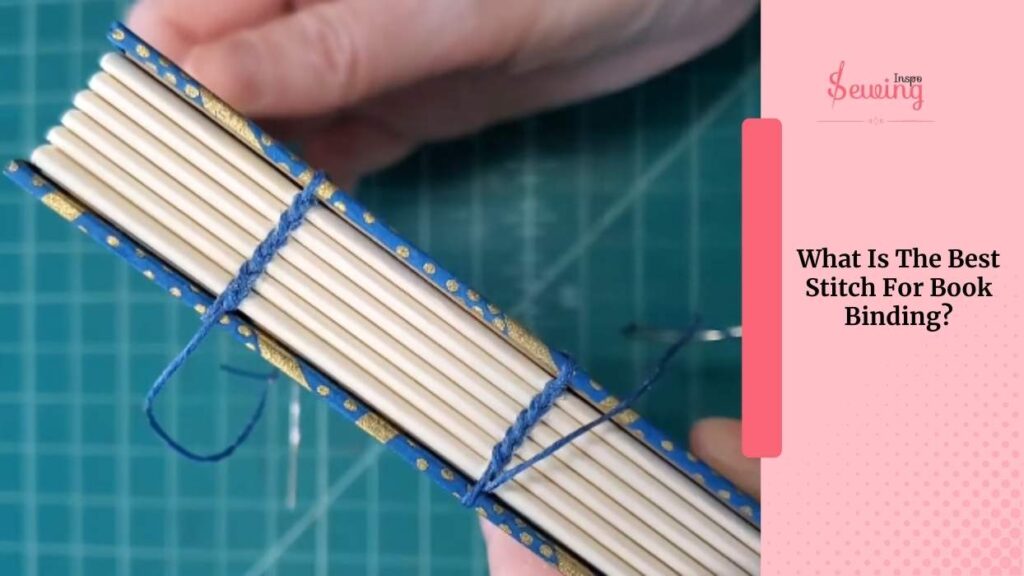
What Is The Best Stitch For Book Binding?
Okay, so technically, the “right answer” is probably Coptic stitch — and yeah, it’s cool. It lets your book lie flat and look neat, blah blah blah. But after doing chain stitch bookbinding myself?
I would say that chain stitch is the best for bookbinding.
Here’s why I’m obsessed with it-
First, it’s so much easier to get into the rhythm. Once you do a few loops, your hands just get it. It’s kind of like jigging with your thread around the book. You can even try this twisted form. It will work there, too.
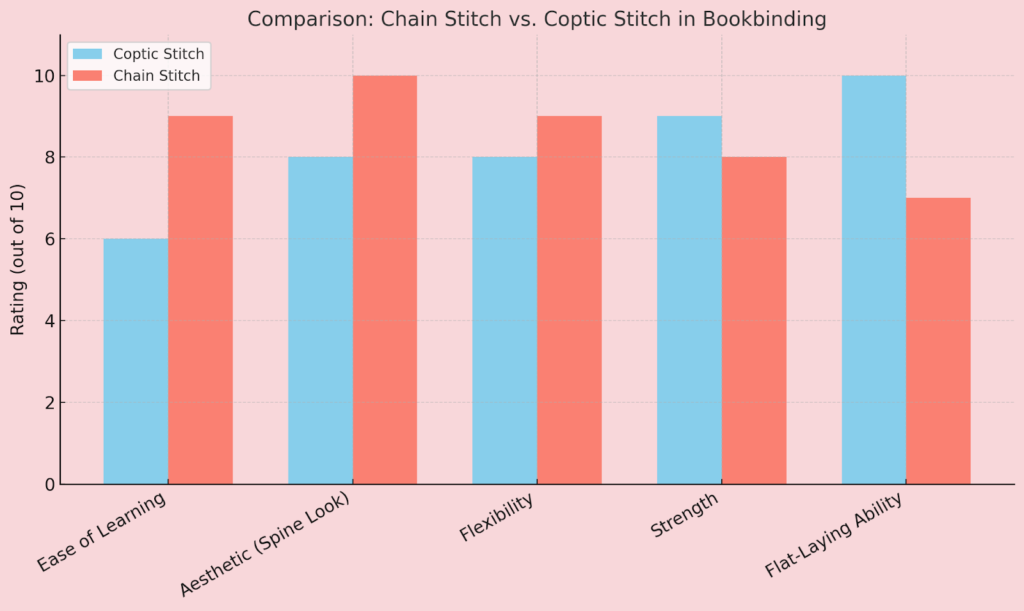
Second, that braided spine look?
Absolutely delicious. It gives handmade journals a cozy, rustic vibe — like they hold ancient spells or secret poems. It’s strong enough to hold the pages together tightly. But still flexible when I want to open the book wide without cracking anything.
Bookbinding Chain Stitch Vs Coptic Stitch
The Internet suggested the same stitch? But is it right? Not really. They are both different. Here is how different are,
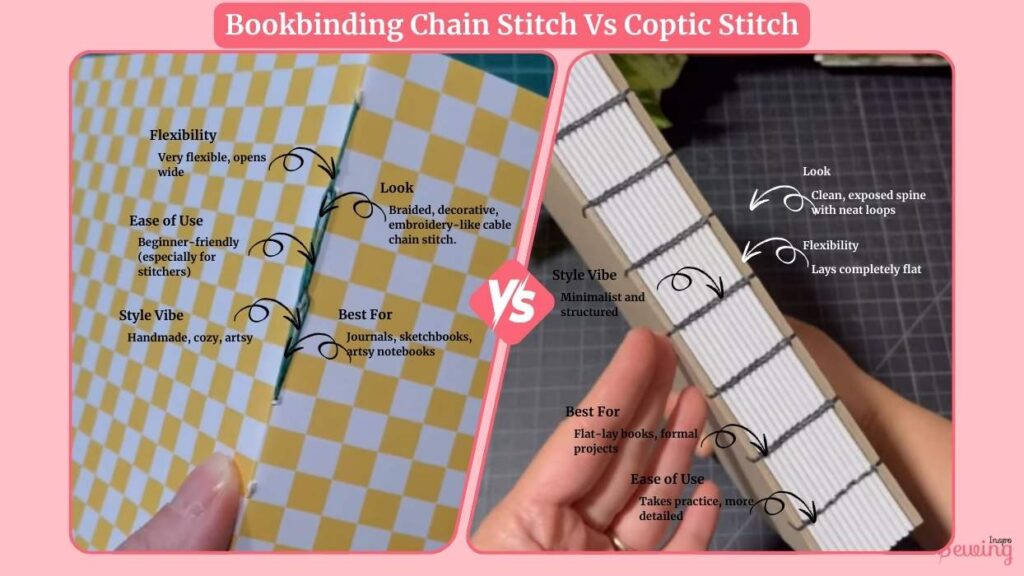
| Feature | Chain Stitch | Coptic Stitch |
| Look | Braided, decorative, embroidery-like cable chain stitch. | Clean, exposed spine with neat loops |
| Flexibility | Very flexible, opens wide | Lays completely flat |
| Ease of Use | Beginner-friendly (especially for stitchers) | Takes practice, more detailed |
| Style Vibe | Handmade, cozy, artsy | Minimalist and structured |
| Best For | Journals, sketchbooks, artsy notebooks | Flat-lay books, formal projects |
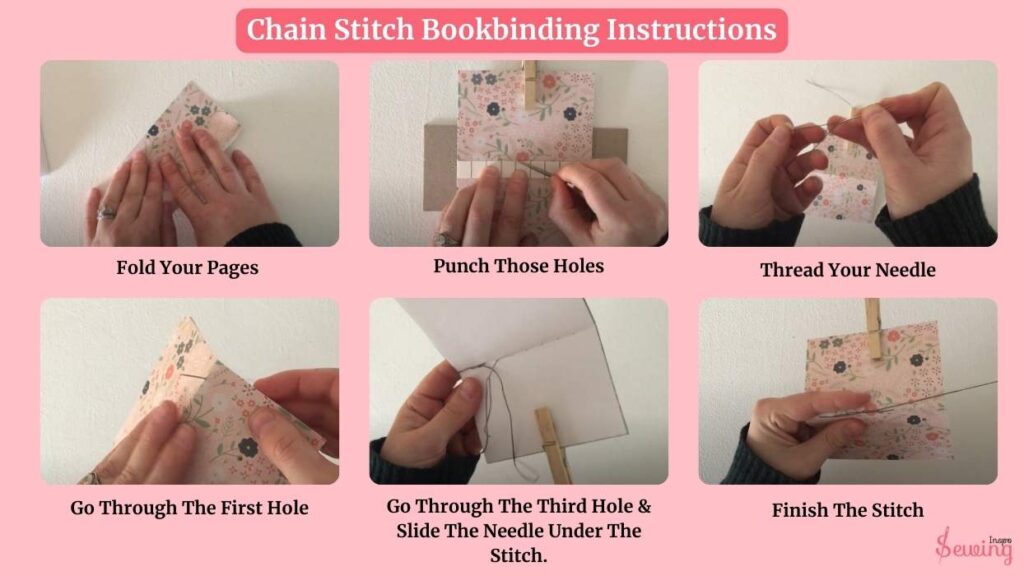
Chain Stitch Bookbinding Instructions
Bending a book can’t be that hard, right? I mean, if I can do embroidery, then I can even do book stitch. 😎 With that confidence, I sit down with everything and start stitching.
- Fold Your Pages
- Punch Those Holes
- Thread Your Needle
- Go Through The First Hole
- Go Through The Third Hole & Slide The Needle Under The Stitch.
- Finish The Stitch
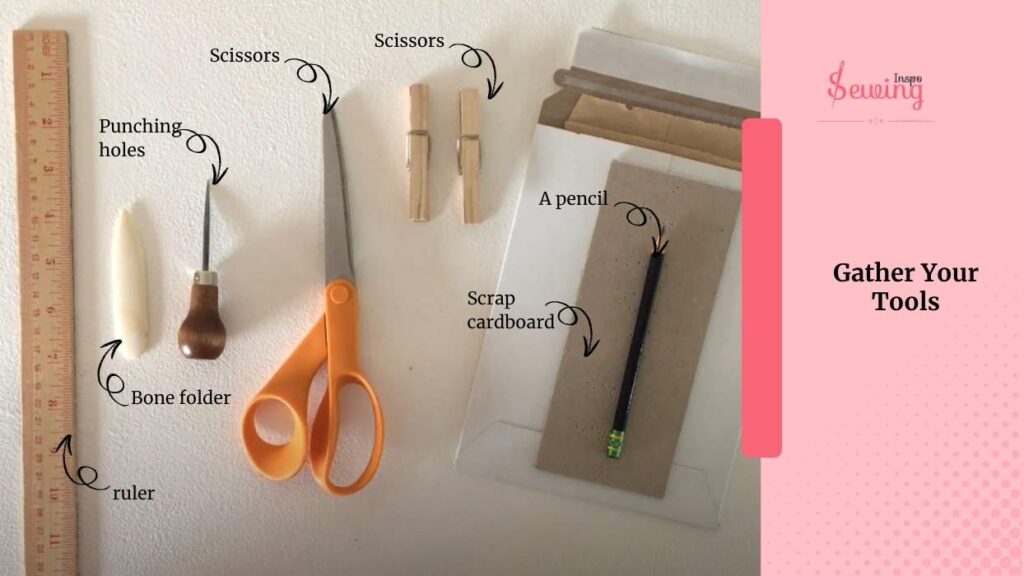
Gather Your Tools
So, first things first, get your stuff together. If you have a kit, perfect. If not, here’s what you’ll need for a handmade books cover:
- Scissors
- Awl (or push pin, or even a nail — no shame in improvising!)
- Bone folder or ruler
- Scrap cardboard (protect your table!)
- Some clips
- A pencil (just in case)
- C120 Chenille Needle + waxed thread (I love waxed linen — it glides like butter)
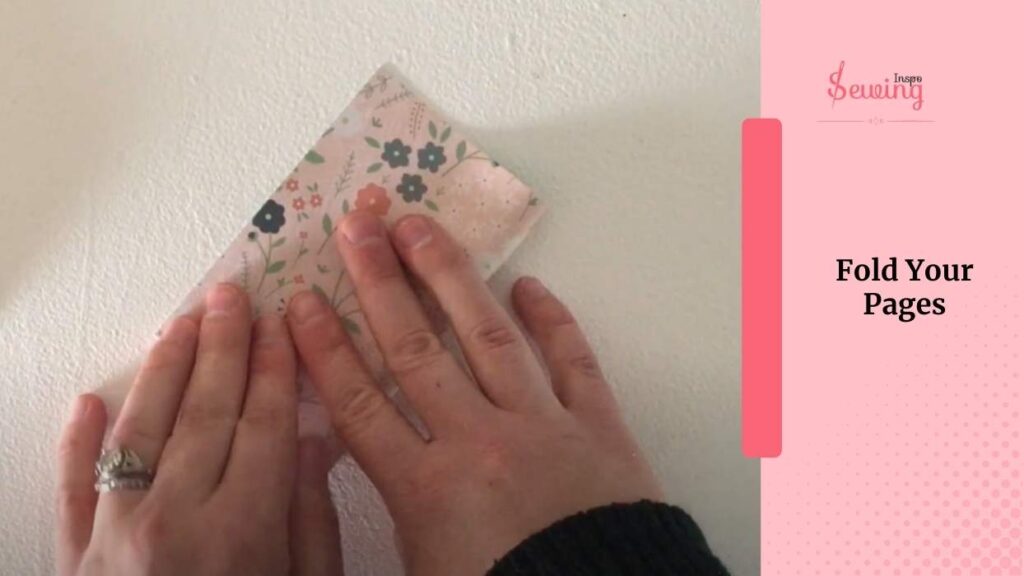
Fold Your Pages
Grab five pieces of blank paper and one pretty cover paper. Fold the blank ones in half first — that’s your signature.
Then fold the cover in half and nestle that signature right inside. Everything should be aligned and snug like a cozy little paper sandwich.
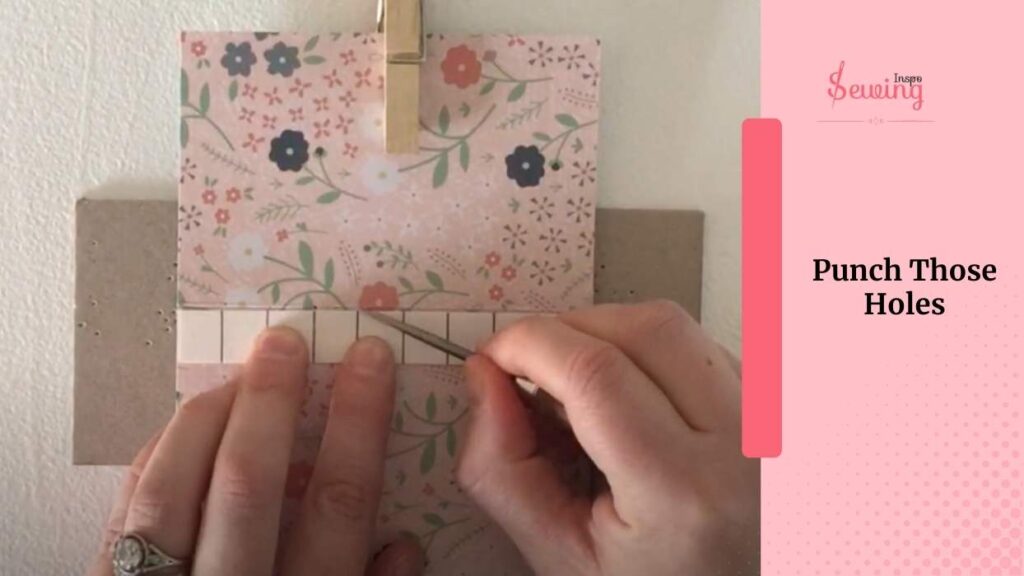
Punch Those Holes
It’s time to punch! Place your folded booklet on top of that scrap cardboard. Use a guide (or ruler) to space out your hole marks along the fold. Around every half inch works great.
Then poke the holes right on the fold using your awl or push pin
I go right through all the layers in one go.
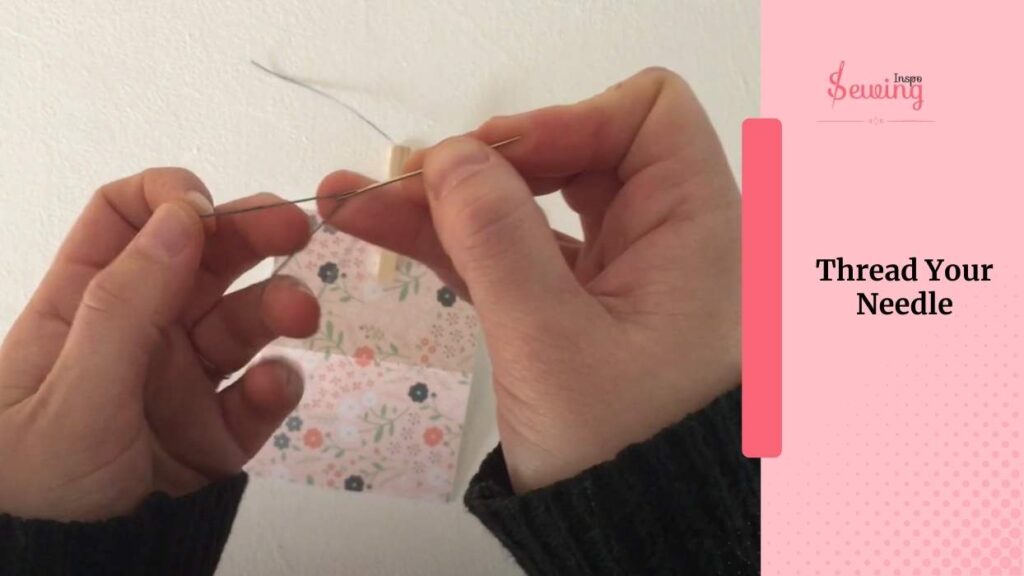
Thread Your Needle
Pick your thread color (go wild or stay classy — your book, your vibe). Cut about 20 inches and thread that needle.
Easy peasy. I use this length of thread for detached chainstitch too.
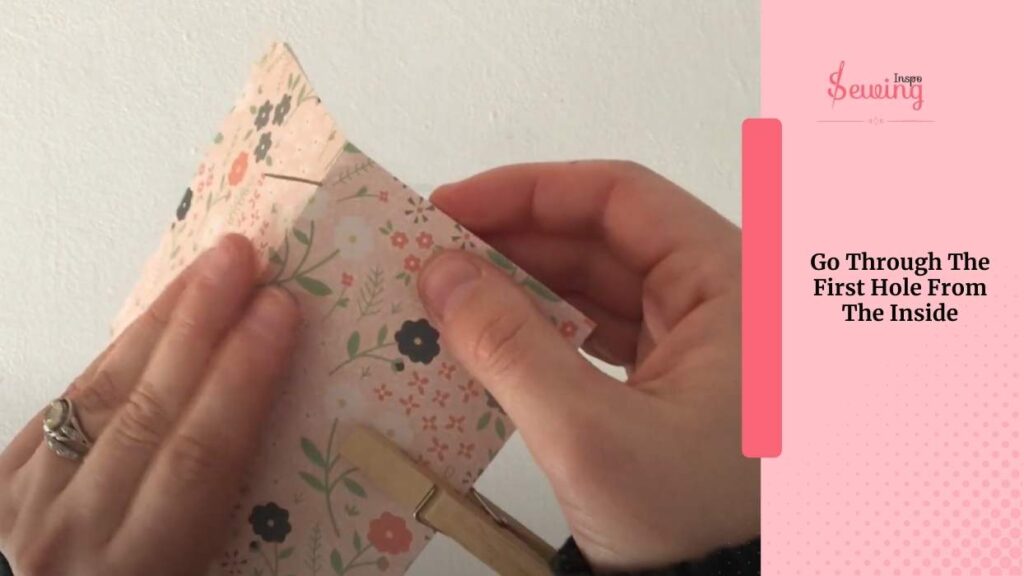
Go Through The First Hole From The Inside
Okay, here’s the fun part. Go through the first hole from the inside, and leave a little tail, maybe 2 inches.
Then go through the second hole from the outside, and tie a knot with that tail. This anchors your thread like a reverse chain.
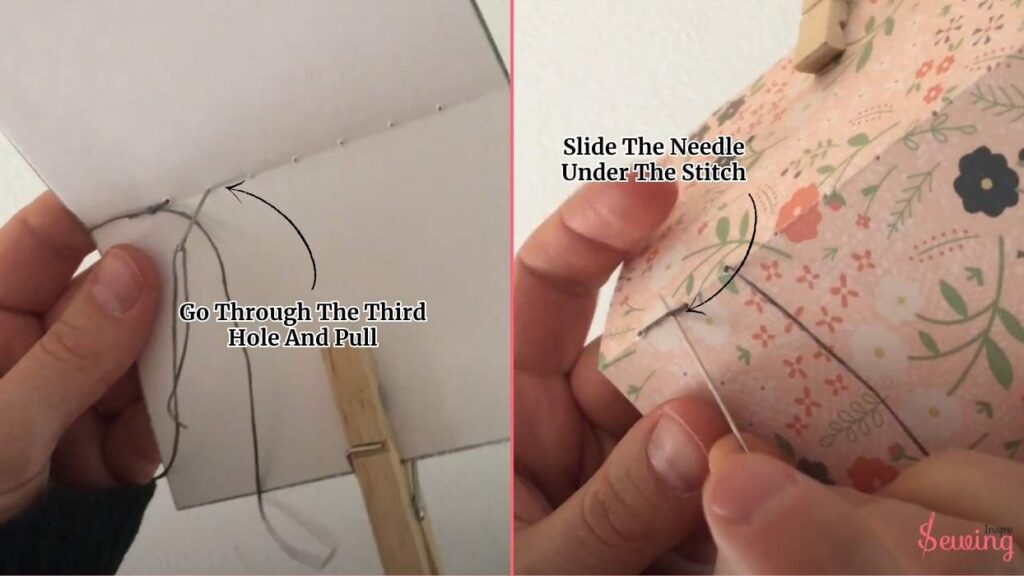
Go Through The Third Hole And Pull & Slide The Needle Under The Stitch
From the inside, go through the third hole and pull. Now here’s the move, slide your needle under the stitch you just made on the outside (like tucking under a thread bridge).
Then back into the same hole again. Boom, your first chain stitch.
Keep going like that:
- Out through the next hole
- Slide under the previous outside stitch
- Back into the same hole
- Repeat till the end!
Finish the Stitch
When you reach the last hole, your needle should be back inside. Now slip the needle under the last stitch, but don’t pull tight yet — let it make a little loop.
Thread your needle through the loop and then pull. That’s your final knot. I like to tuck my needle under the previous stitch, too, and then trim off the thread. Just for that clean finish.
Bonus Ideas From Me
This stitch looks amazing in all kinds of notebooks. So I Try:
- Painted paper
- Junk mail pages
- Scrap paper from your stash
And play with size! Tiny zines or chunky journals — it’s so fun.
Bookbinding Chain Stitch PDF
Frequently Asked Questions
Do I have to use a bookbinding kit?
Nope! Kits are super convenient (and cute), but you can totally DIY it with supplies you already have — some paper, waxed thread, a needle, and something sharp to poke holes.
What if I don’t have an awl?
No worries. I’ve used a thumbtack, push pin, and even a sewing needle in a pinch. Just be careful not to stab the table (or yourself). Put a piece of cardboard underneath for safety.
Can I use any kind of thread?
Technically, yes, but waxed thread is a game changer. It glides smoothly, doesn’t tangle as much, and holds tight knots. If you feel crafty, you can even wax your own with a little beeswax.
Will this notebook hold up?
Yes! This isn’t just for show — the chain stitch is strong. I use mine to jot down ideas, sketch, and journal.
That’s It
That’s how bookbinding chain stitch.
Interesting right?
Then try it and share it with us.


Leave a Reply