
“Do you know how to sew a ladder stitch by hand?” Grandma asked.
I replied,
“no!”
Grandma Said,

I find this stitch the most interesting one among stitches different types, but I never did it.
Sewing A Ladder Stitch
To sew a ladder stitch by hand, fold the edges of your fabric inward, alternate stitching horizontally between the folds, and pull the thread tight to close the seam invisibly.
What you will learn:
- Master the ladder stitch with clear, step-by-step instructions.
- Understand the various uses of the ladder stitch in different sewing projects
- Learn expert tips for perfect, invisible ladder stitches every time.
Table of Contents
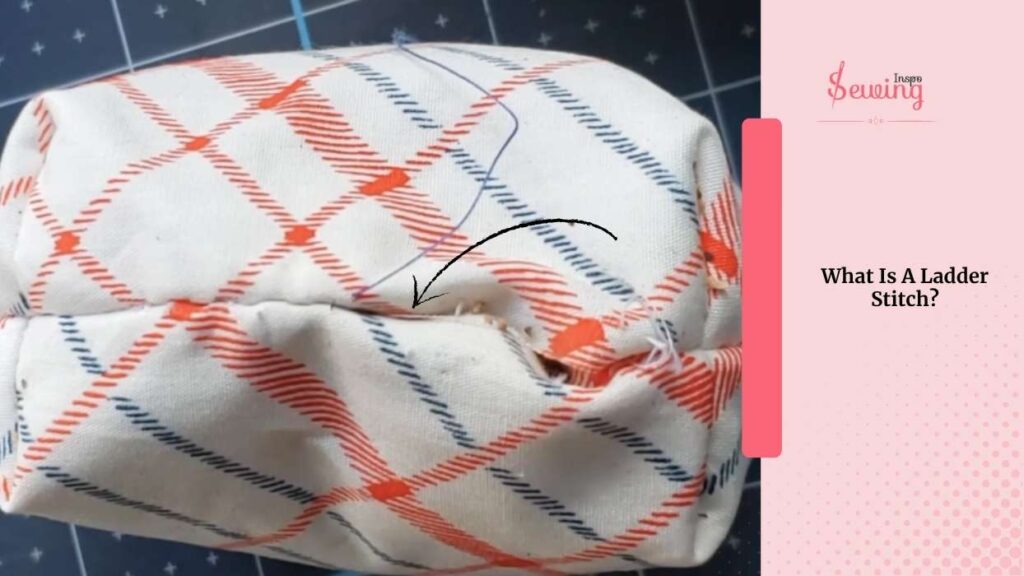
What Is A Ladder Stitch In Sewing??
Ladder stitch is a leader-looking stitch between the 2 fabric edges. Once the stitch is fully done and you pull the thread, it’s mostly invisible.
This stitch is perfect when you want to close something up without the stitches showing
That’s what is a ladder stitch. Isn’t it interesting?

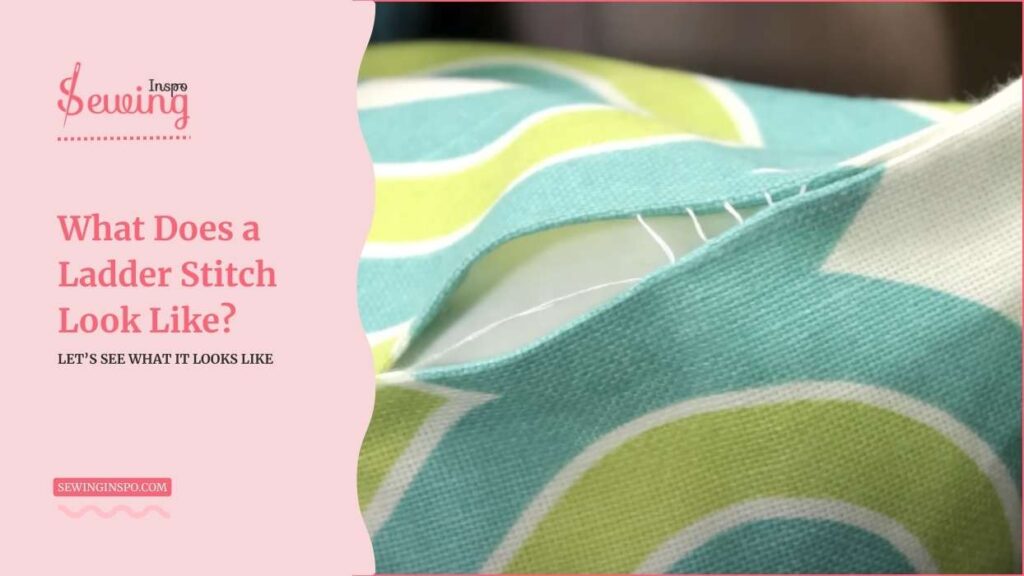
What Does A Ladder Stitch Look Like?
A ladder stitch looks like tiny horizontal stitches running straight across between two folded edges—kind of like the rungs of a ladder when you’re mid-stitch. Once you pull the thread tight, those little “rungs” disappear into the fabric.
The seam closes neatly with no visible stitches on the outside. Before tightening, it looks like a zigzag; after tightening.
Can You Do A Ladder Stitch By Hand?
Yes, you can do a ladder stitch by hand. The technique is kinda like saddle stitch. If you know all kinds of stitches with pictures and names then you would know what I’m talking about.
It’s a handy hand-sewing technique perfect for closing seams on stuffed animals, and fixing split seams. It’s invisible like back backstitch. The ladder stitch gets its name because the stitches look like rungs on a ladder.
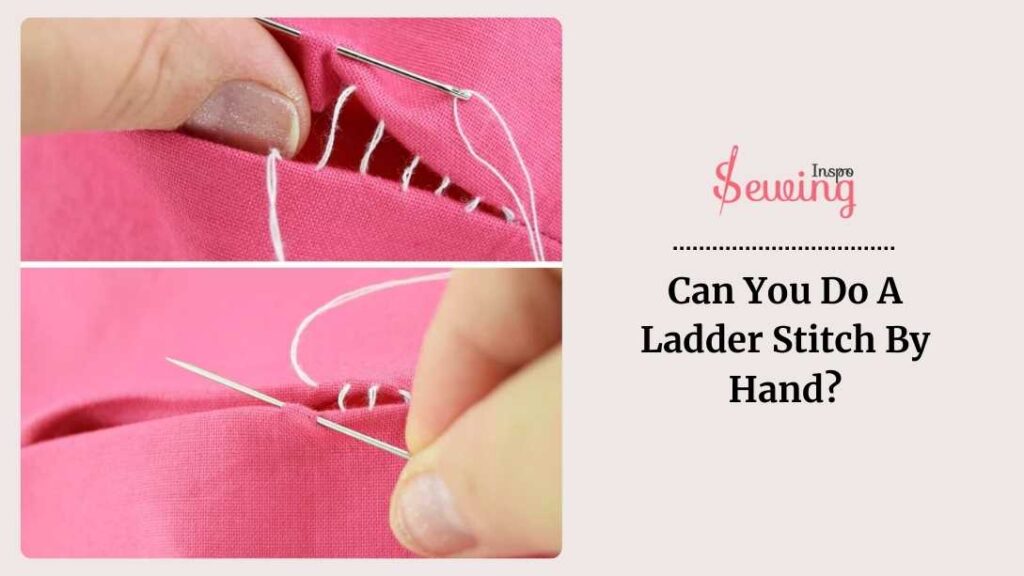
When you pull the thread tight, the stitches pull the fabric together and practically disappear, especially if you use thread that matches your fabric.
That’s why it is even used to repair damaged clothes. So, if you are wondering how to fix darning holes then you can use this.
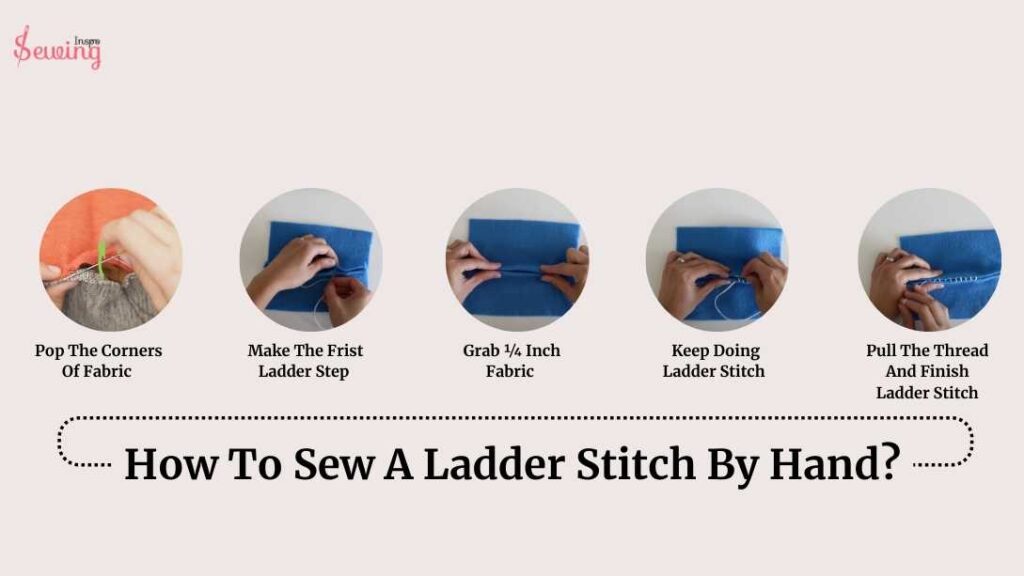
How To Sew A Ladder Stitch By Hand?
To sew a ladder stitch you need to follow 5 steps.
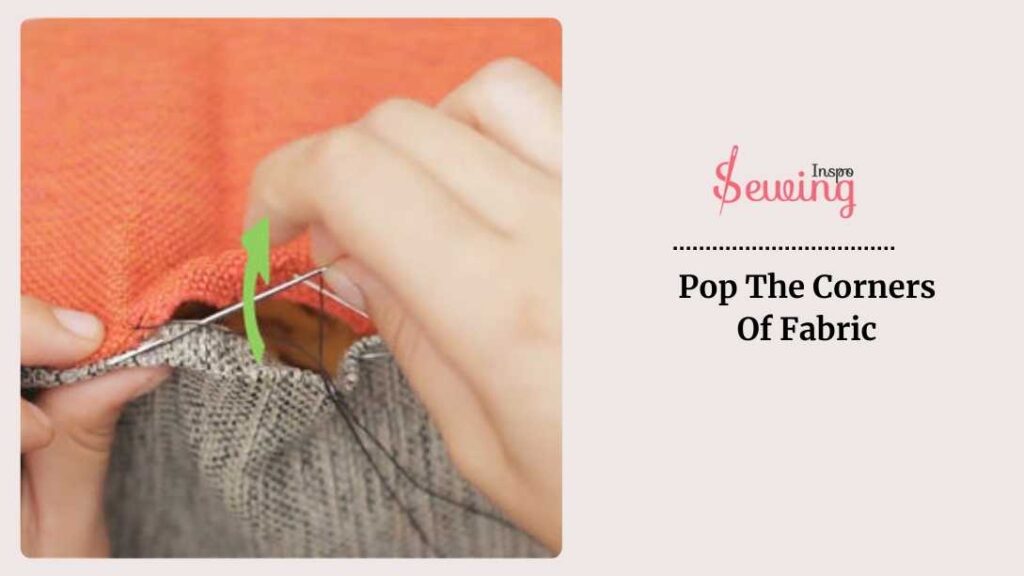
- Pop The Corners Of Fabric
- Make The First Ladder Step
- Grab ¼ Inch Fabric
- Keep Doing Ladder Stitch
- Pull The Thread And Finish the Ladder Stitch
Pop The Corners Of Fabric
To pop the corners, use a sewing needle to carefully push out the corners from the inside. This helps to create sharp, well-defined corners. Gently push the needle into the fabric corners from the inside to ensure they are fully turned out and sharp. Then fold the edge of the corner with 2 fingers. just like you do in the hemming stitch.
If the project is something that needs filling, like a pillow or stuffed animal, make sure to stuff the inside evenly and to your desired firmness before closing up the final part of the hem. Now you will see slip stitch vs ladder stitch clearly.
This part is similar to blanket stitch, isn’t it? If you are curious then read our blanket stitch step by step.😎
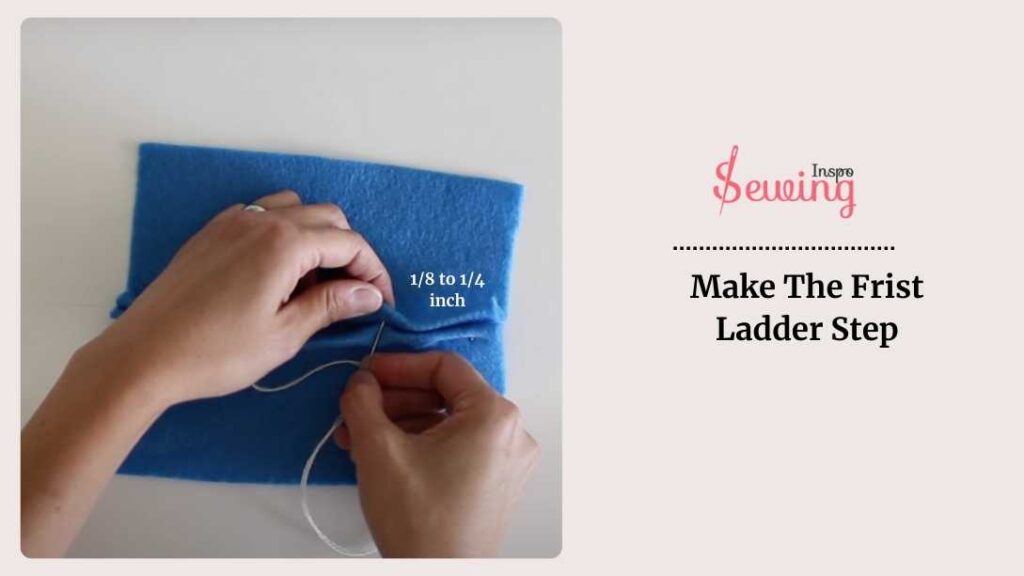
Make The Frist Ladder Step
Make the frist ladder stitch, poke the needle through the edge of the seam allowance, about 1/8 to 1/4 inch from the end of the opening where the seams are turned in. Pull the thread through until it stops at the knot. It has to look like a pick stitch.
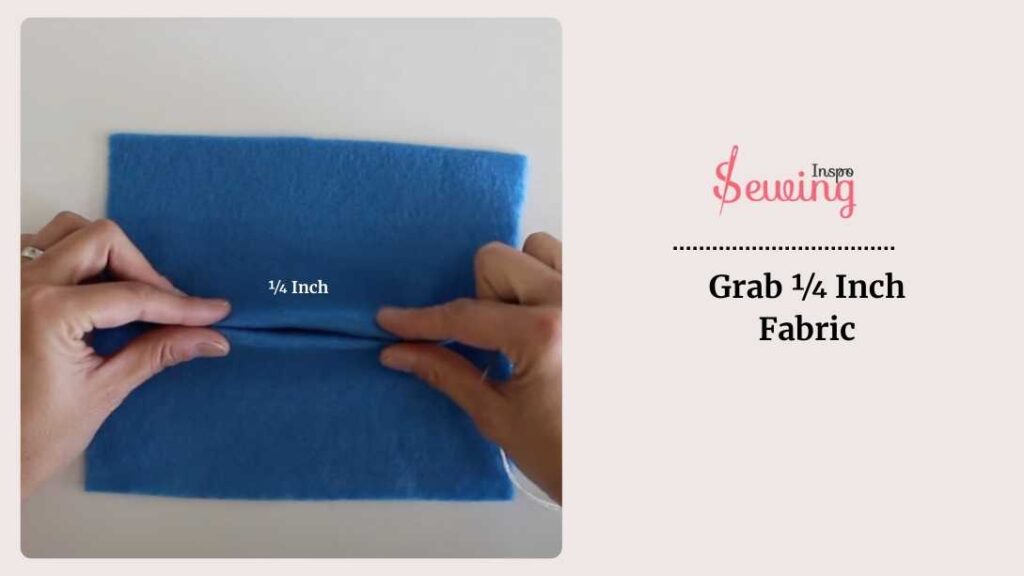
Grab ¼ Inch Fabric
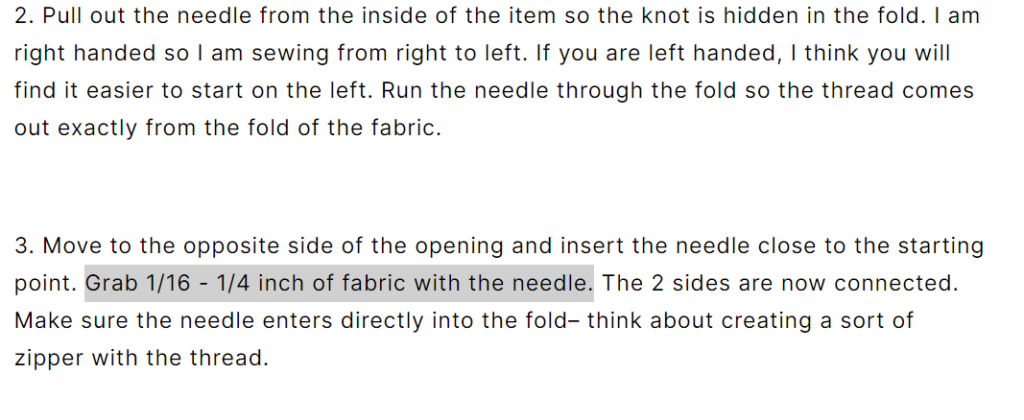
Move to the opposite side of the opening and insert the needle close to where you started, grabbing about 1/16 to 1/4 inch of fabric. This will connect the 2 sides. Make sure the needle enters directly into the fold, creating a zipper-like effect with the thread. You can use the hand sew buttonhole technique here.
-I think ¼ inch fabric is ideal for ladder stitching.
Next, make a knot, pull the needle through, and move to the opposite side again. Just like you would do in running stitch. Insert the needle right in front of where the thread came out of the fold, and grab another 1/16 to 1/4 inch of fabric on the opposite fold. Keep repeating this process to close the seam and make the perfect ladder stitching.
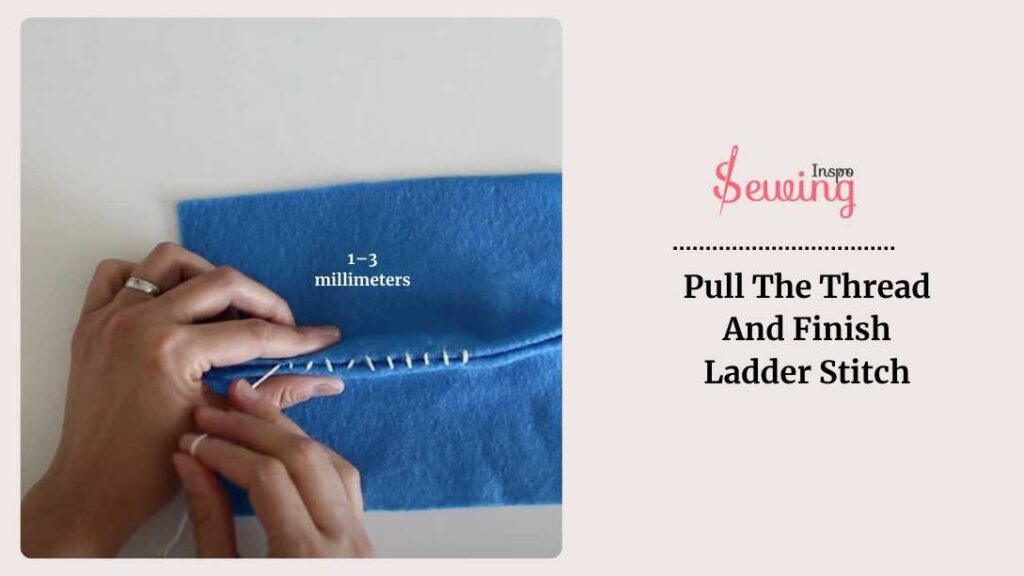
Keep Doing Ladder Stitch
Now you just need to keep doing ladder stitch maintaining the right gap. a stitch length of 1–3 millimeters. Going longer than 3 millimeters can make the fabric pucker. Smaller stitches blend better, making them nearly invisible, especially alongside machine stitching.

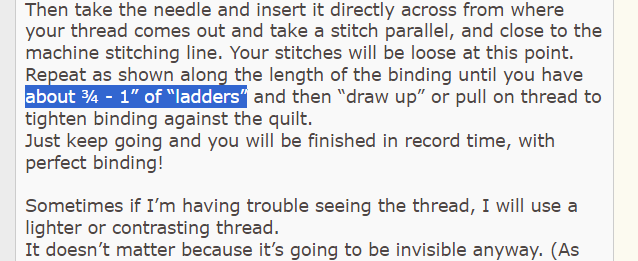
So, keep stitching until you get about ¾ – 1” of “ladders”.
Smaller stitches are less noticeable and blend seamlessly into the seam. This works like a tacking stitch. However, if you’re working on a corner or an area that needs to withstand more wear and tear, you can use larger stitches, like 1/4 inch or 5 millimeters. That’s all makes ladder stitch looks inviable.
How To Finish A Ladder Stitch!
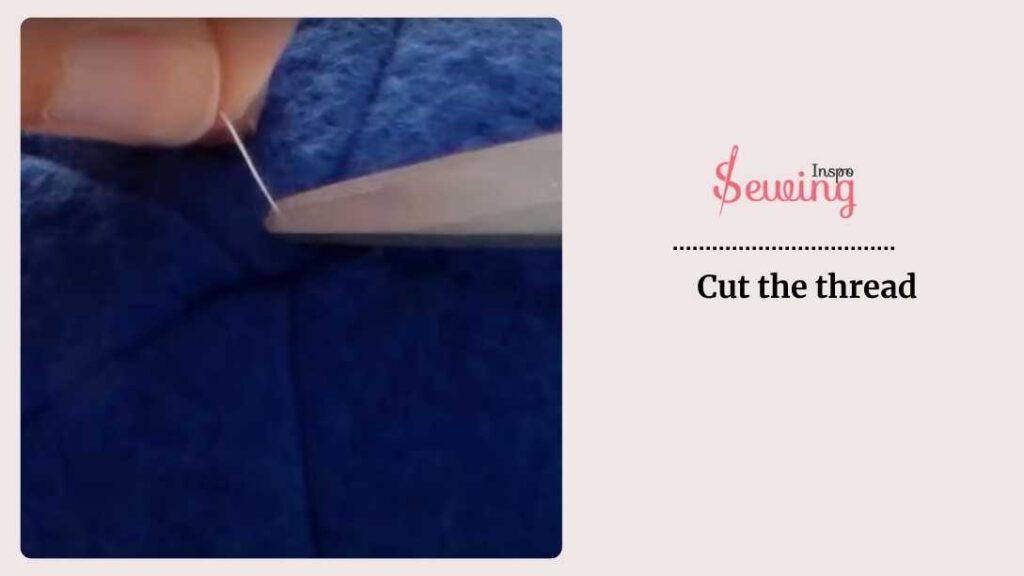
Pull the thread tight when you reach the end of the open section. This will close the seam and hide the ladder stitches within the fold of the hem. Pinch the thread and fabric where it comes out to keep the tension before you secure the stitch.
-Ok then how to finish a ladder stitch?
Next, make a knot by bringing the needle through the inside stitches and creating a loop. Thread the needle through the loop and pull it tight. Repeat this a few times to ensure it’s secure.
Finally, cut the thread close to the fabric and tuck the ends into the fold for a neat finish.
And that’s it! That’s how to sew a ladder stitch by hand.
Ladder Stitch Tutorial
How To: Ladder Stitch (Invisible Stitching)
Ladder Stitch Diagram
The ladder stitch diagram shows the steps for sewing a ladder stitch, illustrating how to close a seam invisibly by stitching between the folded edges of fabric.

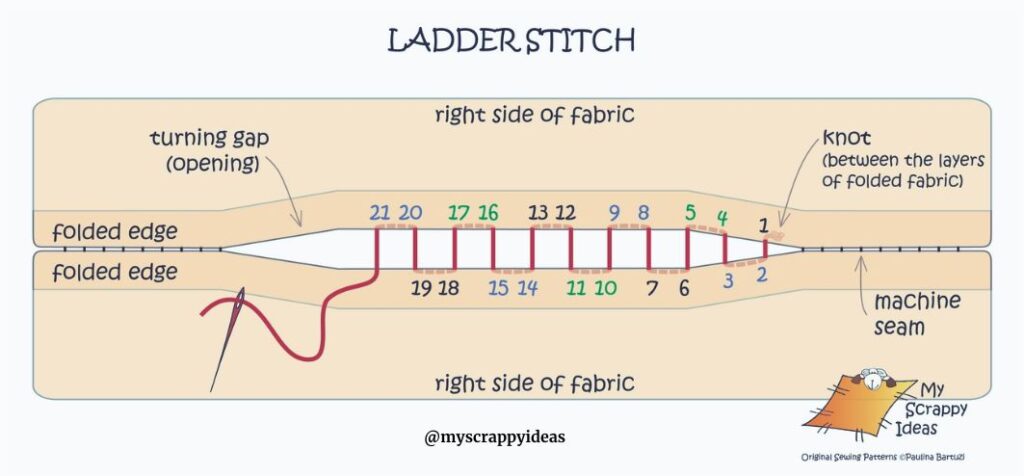
Image Source: @myscrappyideas
Simple Ladder Stitch Diagram
Curious how it looks? Then here have a look,

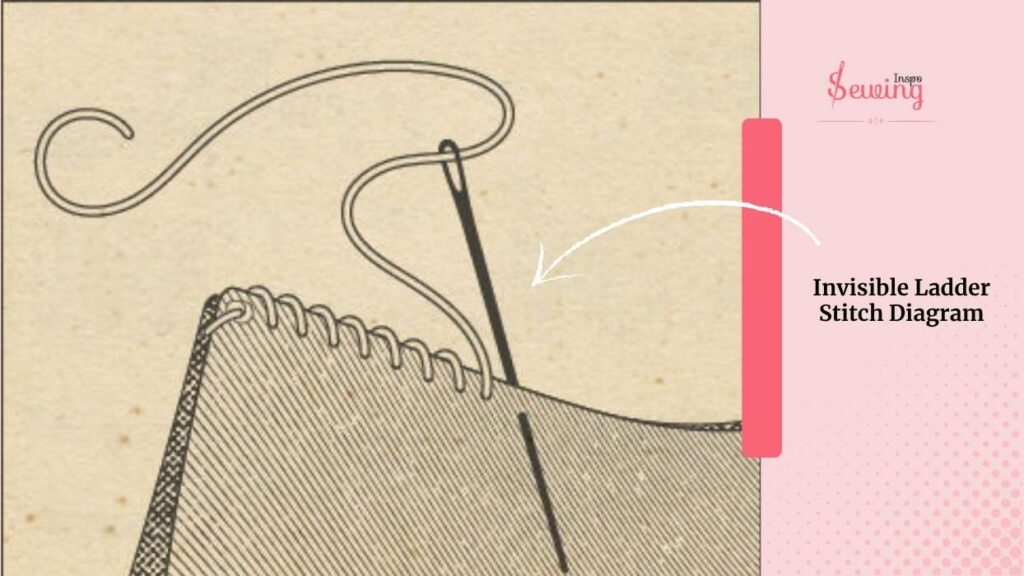
Invisible Ladder Stitch Diagram
If you are wondering what a bead would look like, then this is it.
Thread And Needle For Ladder Stitch
It’s a good idea to use a strong thread, like a quilting weight thread, to prevent it from snapping during the process. For extra strength, double thread your needle.
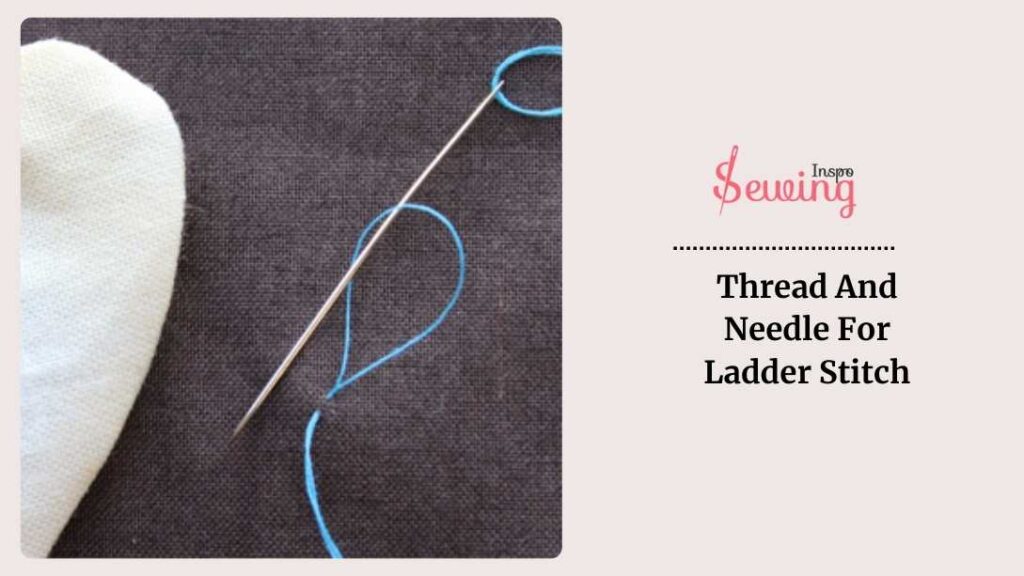
-Ok what needle is best for ladder stitch Grandma?
-For a ladder stitch, you’ll want to use a thin, sharp needle that’s suitable for hand sewing. A common choice is a hand-sewing needle with a small eye, as it makes threading easier and allows the needle to pass smoothly through the fabric.
What Is A Ladder Stitch Used For?
A ladder stitch is mainly used for closing up openings in fabric projects where you want the seam to be hidden.
This is like an invisible form of whipping stitch. It’s perfect for finishing off stuffed animals or pillows after you’ve stuffed them and turned them right-side out. Hemming stitch also can be used on those but ladder stitch is the most found.
You can also use it to fix split seams on clothes without the stitches showing much, so it looks neat. It’s great for hemming too, giving a smooth, almost invisible finish that blends nicely with the fabric.
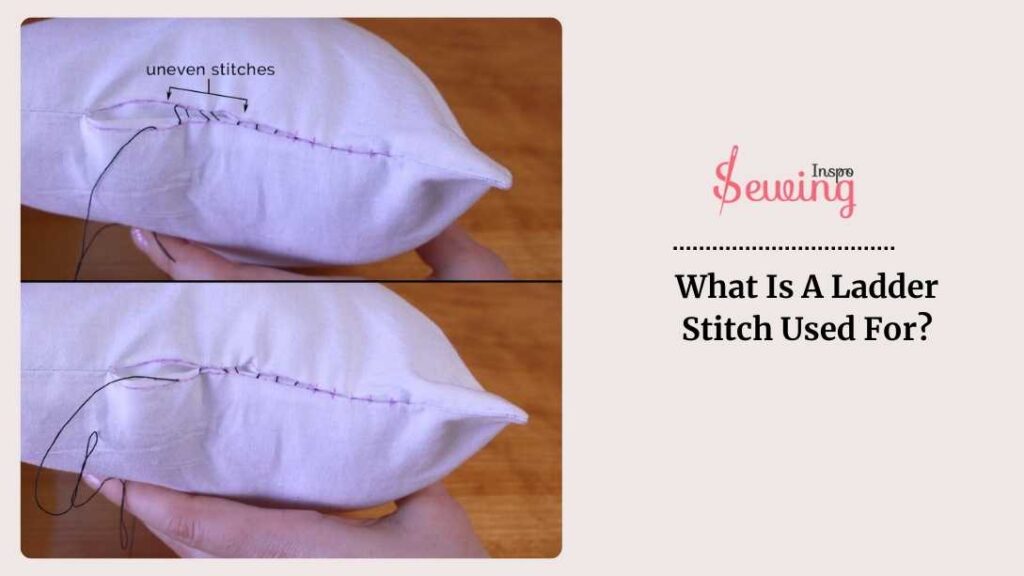
Whether you’re sewing by hand or blending sections from hand-sewn to machine-sewn, the ladder stitch is a go-to for making your sewing look clean and professional. If you want something decorative effect then try loop stitch hand sewing.
Rather than those, there are more eras where this stitch is so useful, for example,
Epp Ladder Stitch
This stitch is so good for EPP. It’s easy & unique like no other stitches. Here is how i use it for epp,
- I place my two epp right sides together and align the edge I want to join.
- I thread an 18″ length, tie a knot, and anchor it in one hexagon’s seam allowance.
- Starting at the corner, I stitch through both corners twice to secure them.
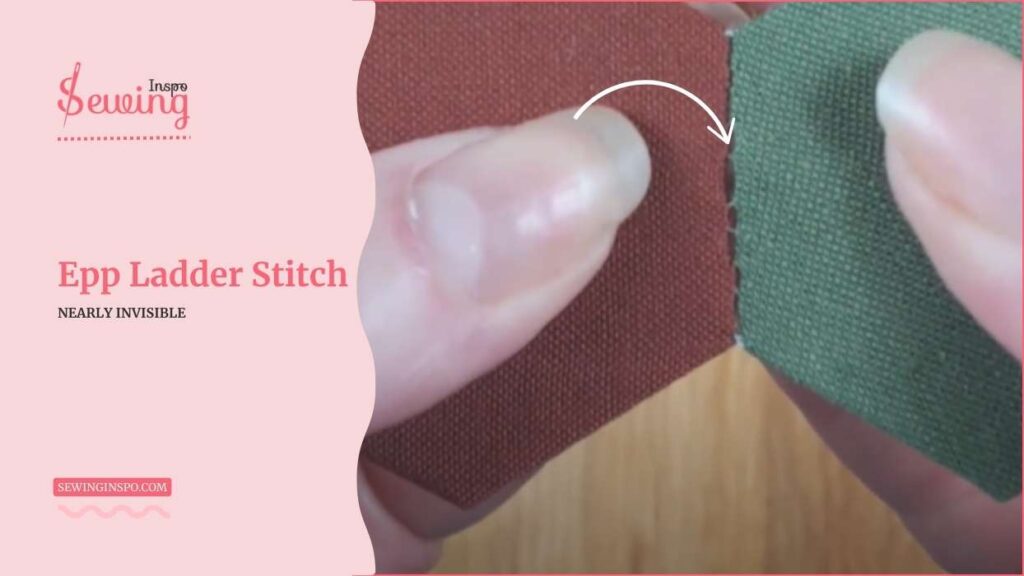
- I insert the needle inside the seam on one edge, slide it about ¼”, and pull out, leaving a small loop.
- I do the same on the other hexagon, 1mm over, creating little “rungs.”
- I keep alternating between top and bottom edges, spacing stitches evenly.
- After a few stitches, I gently pull the thread to close the seam—the ladder vanishes!
- At the end, I secure with a couple extra stitches or leave a tail if I’m continuing.
The result: neat, nearly invisible, and super strong!
Ladder Hem Stitch
A ladder hem stitch is a simple hand-sewing technique I use to close up gaps in fabric.It’s often used in tarkashi embroidery, and honestly. It’s easier than it seems once you get the rhythm going.
Here is how you can use it,
- I grab my tarkashi fabric and secure it in an embroidery hoop, making stitching easier.
- I lock my needle at the front, slide it behind 6 threads, and pull tight—boom, the first “rung” is done!
- I take the needle back behind the same 6 threads again, like a slip stitch, locking them in place.
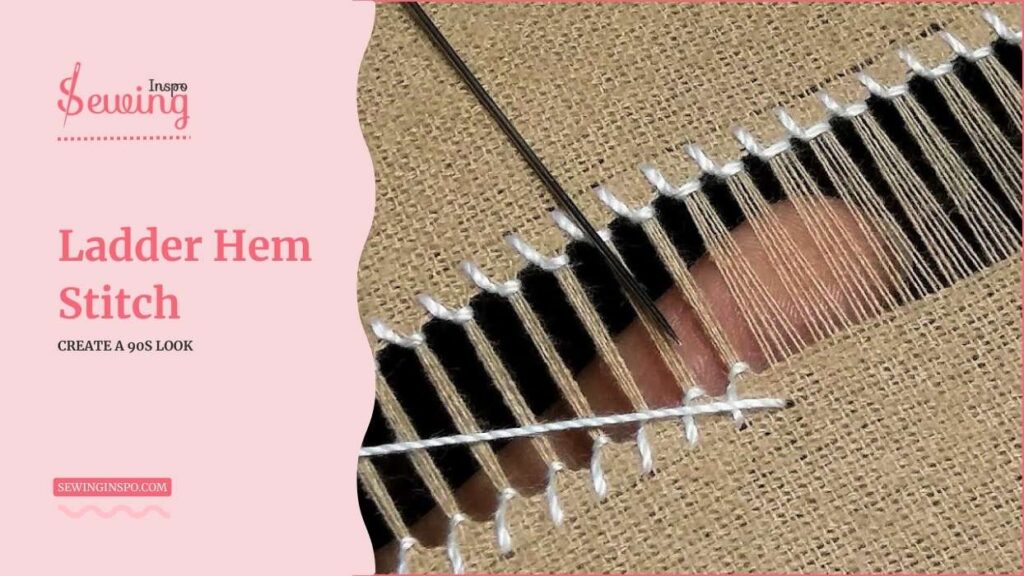
- Then I bring the needle up further down the fabric edge and pull it through to form the next rung.
- I just repeat this rhythm, and the ladder shape builds up—fancy and neat.
- Once I do the same on the other side, I have a beautiful ladder hem stitch!
Ladder Stitch Diagram Pdf
If you’re worried that you might forget some steps, then this PDF is for you.
Frequently Asked Questions(FAQ’s)
Is Slip Stitch And Ladder Stitch The Same?
Yes, slip stitch and ladder stitch are often used interchangeably to refer to the same hand-sewing technique. Both terms describe a method where the stitches are hidden within the seam, resulting in a nearly invisible finish on the outside of the fabric. This stitch is commonly used for closing seams, particularly in situations where you want the sewing to be inconspicuous and blend seamlessly with the surrounding fabric.
What Is An Invisible Ladder Stitch?
An invisible ladder stitch is a hand-sewing technique used to create nearly invisible seams in fabric. It involves sewing two edges of fabric together with small, nearly imperceptible stitches that are hidden within the fold of the fabric.
Is Ladder Stitch The Same As A Blind Stitch?
No, a ladder stitch and a blind stitch are not the same. The ladder stitch is used for closing seams invisibly, while the blind stitch is used for hemming with minimal visibility on the front side of the fabric
Final Talk
Well, I have shown you how to sew a ladder stitch by hand. Now it’s your turn to do the ladder stitch and show me what you have got. Start sewing and if you face any problems. Don’t hesitate to reach out to sewinginspo.

Leave a Reply