
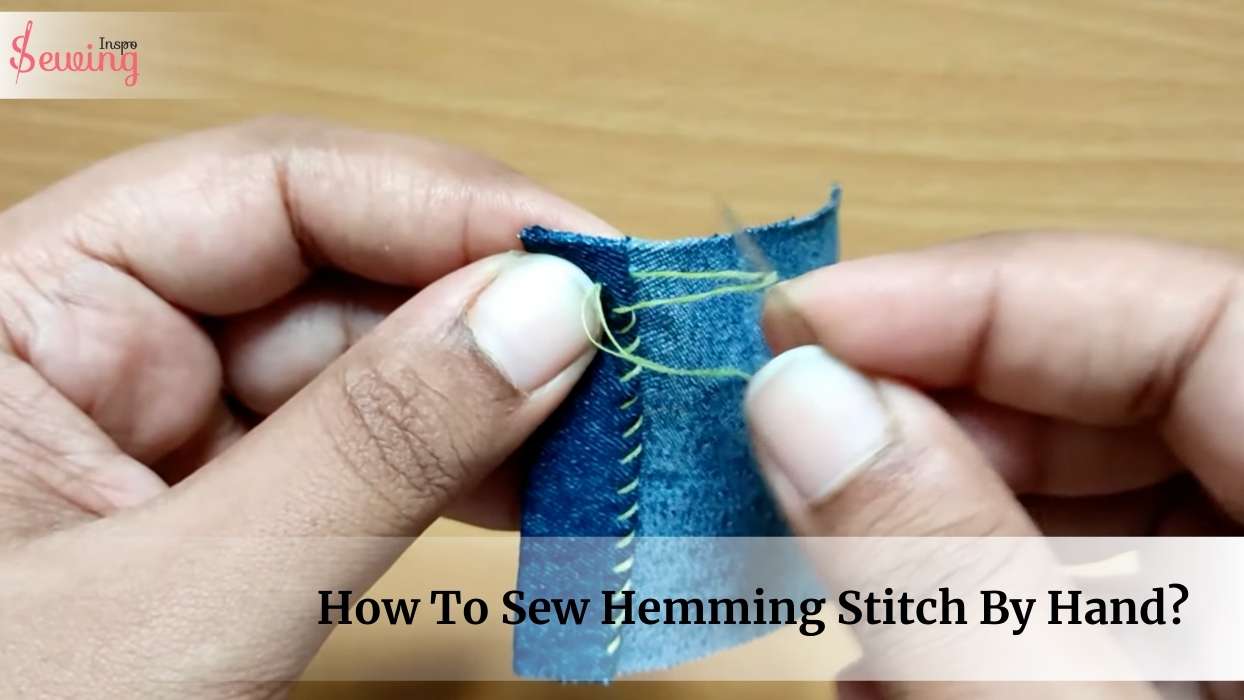
I just enter grandma’s room and see she is doing some hem stitch. She looked at me smiled, and said do you wanna learn how to sew hemming stitches by hand? I said why not?
She began to explain (Sew Hemming Stitch By Hand)
To sew a hemming stitch by hand, fold the fabric edge, make small stitches along the fold, and secure with a knot at the end.
That’s just a glance at the idea. If you wanna learn in detail, then stay with me to learn how to sew a hem by hand for beginners.
At a glance:
- Make a roll with your finger by pressing the side of the edge to create a roll.
- Begin the first hemstitch by making 3 stitches in place just past the raw edge of the fold.
- Insert the needle into the lightweight fabric just below the raw edge.
Table of Contents
How To Sew Hemming Stitch By Hand?
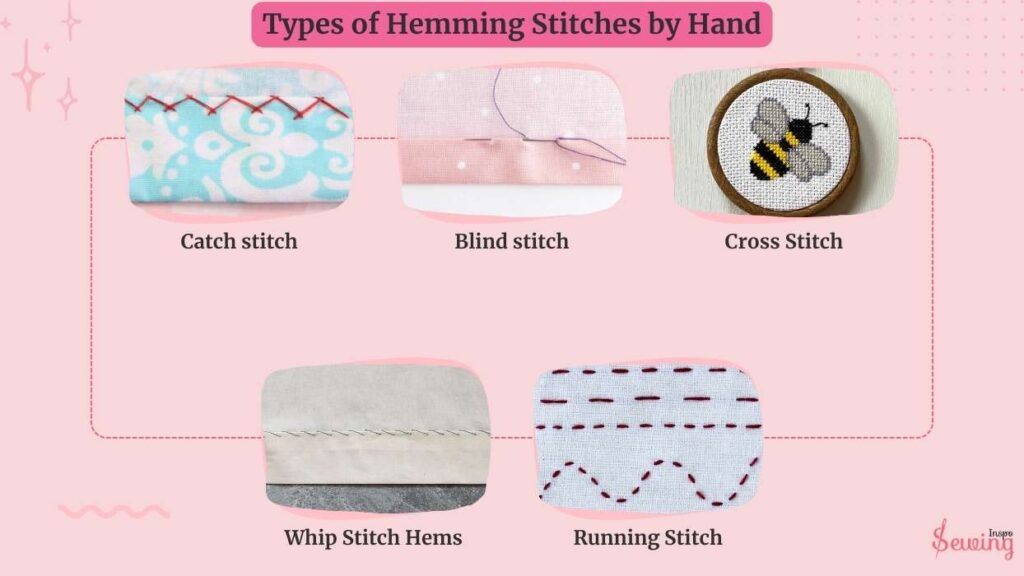
To do hemstitches with 9 kinds of stitches. the most common types of hem stitches by hand are,
- Catch stitch
- Blind stitch
- cross stitch
- Slip Hemming Stitch
- Felled Hemming Stitch
- Whip Stitch Hems
- Hand Rolled Hem Stitch
- Running Stitch
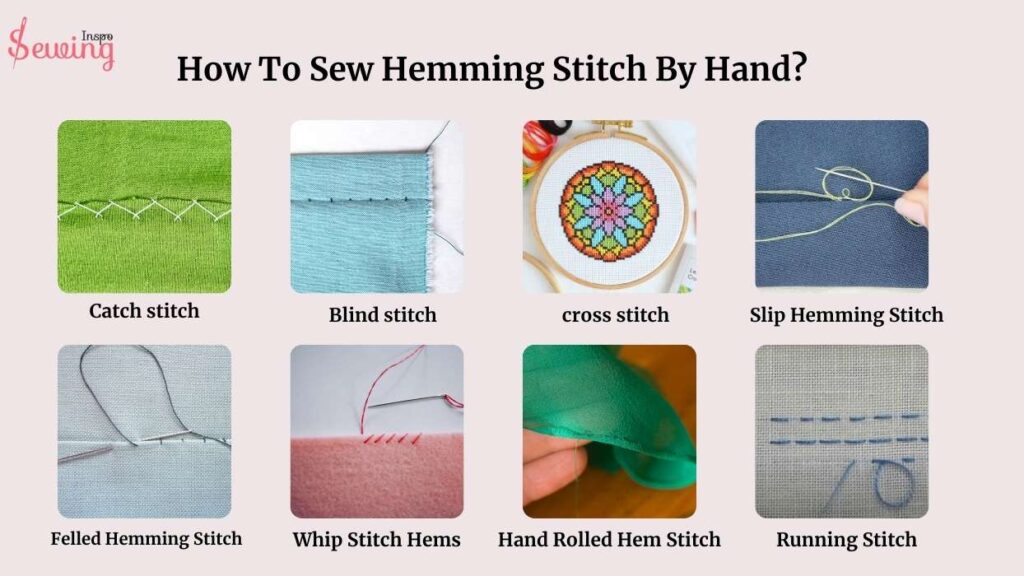
Most of them are pretty common. So, let’s teach you something uncommon: hand rolled stitch today. This is also called a blind hem stitch.
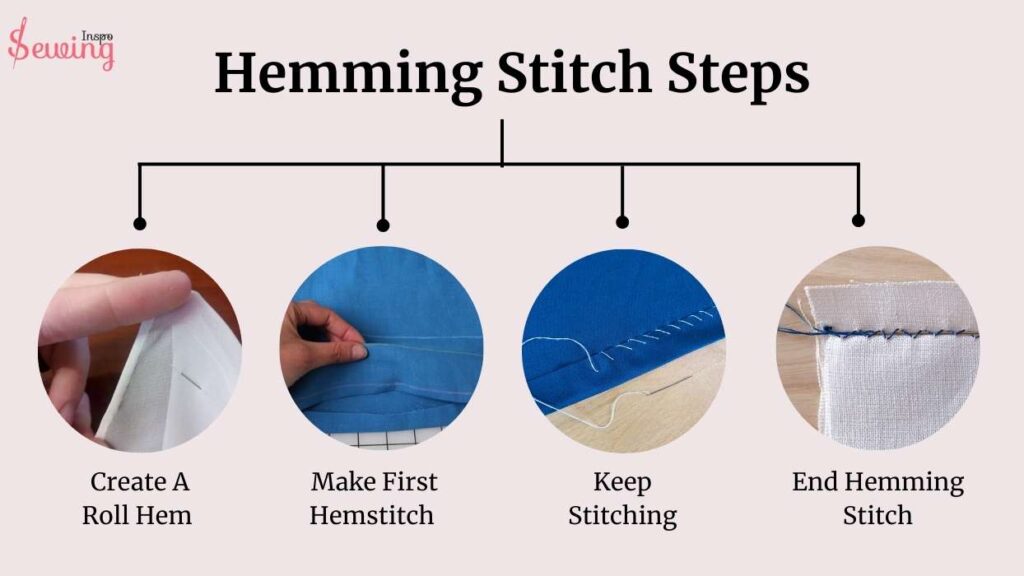
Well, to do hemming stitch by hand, you need to follow 4 steps.
- Create A Roll Hem
- Make First Hemstitch
- Keep Stitching
- End Hemming Stitch
Let’s demonstrate to you the hemming stitch steps.
Create A Roll Hem
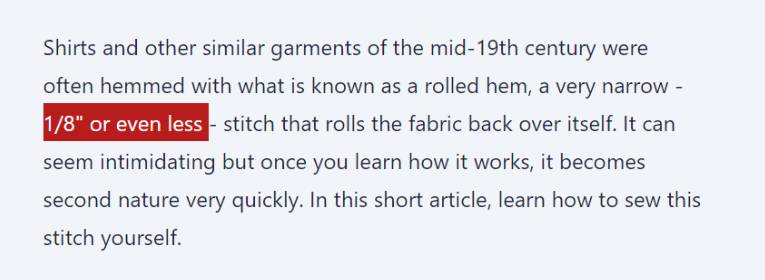
To create a hem roll for a hem stitch, grab your scissors and trim the seam allowance down to about 1/8 inch. That’s the perfect length of hemming stitch by hand. You can use this length for whipstitch, too.
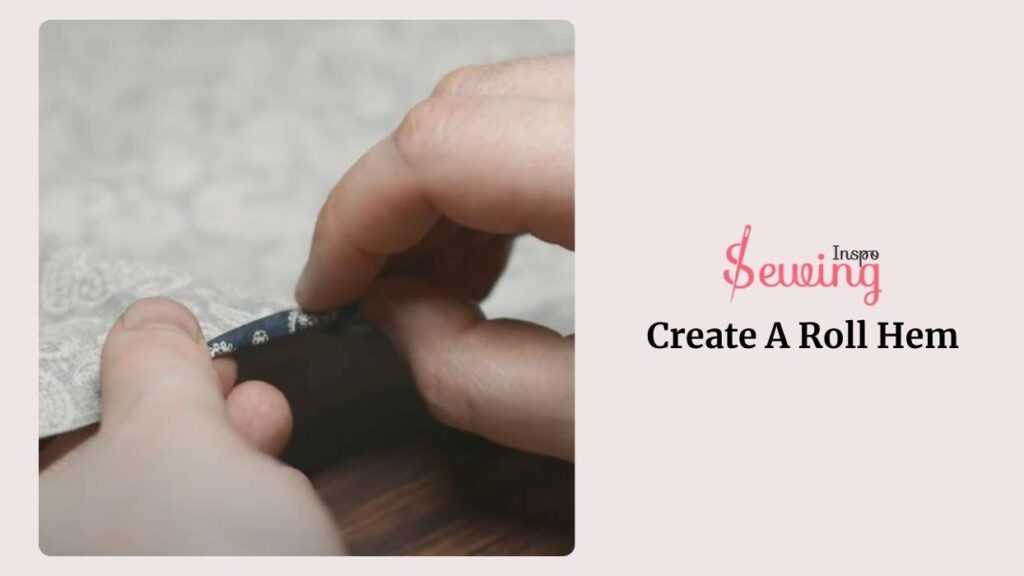
Then, flip the raw edge back to the wrong side by about 1/8 inch along the entire hemline. You can use your fingernails to press it down as you go. You also apply these tricks with blanket stitch.
Now, make a roll with your finger. Use your finger and press the side of the edge to make a roll. If you can’t do it, just make a roll with the edge. That’s how to sew rolled hem by hand?
Make First Hemstitch
To make the stitch, begin by making 3 stitches in place just past the raw edge of the fold to make a hand hem stitch. Then, stick the needle into the lightweight fabric just below the raw edge and bring it up and over the folded edge before inserting it back near the bottom of the raw edge. If you see a hemming stitch drawing, then you would know.
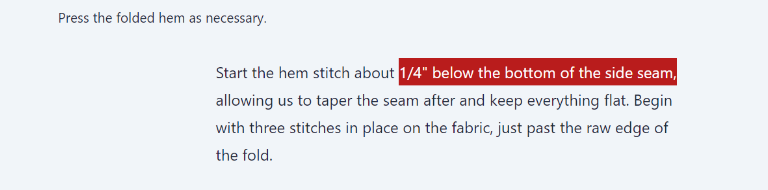
Start your hemstitch about 1/4 inch under the edge of the hem. This is even perfect for sewing a straight line by hand.
No need to go all the way through the fabric with the needle—just catch a few threads and you’re good to go! If you have done pick stitch then this process will be easy for you.
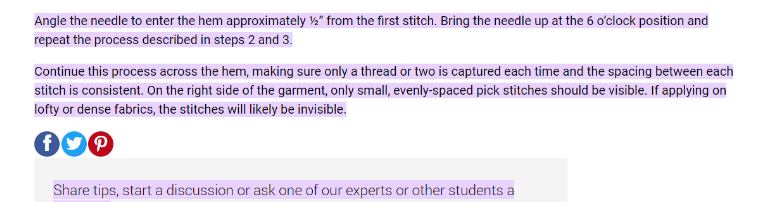
Insert the needle and try to angle it slightly diagonally into the folded bulkier fabrics. Start about 1\2 inches away from your previous stitch, and bring the needle up at the 6 o’clock position. I follow this method for the overlock stitch too.
Keep Stitching
To end the hemming stitch, after you’ve sewn about 1 inch, give your thread knot a gentle tug. Just you would with tacking stitch. This helps tighten up the stitches you’ve just made, and you’ll start to see that folded edge rolling over itself, creating that nice rolled seam.
Just be careful not to pull too hard, or you might end up with some puckering in the fabric. That will make hand sewing easy & makes stronger like overlock stitch by hand.
You can sew about 2 inches worth of stitches before pulling again, but keep in mind that the tension on the thread increases as you go, so watch out for any signs that it might break. This will also secure the fraying edge.

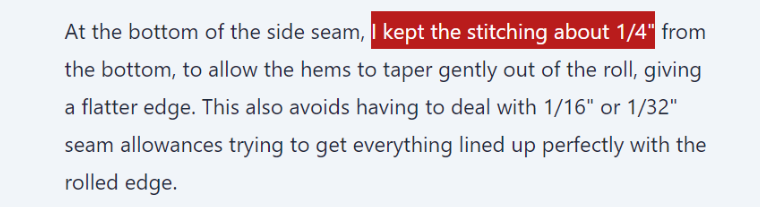
Now, keep stitching across the entire hem until you’re about 1/4 inch from the bottom of the other side seam.
On the right side of your fabric, you should see a crisp edge with a row of small running stitches showing about 1/16 inch from the edge. But you can adjust it according to your stitch. It’s not like a buttonhole stitch so no need to maintain a right edge.
Secure of Hemming Stitch
To secure the hemming stitch, your hem should be all rolled up and looking neat. Near the bottom of the side seam, keep your stitching about 1/4 inch from the bottom. Things are kinda similar to how to pick stitches by hand. This helps the hems taper gently out of the roll, giving you a nice flat edge. Plus, it saves you from dealing with super tiny seam allowances trying to line everything up perfectly with the rolled edge.
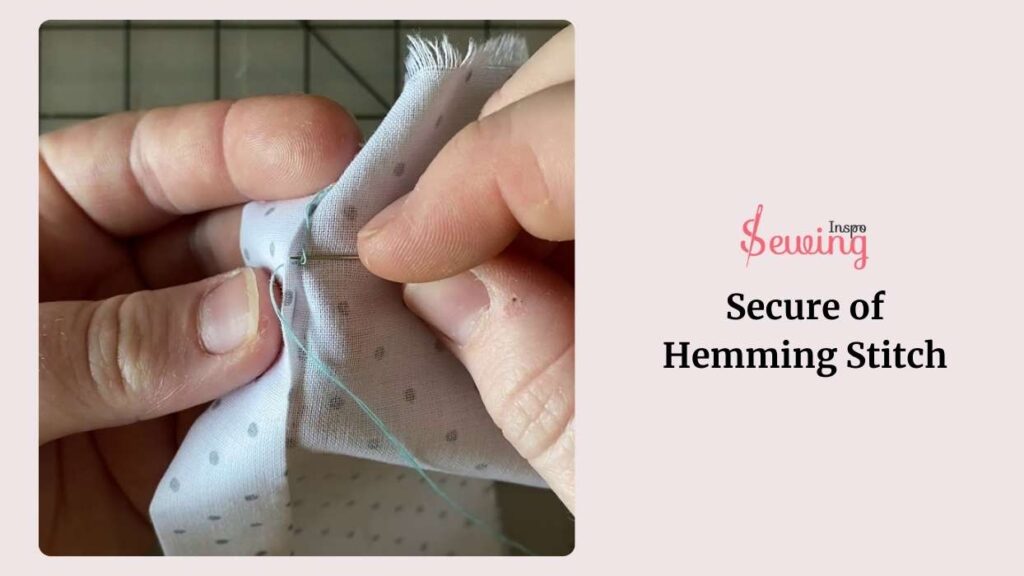
Make sure everything lies as flat as possible near the bottom of the side seams—no puckering allowed!
And that’s it! You got your hemstitch.
Read my sewing book to get a closer look at each stitch.
What Is The Best Method Of Hemming Stitche?
The best method of hemming stitch is a rolled hem stitch. Because it’s a hassle-free method. You don’t need much to do these hemming stitch steps. Just roll the hem and you are good to do hem sewing. It creates a clean, narrow edge, perfect for lightweight fabrics like chiffon, silk, and organza.

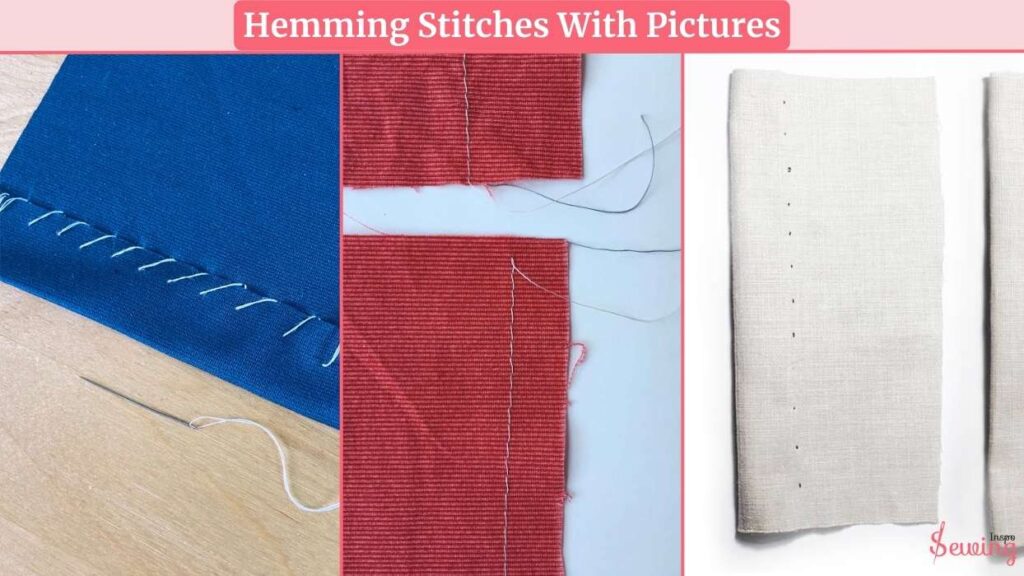
Hemming Stitches With Pictures
Here are a few hemming stitches I have done on some fabric.
How To Sew A Hem By Hand Pants?
To sew a hem by hand on pants, start by folding the bottom edge of the pants to the desired length and pin it in place.
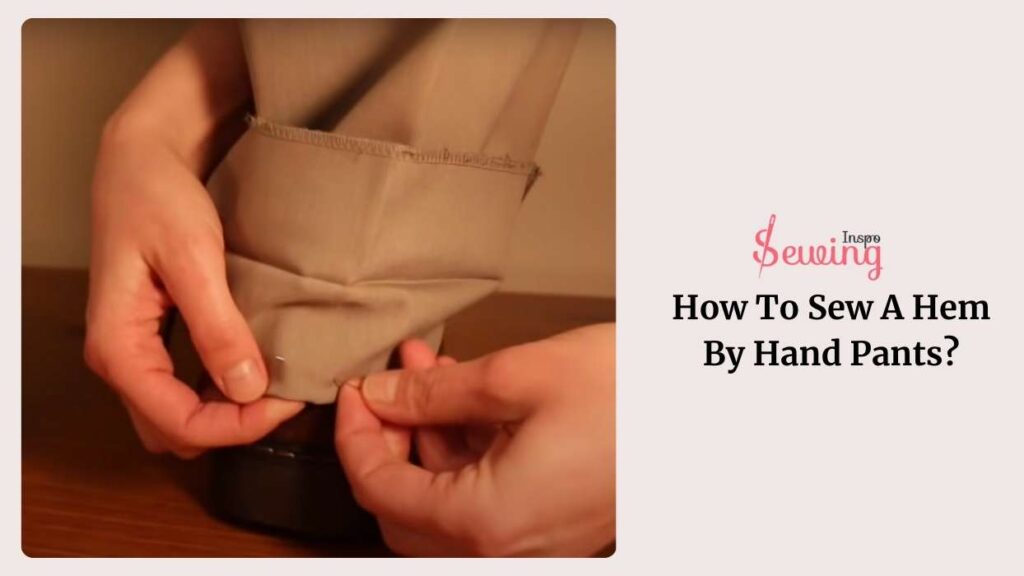
Use a simple running stitch or backstitch to sew along the folded edge, ensuring the stitches are even and tight. Knot the thread securely at the beginning and end to prevent unraveling. For a cleaner finish, fold the raw edge under before stitching.
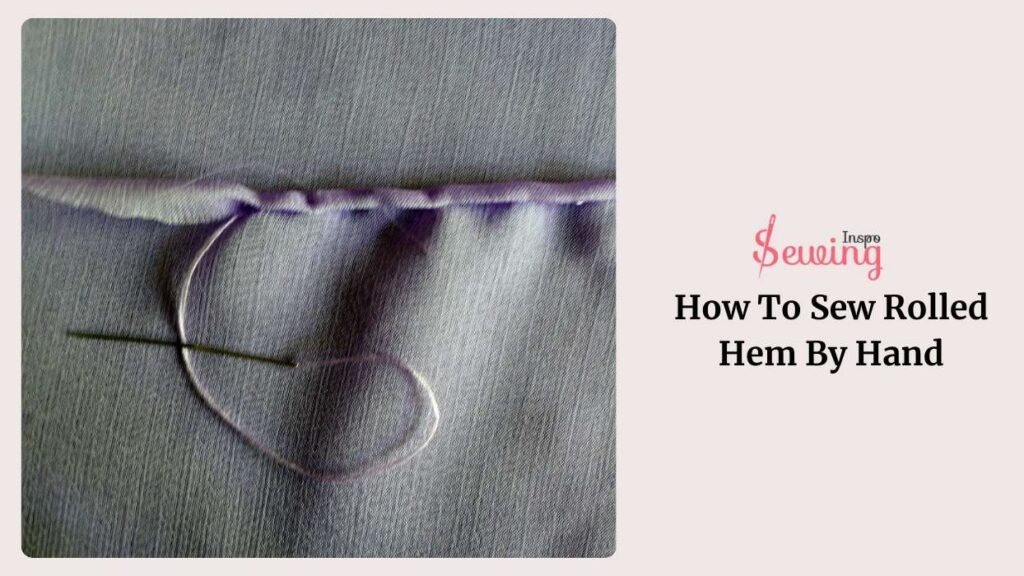
How To Sew Rolled Hem By Hand?
To sew the rolled hem by hand, begin by folding the fabric edge over about 1/8 inch and stitching close to the fold. You can apply that method for overcast stitch too. Then, fold again to encase the raw edge and continue stitching. Use small, tight stitches to keep the hem neat. This technique is particularly useful for finishing edges on scarves and delicate materials.
How To Sew Chiffon Hem By Hand?
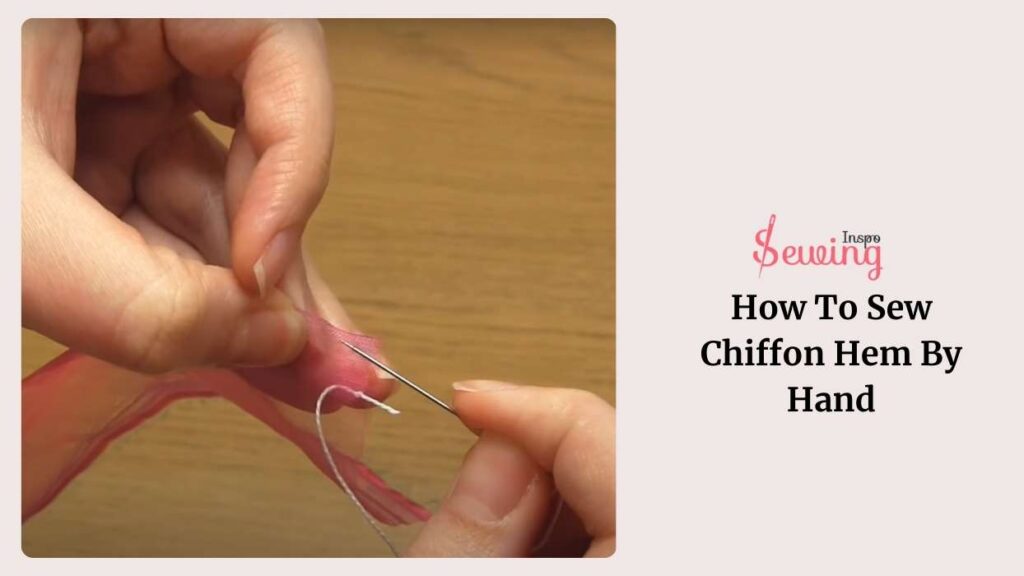
To sew the chiffon hem by hand, fold the edge of the chiffon about 1/4 inch and sew a straight stitch near the fold. Trim any excess fabric close to the stitch line, then fold the edge again and sew another line of straight stitches to encase the raw edge. This double-fold technique helps prevent fraying on such a delicate fabric.
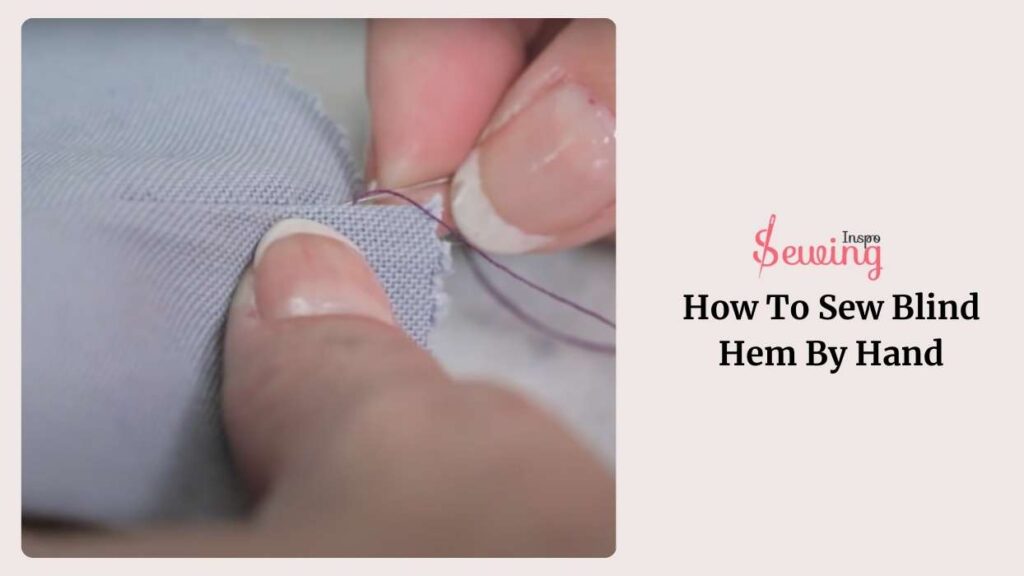
How To Sew Blind Hem By Hand?
To sew the blind hem hand, fold the hem up to the desired length and secure it with pins. Fold back a small section of the hem, then use a blind stitch: catch just a few threads of the fabric with the needle, then pass the needle through the folded edge of the hem. Repeat, spacing stitches evenly. The thread will barely show on the outside.
How To Sew Jeans Hem By Hand?
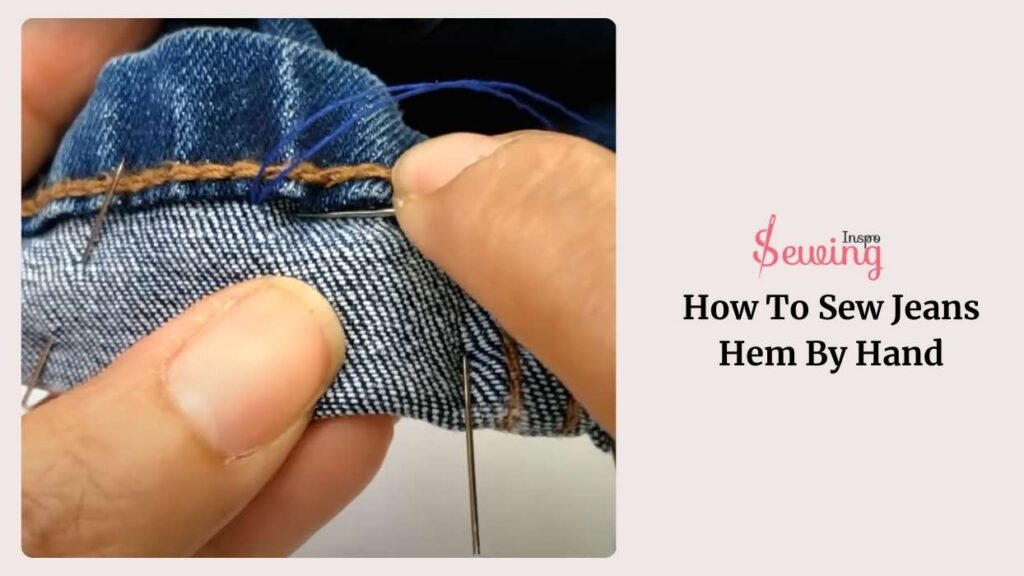
To sew the jeans’ hem by hand, fold the hem to the desired length and secure it with pins. Use a heavy-duty needle and thread. Employ a backstitch for durability, stitching about 1/4 inch from the folded edge. Ensure stitches are tight and close together. Reinforce the hem by twitching twice if necessary to handle the wear and tear.
Thread And Needle For Hem Stitch
Choosing the correct thread and needle for the hem stitch is a must to get the perfect hem stitch. But the market is filled with many kinds of thread and needles. So, which one to grab?
Well, according to Brother USA,
For hemstitch, you can use 60-weight silk finish cotton, 80-weight cotton, or 100-weight silk.
-What size thread and needle do you normally use, Grandma?
-I normally use 60-weight slik cotton thread with 11 size sewing needles.
An Alternative Way To Do Hem Stitch
I show you 1 way to do hemming-stitch but that doesn’t mean it’s only the effective way. There are 5 types of hemming stitches by hand that are used as hem stitched too. For intense,
- Catch stitch
- Blind stitch
- Cross Stitch
- Whip Stitch Hems
- Running Stitch
Catch stitch
Start the catch stitch by positioning the fabric and threading your needle. Take a small diagonal stitch across the seam.
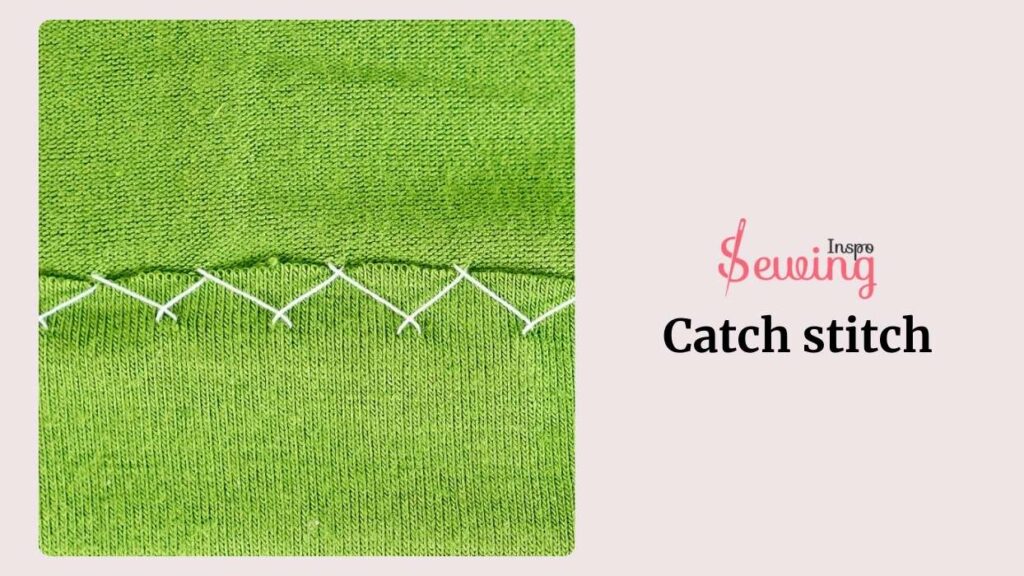
This stitch is ideal for fabrics that may stretch or move, as it allows for some give. Practice on scrap fabric to perfect your technique before using it on your project.
Blind stitch
Start the blind stitch with a needle up through the fold of the fabric on the top layer, then take a small stitch through the fold of the fabric on the bottom layer. Keep alternating between the top and bottom layers, making small, evenly spaced stitches along the seam for blind catch stitch.

This technique creates a seamless finish, perfect for hems, closing openings, or attaching trims without visible stitches. Practice using scrap fabric before trying it on your actual project for the best results.
Cross Stitch
To start cross stitching, separate two strands from the six in your thread kit and thread your needle with them. Begin by bringing the needle out at point 1, crossing to point 2, then returning to point 3 below 1, and finally inserting the needle at point 4 above 2 to create the first cross stitch.

Maintain a 2-3 inch space between stitches. Continue stitching by inserting the needle at point 5 and bringing it out at the previous point 4, then inserting it at point 6 to complete subsequent crosses. End by leaving a tail at the back and sliding the needle under a few stitches.
Slip Hemming Stitch
To do a slip stitch, take small stitches through the folded edge, then diagonally across the hem, catching a few threads of fabric to secure it. Continue stitching along the hem, ensuring the stitches are small and evenly spaced. Finish with a small backstitch or secure knot.
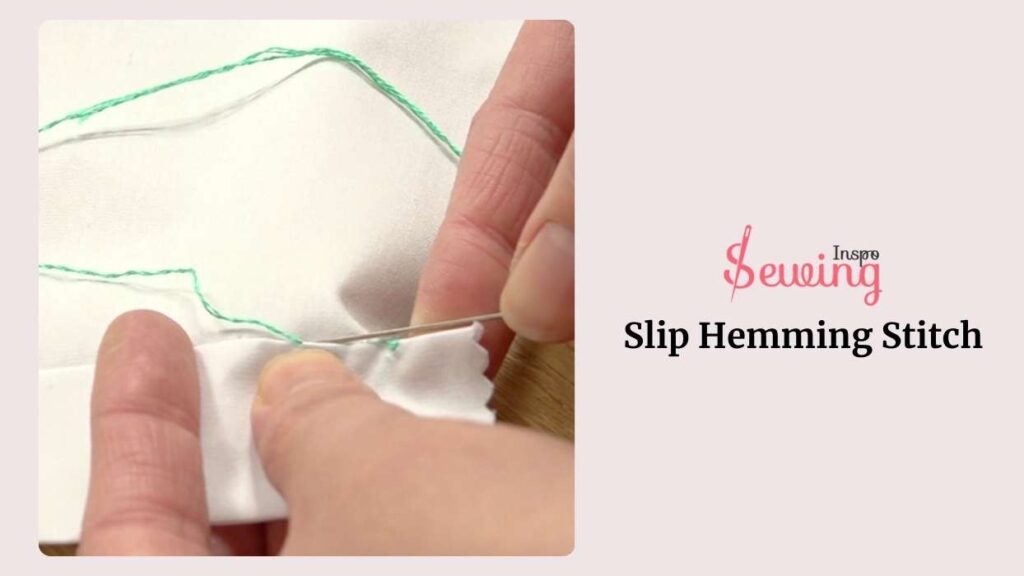
This technique results in a nearly invisible hem on the fabric’s right side while neatly securing the fold on the wrong side. Practice on scrap fabric before attempting on your actual project for best results.
Felled Hemming Stitch
To start, fold the fabric twice to hide the raw edge and press it with an iron. Thread your needle, hiding the knot inside the fold. Take small stitches through the folded edge and a tiny bit of the fabric underneath, working your way along the hem. Keep your stitches small and evenly spaced.
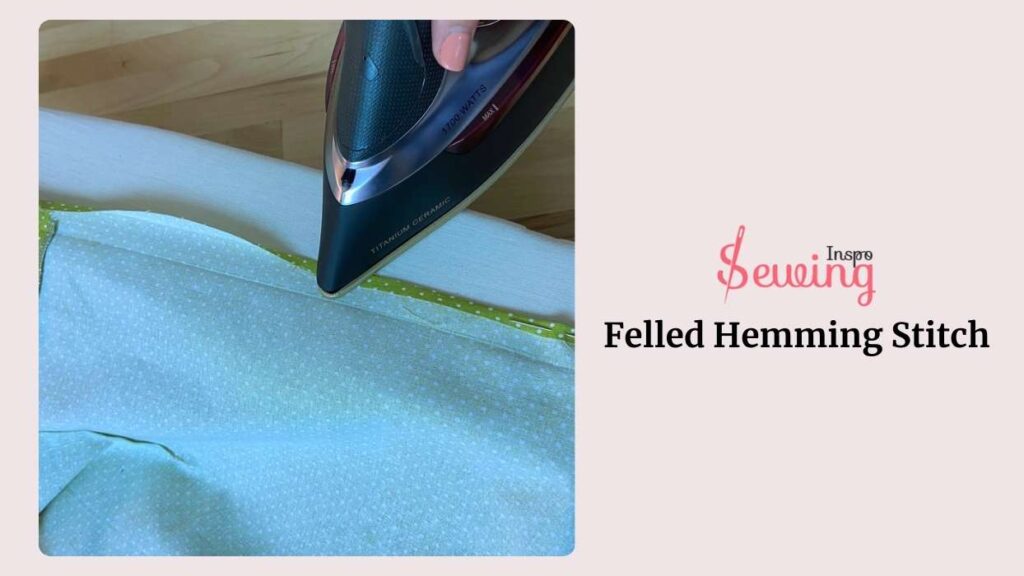
Finish with a secure knot or a small backstitch. This fell stitch makes a neat, strong hem that’s perfect for heavy-duty fabrics. Practice on scrap fabric first to get the hang of it!
Whip Stitch Hems
To start, fold and press the hem, then thread your needle. Bring the needle up through the folded edge to hide the knot. Make small diagonal stitches over the edge of the hem, securing the fold to the main fabric.
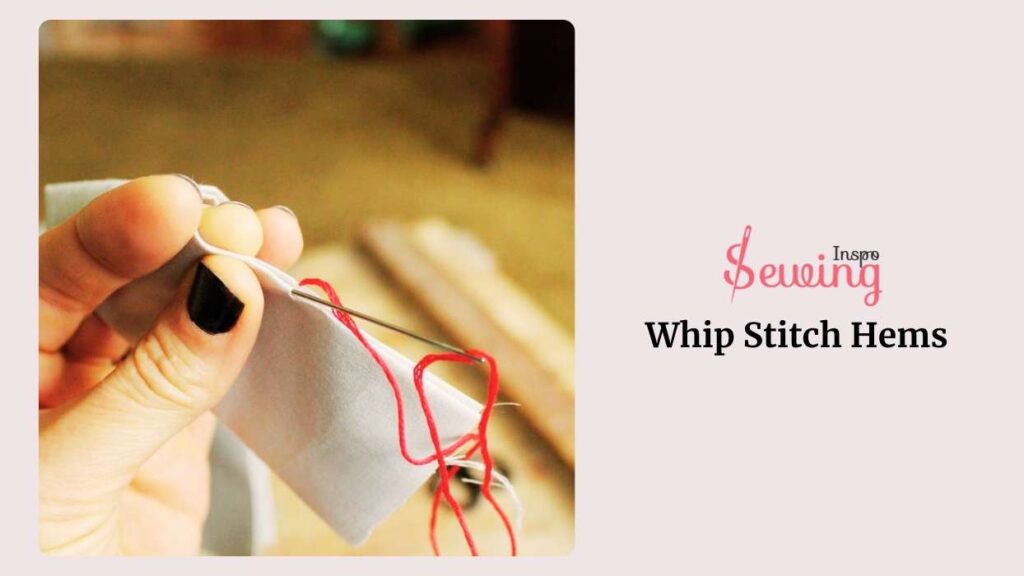
Keep the stitches close together and evenly spaced. When you reach the end, finish with a small backstitch or secure knot. This technique creates a durable and neat hem, perfect for preventing fraying. Give it a try on some scrap fabric first to get the hang of it.
Running Stitch
To start running in the stitch, thread your needle and knot the end. Insert the needle up and down through the fabric at regular intervals, creating a dashed line of stitches. Keep the stitches small and even for a neat finish.
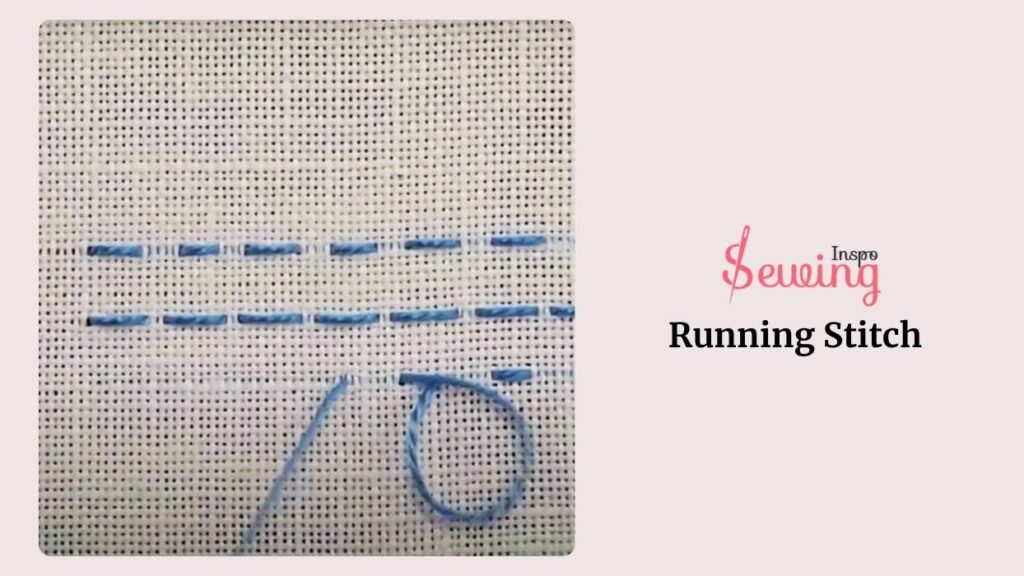
Once you reach the end, secure the thread with a knot. The running stitch is simple but essential for many sewing projects. Practice using scrap fabric to get comfortable with the technique.
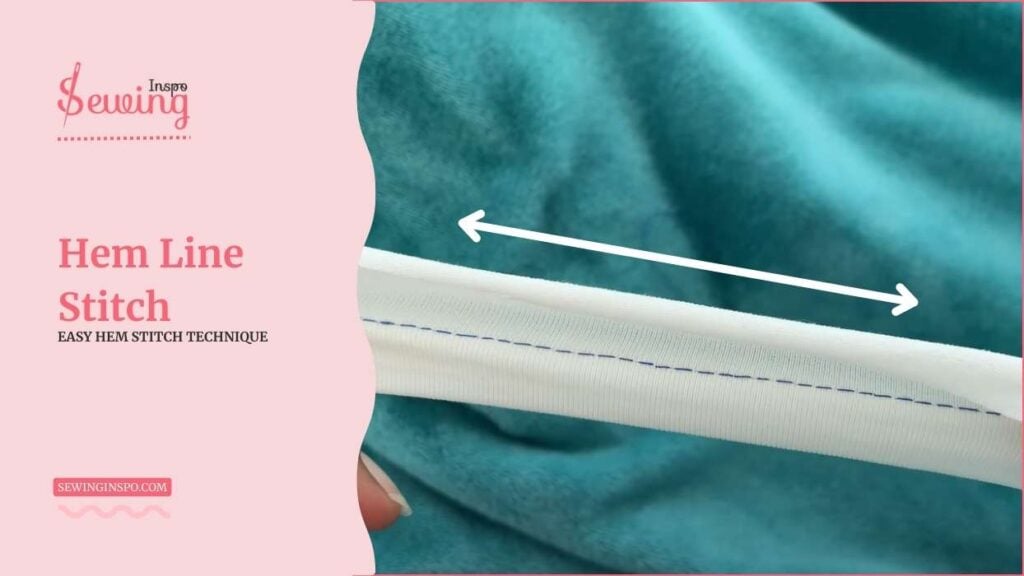
Hem Line Stitch
The hemline is simply the bottom edge of a garment like a dress, skirt, or coat measured from the floor. It’s one of fashion’s most changeable style elements, shifting from mini to floor-length over the years.
What’s considered trendy or appropriate depends on various factors, including personal style, the occasion, and even the wearer’s age. So yeah, that’s what hem line is.
So, I will share the stitch process with you. What do you think right now? Is it easy or will you try to do one of the below stitches?
- Catch stitch
- Blind stitch
- cross stitch
- Slip Hemming Stitch
- Felled Hemming Stitch
- Whip Stitch Hems
- Hand Rolled Hem Stitch
- Running Stitch
- Cross stitch
Hemming Stitch Steps One Video Tutorial
Hem stitch by hand is easy, but if you are doing this for the 1st time, then this hem stitch video will help you out to understand what is hemming.
Hem stitch by hand is easy, but if you are doing this for the 1st time, then this hem stitch video will help you out.
Frequently Asked Questions
What Is The Correct Stitch For Hem?
The correct stitch for hemming is typically a slip stitch or blind stitch. These stitches are nearly invisible from the right side of the sheer fabrics, creating a neat and professional finish. A slip stitch involves catching a small amount of fabric from the folded hem and then a small amount from the main fabric, alternating between the two.
What Is The Common Hem Stitch?
The most common is the slip stitch. This slanted stitches creates nearly invisible hems on garments by catching a small amount of fabric from the folded hem and then a small amount from the main bit of fabric.
How To Sew Jeans Hem By Hand?
To sew a jeans hem by hand, start by turning the jeans inside out and folding the hem to the desired length. Use pins to secure the fold in place. Then, double thread a needle with strong thread that matches the color of the jeans.
Begin stitching along the folded edge. Work your way around the hem, removing the pins as you sew. Once you’ve stitched all the way around, tie off the thread securely and trim any excess. Finally, press the hem with an iron to flatten it.
Conclusion
Thanks for showing me how to sew hemming stitch by hand, Grandma.
Now I can do hem stitch easily. But do you know?
If yes, then share one of your hemstitch works below. Share your hem stitch work with us.


Leave a Reply