
The machine zigzag stitch is the most used stitch on a sewing machine. Cause you can even use this stitch to mimic other types of stitches. But I thought I had explored enough with other stitches. So why not explore with zigzag?
My 1st stop is Triple zigzag stitch! It sounds so complicated, but it’s not that hard. All you gotta do is,
Triple Zigzag
To do a triple zigzag stitch, select the triple zigzag option on your machine, lower your stitch length, and sew along the fabric edge for extra strength and flexibility.
Wanna try this one? Let’s go do it together.
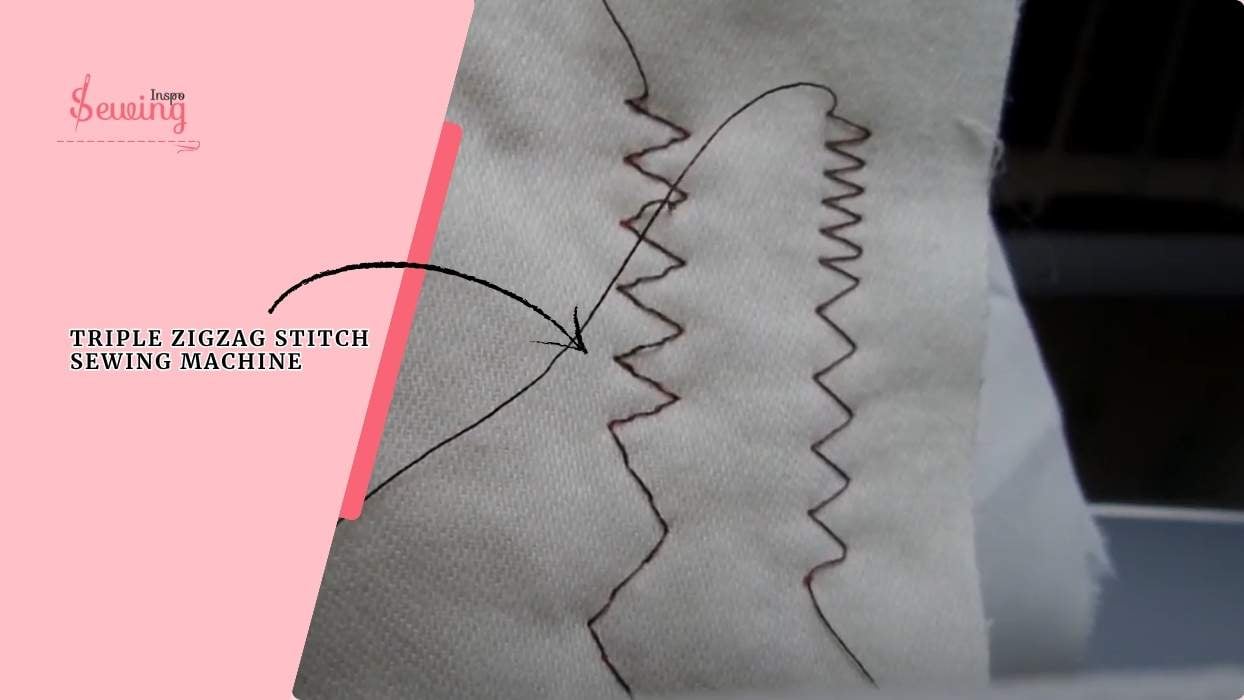
Table of Contents
What Is A Triple Zig Zag Stitch?
A triple zigzag stitch is a variation of the regular zigzag, where the machine makes three small stitches for each “zig” and each “zag” instead of just one. This gives the stitch extra strength and flexibility.
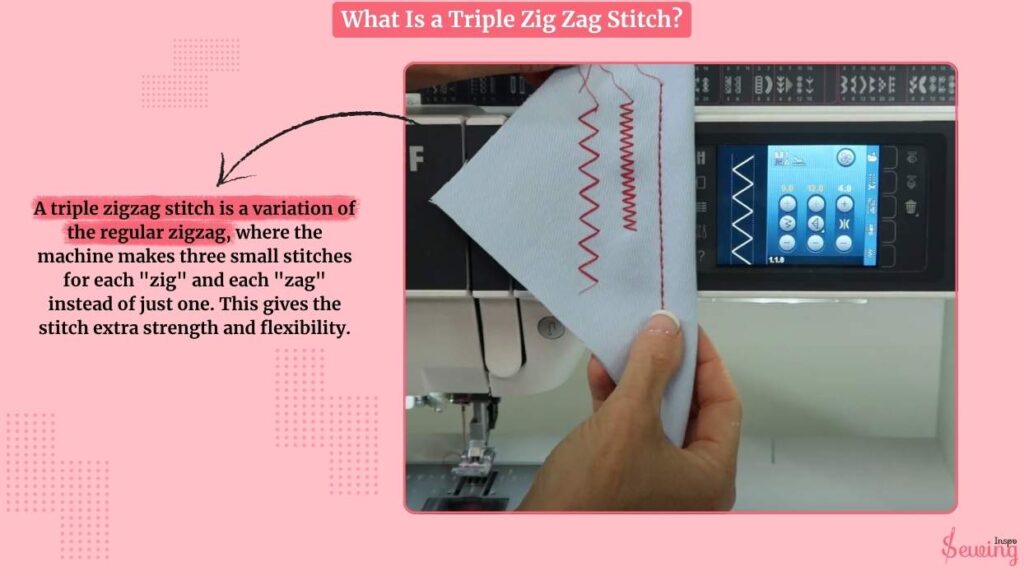
This is also known as the 3-step zig-zag stitch. This stitch is formed by three small straight stitches in each swing, both left and right, of the zigzag. It works well on everything from delicate to heavy fabrics.
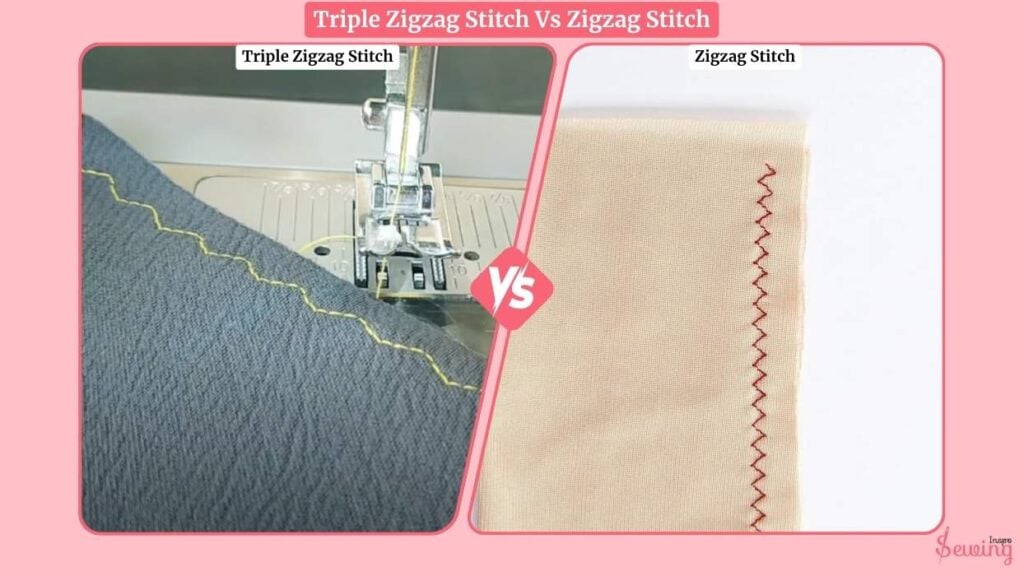
Triple Zigzag Stitch Vs Zigzag Stitch
A regular zigzag stitch moves the needle side to side in a simple zigzag pattern. But the triple zigzag stitch, instead of one stitch per direction, the needle makes three tiny stitches going one way before switching sides.
Rather than that they still differ in many cases. For example,
| Feature | Triple Zigzag | Regular Zigzag |
| Strength | Strong & reinforced | Moderate |
| Stretch | High flexibility | Some stretch |
| Look | Thicker, bold | Simple, clean |
| Best For | Elastic & stress areas | Edges, buttonholes |
How To Do A Triple Zigzag Stitch On A Sewing Machine?
To do zigzag stitch, follow the steps,
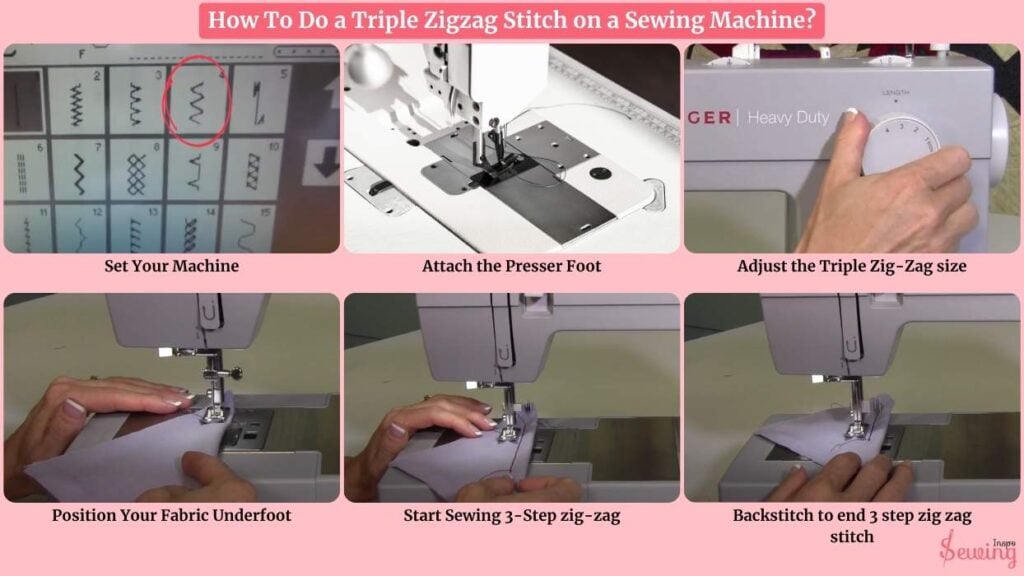
- Set Your Machine
- Attach the Presser Foot
- Adjust the Triple Zig-Zag size
- Position Your Fabric Underfoot
- Start Sewing 3-Step zig-zag
- Backstitch to end 3 step zig zag stitch
Set Your Machine to the Triple Zigzag Stitch
Turn on your sewing machine and find the stitch selection panel. You’re looking for the triple zigzag or 3-step zigzag symbol. It usually looks like three tiny straight stitches forming each “zig” and “zag” leg.
On most Brother or Singer machines, this is labeled as stitch #4 #5 or #7. Turn your dial or press the digital button until it’s selected.
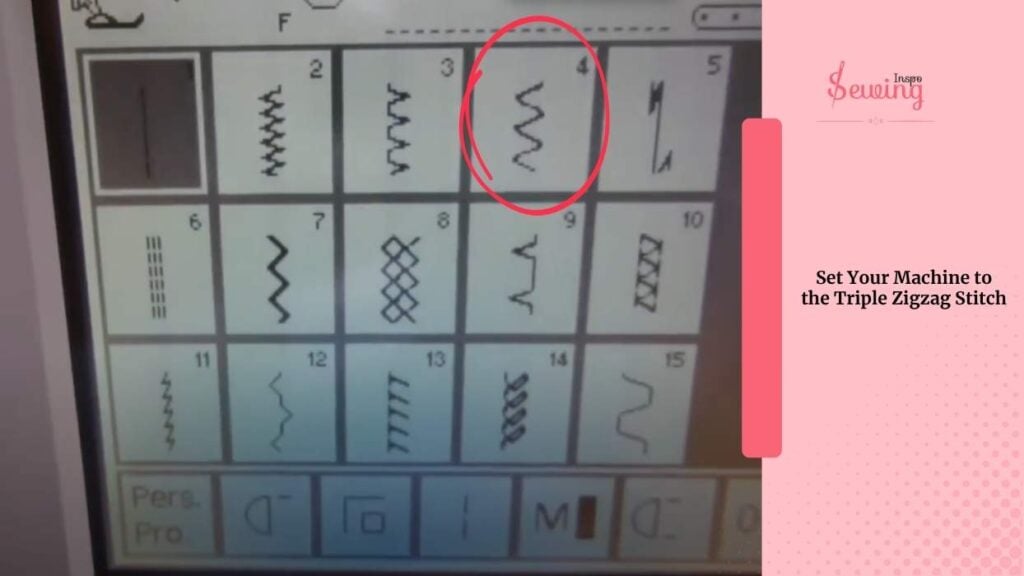
Note: If your machine doesn’t have a triple zigzag, a wide zigzag with tight stitch length can still work for stretchy seams. But it won’t have the same strength.
Attach the Presser Foot for Triple Zig Zag stitch
Now it’s time to pop on the zigzag foot (also known as the all-purpose presser foot). If you’re using a Brother, it’s probably labeled with a “J.”
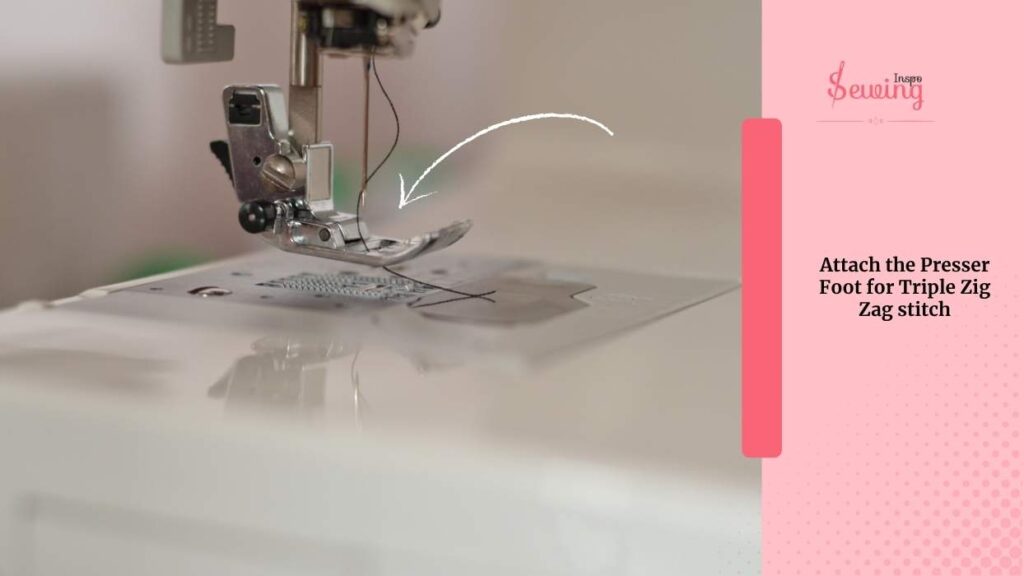
Raise the presser foot lever, slide the foot under, and snap it into place.
Adjust Triple Zig-Zag Stitch Width and Length
Before you start sewing, adjust your stitch settings according to the type of project you’re working on. But here is a rule of thump i like to follow,
- For stretchy fabrics like jersey, leggings, or elastic, use a medium to wide stitch width (around 4–5) and a short length (around 1.5–2).
- For delicate fabrics, opt for narrower lengths and widths like tack on a sewing machine.
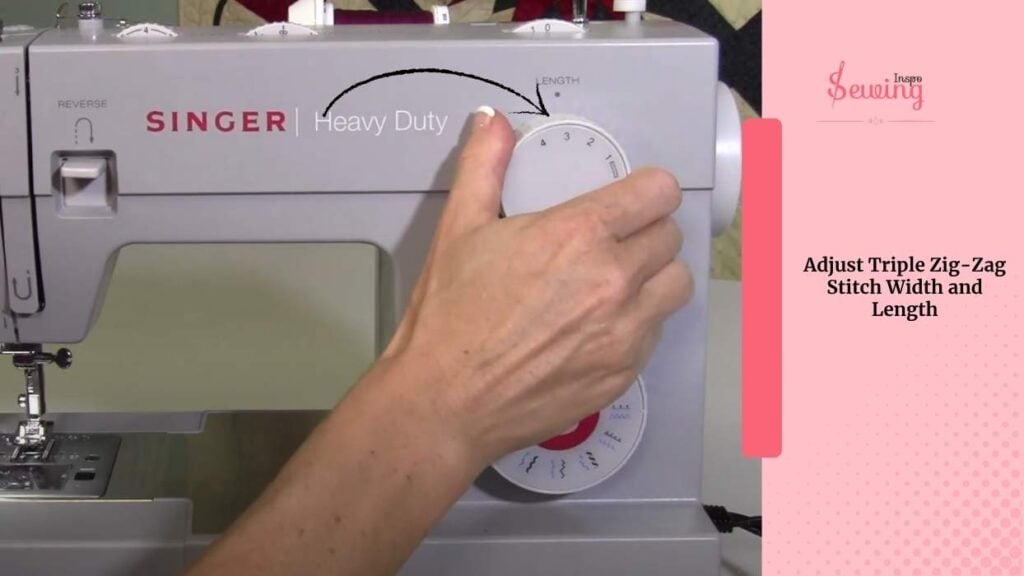
- For heavier fabrics, increase the width and keep the stitch tight for strength.
If you are unsure about anything. Then grab a scrap piece of the fabric you’re working with and test your stitch on it first. It’ll help you tweak settings without ruining your actual project.
Position Your Fabric Under the Foot
Now take your actual fabric and line it up under the presser foot. Ensure the area you want to stitch is directly under the needle, with sufficient fabric extending behind the needle to prevent it from being sucked into the feed dogs.
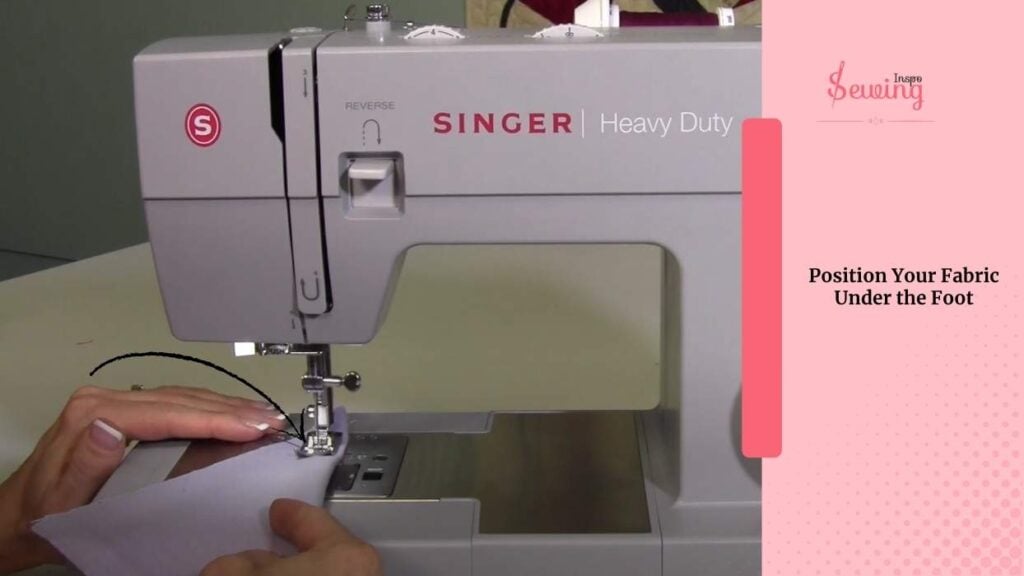
Lower the presser foot gently. You’re almost there.
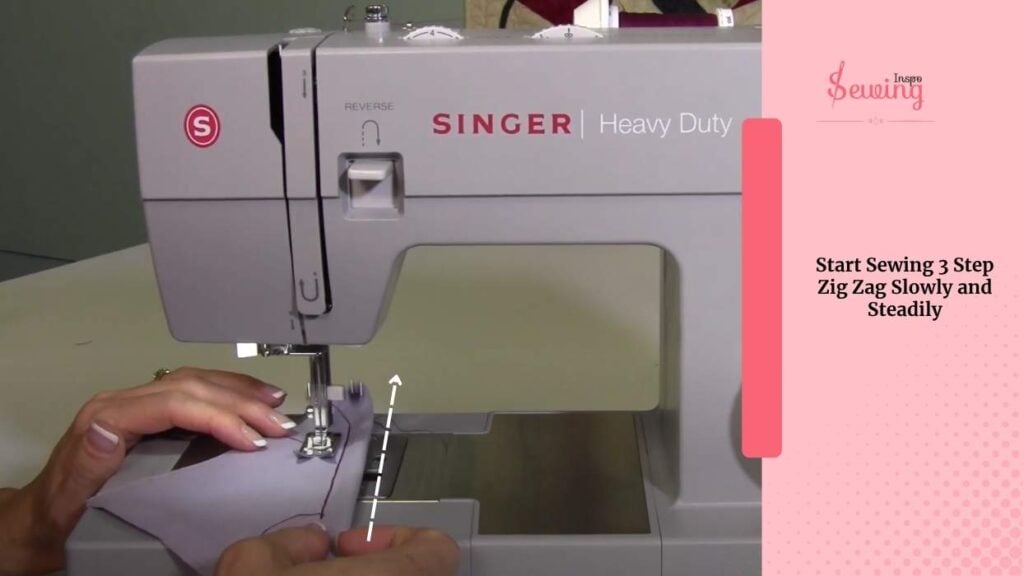
Start Sewing 3 Step Zig Zag Slowly and Steadily
Press down gently on the foot pedal to start sewing. You’ll see the needle doing its thing. Three little stitches in one direction, then three in the other.
This will create that signature “stepped” zigzag look. Keep your hands on either side of the fabric, guiding it through. No tugging—just a light touch to keep things aligned. It will also avoid the chance of a jumping stitch issue.
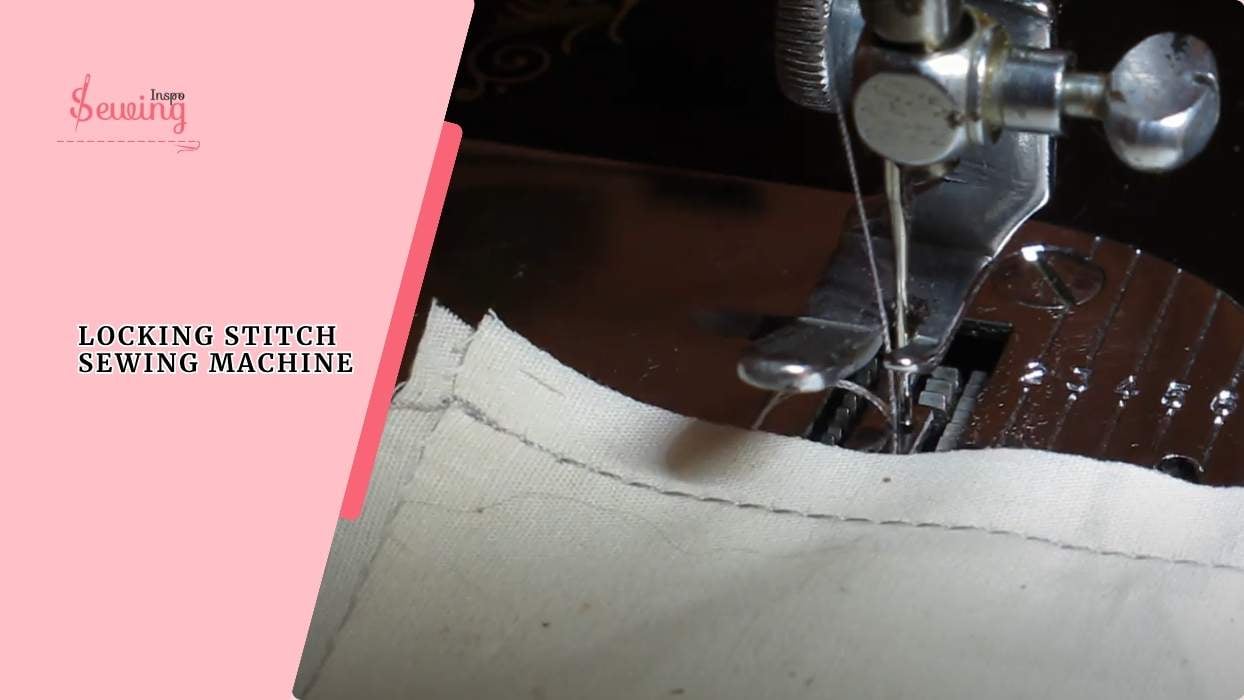
Backstitch at the Beginning and End
Once you’ve sewn the full length of your seam, press the reverse button to backstitch for about ½ inch. This locks your stitch in place and keeps it from unraveling.
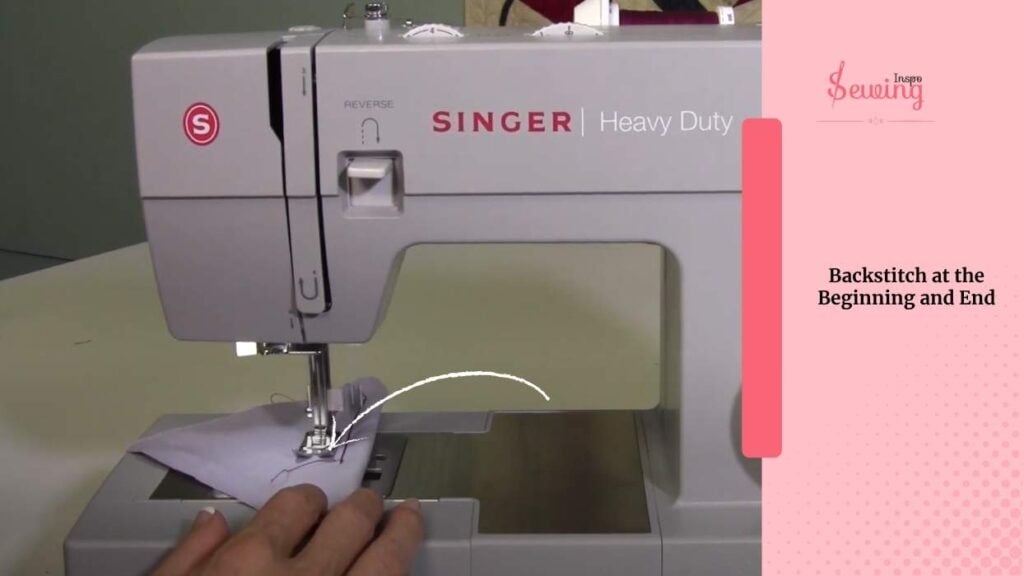
Then lift your presser foot, snip the threads, and admire that clean, dense line of triple zigzag stitching.
Confused about any steps? Then watch this video
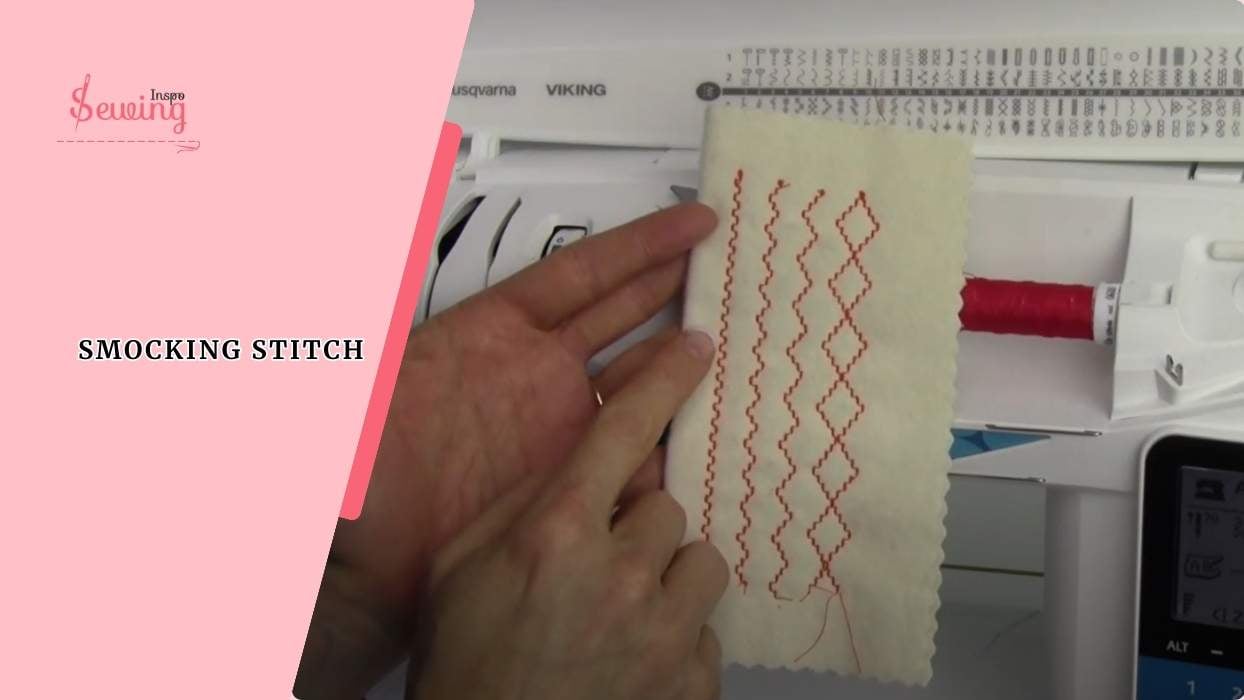
Three step Zig Zag stitch uses for quilters – who knew!
Triple Zigzag Stitch Pdf
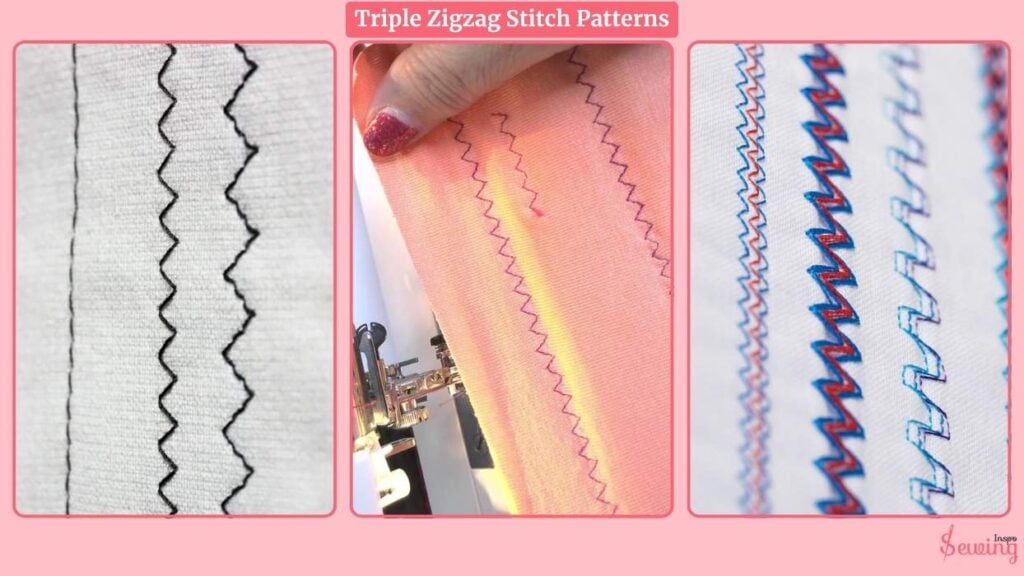
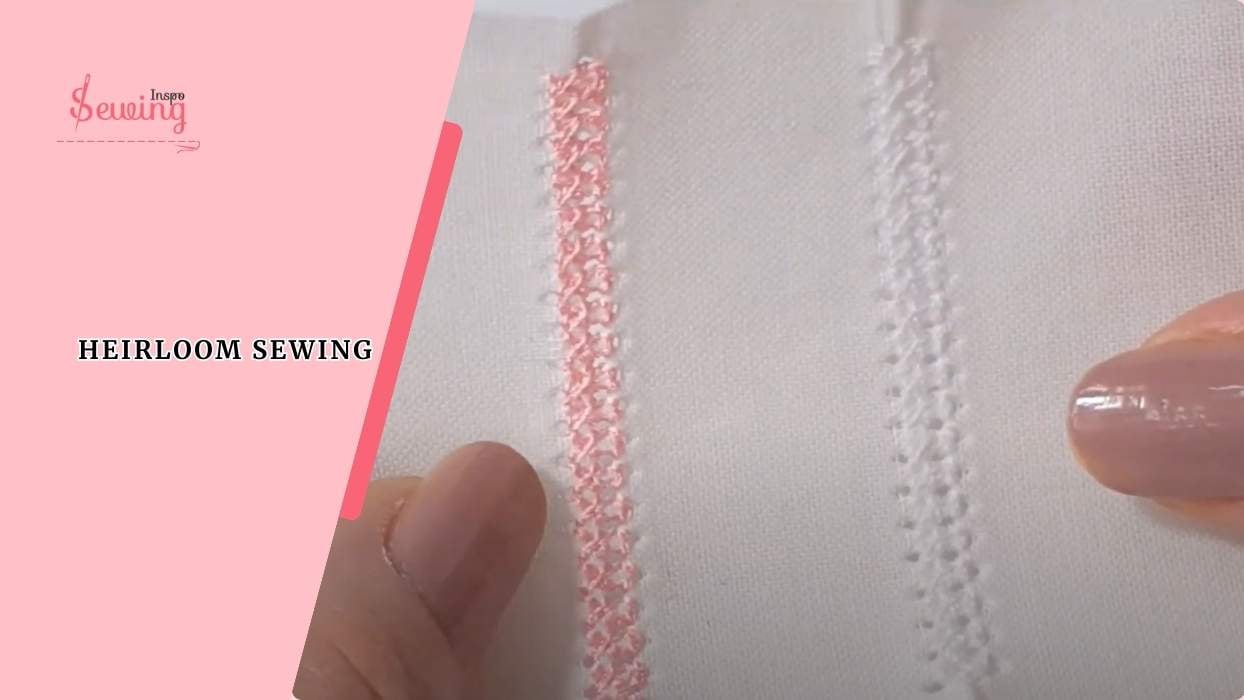
Triple Zigzag Stitch Patterns
Loved the pattern? I know it’s very eye-catching. So I thought it was so beautiful, why is it only on the edge? What do I use it in some patterns? So I did, and here is how it turns out,
Frequently Asked Questions
When should I use a triple zigzag stitch?
It’s perfect for sewing elastic, stretch fabrics, or reinforcing areas that get a lot of wear and tear, like waistbands, cuffs, or underarms.
Can I use a triple zigzag on any sewing machine?
Only if your machine has the triple zigzag function (usually shown as a 3-step zigzag). Not all basic machines have it.
Does a triple zigzag work on delicate fabrics?
Yep! Just lower the stitch width and test on a scrap first so it doesn’t bunch or pucker.
Is it stronger than a regular zigzag?
Definitely. The multiple stitches in each direction make it way more secure and stretch-friendly.
Conclusion
If you’re sewing stretchy materials or need extra strength in a seam, the triple zigzag stitch is a total game changer. It’s like the regular zigzag’s tougher sibling—more flexible, more secure, and built to last. Once you try it, you’ll wonder how you ever sewed elastic without it!

Leave a Reply to Maisha Soumee Cancel reply