
Just after doing the stretch stitch, I came across the Straight stretch stitch. I was like Isn’t the same thing! But I figured it out, it’s not the same! Basically, the straight stretch stitch is a supported straight stitch with triple stitching. Stretch stitch typically zigzags or forms a lightning bolt shape to flex with stretchy fabrics.
And the technique is also slightly different. For example,
To create a straight stretch stitch, select the triple stretch stitch on your machine and sew as you would a regular straight stitch. Your machine will automatically sew each stitch three times for added strength.
It sounds so interesting that I had to try it. And here is how it goes, the straight stitch for stretchy fabric.

Table of Contents
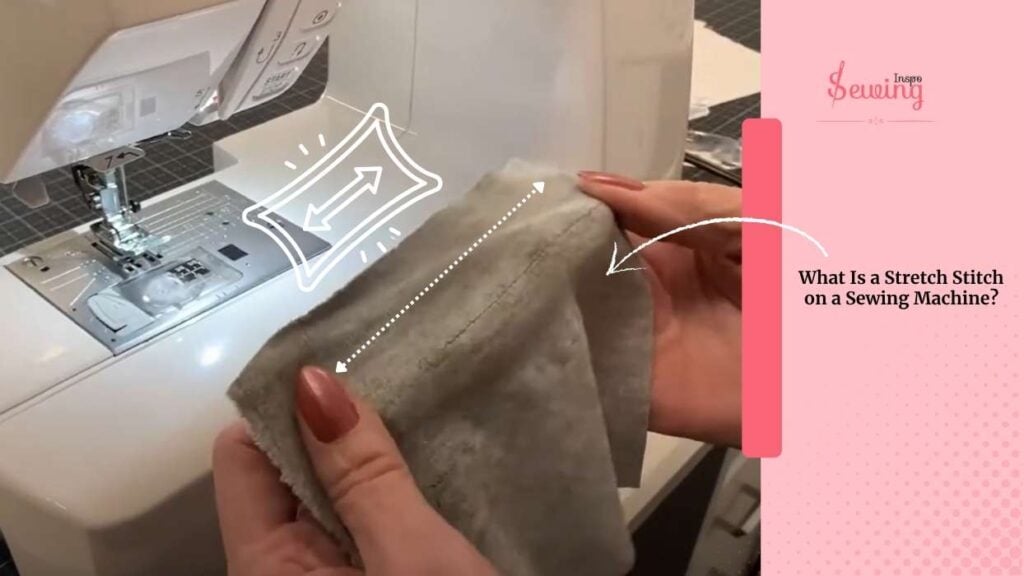
What Is A Stretch Stitch On A Sewing Machine?
A stretch stitch is instead of popping or snapping like a straight stitch might on stretchy clothes. Stretch stitch provides a seam that flexes and bends in tandem with the material. This is a perfect stitch for stretchable seams.
And straight stretch stitch,
It looks just like your regular straight\running stitch, but it’s actually made up of little back-and-forth movements that let the stitch stretch with the fabric. It will make the perfect reinforcement stitching.
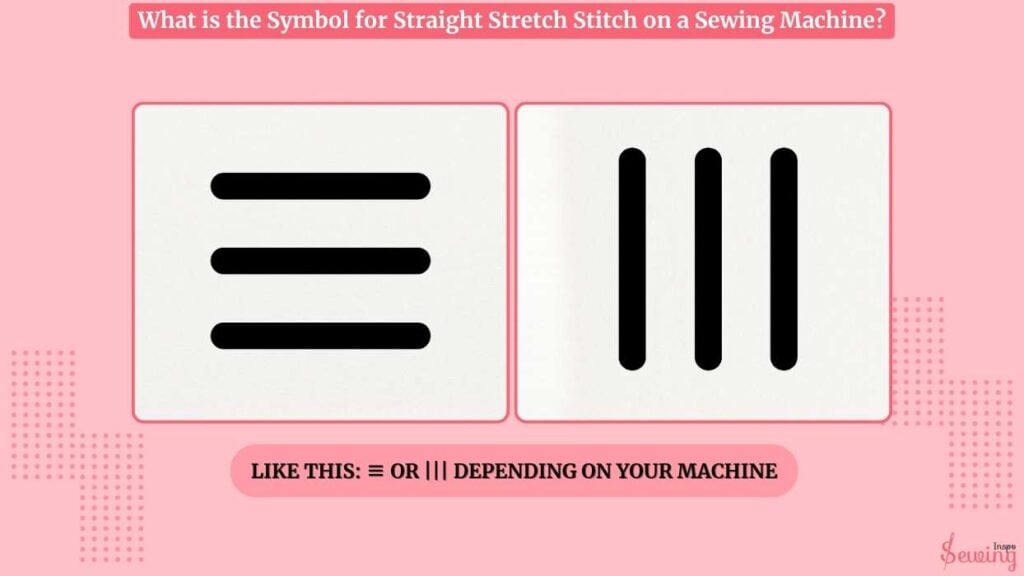
What Is The Symbol For Straight Stretch Stitch On A Sewing Machine?
The symbol for a straight stretch stitch looks like this: Three straight horizontal lines stacked on top of each other. Here is an example of a stretch stitch symbol,
Like this: ≡ or ||| depending on your machine
OR,
It may also be labeled as “SSS” or sometimes simply as #4 or #5 on the stitch selector dial, depending on your model. If you’re using a digital Brother, Singer, or Janome. It’ll often be one of the preset decorative stitches. Basically, you just gotta scroll through and look for those three stacked lines. lines like an Elastic stitch sewing machine.
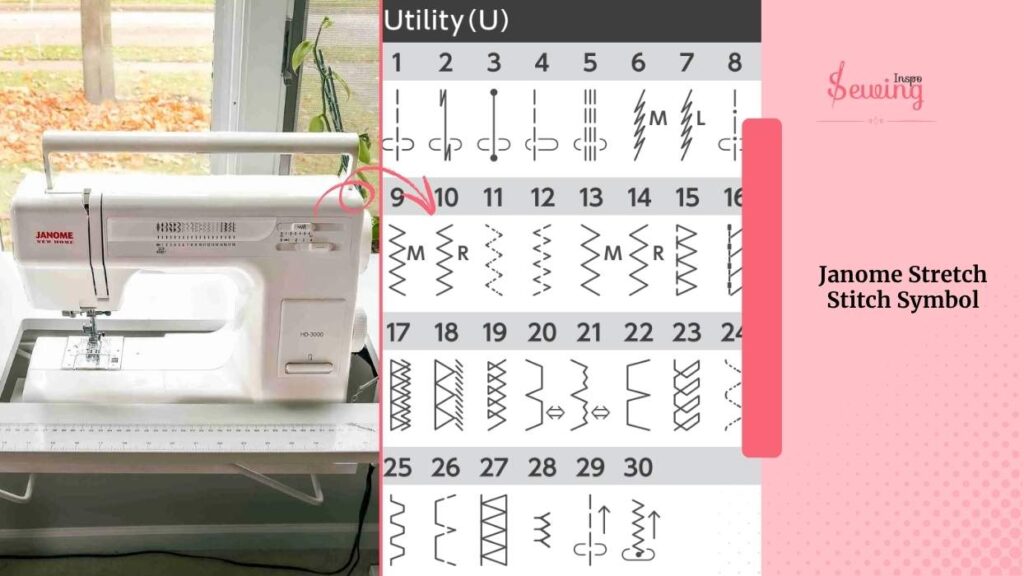
Janome Stretch Stitch Symbol
On a Janome sewing machine, the straight stitch symbol usually looks like a zigzag with a straight line in the middle or a slightly wavy line, depending on the model.
This stitch is designed for sewing stretchy fabrics like jersey, knits, or spandex because it can stretch along with the fabric without breaking the thread.
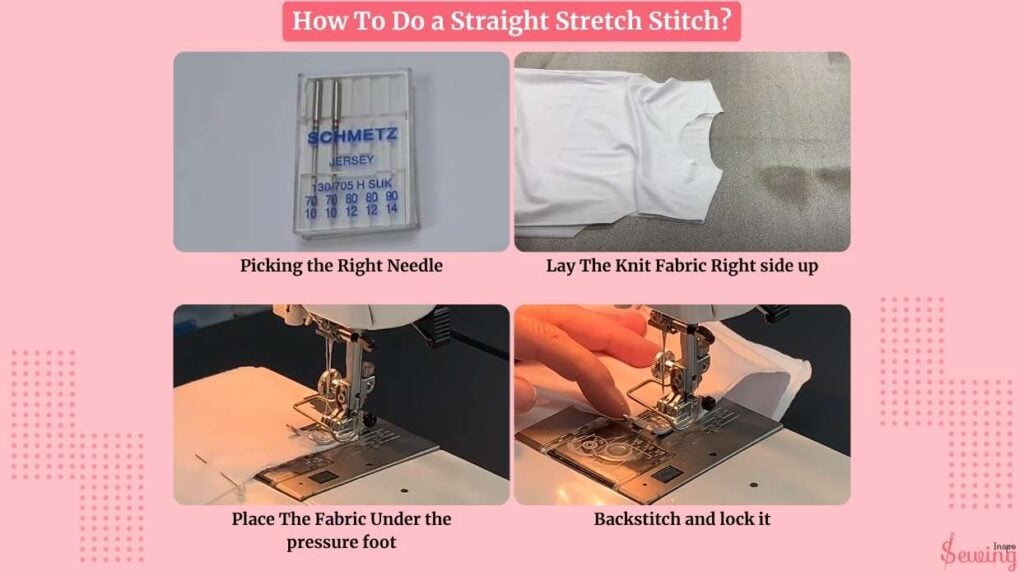
How To Do A Straight Stretch Stitch?
So to do a straight stitch, follow 4 steps,
- Picking the Right Needle
- Lay The Knit Fabric Right side up
- Place The Fabric Under the pressure foot
- Backstitch and lock it
Now, let’s get into the stretch stitch sewing machine
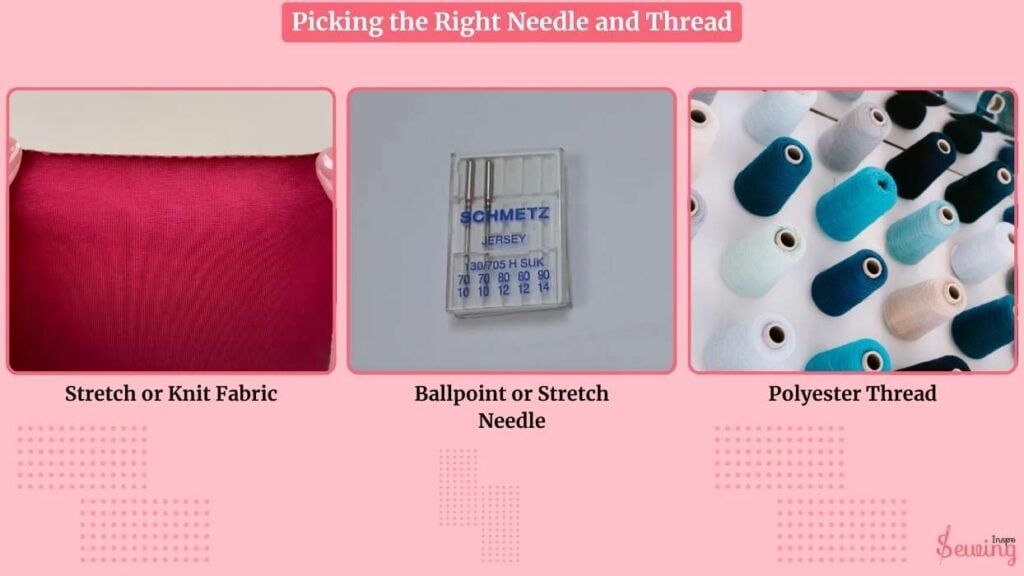
Picking the Right Needle and Thread
Since I’m working with stretch or knit fabric (like jersey or spandex), I need to pick the right needle. I prefer a ballpoint or stretch needle, specifically size 75/11 for lighter knits or 90/14 if the fabric is on the thicker side, such as sweatshirt fleece. That needle is also helpful for blind hem stitch.
Then, I choose my thread.
I always reach for polyester thread. It has just the right amount of give. I’ve made the mistake of using cotton thread before, and it snapped the moment the fabric stretched.
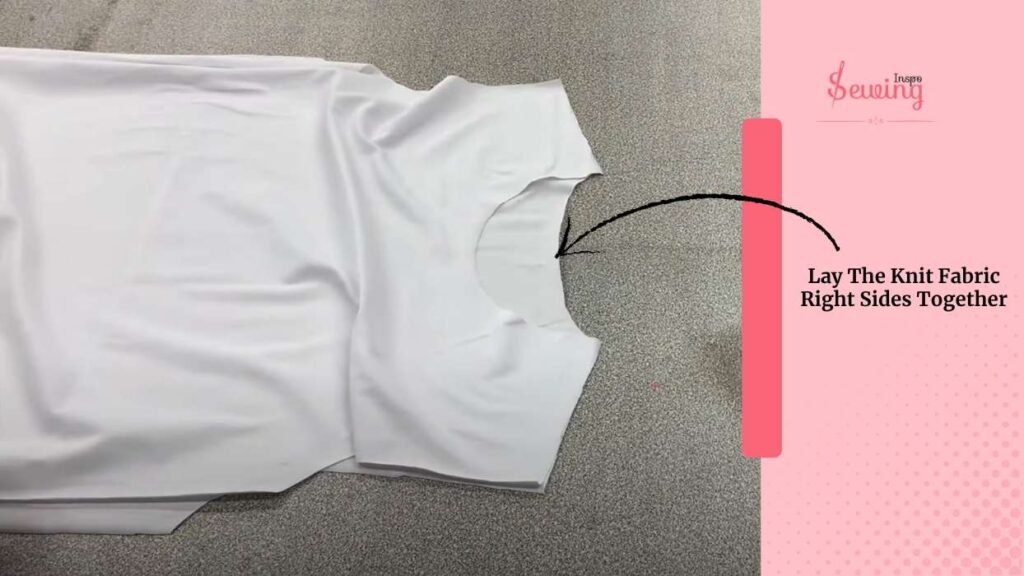
Lay The Knit Fabric Right Sides Together
Now I prep my fabric. I’m working on a stretchy T-shirt hem today, so I lay the knit fabric right sides together, aligning the raw edges. I also do this for twin needle stitch.
I smooth it out gently with my hands and pin it about every 2–3 inches using ballpoint pins (so I don’t snag the knit). Make the right stitch length adjustment to get it perfectly.
Tip:
I don’t stretch the fabric while pinning or sewing. It’s tempting, but stretching it will cause the seam to warp or ripple. I learned that the hard way!
I also like to do a test stitch on a scrap piece of the same fabric. Just to make sure the stitch isn’t too tight or too loose before I dive in for real.
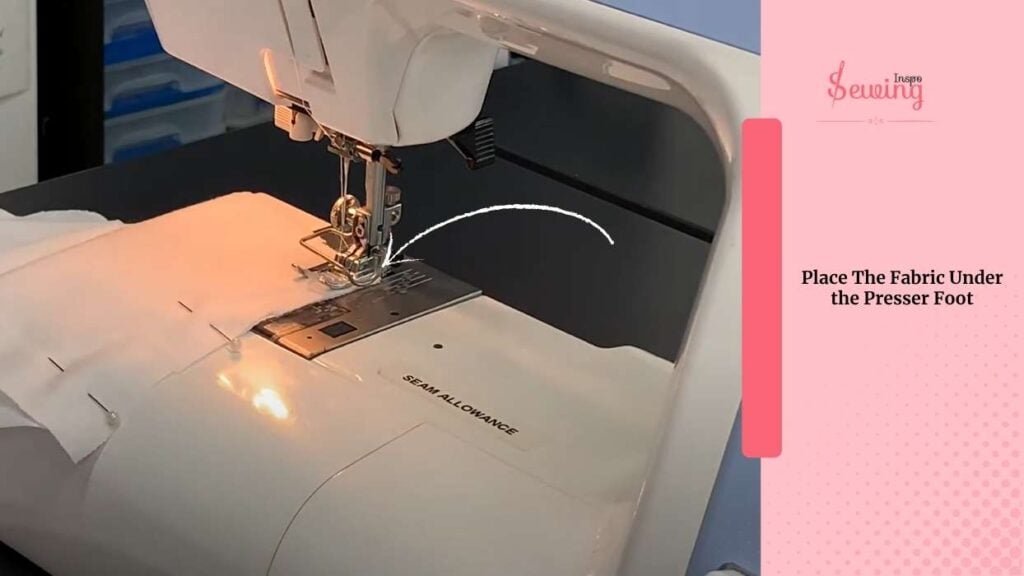
Place The Fabric Under The Presser Foot
Now I’m at the machine, ready to go.
I place the fabric under the presser foot and align the edge with the 5/8-inch seam guide on my plate. I lower the needle manually first, just to be safe, and then I start sewing.
As I press the foot pedal,
I can feel the machine working differently than with a straight stitch. The needle moves forward and slightly back with every stitch. It reinforces the seam and provides it with a bit of flexibility, so it won’t pop when worn. Also, keep the embroidery work tight.
I keep a steady pace, not too fast.Just like i did picot stitch machine.
I let the feed dogs do their job, gently guiding the fabric through. I never pull or push; I just let it glide naturally.That’s where the stretch stitching started.
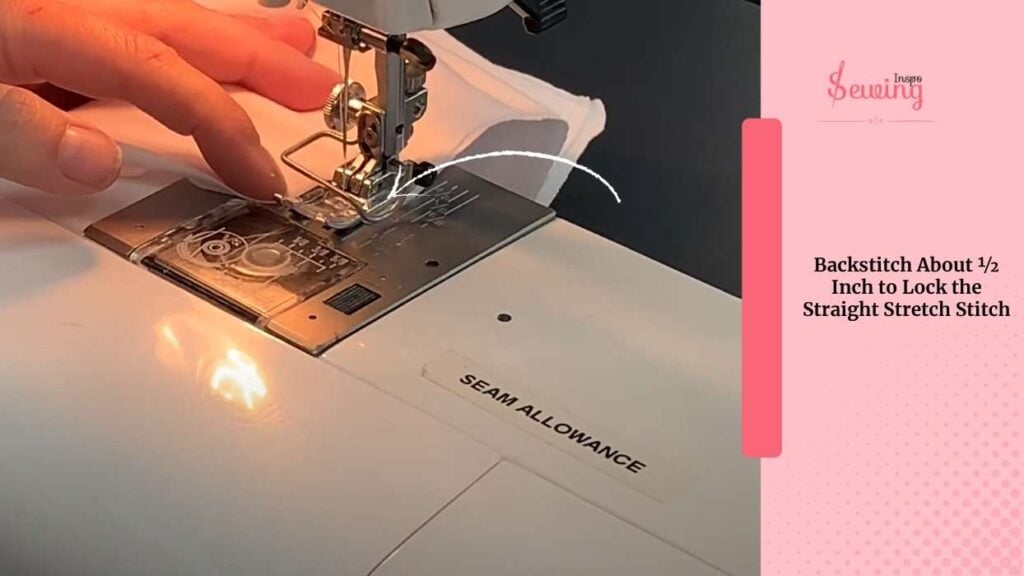
Backstitch About ½ Inch To Lock The Straight Stretch Stitch
As I reach the end of the seam, I backstitch about ½ inch to lock it in. This part is key with stretch strong seams. It is especially if the garment is going to be pulled on and off (like leggings or neckbands).
Then,
I clip my threads, stretch the seam a little with my fingers, and it moves beautifully without a single thread snapping or causing a jump stitch. That’s when I know I nailed the stretch stitch. I usually press the seam flat afterwards with a warm iron (and a pressing cloth) to help it sit nicely.
That’s how to sew straight stitch on stretch fabric too.
Elastic Stitch Sewing Machine
If you are struggling with elastic fabric, then you are not alone. Everyone struggled with it, even I did. Then I figured out that a straight stitch would help me out. Here is how you need to use it on elastic fabric-
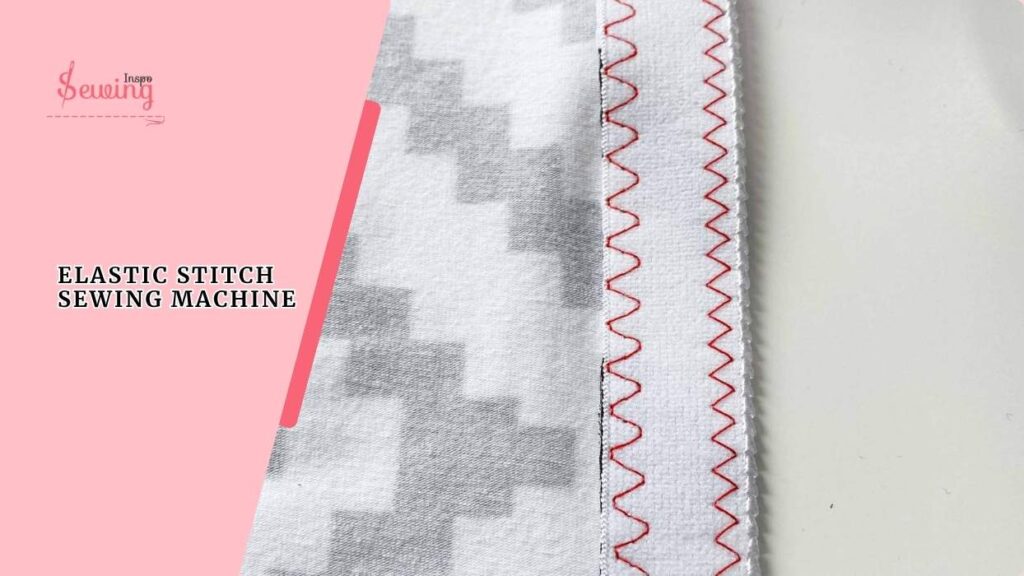
- Set the machine to elastic stitch (multi-line zigzag).
- Stitch length: 0.5–1 mm | Width: about 3 mm.
- Use a ballpoint needle (size 75/11 or 80/12).
- Use stretch fabrics like jersey or spandex.
- Keep hem width: 1/8–1/4 inch (3–6 mm).
- Place the elastic on top of the fabric; feed evenly.
- Sew slowly, stretching fabric slightly as you go.
- Test seam for flexibility and trim loose threads.
- Backstitch if needed for extra strength.
Frequently Asked Questions
When should I use a Straight Stretch Stitch?
Use it when sewing stretchy fabrics like jersey, spandex, or knit fabrics — anything that requires maintaining elasticity after stitching.
Can I use a regular straight stitch on stretch fabrics instead?
You can, but it’s not recommended. A regular straight stitch may snap when the fabric stretches. The Straight Stretch Stitch helps avoid this problem by allowing some give.
Is the Straight Stretch Stitch the same as a zigzag stitch?
No. A zigzag stitch also provides stretch but has a zigzag pattern. The Straight Stretch Stitch maintains a straight line while offering stretch capability, resulting in a cleaner, more professional look.
Final Thoughts
And that’s it! The straight stretch stitch is my go-to for anything stretchy—t-shirts, leggings, knits—you name it. It gives me a clean look on the outside while giving the seam all the flex it needs.
If you’re struggling with sewing knits, this stitch is seriously a lifesaver. Try it once, and you’ll see what I mean!


Leave a Reply