
After demonstrating the overlock stitch on my sewing machine, I received a flood of comments. Some of you were super impressed (thank you!), while others were still a bit confused. A few even asked me about specific machines, especially Brother sewing machines. 😑
One question kept popping up more than anything else:
“How do I use the overlock stitch on Brother sewing machine?”
I’ve replied to some of you with a quick answer:
To overlock stitch on a Brother sewing machine, just select the overlock stitch setting, attach the overcasting foot (usually marked with a ‘G’), and sew along the raw edge.
Some of you got it right away. Others? Not so much. 😅
So I figured a simple reply isn’t enough I need to show you how it’s done. And that’s exactly what I’m going to do here.
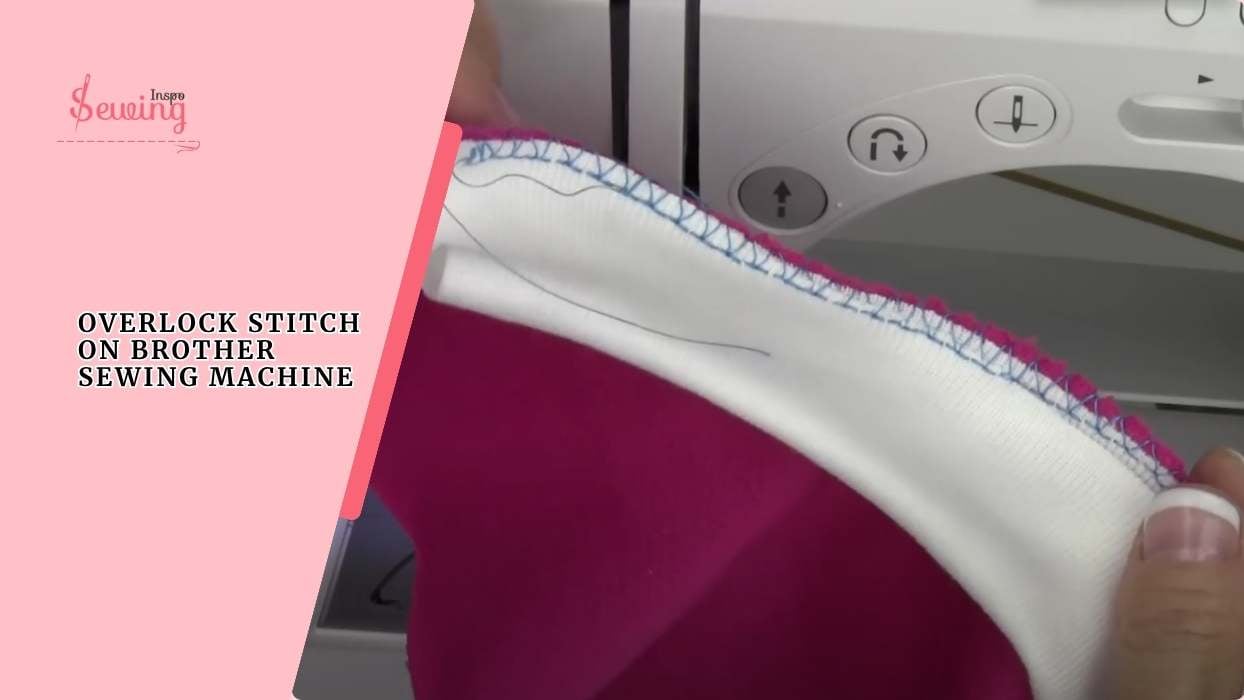
Table of Contents
Where to Find the Overlock Stitch Symbol Brother?
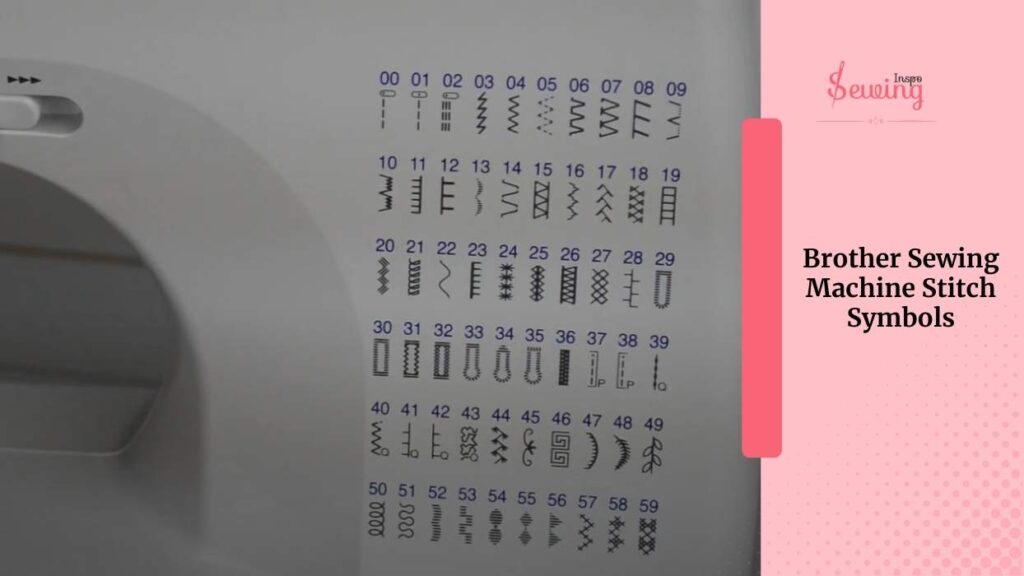
On a Brother sewing machine, the overlock stitch symbol is usually printed right on the stitch selection panel, sitting among other decorative and utility stitches. On most Brother models, you’ll find it:
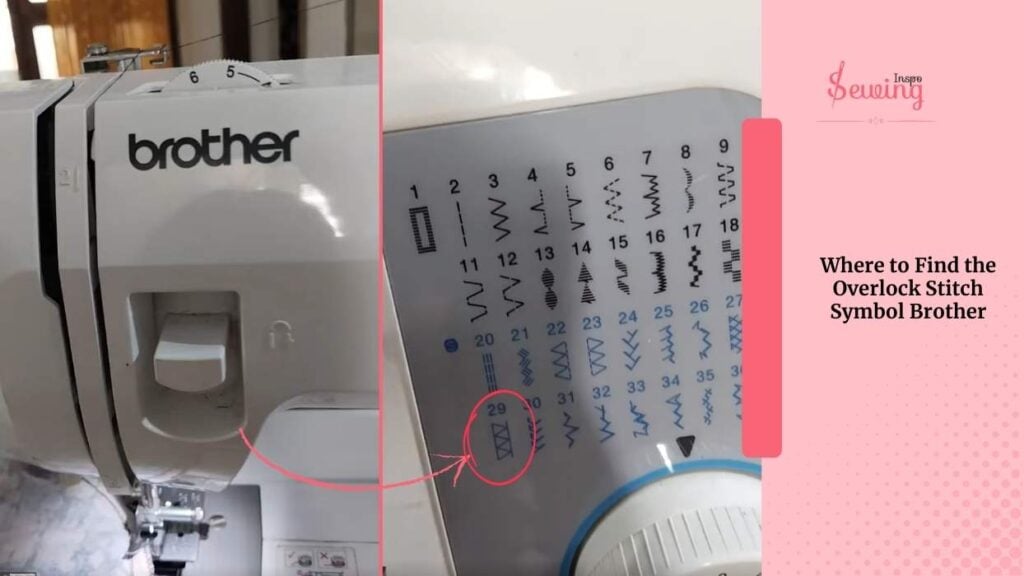
- On the front panel: Near the LCD screen or stitch chart.
- In the manual, the stitch guide at the back or front of your user manual clearly shows the overlock symbol and its corresponding stitch number.
- On the quick-reference card
If you’ve got one of those computerised Brother machines, you just scroll through the stitch options until you see the little “overlock-like” graphic. Almost like a diagonal ladder on one side.
Overlock Stitch Brother Sewing Machine?
To use the overlock stitch on a Brother sewing machine, follow the steps below,
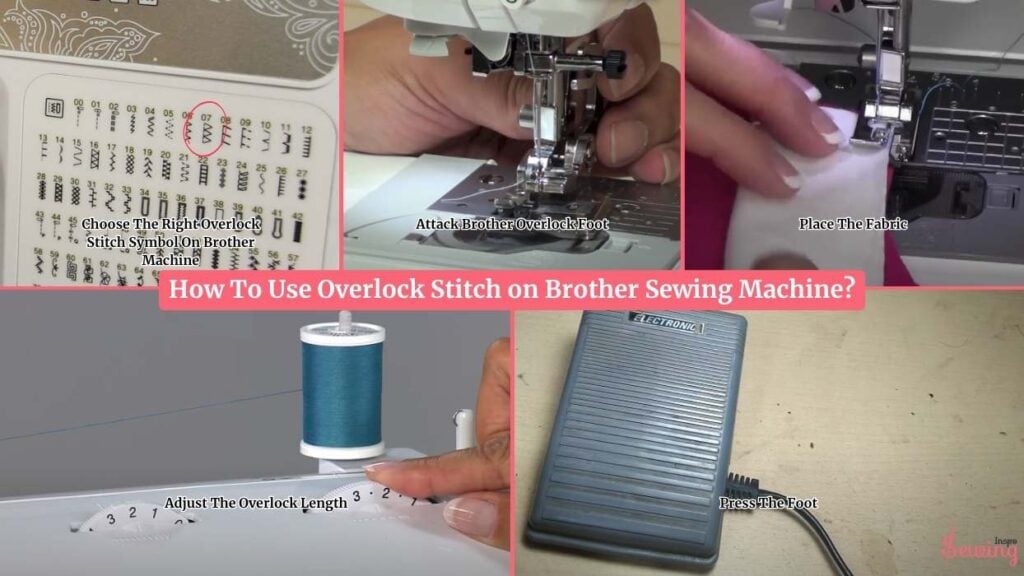
- Choose The Right Overlock Stitch Symbol On Brother Machine
- Attack Brother Overlock Foot
- Place The Fabric
- Adjust The Overlock Length
- Press The Foot
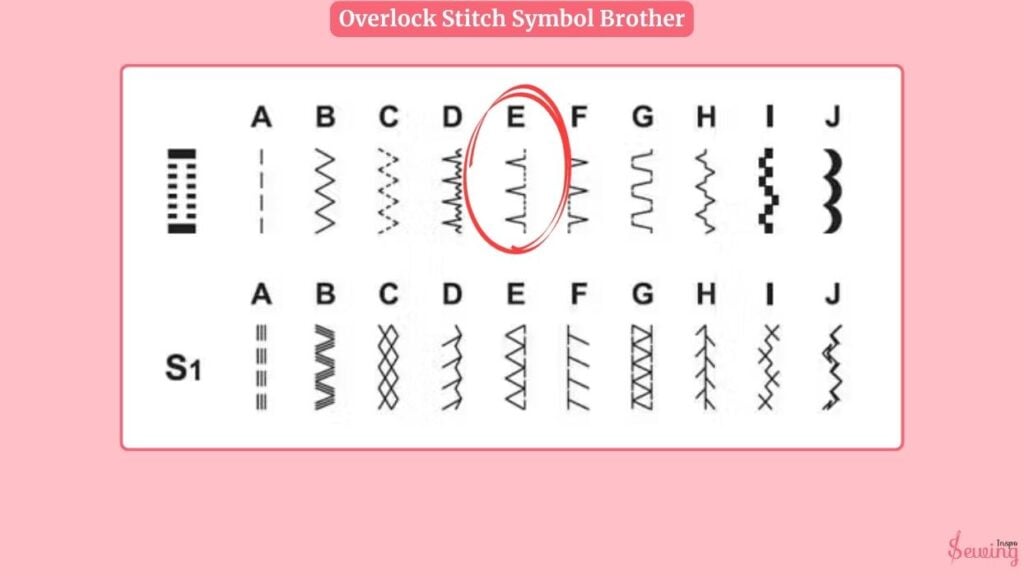
Brother Sewing Machine Stitch Symbols, Choose the right Overlock stitch symbol
First things first, turn on your Brother sewing machine and look at your stitch options. Now scroll through the stitch settings and find the overlock/double overlock stitch.
The overlock stitch symbol on a Brother sewing machine typically resembles a zigzag or comb-like pattern, with a straight edge on one side and a looping edge on the other. This kinda reminds me of a blanket stitch sewing machine.
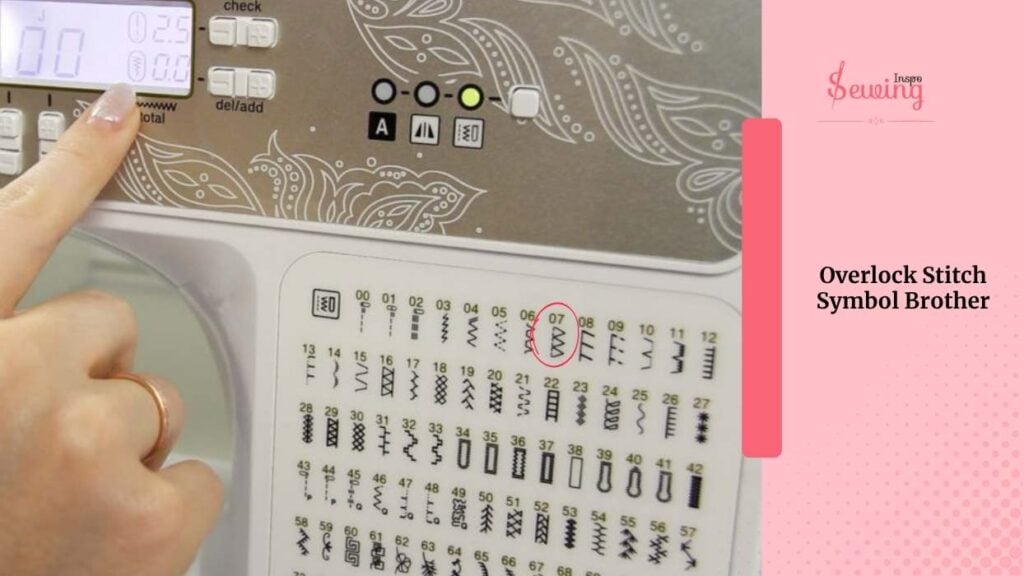
Brother sewing machine stitch symbols!
Warning: don’t mix it with coverstitch! Cause many stitchers make this mistake.
It’s meant to imitate the clean, wrapped-edge finish you’d get from a serger. That’s why it’s perfect for sealing raw fabric edges and preventing fraying.
Attach The Brother Overlock Foot With Cutter
This part matters a lot. For the overlock stitch to work properly, you’ll need the overcasting foot. It typically features a small bar in the center to guide your fabric and prevent it from curling.
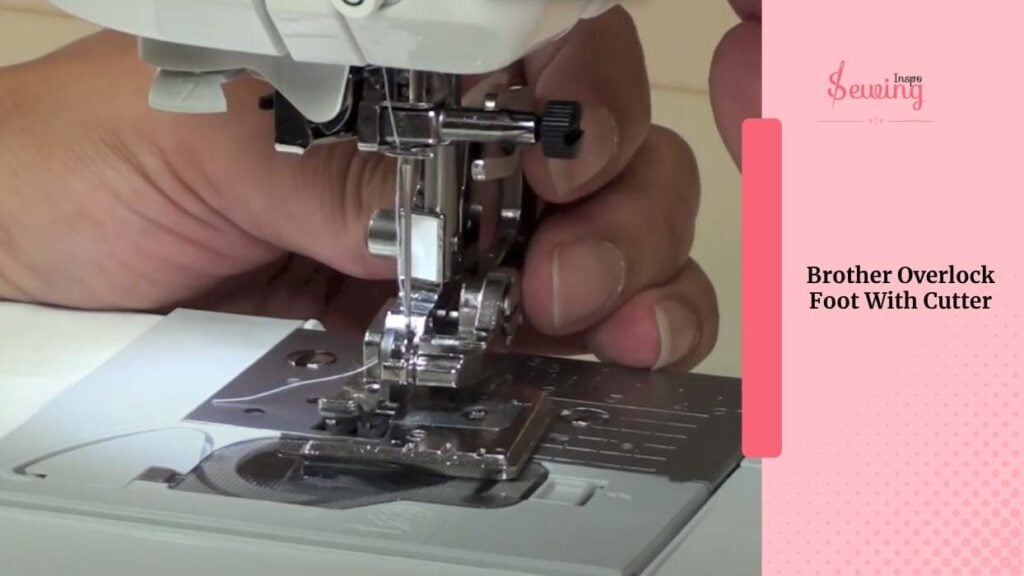
On Brother machines, this is often the one labeled with a “G”. A Brother overlock foot with a cutter, also called a side cutter foot. It is a handy sewing machine accessory that trims the fabric edge as you sew.
It helps you achieve a neat overlock or overcast finish all in one go. Just snap it on like any other presser foot. If you’re unsure how, check your machine’s quick setup guide or flip through the manual.
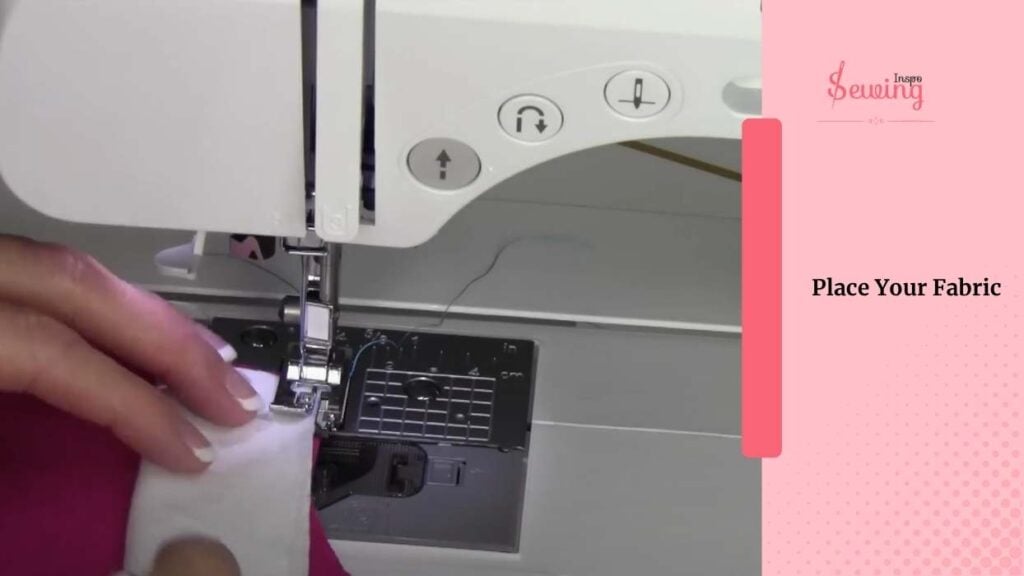
Place Your Fabric
Now lay your fabric under the foot, lining up the raw edge with the guide on the foot. That guide helps keep the stitch right along the edge so it looks clean and prevents fraying.
I like to do a test stitch on a scrap piece of the same fabric first to ensure the tension and placement are correct.
Adjust Stitch Overlock Length and Width On Your Brother Machine
Most Brother machines auto-set the stitch width and length when you select the overlock stitch. However, you can still adjust it if your fabric requires it.
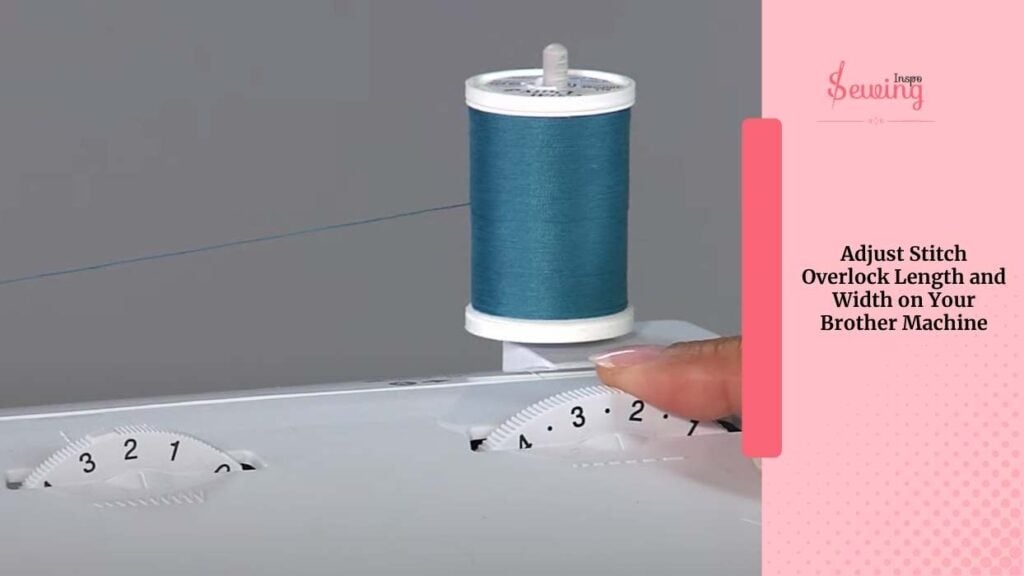
- For thin fabrics, go with a narrower stitch. I do it for zigzag sewing machine too.
- For thicker ones, widen it a bit.
Use the +/- buttons or dials, depending on your model.Just like you would do for a Juki blind stitch machine.
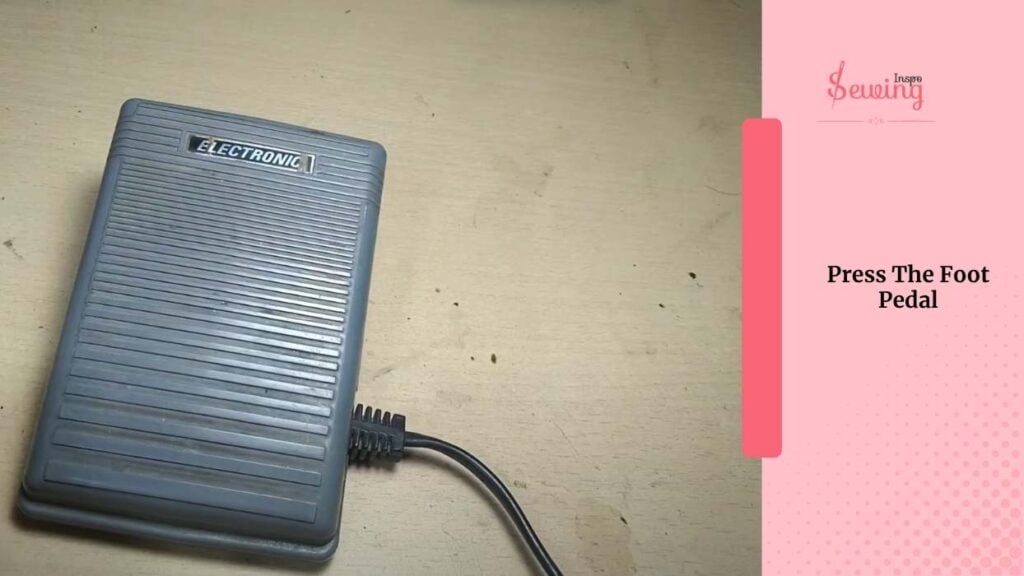
Press The Foot Padal
Press that foot pedal and let the machine do its magic. The needle will move side to side, wrapping the thread around the edge. Go steady, not too fast. So, the stitch grabs the edge just right without bunching.
Keep your fabric aligned with the guide. If it shifts too much inward, you’ll lose that clean finish.
Overlock Stitch On Brother Sewing Machine Youtube
If a video tutorial is were best, then watch this tutorial.
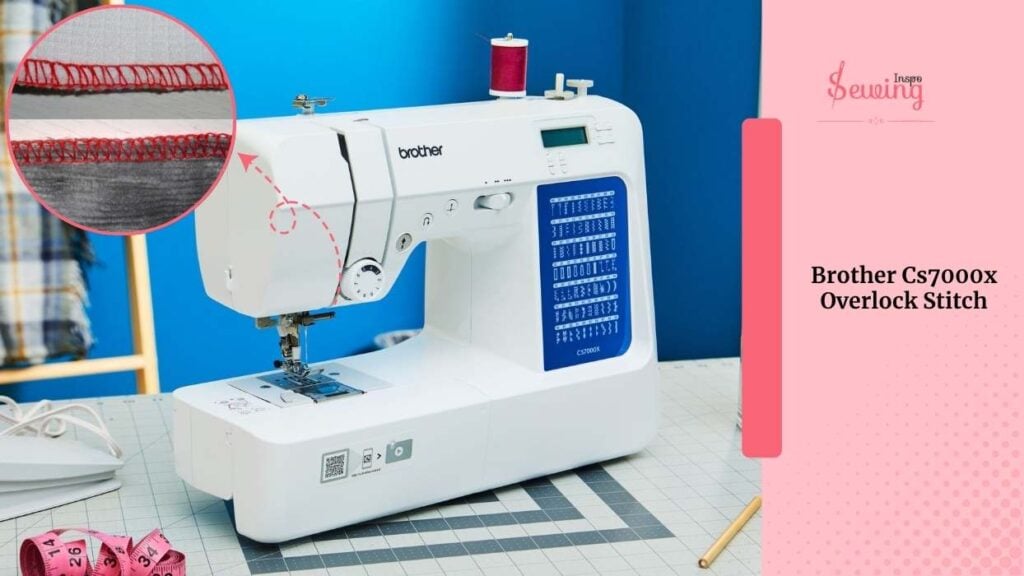
Brother Cs7000x Overlock Stitch
Just when I’m done again, someone pitches me another model of brother. 😑 What to do? I again explained it. But the thing is,
The Brother CS7000X sewing machine doesn’t perform a true overlock stitch like a serger. However, it can achieve a similar effect by using an overcasting stitch with the included overcasting foot (Foot G). It’s kinda like mocking overlocking.
This gives your fabric edges a clean, professional look and helps prevent fraying. It is perfect when you don’t have a serger on hand. How to Sew an Overcasting Stitch on the Brother CS7000X:
- Attach the Overcasting Foot (G) You can use it for a whip stitch sewing machine, too.
- Choose a stitch designed for overcasting. The CS7000X offers several options, including a wide zigzag and built-in overcasting stitches.
- Place the raw edge of your fabric against the guide on the overcasting foot.
- Sew at a slow, steady pace.
- Keep the edge of the fabric aligned with the guide so the stitch lands right where it needs to.
- Once done, gently pull the fabric backwards to release it from the foot and snip off any loose threads.
This method gives your projects a neat, serger-like finish without needing an actual serger pretty handy, right?
Frequently asked questions
Can a Brother sewing machine do overlock?
Not exactly like a serger. But yes, many Brother sewing machines can mimic an overlock stitch using an overcasting stitch and the overcasting foot G. It finishes raw edges nicely and helps prevent fraying.
What foot do I need for overlock stitch on Brother machine?
You’ll need the overcasting foot, usually labeled as Foot G. It has a built-in guide that helps keep the fabric edge in place while the needle stitches along and over it.
Is the overcasting stitch as strong as a serger’s overlock stitch?
Not quite. It’s strong enough for regular garment seams and edge finishing. However, if you’re working with stretchy fabrics or need reinforced seams, a serger offers greater durability and flexibility. Still, for most home sewing, the overcasting stitch gets the job done beautifully.
Done
And just like that, you’ve got a beautifully overlocked edge. Perfect for finishing seams, especially on woven fabrics that love to fray.


Leave a Reply