
Machine embroidery isn’t as versatile as the hand stitch. The options are limited but never zero. So I gave it a shot. I dusted off my basic sewing machine, grabbed some scrap fabric, and tried it.
I’ll be honest—my first few tries weren’t perfect.
But once I figured out the right settings, stabilizers, and how to move the fabric just right… It felt like an easy job. I mean, you just gotta do,
Machine Embroidery
To do embroidery with a sewing machine, use an embroidery foot, stabilize your fabric, select a design, and guide the fabric slowly while stitching.
Let me walk you through how to start machine embroidery. Even if you use a regular home machine. Trust me, once you try it, you’ll be hooked.

Table of Contents
What Stitches Do Embroidery Machines Use?
There are many kinds of stitches for machines, too. But embroidery machines primarily use 2 main types of stitches:
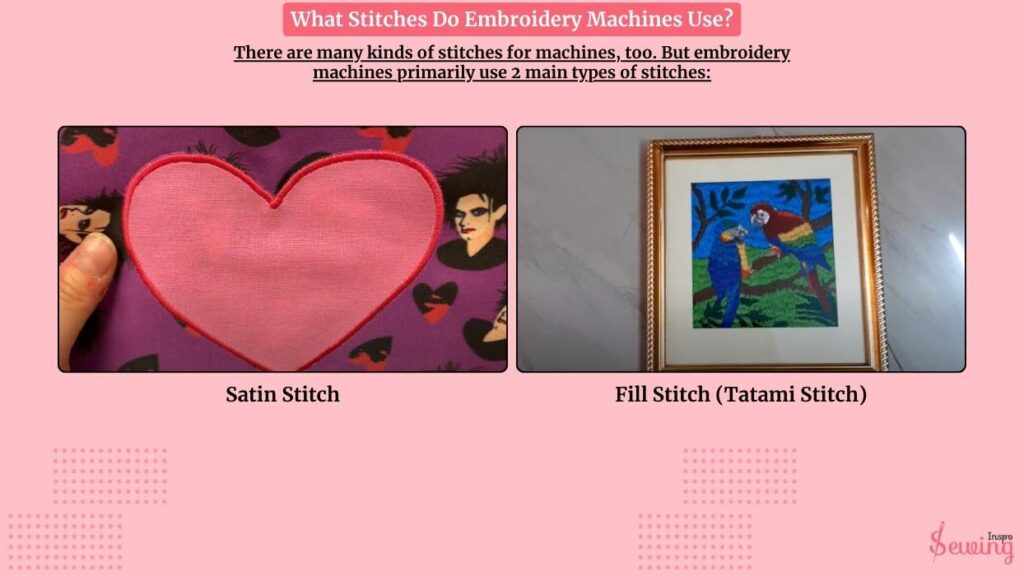
They may also use running stitches for outlines or details and jump stitches to move between areas without stitching. Rather than that, there are even more types of stitching on a sewing machine that you can explore, too.
What Is The Most Popular Thread Used For Machine Embroidery?
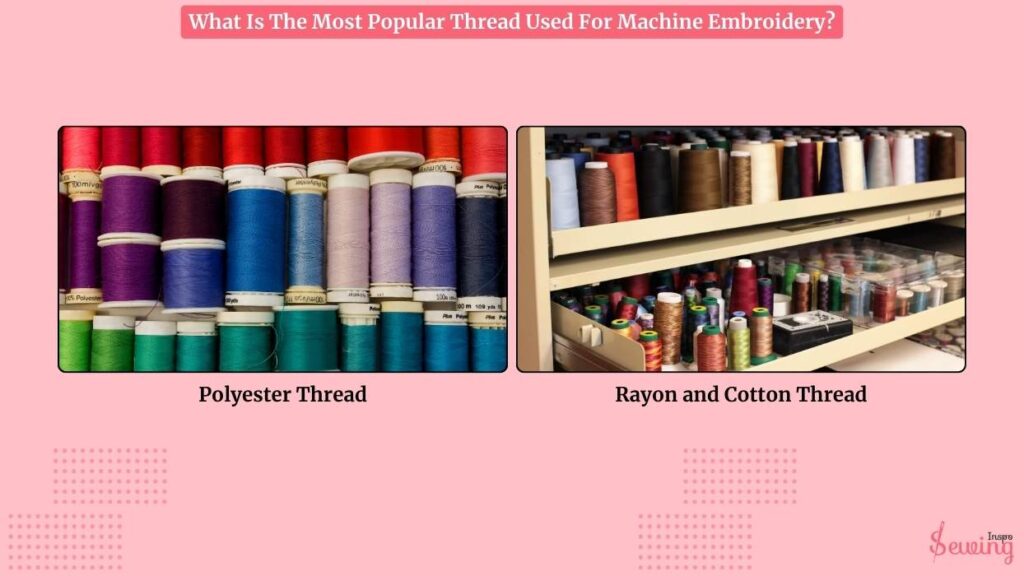
Polyester thread is hands-down the most popular choice. Sure, rayon and cotton have their fans, too. But polyester really hits that sweet spot between strength, durability, and bold, vibrant color. Polyester thread is also helpful for a serger stitch machine.
What I love about it is how well it holds up—it doesn’t fade easily and stays colorfast even after tons of washes.
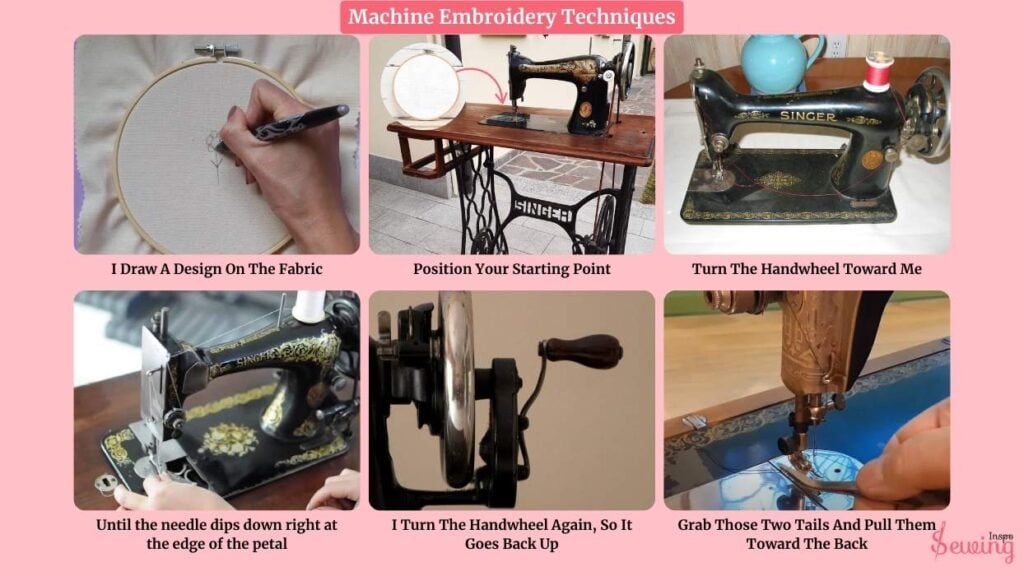
Machine Embroidery Techniques in Old School Sewing Machine
When I first got into machine stitching, I didn’t start with a modern machine. I started with my grandma’s old-school sewing machine. It felt kind of tricky at first, but I got the hang of it little by little.
I Draw A Design On The Fabric
I usually start by drawing my design directly onto the fabric using a washable fabric pen, chalk pencil, or heat-erasable marker.
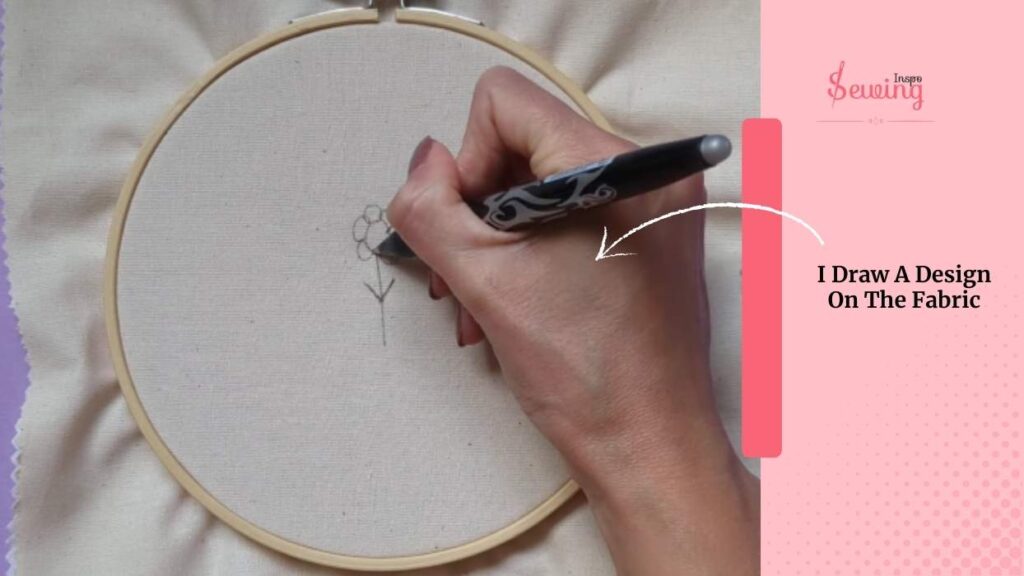
I sketched a simple floral motif for this piece—a large daisy with five petals and a few curving leaves around it. This pattern also looks stunning in a surface embroidery pattern.
I keep the lines light but visible, which helps me stay on track while stitching. Once I am done, I get into the stitching. You can use this design on machine embroidery cutwork too.
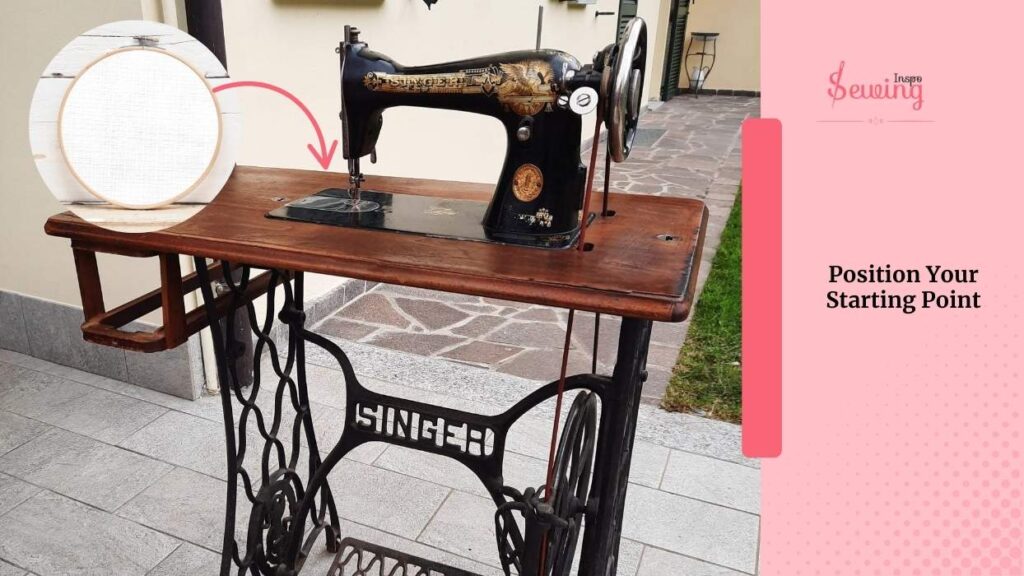
Position Your Starting Point
Let’s say you want to start in the middle of your hoop or at the edge of a leaf you’ve drawn.
Turn the handwheel on your machine slowly to lower the needle manually into the exact spot where you want to start stitching.
Bring it back up once to pull the bobbin thread up to the top. Hold both threads to the back of the hoop. This helps prevent a thread nest.
Turn The Handwheel Toward Me
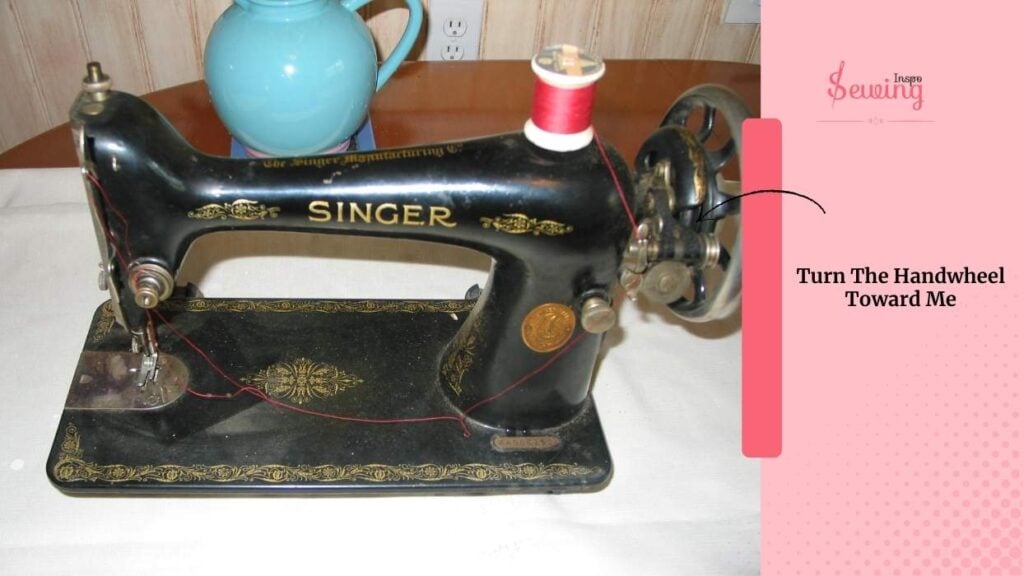
Before I press the pedal, I always slow down and do this one small but important thing: I manually position the needle.
I reach over and turn the handwheel toward me, just slowly, until the needle dips down right at the edge of the petal where I want my first stitch to go.
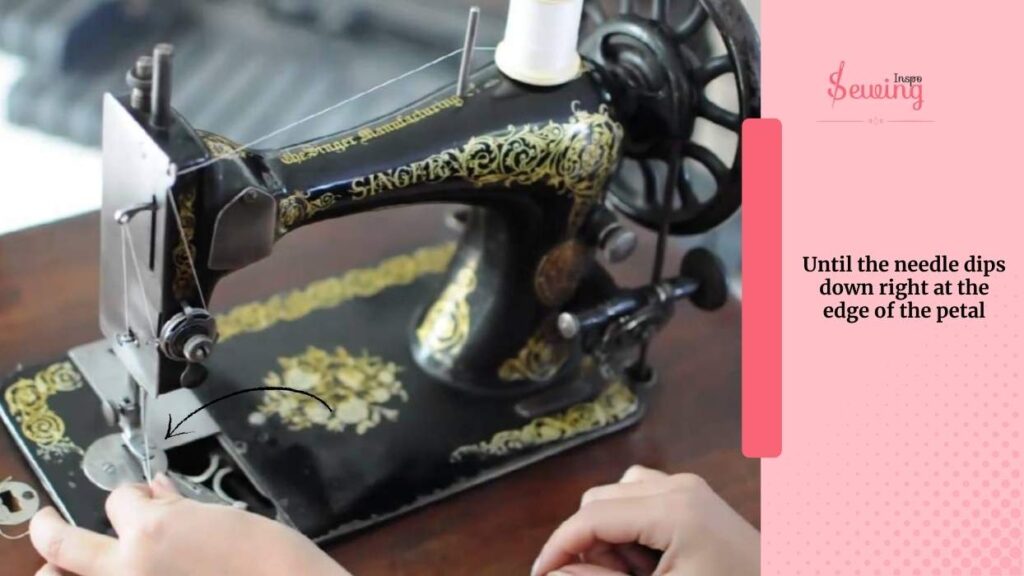
I don’t rush this part—
Getting the exact starting point makes everything feel smoother. It’s like lining up a paintbrush at the edge of a sketch. I want the line to flow right from that point, not feel like it started mid-air.
While doing it, I always get into a problem,
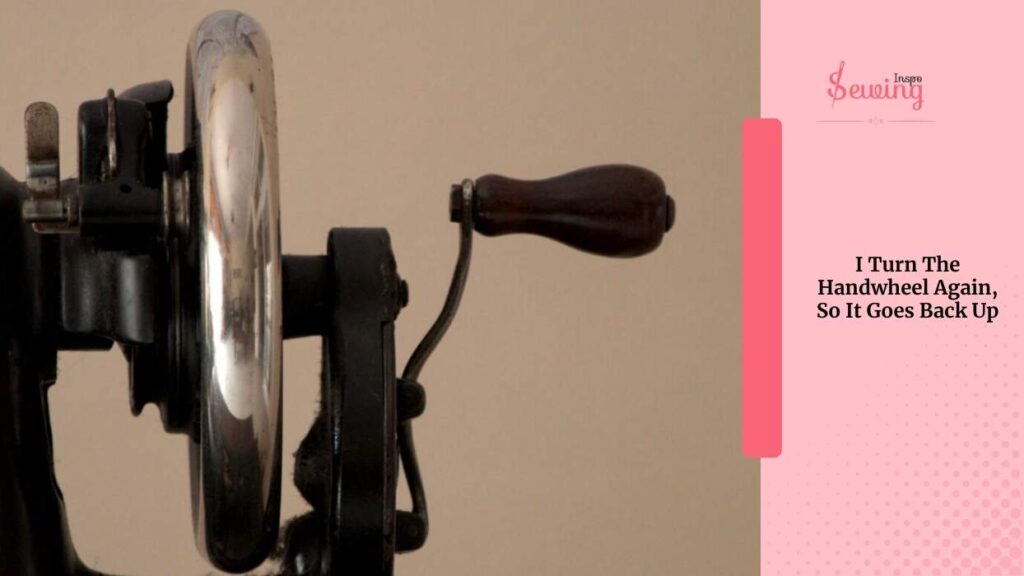
I Turn The Handwheel Again, So It Goes Back Up
Now, with the needle down,
I turn the handwheel again so it goes back up, and I watch closely because this is where the bobbin thread gets pulled up. I see the top thread making a little loop, so I pause and grab a pin to hook that loop and gently pull it through.
Boom! Now both the top and bobbin threads are up on the fabric surface. This is also helpful for the triple zigzag stitch.
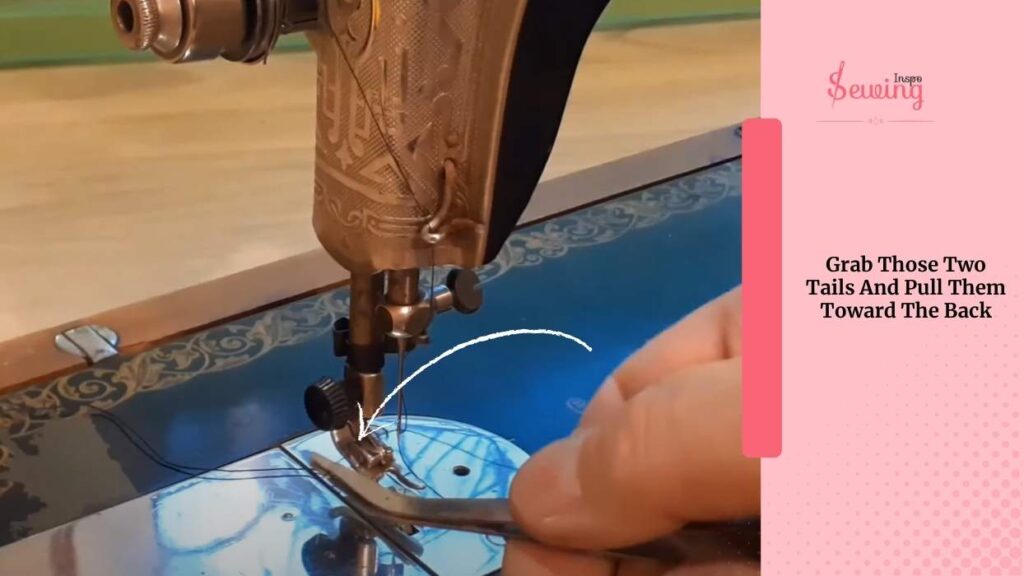
Grab Those Two Tails And Pull Them Toward The Back
I grab those two tails and pull them toward the back of the hoop. Always toward the back. I’ve learned that’s just a habit that saves me from messy thread tangles underneath.’
Early on, I used to forget this, and I’d end up with those awful thread nests on the backside—big, messy knots that made the back look like spaghetti. It’s not fun.
Since I’ve started pulling the bobbin thread up every single time and holding both tails, I barely ever have those issues. It makes the embroidery stitches cleaner.
Then I check that my design is lined up the way I want it. The needle is right on that pedal line, so everything’s good to go.
Now I’m ready to put the presser foot down and start stitching the outline of my daisy, smooth and slow.
That’s it! Keep repeating it throughout your whole pattern. Your embroidery will be done within 3-4 minutes.
Done? Now close the stitch. Don’t know how? Then read out our How to close a stitch on a sewing machine.
Common Mistakes To Avoid While Doing Machine Embroidery Stitches
Machine embroidery is easy, but that doesn’t mean it’s a smooth ride. There are some obstacles you need to overcome, too. Here are some issues I had to overcome,

- Don’t route the thread through the bobbin winding tension button—it’s for bobbin winding only.
- The thread must go through all guides, including:
- Initial thread guide
- Tension discs (open when presser foot is up!)
- Take-up lever (follow machine’s exact path)
- Needle bar guide
- Lower presser foot only after threading is complete.
Machine Embroidery Stitches In A Modern Sewing Machine
Sewing on the modern machine is way easier and faster than on an old model. You don’t need to sweat much with it. You just need to press some buttons and your designs will be done. Here is how it works,
- Select from built-in decorative stitches (e.g., hearts, stars, vines).
- Or go free-motion for custom designs.
- Hoop fabric tightly with stabilizer underneath.
- For free-motion, draw your design with chalk or a washable pen.
- Stitch length: 2.5–3.5 for decorative; 0 for free-motion.
- Check and test thread tension on scrap fabric.
- Guide the fabric slowly while the machine sews the pattern.
- Move the fabric manually to “draw” the design.
- Tie off threads or backstitch (depending on style).
- Trim ends and remove stabilizer.

Machine Embroidery Stitches Pdf
If you are a newbie, it’s easy to forget some of the steps. To avoid that issue, download this PDF.
Types Of Machine Embroidery Stitches With Pictures
I demonstrate embroidery using simple machine embroidery stitches. But there are about 15 types of embroidery stitches. here are the example of machine embroidery stitches types,
- Satin stitch
- Running stitch
- Lock Stitch
- Bean stitch
- Fill stitch
- Zigzag stitch
- Applique
- Straight stitch
- Chain stitch embroidery
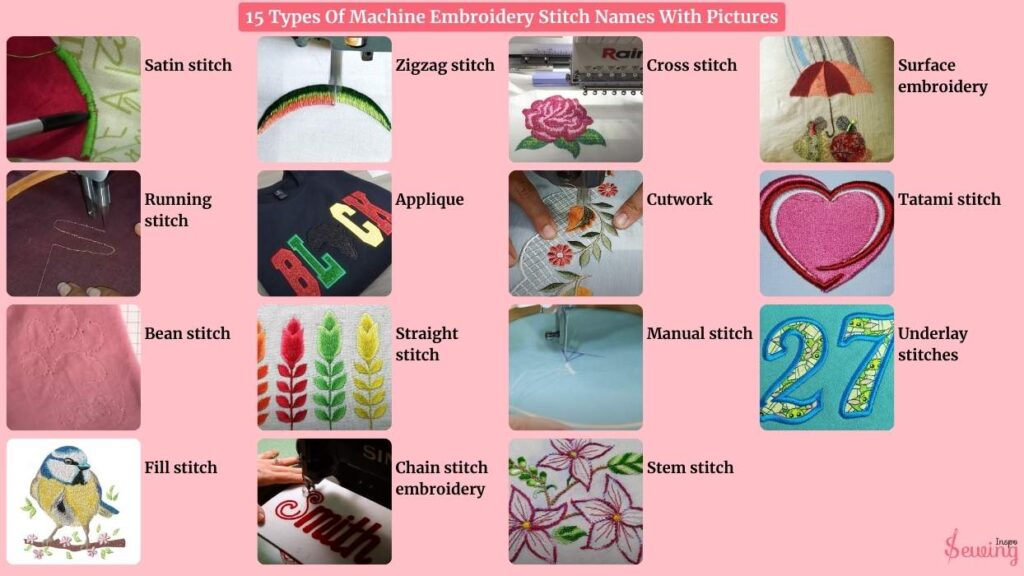
- Cross stitch
- Cutwork
- Manual stitch
- Stem stitch
- Surface embroidery
- Tatami stitch
- Underlay stitches
- Thick Stem Stitch
Types Of Machine Embroidery Stitches Pdf
Save all machine embroidery stitch types. It will help you while doing passionate styles and stitches
While reading this, if you are curious about is hand sewing is stronger than machine sewing. Then read the article.
Others From Of Machine Embroidery
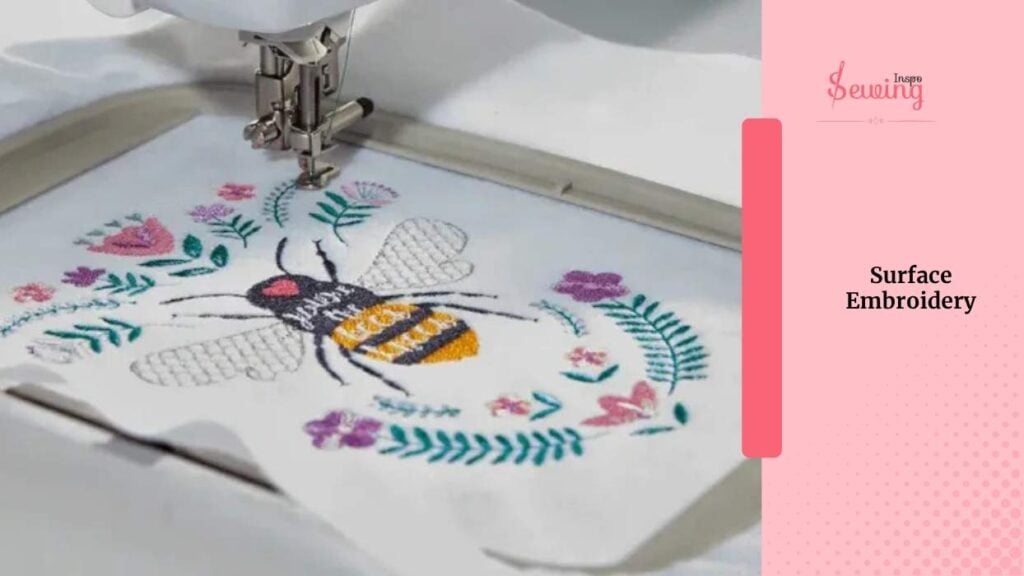
Surface Embroidery
Surface embroidery is a technique where decorative stitches are worked directly on top of the fabric, rather than through it, like in counted thread styles. This is also called free-style embroidery. Here is how it’s done-
- Lower or cover the feed dogs
- Attach a free-motion darning foot
- Set up your sewing machine (straight stitch, length 0)
- Lower the presser foot and bring up bobbin thread
- Slowly press the foot pedal and guide the fabric manually
- Fill the design with back-and-forth or circular motions
- Pull threads to the back and tie them off
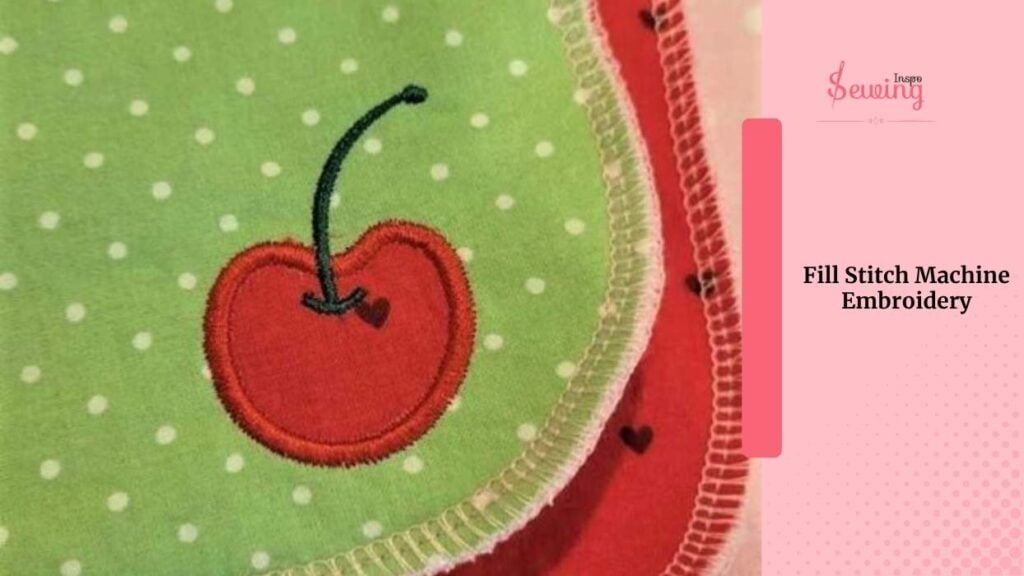
Fill Stitch Machine Embroidery
A fill stitch in machine embroidery is a series of closely placed stitches used to cover large areas of fabric with thread. This is also known as the tatami stitch. It creates solid, textured 3d shape kinda like cross stitch.
In machine embroidery, several types of fill stitches are used to add texture and depth to designs. Common machine embroidery stitch types include:
- Tatami (or Cretan) Fill Stitch
- Satin Fill Stitch
- Brick Stitch
- Waffle Fill
- Contour Fill
- Random Fill
You have server options. You can experiment with all the stitches. However, the tatami stitch is my favourite one.
Machine Applique
If you wanna take your machine embroidery to the next then applique is the one you need. Here is how to do it-
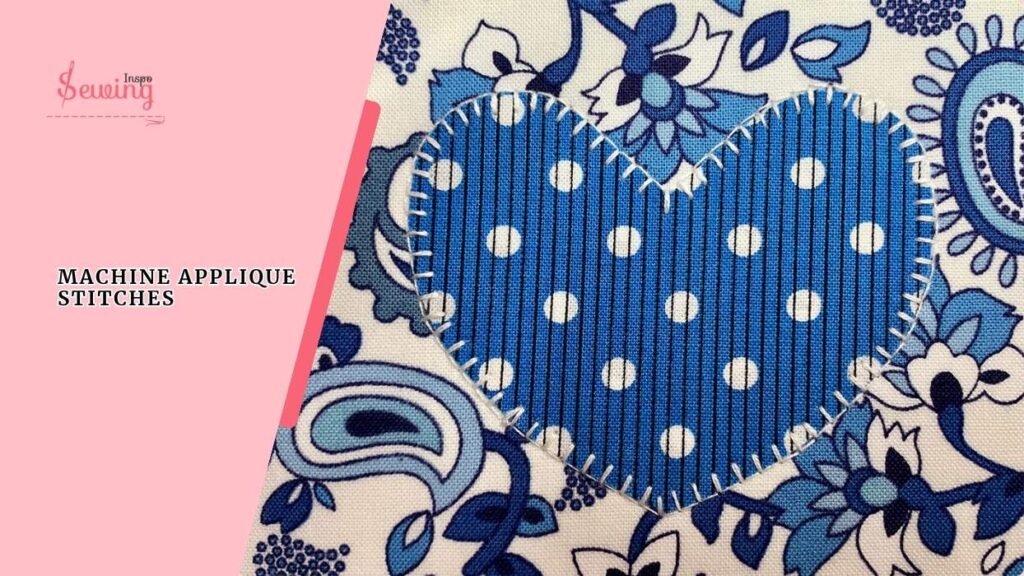
- Cut background fabric 1 inch larger than appliqué.
- Use fabric glue and an awl to tuck edges neatly.
- Stitch slowly around curves and corners.
- Keep the needle jumping evenly between both fabrics.
- Drop needle at corners to pivot smoothly.
- Finish with a backstitch to secure.
- Backstitch a few times to lock stitches.
- The final look is clean, tight, and professional.
- Easier and faster than full machine embroidery.
That’s the beauty of stitch machine embroidery. You can experiment with anything.
Outline Quilting By Machine
If you want to do something unique with your machine, then quilting is your catch. Well, there are many forms of quilting, but outline one is the easy one. So here is how it’s done-
- Use 3.0–3.5 mm (about 8–12 stitches per inch).
- Longer stitches pierce layers smoothly and look cleaner around curves.
- Coordinate foot pedal speed with hand movement for even stitches.
- Move slowly for tight curves, faster for smooth lines.
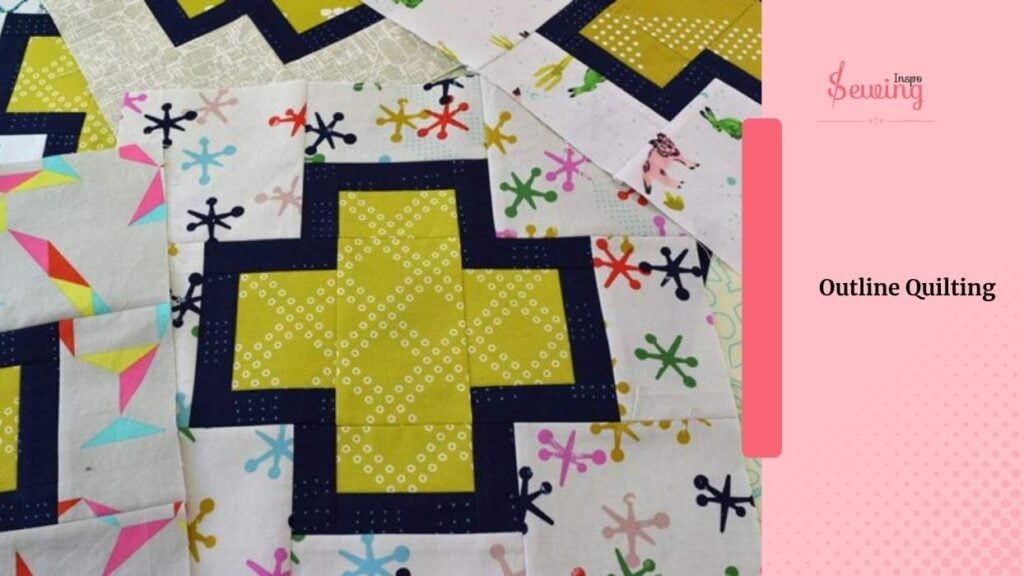
- Focus about ½” ahead of the needle for better control.
- “Trace” the printed or appliqué design on your quilt top.
- Begin from the center and work outward to prevent puckers.
Stitch in the direction that gives you better visibility. - Reposition every 3–5 inches to stay in control.
- For small shapes (like flowers or leaves), stitch each section individually.
- Quilt in short sections, pausing to reposition as needed.
- Finish with 3–4 tiny stitches to lock.
Clean, defined outlines that enhance your quilt’s design. It is perfect for accenting appliqué shapes, motifs, and borders with precision and smooth stitch flow.
Machine Stitching Leather
You can sew leather with a regular sewing machine. However, it requires a few adjustments to work smoothly, such as incorporating decorative stitches. Here is how you can do it-
- Go for heavy-duty or bonded nylon #92 thread; regular thread will snap.
- Use Wonder Clips instead of pins to hold pieces together (no holes left behind).
- Stick a small piece of Scotch Magic Tape under your presser foot to help the leather glide smoothly.
- Use a stitch length of 3–4 mm. Longer stitches keep leather strong and neat.
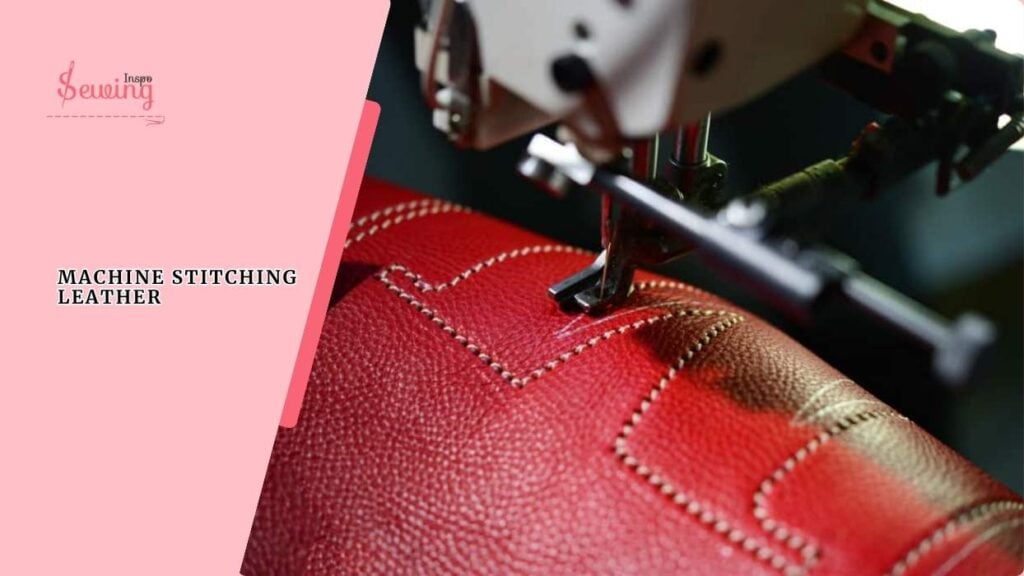
Hold thread tails when starting and stitch slowly and steadily to avoid jamming.
Don’t backstitch, just tie off and melt thread ends for a clean, strong finish.
Which Machine Embroidery Stitch Is The Easy One?
If you’re just starting out, the running stitch is by far one of the embroidery machine techniques It’s simple, straight, and doesn’t require complicated patterns. It is perfect for outlining shapes or practicing control.
Another beginner-friendly option is the satin stitch, especially if your machine has an automatic satin stitch function. It gives a smooth, filled look without too much fuss once you get the hang of guiding the fabric.
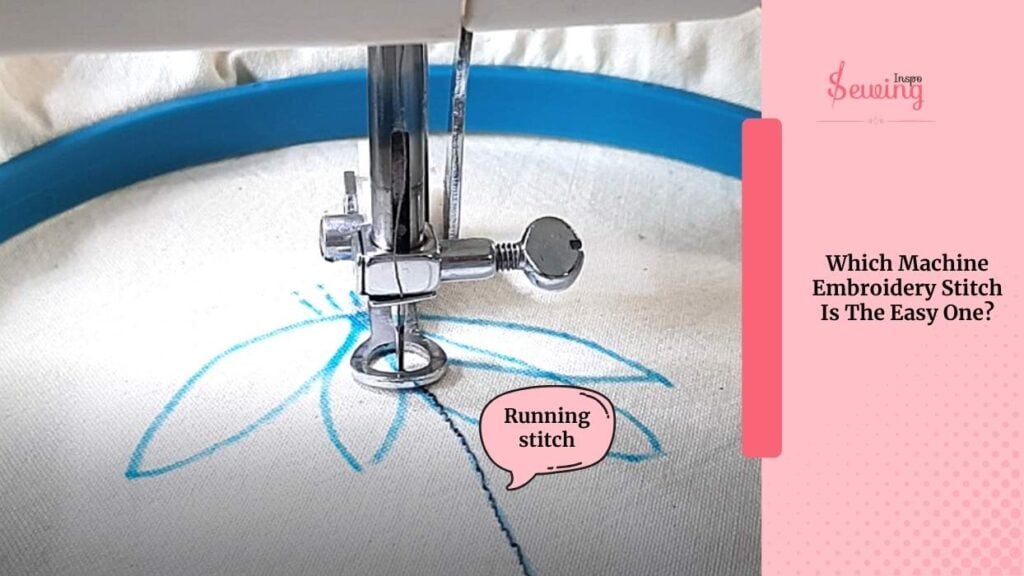
For absolute beginners, I always recommend starting with running stitch, then gradually experimenting with satin stitch as you gain confidence.
Frequently Asked Questions
Which Stitch Is Called The Queen Of Embroidery?
That title goes to the satin stitch! It’s smooth, shiny, and super elegant—perfect for lettering, outlines, and bold decorative elements. People love it because it really makes designs pop with a polished, professional finish.
What stitches do embroidery machines use?
Most embroidery machines rely on a few key stitch types—satin stitch, fill stitch (also called tatami or celtic stitch), and running stitch. Satin is for clean, raised lines, fill is for larger areas like shapes or backgrounds.
Outro
Machine embroidery is such a fun and creative journey. Once you get the hang of the basics, the possibilities really are endless. So fire up your machine, explore different stitch styles, and don’t hesitate to get creative.
Happy stitching


Leave a Reply