
After trying out the Mauzer chain stitch machine, I thought, Let’s try something old-fashioned. I grew up seeing Grandma using a falak chain stitch machine. So i have an urge to use it.
But I wasn’t confident enough for it. But since I am trying a different chain stitch machine, I thought I would give it a try.
Falak Stitch
So, To use the Falak chain stitch machine, thread it with embroidery-weight thread, adjust the tension and stitch length, and guide the fabric steadily to create decorative chain stitches.
But it isn’t any digital machine. So few things might feel overwhelming. So here is the catch.
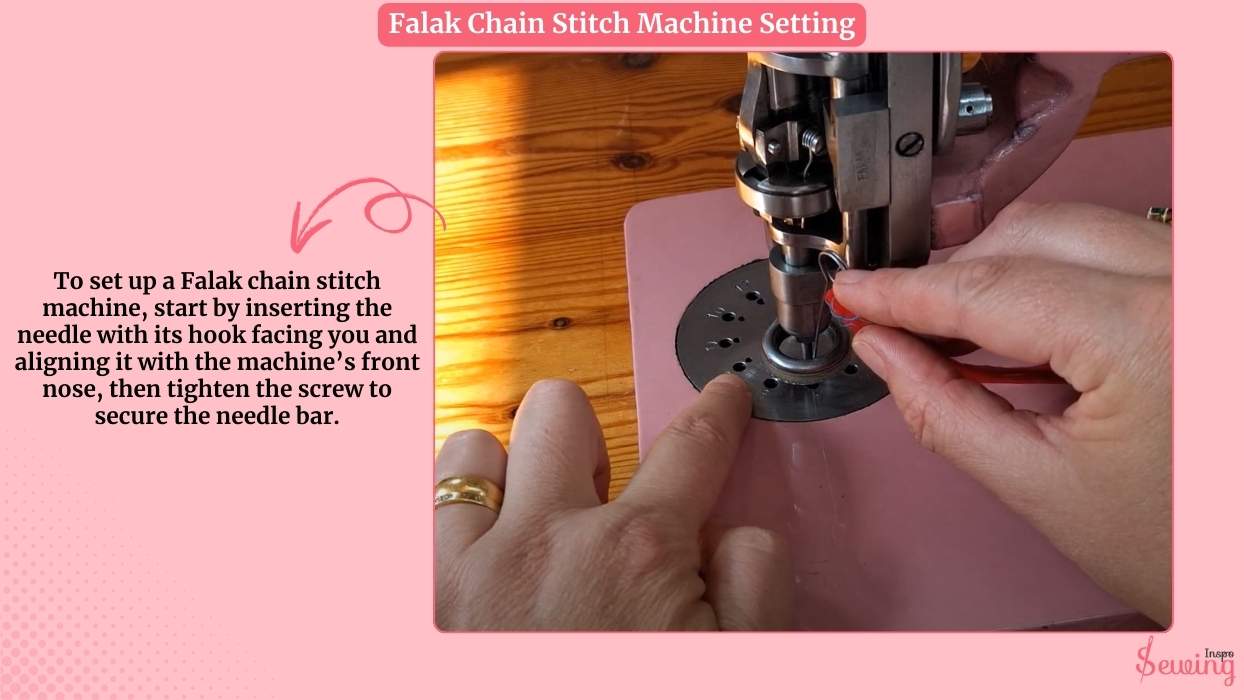
Table of Contents
Falak Chain Stitch Machine Setting
This isn’t some digital machine, so setup is kinda different for it from other sewing machine.
To set up a Falak chain stitch machine, start by inserting the needle with its hook facing you and aligning it with the machine’s front nose, then tighten the screw to secure the needle bar.
Next, fit the tension unit and check the spring, making sure the small hole lines up with the tension discs to avoid thread breakage. This helps me use worlden chain stitch machine too.
You may also need to adjust the needle height, presser foot pressure, and presser foot for optimal performance.
Don’t forget to lubricate the machine during setup to properly break it in. You can use it as a saddle stitch machine.

How Does A Chainstitch Machine Work?
A chainstitch machine works by using a single thread and a looper, rather than a bobbin. As the needle passes through the fabric, the looper catches the thread and forms interlinked loops underneath. These loops connect like a chain, which gives the stitch its name. You can even do zig zag stitch embroidery if you use the right one.
Because the thread isn’t locked with a second thread (like in a lockstitch), the stitch stays flexible and stretchy. That’s what is a chain stitch looks like.
It is great for embroidery, decorative stitching, or seams that need some give. However, it can also unravel easily if the end isn’t secured.
Basically, the needle makes a hole, the looper grabs the thread, and the loops chain together to form a stretchy line of stitches.

How To Use Falak Chain Stitch Machine For Beginners?
To use the falak chain stitch machine, follow the below 7 steps,
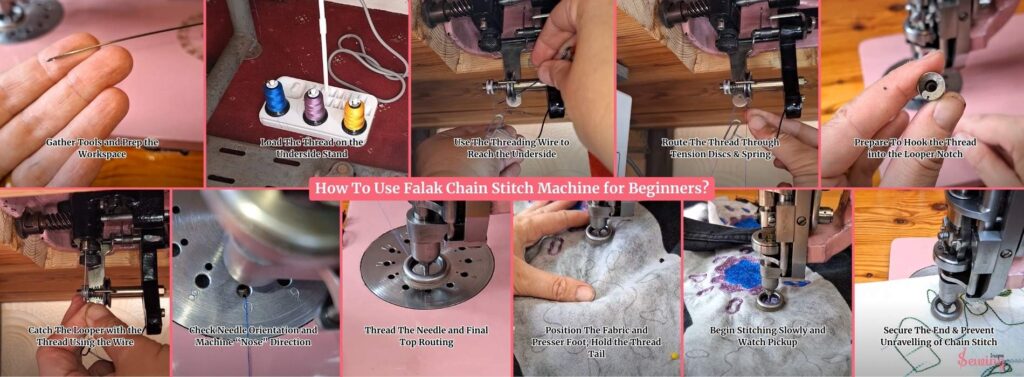
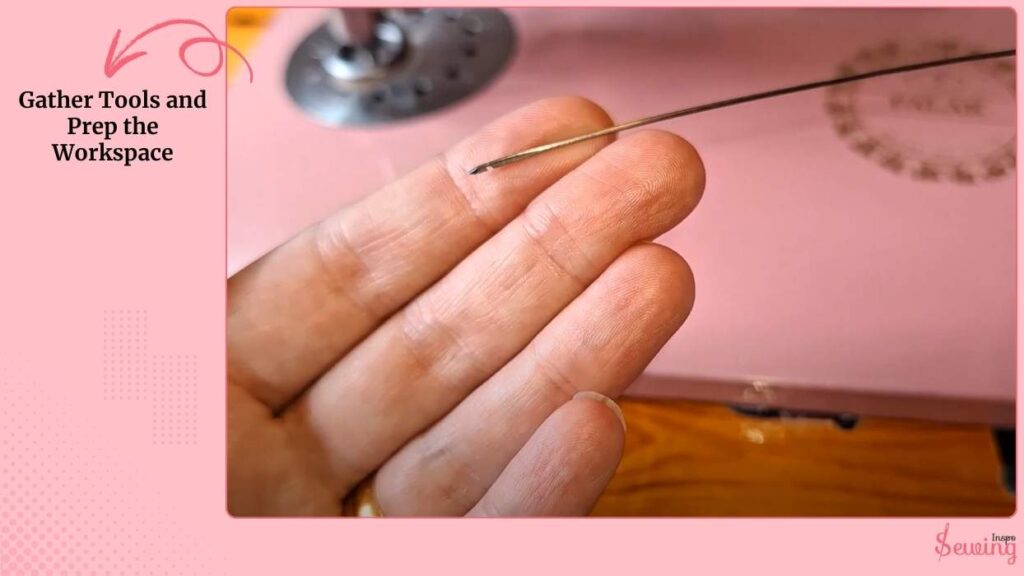
Gather Tools And Prep The Workspace
I place a small thread stand under the machine (or a larger cone stand if using big cones), a pair of snips, and my special threading wire/needle (the little hooked wire).
I keep a scrap of fabric for testing, and I attach a ribbon or thread loop to the threading wire so I don’t lose it, trust me, that tiny tool disappears if you don’t.
Make sure the machine is clean and oiled, the power is off while I set things up, and I have good quality embroidery/thread suitable for chain stitch ready.
Load The Thread On The Underside Stand
I put the cone or spool on the thread stand so the thread will feed from the underside of the machine. This is total opposite of singer sewing machine stitch. It’s kinda complicated unlike flatbed chain stitch machine.
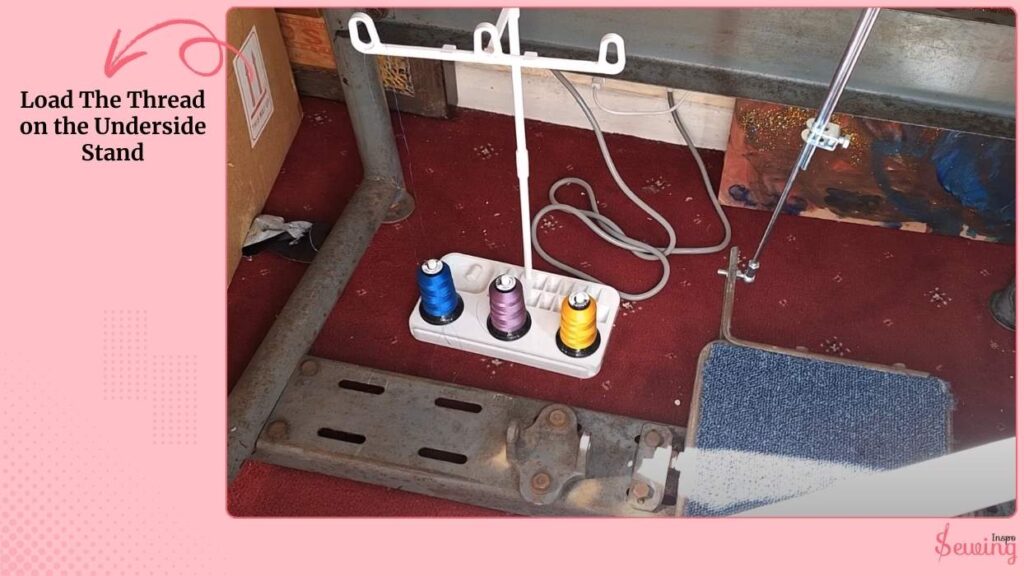
This chain stitch machines use a single thread from underneath, no bobbin. So you can’t do double chainstitch with this.
The thread should run freely off the cone with no catch or twist. Smooth feed is important to avoid tension problems.
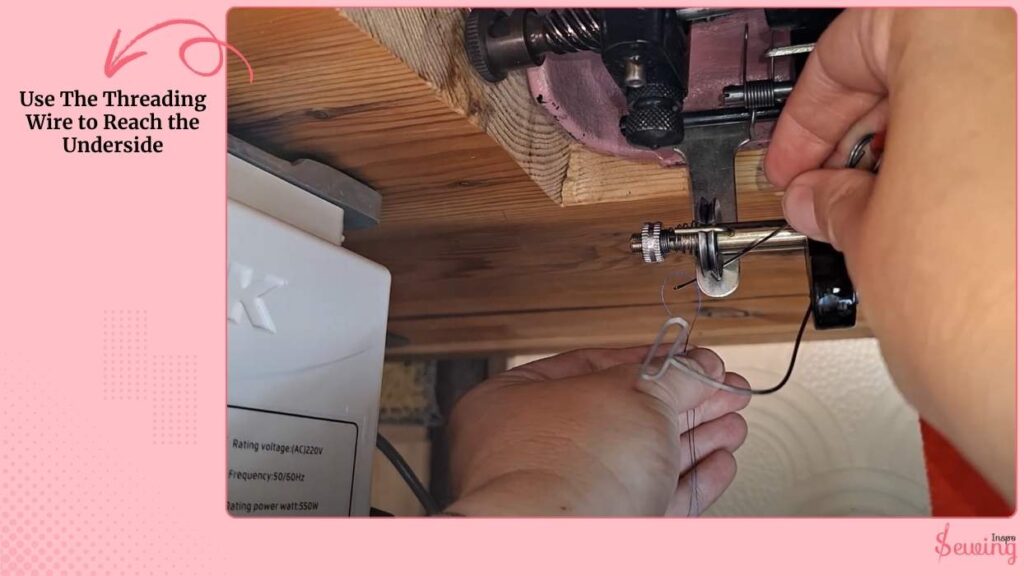
Use The Threading Wire To Reach The Underside
With the threading wire, I push it down through the large hole in the face/plate so it comes out the underside of the machine.
I loop the thread end onto the small hook of the wire like vintage machine.
Then pull the wire back up through the hole so the thread comes up through to the top. This gives me control of the thread path from the bottom to the top.
Route The Thread Through Tension Discs & Spring
I carefully loop the thread around the tension discs as shown on the machine (behind the tension spring assembly).
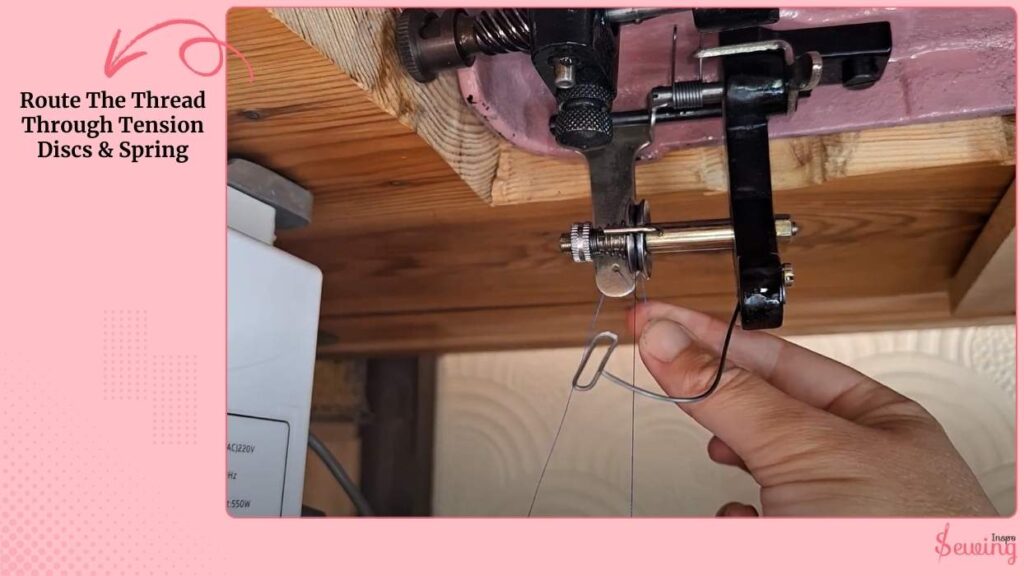
Then bring it up into the small spring pocket/hook at the front. Make sure the thread rides properly between the tension faces. Dirt or misalignment here is the primary cause of thread breakage.
Keep the presser foot raised while routing so the discs are open. This is kinda new. Cause it isn’t a digital machine like juki chain stitch machine.
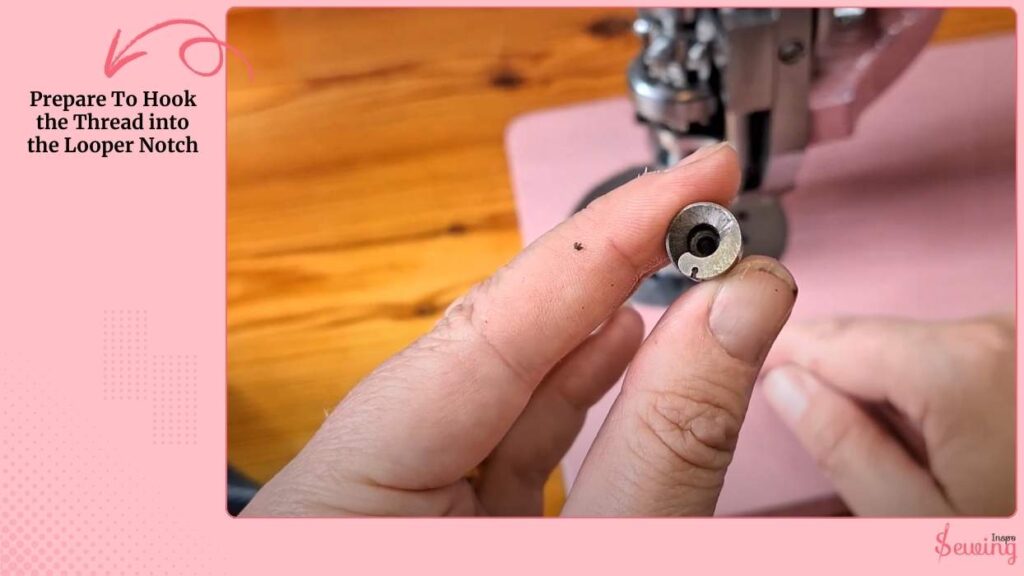
Prepare To Hook The Thread Into The Looper Notch
I lower the presser foot and turn the handwheel so the handle is at about 6:00. This rotates the looper.
As I slowly turn, I watch the looper come into view. When the looper exposes its little groove/notch, that’s the moment to capture the thread.
For many Falak models the correct looper notch exposure is when the needle is high and the looper notch sits around 12:30–1:00 on the looper wheel.
Catch The Looper With The Thread Using The Wire
With the handwheel positioned, I use the threading wire again: push it down the large hole until it appears under the machine like triple chainstitch.
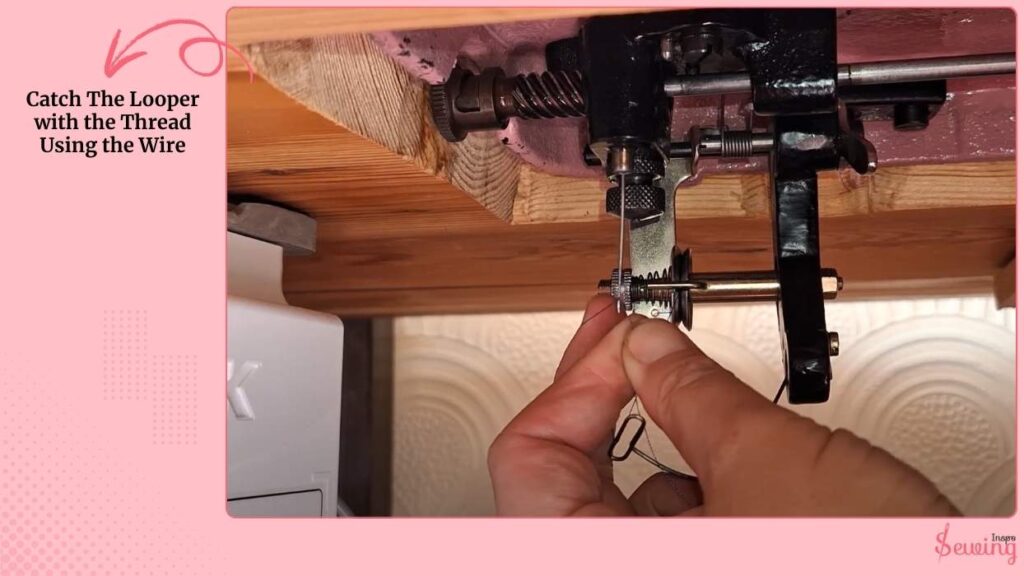
Then i hook the thread onto the wire, and gently pull so the thread runs up and into the small groove/notch on the looper.
I keep a light tension on the thread so it seats in the notch and won’t slip out when I start. That’s the beauty of Falak Chainstitch Embroidery Machine.
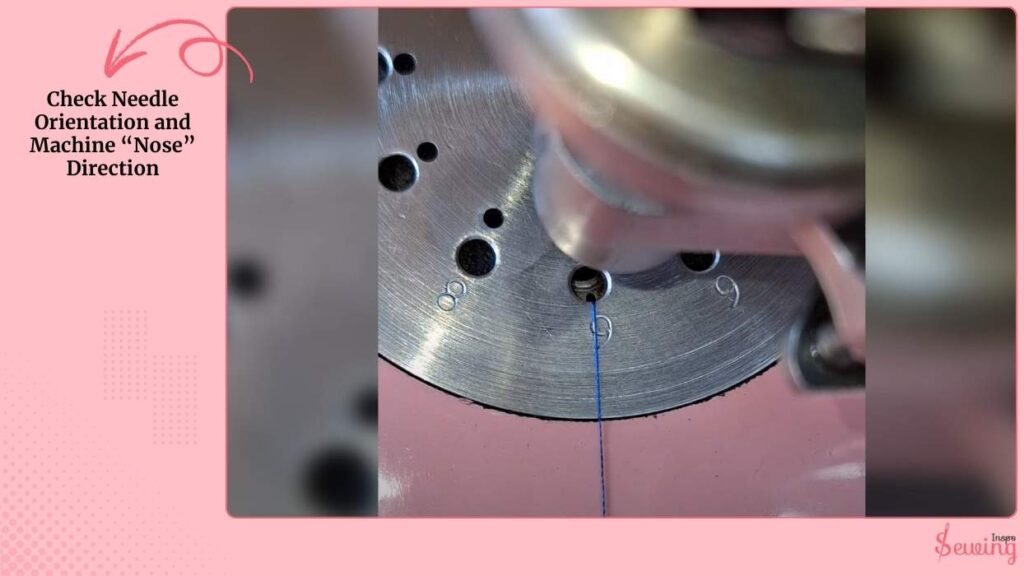
Check Needle Orientation And Machine “Nose” Direction
I check that the needle hook faces me (the user). The needle’s hooked side must be aligned with the machine nose so the looper and needle meet correctly.
I also note the machine’s nose direction (this tells me which way the fabric will sew). If the needle or nose is misaligned, the machine won’t pick the thread up properly.
Thread The Needle And Final Top Routing
I thread the needle in the usual way top thread path → needle eye.
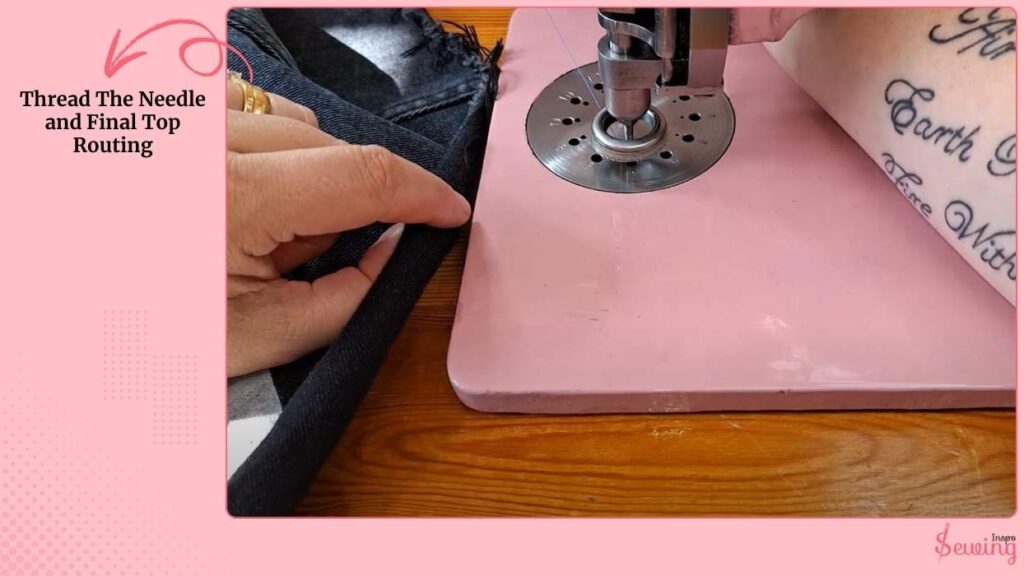
I ensure the thread is sitting between the tension spring and any thread guides, and I pull a small tail through the needle (leave enough slack).
Do a manual turn of the handwheel once or twice to confirm the thread and looper interact cleanly.
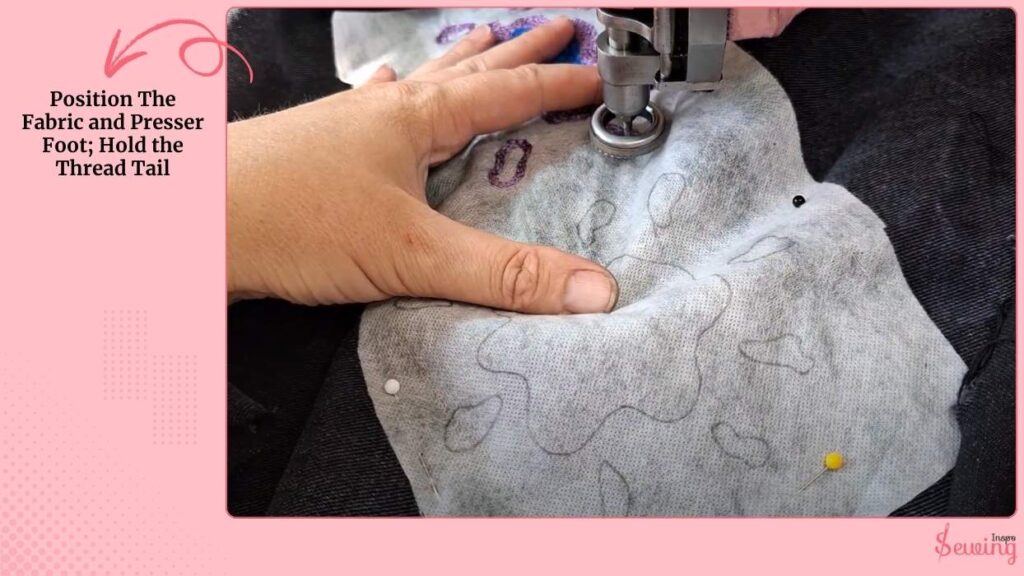
Position The Fabric And Presser Foot; Hold The Thread Tail
I place my fabric under the foot where I want to start, lower the presser foot, and hold the thread tail gently (just a finger’s light hold) while I begin stitching.
This prevents the thread from slipping out of the looper notch during the first few stitches.
Begin Stitching Slowly And Watch Pickup
I start the motor at a very low speed and watch. The machine should pick up the thread cleanly and form neat chain loops on the underside.
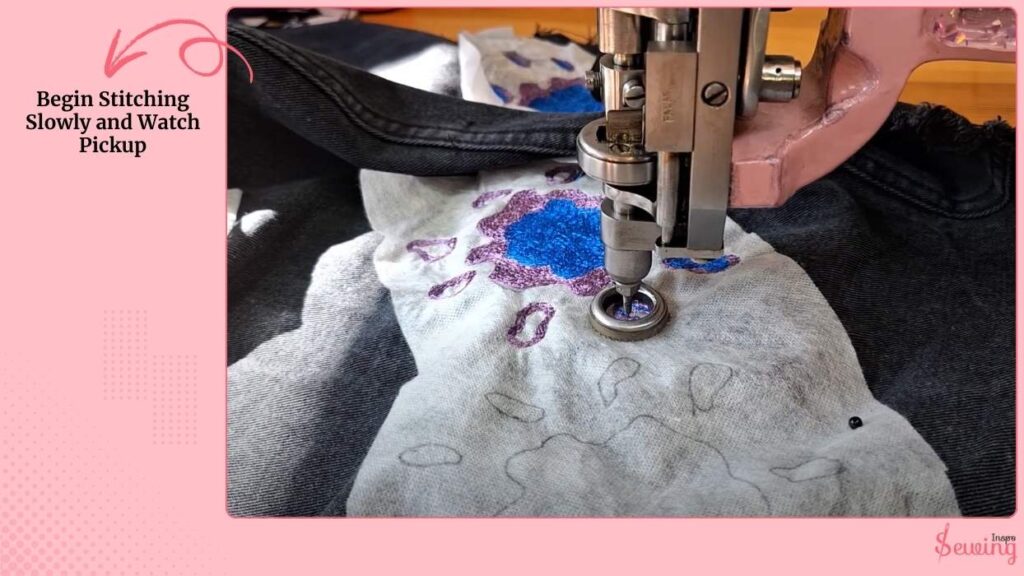
If nothing is picked up, I stop and re-check needle hook orientation and looper seating. Keep tension light on the thread tail; don’t pull the fabric.
Guide it gently.
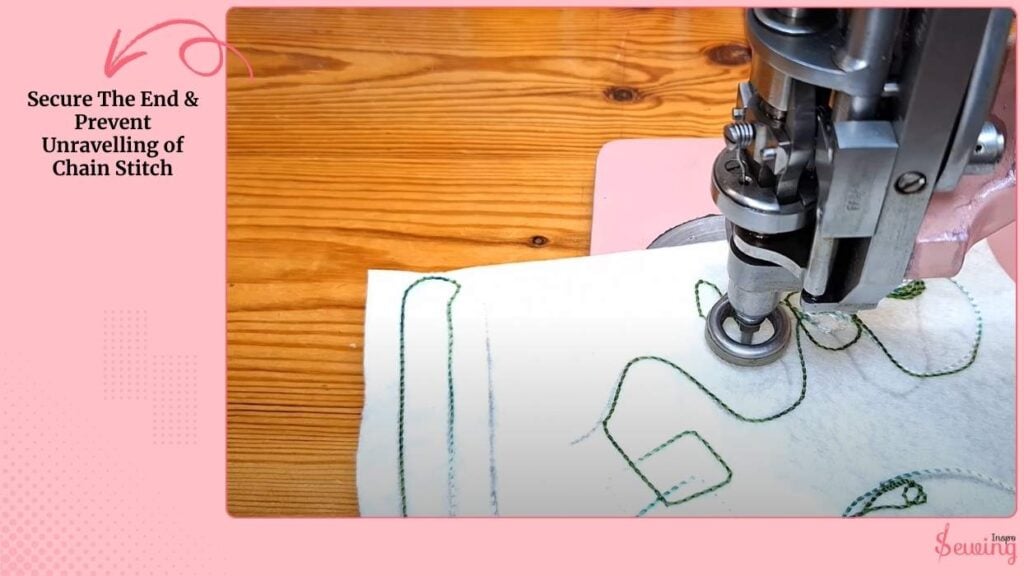
Secure The End & Prevent Unravelling Of Chain Stitch
Chain stitch can unravel if you just cut the tail. To finish, I either hand-knot the last loop by pulling the tail through several chain loops and tying, or I do a small hand-tie or back-tack if my model allows.
For extra security on high-wear seams, I add a tiny lockstitch or bar tack over the last few stitches with a different machine.
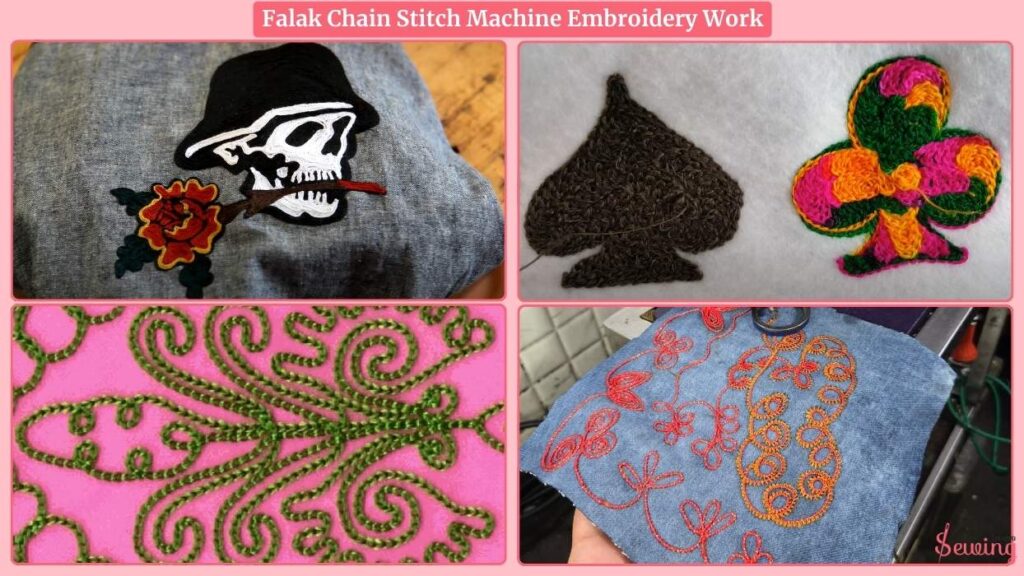
Falak Chain Stitch Machine Emberidry Work
Curious to know how it looks in fabric then here have a look-
How To Use Falak Chain Stitch Machine Youtube
Easy Threading Tutorial: Falak FK-114 Chainstitch Embroidery Machine
Common Troubleshooting Checks For Falak Chain Stitch Machine
If you are new to this machine, you may encounter some issues. For example,
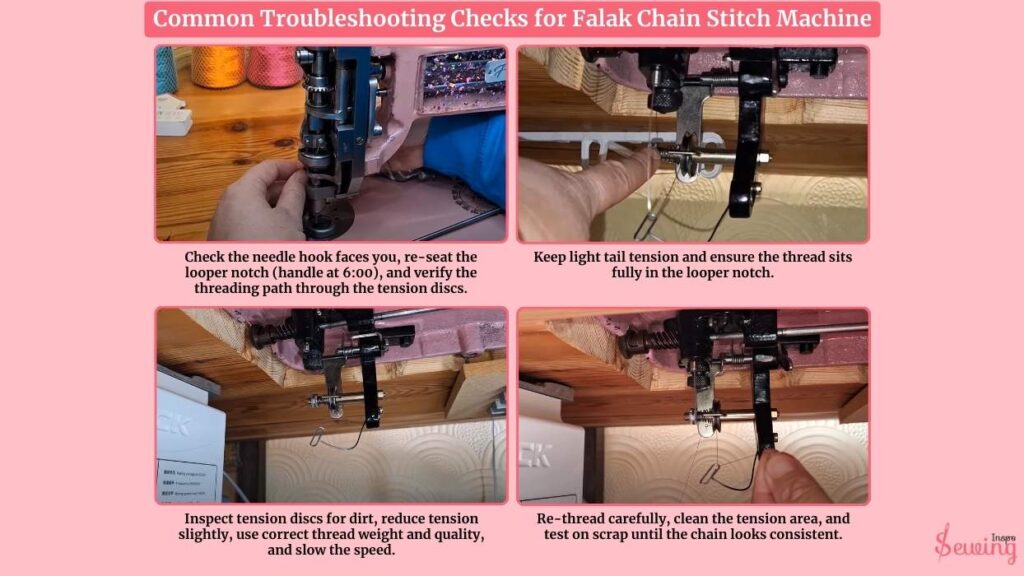
- Check the needle hook faces you, re-seat the looper notch (handle at 6:00), and verify the threading path through the tension discs.
- Keep light tail tension and ensure the thread sits fully in the looper notch.
- Inspect tension discs for dirt, reduce tension slightly, use correct thread weight and quality, and slow the speed.
- Re-thread carefully, clean the tension area, and test on scrap until the chain looks consistent.
Frequently asked questions
What type of thread works best?
A 12 wt cotton or embroidery thread is common. For decorative embroidery, polyester embroidery threads like Floriani also work well. Always choose smooth, strong threads to prevent looping issues.
How do I know if my needle is in the right position?
The needle hook must face you (the user) and align with the machine’s nose. If it’s turned even slightly, the looper won’t catch the thread.
Why does my chain keep unraveling?
Chain stitches naturally pull out if not secured. Always knot the end or pull the thread tail through the last few loops before cutting.
Finish-up
When I’m done, I trim thread tails, clean lint from the underside and tension plates, oil per the manual, and store the threading wire in a safe place (I tie it to a ribbon).
Regular oiling and keeping the tension faces clean saves more headaches than any adjustment ever will.


Leave a Reply