
I need to hem stitch every now and then. But I was bored with the old one. So I asked my grandma if there was another way.
She smiled that knowing smile, the kind that always means she’s about to drop some old-school wisdom. Then she disappeared into the attic and came back with a dusty wooden box.
But this time, she didn’t go the old-school way. She adopted the modern approach and said to use a sewing machine.
It’s easy. For example,
To do pad stitching with a machine, feed the fabric and canvas under the presser foot while the machine sews short diagonal stitches to shape and secure the layers.
I tried it—and wow. Clean edges, neat little holes, and no hand cramps. Turns out, grandma’s “another way” was better than anything YouTube had taught me.

Table of Contents
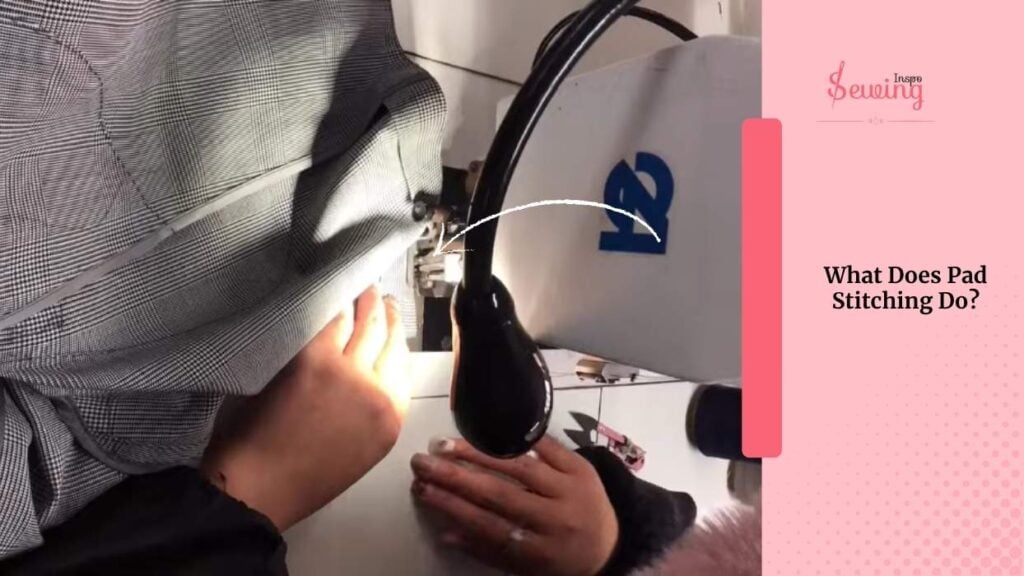
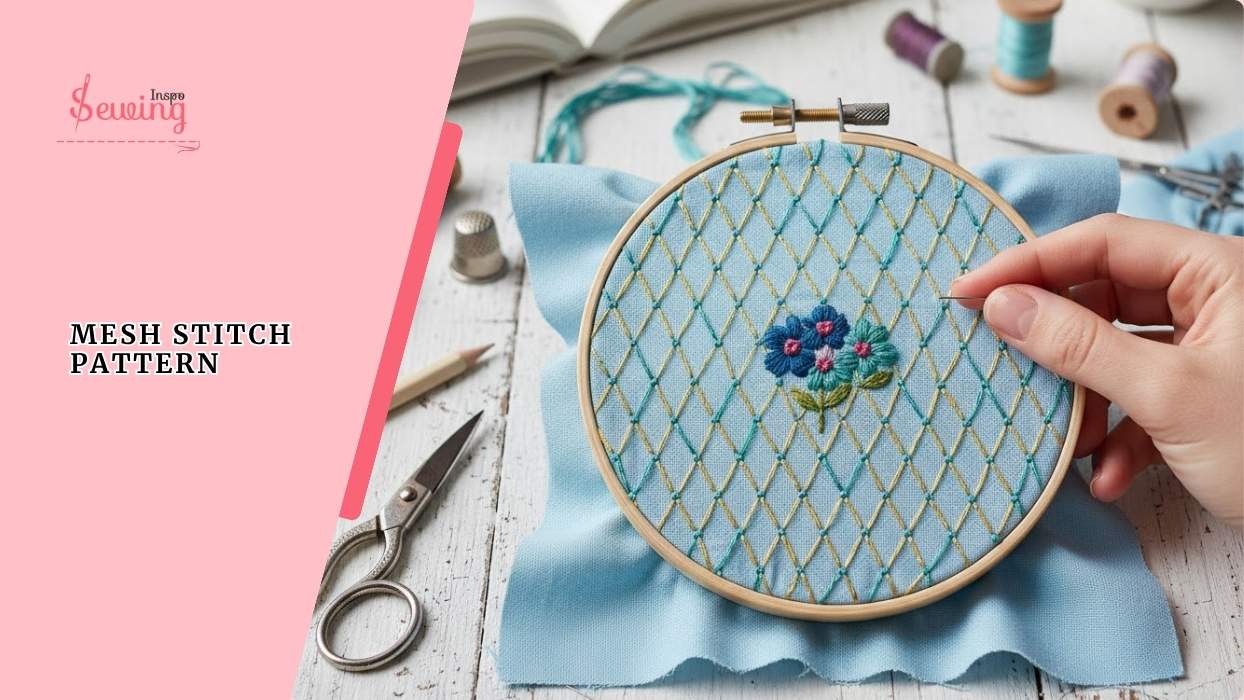
What Does Pad Stitching Do?
Pad stitching on a sewing machine is a technique used primarily in tailoring garments to add structure, shape, and support to specific areas of a garment. It is mainly used in collars, lapels, binding strips and jacket fronts. This is the most easist among Different types of stitches on sewing machine.
The stitch line mostly functions as an invisible stitch, similar to a pad stitch. That may sound similar to what is blind stitch sewing machine. But it isn’t.
So this stitch is perfect for all kinds of fabric pieces?
Well, I mostly used medium to heavyweight wool suiting fabric combined with a horsehair canvas for machine pad stitching. If you can’t get the fabric, then cotton fabric also works the best.
What Stitch Length Should I Use For Pad Stitching On A Sewing Machine?
For pad stitching on a sewing machine, I used a short stitch length of around 1.5 to 2 mm. This tight stitch length helps keep the layers firmly together without puckering the fabric.
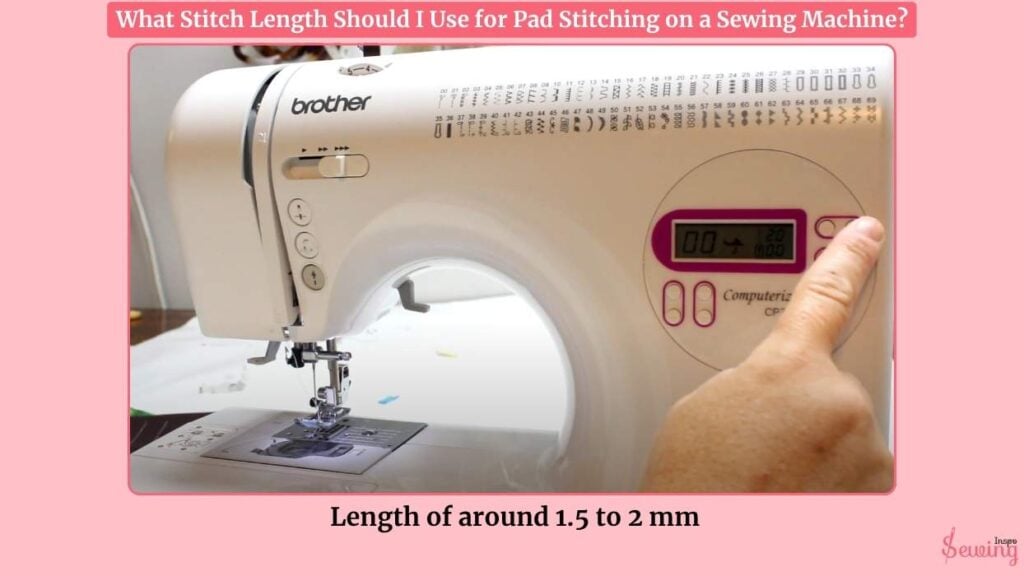
It gives a clean, strong hold that’s perfect for shaping collars and lapels. Too long stitches would make the pad stitching loose and jump.
How To Do Pad Stitching Machine?
To do the pad stitching machine, follow the 7 steps,
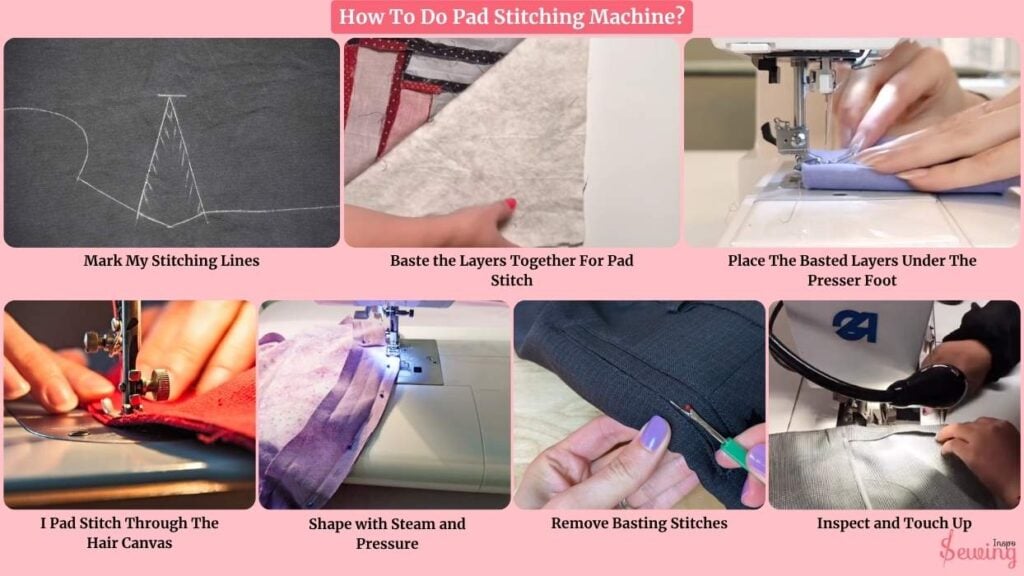
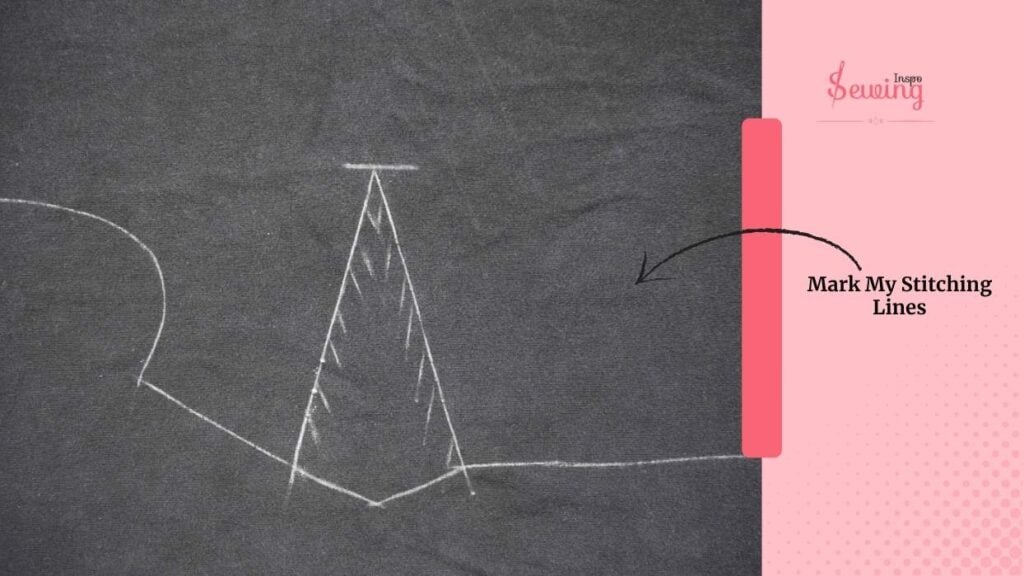
Mark My Stitching Lines
Using tailor’s chalk or a fabric marker, I draw horizontal guide lines across the hair canvas and base fabric. These are spaced about ½ inch (1.2 cm) apart. These lines will keep my stitches evenly spaced and in a straight line.
I also mark the roll line if I’m doing a lapel. This will guide the stitch angle for shaping. This marking technique also helps you to do sewing machine chain stitch.
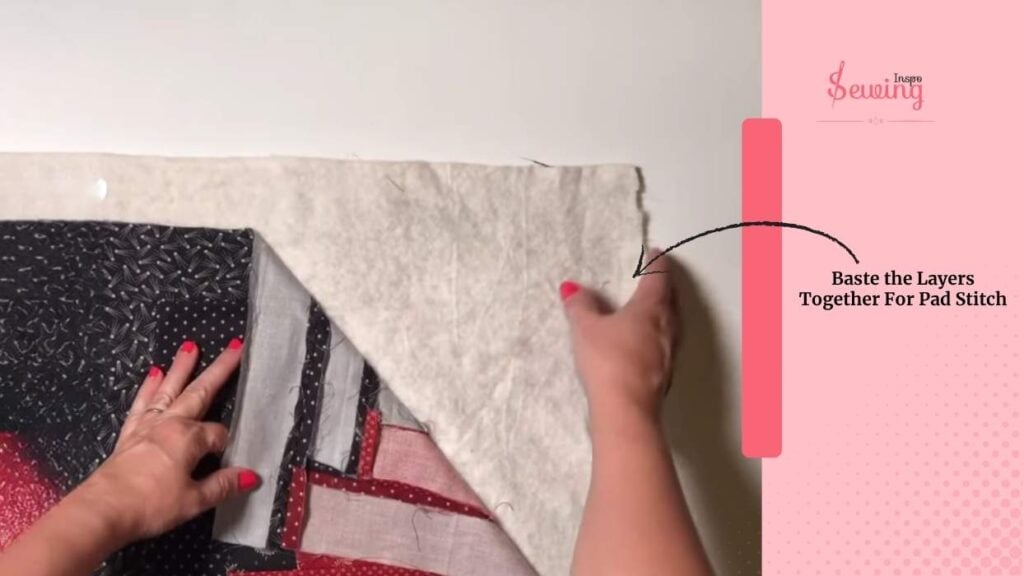
Baste the Layers Together For Pad Stitch
I align the hair canvas to the wrong side of my main fabric. I’m making sure the edges are even. Then I baste them together with long, loose stitches either by hand or with my machine using the longest stitch length. The longest stitch is most helpful for leather sewing, too.
This helps hold everything in place without shifting while I do the pad stitching.
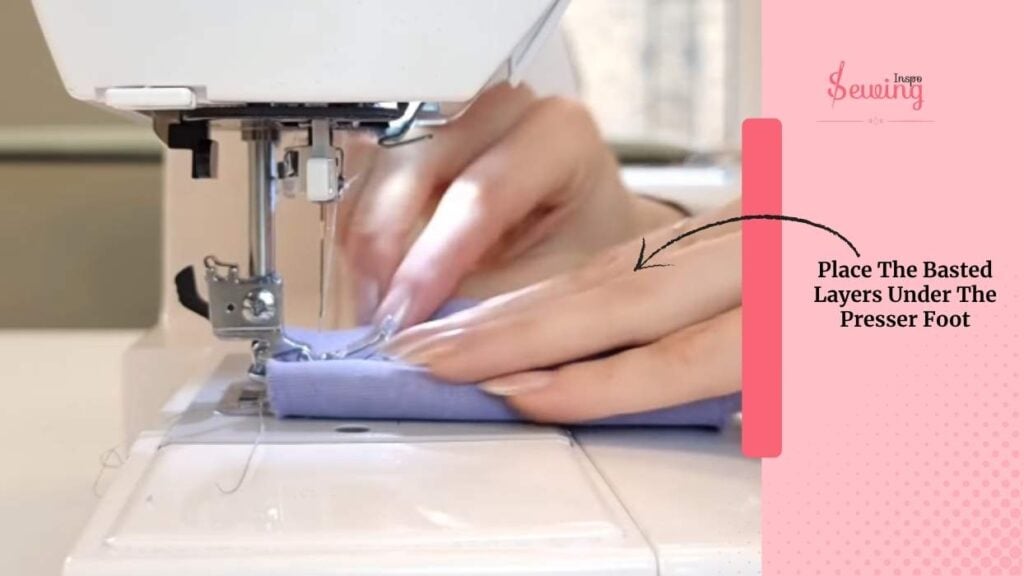
Place The Basted Layers Under The Presser Foot
I carefully place the basted layers under the presser foot. I start near one edge and ensure the piece is flat, not stretched, or warped.
I use my hands to gently guide the fabric without pulling, especially since hair canvas can be stiff.
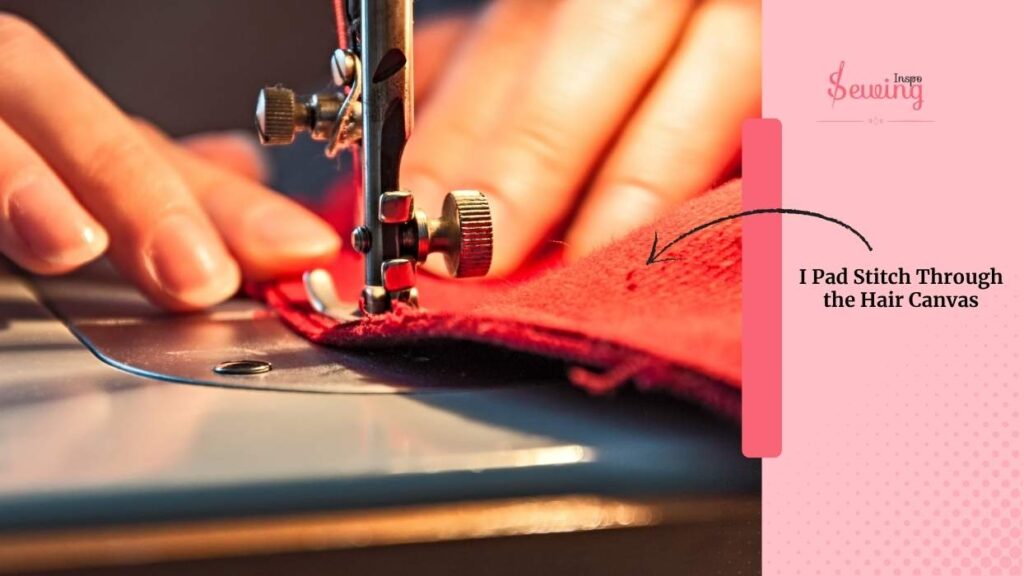
I Pad Stitch Through The Hair Canvas
I start stitching along my marked guide lines. These stitches go through the hair canvas and only slightly into the outer fabric. I want to catch just the surface to keep the outer layer smooth.
I stitch in one direction across the row, then move down to the next row. I maintain even spacing and an angled stitch if shaping a collar or lapel. This helped me a lot while doing appliqué.
If the area needs more shaping (like for a curved lapel),
I slightly angle my stitching so the pad stitches form a herringbone-like pattern.
Shape with Steam and Pressure
Once I’ve stitched several rows, I use steam from an iron to help mold the fabric. I gently press and curve the stitched piece over a tailor’s ham or sleeve roll. It will allow it to cool in shape.
This locks in the curve and gives structure, essential in tailored garments like blazers.
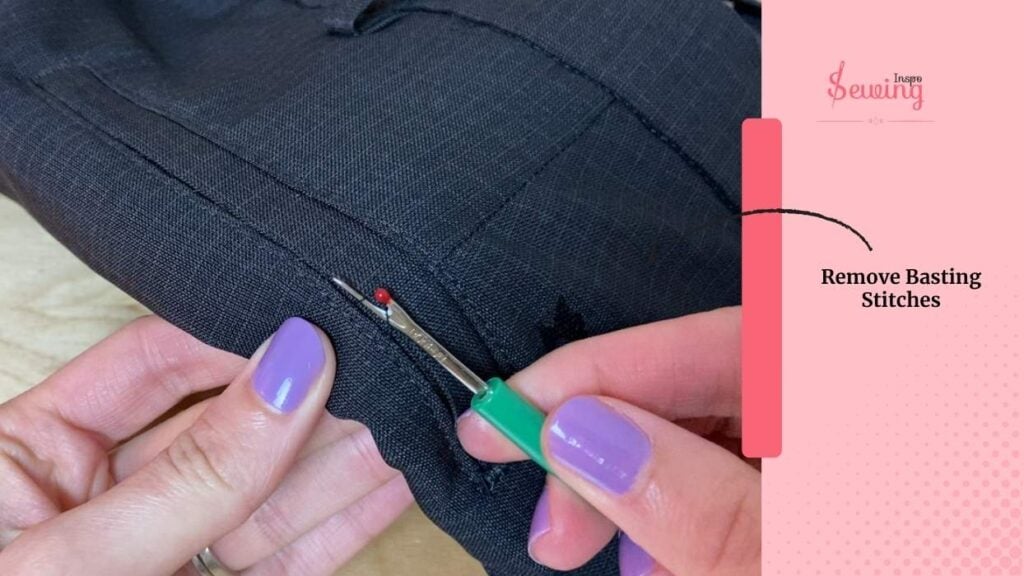
Remove Basting Stitches
After pad stitching and shaping are complete, I carefully remove the basting stitches. I make sure not to cut or pull the actual pad stitches. Now, the canvas is securely attached and shaped, and the piece is ready for final garment construction.
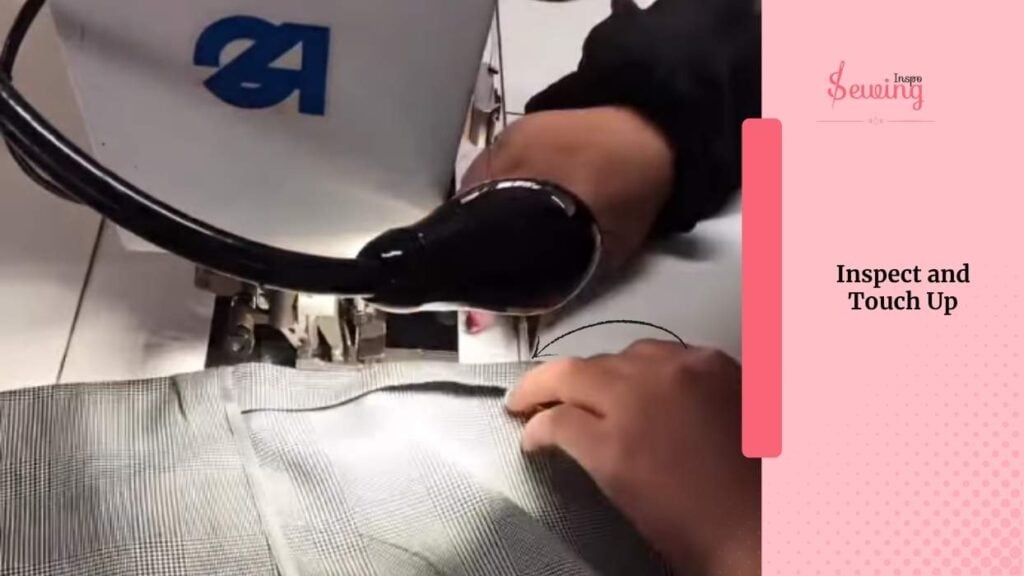
Inspect and Touch Up
Finally, I inspect my work, checking for any loose threads, uneven rows, or puckering. If needed, I go back and restitch or press gently again. The result is a firm yet flexible inner structure that gives my tailored piece a professional and lasting finish.
Watch my tutorial
If you are confused about anything, then watch this video tutorial
How To Do Pad Stitching Machine Pdf
What Is The Best Thread For Pad Stitching On A Sewing Machine?
For pad stitching on a sewing machine, I’ve found that polyester thread works best. It’s strong, smooth, and doesn’t break easily when sewing through thick layers like wool and horsehair canvas.
I usually go for a lightweight thread, like 50 wt, so it doesn’t add bulk, especially when stitching close rows.
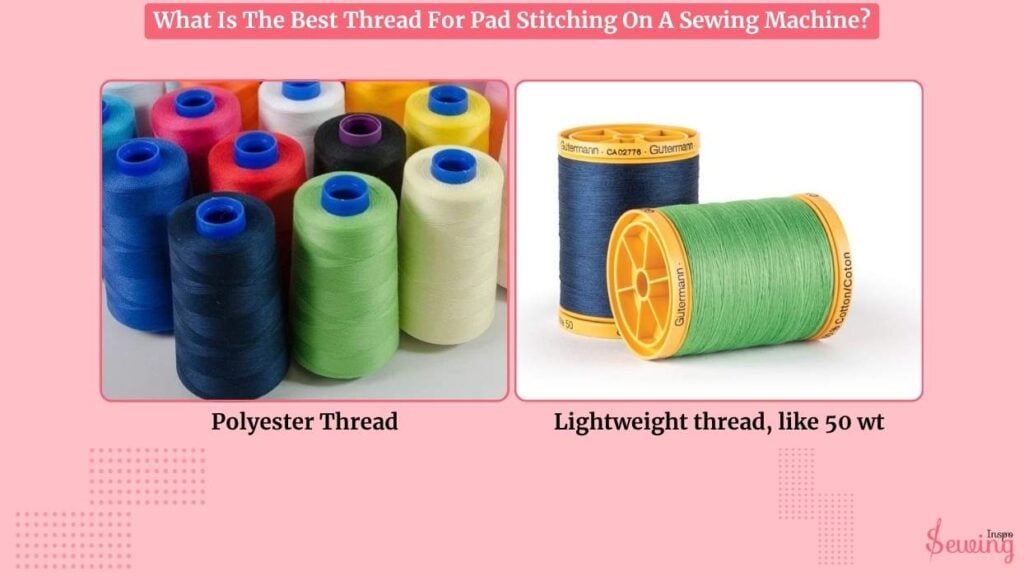
If I want the stitches to blend in, I match the thread color to the fabric. But if I need to see the stitches for training or basting purposes, I’ll use a contrasting color instead.
How Do You Choose The Right Thread For Pad Stitching?
When I choose thread for pad stitching, I think about three main things:
- Strength
- Weight
- Visibility.
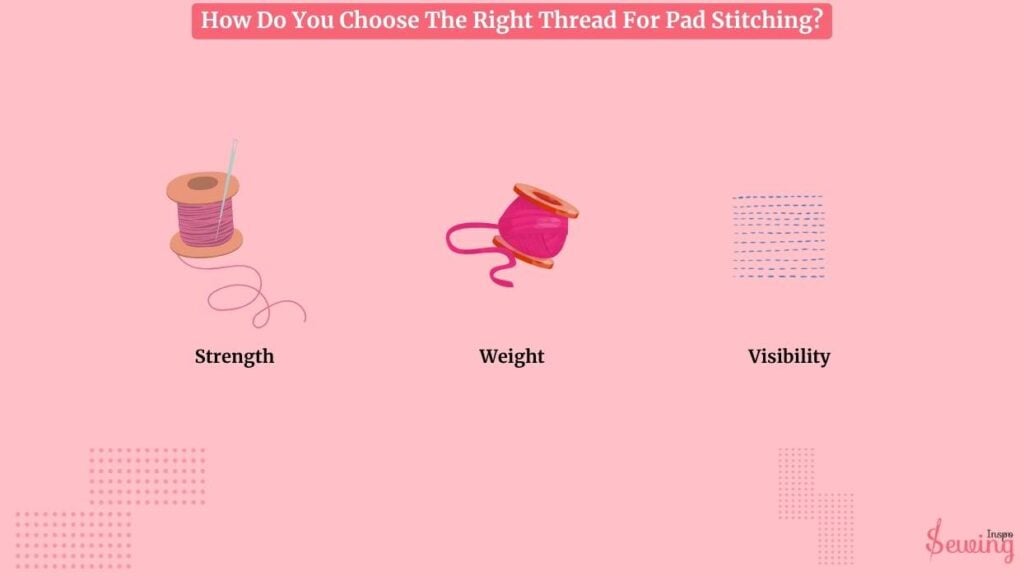
Basically, I aim for a thread that’s strong, smooth, and subtle. Unless I need it to stand out for training or a temporary structure.
Frequently Asked Questions
Do I need any special sewing machine?
Nope, not really. A regular domestic sewing machine with adjustable stitch length and a standard presser foot is sufficient. Just ensure your machine can handle thicker layers without clogging.
How do I avoid puckering when pad stitching by machine?
Good prep is everything. I baste or pin the fabric and canvas together carefully, lower the presser foot pressure, and sew slowly. Also, keeping the stitch length short and tension balanced makes a big difference.
Is machine pad stitching as good as hand pad stitching?
It depends. Hand pad stitching provides more control over shaping curves, such as lapels. But machine pad stitching is faster and consistent. It is ideal for production or casual tailoring, where speed takes precedence over perfection.
Conclusion
That’s how you can do the pad stitching machine. I love to do this whenever I want to do something different, but strong.
If you’re like me, then you can do this too.


Leave a Reply