
I saw a stitch around the fabric and a scream, ‘overcast stitch’
My friend looked at me, confused, and whispered, “Wait… isn’t that just an overhand stitch?” That’s when I realised how easy it is to mix them up.
Overhand
The main difference is that the overhand Stitch is a simple stitch that goes straight across the edge of the fabric. The overcast is looped continuously over the edge of the fabric, wrapping around to protect the edge from fraying.
So the next time you see a neat stitch around fabric, check: is it just touching the edge (overhand) or wrapping around it (overcast)? That little twist makes all the difference.

Table of Contents
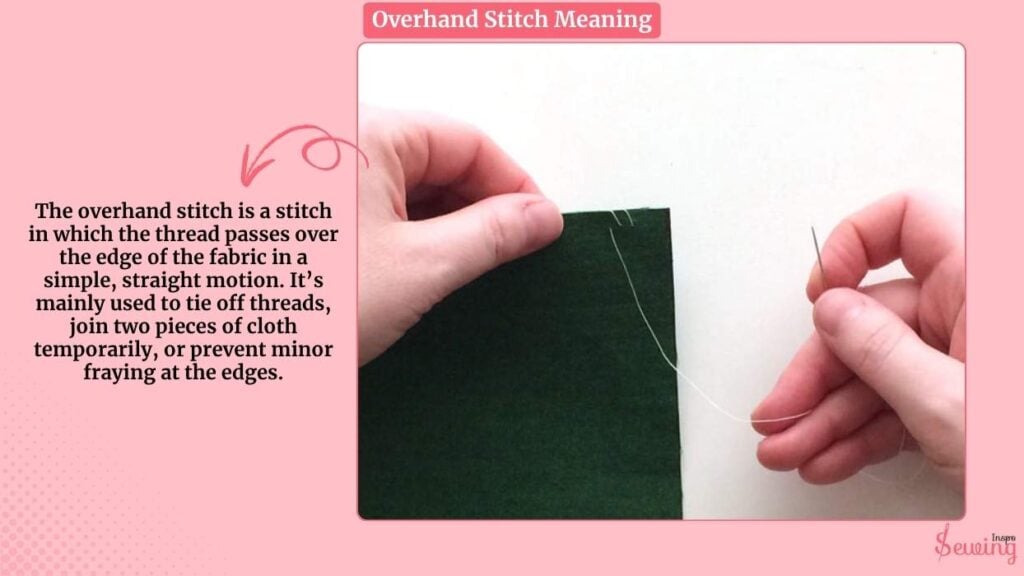
Overhand Stitch Meaning
The overhand stitch is a stitch in which the thread passes over the edge of the fabric in a simple, straight motion. It’s mainly used to tie off threads, join two pieces of cloth temporarily, or prevent minor fraying at the edges.
So, basically, it’s a simple, quick stitch that simply “dots” along the fabric edge, unlike the overcast stitch, which loops continuously around the edge to fully protect it.
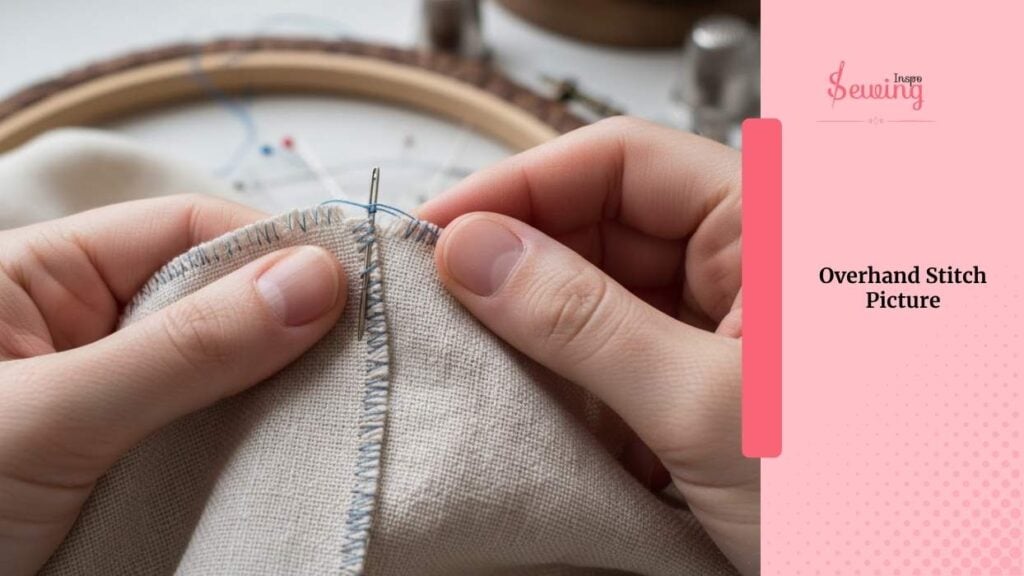
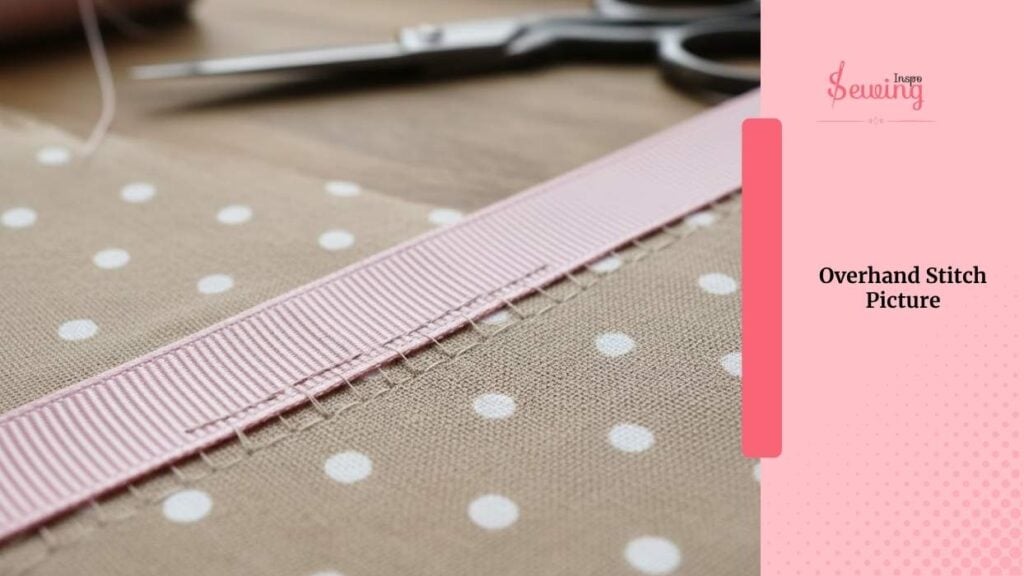
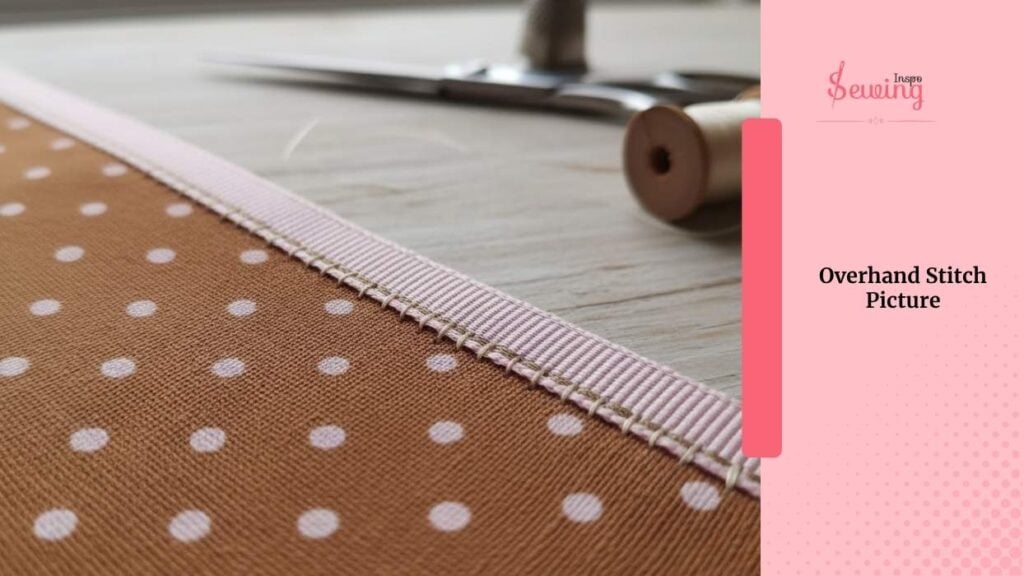
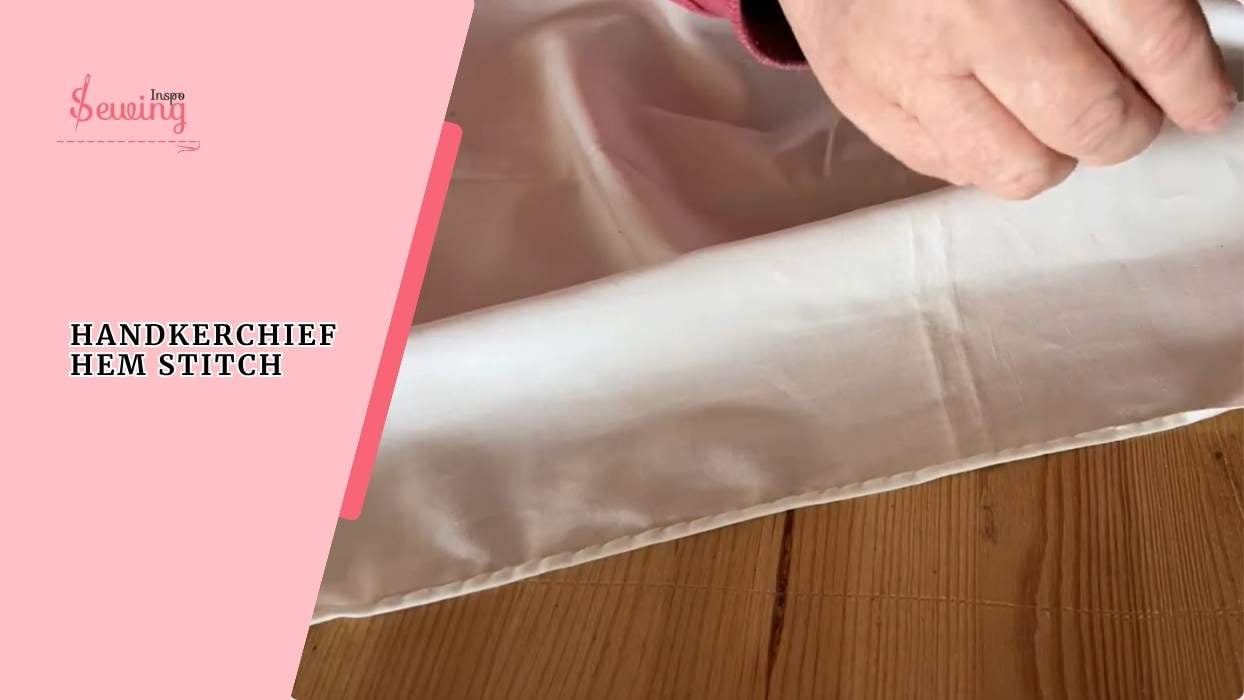
Overhand Stitch Picture
If you’ve just heard about this, it’s easy to get confused. So here, take a closer look-
Overhand Stitch Vs Overcast Vs Whip Stitch
People often mix those 3 stitches up. So I answered it here.
The overhand stitch is a simple straight stitch along the edge, mainly for tying off, the overcast stitch loops continuously around the edge to prevent fraying, and the whip stitch diagonally wraps around edges to join two fabric pieces securely.
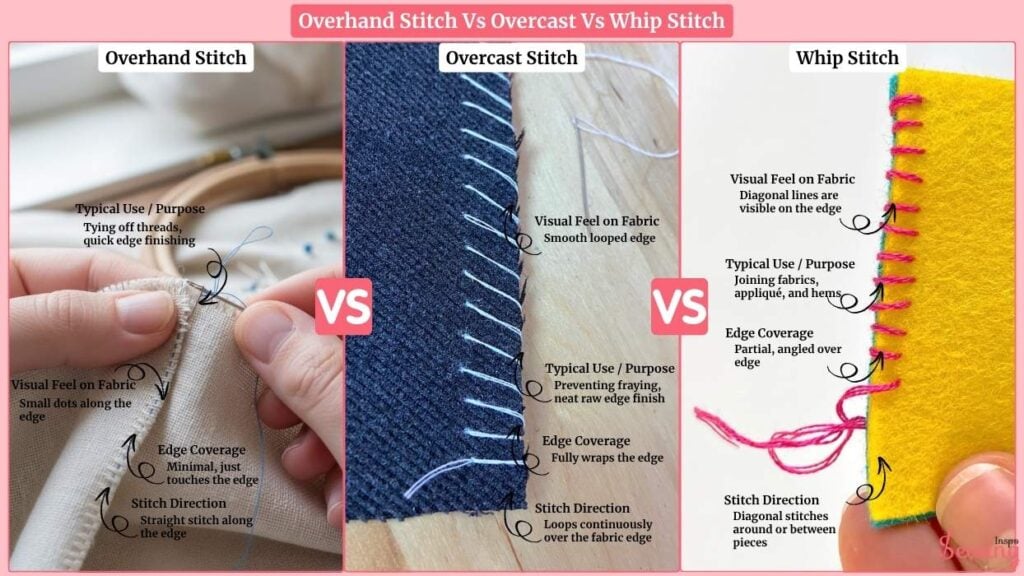
| Stitch Type | Stitch Direction | Edge Coverage | Typical Use / Purpose | Visual Feel on Fabric |
| Overhand Stitch | Straight stitch along the edge | Minimal, just touches the edge | Tying off threads, quick edge finishing | Small dots along the edge |
| Overcast Stitch | Loops continuously over the fabric edge | Fully wraps the edge | Preventing fraying, neat raw edge finish | Smooth looped edge |
| Whip Stitch | Diagonal stitches around or between pieces | Partial, angled over edge | Joining fabrics, appliqué, and hems | Diagonal lines are visible on the edge |
Overhand Stitch Tutorial
To do an overhand stitch, follow the steps-
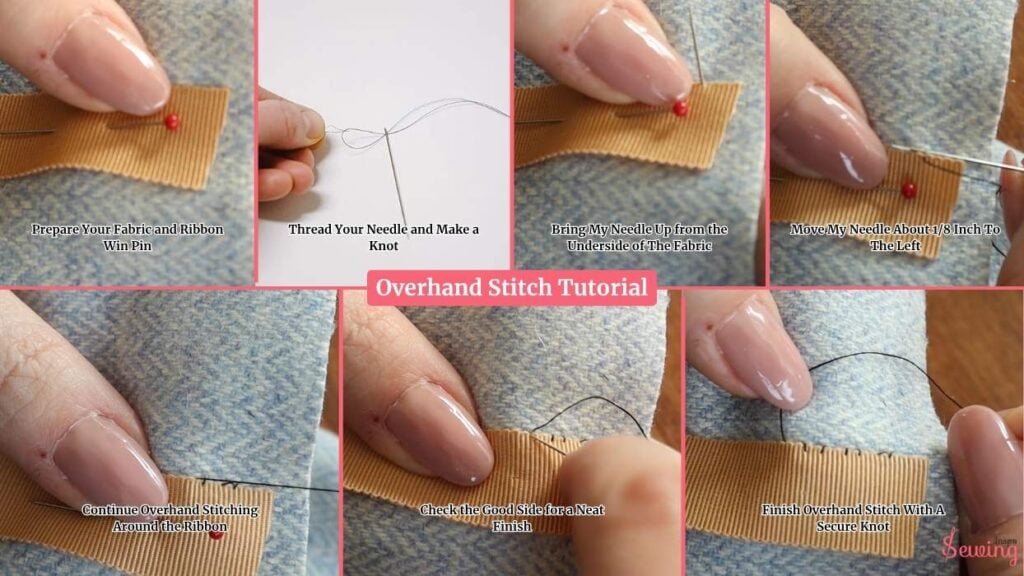
Prepare Your Fabric and Ribbon Win Pin
I start by choosing the “good side” of my fabric and ribbon. The sides I want visible.
For this demo, my fabric is brown with pink polka dots, and the ribbon has matching colors. I place the good side of the ribbon against the good side of the fabric so that they are perfectly aligned.
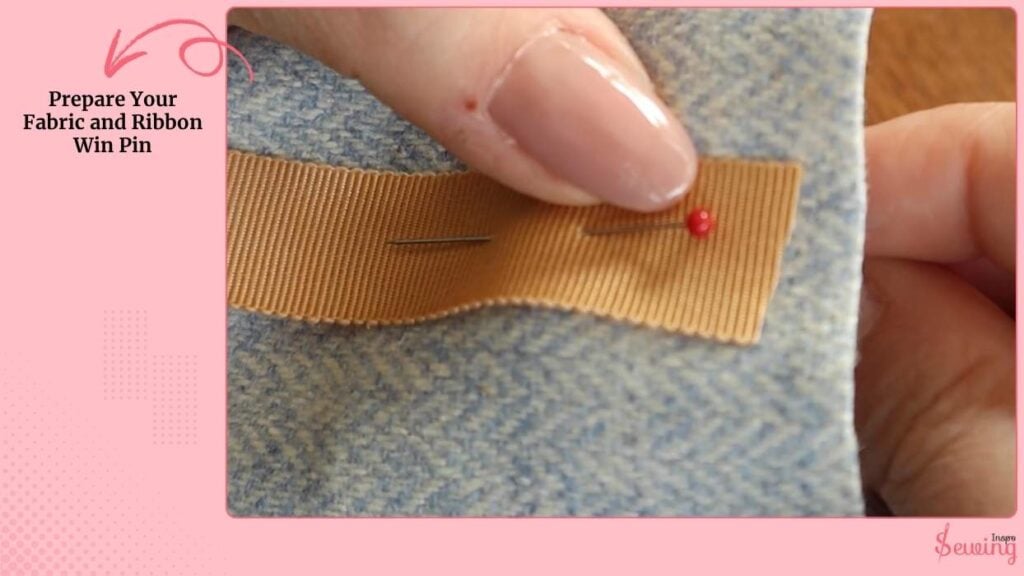
Next, I use a few pins to secure the ribbon along the edge of the fabric. This keeps the ribbon from shifting while I sew.
I make sure the pins are perpendicular to the edge so they’re easy to remove while stitching.
Thread Your Needle and Make a Knot
I take a single strand of all-purpose thread and thread it through my needle. At the end, I tie a small overhand knot.
This knot is important because it will be buried between the ribbon and fabric, keeping it invisible from the top side.
When threading, I make sure the thread is smooth, untangled, and long enough to complete the section I want to sew around 18–24 inches is usually perfect.

Too short and you’ll have to stop and start again; too long and it tangles.
Bring My Needle Up From The Underside Of The Fabric
I bring my needle up from the underside of the fabric, making sure the knot stays hidden between the layers.
The first stitch is tiny, picking up only a few threads of the fabric, usually 2–3 threads, depending on the fabric thickness.
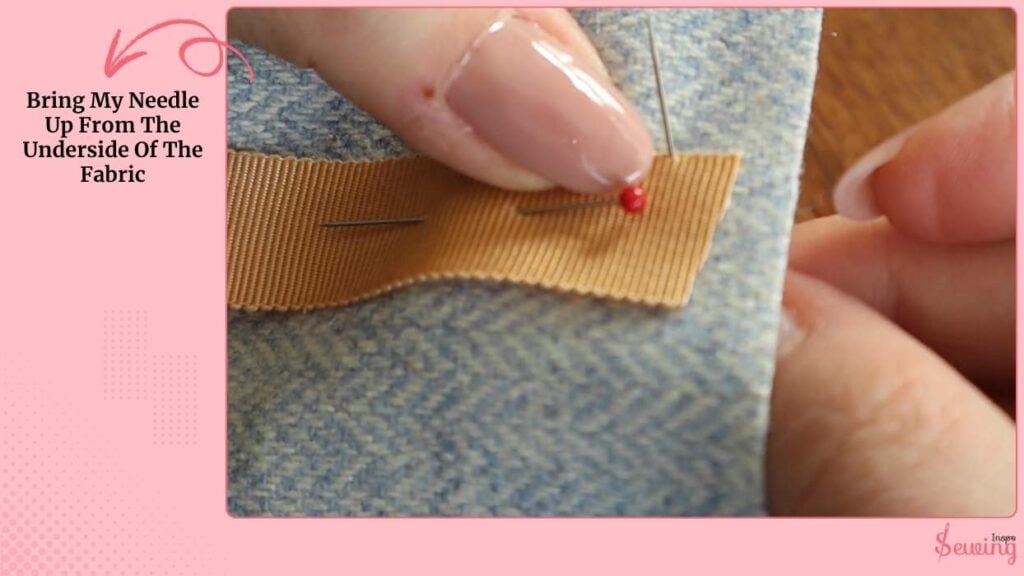
I keep the needle at a slight diagonal angle, coming up through the edge of the fabric and just into the ribbon edge.
This angle helps the stitch stay secure while remaining nearly invisible on the top side.
Move My Needle About 1/8 Inch To The Left
Now, I move my needle about 1/8 inch to the left and prepare for the next stitch. I pick up just a tiny bit of the fabric edge and the edge of the ribbon.
It keep the stitch as small as possible.
I ensure the spacing between stitches is consistent, as uneven stitches can make the ribbon look messy. The stitch is diagonal, snug, and tight, but I don’t pull the thread too hard, or the ribbon will pucker.
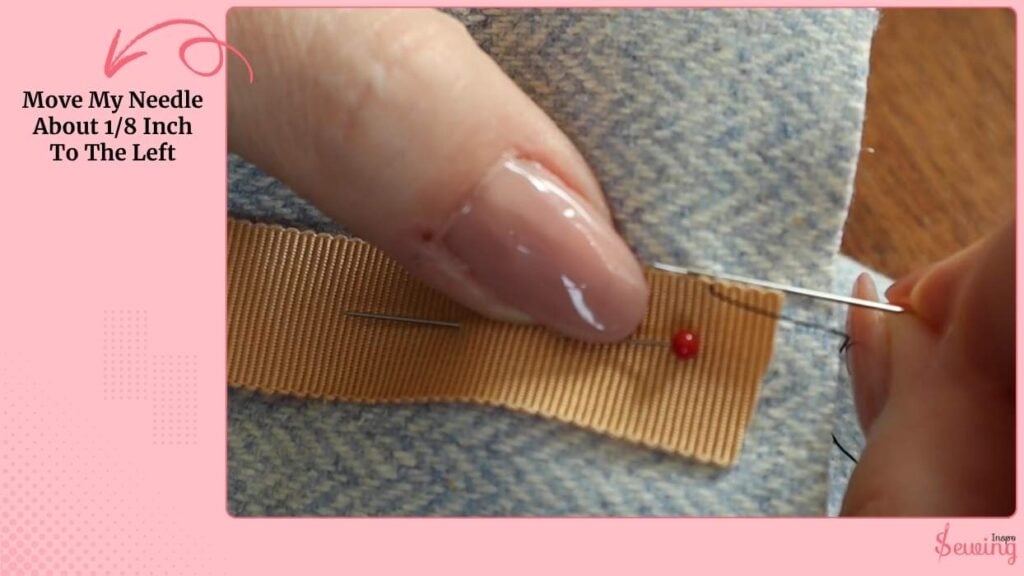
I repeat this process: bring the needle from under the ribbon, pick up a tiny edge on the fabric, move 1/8 inch, and continue.
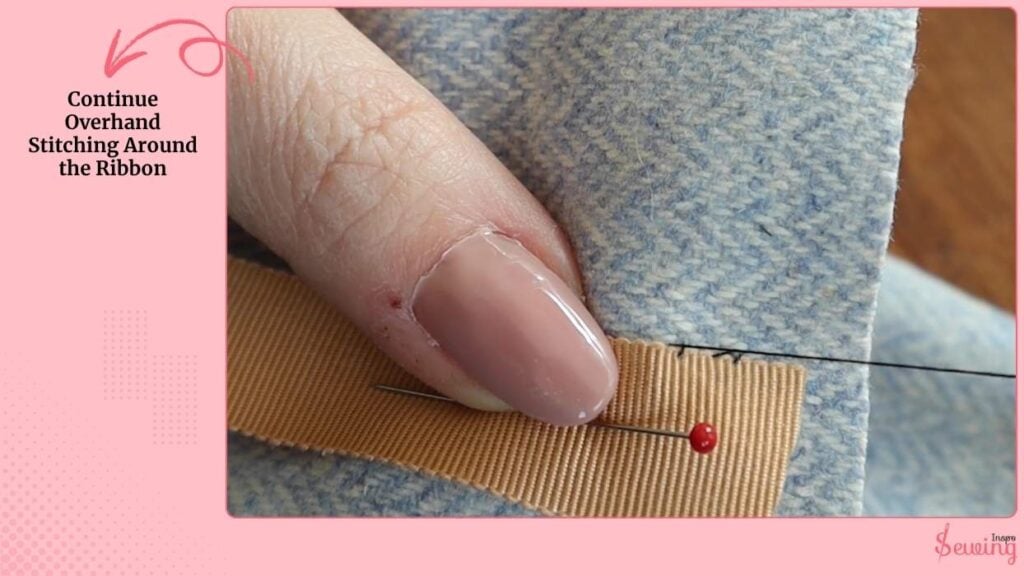
Continue Overhand Stitching Around the Ribbon
I continue stitching along the ribbon edge, keeping the stitches small, even, and snug.
I periodically check the top side of the fabric to ensure the stitches are neat and well-hidden.
If pins are getting in the way, I remove them as I go. I take my time. Overhand stitching is a slow but precise work, and rushing can result in uneven stitches.
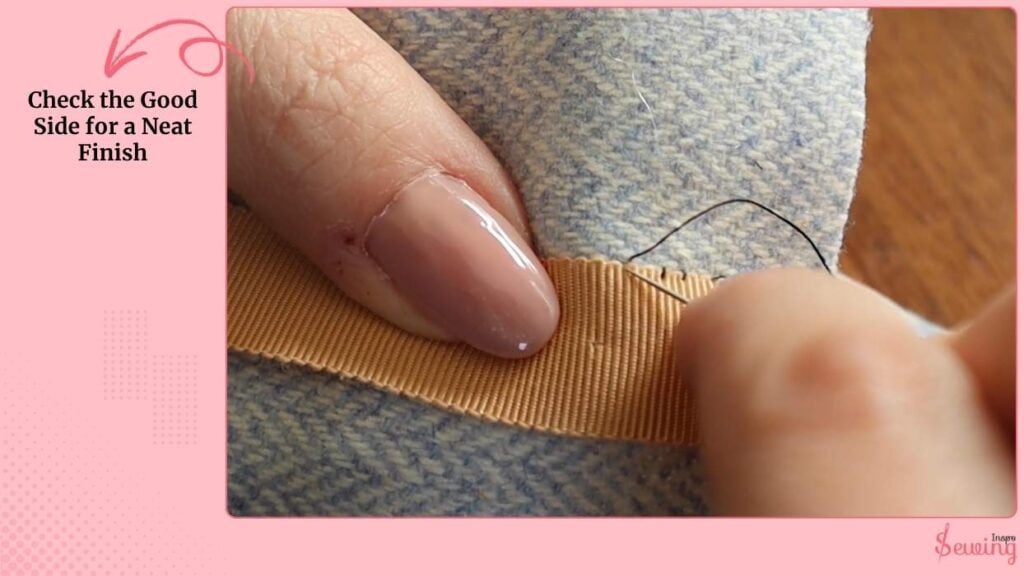
Check the Good Side for a Neat Finish
After a few inches, I flip the ribbon over to the good side of the fabric to see the results. The stitches should be nearly invisible, and the ribbon should look like it’s been professionally attached.
If the stitches are too loose, I can carefully tighten them by pulling the thread slightly from the underside. The goal is a smooth, flat ribbon edge with no puckering or gaps.
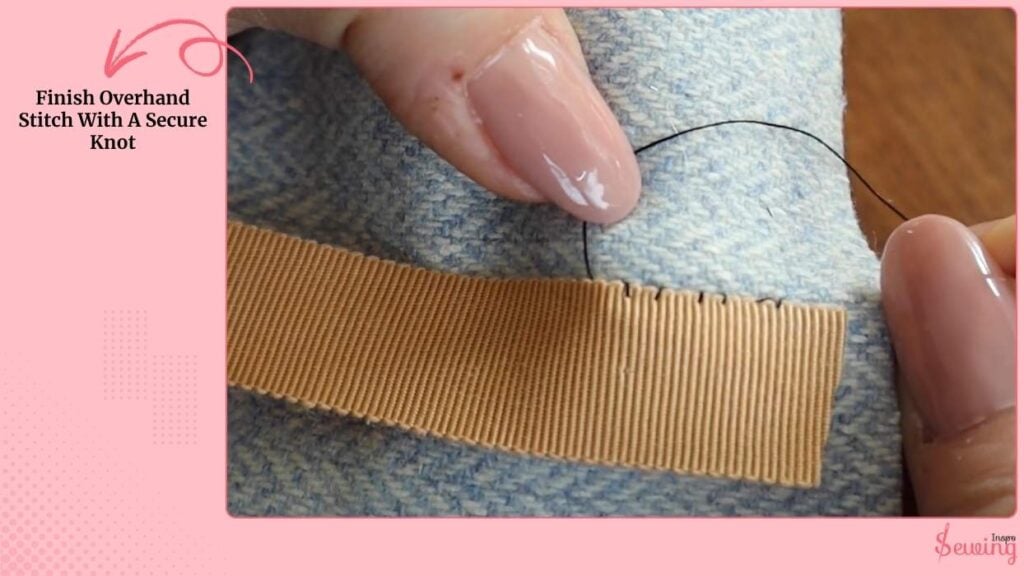
Finish Overhand Stitch With A Secure Knot
When I reach the end of the ribbon, I make a permanent knot to secure the thread. I bury the knot between the fabric and ribbon so it doesn’t show on the top side. It will secure the stitch.
After tying the knot, I cut the excess thread close to the knot.
The overhand stitch is now complete, and the ribbon is securely attached with tiny, even stitches that look almost invisible from the front.
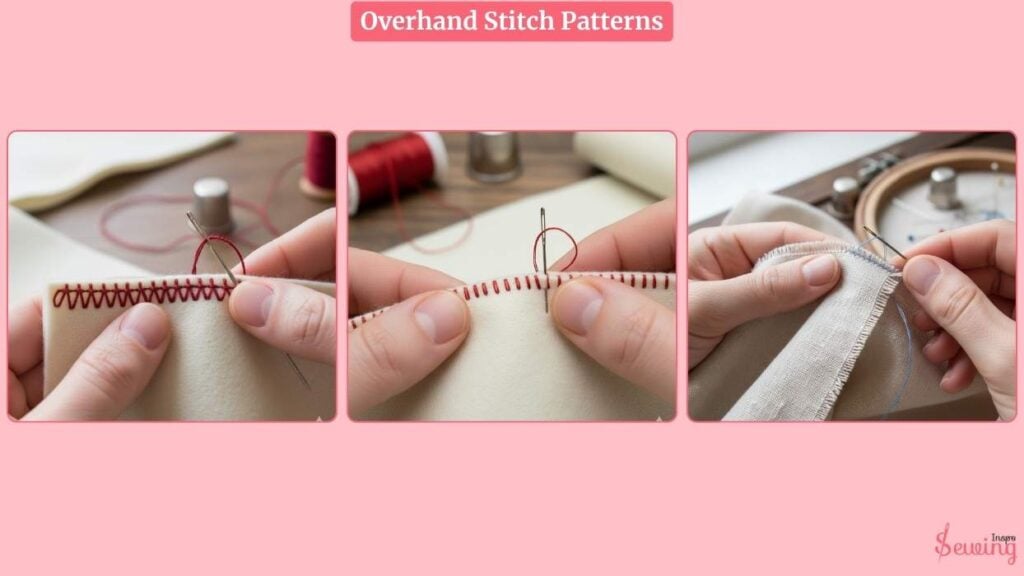
Overhand stitch patterns
I even did some patterns with it. Here, have a look,
Overhand Stitch Video
If you feel confused, then watch this overhand stitch sewing tutorial.
How to make an Overhandstitch – for seam stitch or appliqué
FAQ
How close should my stitches be?
Tiny and even is best—around 1/8 inch apart. Closer stitches make the ribbon more secure and look neater.
Can I see the stitches on the front side?
If done correctly, the overhand stitch should be almost invisible on the top side. The stitches are mostly hidden under the ribbon or fabric edge.
Should I knot the thread at the start and end?
Yes! Start with a small knot hidden between the layers and finish with a permanent knot at the end to prevent the stitches from unraveling.
Conclusion
The overhand stitch is a simple yet essential hand stitch that keeps fabric and ribbon edges neat and secure. By taking small, even stitches and burying your knots, you can attach fabric.
Remember to go slow, keep your stitches consistent, and check your work on the good side for a flawless finish.
With a little practice, the overhand stitch becomes a quiet hero of hand sewing, giving your projects a clean, polished look.

Leave a Reply