
Honestly, framing cross stitches is expensive and time consuming. And you can’t do much with framing rather than mounting it on the wall. That’s when I thought, why not make cross stitch pillow!?
It will be a unique pillow cover and will also be usable. So I grab my cross stitch piece and a pillow case and just,
Pillow
Sew a cross-stitch pillow by stitching your finished design to a fabric backing, leaving an opening, stuffing it, and hand-sewing the gap closed.
Seeing me talking like this, she insisted I show how I do it. So I say, why not? Let me show you how to put cross stitch on a pillow.

Table of Contents
What Is The Best Fabric For Cross Stitch Pillows?
For me, the best fabric for cross-stitch pillows is evenweave! It’s soft and smooth, so my pillows have a polished, elegant look—way less stiff than Aida’s. That’s why even weave is my favourite for all types of cross stitches.
The finer grid makes my stitches look crisp and detailed, especially when stitching “over two.” Plus, it drapes beautifully, so the finished pillow looks natural instead of boxy. And let’s not forget the color options so many gorgeous shades to choose from!

But if you want that classic,
Traditional vibe, Aida cloth (usually 14 or 16 count) is perfect. It’s easy to stitch on and gives a structured look.
Aida cloth is the best choice for cross stitch pillows. It’s soft & durable, so your beloved pillow will stick with you forever.

How To Make A Cross Stitch Pillow?
Since I was sewinginspo class, I decided to make a small pillow. Cause big covers are time-consuming, and I didn’t have that much time on my hands. So i decide to go easy.

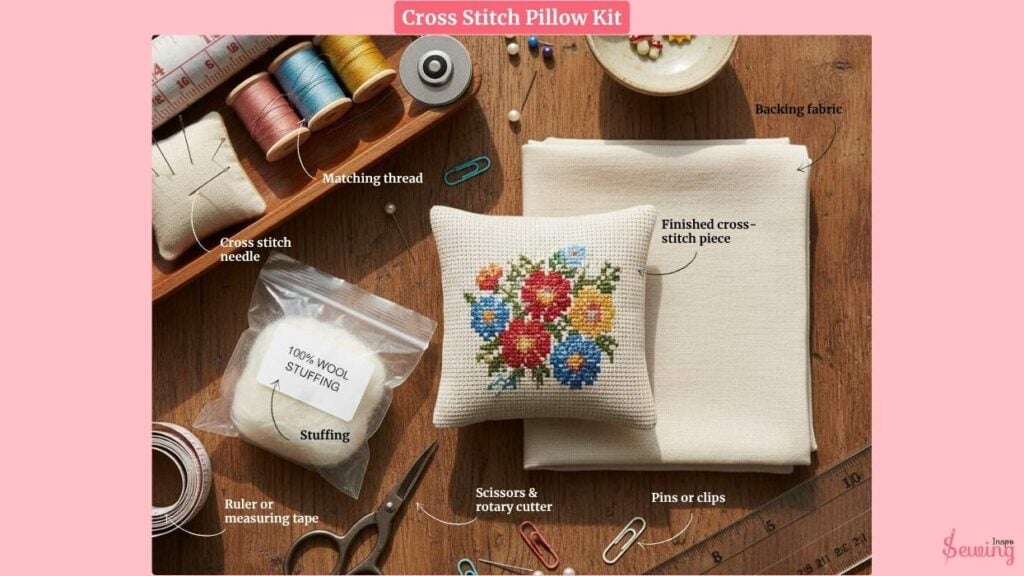
Gather My Cross Stitch Pillow Kit
Before I begin, I make sure I have everything ready with cross stitch kits:
- Finished cross-stitch piece – any size works, but small designs (around 24×24 stitches) are great for pillows.
- Backing fabric – cotton, linen, or wool (I use scraps from previous projects).

- Stuffing – 100% wool or polyfill works best for a soft, full pillow
- Cross stitch needle – depending on how I want to stitch it together.
- Matching thread – to sew the pillow shut.
- Scissors & rotary cutter – for trimming fabric neatly.
- Ruler or measuring tape – to make sure my cuts are straight.
- Pins or clips – to keep the fabric from shifting while sewing. It can be helpful if you are doing cross stitch wedding.
- Decorative buttons (optional) – I love adding cute little buttons for extra charm.
If you wanna avoid the tool gathering hassle then use cross stitch packs. The packs will have everything you need. That’s why i love the cross stitch pillow kit so much. It makes the work easy.

Square Up My Cross-Stitch Piece
Before I sew, I trim my finished cross-stitch to the correct size.
I lay my cross-stitch piece flat on a cutting mat. I measure ¾ inch past the outermost stitches on all four sides. This extra fabric will be used for seams or you can use this for needlepoint too.
I carefully trim the edges Using a rotary cutter and ruler, ensuring everything is straight and even. You can do this for the sewing method cross stitch, too.

Cut and Attach the Backing Fabric
Now, I prepare the backing fabric for my pillow’s back.
I pick a fabric that complements my cross-stitch. I love using coordinating cotton prints or wool pieces. I cut the backing fabric slightly larger than my cross-stitch piece (about ½ inch extra on all sides). This prevents shifting while sewing.
And then,
I place the backing fabric right-side down on top of my cross-stitch piece, aligning the edges as best as I can. I use pins or clips to keep everything in place before sewing.

Sew the Pillow Together
Now, it’s time to stitch the pillow. I sew around all four edges using a ¼-inch seam allowance. I sew around the edges twice instead of backstitching to reinforce the seams. You can try French knot cross stitch too. It will secure and also give you a unique look.
But before trimming the fabric,
I cut a small slit in the back fabric (NOT through the cross-stitch) to create an opening for turning the pillow inside out later.

Tip: I haven’t trim the extra backing fabric yet, but it gives me more control when sewing. I’ll trim it after stitching!
Trim & Turn the Pillow Right-Side Out
I carefully trim excess fabric around the edges to reduce bulk. I clip the corners at a diagonal (without cutting into my stitches) so they turn out nice and crisp.
Through the small slit in the back fabric,
I gently turn the pillow inside out, pushing the corners out carefully with my fingers or a crochet hook.

Tip: I avoid using anything too sharp (like scissors) to push the corners, so I don’t accidentally poke through the fabric.
Stuff the Pillow
I use 100% wool stuffing (or polyfill) and pull it apart to make it fluffy. Starting with the corners first, I push stuffing inside. I make sure they’re firm and well-shaped.
I continue adding stuffing, working from the outside toward the center then until the pillow is full but still soft enough to squish.

Sew the Opening Shut
I use matching thread, I thread a needle and knot the end. I use a whip stitch or invisible ladder stitch to sew the slit shut, keeping my stitches close together.
Once done, I knot the thread securely and trim any excess.

Add Wool & Buttons (Optional)
For extra charm, I sometimes add a wool patch and decorative buttons!
I cut a small square of wool fabric big enough to cover the back stitching.
Using EZ Steam or Wonder Under, I iron the wool onto the back to secure it.
I select three coordinating buttons (small, medium, and large) and attach them using a needle and thread.
That’s it—my adorable cross stitch pillow is complete! I love making these pillows in different seasonal designs to switch them out throughout the year. Now, onto the next one! If you are worried about fraying, do cross stitch overcasting edges.
That’s how to turn cross stitch into a pillow.

Cross Stitch Pillow Tutorial
Cross Stitch Pillow Bottom Sewing Tutorial
How To Weave A Pillow?
If you want to give a special touch to your pillow, then do a weave effect. It’s not as hard as it sounds. Here is how I do it,
- Use a frame loom or rigid heddle loom with cotton or sturdy warp threads.
- Go with soft yarn or fabric strips for the weft.
- Use an over-under pattern (plain weave) until you reach the desired size.
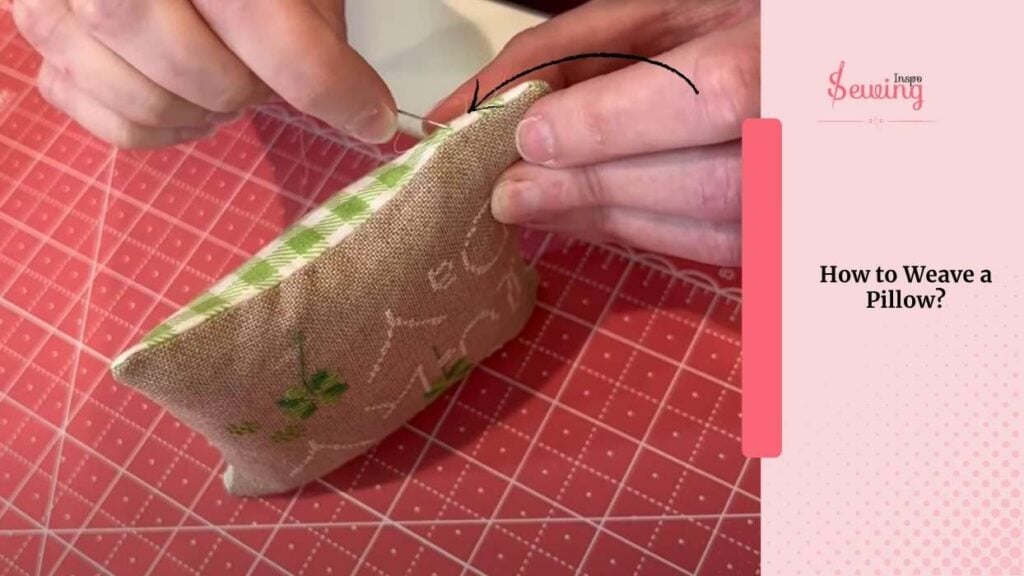
- Carefully remove the woven piece, tying the warp ends to secure it.
- Fold in half or use a backing fabric, then sew three sides.
- Add pillow stuffing or a pillow form.
- Hand-stitch or use a machine for a clean finish.
And boom—woven pillow done!
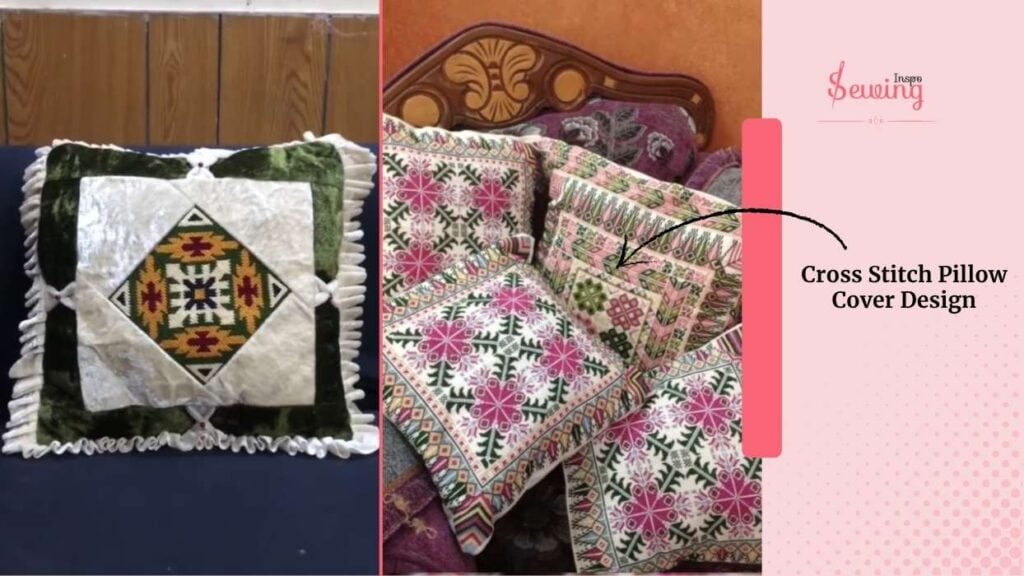
Cross Stitch Pillow Cover Design
Doesn’t that pillow look so cute 🥺? Yes, it does. So why will you stop with that?
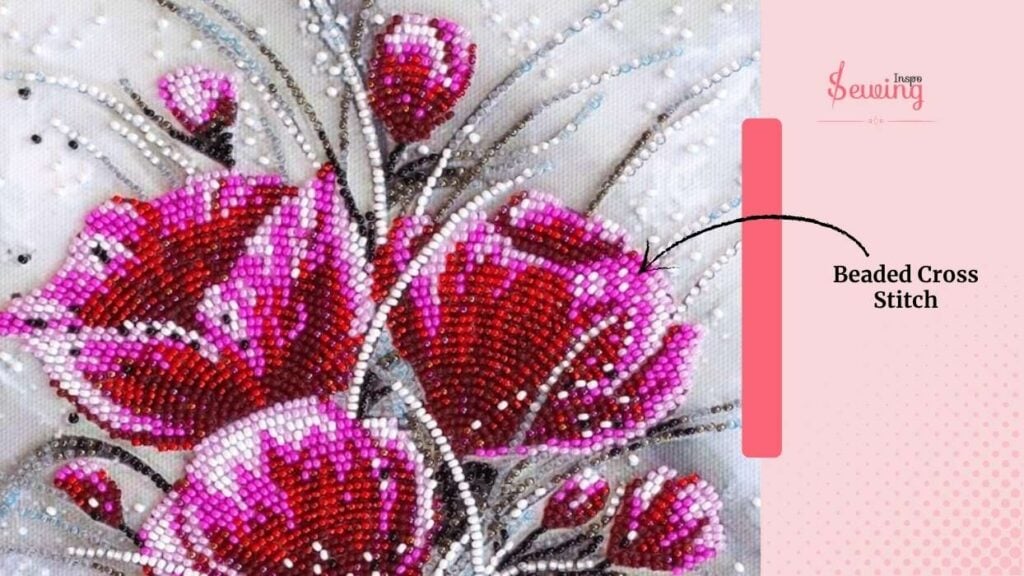
Here are a few design ideas for you to try on, or you can do beaded cross stitch. This will give a unique look & texture.
- Floral Patterns – Roses, daisies, or modern botanical designs. You can try beads cross stitch with it.
- Farmhouse Style – Gingham borders, farm animals, rustic quotes.

- Seasonal Themes – Pumpkins, snowflakes, hearts, or Easter bunnies.
- Inspirational Quotes – Motivational words with stylish fonts and borders.
- Geometric Designs – Triangles, diamonds, and abstract patterns.
- Personalized Monograms – Names or initials with decorative accents.
- Whimsical Animals – Cute foxes, owls, cats, or woodland creatures.
- Patchwork-Inspired – A mix of small motifs in a quilt-like pattern.
Free Cross stitch pillow pattern
Loved that pillow!? Ok, then use these pattern ideas to make your own creative pillowcase.


Cross Stitch Pillow Patterns Free!
If you want to try it, download this PDF and test it on your pillow cover.
Frequently Asked Questions
What thread should I use for stitching?
Cotton embroidery floss (like DMC) is the most common choice, but silk or variegated floss can add a unique touch.
How do I finish a cross-stitch pillow cover?
After stitching, trim the fabric, sew it to a backing fabric, and add stuffing or an insert. You can also add a zipper or buttons for easy removal.
Can I wash my cross-stitch pillow?
Yes, but hand-washing is best to prevent colors from bleeding. Use mild detergent and air dry.
How do I prevent fabric from fraying?
Use a serger, zigzag stitch on a sewing machine, or apply fabric glue to the edges before sewing.
Did You Make A Cross Stitch Pillow?
So yes, that’s how I use a cross stitch. And trust me, each pillow cover is stunning. Whoever sees those pillows always asks me where I get it. And each time I say, ‘Oh i made those. Do you want me to make you a one? 😜’


Leave a Reply