
I still remember the first time I tried a stem stitch. I was sitting by my sewing table with a half-finished floral design, and every line looked too flat.
I loved this as soon as I laid my eyes on it.
The stem stitch flows like a smooth, twisted rope, perfect for flower stems, vines, or delicate outlines like a wave pattern. At 1st it may feel overwhelming. But if you do it rightly, then it won’t be.
Stem Pattern
To do a stem stitch in embroidery, bring the needle up through the fabric, take a short stitch forward, and bring it back up halfway along the previous stitch to create a smooth, twisted line.
I know it sounds simple and won’t be much. But it looks great if you do it in a pattern.
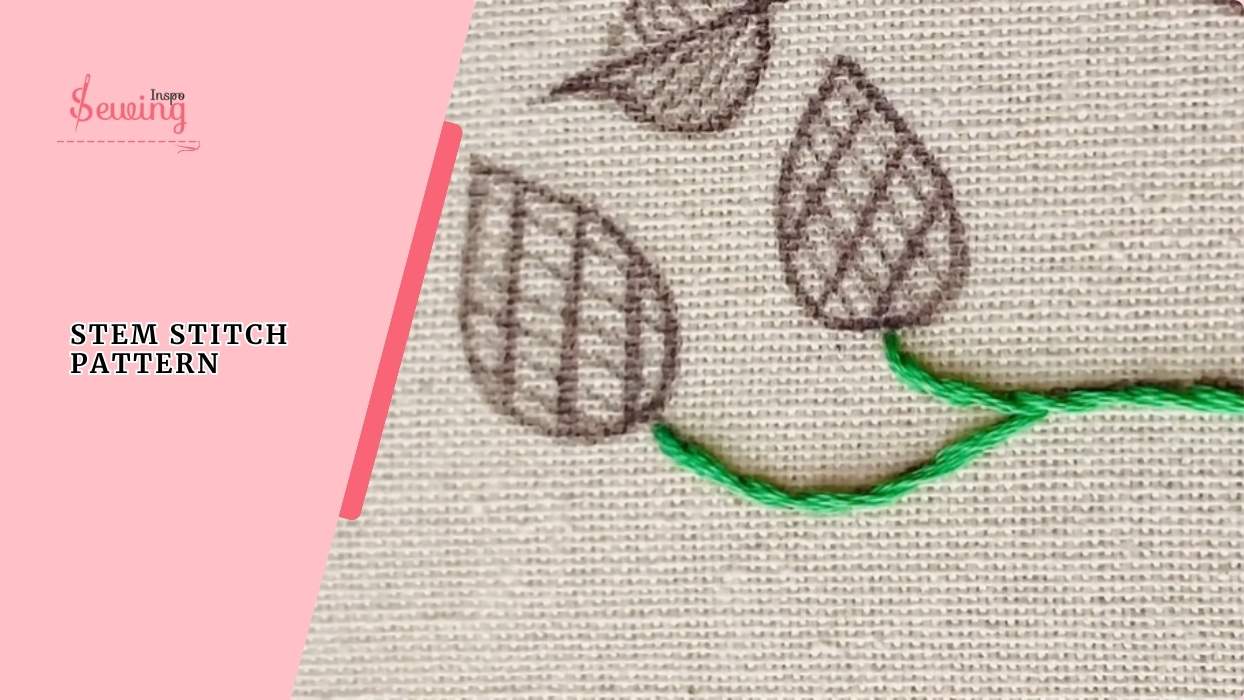
Table of Contents
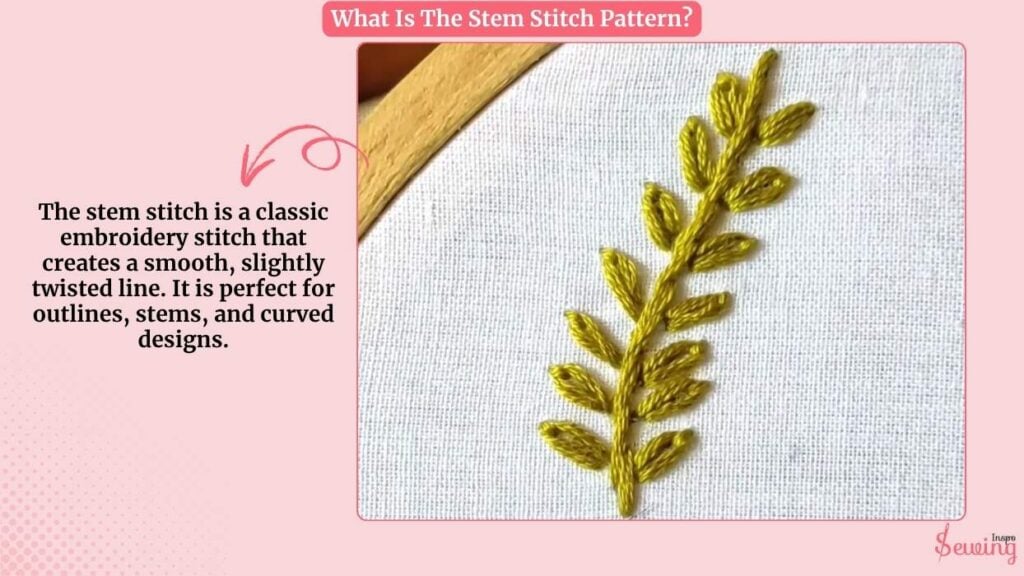
What Is The Stem Stitch Pattern?
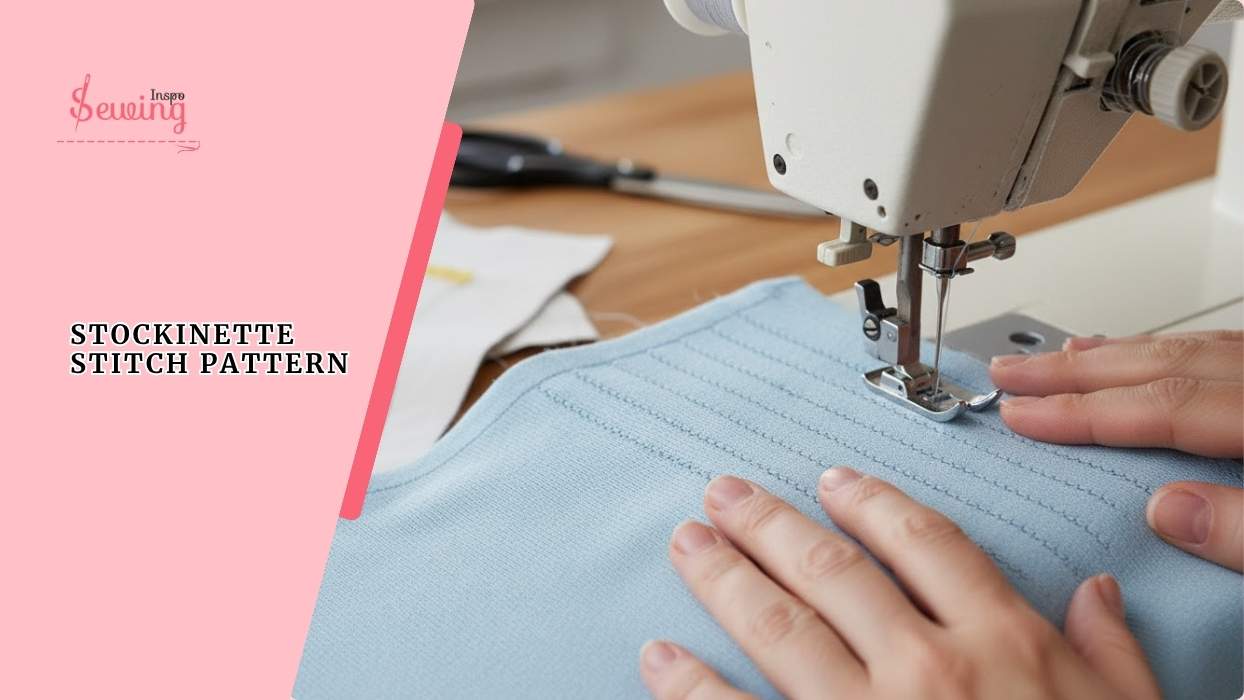
The stem stitch is a classic embroidery stitch that creates a smooth, slightly twisted line. It is perfect for outlines, stems, and curved designs. It is more beautiful than the stockinette stitch pattern.
It’s made by bringing the needle up through the fabric, then stitching slightly ahead and bringing it back up halfway along the previous stitch. This overlapping motion gives it that neat, rope-like texture.
Let’s Make A Stem Stitch Flower
To make a stem stitch pattern, follow the steps-
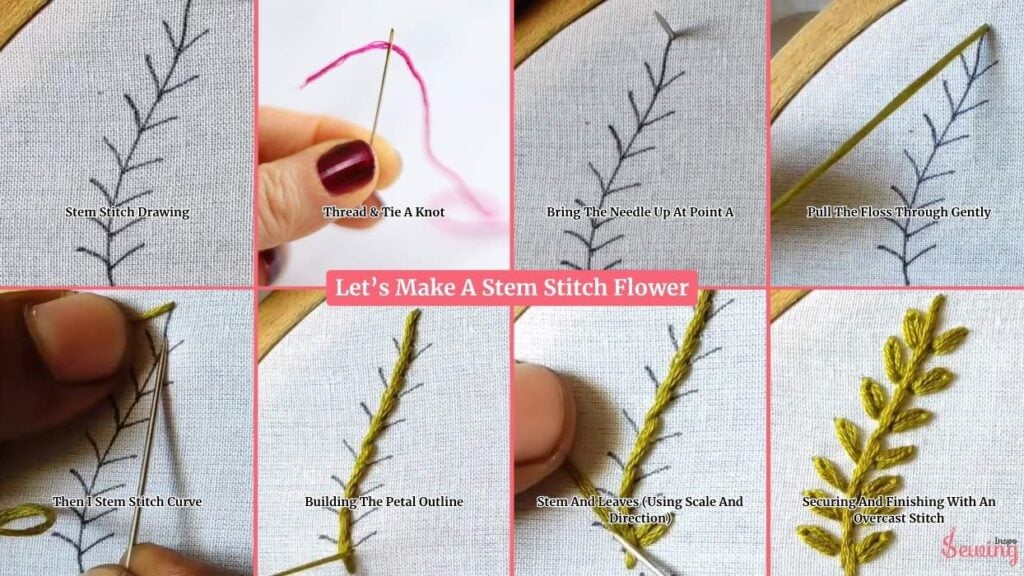
Stem Stitch Drawing
Before I start stitching, I sketch my flower right on the fabric using a water-erasable pen. I draw the pattern like this for seed stitch too.
I draw a small circle in the center for the flower’s heart, then add five soft, rounded petals around it.
It’s not too perfect, just natural.
From the base, I draw a short, slightly curved stem and two little leaves on each side. The lines are light, just enough to guide my stitches later.
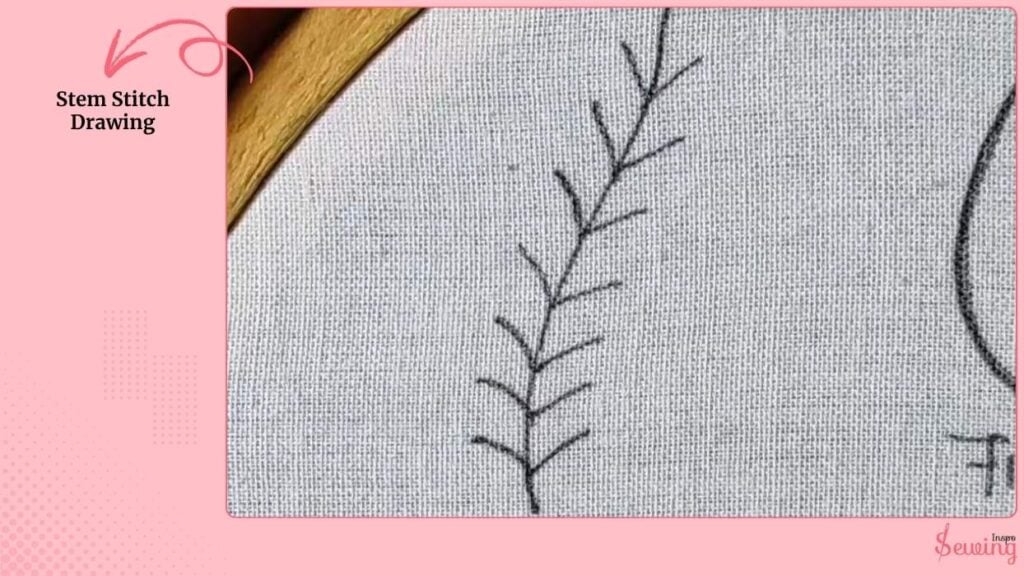
It’s a simple outline, but it already feels like the flower’s starting to bloom.
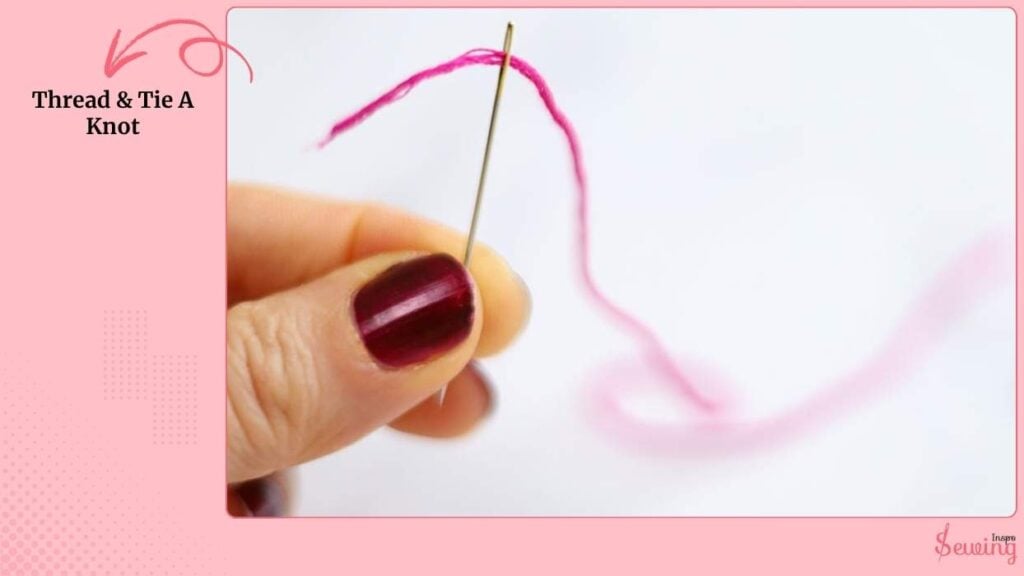
Thread & Tie A Knot
To start, I come up through the fabric at the base of a petal, bringing the needle all the way through so the waste knot stays on the back.
I gently pull the floss until a short tail remains, then smooth the working thread to remove any twists.
I position my hands so my left hand steadies the hoop and my right hand holds the needle between thumb and forefinger.
I keep my wrist relaxed; a tense grip makes stitches stiff. Before the first stitch, I check the tension by lifting the needle eye slightly as I pull the thread.
It should slide smoothly without catching. That little check saves a lot of sloppy stitches later.
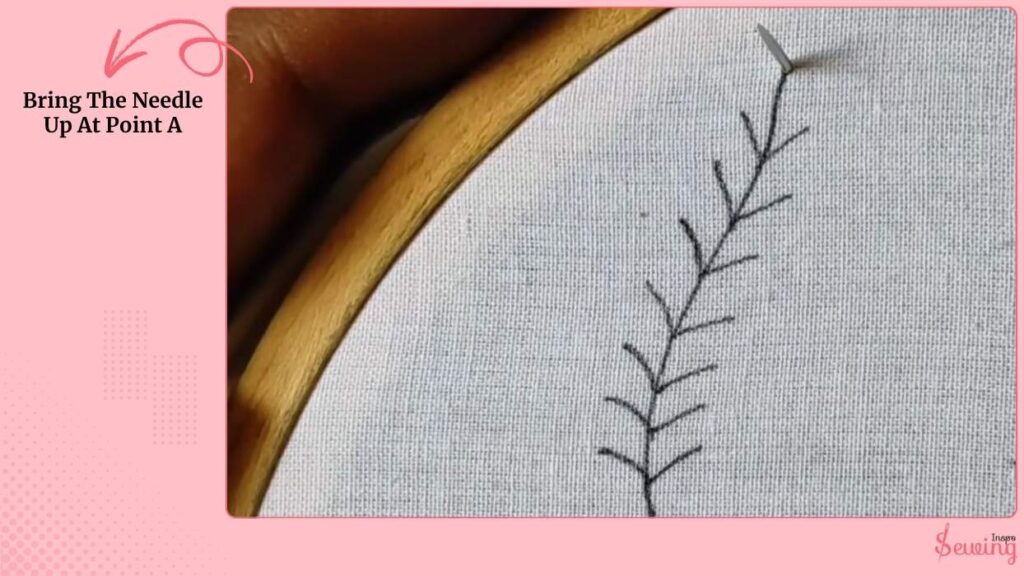
Bring The Needle Up At Point A
Bring the needle up to point A, the start of the petal line.
I insert the needle forward about 4 to 6 millimeters, depending on the curve I’m following, then push it back up halfway along that first stitch about 2 to 3 millimeters from point A.
Pull The Floss Through Gently
As I bring the needle up, I make sure the working thread lies below the needle so the stitch twists neatly to one side. Pull the floss through gently until it sits snug on the surface.
That up-forward-up-halfway pattern is the rhythm you’ll repeat: forward, then up halfway back.
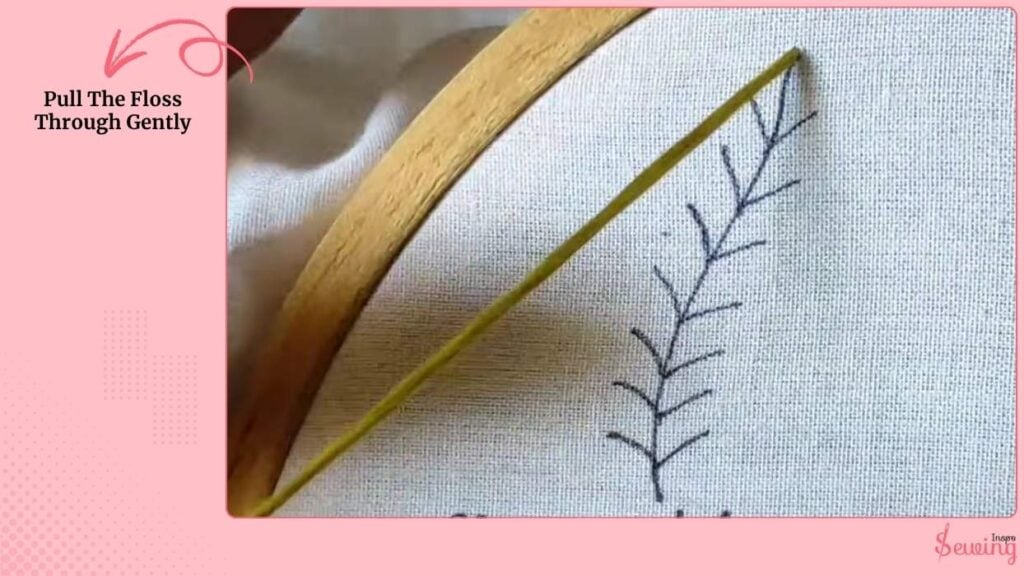
Keep the stitch lengths even and the thread always coming up on the same side of the line so the rope-like twist faces the same way along the whole curve. I work in this motion for diamond shape also.
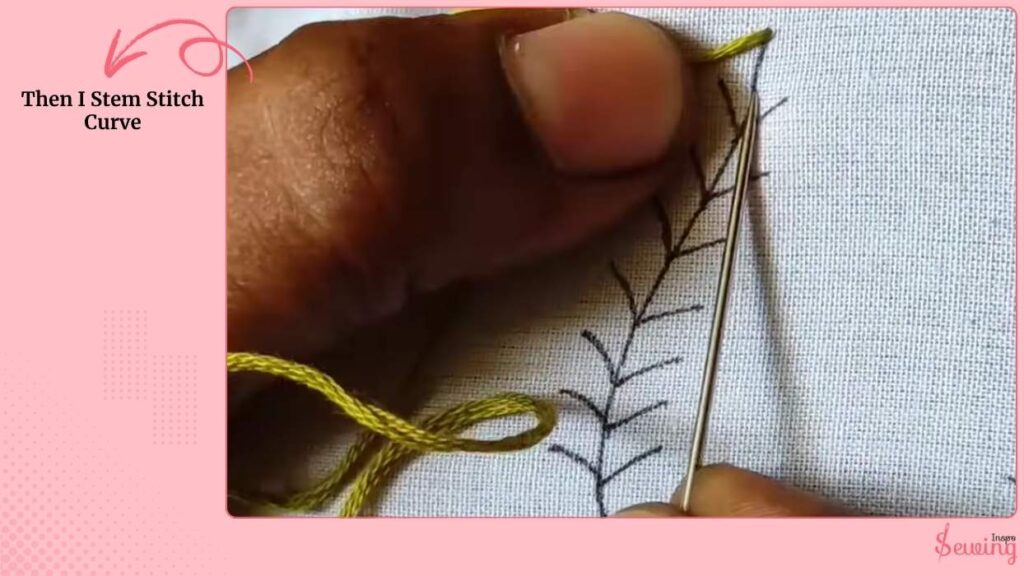
Then I Stem Stitch Curve
I shorten my stitch to about 3 millimeters so the line bends smoothly. For long, graceful sweeps, I lengthen to 5 or 6 millimeters. So, the stitch breathes and the curve flows.
I rotate the hoop in my left hand as I stitch rather than contorting my fingers; turning the fabric gives me a better angle and keeps my stitches even.
If a stitch looks bulky or the twist flips the wrong way, I pause, slide the working thread gently so it lies flat, and resume.
This isn’t about the not-perfect speed. I often tell students: stitch slowly for control, and the momentum will come naturally.
Building The Petal Outline
As I trace the petal edge, I check frequently from the right side to ensure the twist faces the same direction and the curve reads smoothly.
When I reach the petal tip, I don’t yank the thread.
I ease the needle out and make one or two tiny securing stitches on the wrong side to anchor the line.
I prefer a small waste knot or a tiny backstitch hidden under the last few loops because it keeps the back tidy for lining or framing.
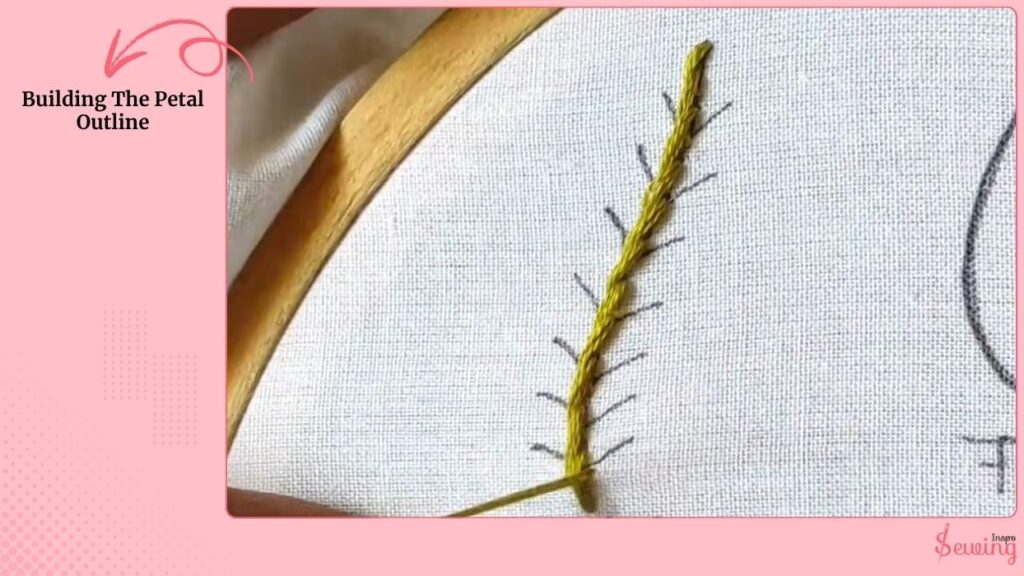
After anchoring, I clip the thread, leaving a short tail that I tuck under the nearest stitches so nothing shows through.
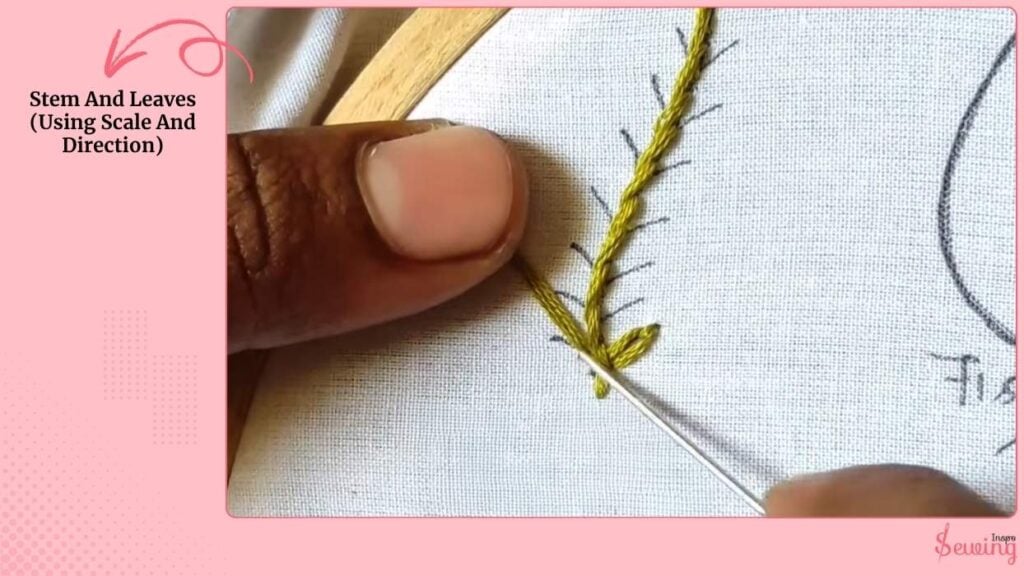
Stem And Leaves (Using Scale And Direction)
For the flower stem, I use the same stem stitch. But lengthen my stitches slightly to about 5 millimetres so the stem looks proportionate to the petals. At this point, it kind of started looking like a purl stitch.
When I stitch leaves, I outline the leaf with short stem stitches around 3 to 4 millimeters and then rotate the hoop to stitch a central vein down the middle.
If I want the leaf to look fuller, I stitch parallel stem-stitch rows inside the outline.
Always keeping the twist direction consistent so the texture reads as a deliberate pattern rather than random loops.
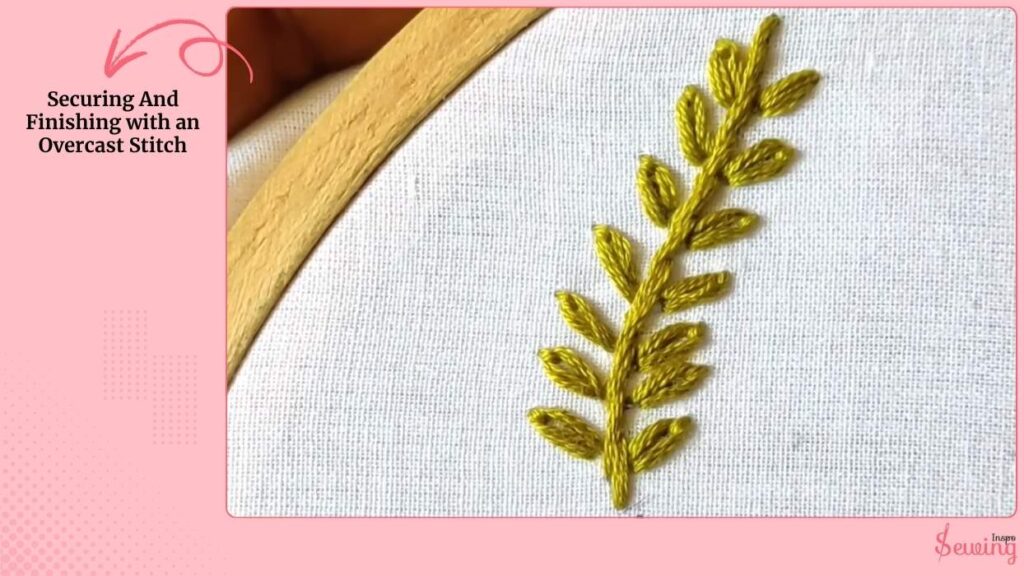
Securing And Finishing With An Overcast Stitch
To finish a stitch line, I make a couple of small overcast stitches on the wrong side or tie a discreet overhand and thread the tail under a few nearby stitches with the needle.
I trim the thread close but not flush to avoid cutting the fiber bundle. When the whole flower is done, I remove the hoop, lay the piece wrong side up, and press gently with a damp pressing cloth.
I don’t press too hard.
The idea is to relax the linen and set the stitches, not flatten them. After pressing, I inspect the right side for any stray tails showing through and gently tuck them with the tip of a needle if needed.
If you feel confused, then watch this video
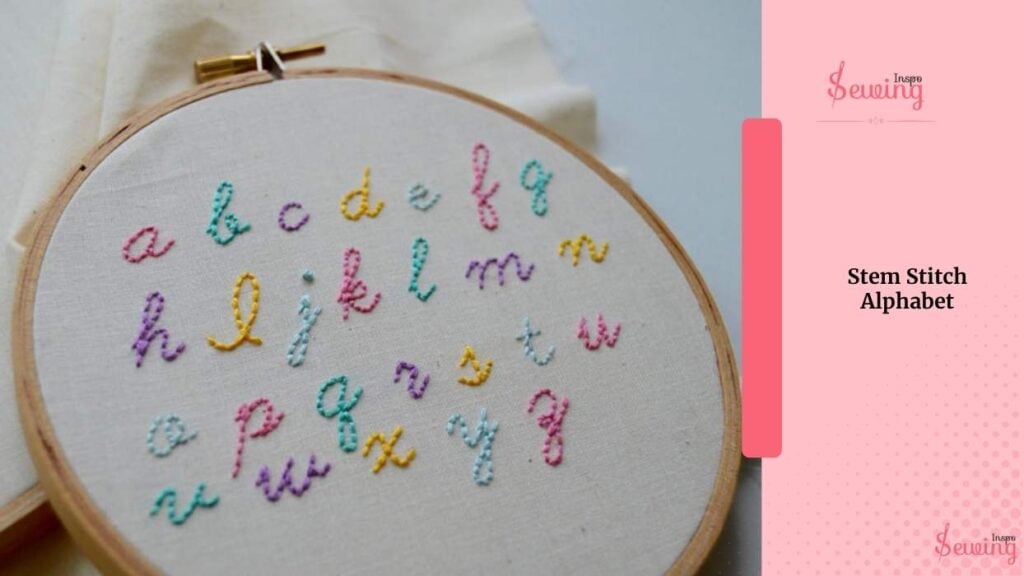
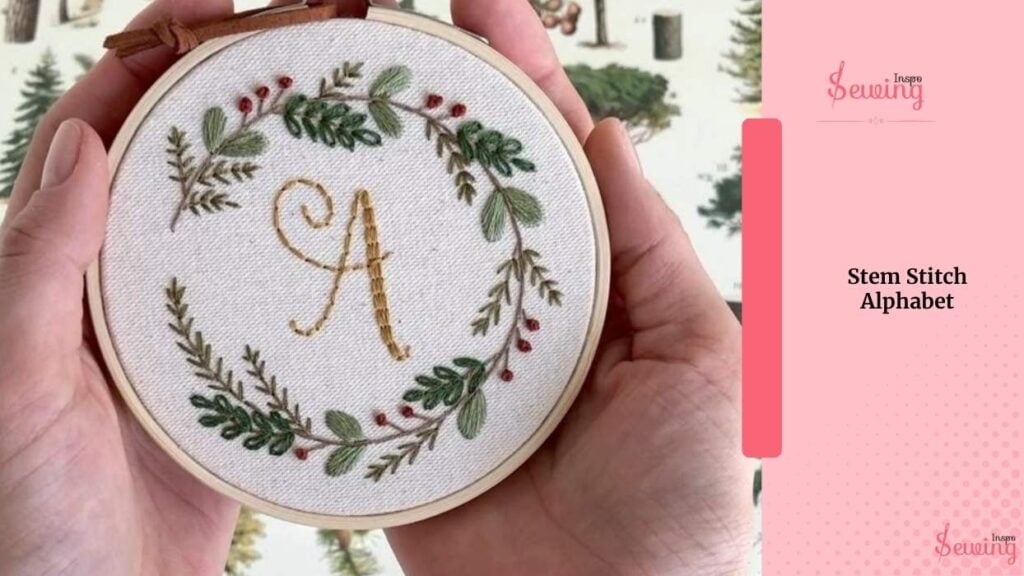
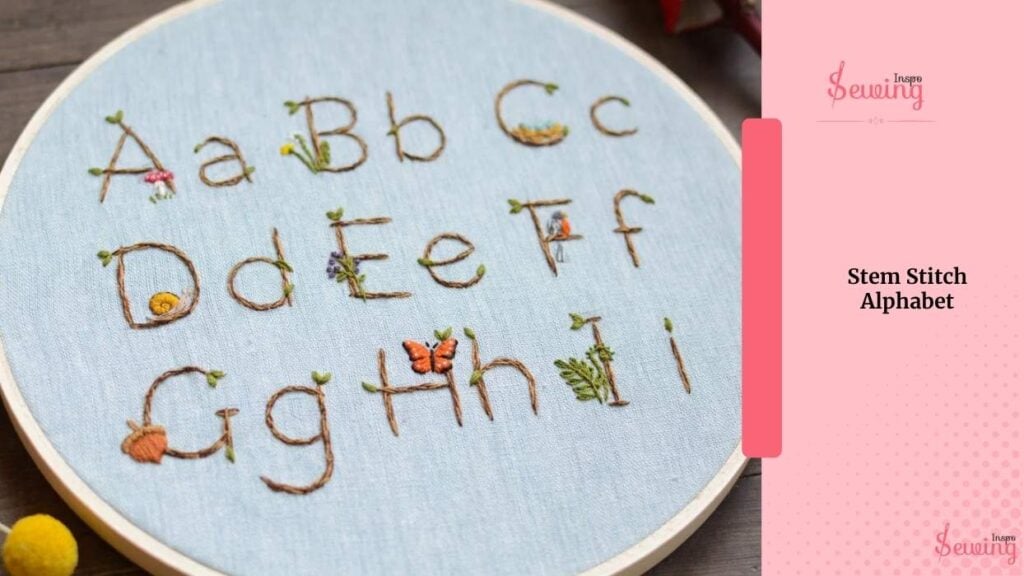
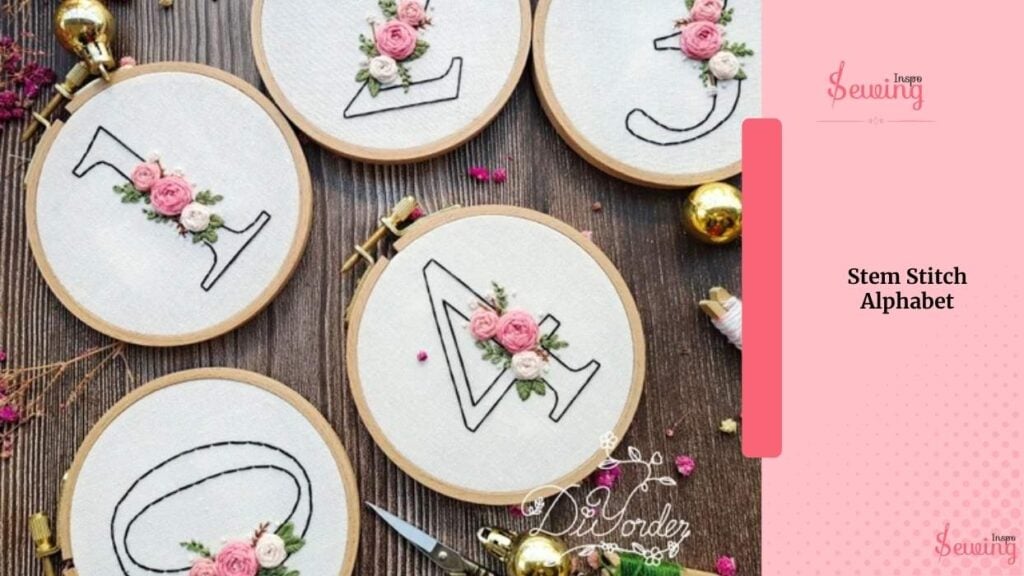
Stem Stitch Alphabet
This stitch is not just for embroidery work, either. You can do simple alphabet stitches, too. For intense-
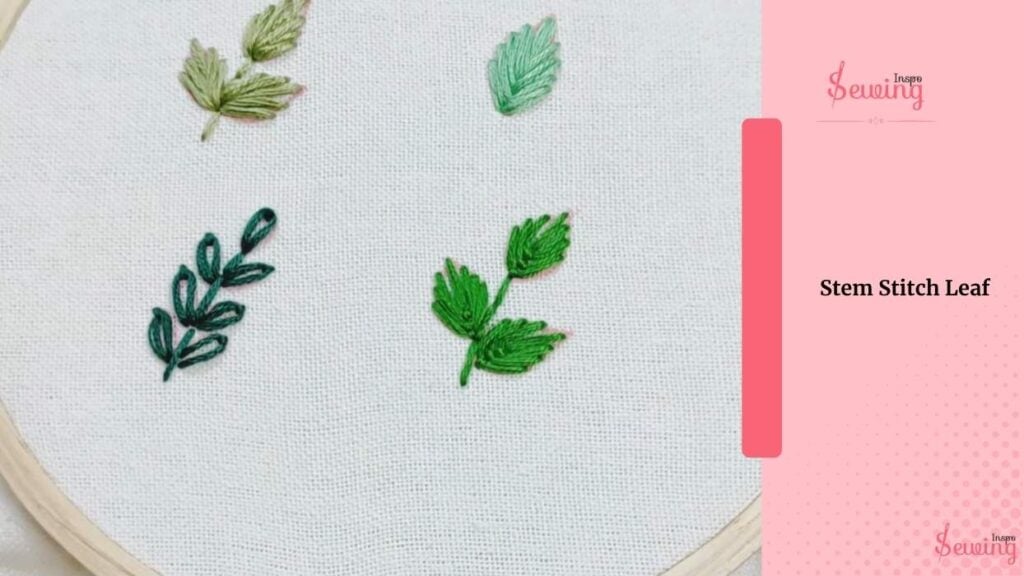
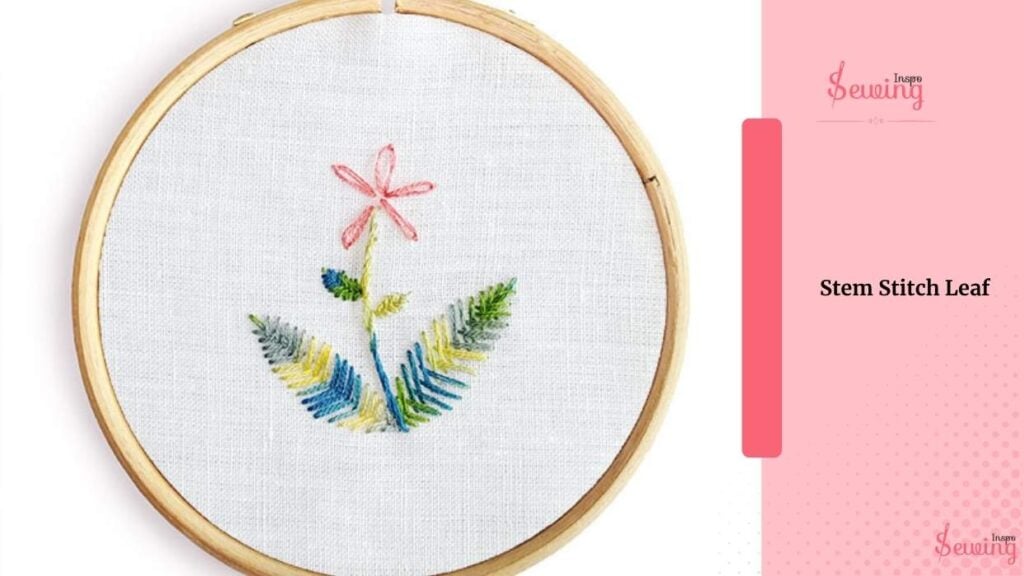
Stem Stitch Leaf
I made some leaves with stem stitch, and here is how they look.

Faq
Can I use any fabric for a stem stitch flower?
You can, but tightly woven fabrics like cotton or linen work best. They hold the stitches neatly without puckering or slipping.
How many strands of thread should I use?
Two strands of embroidery floss usually give a nice, clean look. You can use more if you want a thicker, bolder line.
Why does my stem stitch twist look uneven?
That happens when the working thread switches sides while stitching. Always keep your thread on the same side of the needle, usually below. So, the twist stays uniform.
Conclusion
The stem stitch flower is a lovely way to blend precision with creativity. I love how it adds movement and softness to any floral design without needing fancy techniques.
Whether you’re stitching by hand for relaxation or demonstrating it to beginners, the stem stitch always delivers that neat, graceful finish that makes your embroidery feel alive.

Leave a Reply