
When I first heard the term “popcorn stitch”, I pictured a bowl of popcorn sitting next to my sewing knits. Turns out, I wasn’t too far off! 😜
The name comes from the way these little raised stitches pop right out of the fabric, just like kernels bursting open.
It all started when I was working on a textured cushion cover and wanted something that added both charm and dimension.
My grandma smiled and said, “Try the popcorn stitch, dear. It gives your fabric a little puff, like it’s smiling back at you.”
And she was right. Popcorn stitch patterns don’t just sit flat like regular stitches. They rise. It creates tiny 3D bumps that look adorable on quilts, pillow covers, or even decorative hems.
And doing popcorn stitch patterns is easy, too. All you gotta do is-
Popcorn Stitch
To sew a popcorn stitch pattern, work several stitches into the same spot, then pull the needle through all loops together to create a small raised “pop” or textured bump on the fabric.
I know this is something new, so I decided to make a foolproof guide for it.
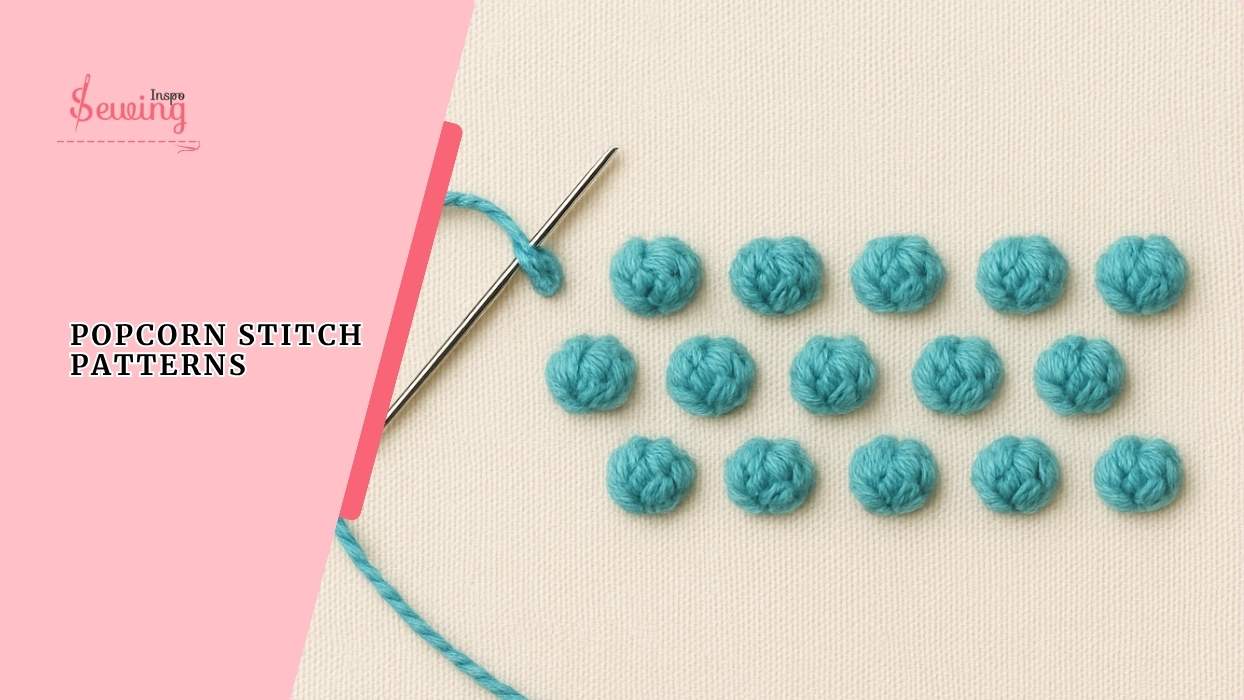
Table of Contents
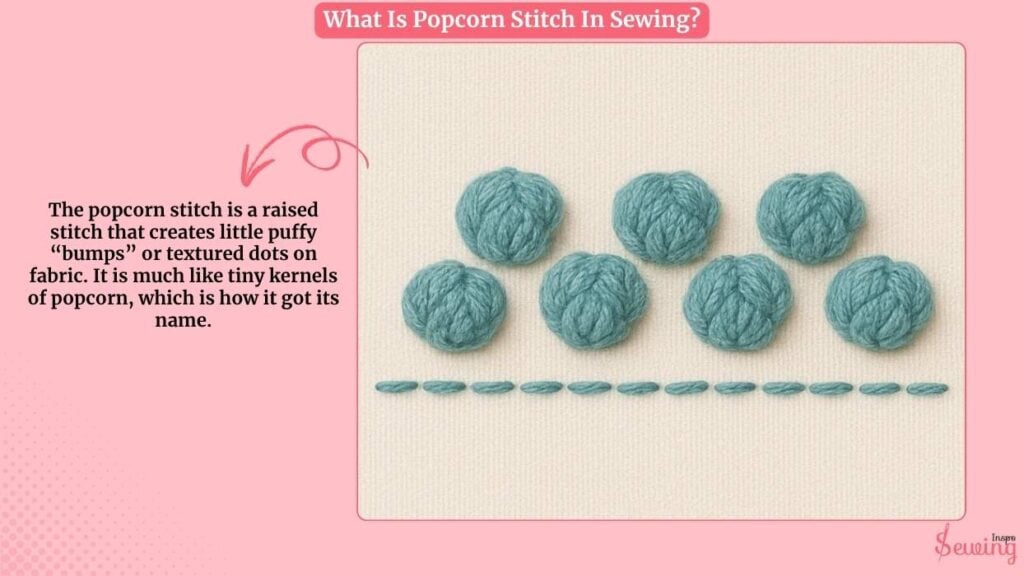
What Is Popcorn Stitch In Sewing?
The popcorn stitch is a raised stitch that creates little puffy “bumps” or textured dots on fabric. It is much like tiny kernels of popcorn, which is how it got its name.
Unlike flat stitches such as backstitch or running stitch, popcorn stitches are built by stacking multiple stitches in the same spot.
Typically, you’ll make four to six tiny straight stitches close together, then loop the needle under their base and gently pull to puff them out. The result is a small, rounded cluster that adds both texture and depth to your design.
You’ll often find popcorn stitches used to:
- Highlight flower centres or berries in embroidery. You can even do it on purse stitching pattern.
- Add raised textures to borders and motifs like diamond stitching pattern.
- Create a 3D element in decorative quilting or smocking
They’re not meant for seams or construction. They’re purely ornamental.
What Is The Difference Between Popcorn Stitch And Puff Stitch?
The main difference between a popcorn stitch and a puff stitch lies in their structure and texture.
A popcorn stitch is made by working several complete stitches into the same spot, then closing them together to form a tight, firm bump that stands out distinctly.
And A puff stitch is created by drawing up multiple loops of yarn into one stitch and pulling them through together, giving it a softer, more airy look.
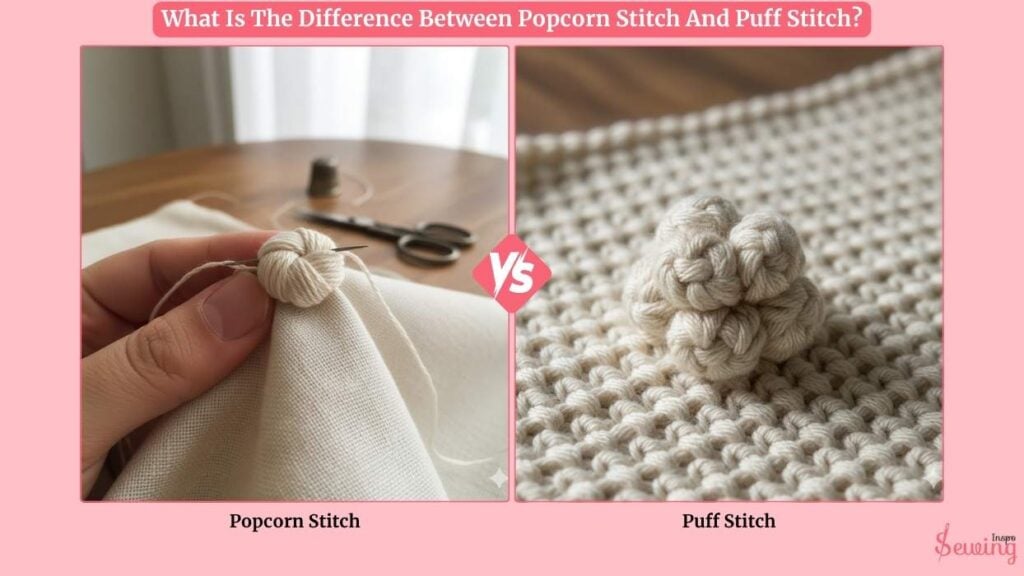
Simply put, popcorn stitches are denser and more defined, while puff stitches are fluffier and lighter in texture.
How Do You Do Popcorn Stitch Patterns In Sewing?
To do popcorn stitch patterns, follow the steps-
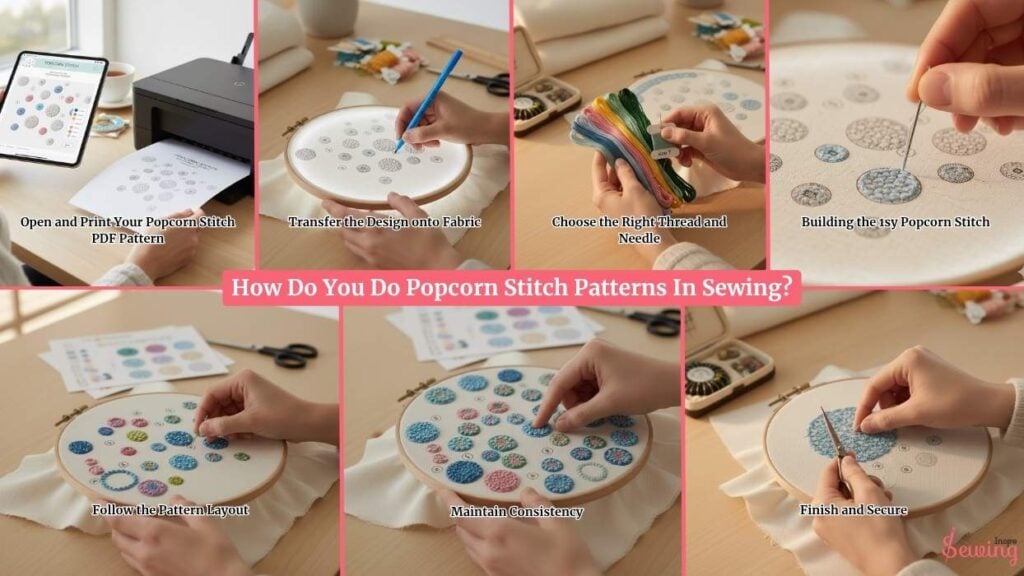
Open and Print Your Popcorn Stitch PDF Pattern
I start by opening the PDF of free patterns on my laptop or tablet and giving it a quick look. The pattern usually shows where each popcorn cluster should go.
It is like “texture spots.” This is kinda like cross stitch pattern.
Then, I print it out on regular A4 paper. If the design includes a color key or symbol chart, I keep that page handy. It’s my map for thread colors and stitch counts.
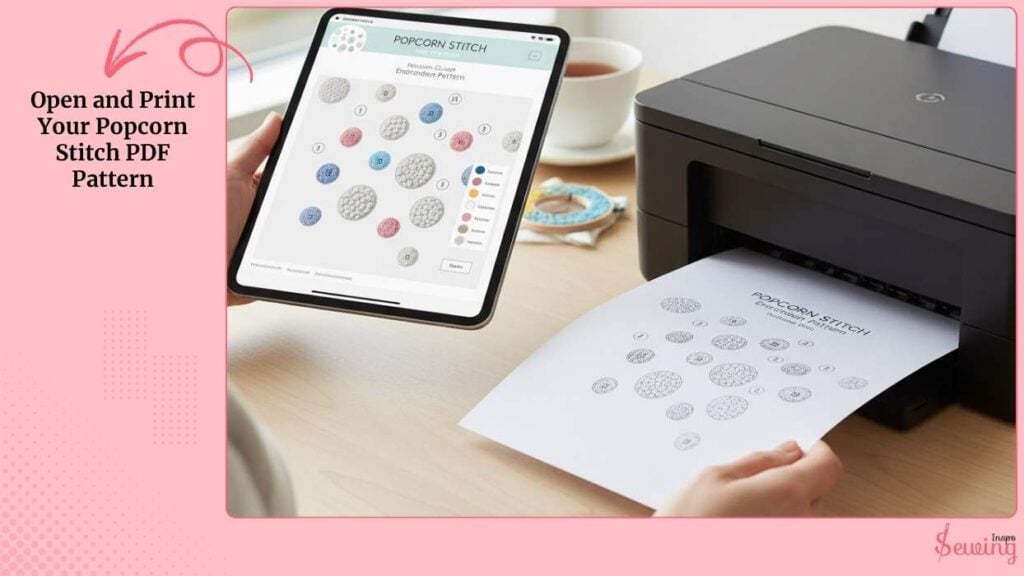
Tip: If your pattern has small popcorn clusters, you can enlarge the print size to make placement easier to see.
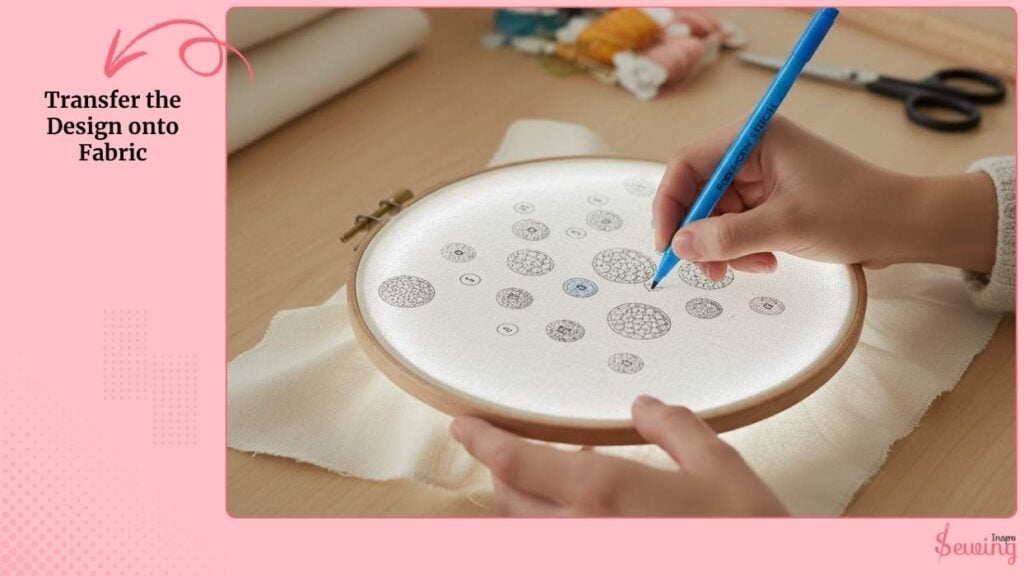
Transfer the Design onto Fabric
I lay my fabric flat and place the printed pattern underneath (or use a lightbox if it’s hard to see through).
It’s not hard to read like a peyote stitch pattern. So you can mark them easily.
Then, using a water-soluble pen, I lightly trace the popcorn symbols or dots onto the fabric. These marks will guide where each raised stitch goes.
For darker fabrics, I sometimes use chalk transfer paper. Just trace over the design and it leaves a perfect outline.
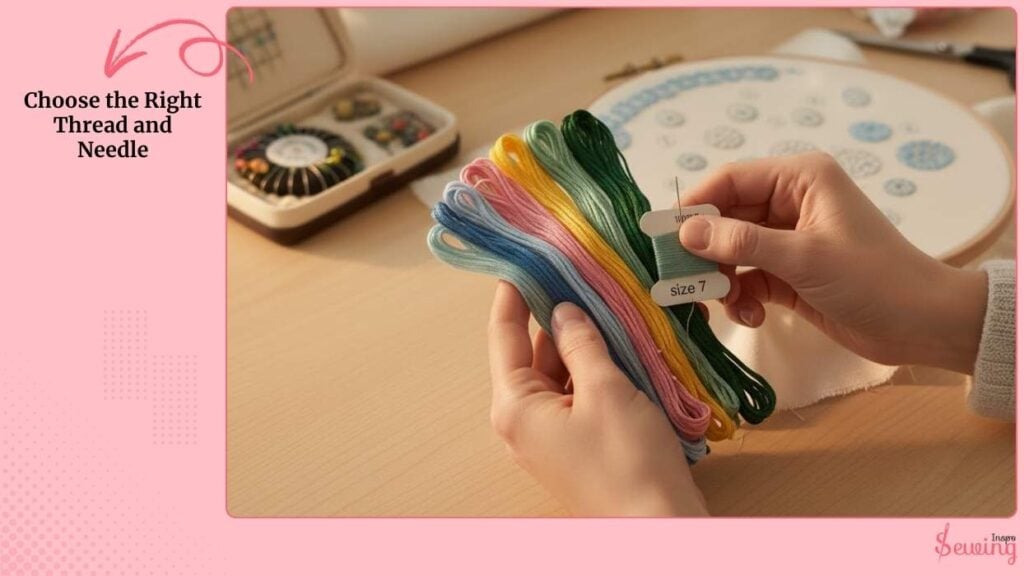
Choose The Right Thread & Needle
Popcorn stitches are thick and raised, so I use embroidery floss (like DMC). I usually use 4 to 6 strands for a bold pop.
For delicate projects like baby clothes or napkins, 3 strands work best. I use a trick for the seed stitch pattern, too.
Then, I pick a sharp embroidery needle (size 7 or 8) to help pierce the fabric smoothly, especially when forming multiple loops for each popcorn.
Building the 1st Popcorn Stitch
Now the fun part begins. I bring the needle up through the fabric where the first popcorn mark is.
Here’s how I form each popcorn stitch:
- Make five tiny straight stitches (like mini satin stitches) all in the same spot. They stack up to create fullness.
- After the fifth stitch, I insert the needle under the base of the group (without piercing the fabric) and pull gently to make the stitches puff out.
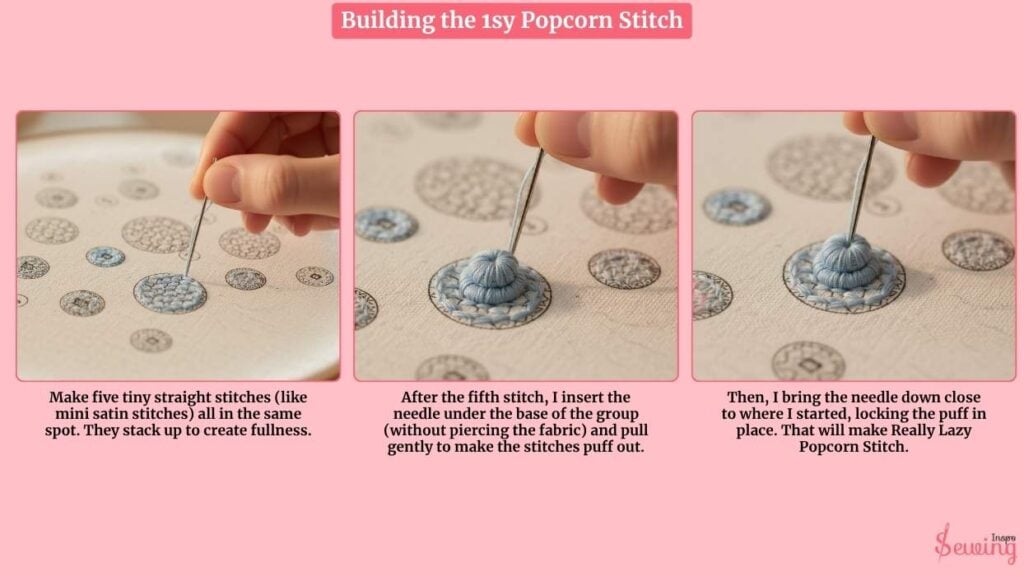
- Then, I bring the needle down close to where I started, locking the puff in place. That will make Really Lazy Popcorn Stitch.
And just like that. One popcorn is born! 🍿
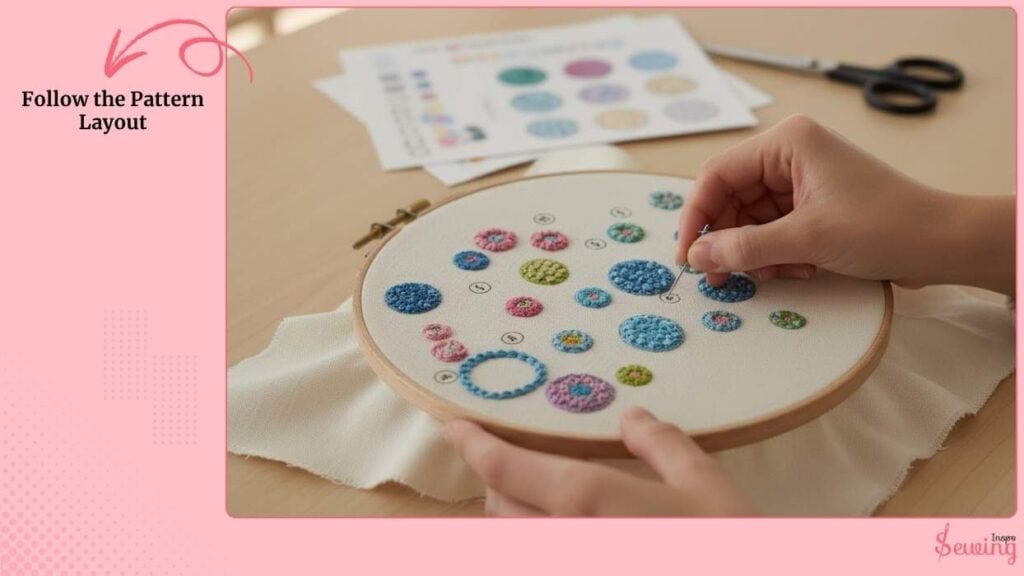
Follow the Pattern Layout
Using my printed PDF as a guide, I move to the next marked spot like doing chevron stitch patterns.
Popcorn stitches are usually placed a few millimeters apart to allow each puff to stand on its own.
If the pattern combines popcorn with other stitches (like chain or lazy daisy), I complete those in order so the texture builds beautifully across the design.
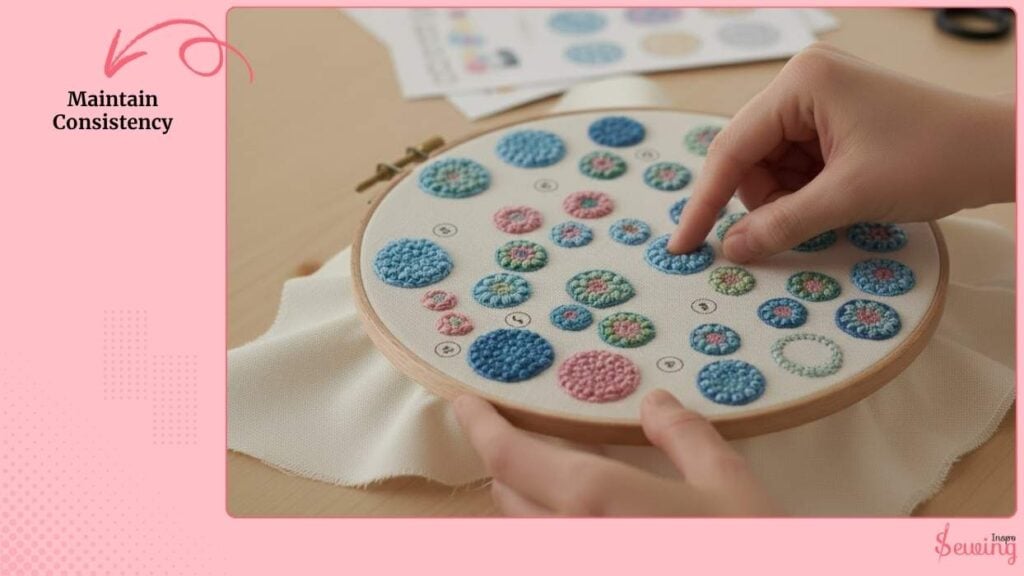
Maintain Consistency
As I stitch, I keep an eye on size. If one popcorn looks too flat, it means I didn’t layer enough stitches. I’ll add another loop. I do this while doing wave stitch pattern too.
If one’s too bulky, I flatten it a bit with my fingertip before locking it down. Each popcorn should look full, rounded, and slightly raised, not stiff.
Finish and Secure
Once the pattern is complete, I flip the fabric over and weave the loose thread tails under nearby stitches.
Then, I gently rinse the fabric in cool water to remove any tracing marks. After it dries flat, I lightly press the fabric from the back side using a pressing cloth.
This keeps the popcorn puffed and perfect. You can use this stitch to make tie patterns, too.

Easy Popcorn Stitch Patterns In Sewing Pdf Free
How Many Stitches Are In A Popcorn Stitch?
A typical popcorn stitch is made up of 5 individual stitches, though the number can vary depending on the look or texture you want. Most stitchers use between four and six stitches to form one “popcorn,” creating that signature raised, puffy effect.
But-
- If you want your popcorns to be flatter and subtler, try 4 stitches.
- If you want them to stand out more and feel plush, go for 6 or 7.
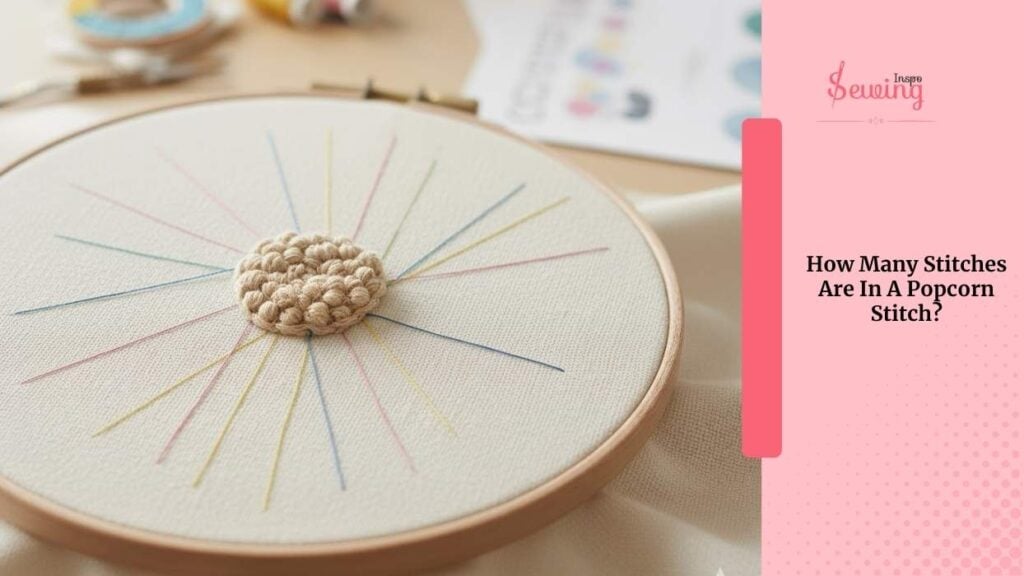
The key is balance.
Too few stitches and your popcorn looks flat; too many, and it may bulge unevenly or tangle. Once you find your rhythm, each popcorn will look like a tiny embroidered pearl sitting proudly on your fabric.
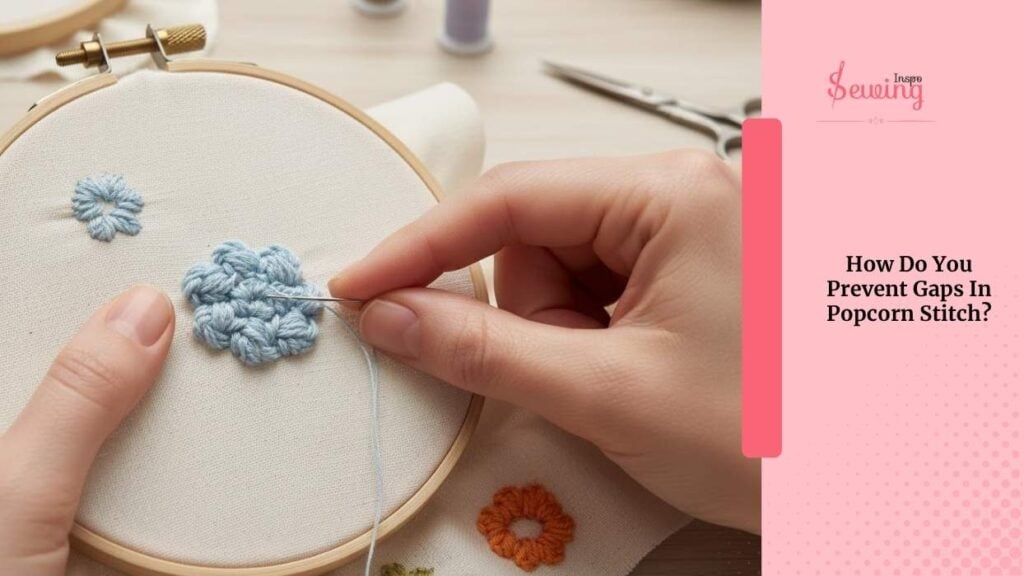
How Do You Prevent Gaps In Popcorn Stitch?
To prevent gaps in popcorn stitches, make sure you’re stitching into the correct spaces and not skipping any. Keep the number of double crochets consistent for every popcorn, and don’t pull the yarn too tightly when closing the stitch.
The gentle tension works best.
You can also tighten the stitches right before and after each popcorn for a cleaner look. If gaps still appear, try using a slightly smaller hook or linked stitches to bring everything closer together.
If wanna learn more unique patterns like this, then read the purl stitch pattern article too.
Faq
Can I use popcorn stitches in sewing patterns or just crochet?
While commonly used in crochet, the popcorn stitch effect can be adapted for decorative sewing or embroidery to create raised, textured designs.
Are popcorn stitches suitable for all fabrics?
They work best on medium to heavy fabrics that can support the raised texture without pulling or warping.
Bonus Line
If you’re working on a large project like a cushion or wall hanging, sprinkle popcorn stitches between flat stitches like backstitch or chain. It creates a lovely mix of texture and depth.


Leave a Reply