
The peyote stitch pattern is an off-loom bead weaving technique where beads are added in a staggered pattern. It is a back-and-forth sequence to form a flat or tubular, flexible fabric. It is also known as the gourd stitch.
It’s versatile. That’s why it is mostly used for jewellery making and decorative beadwork. Peyote patterns have 2 main types, based on the number of beads in the starting row:–
- Even-Count
- Odd-Count.
But for a newbie, it can be confusing. They often asked how to read a peyote stitch pattern. Cause honestly, it is confusing. Different types need different methods. But in general, to make peyote stitch patterns, start by threading your needle, stringing an even number of beads, then pass the needle back through every second bead to create the first row, and keep adding beads into the gaps of the previous row in a staggered sequence until the pattern builds.
But what about the other type? No worries, I’ll let you know that too. Let’s get into it like making cross stitch pattern.
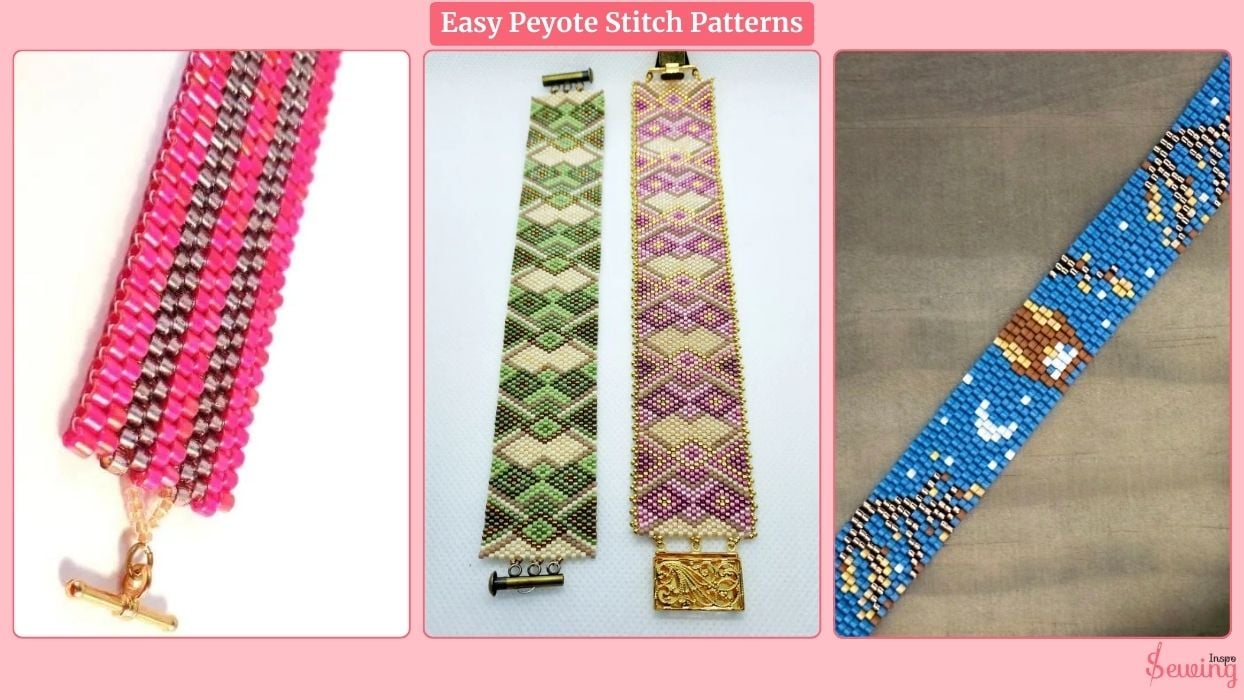
Table of Contents
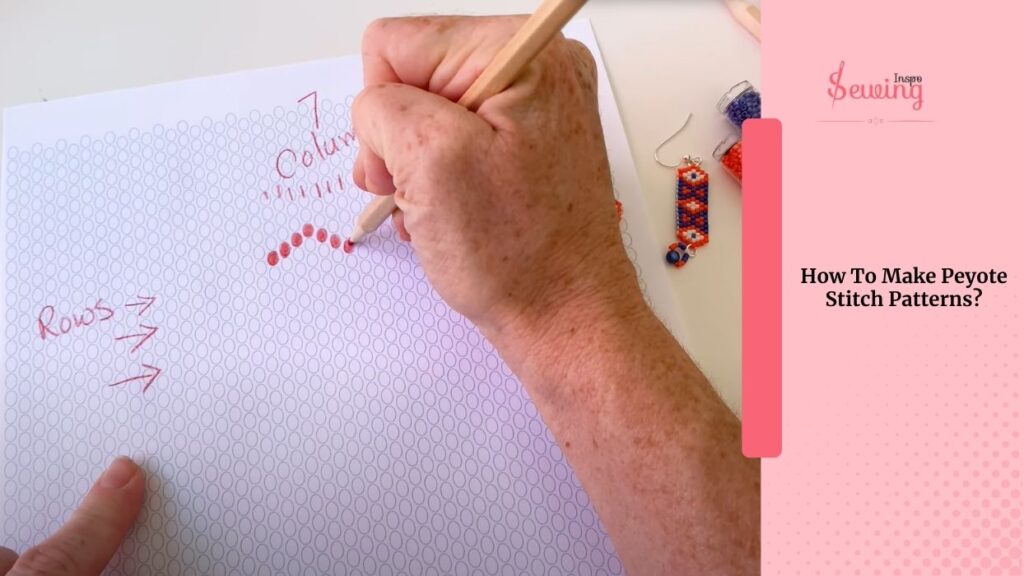
How To Make Peyote Stitch Patterns?
Once you’ve read a peyote stitch pattern and understand the legend, word chart, or bead chart, it’s time to bring it to life. Here’s how I do it:
- Place beads by color for easy access.
- String the first two rows in zigzag
- Odd-count: follow the pattern for the first row and special turn
- Add a stop bead to keep the beads from sliding off
- Pick up the next bead in sequence
- Pass the needle through the next bead sticking up from the previous row
- Pull the thread snug and repeat across the row
- Turn work according to pattern
- Follow the word chart or the bead chart
- Weave the thread back through the beads to secure
- Tie a small knot and trim excess thread
That’s it. You got a stunning peyote stitch.
Easy Peyote Stitch Patterns
Here are a few patterns i had a look at
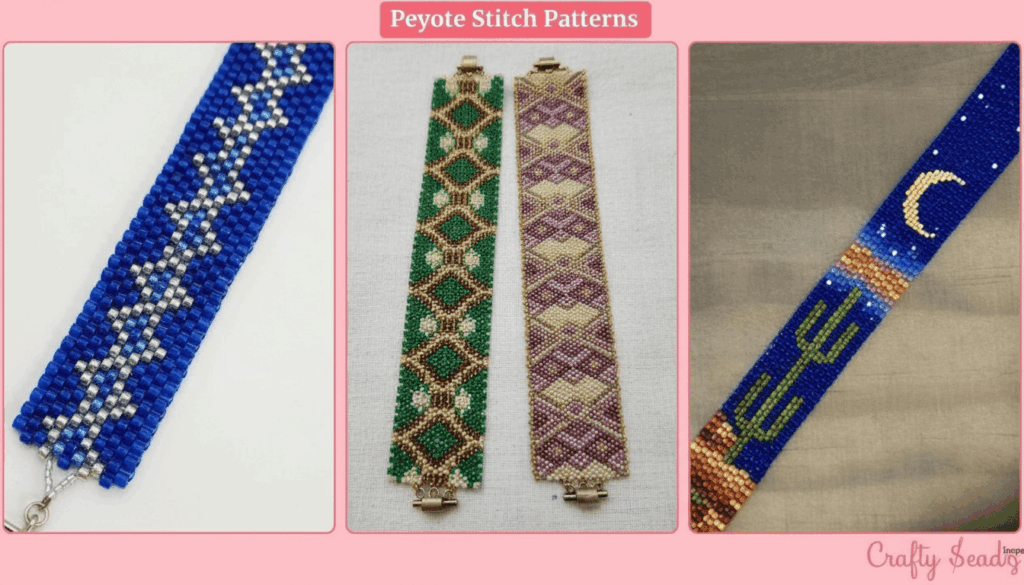
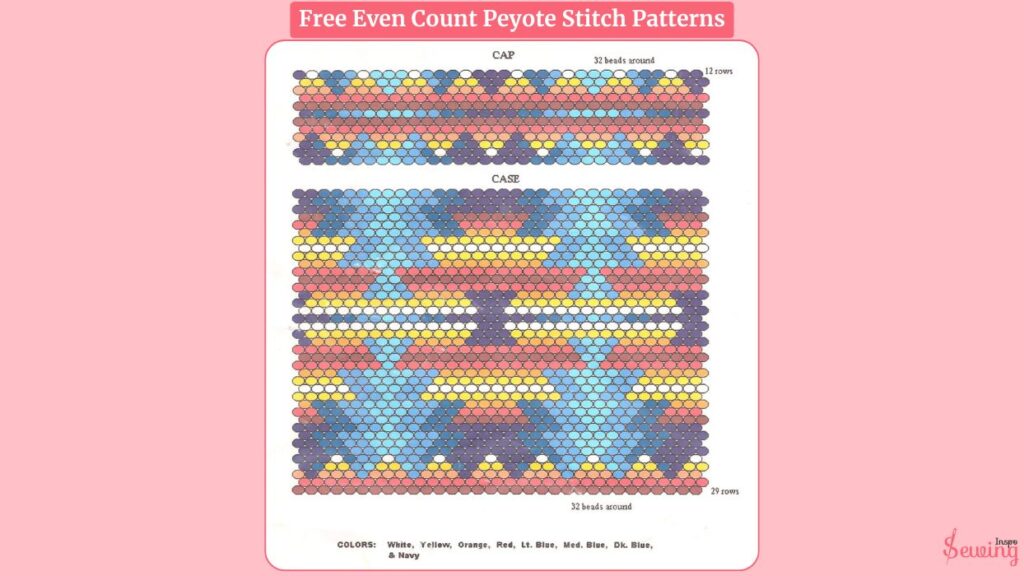
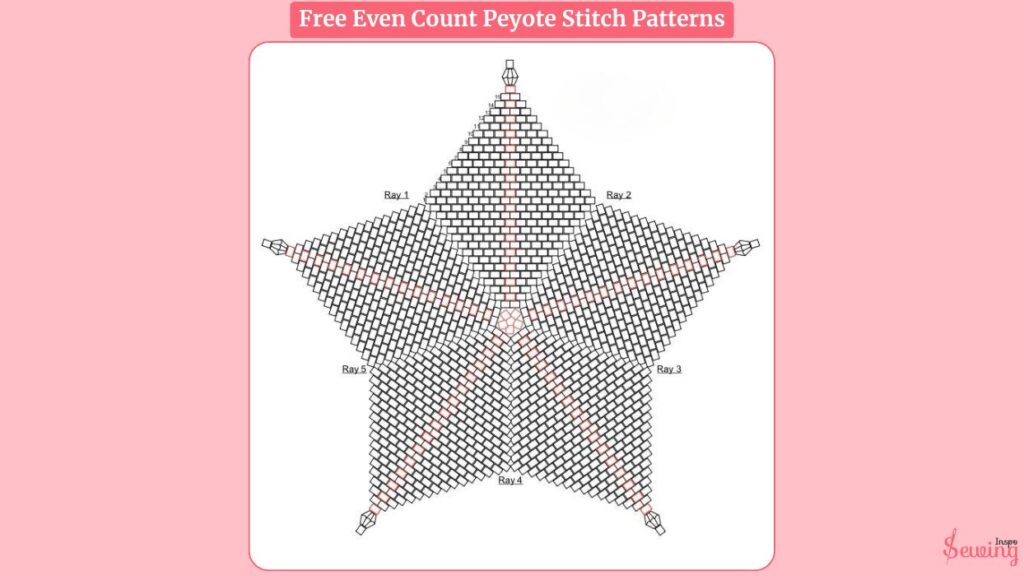
Free Peyote Stitch Patterns
Wanna try but don’t know where to start? Then try this-
Peyote Stitch Tutorial PDF
In case you forgot any step, I made a PDF.
What Is The Difference Between Even And Odd Peyote Stitch?
The main difference between even-count and odd-count peyote stitch is the number of beads in the starting row, and how you turn your thread at the end of each row. This is kinda like counted cross stitch.
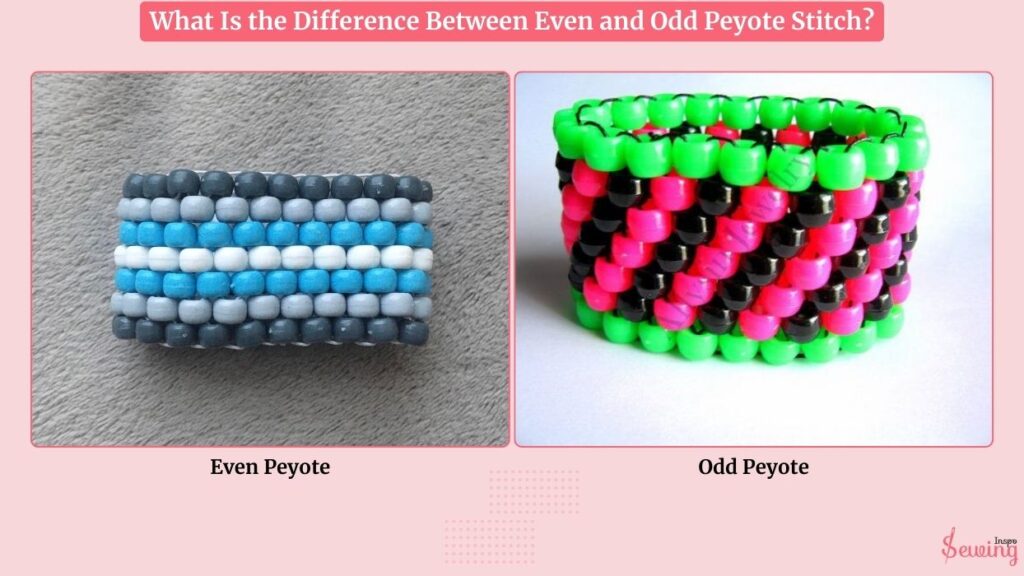
In even-count peyote stitch, you start with an even number of beads in the first row. Turning at the end of each row is simple and straightforward.
In Odd-count peyote stitch, you start with an odd number of beads in the first row. This allows for more complex patterns and symmetry in designs. The catch is that turning at the end of a row is a little trickier because you can’t just “step up” easily. You may need a special turn stitch to continue.
How To Read A Peyote Stitch Pattern With a Word Chart?
To read a peyote stitch pattern, follow these 4 steps
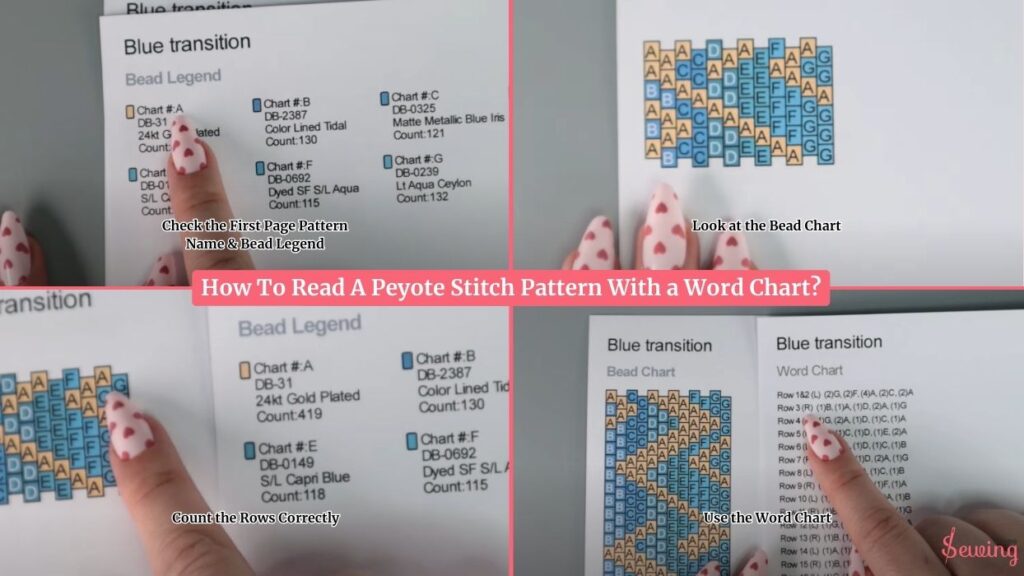
Even peyote is an easier one. So I’m reading the odd count peyote stitch pattern one.
Check the First Page Pattern Name & Bead Legend
On the first page, I always start by looking at the pattern name and the bead legend. Here’s how I read it:
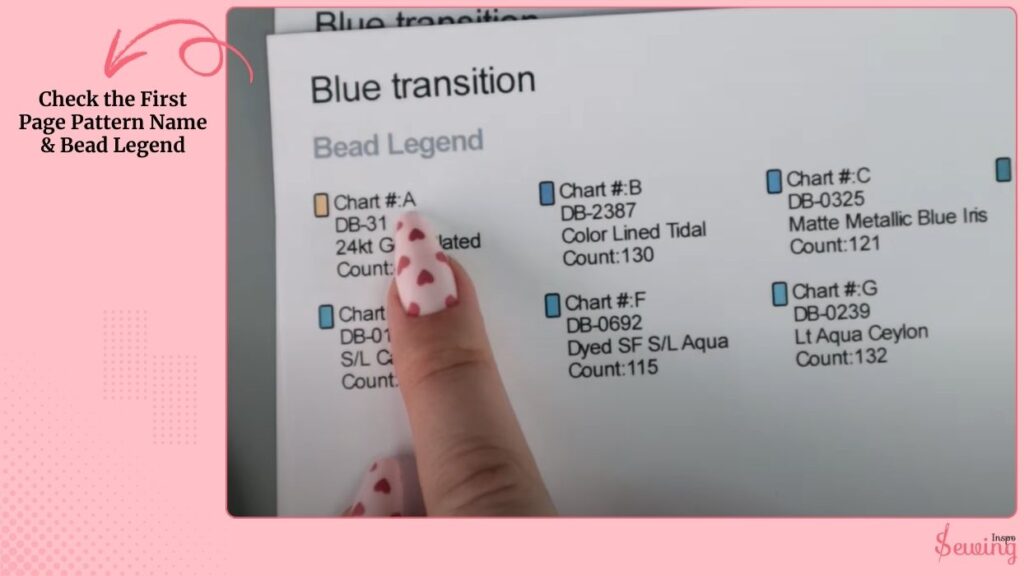
First line,
Shows Chart A, B, C, etc. These letters match the symbols in the pattern and tell me which bead color goes with which letter. It’s like doing wool patterns but in reading version.
Second line,
The bead code, like DB-2387. This is the manufacturer’s number. It is perfect for online shopping. (DB = Delica, TR = TOHO Round, etc.)
Optional: I like to add the color name and even a photo of the beads to make things easier.
Last line,
Shows the bead count for the entire pattern. This helps me calculate how many beads to buy. I also note the finished size, width & length, type of beads, number of colors, and the technique (even-count peyote stitch) to get the full picture before I start.
Isn’t it like changing the pattern on a sewing machine?
Look at the Bead Chart
The bead chart is the actual visual pattern. Some people work directly from it, but I personally prefer the word chart. It’s easier to follow, especially for patterns with many colors.
A few things to notice:
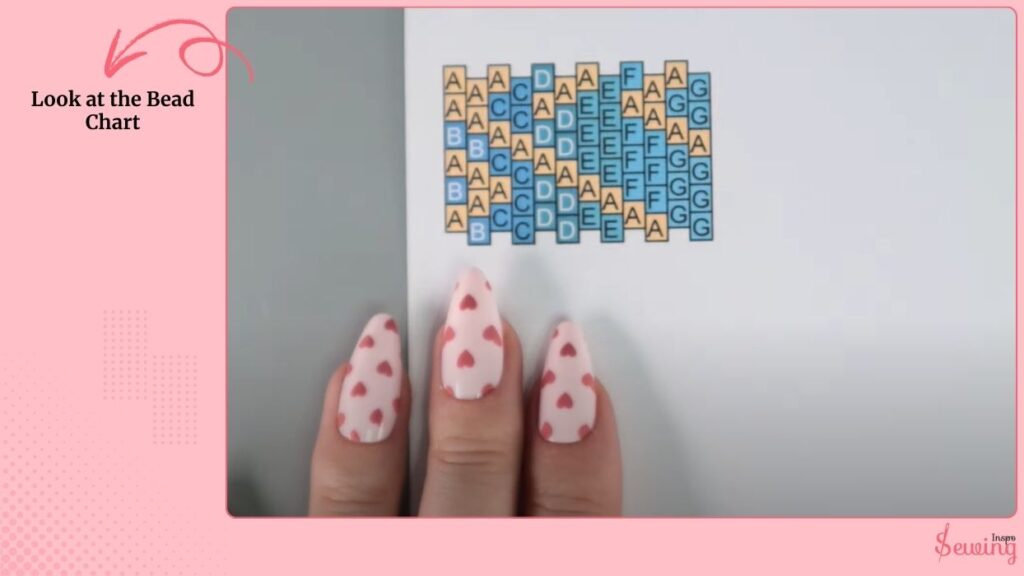
- This pattern has 12 beads per row, so it’s an even-count peyote.
- That means no tricky turns at the end of odd rows.
- Variations exist, like 2-drop or 3-drop peyote, where you pick up 2 or 3 beads at a time instead of one.
Count the Rows Correctly
The first two rows are the foundation. They are strung together before actual peyote stitching begins. Example,
- Row 1 = A, C, A, A, F, G
- Row 2 = same as Row 1
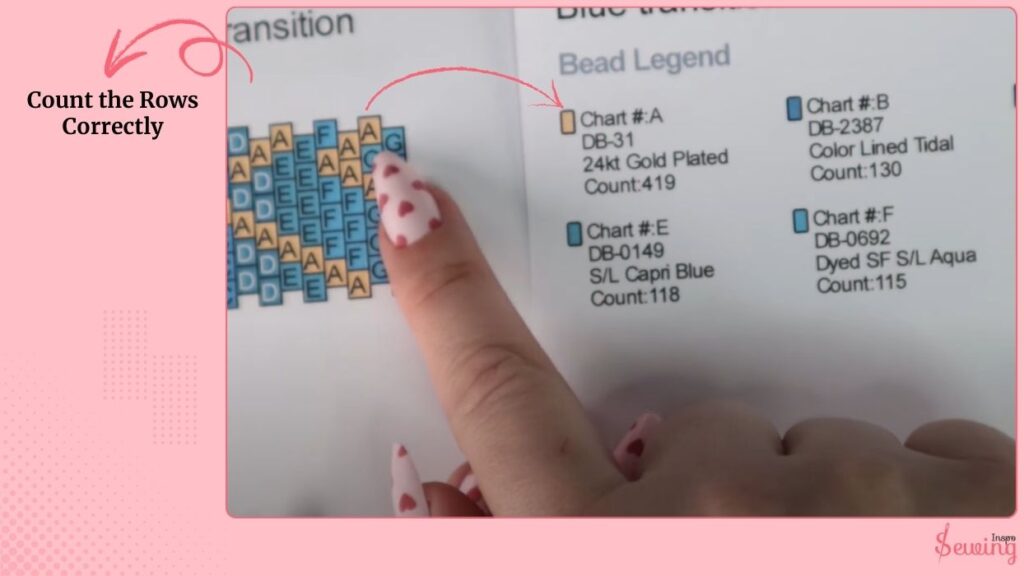
Third row onward is where the peyote stitch starts: B, A, D, A, A, G
Important tip: Don’t mistake the first full line in the chart as Row 1. It’s actually just your foundation.
Use the Word Chart
The word chart breaks down each row in writing, which I find easier to follow than the graph. Here’s how I use it:
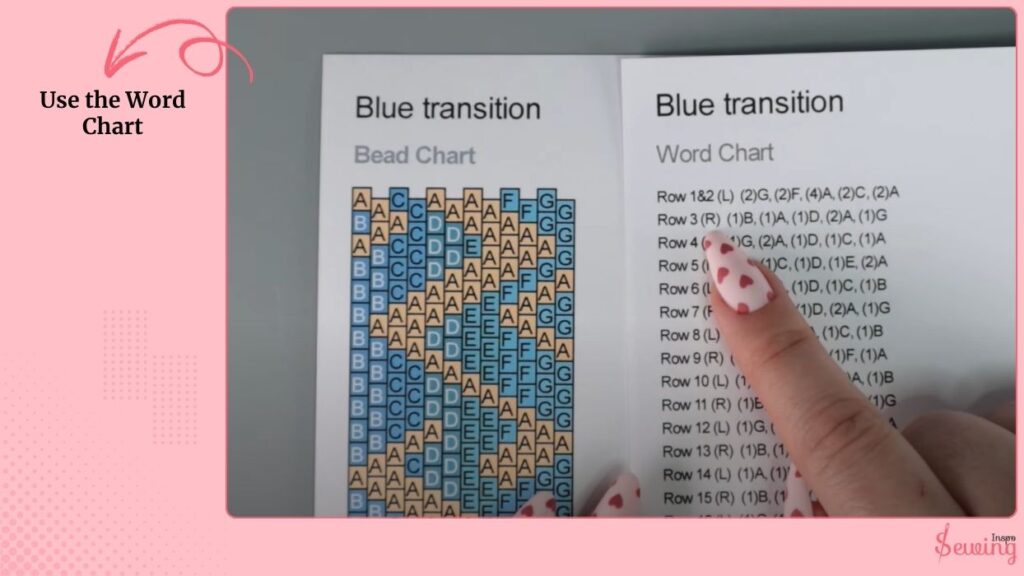
L and R in brackets indicate stitching direction (left or right). I usually ignore this because I work in a non-linear manner, but you can follow it if you prefer a set direction. Numbers in brackets show how many beads of each color to add.
Example: (2G), (2F) means pick up two G beads, then two F beads, and so on.
The letters correspond to the bead colors in your legend. That’s how the old count works.
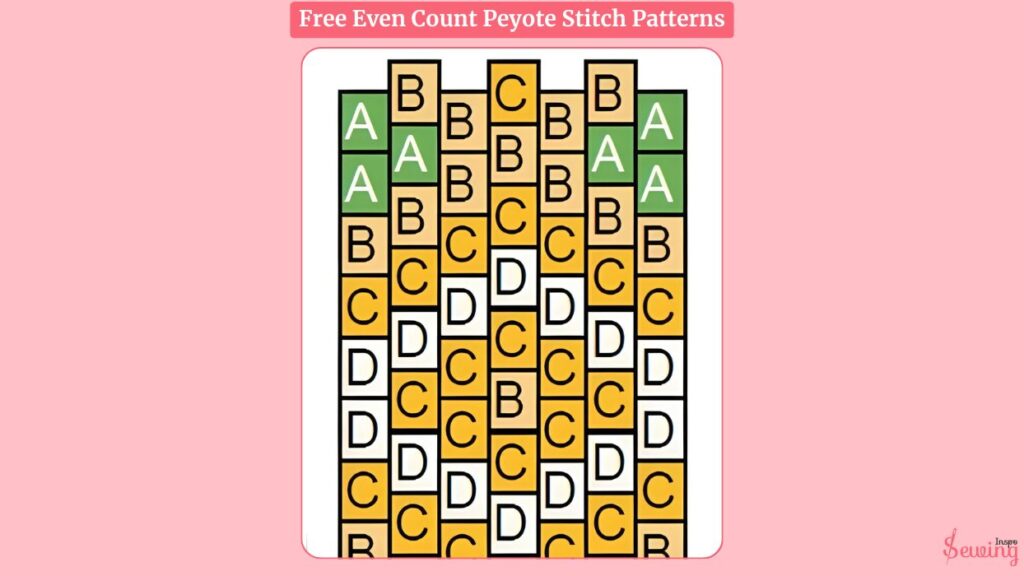
Read Even Count Peyote Stitch Patterns
Even-count peyote stitch is a basic bead weaving technique where the starting row has an even number of beads. It forms a flexible, brick-like pattern that’s perfect for bracelets, flat designs, and other beadwork projects.
Sounds easier than the old count? Yes, it is. And reading even count peyote is also easy. Here is how it works.
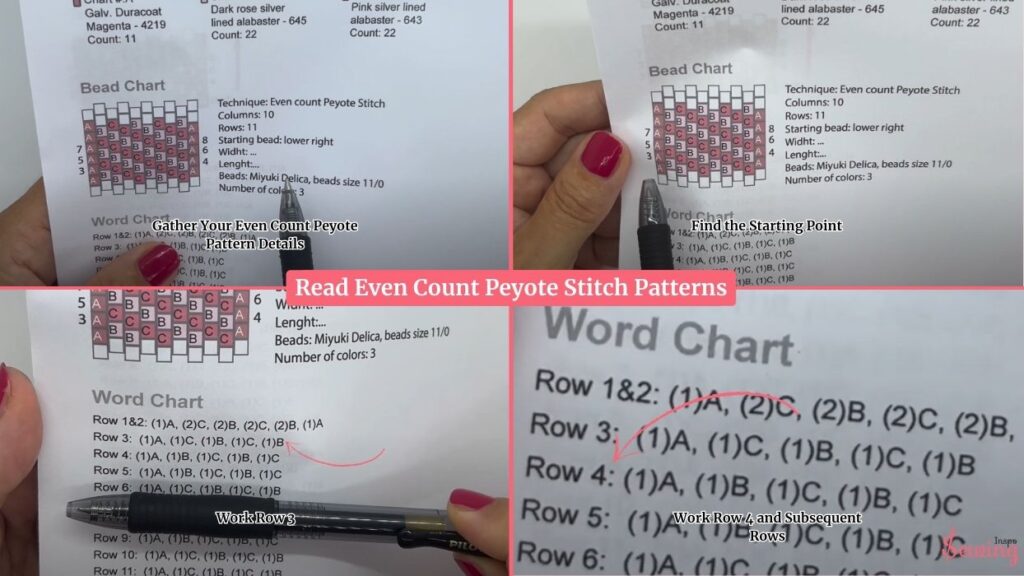
Gather Your Even Count Peyote Pattern Details
Before you start, make sure you know the technique and size of your project:
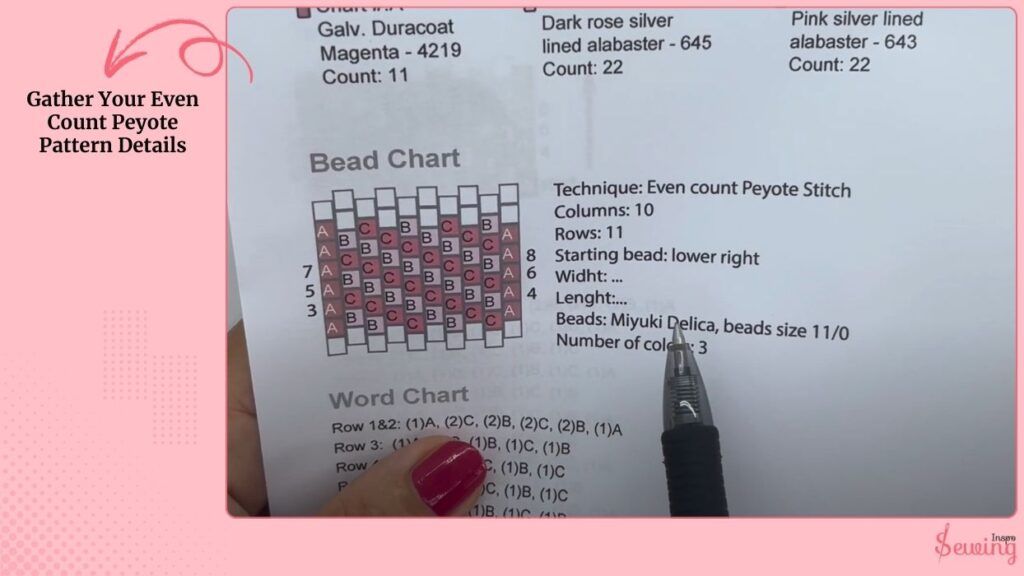
- Technique: Even-count peyote stitch
- Columns: How many beads across the width
- Rows: Total number of rows
- Width & Length: How wide/tall your piece will be (bracelet, ring, or other item)
- Bead Type: Size, shape, and material of beads
- Colors: Total number of colors and their codes (A, B, C…)
These details are usually found in the bead legend, which acts as your roadmap.
Find the Starting Point
Patterns often indicate where to start reading:
- Bottom or top
- Right side or left side
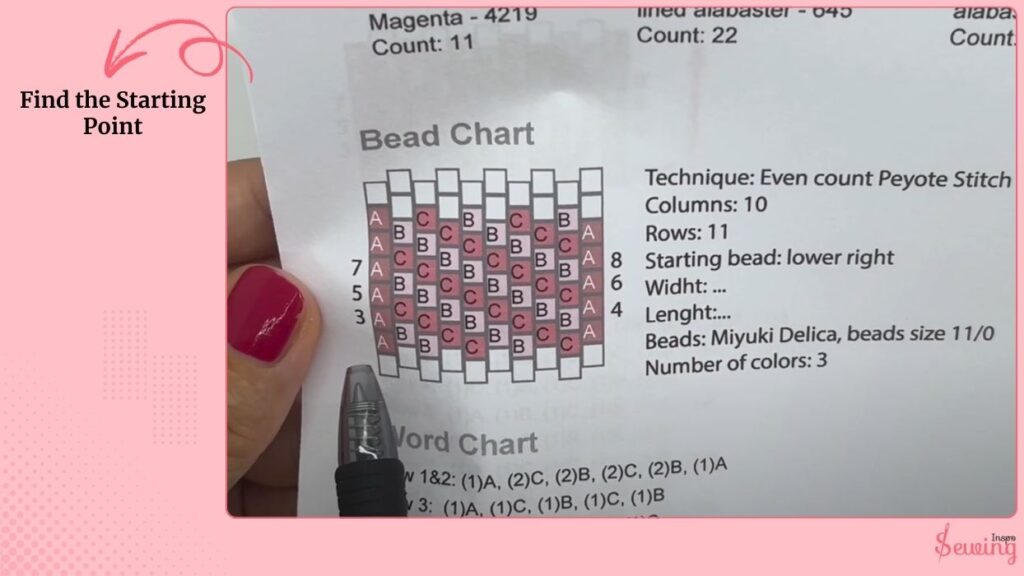
I usually start from the bottom-right corner. Pick up the first sequence of beads as indicated. This forms the foundation, often creating the first two rows in a zigzag.
Example: “Two C’s, two B’s, two C’s, two B’s, and one A.” The word chart would read: “one A, two C’s, two B’s, two C’s, two B’s, one A.” This sequence forms Rows 1 & 2.
Work Row 3
Pick up a bead from your sequence (for example, A). Pass your needle through the next bead that’s sticking up from the previous row (B). This is a kind of reading checker stitch pattern.
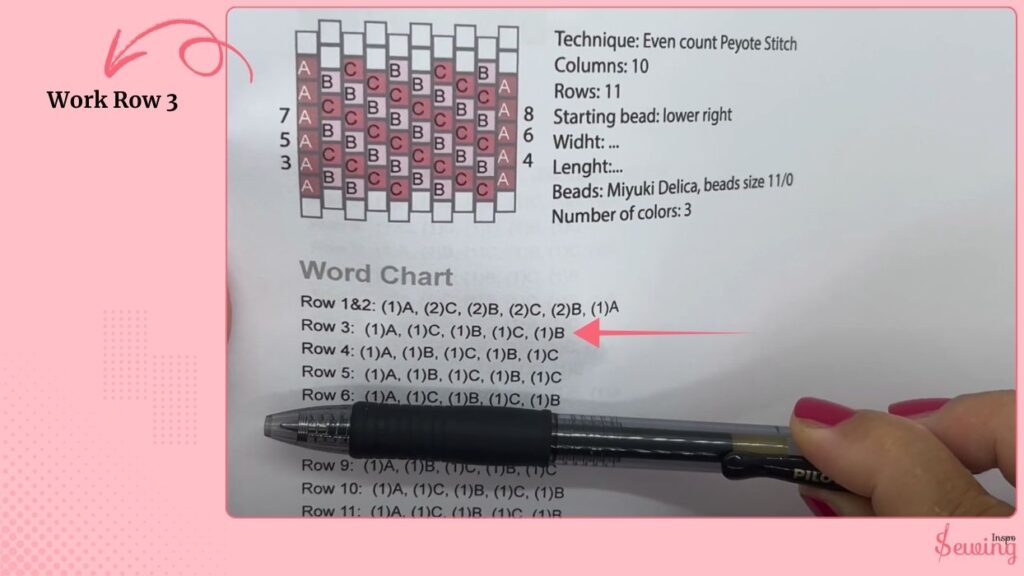
Pick up the next bead (C) and pass through the next up bead (C). Repeat across the row using the word chart sequence: A, C, B, C, B, …
Note: At this point, the beads start to form that classic brick-like peyote pattern.
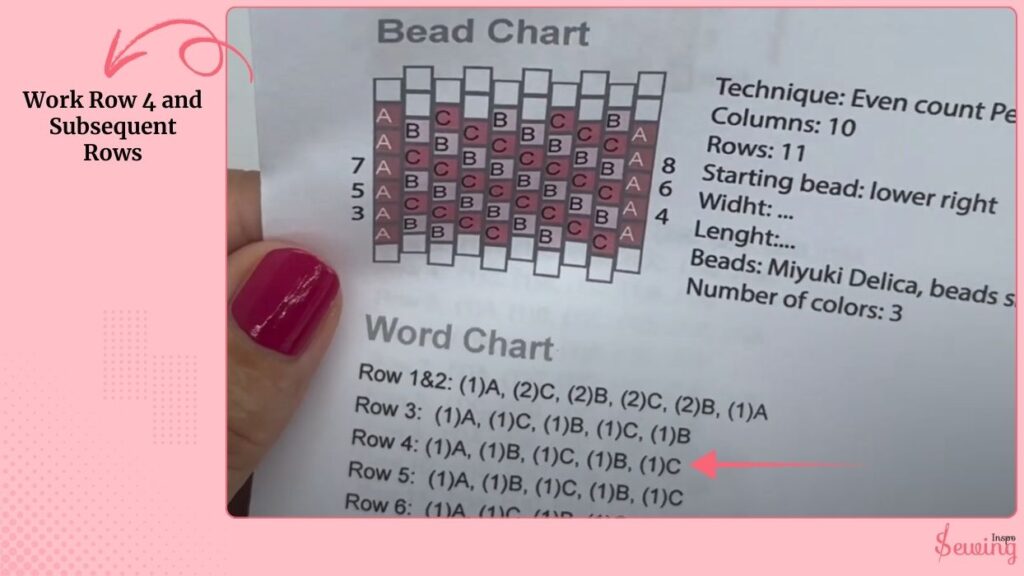
Work Row 4 and Subsequent Rows
For even rows, turn your work left-to-right if you started bottom-right. Follow the sequence from your word chart (example: A, B, C, B, C…). Repeat the pick-up-and-pass-through rhythm until you reach the desired number of rows
That’s it! Once you know what to do, where to do the rest is pretty simple, actually.
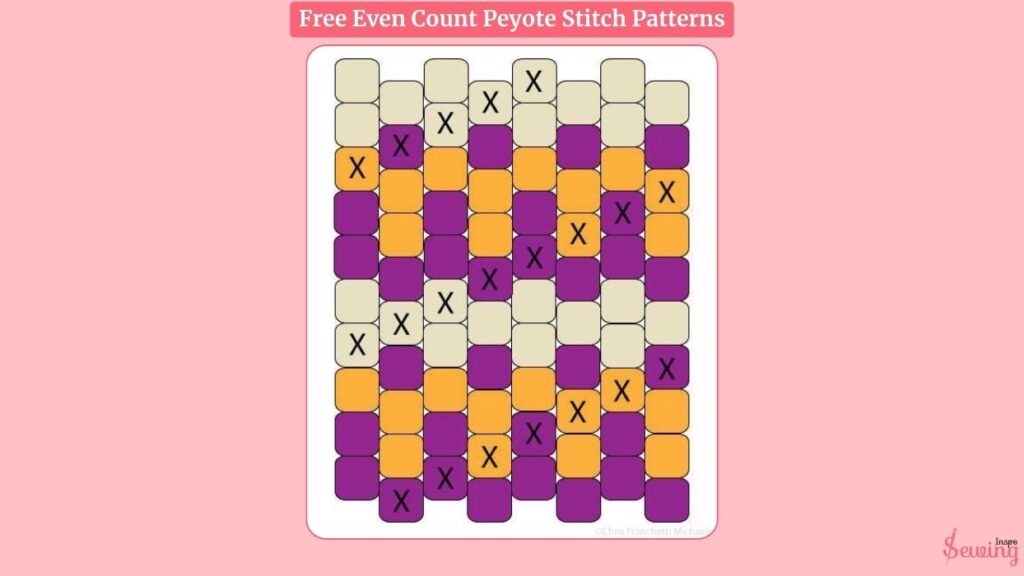
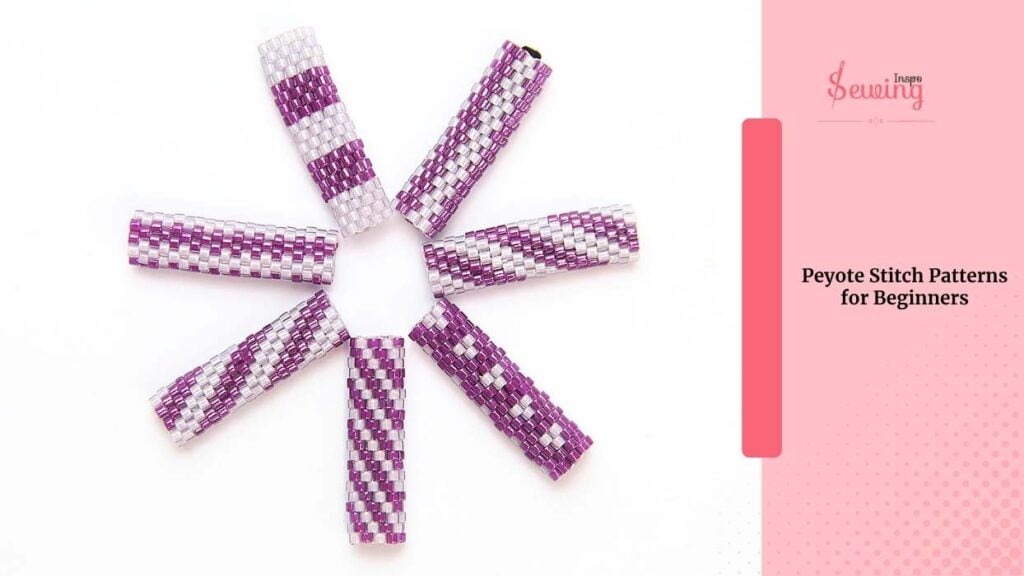
Peyote Stitch Patterns For Beginners
If you are new and all those patterns feel overwhelming, then this start with something simple like this-
Frequently Asked Questions
How do I know if it’s an even or odd count?
Check the pattern’s bead chart or word chart. If each row has an even number of beads, it’s even-count; if it has an odd number of beads, it’s odd-count.
What’s the difference between brick stitch and peyote stitch?
The main difference between brick stitch and peyote stitch is in how the beads are stacked. In brick stitch, beads are stacked directly on top of each other like a wall. Peyote stitch, on the other hand, staggers the beads in an offset pattern
What projects are good for peyote stitch?
Peyote stitch is ideal for projects such as bracelets, cuffs, rings, pendants, necklaces, decorative beads, charms, and bead embroidery accents due to its versatility and ability to create both flat and tubular designs.
Finally
That’s how to read a peyote stitch pattern.
What about you? What technique did you use? Share your technique too.


Leave a Reply