
If you’ve ever searched for “mesh stitch” and ended up watching a tutorial about sewing mesh tops.
You’re not alone.
The terms mesh fabric and mesh stitch pattern sound almost identical, but they mean 2 very different things in the sewing world.
Mesh fabric is something you buy.
It’s that airy, open-weave material you see in athletic wear, sheer blouses, or dance costumes. It’s stretchy, breathable, and already made for you to cut and sew.
Meanwhile, the mesh stitch pattern is something you create.
It’s a stitching technique used in embroidery, knitting, or machine sewing to form a net-like texture from scratch. It’s like making your own “mesh” using just thread and stitches.
Ok then, how to do a mesh stitch pattern in sewing?
Mesh Stitch
To sew a simple mesh stitch pattern, use a zigzag or honeycomb stitch over water-soluble stabilizer to create an open, net-like texture.
It’s an exciting and new thing in sewing. Let’s do it together.
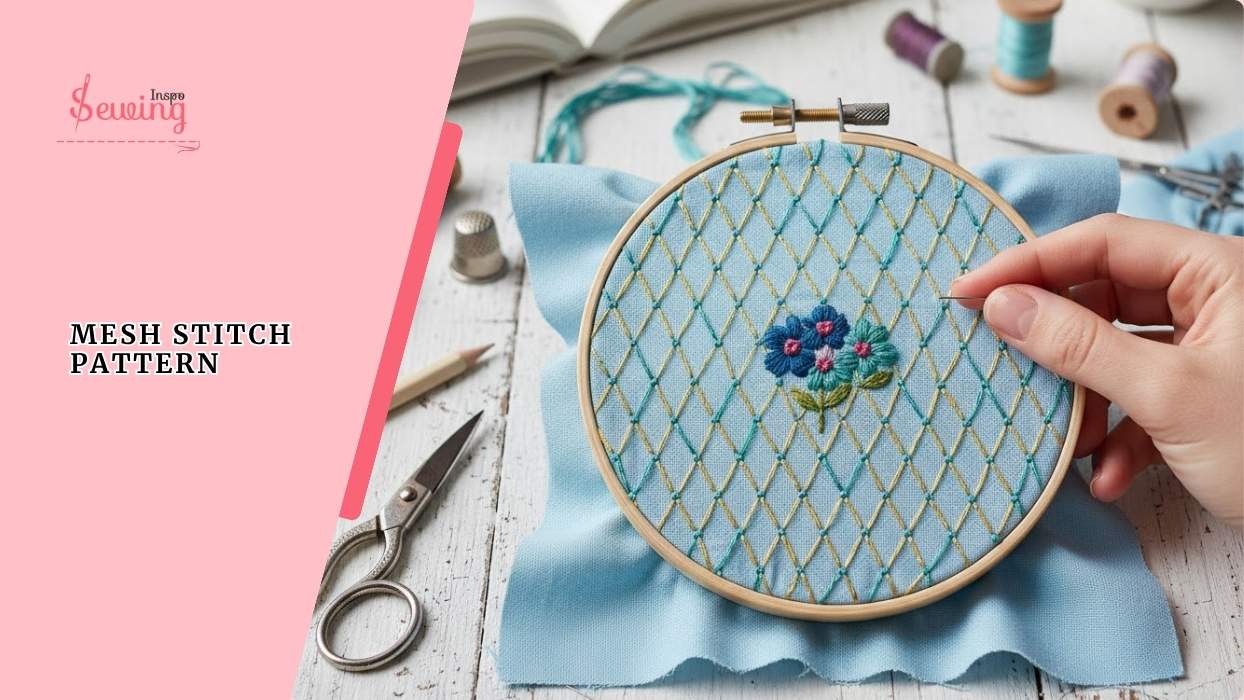
Table of Contents
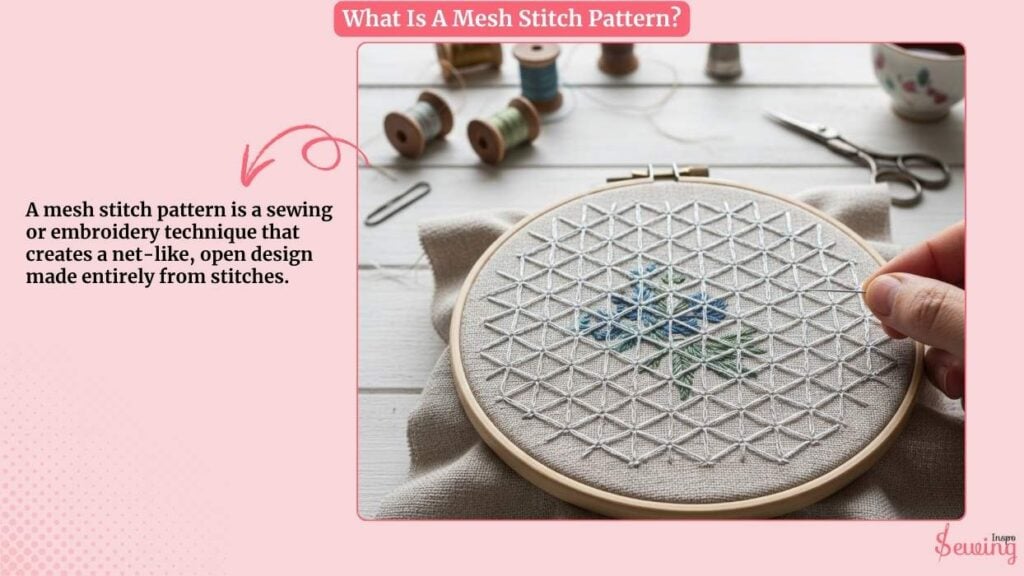
What Is A Mesh Stitch Pattern?
A mesh stitch pattern is a sewing or embroidery technique that creates a net-like, open design made entirely from stitches.
Instead of starting with an already-made mesh fabric, you use your needle, thread, and a bit of patience to form that mesh effect yourself.
It’s often used in embroidery, needlepoint, knitting, or machine decorative stitching to add texture and dimension to a project. The result looks like tiny interlocking squares or diamonds. It is similar to a fishing net or lace.
How To Do A Mesh Stitch Pattern In Sewing?
To do a mesh stitch pattern in sewing,
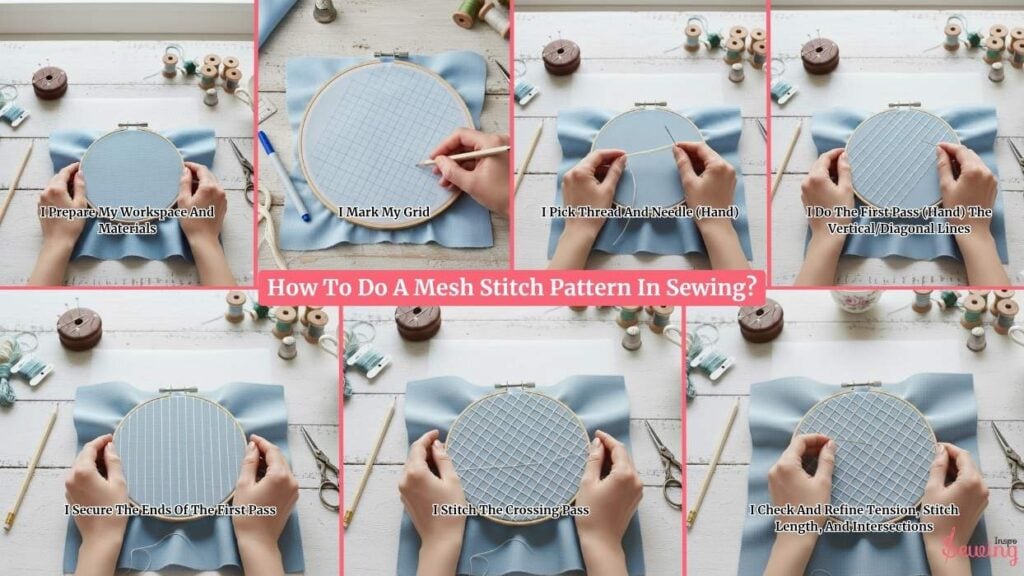
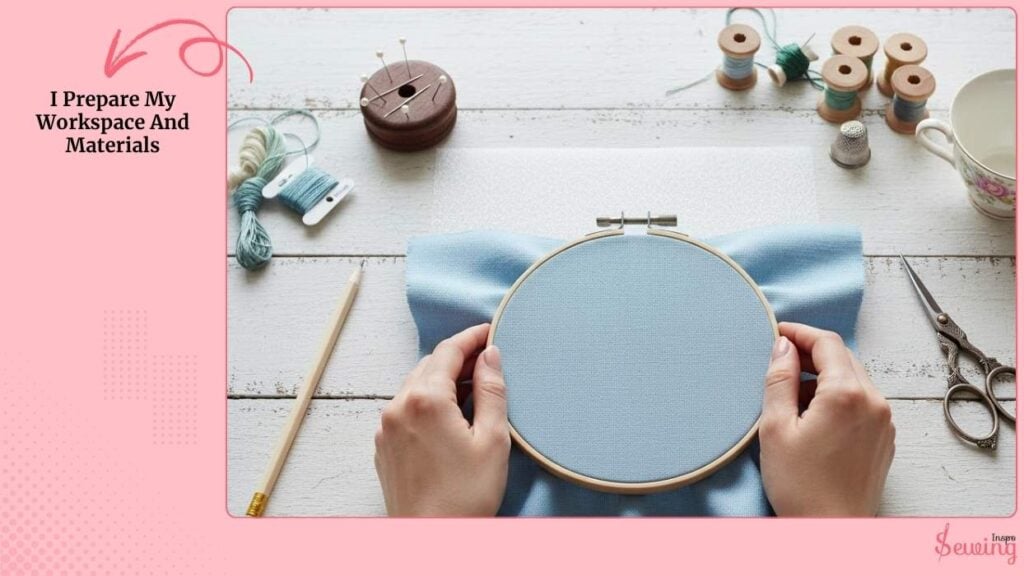
I Prepare My Workspace And Materials
I hoop the fabric with stabilizer underneath so the area is taut but not stretched. If the fabric is already slippery or open-weave (like mesh fabric), I use a full-coverage water-soluble stabilizer on top and a light tear-away beneath. Hooping keeps my grid accurate.
I Mark My Grid
With an erasable marker or light pencil, I draw parallel straight lines across the area at my chosen spacing (for example, every 5 mm).
Then, I draw the crossing set of lines at a 90° angle so that the grid resembles squares. If I want diamonds, I mark lines at 45° instead. The marked lines are my guide, like seed stitches.
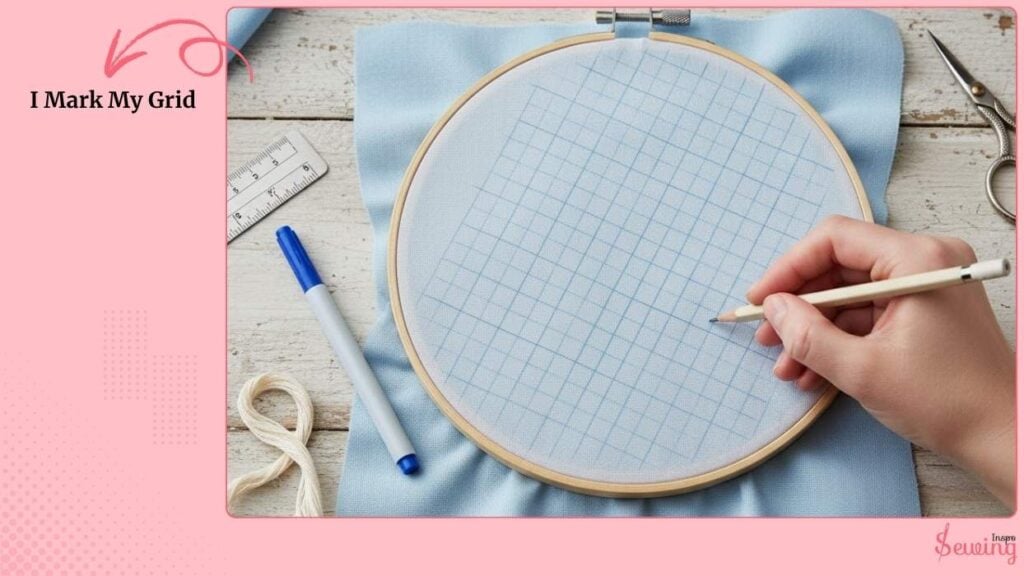
I’ll stitch along them.
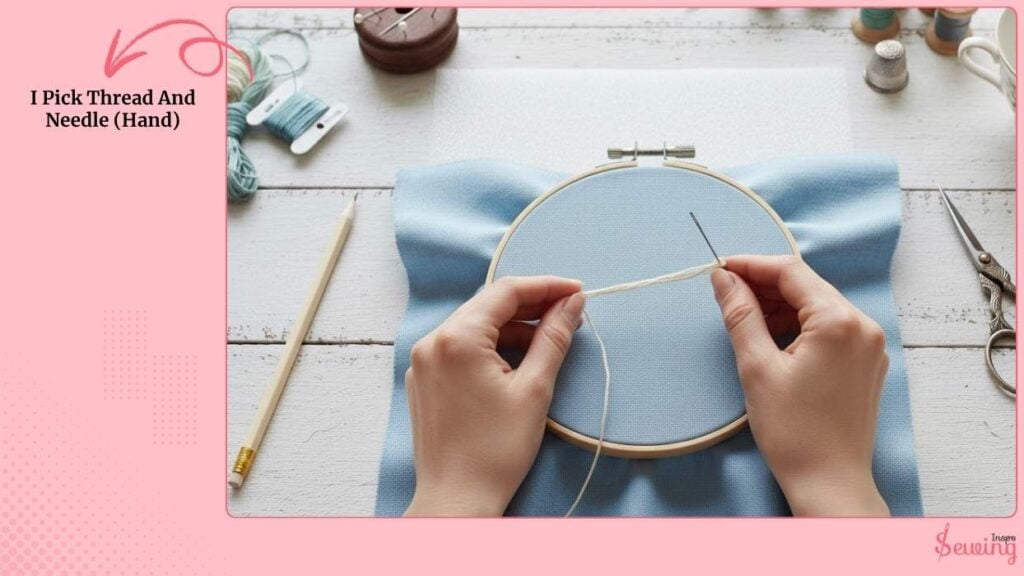
I Pick Thread And Needle (Hand)
I thread my crewel needle with 2–3 strands of embroidery floss for a soft mesh. If I want a chunky visible net, I use a heavier perle cotton.
I keep my needle perpendicular when stitching (about 90° angle to fabric) so stitches sit evenly.
I Do The First Pass (Hand) The Vertical/Diagonal Lines
I work in one direction first. I’m making long running stitches or even straight stitches along each marked line. For each stitch I:
- Insert the needle and bring it up at the start point. I do this for the tie sewing pattern, too.
- Take a straight stitch of about 4–6 mm (or match the grid spacing),
- Continue along the line, keeping stitch length even.
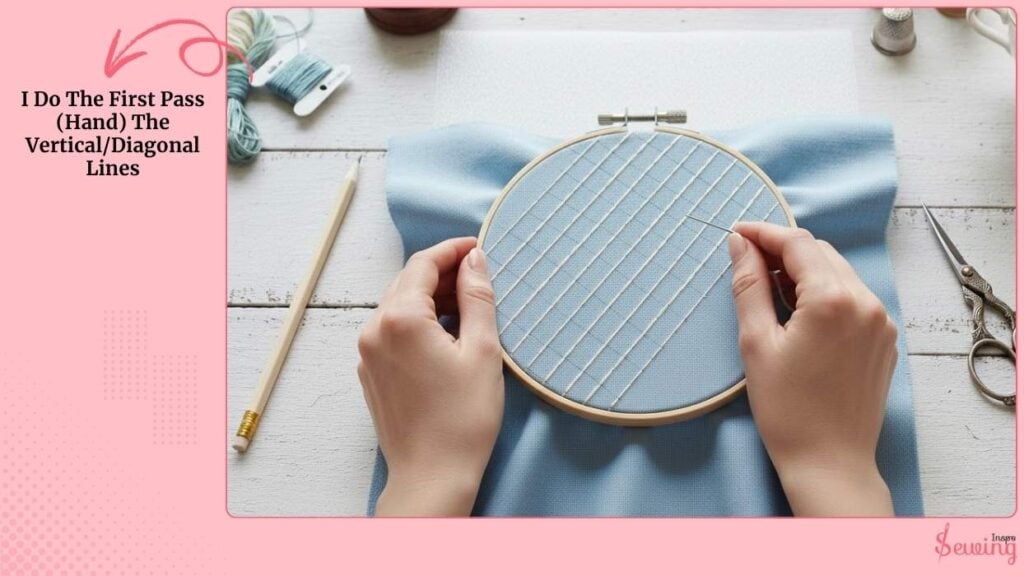
If I want a stronger mesh, I use a backstitch or split the stitch into shorter lengths (2–3 mm). I keep tension even, not too tight (that would pucker), not too loose (that looks sloppy).
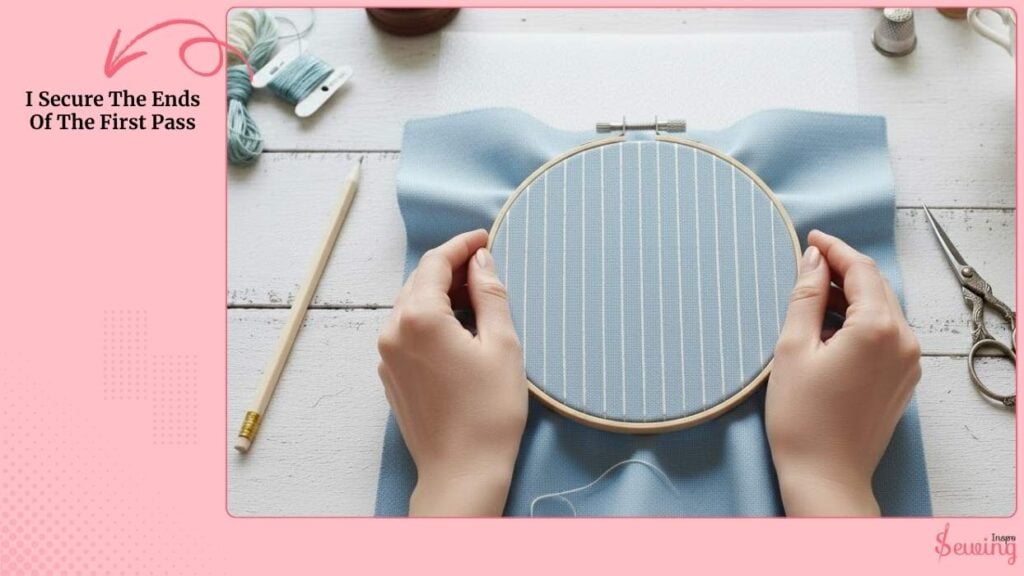
I Secure The Ends Of The First Pass
At the end of each stitched line, I tie off neatly on the back with a small knot or weave the tail under a few stitches. If using a hoop and water-soluble top stabilizer, I can leave tails and hide them when washing the stabilizer away.
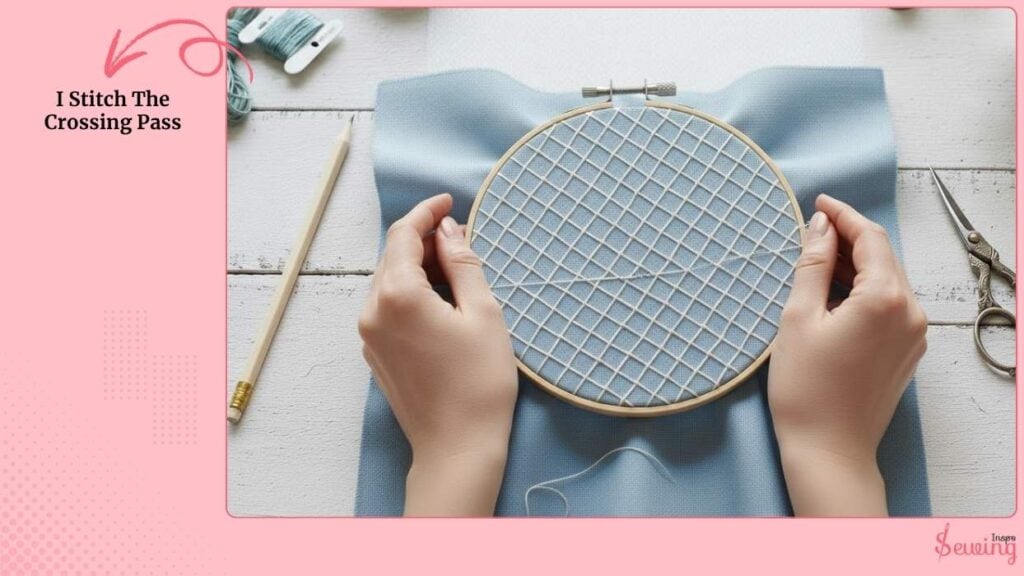
I Stitch The Crossing Pass
I stitch the perpendicular set of lines the same way, crossing over the first set to form little squares or diamonds. Where threads cross, I can:
Leave them simply crossing (flat net), or add tiny catch stitches at each intersection (a small horizontal stitch of 1–2 mm) to create a more stable, decorative lattice. At this point, it will give a waffle pattern look.
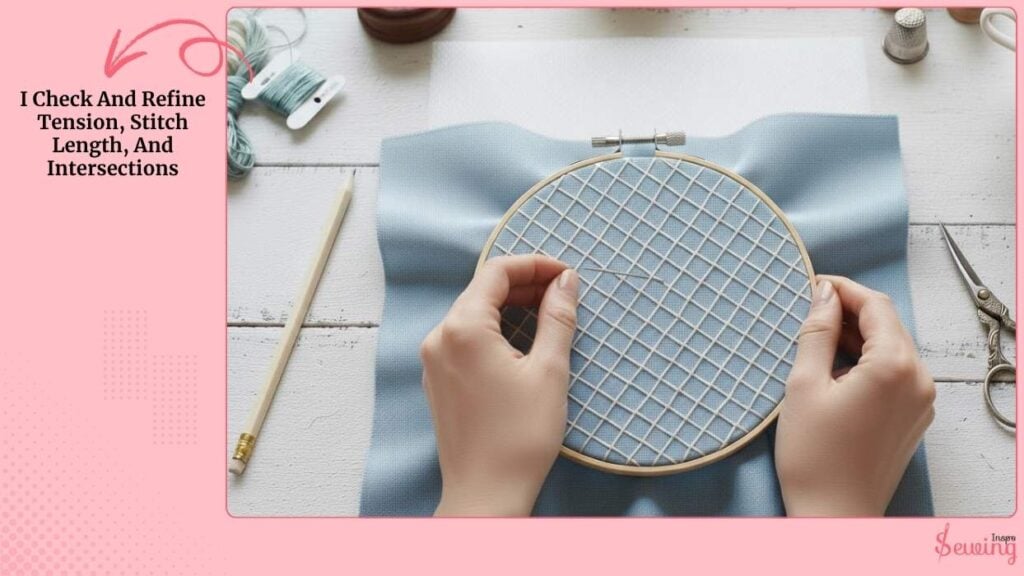
I Check And Refine Tension, Stitch Length, And Intersections
I step back and check the look. If intersections pull in, I loosen tension or make stitches a hair longer.
If the mesh looks baggy, shorten the stitch length or add catch stitches at the intersections. For an even look, I try to keep stitch length variance less than ±1 mm.
FAQ
Can I do mesh stitch on any fabric?
Not really. Mesh stitch works best on medium- to tightly woven fabrics, such as cotton, linen, or canvas. If the fabric is too stretchy or thin, it can cause the grid to pucker or distort. For slippery materials (like satin), I always use a stabilizer underneath to keep everything in shape.
What stitch length should I use for machine sewing?
A good starting point is 2.0–2.5 mm for straight stitches. For free-motion mesh, your “stitch length” depends on how fast you move the fabric; steady and moderate speeds give the cleanest grid.
What’s the best thread for mesh stitching?
For hand stitching, I typically use embroidery floss or perle cotton. For machine stitching, polyester or rayon embroidery thread gives a clean, slightly shiny finish. Avoid overly thick threads unless you’re doing decorative mesh.
Conclusion
The mesh stitch pattern is one of those techniques that looks complicated but feels relaxing once you get into the rhythm.
I personally love how flexible it is.
You can keep it airy and soft for a lace effect or tighten the grid for a structured, woven look. It’s perfect for embroidery fillers, art quilts, or just adding that “I actually made this texture myself!” moment to your project.


Leave a Reply