
If you’ve ever wanted to dip your toes into embroidery but thought, “Wait… how do I even get the design onto fabric without messing it up?”
Don’t worry, I’ve been there too. That’s exactly where stick and stitch embroidery patterns swoop in to save the day.
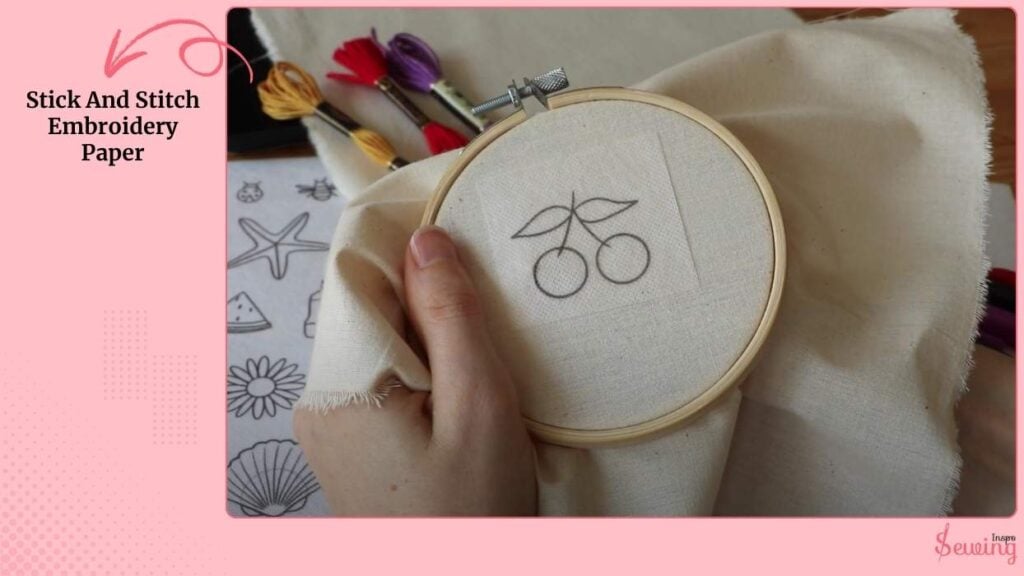
Basically, stick and stitch is pre-printed designs on a special, water-soluble stabilizer. You just peel off the backing, stick it onto your fabric, and stitch right over the lines. Once you’re done, a quick rinse in water dissolves the stabilizer. Your embroidery design is left perfectly stitched on the fabric.
Ok, but how to make stick and stitch embroidery patterns? Well, it’s easy,
Stick And Stitch Embroidery Patterns
To make stick and stitch embroidery patterns, print or draw your design onto water-soluble stabilizer, cut it out, stick it on your fabric, stitch over it, then rinse away the stabilizer.
Sounds easy, right? Ok, let’s get to it practically & make the hand embroidery easy.
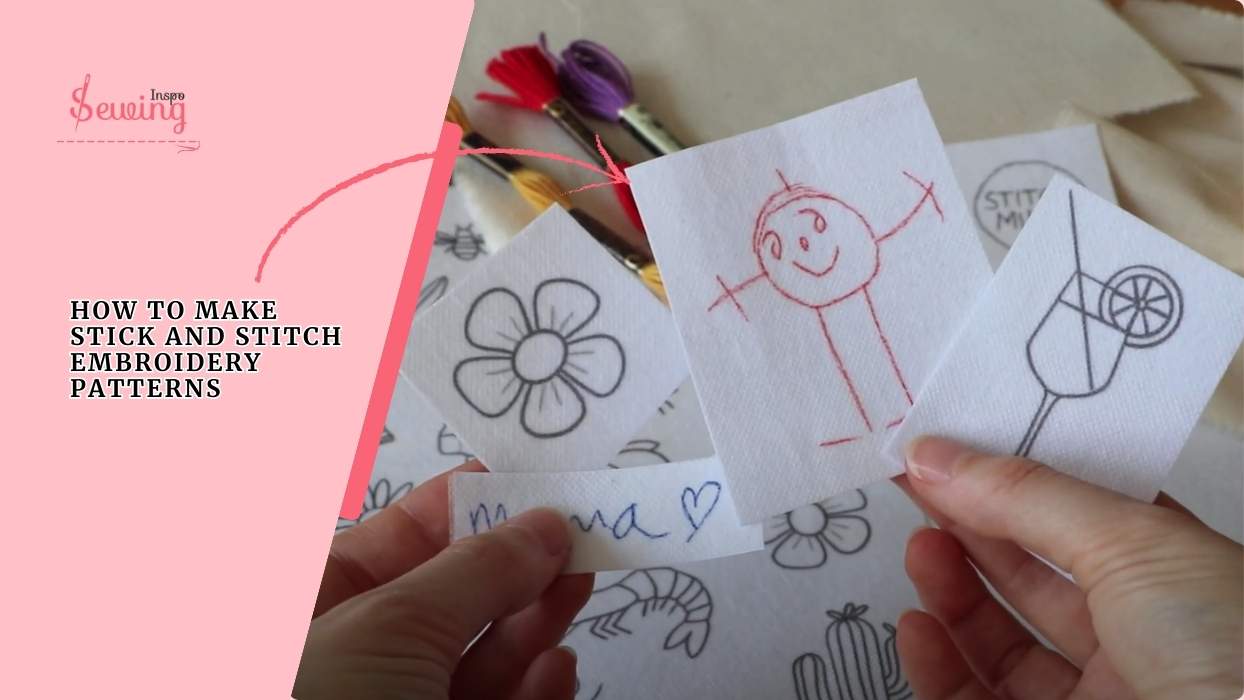
Table of Contents
How To Make Stick And Stitch Embroidery Patterns?
There are 3 ways to make a stitch and stitch embroidery pattern,
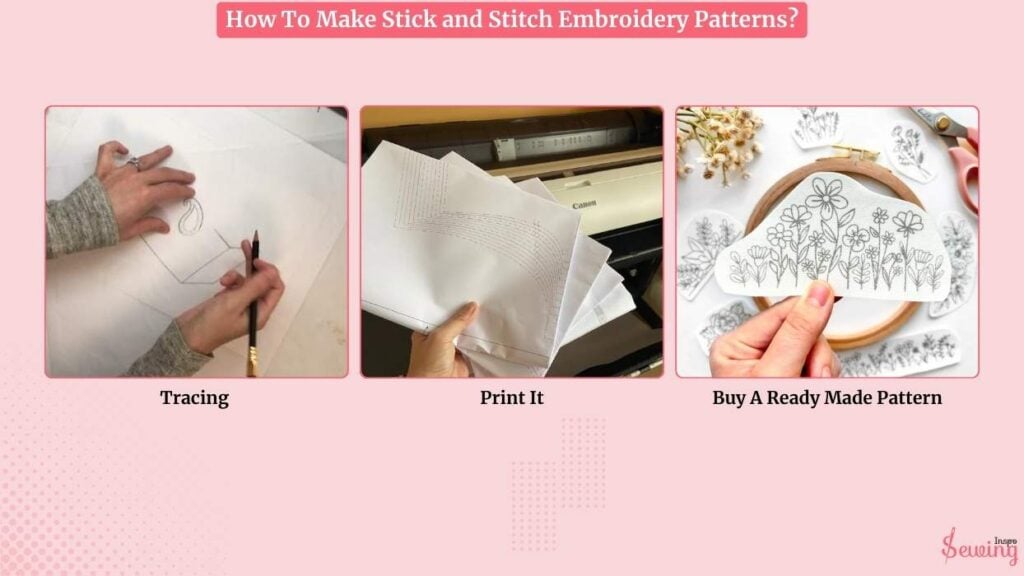
- Tracing
- Print It
- Buy A Ready Made Pattern
Macking Stick And Stitch: Tracing
This is the most hands-on method, and honestly, it’s great if you love doodling or want something truly personal. I use this technique to make cross stitch pattern too.
Grab a permanent marker, fine liner, or fabric-safe pen/Sakura Micron pens and sketch directly onto the blank, water-soluble stabilizer sheet. You can do this for popcorn stitch patterns.
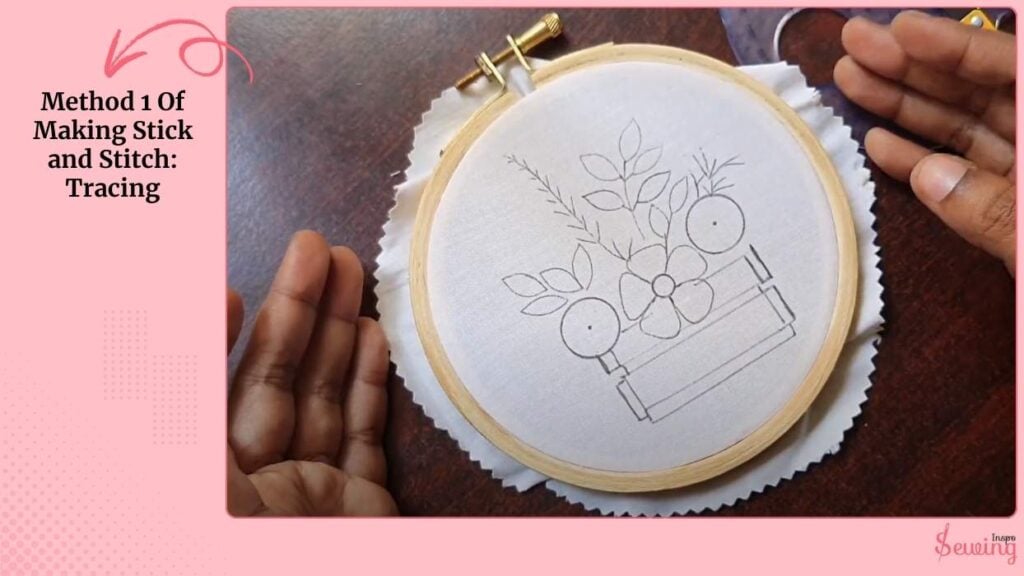
Tape your design, such as a sketch, logo, or printed picture, onto a sunny window. Hold your stabilizer on top, sticky side facing you, and trace the lines. The light shining through makes tracing super easy. I like to use it a lot for hand stitch design for kameez and sometimes for tie sewing pattern.
Or you can use another cheat code 😜
Open your design on a tablet or laptop, crank the brightness up, and carefully lay the stabilizer sheet over it. Then trace the lines. Just be gentle so you don’t press too hard and damage the screen.
Making Stick & Stitch: Printing
If you want clean, precise patterns, or you’re not in the mood to trace. This method is what you need,
- Use an inkjet printer (not a laser printer, as lasers can get too hot and damage the stabilizer).
- Place the stabilizer sheet into the paper tray, just as you would with normal paper.
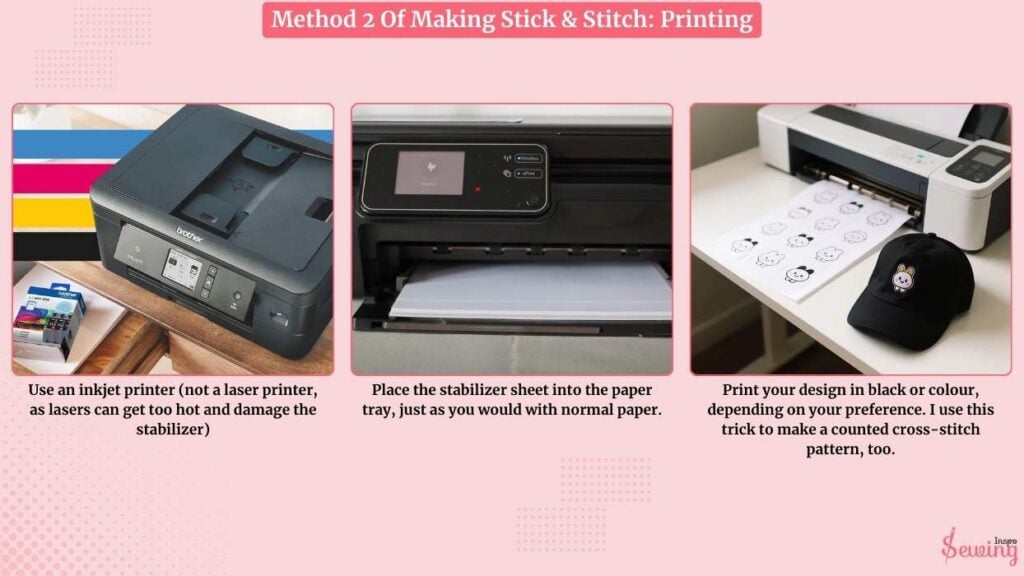
- Print your design in black or colour, depending on your preference. I use this trick to make a counted cross stitch pattern, too.
The printed lines will stick firmly onto the fabric and stay visible while you stitch. This is perfect for complex patterns, such as mandalas, floral borders, or detailed lettering, where freehand drawing might become messy. It’s perfect for water-soluble fabric.
Buy Stick And Stitch Embroidery Paper
If you want the shortcut and skip all the hassle, then just buy some ready made paper. There are many options out there. Like,
Some come with 3 A4 sheets and have 57 ready-to-stitch floral and leaf designs. Honestly, this is perfect if you don’t want the hassle of printing your own patterns. I got this set once for making floral patches on tote bags. I use this for checker stitch patterns in sewing, too.
It is super beginner-friendly, and the designs look pretty fancy for the effort it takes. Ok, but where to buy Stick and stitch Embroidery Paper?
Well, you can find it on every e-commerce, but I mostly buy it from Etsy, sellers like MatryoshkaDollShop make pre-printed designs on sticky stabiliser.
My personal tip?
If you’re a beginner, start with ZQmino or a small sample pack. If you’re the creative type who enjoys creating your own designs, opt for Sulky. And if you just want a quick, fun, no-stress project, grab one of those Etsy sets.
If you get stuck somewhere, then watch this video Using Stick & Stitch Embroidery patterns – Beginner Embroidery Tutorial
How To Make Embroidery Designs On Computer?
If you cross that part of the newbie, then your mind is filled with design ideas, right? I’m pretty sure you are stuck on putting it up on fabric. So here I come with a lazy solution with an embroidery pattern transfer,
- Import an image/sketch
- Or draw your own design directly in the software
- Trace with tools (lines, shapes, freehand)
- Choose stitch types (satin, fill, running)
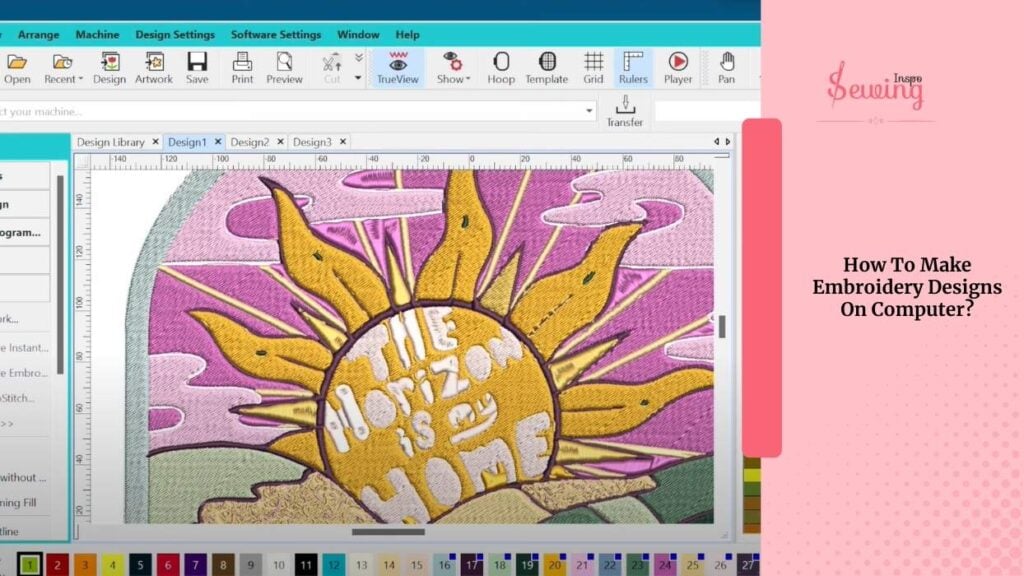
- Adjust stitch density, length, and angle
- Add colour changes & underlay stitches. You can even change the pattern if you want to.
- Use simulation to see how it’ll stitch out
- Adjust for your fabric
That’s it, you got your own design printed.
Read how to read a peyote stitch pattern if you like this guide.
How To Stitch Using The Stick And Stitch Embroidery Pattern?
Got your stitch pattern ready? Ok, now let’s stitch it. Here is how i do it,
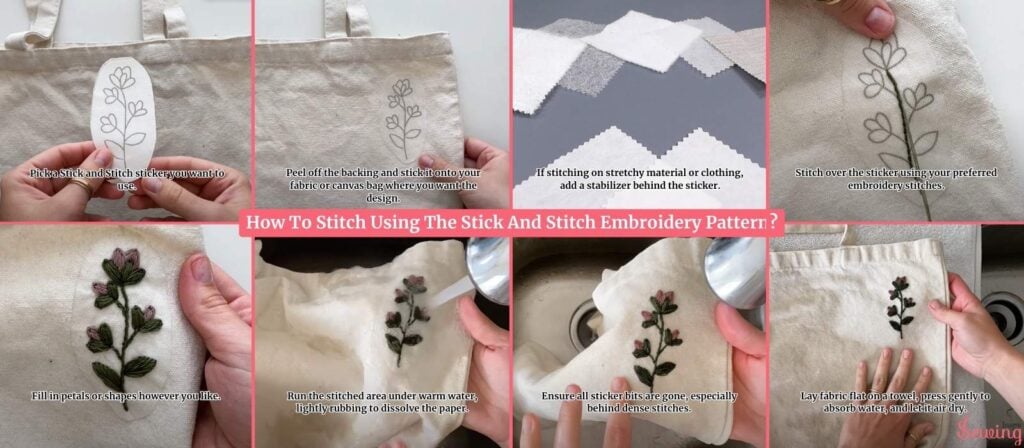
- Pick a Stick and Stitch sticker you want to use.
- Peel off the backing and stick it onto your fabric or canvas bag where you want the design.
- If stitching on stretchy material or clothing, add a stabiliser behind the sticker.
- Stitch over the sticker using your preferred embroidery stitches.
- Fill in petals or shapes however you like.
- Run the stitched area under warm water, lightly rubbing to dissolve the paper.
- Ensure all sticker bits are gone, especially behind dense stitches.
- Lay fabric flat on a towel, press gently to absorb water, and let it air dry.
All of a sudden, embroidery is not so hard, right? Just peel, stick, and stitch.
Frequently Asked Questions
How does Stick and Stitch work?
Stick and Stitch uses a water-soluble sticker with a pre-printed design. You stick it onto your fabric, stitch over it, and then wash away the sticker, leaving just your embroidery.
How does peel and stick embroidery work?
You peel the backing off a sticker design, stick it onto your fabric, embroider over the lines, and then rinse off the sticker so only your stitches remain.
What is a Stick and Stitch?
It’s an embroidery design printed on a removable, water-soluble sticker, making it easy to transfer designs to fabric without tracing or drawing.
Now It’s Your Turn
That’s how to make stick and stitch embroidery patterns.
Now you make it and show us how it turns out.


Leave a Reply