
You can bring any art to life with cross stitch. That’s what makes it one of my favorite stitches. When I first started, pattern-making was a real headache. I had all these beautiful ideas swirling in my head.
But when it came to transferring them onto fabric… I was stuck.
If you’ve ever sat there, staring at a blank piece of fabric, wondering how to make a cross stitch pattern. Trust me, you’re not alone. I’ve been there too.
The truth is, there are different ways to create a pattern, and over time, I’ve tried quite a few. These days, my favourite method is simple,
Cross Stitch Pattern
To make a cross-stitch pattern, choose a design or image, place it on graph paper (or software), and map each square to a stitch with its color code.
If you’re working with an actual picture you want to stitch, the process changes a bit. Don’t worry, though, I’ll walk you through every method so you can bring any idea, sketch, or photo to life with cross stitch.
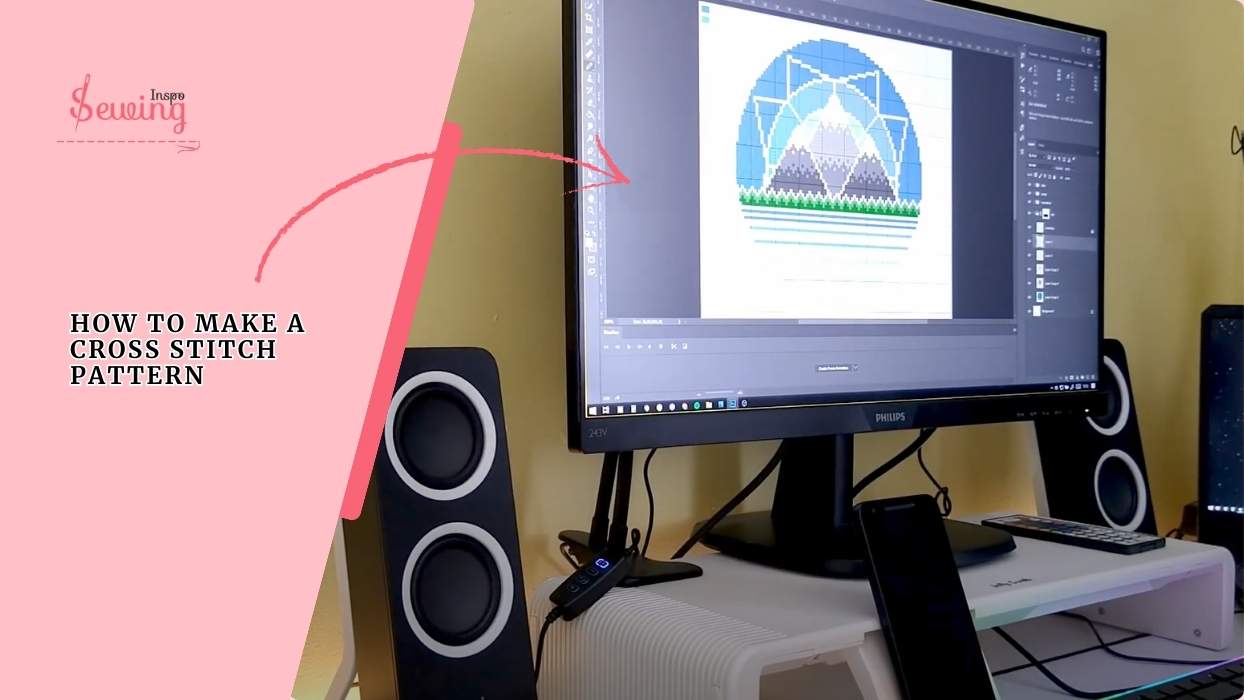
Table of Contents
How To Make A Cross Stitch Pattern With Graph Paper?
Before going to all the digital and tool methods, let’s teach the manual with a graph and a pencil. So,
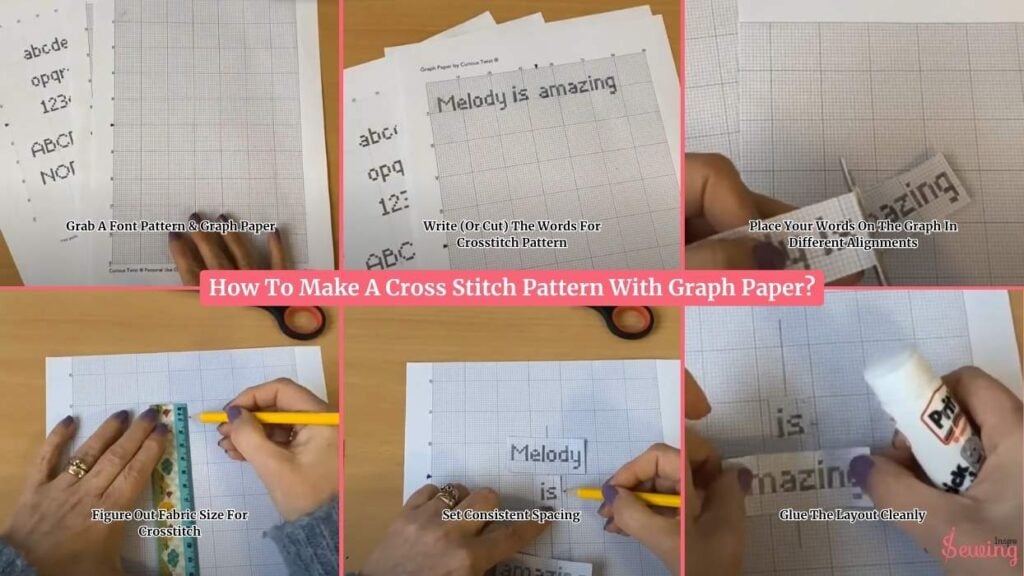
To make a cross stitching pattern, follow the 4 steps,
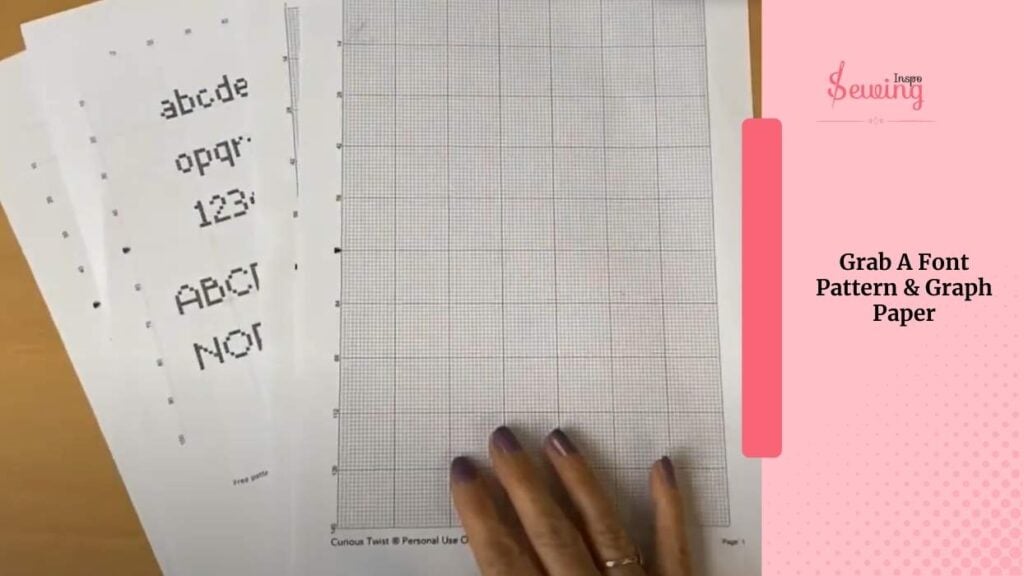
Grab A Font Pattern & Graph Paper
I grab a font pattern & need some graph paper. I usually use a PDF copy from Google. But honestly, you can find graph paper pretty easily, in stationery shops, or even just by downloading a free PDF online and printing it yourself.
Now,
I’ve set mine up so that each block represents 14 stitches, because I usually stitch on 14-count fabric. That’s the nice thing about graph paper. It often has those darker lines every 10 squares, which makes it easy to count. I use this trick while making peyote stitch pattern too.
So, for me, I know that 14 squares equal one inch. That way, once I’ve written out my design and laid it out on the graph. I can quickly determine exactly how big my finished piece will be and what size fabric I’ll need. Makes life so much easier!
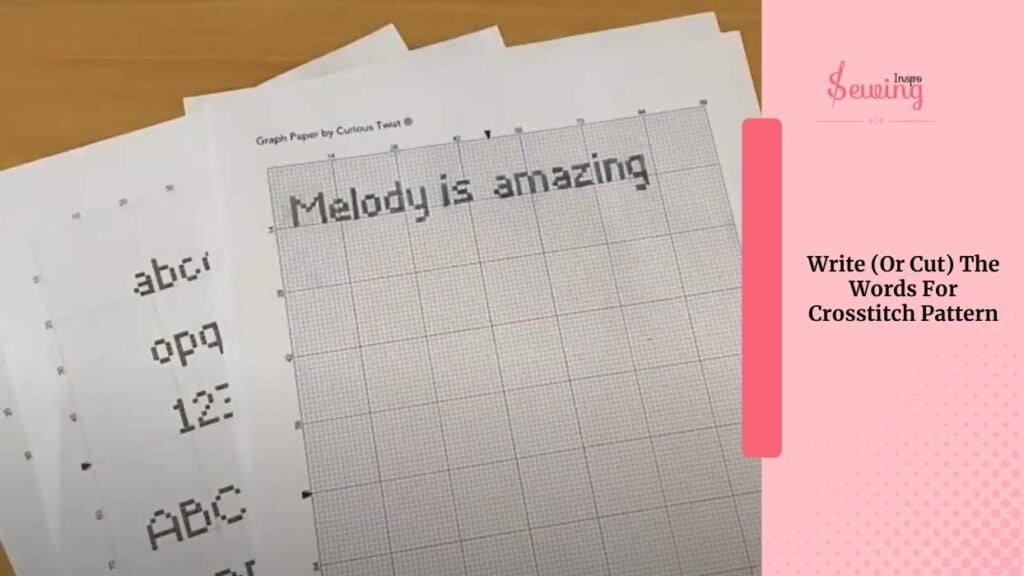
Write (Or Cut) The Words For Crosstitch Pattern
Now comes the fun: deciding what text or phrase you’re stitching. If drawing directly, use your alphabet chart and copy each letter, square by square, onto your graph paper.
If cutting/printing. Print the letters or whole words, cut them into strips, and place them onto your graph paper. I love the cut-and-move method because it feels like arranging fridge magnets. You can shuffle until it “feels right.”
Place Your Words On The Graph In Different Alignments
Place your words on the graph in different alignments: centered, left, right, staggered. Try spacing them out by moving them closer or farther apart. Don’t worry about perfection yet. Just see what flows visually.
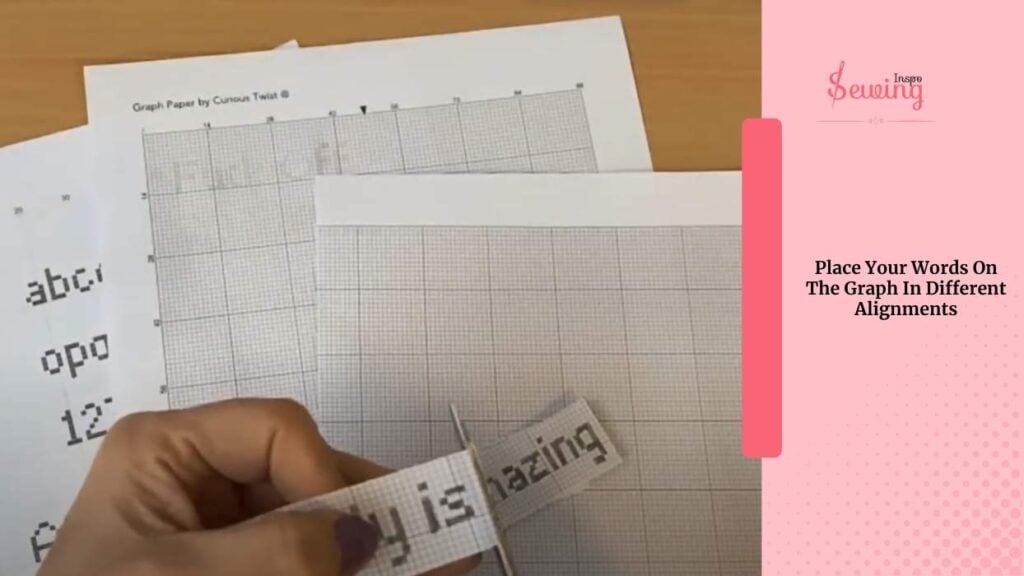
This step is important for balance. So do it properly. Cause,
A pretty design on paper = a pretty finish on fabric.
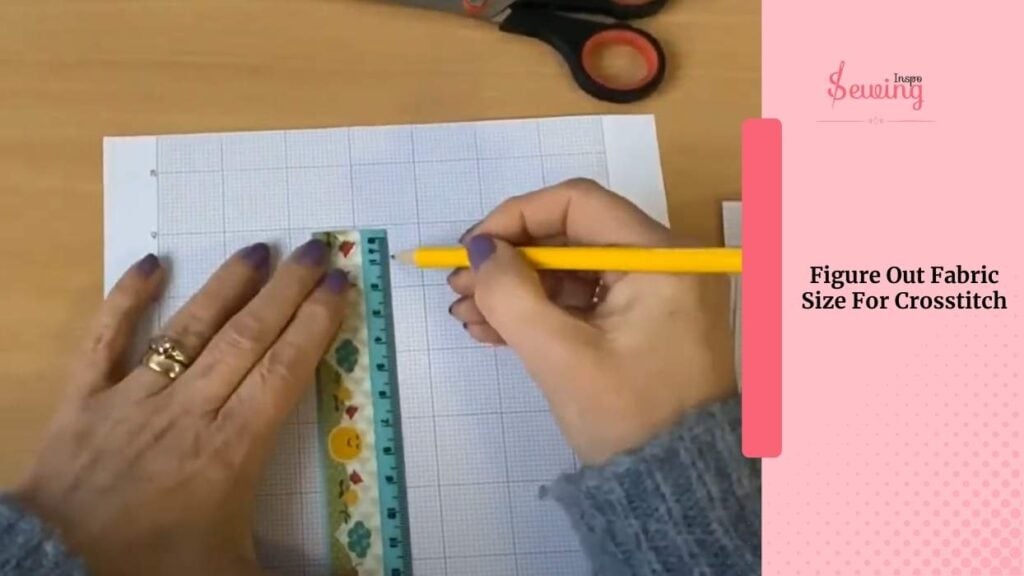
Figure Out Fabric Size For Crosstitch
Okay, now comes the part where a tiny bit of math sneaks in (don’t worry, I promise it’s painless).
First, count the number of squares wide and tall your design is on the graph paper. For example, let’s say it’s 84 squares across and 56 squares down. Next, you’ll match that to your fabric count. If you’re stitching on 14-count fabric, just divide:
- 84 ÷ 14 = 6 inches wide
- 56 ÷ 14 = 4 inches tall
Now, here’s the trick most beginners forget (and I learned the hard way),
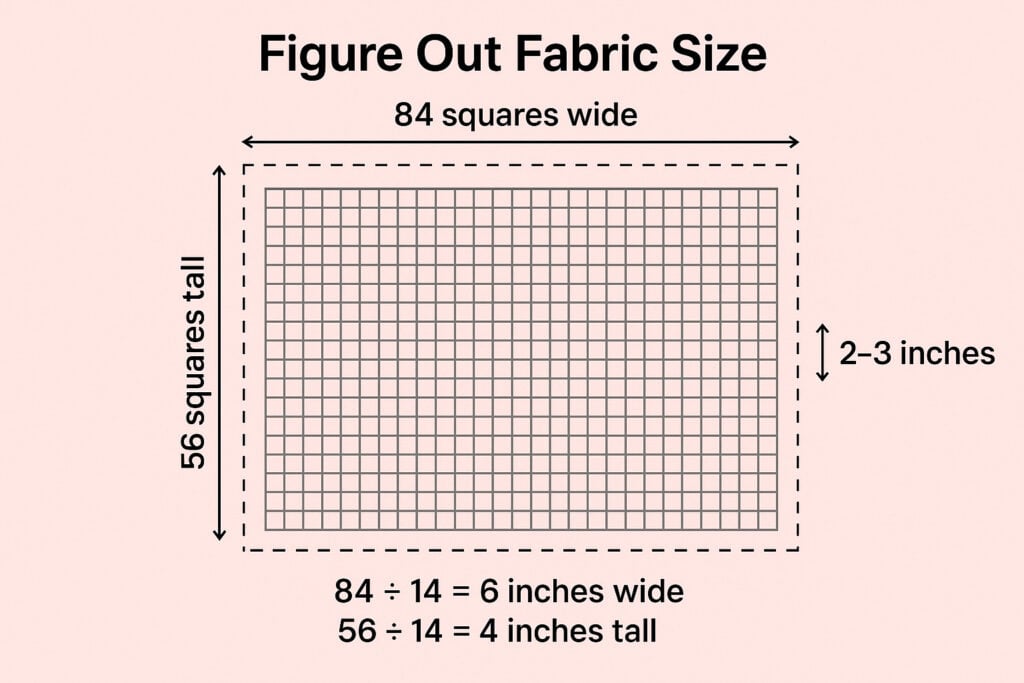
Always add extra fabric around the edges for framing or hooping. I usually give myself at least 2–3 inches on each side. So instead of cutting exactly 6″×4″, I’d cut a piece that’s 10″×8″ minimum.
Trust me, nothing hurts more than realizing your fabric is too small after you’ve started stitching (yep, been there, done that, regretted it 😅).
Set Consistent Spacing
Spacing makes or breaks readability. Here’s my go-to formula:
- Between letters: 1 square (unless your font guide suggests more).
- Between words: 3–5 squares.
- Between lines: 6–8 squares on 14-count. Add more if letters like g, y, p dip below the line or tall letters like k, l rise high.
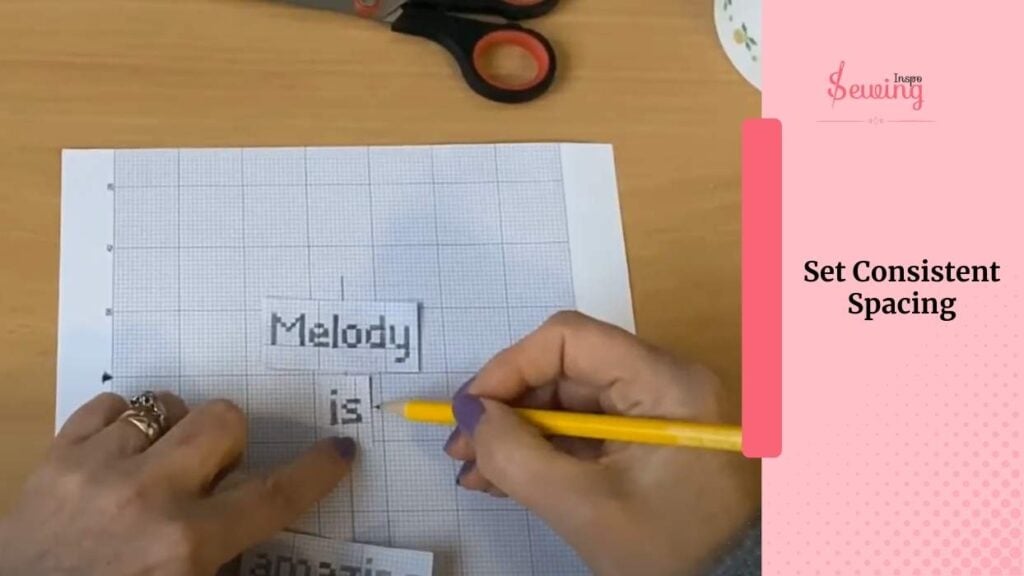
I always double-check this by “mock reading” my chart. If I have to squint, I increase spacing.
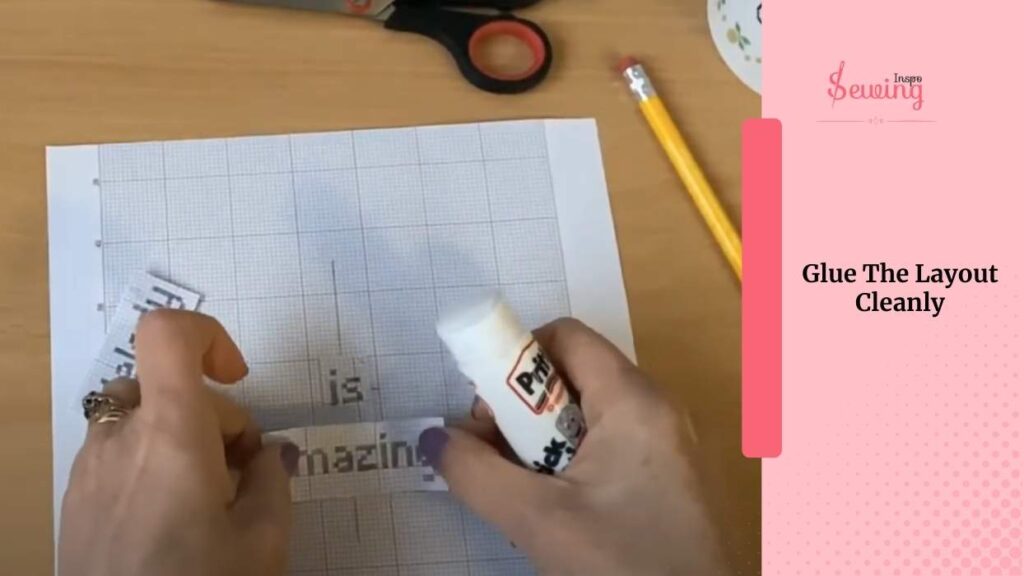
Glue The Layout Cleanly
Once happy with the draft. If using paper words, glue them down lightly. If sketching, trace your letters neatly with a pencil (then ink if you want it permanent).
Add row/column numbers every 10 squares on the grid. This makes counting while stitching so much easier. Mark the center point with a small crosshair. Now your chart looks “official,” like one from a magazine. You can use this to stitch necktie sewing pattern.
And that’s it! Your pattern is ready to come out in life. If you are still confused, then watch this video tutorial. Easy Cross-Stitch Patterns, Letters and Fonts You Can DIY
Make Your Own Cross Stitch Pattern From Photo
To turn a photo into a cross-stitch pattern, you can use a generator such as Pixel-Stitch, StitchFiddle, or Pic2Pat. These tools enable you to adjust details such as stitch size, color count, and fabric type to match your project. Here is how you can do it,

- Ensure it’s the correct file type and not too large.
- Resize it to around 800 pixels wide.
- Crop and center it (square dimensions usually work best).
- Remove unwanted or busy backgrounds (so you only stitch the subject, the dog, not the garden).
- Upload the photo file (in a supported format).
- Select fabric count and project size (or let the tool choose for you).
- Set the maximum number of floss colors you want to use.
- The tool automatically maps to the closest DMC thread colors.
- The photo is now on the design canvas. This kinda reminds me of changing the stitch pattern on a sewing machine.
- Switch between different views (color blocks or stitches).
- Tweak as needed
- Make sure the pattern is centered.
- Export the pattern
That’s it, you are done. Those app will help you make counted cross stitch pattern too.
How To Make A Cross Stitch Pattern On Excel?
Excel can be used as a DIY cross-stitch pattern maker! Here’s how you can set it up:
- Open a Blank Workbook: Start fresh with a new Excel file.
- Make Square Cells: Select the whole sheet by clicking the little triangle in the top-left corner.
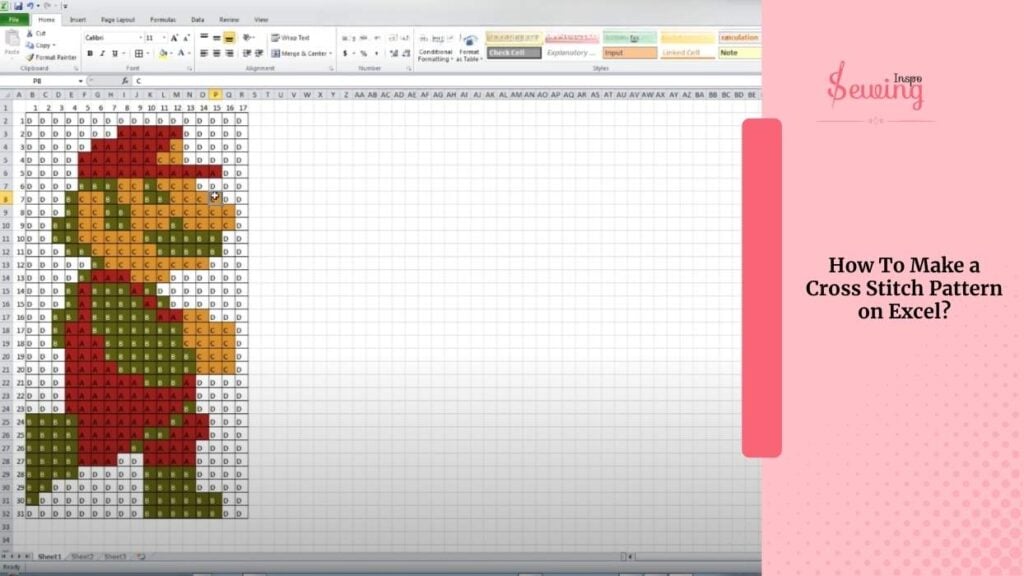
- 3. Add Grid Lines Highlight the area where your design will go, click “Borders,” choose “All Borders.” This gives you a neat stitch grid.
- 4. Fill in Your Design Click a cell, use the “Fill Color” tool, and pick your thread color. Each colored cell = one cross-stitch.
- 5. Make a Key On the side, create a simple chart with either symbols or color swatches. Link each one to the thread color (like DMC codes) so you or anyone else knows what to stitch.
- 6. Add Outlines (Optional) Want to include backstitch details? Use the “Borders” tool to draw outlines right on the design.
- 7. Save Your Pattern Save your work as an Excel file for editing later, or export it as a PDF if you want to print or share it.
Now the pattern is ready to come alive. Sometimes I feel lazy, so I just use stick and stitch embroidery paper.
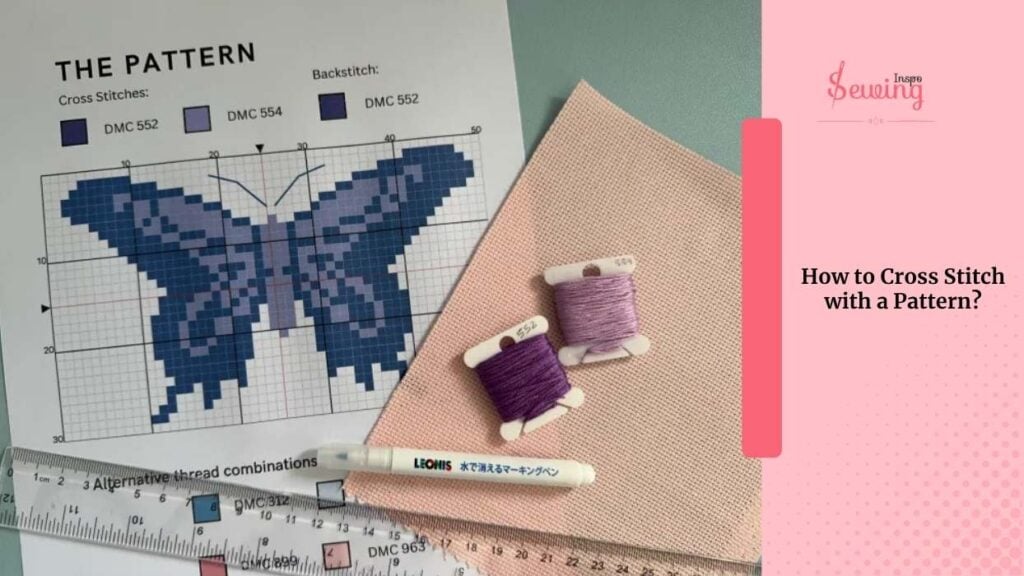
How To Start A Cross Stitch From A Pattern?
Now you must be wondering, ‘I got my pattern, but how do I stitch on it?’ I know, and it’s not that hard. Here is how I handle it,
- Find the center of your fabric and match it with the center of your graph.
- Each square on the graph = one stitch on the fabric.
- Use 2 strands of floss (for 14-count Aida), cut about 18–20 inches long.
- Start stitching: make diagonal stitches () across, then return (/) to complete the X.
- Follow the graph square by square, color by color.
- Secure floss by tucking under 3–4 stitches on the back (no knots).
Issues While Making Cross-Stitch Pattern
I told you the process above, but don’t assume it will go smoothly. You will surely face some issues. The most common complaint i come across is pattern size. Some say it got bigger, some say it got smaller.
So here is how you can fix it,
How To Make A Cross Stitch Pattern Bigger?
If your original cross-stitch pattern feels too small, there are several ways to scale it up to fill more space or accommodate a larger project. You don’t have to redraw everything from scratch. Sometimes, a few tweaks are all you need.
- Use lower-count fabric to make each stitch bigger (switch 14-count Aida to 11-count).
- Resize digitally in pattern software using the scale or resize option.
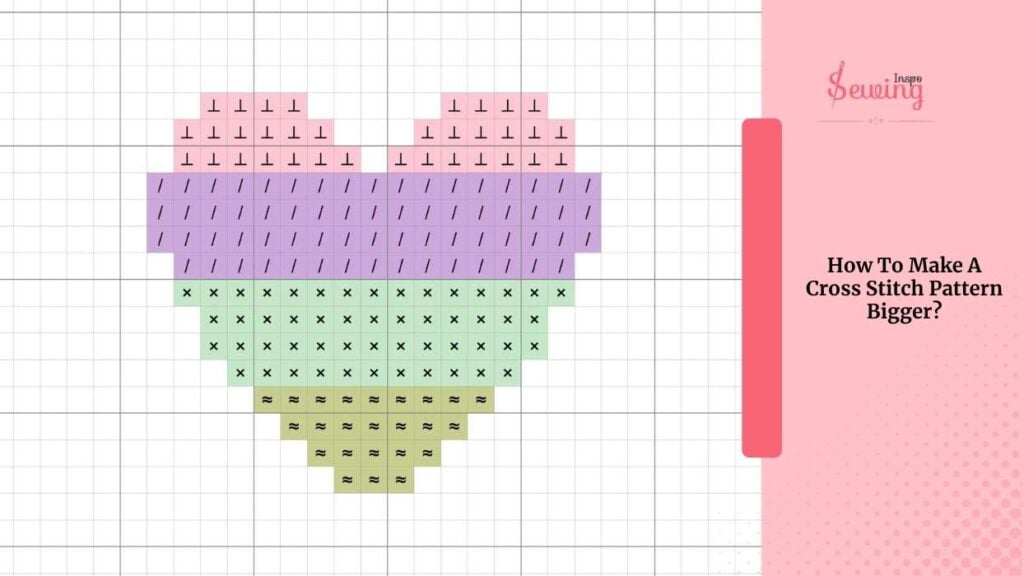
- Redraw on larger graph squares so that each square represents a greater number of stitches.
- Combine methods to create a larger design without compromising detail.
See, it’s easy to increase your pattern size.
How To Make A Cross Stitch Pattern Smaller?
If your pattern feels too big for your project, shrinking it is easier than you might think. You can do it digitally or manually, and sometimes a few tweaks make a huge difference.
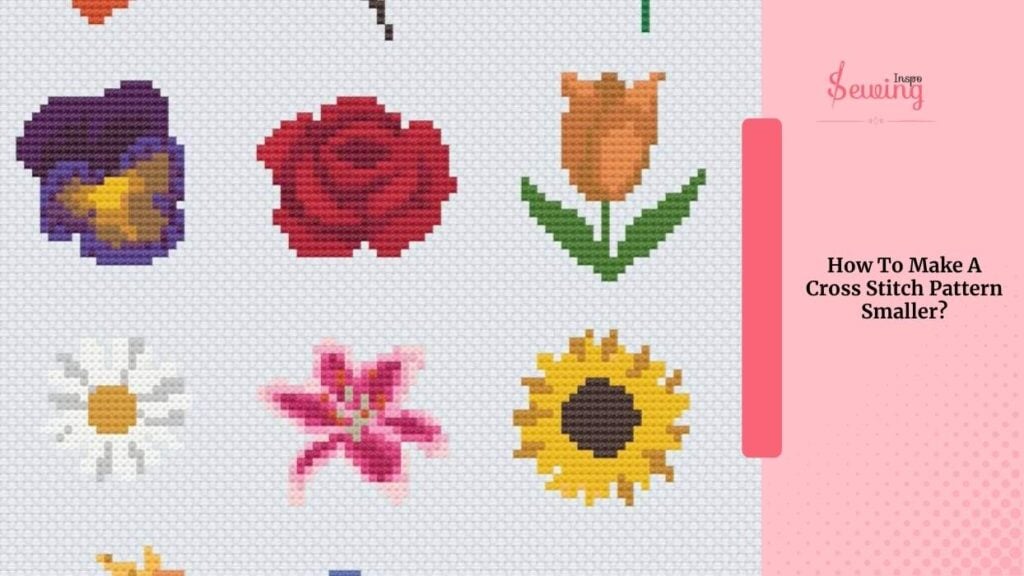
- Use higher-count fabric. 18- or 20-count Aida makes stitches smaller.
- Reduce pattern size in software while keeping proportions.
- Redraw on smaller graph squares. Each square still = 1 stitch.
- Simplify small areas to keep the design clear.
Always measure your fabric before stitching. Shrinking a design too much without adjusting the fabric size can lead to stitching off-center or running out of space.
Frequently Asked Questions
Where can I download cross stitch patterns for free?
You can find free patterns on websites like DMC, StitchFiddle, Pinterest, and various crafting blogs.
Can you turn a photo into a cross stitch pattern for free?
Yes! Free tools like Pic2Pat, StitchFiddle, and Pixel-Stitch allow you to upload a photo and convert it into a stitchable pattern.
What is the best free cross stitch pattern maker?
Popular free options include StitchFiddle, Pic2Pat, and Pixel-Stitch, which let you customize colors, fabric count, and stitch size.
Warp up
That’s how to make a cross stitch pattern. Which is your favorite so far? Comment below.


Leave a Reply