
Counted cross-stitch differs slightly from a regular cross-stitch pattern. Instead of working on fabric that already has the design printed or drawn on it. You’re counting the threads on plain fabric to know exactly where each stitch should go. It is tricky to make a pattern for it.
Then, how to make a counted cross stitch pattern? Well,
Counted Cross Stitch Pattern
To make a counted cross-stitch pattern, map your design onto graph paper or software, assign each square a thread color, and count the fabric threads to stitch each square precisely.
Confusing? Ok, let me break it down to you.
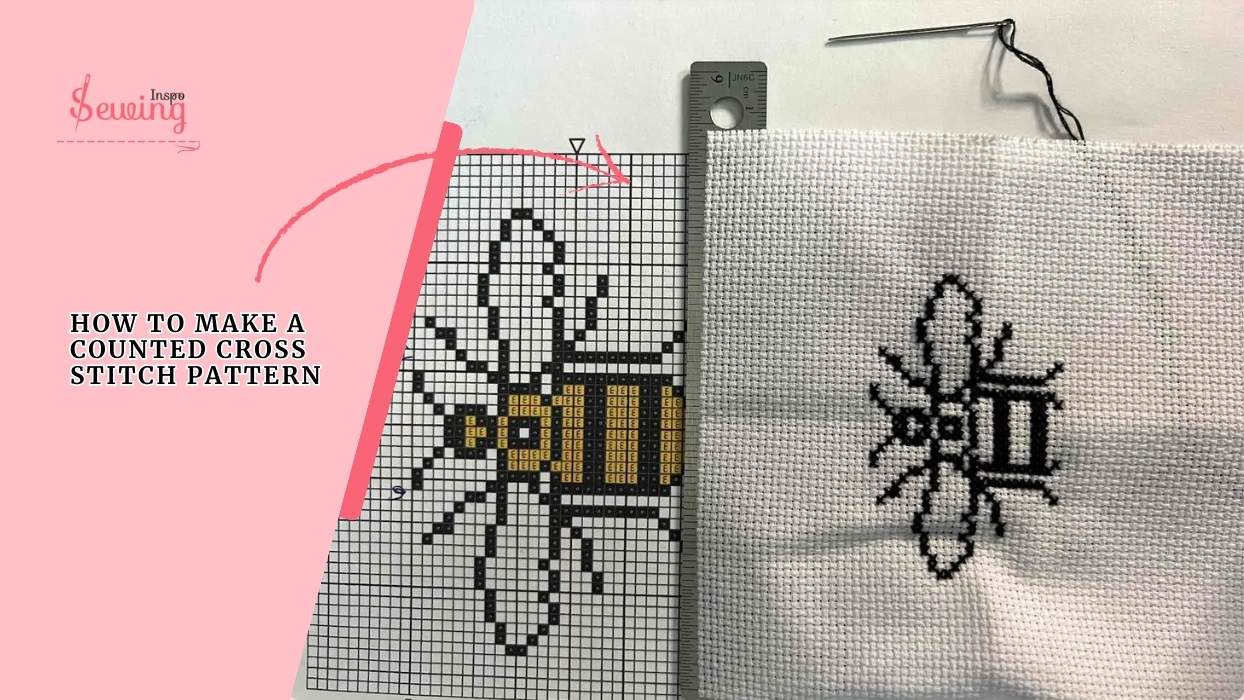
Table of Contents
How To Make A Counted Cross Stitch Pattern From A Picture?
To make a counted cross-stitch pattern, follow the below 8 steps,

Choose Your Picture
Start with something simple if you’re a beginner, portraits, landscapes, or simple illustrations work best.
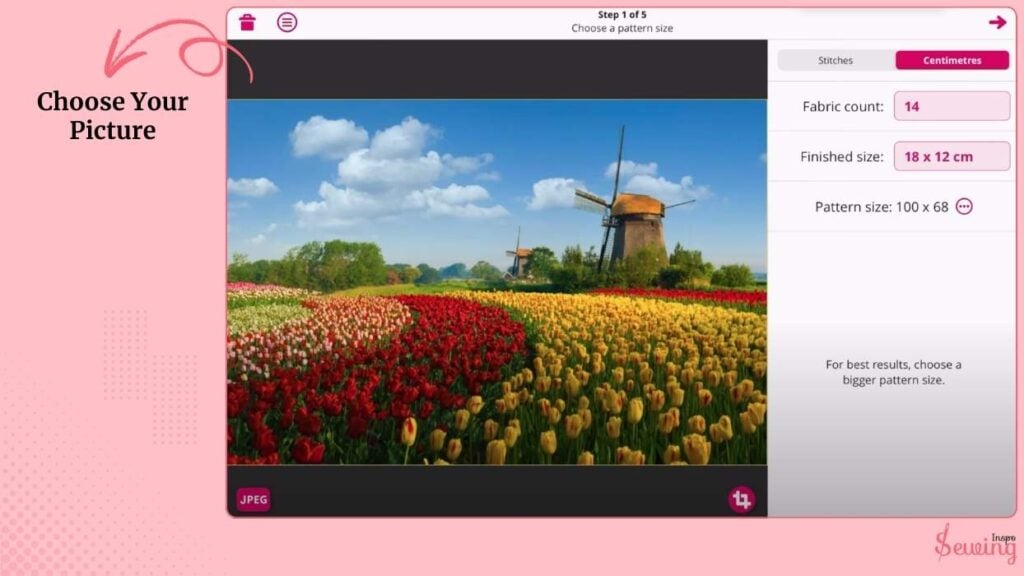
I usually pick images with clear lines and defined colors. Avoid tiny details; they get lost in stitching. High contrast images make it easier to assign floss colors.
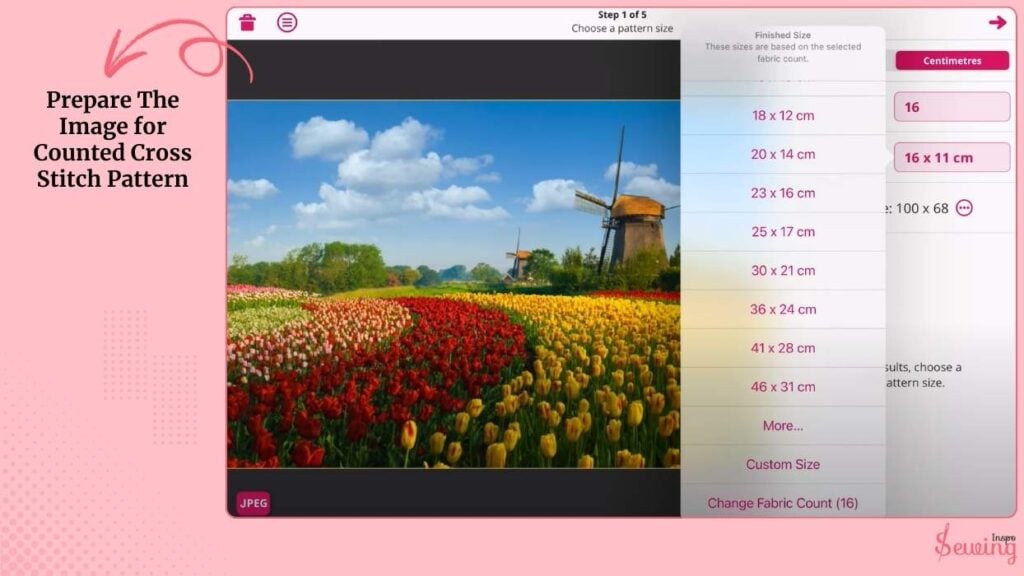
Prepare The Image For Counted Cross Stitch Pattern
You need your picture in a format you can work with. Open in photo editing software or an online pixelator tool. Resize it to fit your desired stitch count.
Example: 100×100 stitches for a small design. This is best for necktie pattern.
Convert it to grayscale or a simplified color palette if you want fewer thread colors. This makes the pattern easier to read and stitch.
Grid Your Image
A counted cross stitch pattern is basically a grid of squares where each square = 1 stitch.
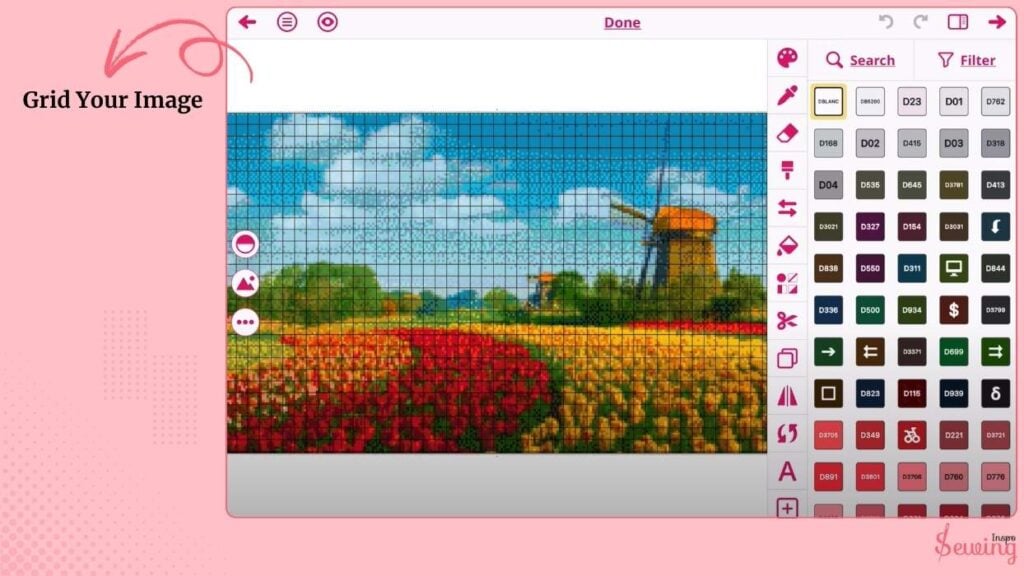
Print graph paper or use cross stitch software that creates a grid overlay on your image. Ensure the grid matches your fabric count (14-count, 16-count, etc.). Mark the center of your image and grid. This helps you line up stitches with the fabric later.
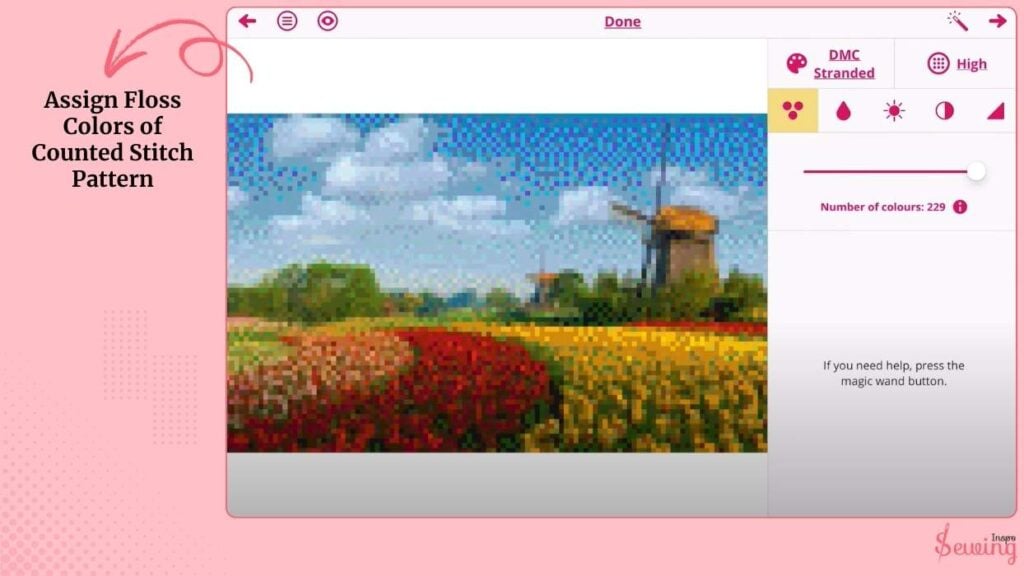
Assign Floss Colors Of Counted Stitch Pattern
Now it’s time to turn pixels into threads. Pick DMC, Anchor, or your preferred floss brand. Match the main colors in the image to floss shades.
Assign symbols for each color on the grid—triangles, dots, Xs, etc. Reduce very similar shades to a single floss color for an easier pattern.
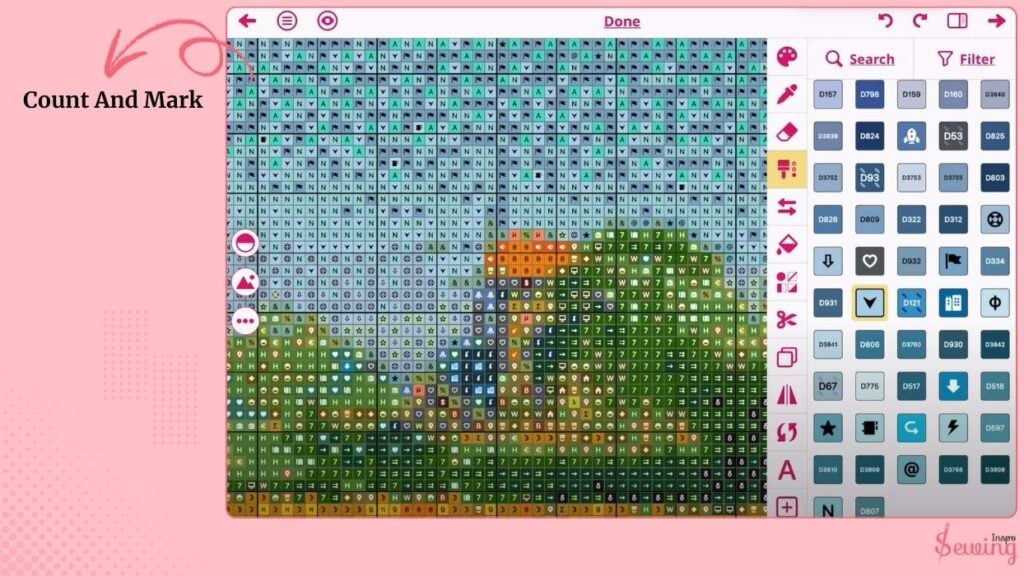
Count And Mark
Count each colored square on your grid carefully. Mark the squares with their assigned symbols. Double-check your counts on both axes (width and height) to avoid errors.
Determine Counted Cross-Stitch Fabric Size
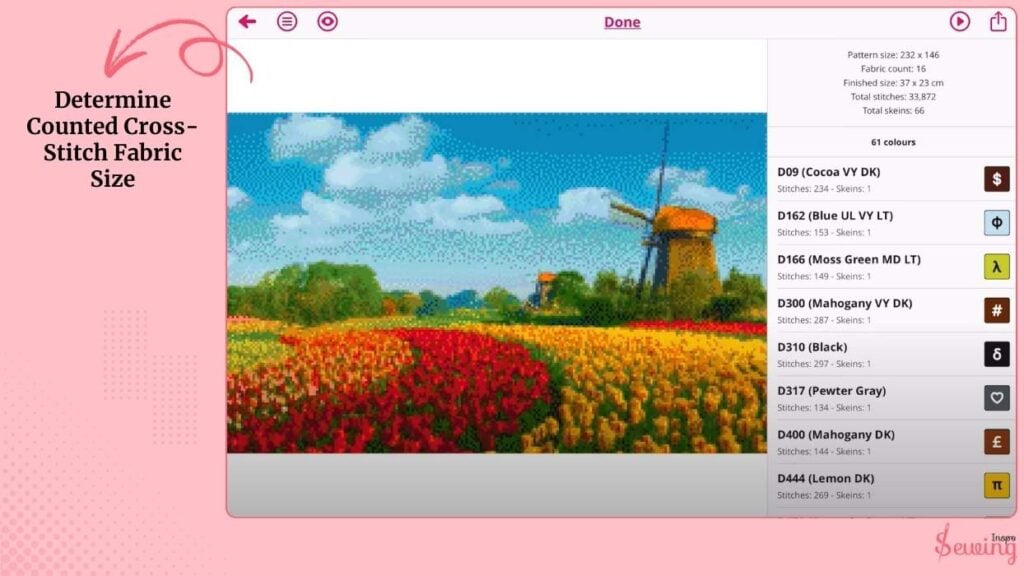
First, I check the total stitch count of my design. Let’s say it’s 100 by 100 stitches. Then I divide that by the fabric count I’m using. For example,
If I’m on 14-count Aida, 100 ÷ 14 gives me roughly 7 inches wide.
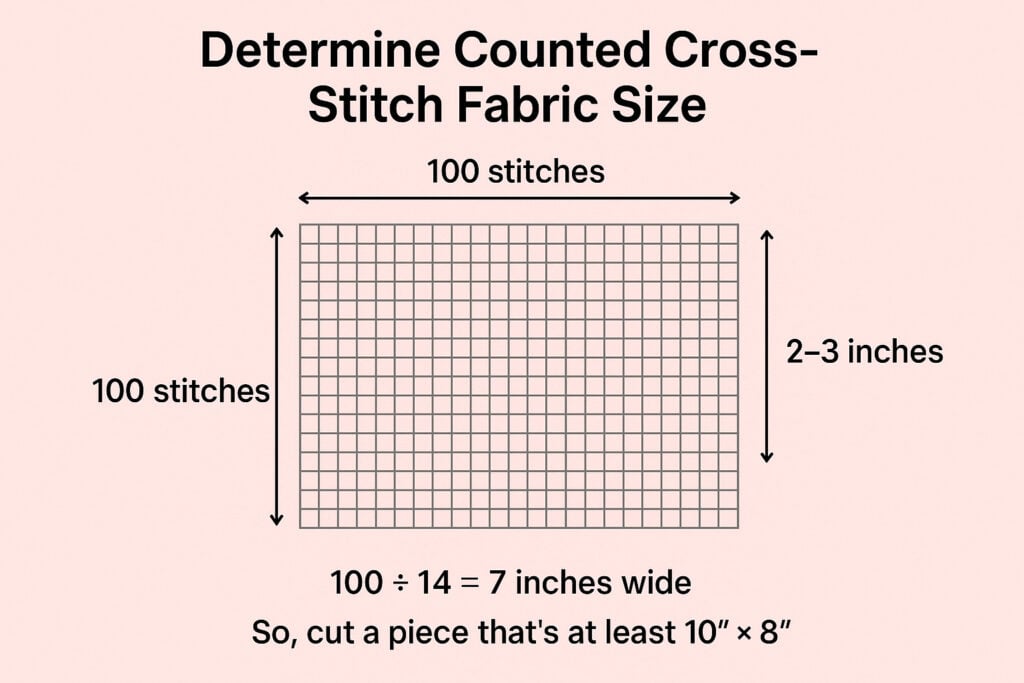
Next, I always add a couple of extra inches on all sides 2 to 3 inches. So, I have room to hoop the fabric and for framing later. This little buffer makes sure my design doesn’t get cut off or feel cramped.
It’s an easy step, but it saves a lot of headaches later!
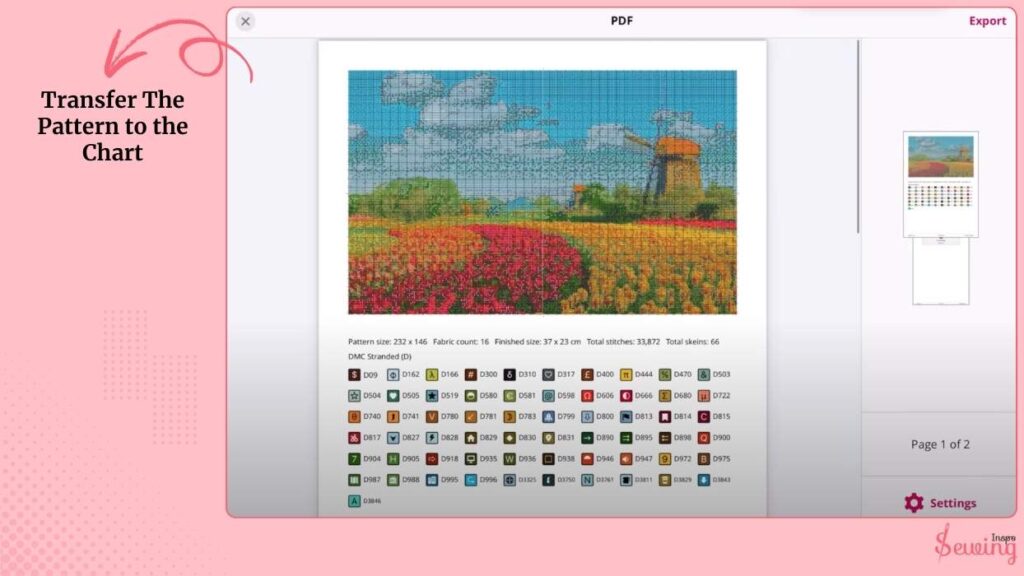
Transfer The Pattern To The Chart
First, I finalize my pattern, whether I’m using a printed version or a digital one. Once that’s set, I add all the key details at the top: the design name, the list of floss colors, the fabric count, and the total stitch size.
Then, I number the grid every 10 squares.
Trust me, this little step makes life so much easier when you’re stitching, because you can quickly check your place without squinting or losing track. It keeps everything neat and organized from the start.
Finalize And Save The Pattern
Once you’re happy with your chart, make sure you save a copy. Both the pattern itself and the floss list. I also like to snap a photo of the finished stitched piece and keep it together with the chart.
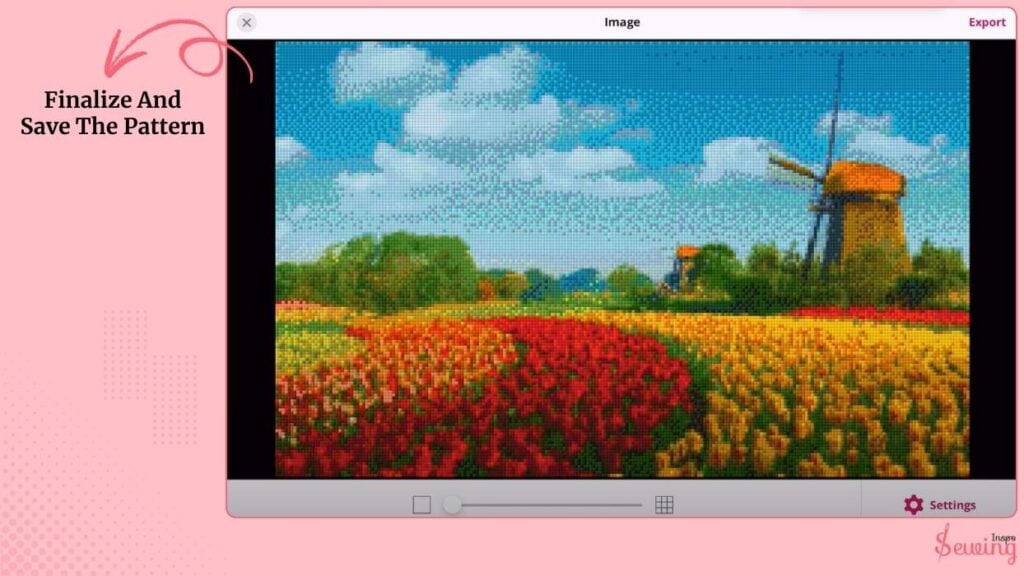
That way, if I ever come back to the design later, I know exactly how it looked when stitched.
Doing this gives you a little “pattern library” you can reuse, share with friends, or tweak in the future without starting all over again. It’s like keeping notes for your future stitching self.
You’ll thank yourself later! Or if you want to skip the hassle, then just stick to the stitch embroidery patterns.
Read the article on how to change stitch patterns on a sewing machine to learn something new.
How To Stitch On The Counted Cross Stitch Pattern?
I have the pattern ready; now it’s time to bring it to life. So to stitch the counted cross stitch pattern, you need to do the following,
- Find the centre of your fabric and match it with the centre of your chart.
- Cut floss about 18–20 inches and thread your needle (use 2 strands for 14-count Aida).
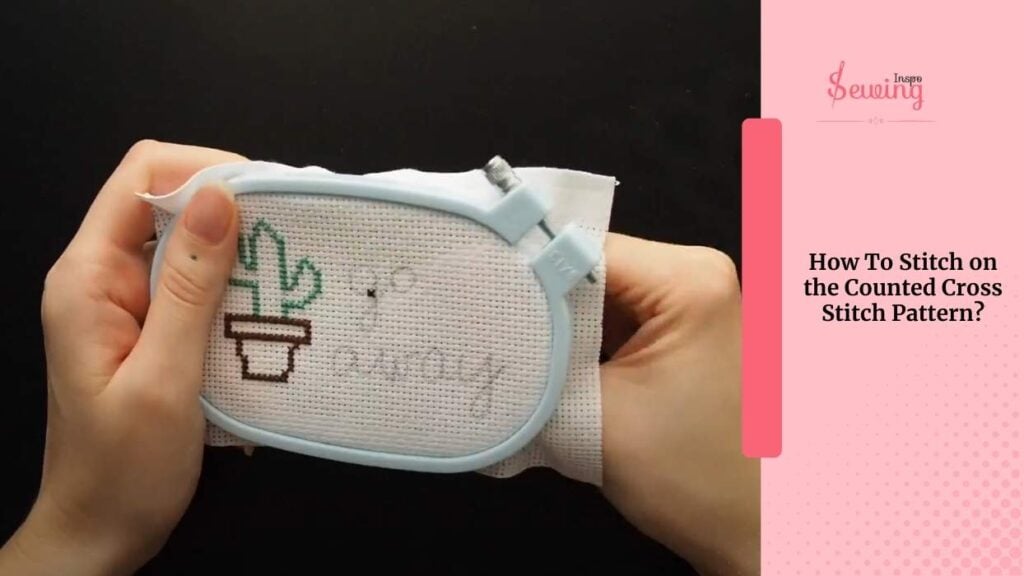
- Start stitching:
- Bring needle up from the back.
- Make a diagonal stitch ().
- Do a row of half stitches, then go back (/) to complete the X.
- Follow the chart: one square = one stitch, each symbol = a color.
- Work section by section to avoid mistakes.
- Secure threads by tucking under 3–4 stitches. Don’t use knots.
When you’re done, rinse your piece gently in lukewarm water with mild soap.Let it air dry flat on a towel. Press it from the back side with a warm iron.
Frequently Asked Questions
How many colors should I use?
It depends on the design! Simple patterns look great with 2–5 colors, while photo conversions may need 20+ for detail.
Do I have to number my grid?
It’s not a rule, but numbering every 10 squares makes counting and stitching so much easier.
What’s the benefit of saving the finished chart and photo together?
It creates your own little pattern library. You can reuse, tweak, or share without reinventing the wheel.
Final Thought
That’s how to make a counted cross stitch pattern. It may sound tricky, but once you break it into steps. It becomes easy.
The best part?
Every pattern you make is uniquely yours, and you can stitch your favorite art, words, or even photos into fabric.


Leave a Reply