
A checker stitch pattern is a sewing, embroidery, knitting, or quilting technique that creates a grid-like design with alternating colors, fabrics, or textures. It basically gives you that classic checkerboard look.
Some people use the Scotch checker stitch or cross stitch. Others go for a free-motion quilting checkerboard, and in fabric projects. That’s why it is also called checkerboard stitch.
Or you can simply sew strips of contrasting fabrics and flip every other strip to get that checkerboard effect. Most people hear “checker stitch pattern” and instantly think of knitting. It’s the classic way you picture that alternating block design.
But the truth is, you’re not limited to yarn and needles. You can actually create the same checkerboard effect in sewing, too.
checker pattern
To sew a checker stitch pattern, piece together alternating fabric squares or stitch blocks in contrasting colors to form a checkerboard effect.
Let’s do it and see how it looks in reality.
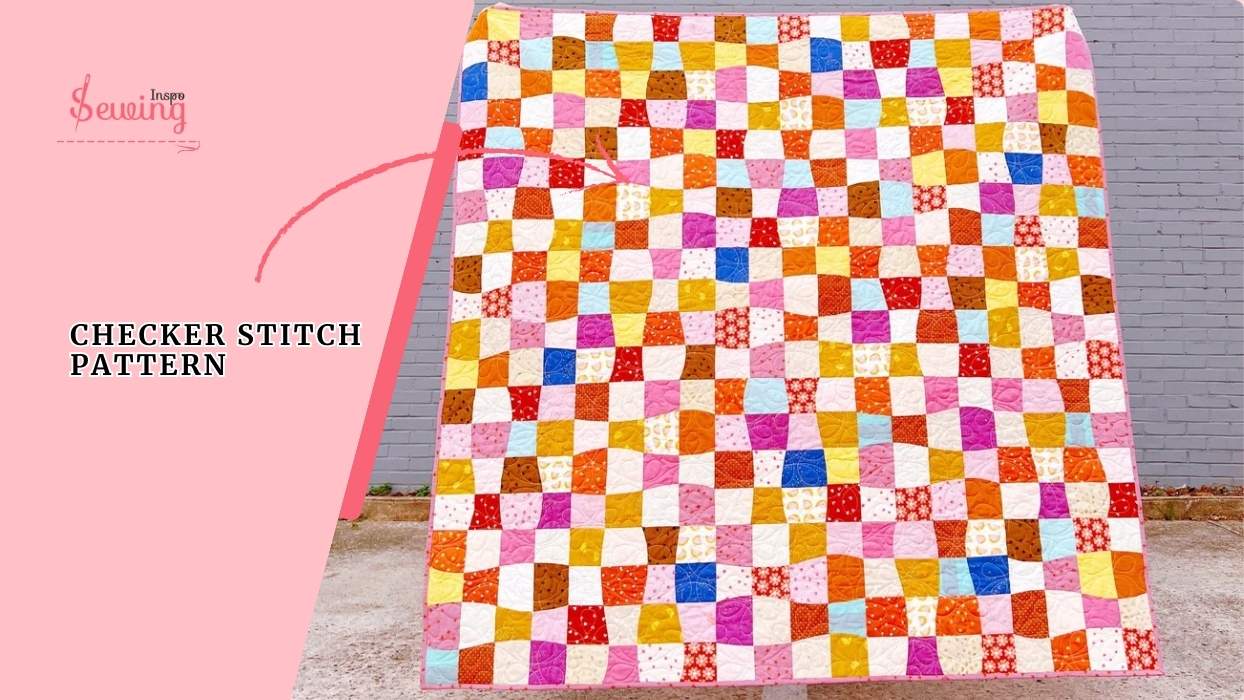
Table of Contents
How To Do A Checker Stitch Pattern In Sewing?
To do a checker stitch pattern in sewing, follow the steps below,
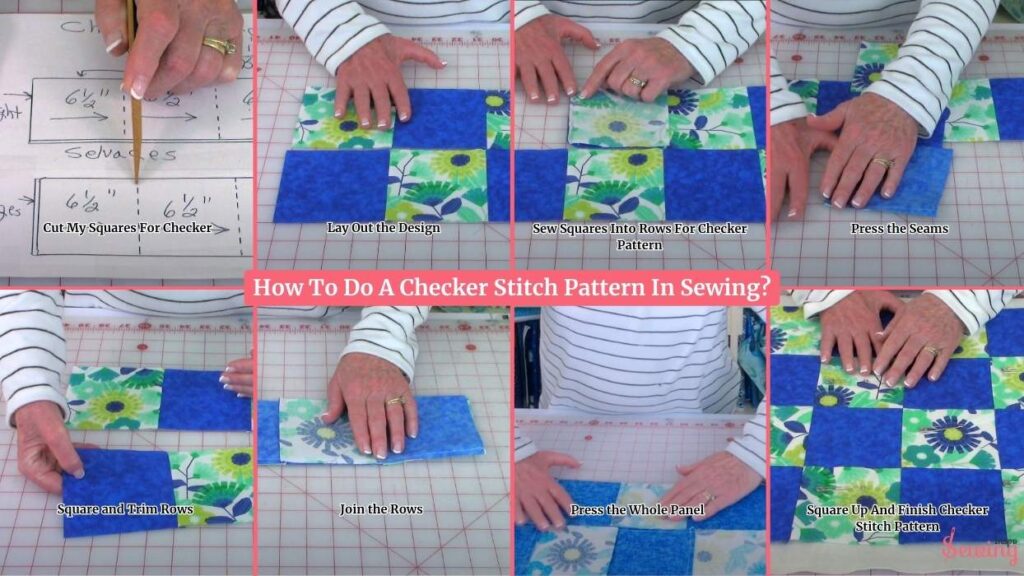
Cut My Squares For Checker
I start by choosing two contrasting fabrics. It usually has one light and one dark, so the checkerboard stands out. For a standard block, I like 2-inch finished squares, which means I cut them at 2.5 inches to account for the ¼-inch seam allowance on all sides.
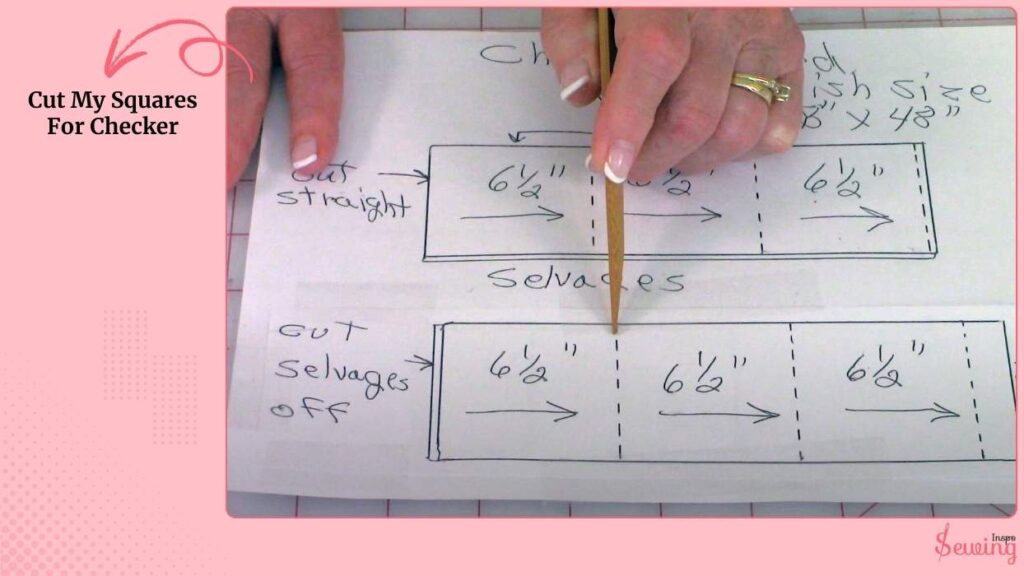
- For a small project like a placemat (about 12″ x 16″), I’ll need around 6 rows of 8 squares → 48 squares total. This is perfect for chevron stitch patterns for beginners too.
- For a cushion cover (about 16″ x 16″), I cut 8 rows of 8 squares → 64 squares total. This also helps me do counted cross stitch.
- For a larger quilt, I just scale it up by cutting more squares and grouping them in blocks of 8×8 or 10×10.
I use my rotary cutter, self-healing mat, and a quilting ruler to make sure every square is exactly the same size. Consistency is everything here.
Lay Out the Design
Next, I spread the squares out on my table (or the floor if I’m making a big panel). I lay them in alternating order, Fabric A, then Fabric B. Just like a checkerboard. This steps is kinda similar to wool stitchery patterns.
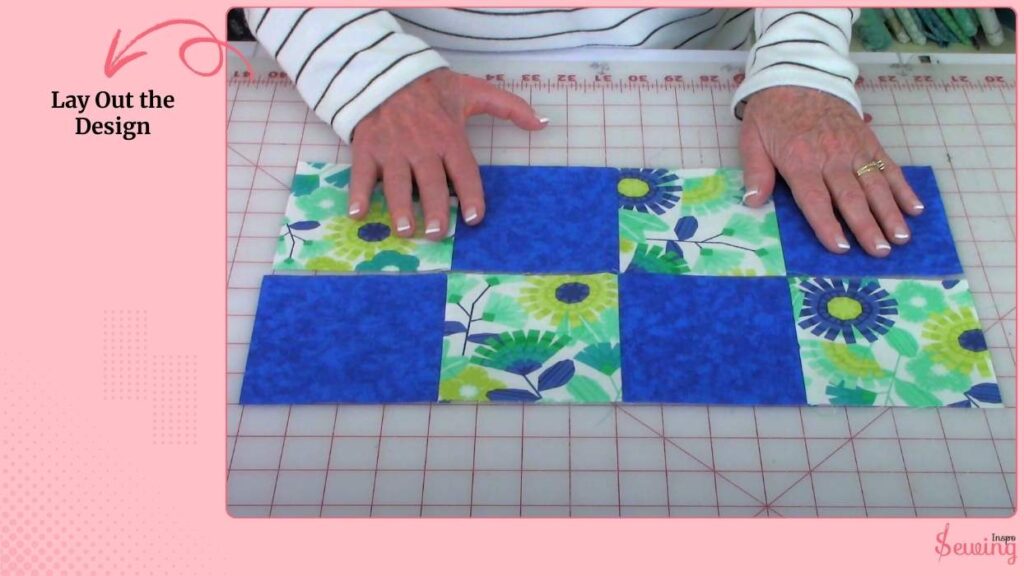
For example:
- Row 1 → A-B-A-B-A-B-A-B
- Row 2 → B-A-B-A-B-A-B-A
It will works as Knit checkerboard pattern 2 colors. I step back and check the balance of the colors. If the fabrics have patterns, I make sure they’re not clumping in one area. Laying it out first saves me from ripping seams later.
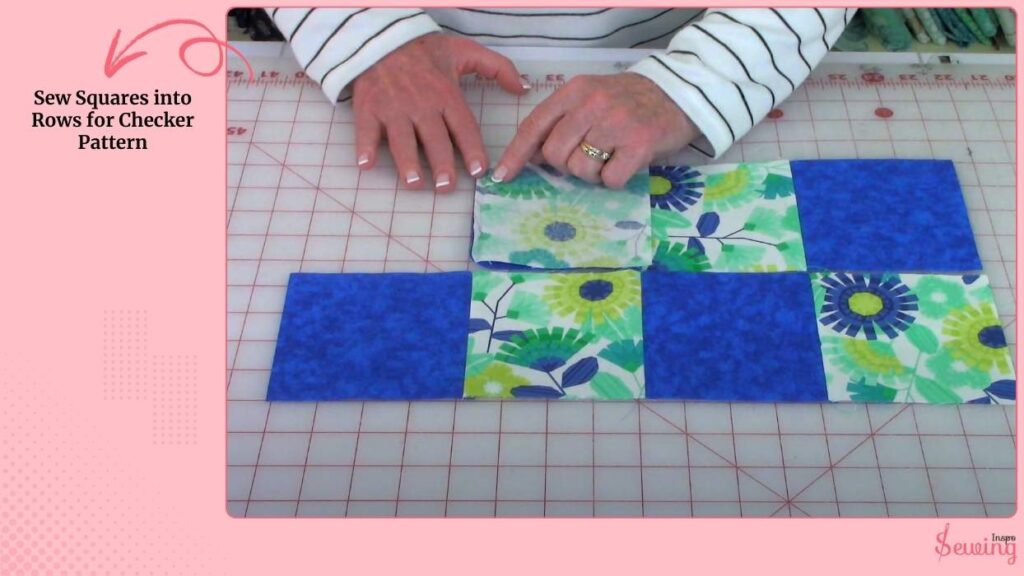
Sew Squares Into Rows For Checker Pattern
Time to stitch. I pick up the first two squares in Row 1, place them right sides together, and sew a ¼-inch seam. I keep adding one square at a time until the row is finished.
I chain-piece the rows (feeding pairs of squares through the machine one after the other without cutting the thread in between). This saves time and keeps everything in order.
Press the Seams
After finishing a row, I press the seams right away. For Row 1, I press all seams toward the left; for Row 2, I press to the right. Alternating seam directions means that when I join the rows later, the seams “nest” together snugly.
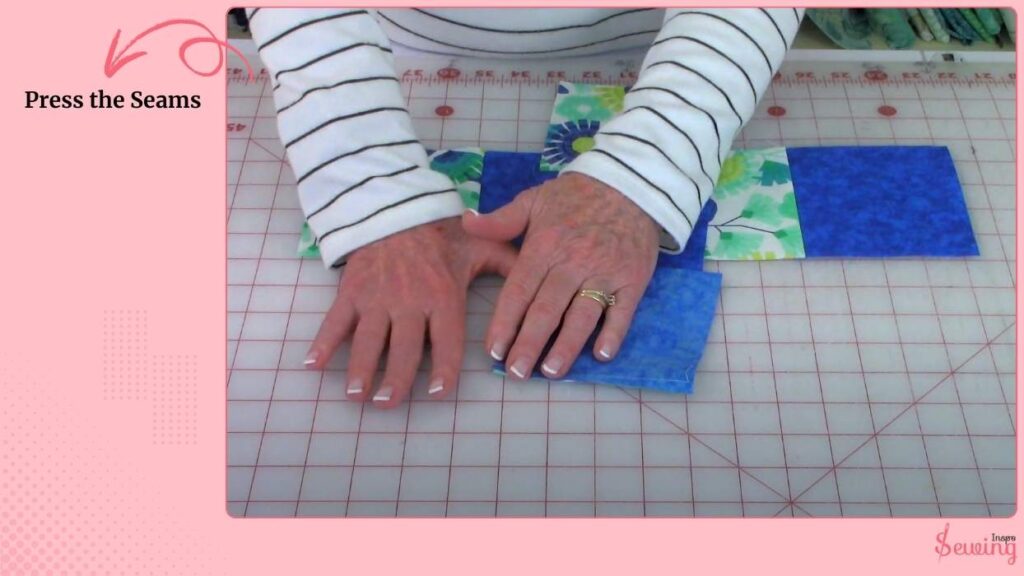
If I’m using bulkier fabric (like home décor fabric), I press seams open instead, so it lies flatter.
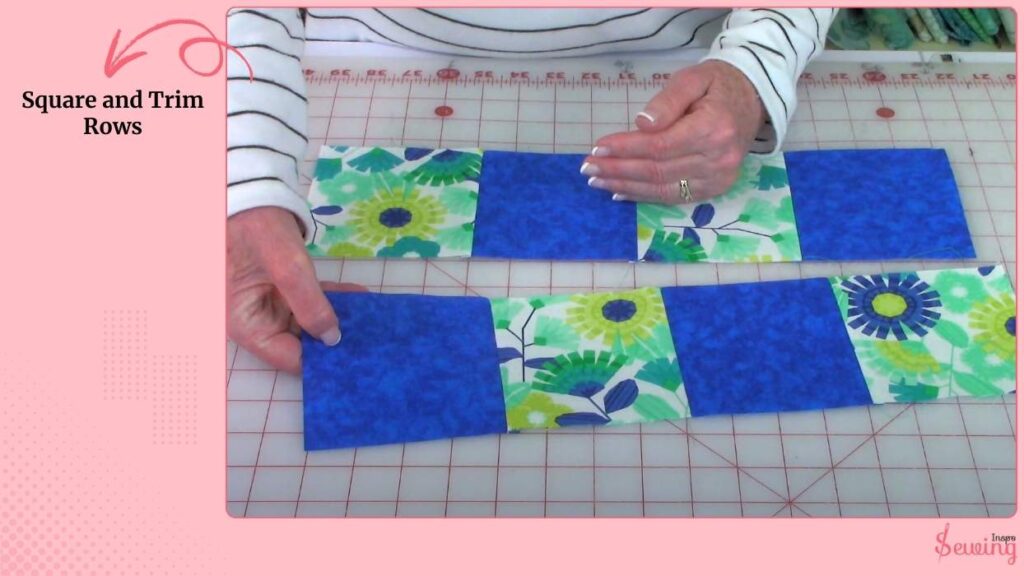
Square and Trim Rows
Sometimes the rows stretch a little while sewing. To fix this, I square them up with my ruler and rotary cutter so all rows match in length.
For example, if my row should measure 16.5 inches (for an 8-square row with 2.5″ squares), I trim it to size before moving on.
Join the Rows
Building the checkerboard effect. I take Row 1 and Row 2, place them right sides together, and carefully align all those seam intersections like changing patterns.
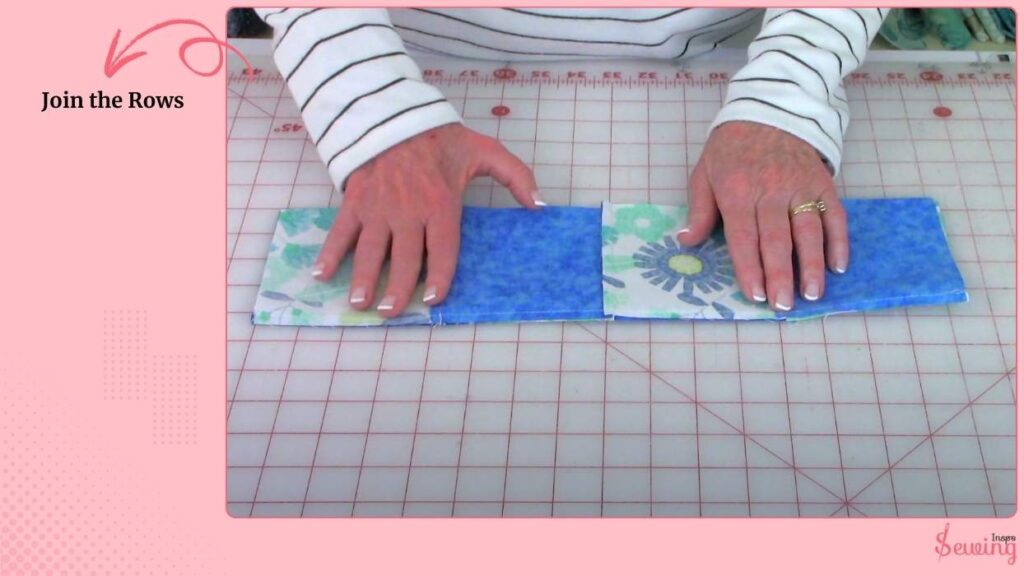
I put a pin through each seam intersection so the squares line up perfectly like diamond shapes.
Then I sew with a ¼-inch seam allowance down the long edge. I repeat the process, adding row by row until the full checkerboard is complete.
Press the Whole Panel
Once all the rows are joined, I give the whole panel a good press. I press each seam carefully either toward one side or open.
So, the checkerboard lies flat. This is where the pattern really comes alive, and the alternating colors look crisp and professional.

Square Up And Finish Checker Stitch Pattern
Finally, I square up the edges. If I’m making a placemat, I trim it to about 12.5″ x 16.5″ so it finishes at 12″ x 16″. For a cushion cover, I trim it to 16.5″ x 16.5″.
At this point, I can:
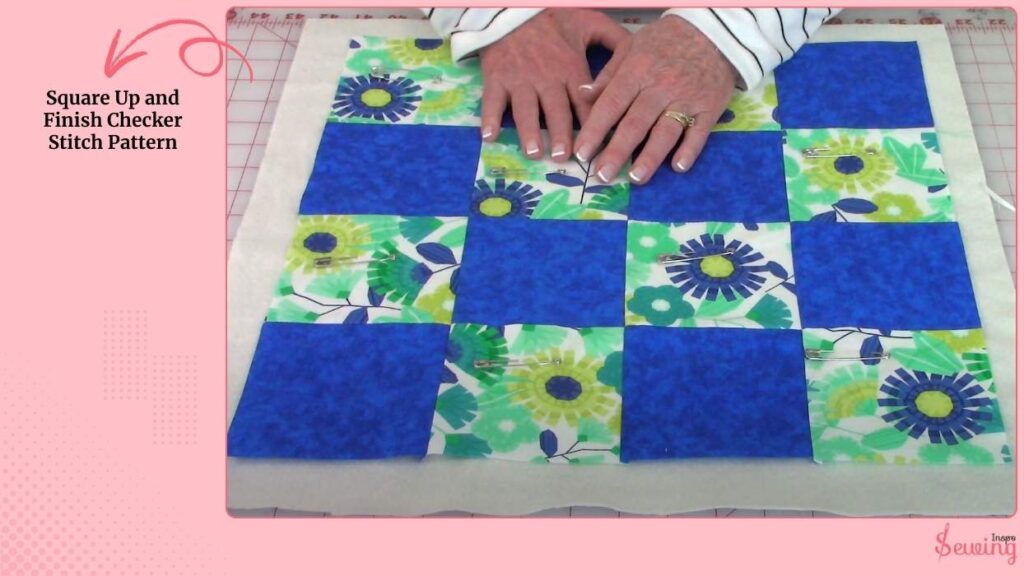
- Add batting and backing to quilt it.
- Sew borders around the checkerboard to enlarge it.
- Use it as a front panel for a bag, pillow, or even a quilt block.
And just like that, my checker stitch pattern is finished clean, even, and super versatile.
If you are confused about any of it then watch this video
Faster Alternative To The Checker Pattern: Strip Method
The strip method is a faster sewing technique that involves stitching long, alternating fabric strips together.
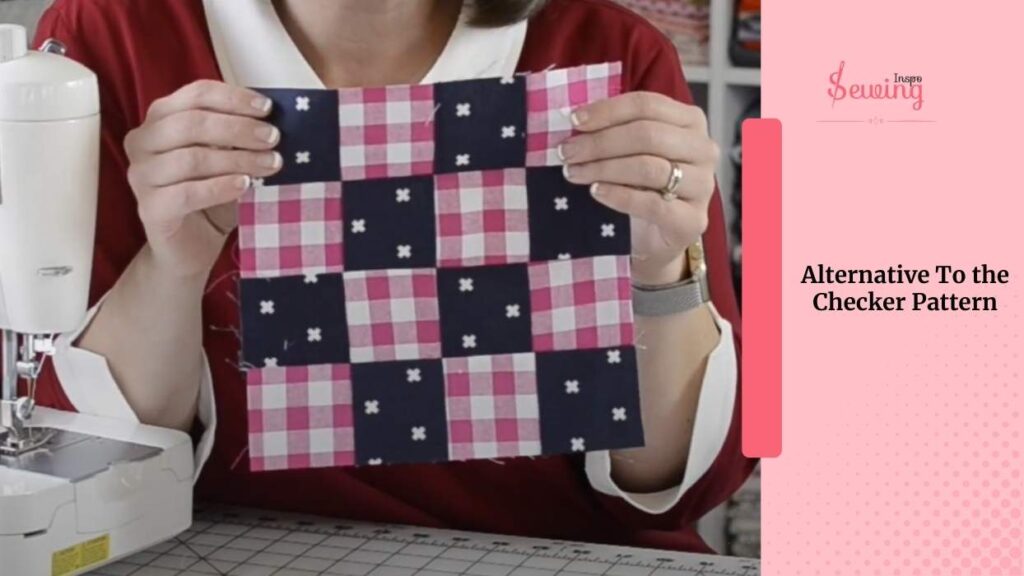
Then cut and offset them to create a checkerboard pattern without sewing each square individually. Here is how you do it,
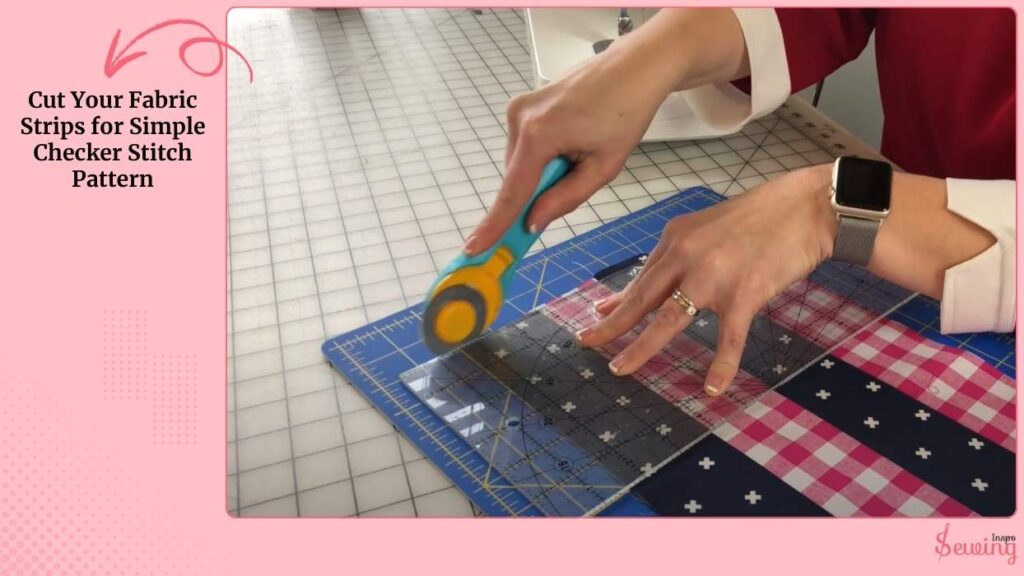
Cut Your Fabric Strips For Simple Checker Stitch Pattern
Instead of cutting dozens of tiny squares, I start by cutting long strips of fabric. For example,
If I want 2-inch finished squares, I cut strips 2½ inches wide (to account for ¼-inch seam allowances on both sides). I make strips of two fabrics (say Fabric A and Fabric B).
Sew the Strips Together
I take one strip of Fabric A and one strip of Fabric B, place them right sides together, and sew down the long edge using a ¼-inch seam. This is kinda like stick and stitch thing.
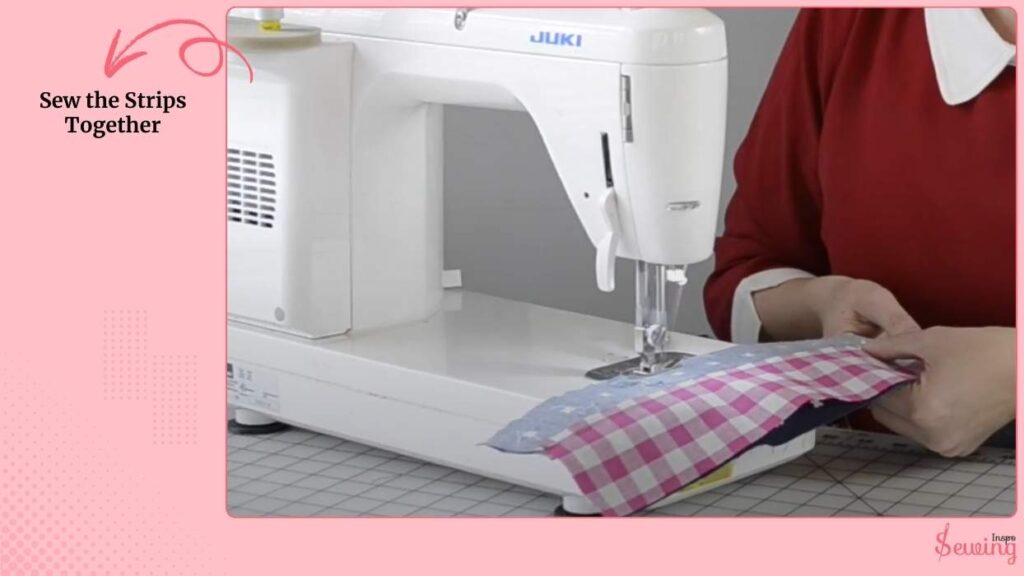
After stitching, I press the seam allowance toward the darker fabric (it hides better). Now I’ve got a strip set with two alternating fabrics. For bigger patterns, I’ll repeat with multiple A/B strips and mix up the order.
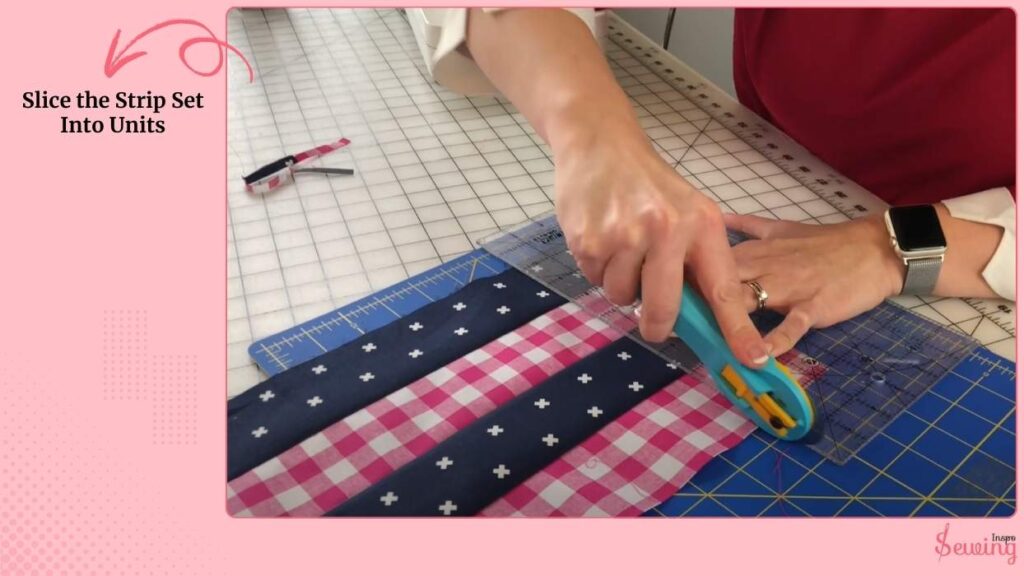
Slice the Strip Set Into Units
I rotate my strip set horizontally on the cutting mat and cut across it into 2½-inch-wide segments. Each little segment now looks like a two-square unit (A/B).
Offset & Stitch Into Checker Rows
I lay out these units like bricks:
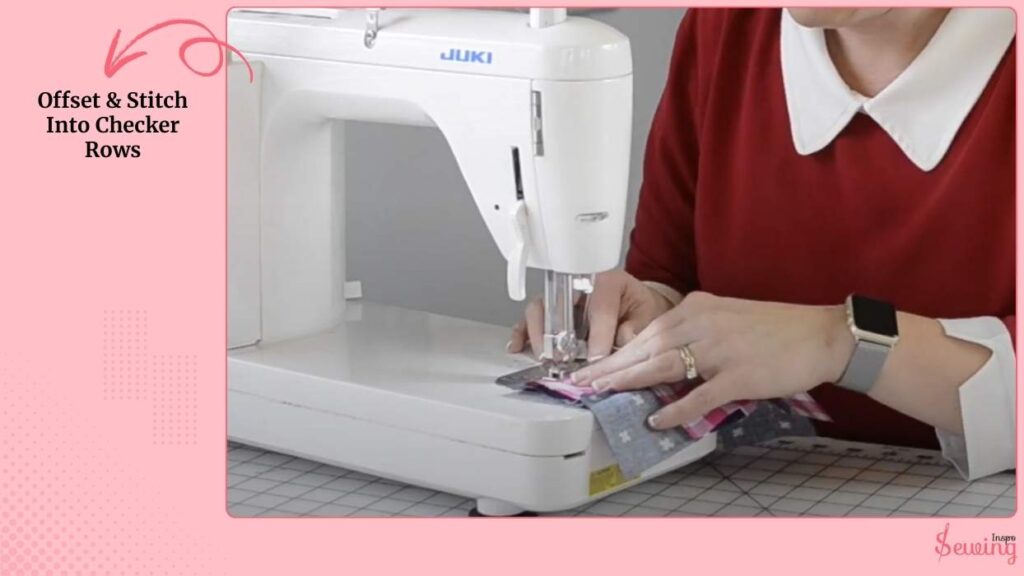
- First row starts with Fabric A, then B.
- Second row starts with Fabric B, then A.
When I stitch them together, the squares automatically form that checkerboard look without me needing to pin each tiny square.
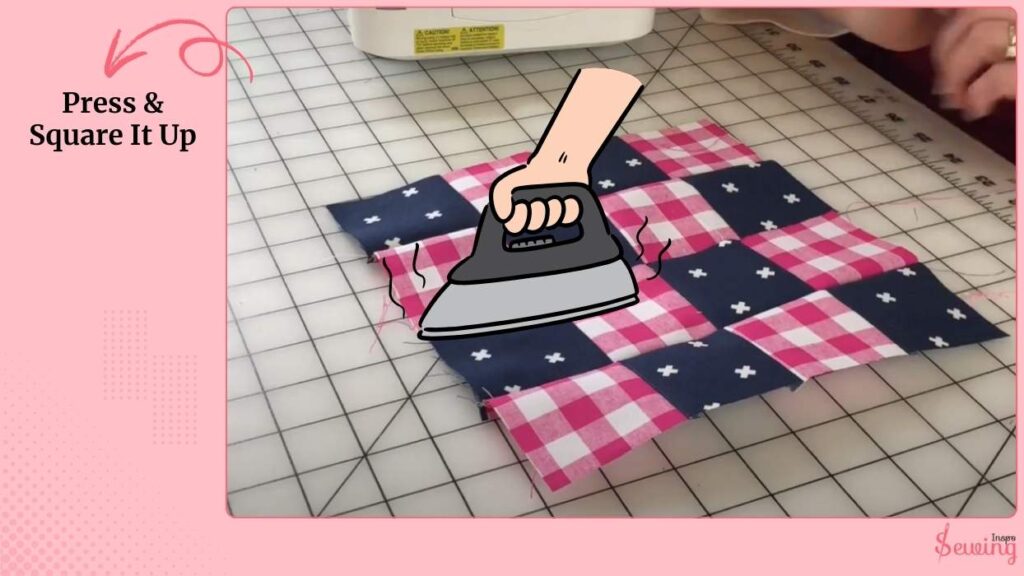
Press & Square It Up
Once all rows are sewn together, I press each seam (alternating directions per row to help them nest neatly). Basically read it rightly for the perfect pattern. Then I square up the whole checker panel to the right size.
That’s a checker stitch in sewing version for you all. So yes, it’s not in the Checker stitch pattern, knitting only. You can do it in sewing, too.
Free Checker Stitch Pattern
If you wanna try this pattern but don’t know where to start, then use this idea.
Frequently Asked Questions
Can I do a checker stitch pattern on any fabric?
Yes! Lightweight to medium-weight fabrics like cotton, linen, or canvas work best. Avoid very stretchy fabrics unless you stabilize them first.
What thread should I use?
Cotton or polyester thread works well. For more contrast, use a different color in alternating squares.
Do I need a special sewing machine?
Nope! Any standard sewing machine can do this. If you want to use decorative stitches, make sure your machine has those options.
Conclusion
The checker stitch pattern isn’t just for knitting or quilting. You can create a beautiful, structured grid using simple sewing techniques.
Take your time with your grid, stitch consistently, and you’ll be amazed at how professional your finished piece looks.


Leave a Reply