
You know that moment when you finish a project, and everything looks great, but there’s still something missing? That’s when you need a top stitch sewing machine. This stitch doesn’t have a decorative look. But it secures the fabric edge. So your project doesn’t go slowly.
It’s easy to do so, too. You just gotta do,
To topstitch on a sewing machine, set the machine to a straight stitch, adjust the stitch length, and sew along the seam, keeping the fabric aligned and even.
Ready to add that perfect finishing touch? Let’s get started with topstitch machine!

Table of Contents
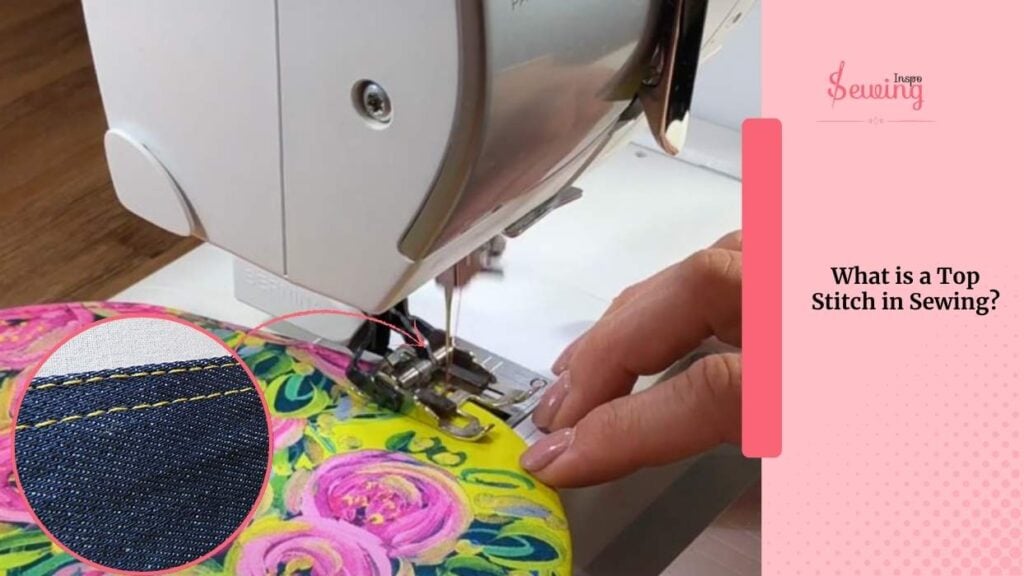
What Is A Top Stitch In Sewing?
A top stitch is a visible line of stitching sewn on the outside of a garment finishing or project, usually along seams, hems, or edges.
It’s done both for decoration and reinforcement, giving a polished, professional look while helping seams stay flat and durable. You often see it on jeans, jackets, or bags to add that neat, finished detail.
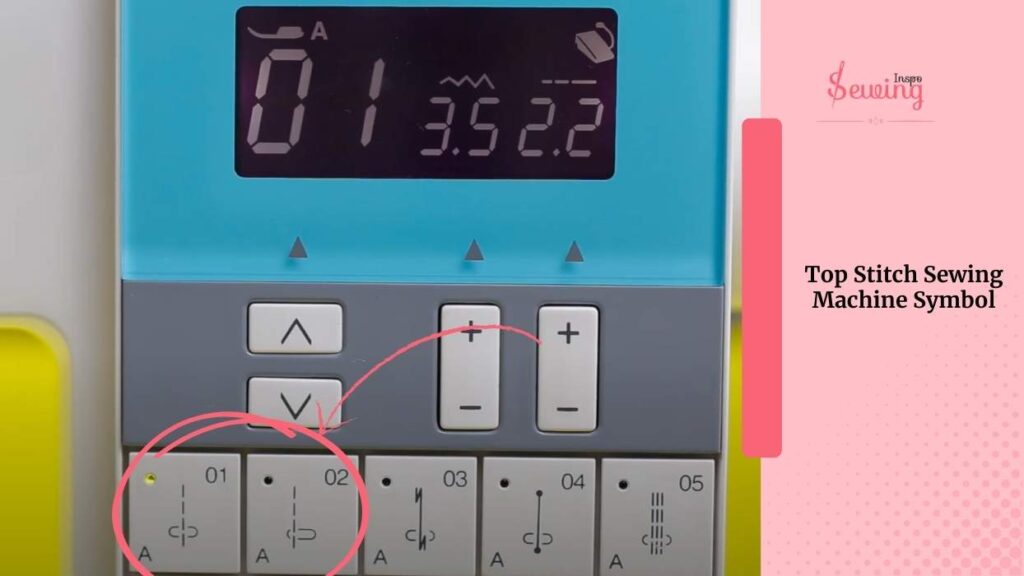
Top Stitch Sewing Machine Symbol
Before getting into stitching, let’s explained sewing machine stitch symbols.
The topstitch sewing machine symbol usually looks like a straight line with one or two lines above or below, representing the needle stitching along the fabric. It can also appear as a dashed or solid line in your sewing machine manual or dial settings.
It is often labeled with a “topstitch” icon or “T” for easy identification. If you’re selecting the stitch type, look for a straight or running stitch with a slightly wider setting to create a more prominent topstitch effect. You can find it beside decorative stitch.
Top Stitch Sewing Machine Settings
Here’s how I like to set up my sewing machine for a topstitch. Start by selecting a straight stitch—it’s the core of topstitching. Then, bump up the stitch length to about 3.5 to 4 mm. This helps make the stitch more noticeable, like baste stitching.
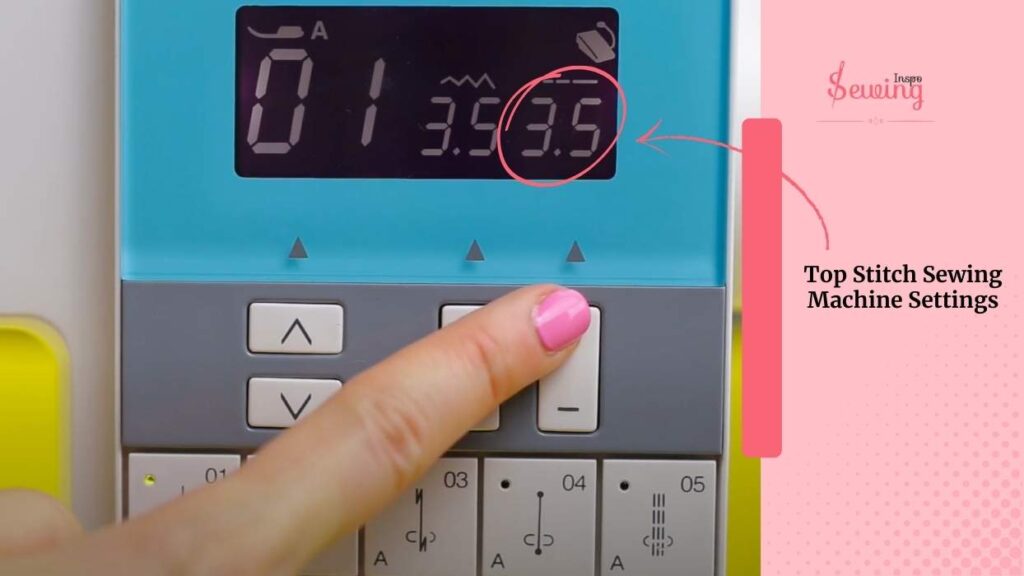

Grab a size 90/14 or 100/16 needle if you’re working with thicker fabrics. It’ll handle the job better. I also like to use topstitching thread because it gives that extra pop. That’s why it is one of my favourites among different stitches of sewing machine.
Lastly, slightly tweak the tension adjustment to ensure the stitches sit flat and neat. These small adjustments really make your seams look sharp and professional.
Topstitch Presser Foot
Most sewing machine comes with a presser foot. If your machine doesn’t have a presser foot, then it’s wise to buy one.
A topstitch presser foot is a speciality foot designed to help you sew perfectly straight and evenly spaced topstitching lines, without playing guessing games.
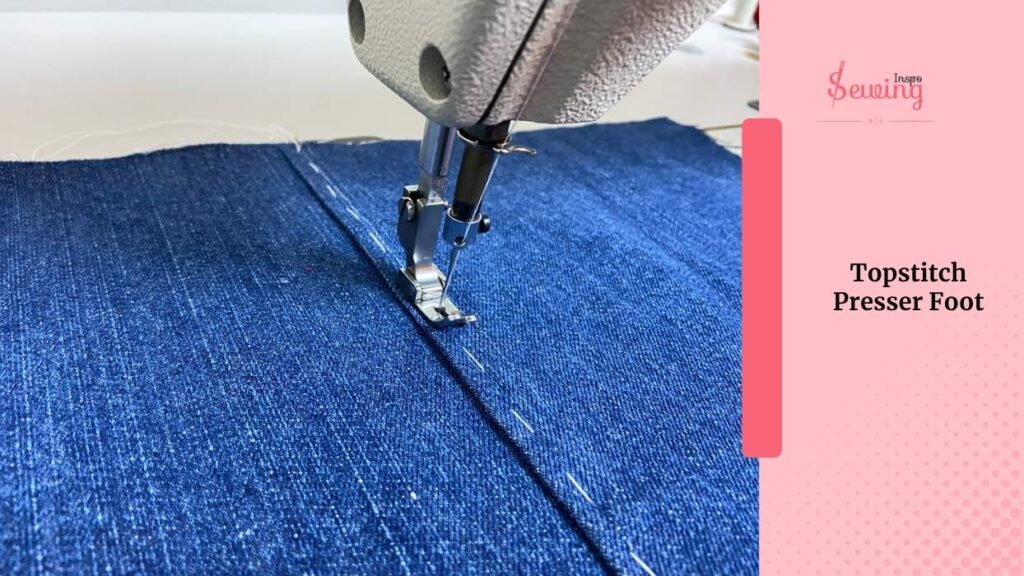
It usually has a centre guide blade or a raised ridge underneath that runs right along a seam line or fabric edge. This makes it super easy to sew decorative or functional stitches with clean, pro-level precision.
How To Do A Top Stitch On A Sewing Machine?
To do a top stitch on a machine, you gotta follow 6 steps,
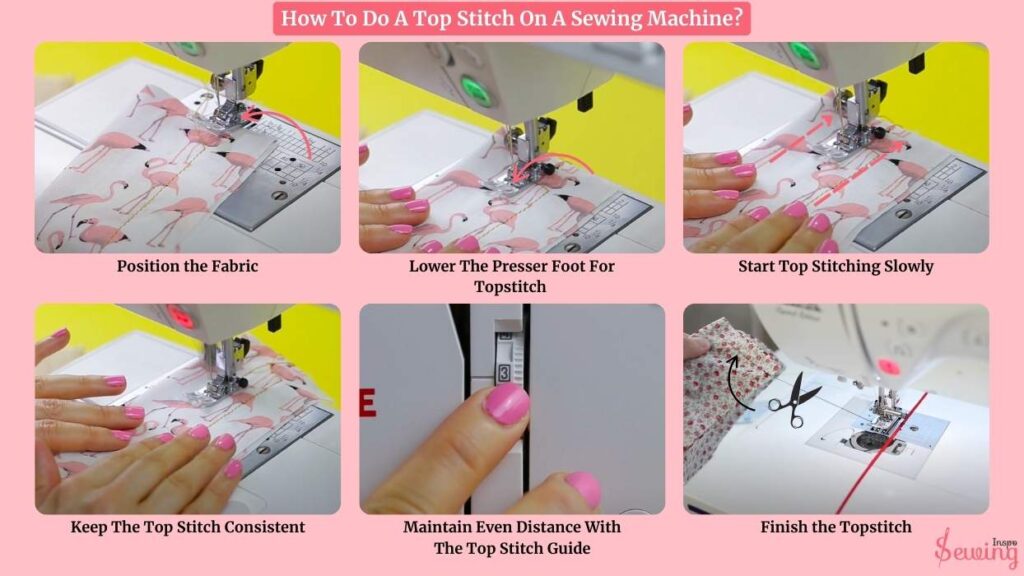
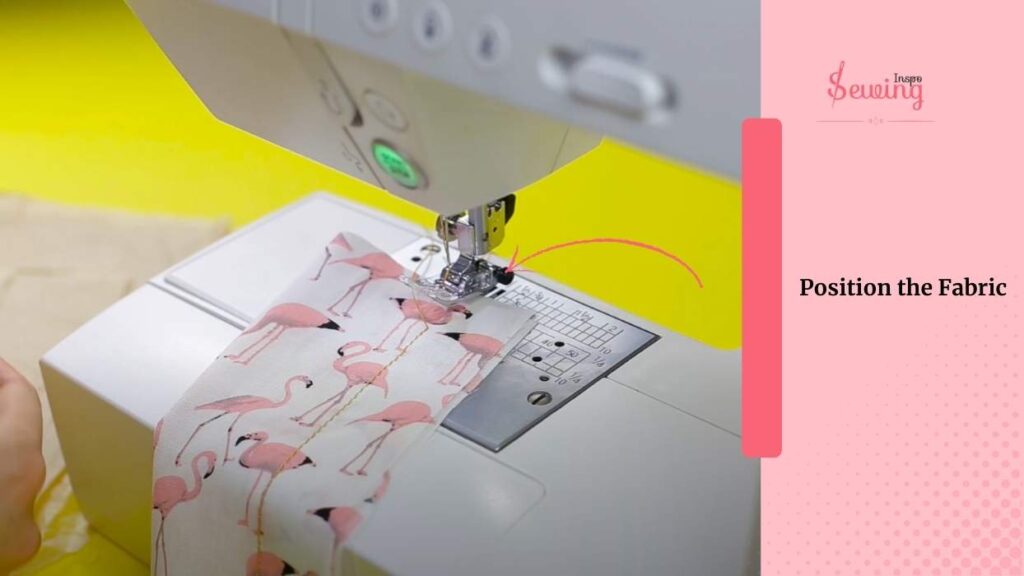
Position the Fabric
Take your fabric layers and place it under the presser foot. Make sure you know exactly where you want the topstitch to go. If you’re topstitching along an existing seam, align the fabric so that the seam is pressed flat and in the desired position. This isn’t ladder stitch, so you gotta keep the fabric straight.
Keep the fabric aligned with the presser foot. Some sewing machines have a built-in guide. This helps to do edge stitching sewing machine, too.
But if yours doesn’t, you can use the edge of the presser foot to help you keep the fabric straight. This will ensure the topstitch runs parallel to the edge. I use this method for chain stitching machine.
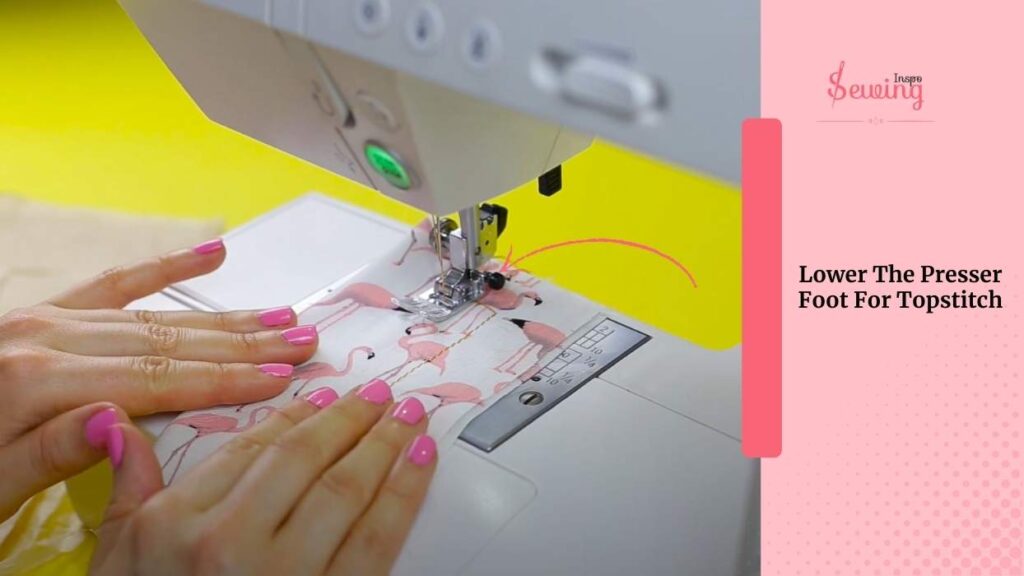
Lower The Presser Foot For Topstitch
Once double-checked the fabric alignment, lower the presser foot to hold the fabric in place. Ensure that the needle is positioned right at the starting point of your stitch line.
At this point, this kinda looks like blind stitch sewing machine.
If you’re stitching over a seam, make sure that it lies flat under the foot so that it doesn’t cause lumps or uneven stitches as you move forward.
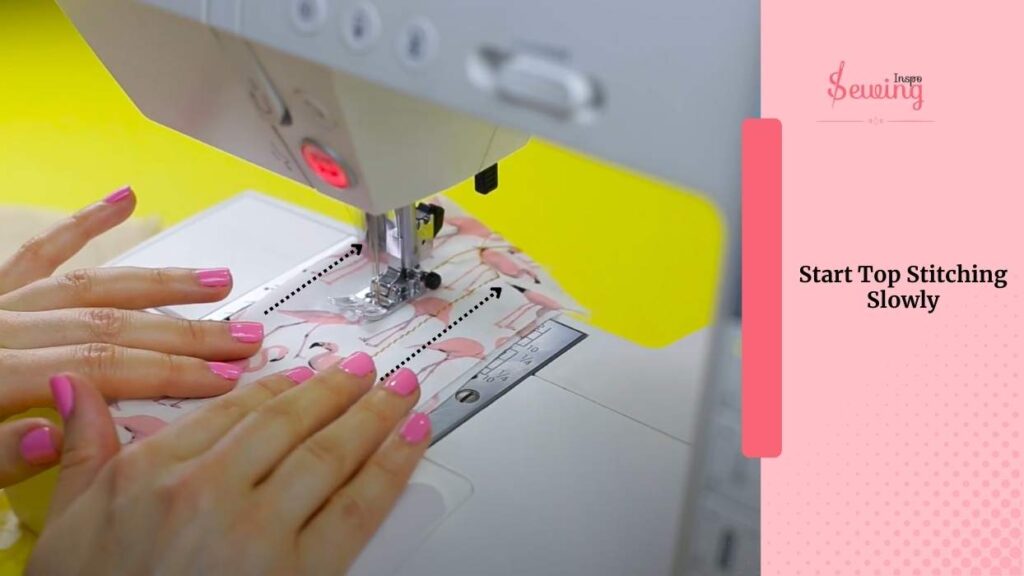
Start Top Stitching Slowly
Don’t rush!
Start by sewing slowly, especially if you’re new to topstitching. This helps you maintain control and ensures your stitch is even. As you sew, use both hands to gently guide the fabric through, but never pull the fabric through the machine. Let the machine move the fabric at its own pace.
It will work smoothly if you use the right thread type.
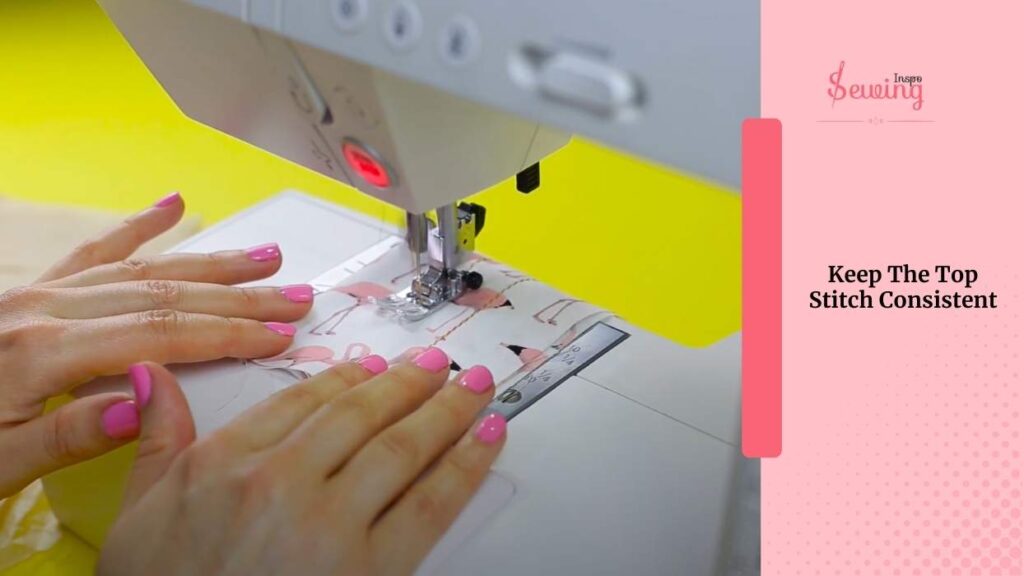
Keep The Top Stitch Consistent
Keep a steady pace as you sew and ensure that the stitch length is even. I keep the gap around 1-2 inches. I also maintain this gap for blind stitching.
But you can adjust the fabric as needed if you notice any unevenness. It’s okay to slow down or stop to adjust if you feel the stitch is drifting.
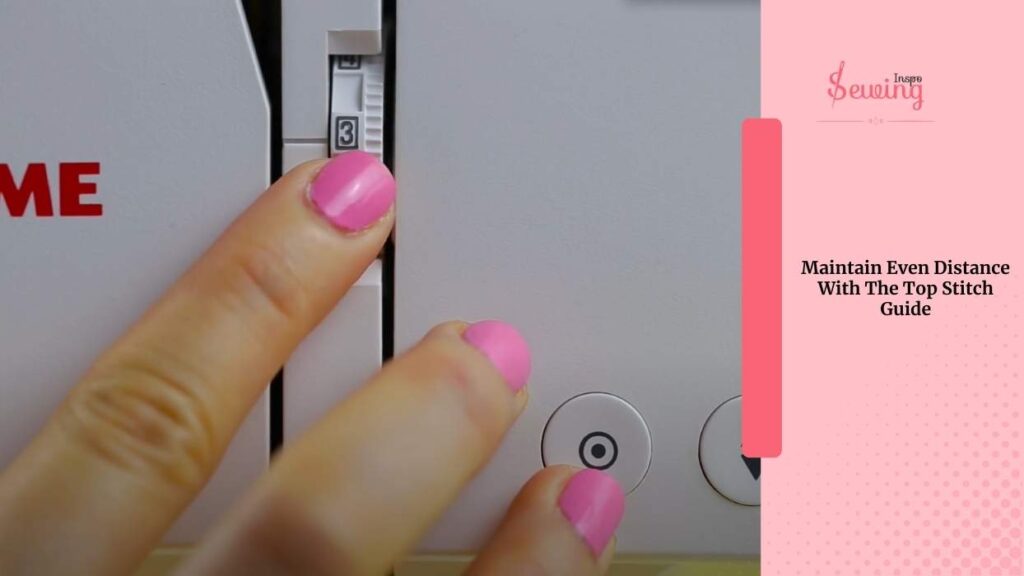
Maintain Even Distance With The Top Stitch Guide
To keep your topstitch straight, follow the guideline you drew or use the presser foot as a guide. Some sewing machines come with a built-in guide to help you sew at a consistent distance from the edge.
If your machine doesn’t have one, you can attach a separate seam guide to help keep the stitching consistent.
When you’re sewing along curves or corners, use your hands to adjust the fabric as you go gently. Take your time to ensure the stitch remains evenly spaced.
Warming:
Topstitching can be challenging, especially on tricky areas like around curves or seams. It’s okay to go slow, especially if you’re still getting the hang of it. If you want extra strength, then go for double top stitch sewing.
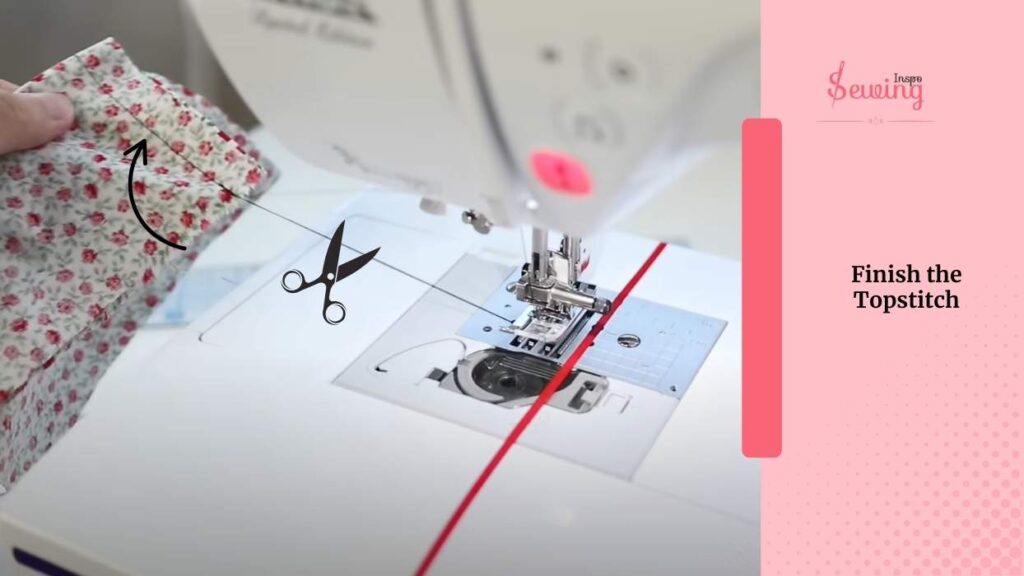
Finish the Topstitch
Once you reach the end of your stitching line, don’t just stop—backstitch to lock your stitches.
This ensures that your topstitch doesn’t come undone. Backstitching is crucial to secure the beginning and ending of your seam.
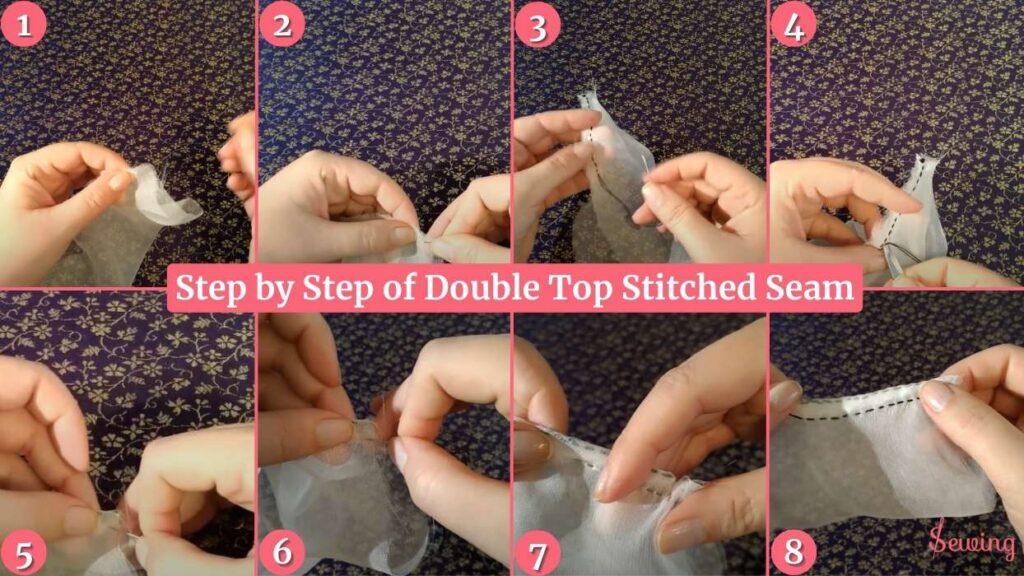
Double Top Stitch, Durable Version Of Top Stitch
The top stitch is strong in itself, but if you want extra strength, then do a double top stitch on it. It actually makes seams stronger and tougher, so your clothes or projects last longer. Here is how you can do it-
- Grab 2 Fabric Pieces
- Get A Twin Needle
- Sew ⅝-inch seams
- Press The Seam Open
- Turn The Fabric To The Right Side
- Sew First Line
- Position To Stitch The 2nd Line
- Sew Straight Down To The Bottom Again
- Give Your Stitches A Gentle Press
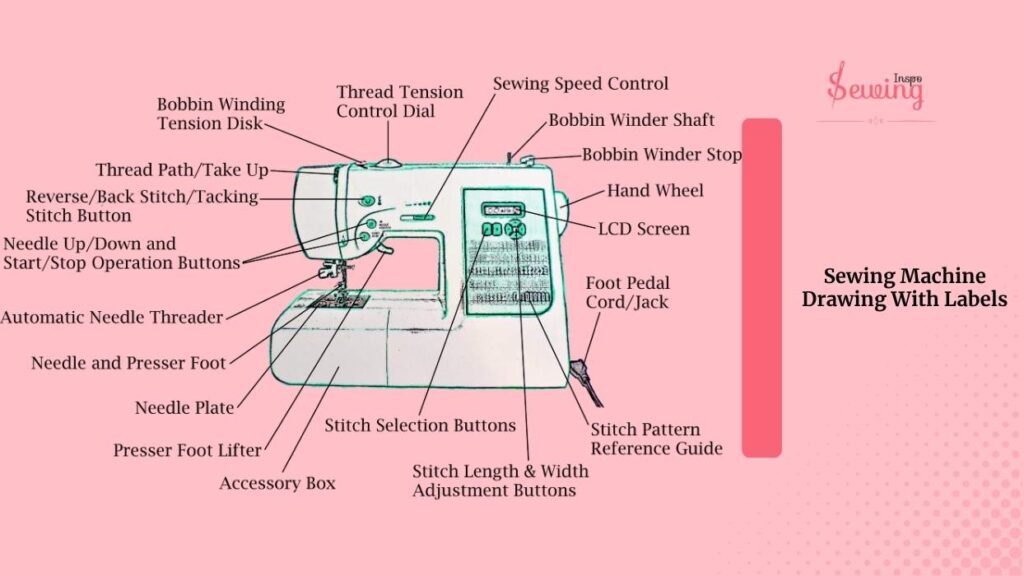
Sewing Machine Drawing With Labels Easy
If you want sa guide to understand the sewing machine easily so you can do top stitch perfectly. Then here have a look-
Frequently Asked Questions
What is the difference between a top stitch and a regular stitch?
A top stitch is a visible, longer stitch often used to decorate or reinforce seams. A regular stitch is the basic stitch used to join fabric together and is usually hidden inside seams.
When to use top stitch thread?
Use top stitch thread for visible stitching on hems, seams, or decorative accents where you want the stitch to stand out.
Do you put top stitch thread in the bobbin?
No, use regular sewing thread in the bobbin and top stitch thread only in the needle for visible stitching.
Conclusion
That’s how a top-stitch sewing machine works. Once you learn to do it, your sewing work will never fall apart.


Leave a Reply