
Sewing on stretchy fabric can be a total headache. You know what I’m talking about—when your stitch just doesn’t stay put, and your fabric starts shifting everywhere.
Ugh!
Or even worse, a tight stitch can cause that awful gathering effect on your fabric, which is the last thing you want for your dress.
However, after some research, I also found that other helpful stitches, like zigzag, overcast, honeycomb, and hem stitches, are stretch stitches on the sewing machine. And the process is super smooth too. I mean
stretch stitch
To do a stretch stitch on a sewing machine, set your machine to the stretch stitch setting, use polyester thread, and sew with a twin needle for flexible, durable seams on stretchy fabrics.
But knowing wouldn’t let me sit straight. I had to try independently, so I got into my business immediately. Let’s see How to use stretch stitch on the sewing machine.
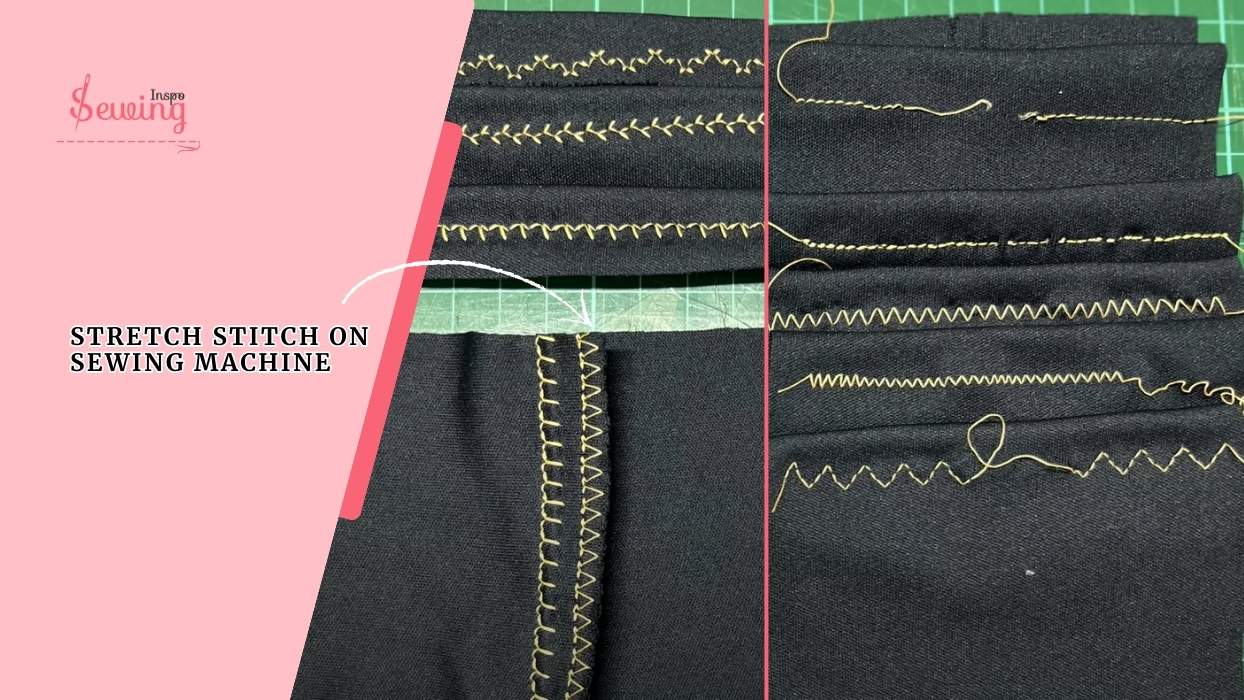
Table of Contents
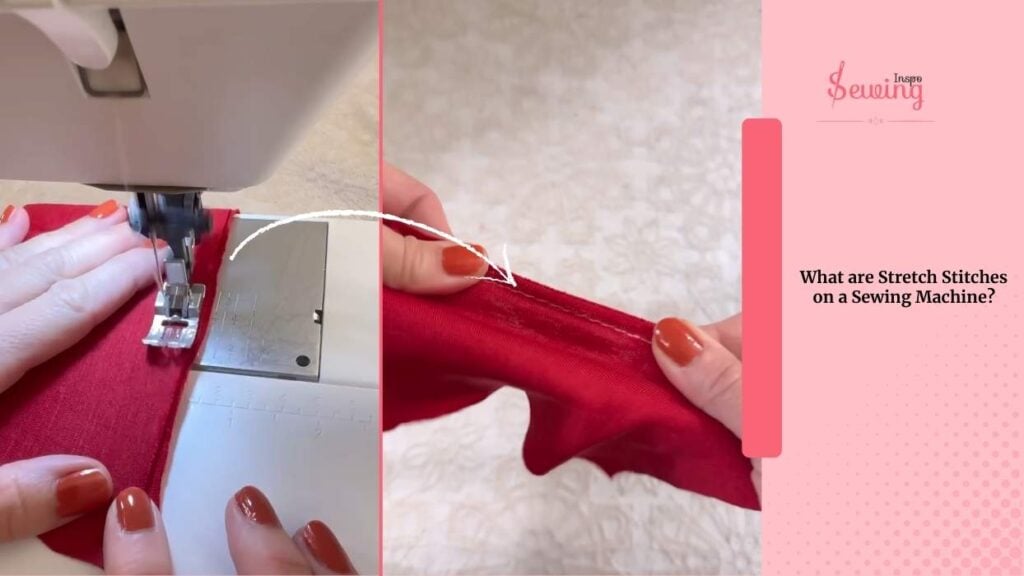
What Are Stretch Stitches On A Sewing Machine?
Stretch stitches on a sewing machine are unlike regular stitches.
They can stretch with the fabric without breaking, so your seams stay strong and flexible. But not all machines have a stretch stitch built in. That’s the twist of the stretch stitch sewing machine.
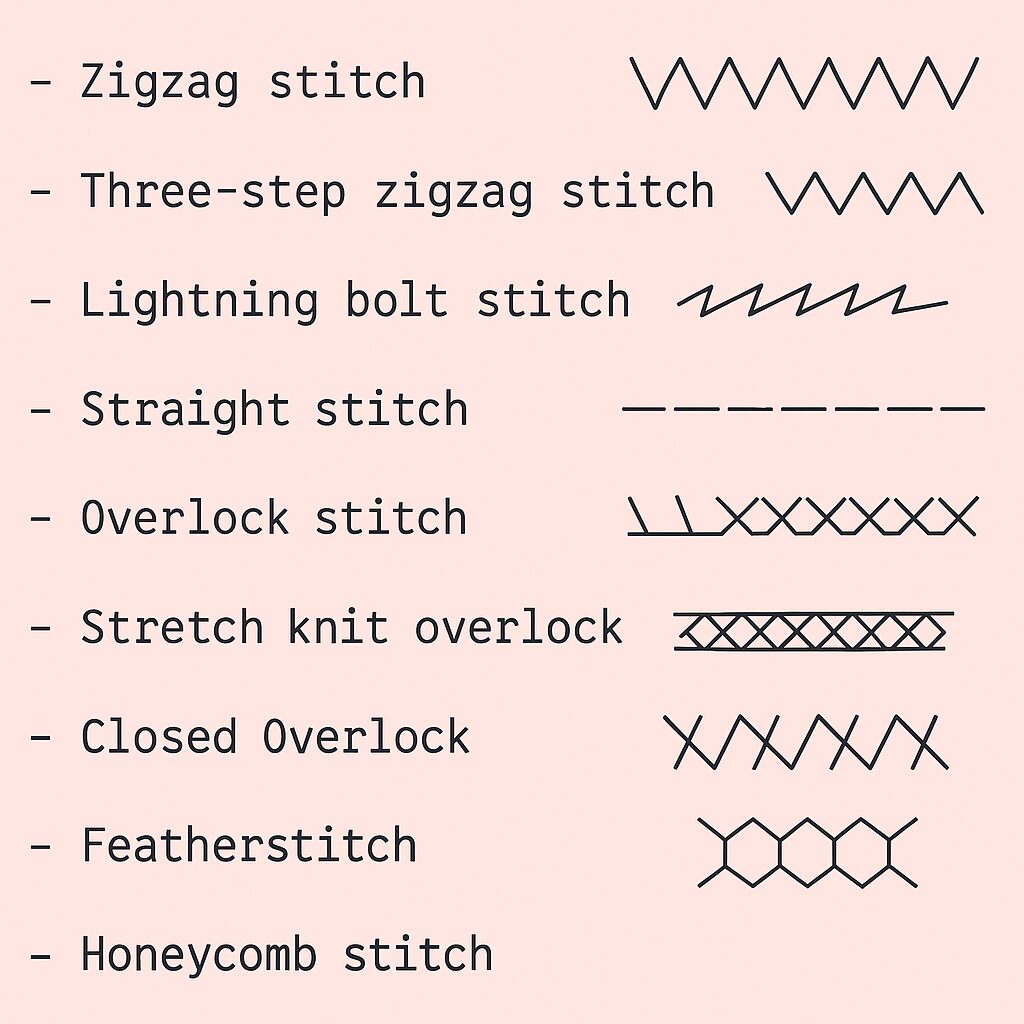
So, there are some common types of stretch stitches:
- Zigzag stitch
- Straight stretch stitch
- Lightning stitch
- Long straight stitch
- Step zig-zag
- Twin needle stitch
- Overedge stitch
- Overlock stitch
- Feather stitch
- Skipped stitches
- Triple Stitch
- Honeycomb stitch
- Blanket stitch
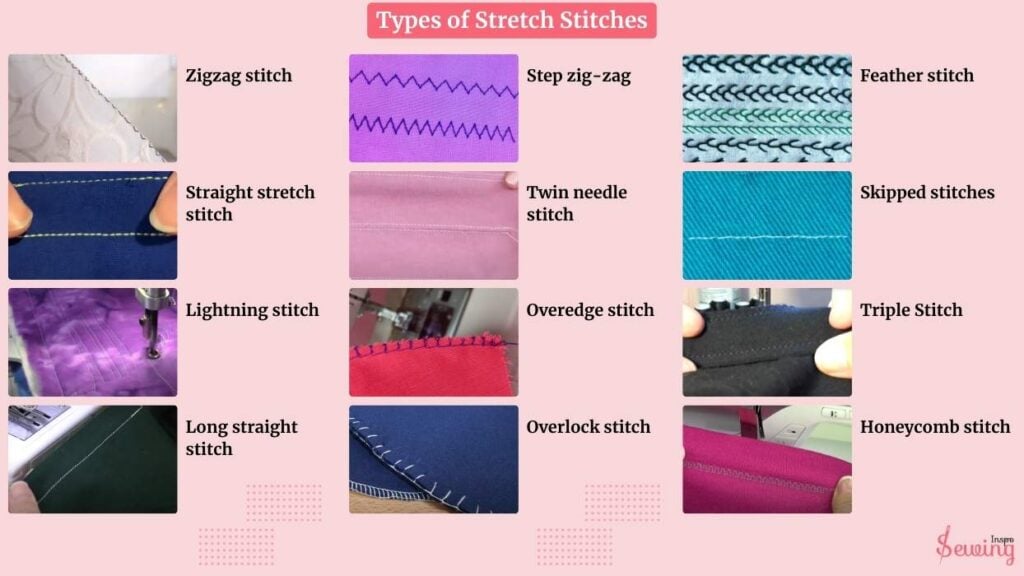
Each stretch stitch is perfect for stretchy fabrics, and I’ve tried them all! 😍The zigzag is great for flexibility. I love them all for different reasons.
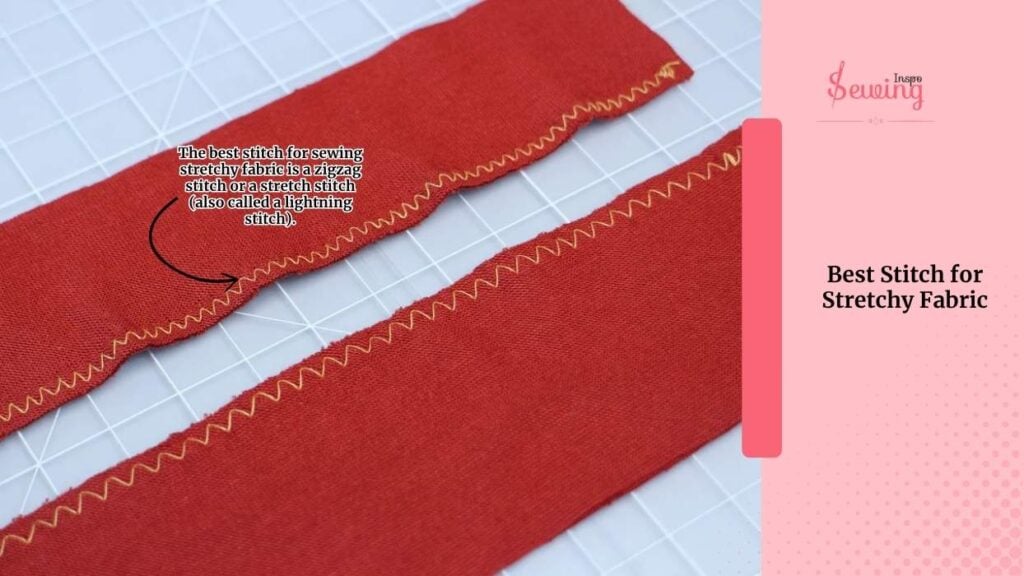
Best Stitch For Stretchy Fabric
I’ve tried a bunch of stitches on stretchy fabric, but the lightning stitch is the best stitch for stretchy fabric.
It flexes perfectly with the fabric and holds everything in place without snapping—total game changer for side seams on knits.
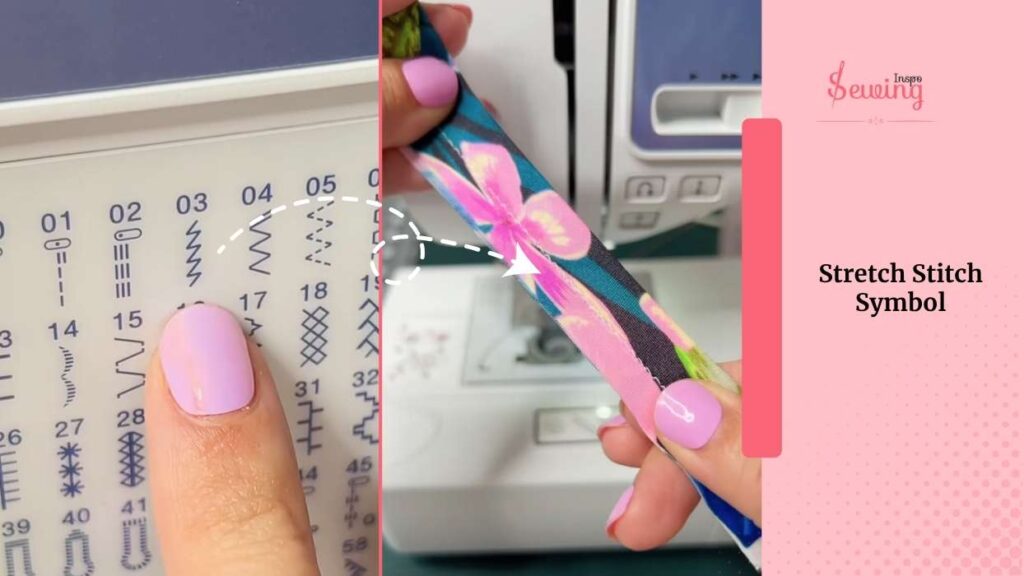
Stretch Stitch Symbol On Sewing Machine
The main stretch stitch symbol looks like thick dots of a line. But most sewing machines don’t have it. So, most stretch stitch symbol on a sewing machine typically looks like a zigzag line, but with a noticeable difference.
For example,
The zigzag stitches are longer and more evenly spaced than the standard zigzag stitch. It may appear as a line of diagonal “V” shapes or resemble a slightly elongated zigzag pattern.
But that also isn’t fixed. This causes the symbol changes on the sewing machine brand. Here are some symbols I have seen so far,
- It might look like a series of diagonal “V” shapes or slightly elongated zigzags.
- Sometimes, it can look like a curved line or two parallel lines with slanted stitches between them.
What Does A Stretch Stitch Symbol Look Like?
Rather than that, it may also look like this! sewing machine stitch symbols
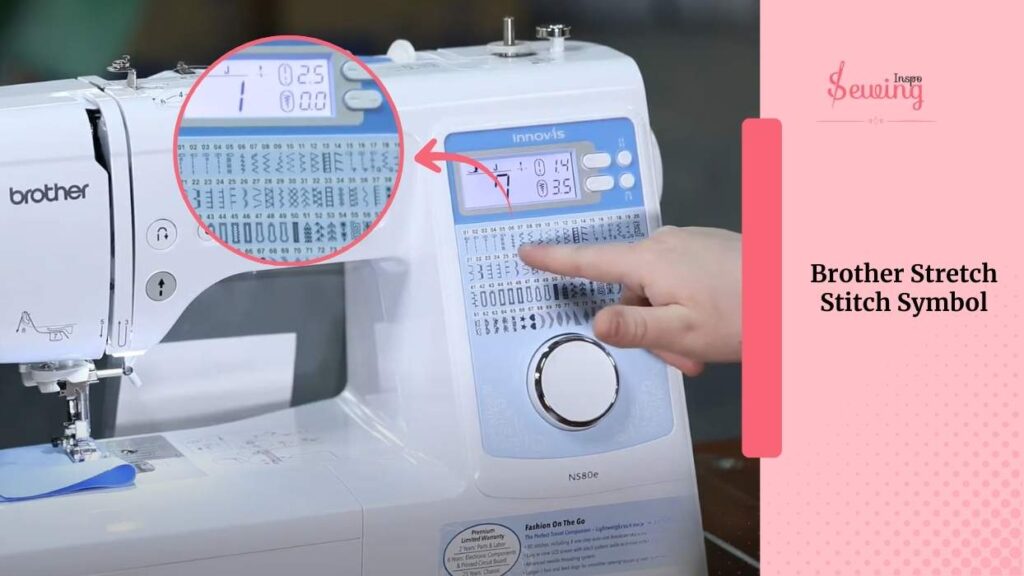
Brother Stretch Stitch Symbol
On a Brother sewing machine, the stretch stitch symbol usually looks like a lightning bolt (⚡).
It’s designed for sewing stretchy fabrics, allowing the seam to stretch without breaking the thread.
Singer Stretch Stitch Symbol
On a Singer sewing machine, the stretch stitch is usually represented by a lightning bolt or zigzag with a straight center line.
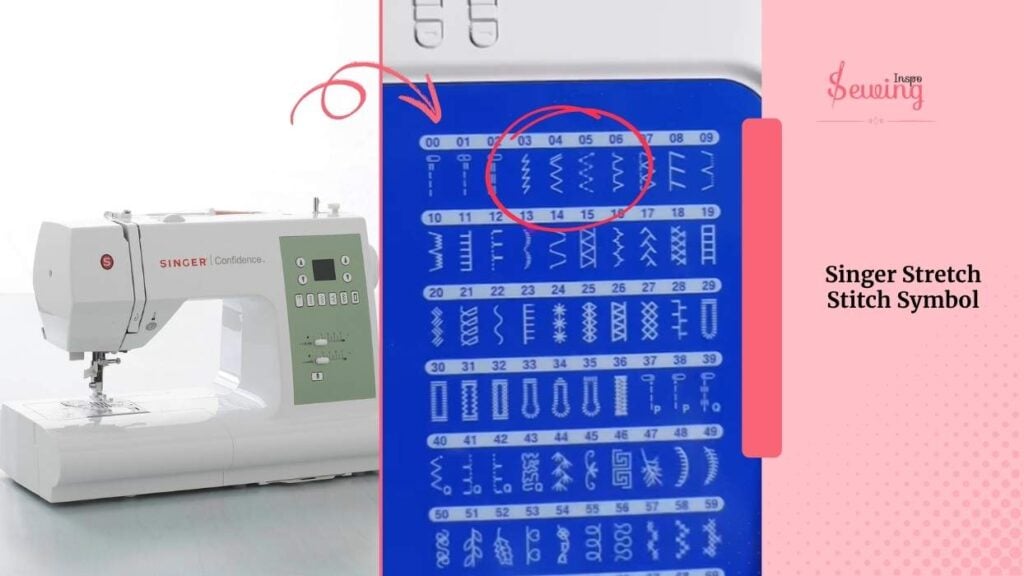
It can look like a small zigzag combined with a straight stitch, sometimes called the “lightning bolt stitch.”
What Does A Stretch Stitch Look Like On A Sewing Machine?
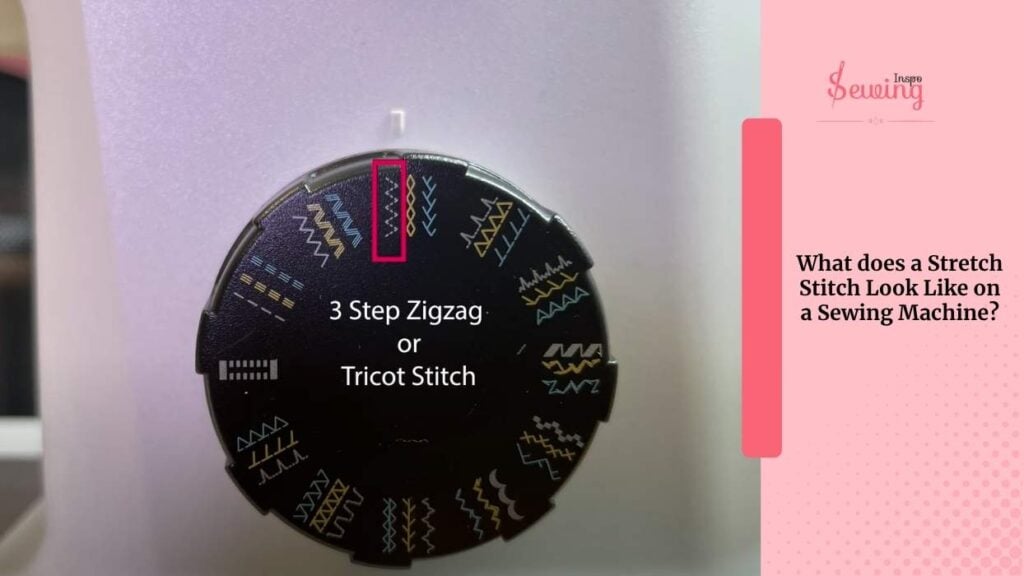
If you are still so unsure and can’t find a stretch on a machine, then here is a closer look,
Do A Stretch Stitch On Sewing Machine With Twin Needle Stitch
Stretch stitching with another stitch is easy. You select the stitch, and the machine does the rest.
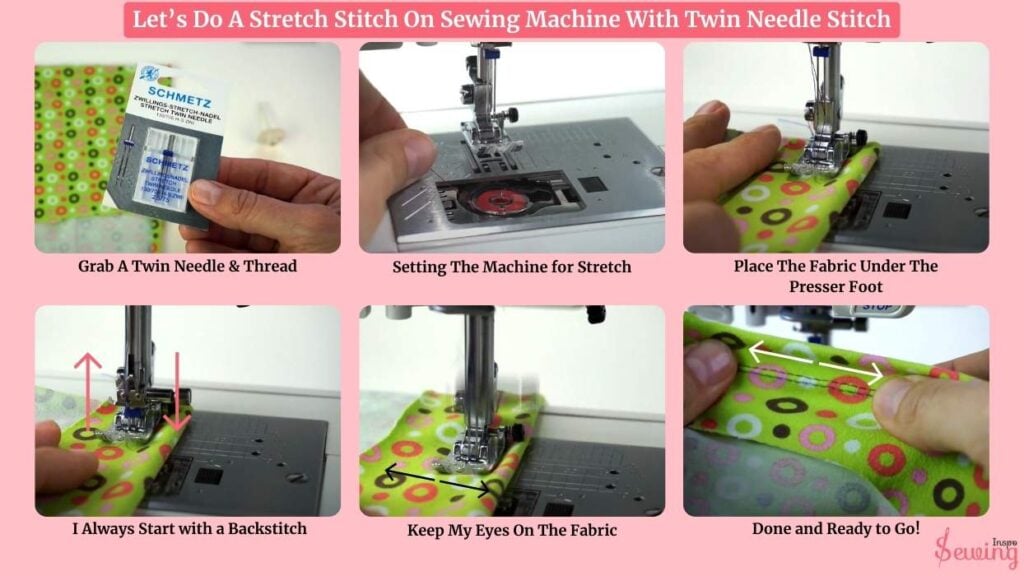
The Twin needle stitch is quite a complicated one. So I decided to go with this one. Why? Cause i like to go the other side of the wave 😜 so to do stretch stitch on a sewing machine, you need to follow 5 steps,
Grab A Twin Needle & Thread
I grabbed my Schmidt’s stretch twin needle (size 2.5/75). I made sure to use polyester thread because it’s much stronger than cotton thread—cotton can snap when stretched, and we definitely don’t want that!
Next,
I inserted the twin stretch needle just like a regular needle. It felt a little different, but once it was in, I dropped my bobbin in as usual, as I do for top stitch.
I use a drop-in bobbin system because it’s quick and easy. Then, I placed my spools of thread (blue, brown, and red) in the thread holders. However, you can adjust this depending on the sewing pattern.

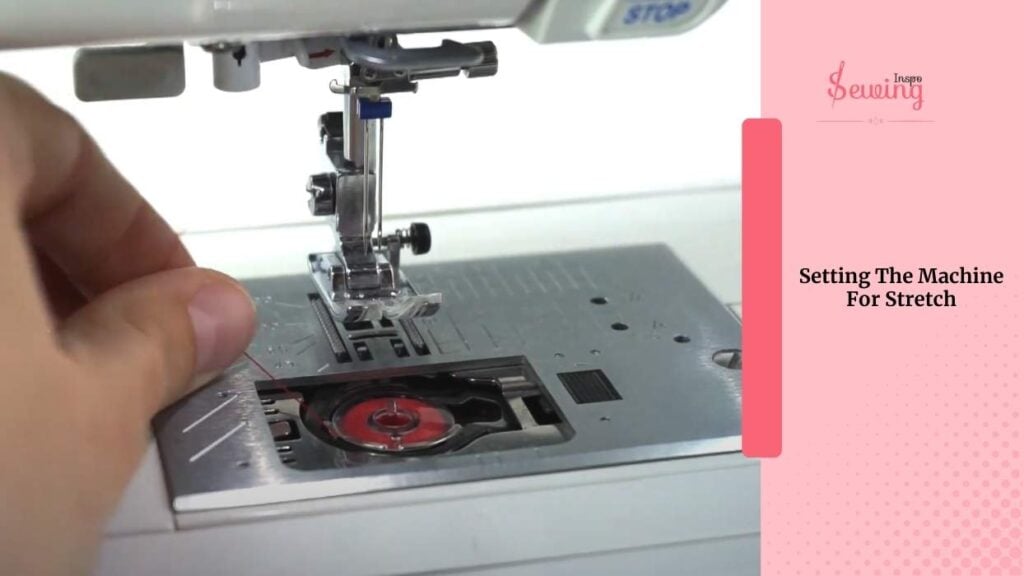
Setting The Machine For Stretch
Now, I adjusted my stitch length to 3.5, which I found worked best for my stretch fabric. I also lowered the top thread tension from 4 to 3 to allow for more flexibility. This length is perfect for an Elastic stitch sewing machine.
Lastly,
I grabbed my four-way stretch knit fabric and folded it in half with the stretch going horizontally, since that’s where I was going to sew.
Place The Fabric Under The Presser Foot
Now that everything is set up, I’m ready to start sewing, and honestly, this part is always a bit exciting! I place the fabric under the presser foot.
I’m ensuring it’s aligned properly with the edge of the fabric, which is the hemline I’m working on.
Once it’s positioned,
I gently lower the presser foot onto the fabric to hold it in place.

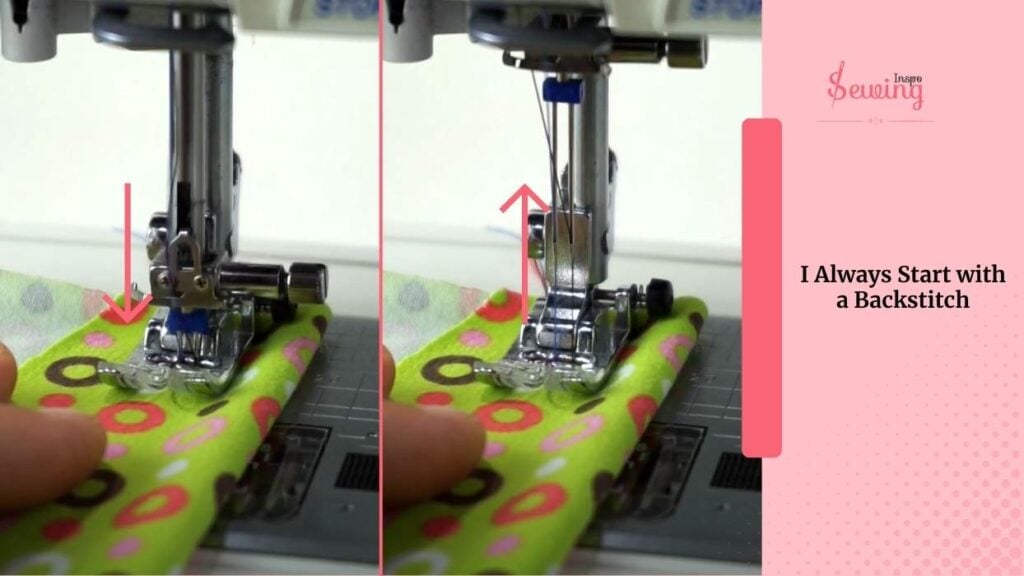
I Always Start With A Backstitch
Before I get going, I always start with a backstitch. I press the pedal just a little to sew a few stitches in reverse. This is essential because it locks the threads.
Also, it prevents the stitches from unraveling later. It’s like securing your starting point, making sure it doesn’t budge. Once I’ve done that, I flip the switch and go forward, continuing to sew in a straight line.
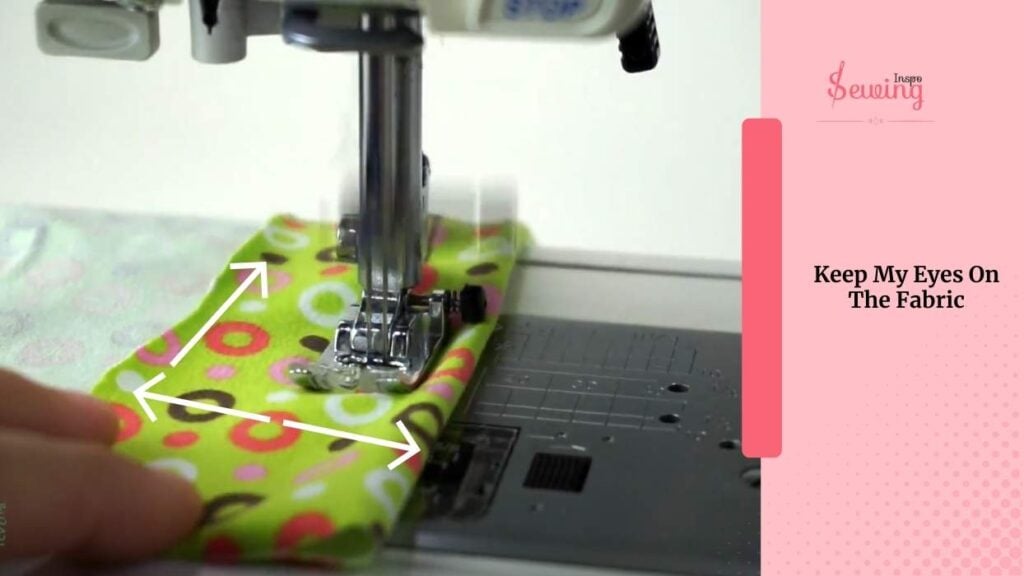
Keep My Eyes On The Fabric
As I sew, I keep my eyes on the fabric and the machine guide to help me keep everything even. This is key, especially with stretch fabric.
It can be easy for it to shift or stretch out of shape if I’m not paying attention, so I need to keep the fabric straight. I just needed to handle the fabric. The machine will do the work.
Those two parallel lines form perfectly on the top side of the fabric. It’s like magic watching the fabric feed through smoothly, with the two rows of stitching coming together so cleanly.
On the back side,
I see the red thread running between the blue and brown stitches. Knowing the stitching is stretchy and strong, ready to handle the stretch of the fabric, is such a satisfying sight.
If something isn’t quite right, I always adjust the stitch length, top thread tension, or bobbin tension to get everything just right.
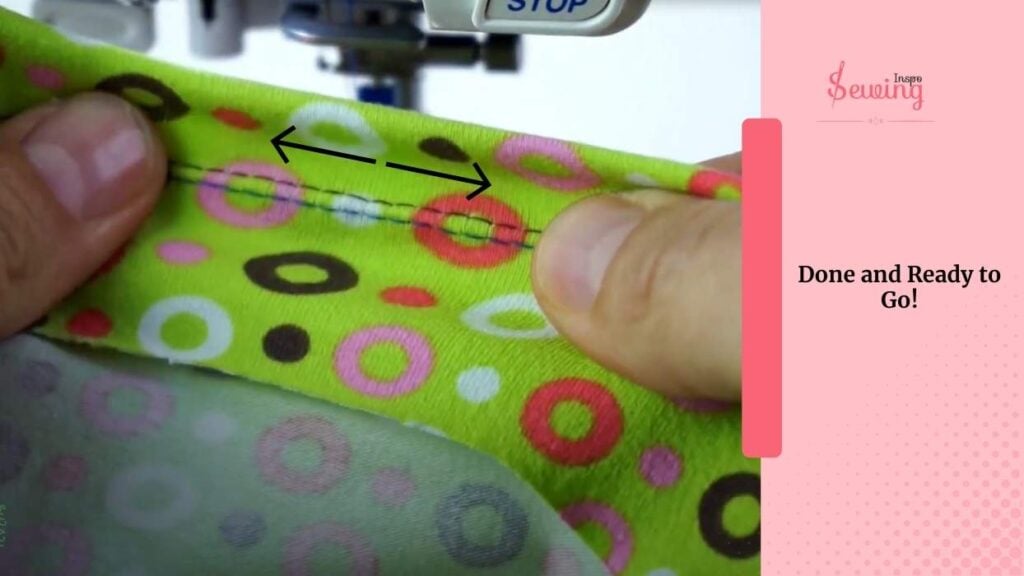
Done and Ready to Go!
In the end, I had a beautiful, stretchy seam that looked neat and professional and could stretch with the fabric.
It was perfect for my stretchy garment! I felt like I really nailed it with the stretch twin needle technique.
Stretch Stitch On Brother Sewing Machine
A stretch stitch on a Brother sewing machine is a special stitch designed for stretchy or knit fabrics. Unlike a regular straight stitch.
It can break when the fabric stretches; the stretch stitch expands with the fabric. It keeps your seams strong and prevents them from popping.
That’s why brother sewing machine stretch stitch most favorite am ong the stitcher.
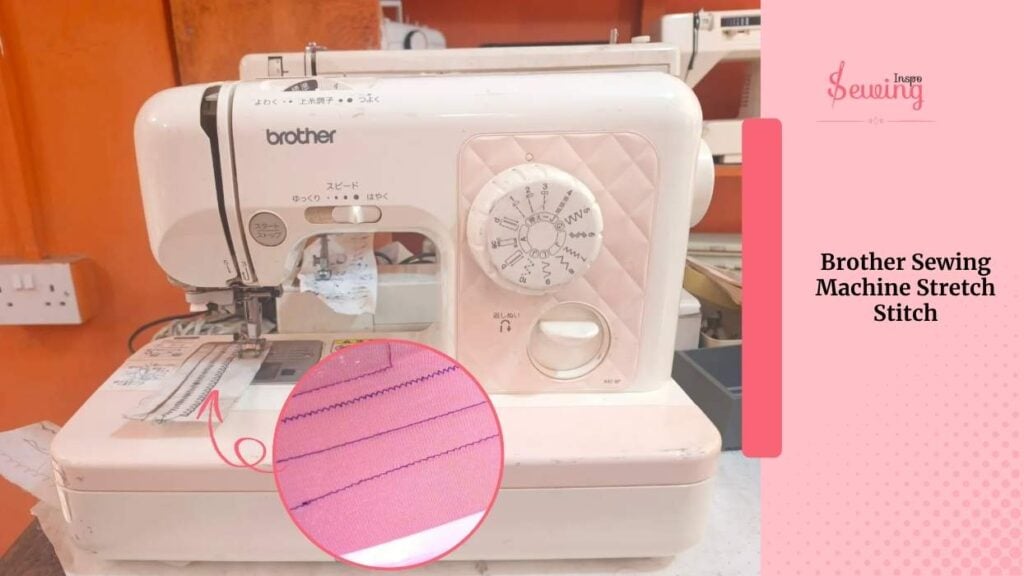
On most Brother machines, you’ll find it labeled as a “stretch” or “lightning bolt” stitch. To use it, select the stretch stitch pattern, adjust the stitch length to around 2.5–3 mm, and set the tension according to your fabric.

It is usually a bit lower than for woven fabrics. Sew slowly to keep the fabric from puckering.This stitch is perfect for t-shirts, leggings, swimwear, or any project where the fabric needs to move with you without the seams breaking. It’s basically the secret to professional-looking seams on stretchy fabrics!
What Does A Stretch Stitch Look Like?
Stretch stitch usually looks like a narrow zigzag, lightning bolt shape, or even a triple straight stitch that flexes with your fabric.
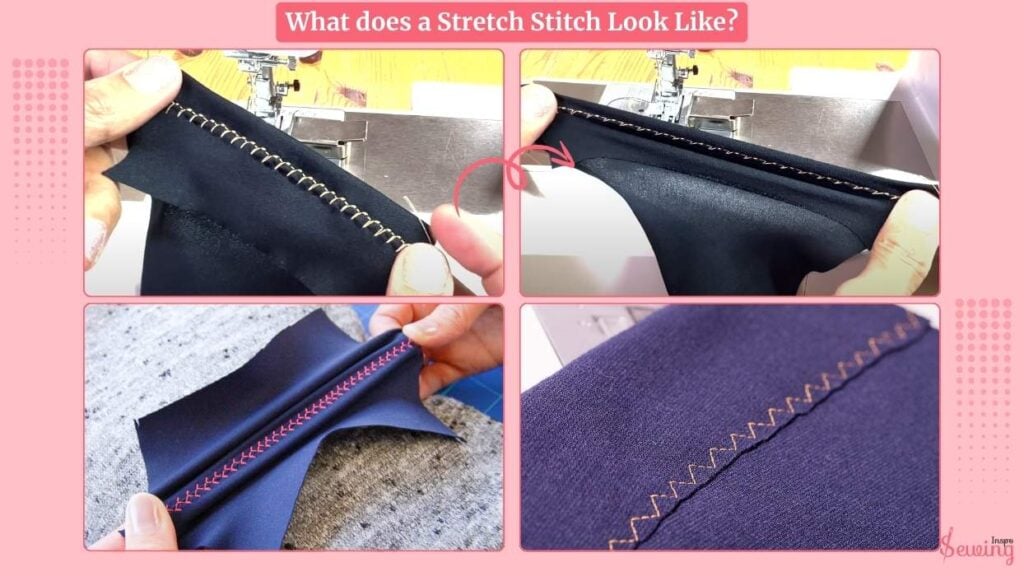
You’ll find it hugging your seams on knit fabrics, moving with every stretch instead of snapping like a regular straight stitch would.
FAQ
What setting do you set a sewing machine for a stretch stitch?
To set your sewing machine for a stretch stitch, set it to a stitch length of around 3-4 and adjust the tension slightly lower than usual (around 3) to allow for flexibility. If you’re using a twin needle, make sure the machine is threaded correctly with the right needles and thread.
When should I use a stretch stitch?
Use a stretch stitch when sewing fabrics that need to stretch, like knits, spandex, or jersey. It’s perfect for hems, seams, and areas like armholes or waistlines where the fabric needs to move and stretch without breaking the thread. Or alternatively you can try double overlock stitch.
How do you stretch a stitch?
To stretch a stitch, you need to use a stretch stitch or a zigzag stitch that’s designed to give. Adjust your machine settings (stitch length, tension) and ensure you’re using polyester thread (which has more stretch than cotton). The stitch itself will stretch along with the fabric when you sew it, allowing for flexibility and movement.
Conclusion
Using a stretch stitch is the key to sewing stretchy fabrics without worrying about your seams breaking. With the right settings, thread, and stitch, you’ll get professional, durable results that move with the fabric.
Happy sewing, and enjoy making those stretchy garments!


Leave a Reply