
I was on the phone with a friend the other day, just catching up like usual, when I heard that unmistakable hum in the background—vrrrmmm. Yep, she was clearly stitching something. So, naturally, I asked, “Hey, what stitch are you working on?”
She casually replied, “Oh, just a chain stitch.”
Wait. Chain stitch? My brain did a double take.
“Hold up,” I said. “Chain stitch… on a machine? Isn’t that a hand embroidery thing?”
I could practically hear her grin through the phone. “Not anymore.”
And just like that, I was delighted. I searched and found that yes, there is a way to do machine chain stitch. Here is how it’s done,
Chain Stitch
To chain stitch on a sewing machine, thread the machine carefully, sew while managing slack, and gently adjust the needle if the fabric sticks to keep your chain stitching smooth and hassle-free.
Sounds interesting, so I had to learn more about it and do it. So, I started doing research more. Let’s learn about the most talked-about types of machine stitches.

Table of Contents
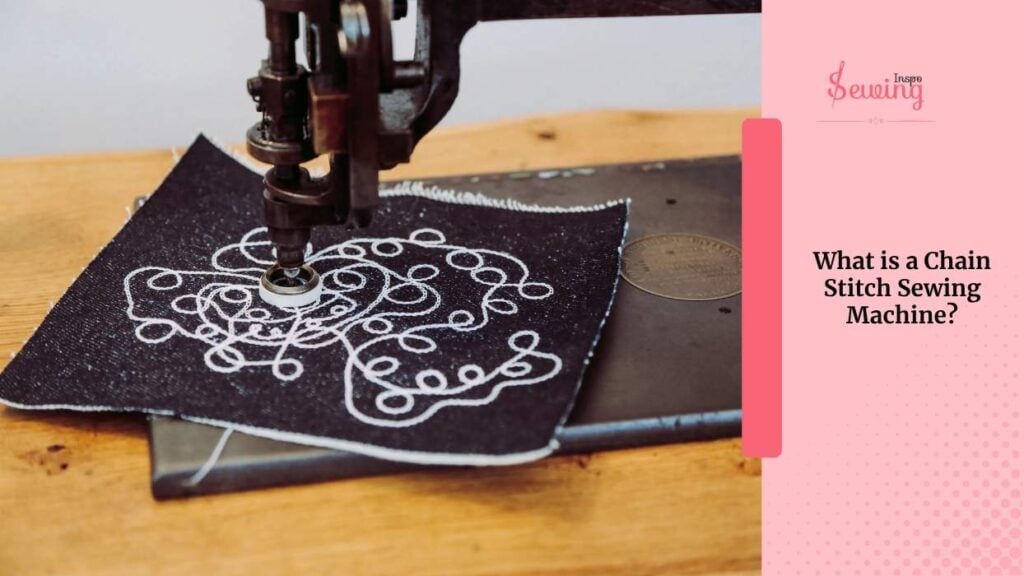
What Is A Chain Stitch Sewing Machine?
A chain stitch sewing machine is a type of sewing machine that forms stitches using a single thread looped in a chain-like pattern instead of the traditional lockstitch.
Let me explain it simply-
When you use a regular sewing machine, it uses two threads: one from the needle and one from the bobbin.
But a chain stitch machine only uses one thread, looping it continuously through the fabric so it looks like a little chain on the underside.It’s called a chain stitch because the back of the fabric looks like a chain link fence.
Can Chain Stitch Be Done By Machine?
Yes, you can! ! If your machine has a chain sewing machine stitch symbols. I know I know. I was surprised, too, just like you. I used to think chain stitch was only for hand embroidery, too 😄
But turns out, machines can do it too!
But wait! 🫷 All kinds of machines can’t do chain stitch.

There are special chain stitch machines designed. Barthélemy Thimonnier, a French tailor, invented the first successful chain-stitch sewing machine back in the early 1800s. His invention really marked a turning point in sewing machine history.
That’s how we got today’s chain stitch embroidery sewing machine.

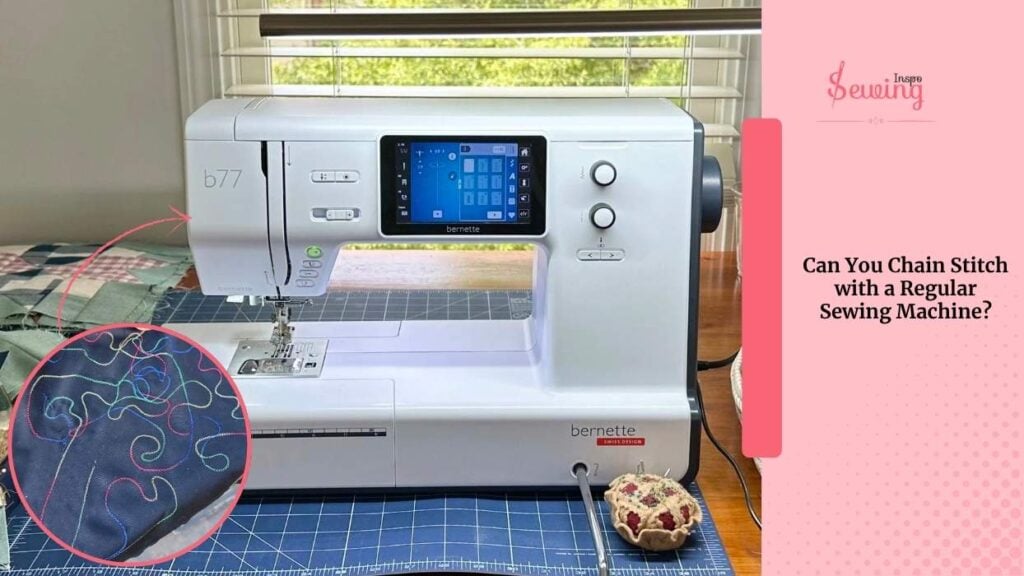
Can You Chain Stitch With A Regular Sewing Machine?
No, a regular sewing machine can’t do a true chain stitch because it doesn’t have a looper mechanism. It uses a bobbin system instead.
However, you can mimic the look of a chain stitch using decorative or stretch stitches if your machine has those built-in settings.
Which Machine Is Used For Doing Chain Stitch?
Fast forward to today-
Many companies design their own chain-stitch machines. Among them, the most famous chain stitch embroidery machine ones are,
- Singer sewing machine chain stitch
- Brother sewing machine chain stitch
- Janome sewing machine chain stitch
- Vintage chain stitch machine
- Hand crank chain stitch machine
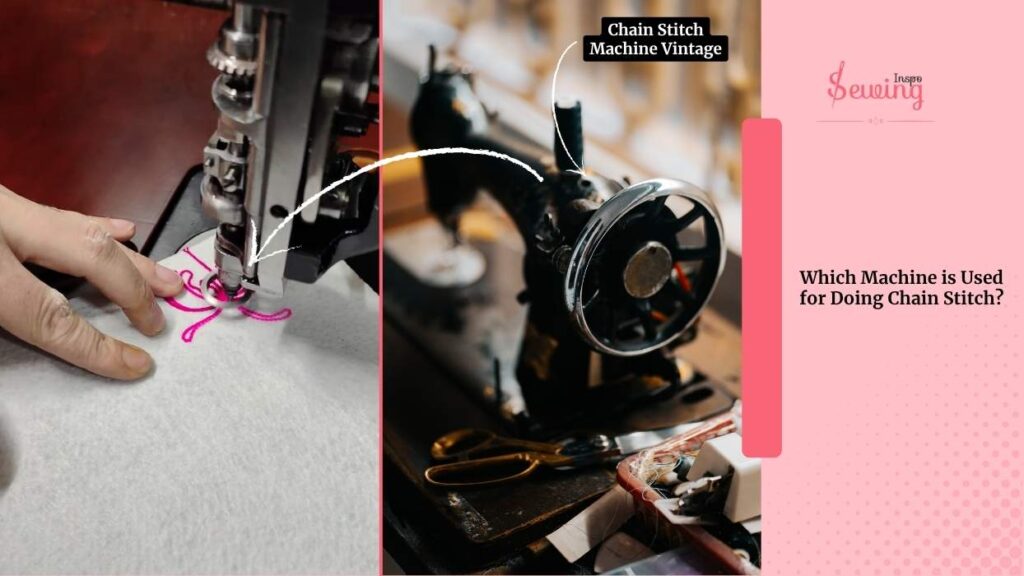
In my opinion, my personal favorite is chain stitch machine vintage. Cause the price range is reasonable and also works smoothly. That’s the perfect 1-needle, 2-thread chainstitch machine.
What Is A Chain Stitch Sewing Machine? Meaning Of Chain Stitch Sewing Machine
A chain stitch machine creates a looped stitch pattern that resembles the classic hand-sewn chain stitch.
Instead of locking threads together like a standard lockstitch sewing machine, it uses one or more threads that form looped chains on the underside of the fabric. That’s why chainstitch embroidery is so mesmerizing.
There are even 2 types of machine chain-stitch,

- Basic Chainstitch machine
- Double Chain-Stitch

Where can you use it? Well, it can be used anywhere, but it’s mostly
- It’s perfect for knit fabrics or areas that need flexibility, like waistbands.
- It adds a beautiful, vintage-style texture to the fabric surface.
- Also Ideal for mass production in fashion and textiles.
Basically,
Chain stitch machines are widely used in industrial sewing, such as in denim production. However, some home sewing and embroidery machines can also mimic this effect.
Interesting right? I know, so I had to try it.
What Is The Best Thread For Chain Stitch Machine?
When I first started using a chain stitch machine, I thought I could grab any old thread I had lying around.
Big mistake. 😅

A regular sewing machine can’t do a chain stitch. I tried using regular cotton thread at first, and guess what? The stitches kept snapping every time I pulled even a little on the fabric. It was SO frustrating.
After a mini meltdown (lol),
I found that polyester Tex 15 thread is actually the best for chain stitch machines. It’s strong, it’s got a little bit of stretch, and it glides through the machine like butter. Once I switched to polyester, the difference was night and day — no more breaking, no more messy loops.
Later, I experimented with a poly-cotton blend, and it worked great too, especially for projects where I wanted a slightly softer, more natural look.

Long story short:
If you’re using a chain stitch machine, go for polyester or poly-cotton blend threads. Trust me, it’ll save you a lot of headaches (and broken threads). 🎀
Chain Stitch Sewing Machine How It Works
Now that I’ve got all things sorted, let’s start the stitching.
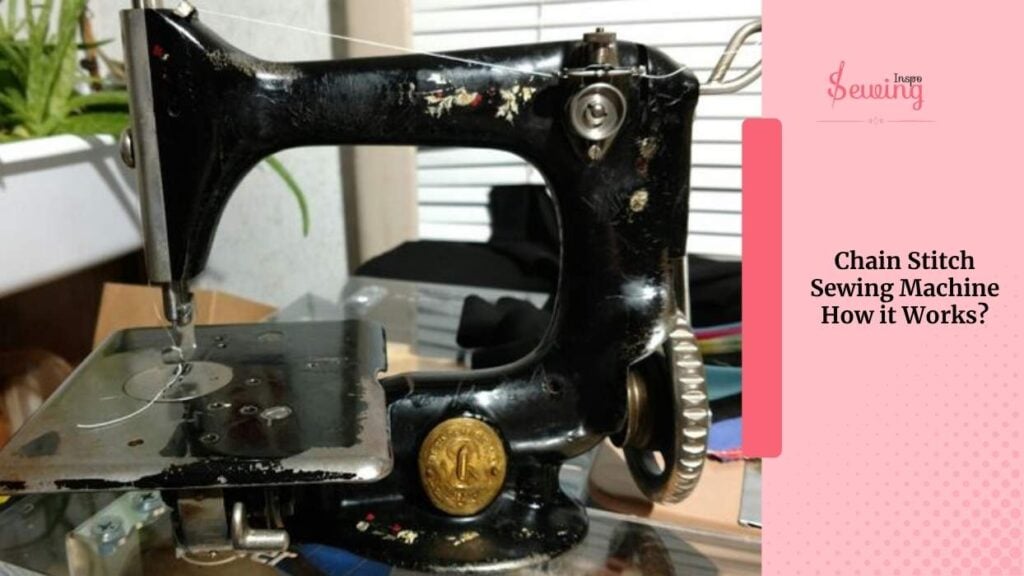

Threading the Chain Stitch Machine Chain Stitch On Sewing Machine
First, I get my machine ready. I point the PH-C120 Chenille needle toward me. That’s important, and grab my threading wire.
I carefully slide it down the big hole (sometimes I fumble, but it’s no big deal). Then, I hook the thread with the wire and pull it back up through the machine.
Wait, wait! How long a thread should I need for machine chain stitch? Well that depends on your project.

But Quick Rule of Thumb:
For a basic chain stitch on sewing machines, you usually need about 2 to 2.5 times the length of the stitching line.
Example:
- If you’re stitching a line that is 10 inches long, plan for about 20–25 inches of thread. This length is also suitable for machine running stitch.
If it’s a dense or multi-layered chain stitch (like heavy embroidery), it could be closer to 3 times the stitched distance.
I Rotate My Needle To About 9 O’clock To Make The Sewing Machine Chain Stitch
Next, I rotate my needle to about 9 o’clock. That helps the thread catch properly in the notch and come up through the needle. I raise the presser foot and pull a little extra slack underneath. Trust me, it makes everything easier.
After that, I gently pull the thread off the needle and make sure it’s free from below.

If it doesn’t come off easily, it usually means I need to pull the part that’s coming up from underneath the machine. Once everything is nice and loose, I’m finally ready to start stitching.
I Place My Fabric Under The Presser Foot
I place my fabric under the presser foot and lower the foot down to hold it in place. Then, I start sewing.
A little tip I’ve learned:
It’s usually easier if you stop sewing with the needle pointing away from you. So, when I need to pause, I raise the needle up, reach under with my right hand, and pull a bit of slack between the spring and the looper. Then, I lift the foot and try to pull my fabric away.

Tying Off and Cutting Threads Of The Chain Stitch On Sewing Machine
Once I have enough slack, I hold onto the thread from below tightly (don’t let go!). I snip it, then pull the thread off the needle carefully.
Since the thread was threaded from left to right, I pulled it back to the left to remove it properly.

Then I turn the handwheel a little backward to raise the needle back up, making sure I’m ready to move on to the next part of my project.
Moving to the Next Stitching Spot
I move my fabric to the next starting spot, put the foot down again, and start sewing my next circle. After a few stitches, I can let go of the tail.
When I need to stop again, I follow the same method:
- Raise the needle.
- Pull slack from between the spring and the looper.
- Raise the foot.
- If the fabric won’t slide, lower the needle slightly until it loosens up.
- Pull the fabric gently.

Final Tips on Direction
I noticed it’s easier to stop if my needle is pointing away from me, but if I happen to stop with it pointing toward me, I adjust the fabric direction accordingly. The same process either way: lower the needle a bit if it feels stuck, and then slide it free.
An Issue I Face While Stitching
Sometimes the fabric won’t move. It feels stuck! At first, I panicked and thought I broke something, but here’s the trick:
I lower the needle by using the handwheel. That loosens the thread loop. Once I see the loop open up, I can pull my fabric away easily without snapping any threads.
I reach under again and find two threads:
- The left thread made the last stitch.
- The right thread is the one coming from below.
I grab the right one, pull some slack out, and if I don’t have enough to tie a knot yet, I simply pull a bit more until I do. You can do it in falak chain stitch machine too.
So, yes, that’s how sewing machine chain stitch works. If you use it the right way, you’ll have a perfect-looking embroidery within a minute.
Machine Chain Stitch Embroidery
After that one learning session, I never stopped doing it. Cause it’s so quick yet creates such beautiful embroidery. Come see, some of my machine chain stitch embroidery,


Chain Stitch Mechanism
Is Chain Stitching Sewing Machine Hard?
Not really once you get the hang of it, a chain stitch sewing machine is pretty easy to use. The threading can seem tricky at first because it uses a looper instead of a bobbin.
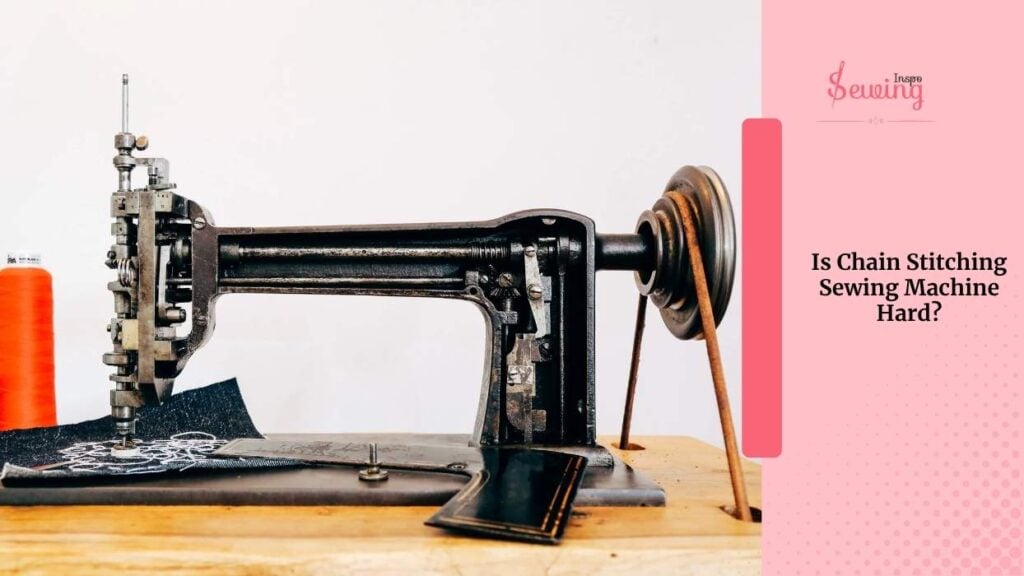
But after a few tries, it becomes second nature. Plus, chain stitching is super satisfying to do. It’s smooth, fast, and gives a neat, flexible finish.
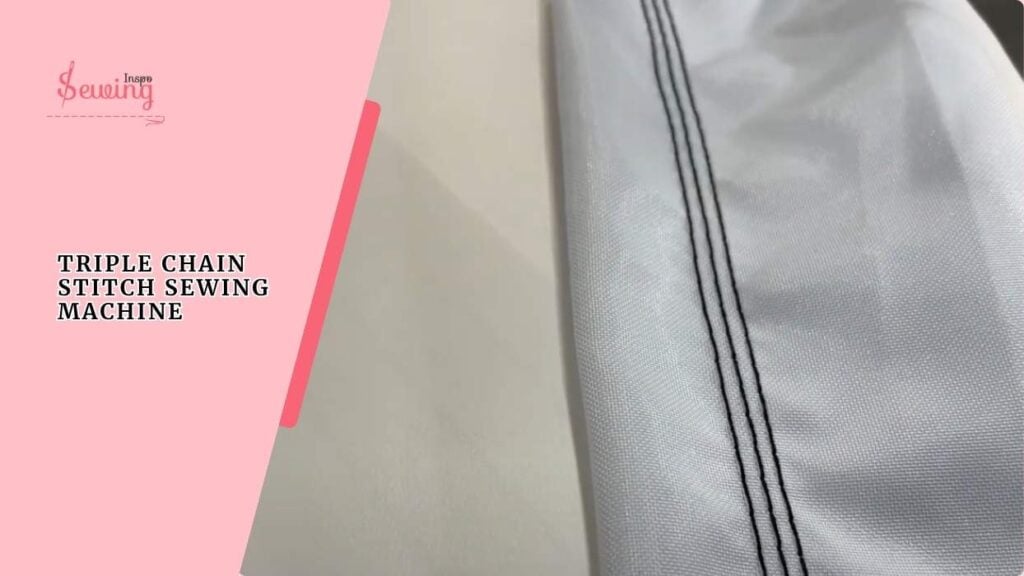
Triple Chain Stitch: A Decorative Form Of Chainstitch
Chain stitch is itself a decorative form, but if you wanna twist it more, then triple chain stitch is the one.
But A true triple chain stitch can’t be done on a regular domestic sewing machine because it requires a coverstitch or chainstitch-capable machine. If you have one of those machine, then all you gotta do is-
- Thread the machine in the order.
- Set your stitch length to a moderate setting to begin (about 2.5–3.5 mm).
- Sew to the end. Stop with the needle down and raise the presser foot.
- Cut the threads, leaving long tails (about 6 inches).
- Gently pull one tail to bring a small loop of the chain up to the top.
- Tie a secure double knot by hand with the exposed tails, or hand-stitch a few tin
Frequently Asked Questions
What Is The Difference Between A Chain Stitch And A Coverstitch?
A chain stitch uses one needle and one thread to create a looped, chain-like pattern on the underside of the fabric. A coverstitch, on the other hand, uses two or three needles with a looper underneath to create parallel lines on top and a chain stitch underneath.
What Is The Singer 114w103 Chain Stitch?
The Singer 114W103 is a vintage industrial embroidery machine designed for freehand chain stitch embroidery. It allows the user to manually move the fabric while stitching, creating detailed, flowing designs like monograms, logos, and patches. Even today, it’s valued for its unique, hand-drawn look that modern machines can’t quite replicate.
Now It’s Your Turn
So, yes, that’s how you can chain stitch on a machine. It’s easier than hand embroidery, right? So do it and share it with us.


Leave a Reply