
I was getting bored with all the usual machine stitches; they just weren’t cutting it for the dress I had in mind. I wanted something with texture, something playful. That’s when the gathering stitch popped into my head. It’s simple, stylish, and adds that fluffy, ruffled charm you just can’t ignore.
So, I did a little digging, got my machine ready, and dove right in. Here’s how gathering stitch works on a sewing machine,
Gathering Stitch
To do a gathering stitch on a sewing machine, set your stitch length to the longest setting, loosen the top tension slightly, and sew two parallel lines without backstitching. Then, gently pull the bobbin threads to gather fabric.
But which length is perfect for gathering stitch? What are the detailed steps? Let’s find out about the gathering stitch sewing machine.

Table of Contents
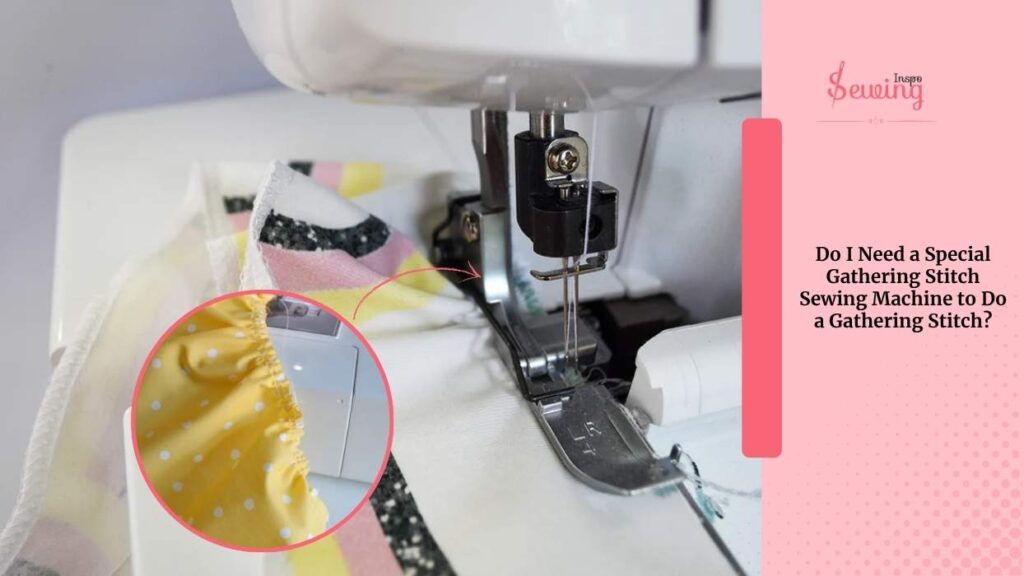
Do I Need A Special Gathering Stitch Sewing Machine To Do A Gathering Stitch?
No, you don’t need a special gather stitch sewing machine to sew a gathering stitch. A regular sewing machine can do it perfectly. You just need to adjust your settings.
I usually set my stitch length to the longest option (around 4–5 mm) and slightly loosen the upper tension. This lets the fabric bunch up naturally as I sew.
Gathering Stitch Symbol
The gathering stitch doesn’t have a universal, official symbol like embroidery stitches do. But in sewing patterns or diagrams, it’s often represented in one of these ways:
Common Symbols for Gathering Stitch:
- A dashed line labeled “gather” or “gathering stitch.”
- Double dashed lines close together show two rows of basting stitches (used for even gathering).
- A wavy or ruffled line indicates that the fabric will be gathered. The Fabric Gathering will help with the stitch.
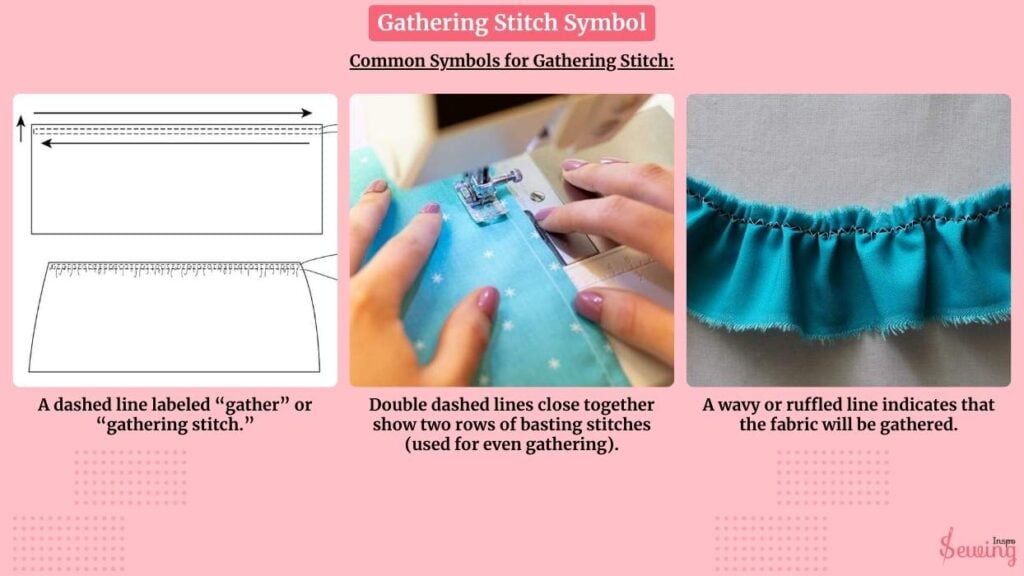
If you can’t find anything like the gathering stitch symbol, the above one. Then sometimes just written instructions like:
“Stitch two rows of long basting stitches between notches and pull threads to gather.”
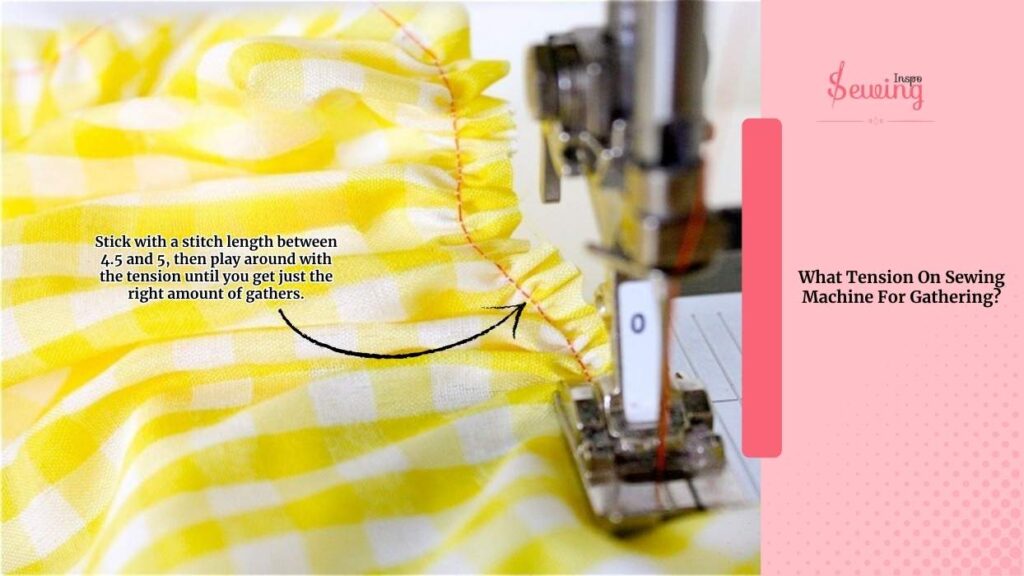
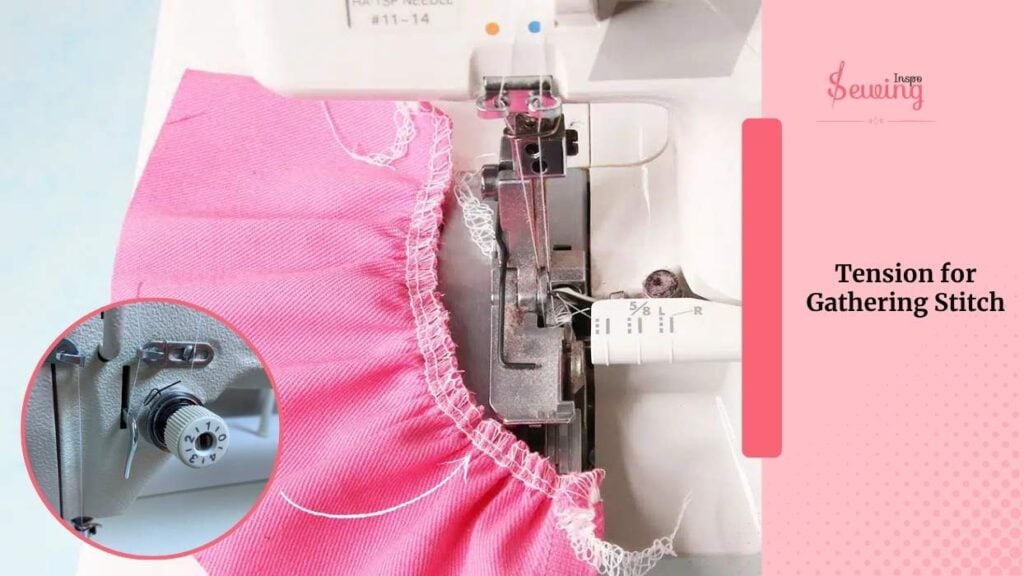
What Tension On Sewing Machine For Gathering? Tension For Gathering Stitch
If you’re gathering fabric on your sewing machine, bumping up the tension a bit higher than usual helps.
But don’t crank it all the way up or your fabric layers might bunch like crazy.
Stick with a stitch length between 4.5 and 5, then play around with the tension for gathering stitch until you get just the right amount of gathers.
How To Do Gathering Stitch On Sewing Machine?
To do gathering stitch on sewing machine follow 7 steps,
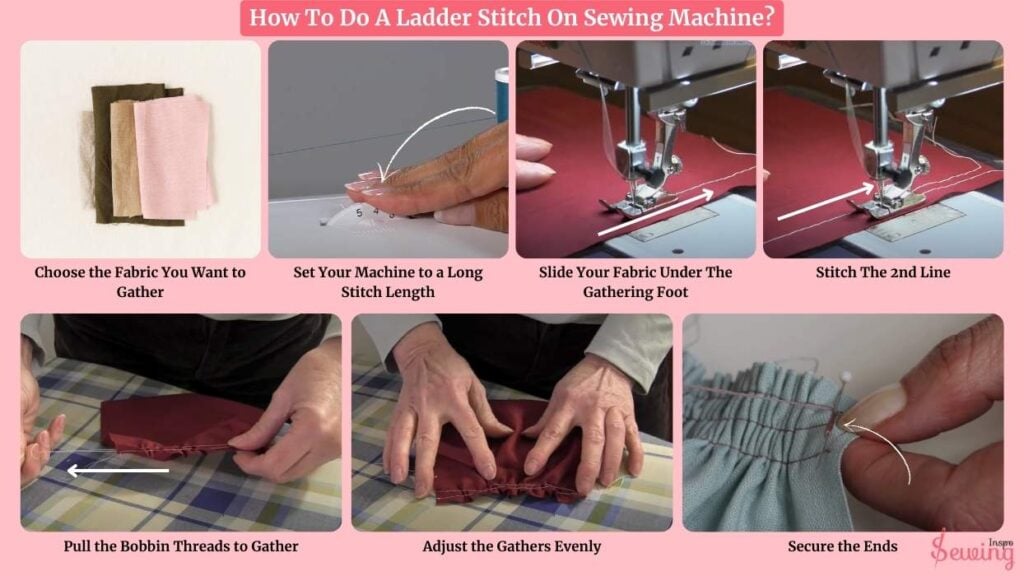
- Choose the Fabric
- Set Your Machine length
- Slide Your Fabric Under the pressure foot
- Stitch The 2nd Line
- Pull the Bobbin Thread
- Adjust the Gathers Evenly
- Secure the Ends
Now let’s gathering technique the right way.
Choose the Fabric You Want to Gather
Alright, first things first—pick your fabric. Gathering works best on lightweight to medium-weight fabrics, like cotton or lawn. These are super easy to manage and give you soft, fluffy gathers without a struggle or any dressmaking.

If you’re working with something thicker like denim or canvas, just know it’s doable, but you’ll need stronger thread and a bit more patience. If this is your first try, keep it simple and light—you’ll thank yourself later! Not so complicated like zigzag stitch.
Set Your Machine to a Long Stitch Length For Machine Gathering
Now let’s get your machine ready. Go ahead and set your stitch length to somewhere between 4.5 and 5 mm. Do the stitch adjustment correctly otherwise it will go wrong.
Longer stitches are the key here. They give the fabric room to shift and bunch up once we start pulling on those threads. If your machine doesn’t go quite that long, just set it to the longest stitch it allows.
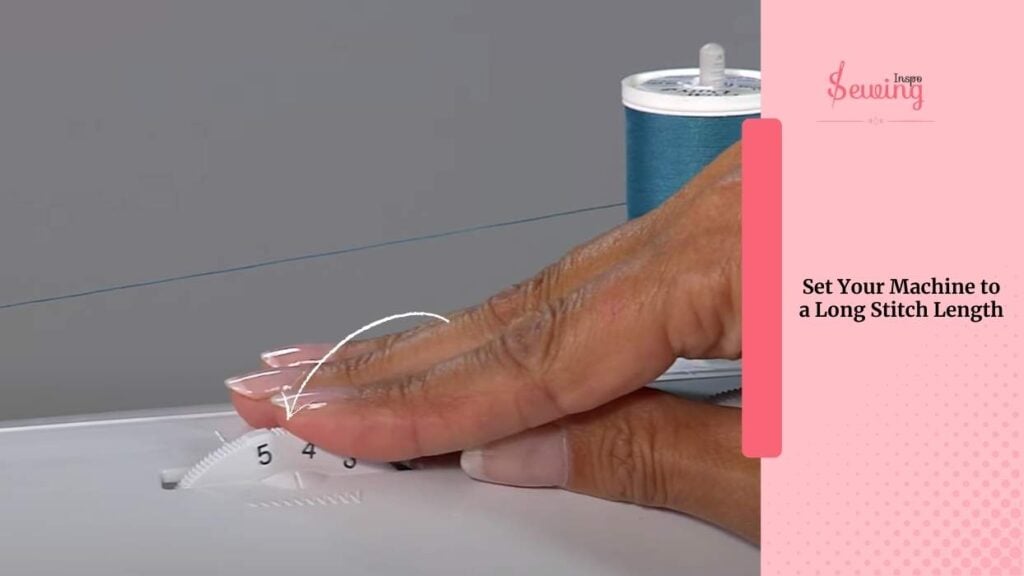
You’re basically creating a loose path of thread that can be tugged into soft folds later on.
Slide Your Fabric Under The Gathering Foot
Time to stitch! Slide your fabric under the presser foot and start sewing along the edge where you want the gathers to be.
Important: do NOT backstitch at the beginning or end.
I know it feels wrong (we’re trained to lock those stitches in!), but in this case, we actually want those thread tails left free so we can pull on them.
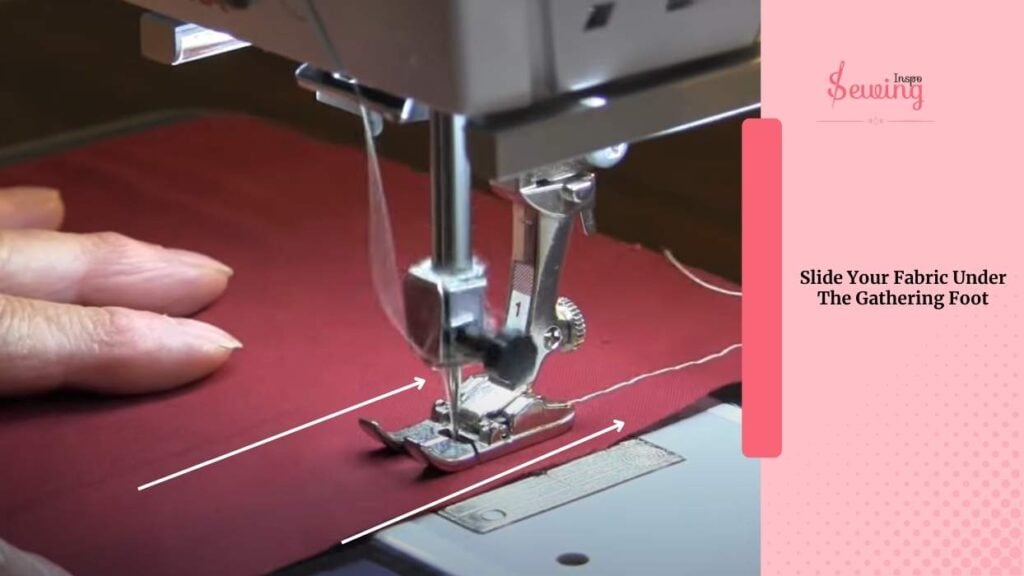
Stitch a straight line about ⅛ to ¼ inch from the edge of your fabric. Just let the fabric glide through while the machine does its thing. You can do double row stitching for stronger security.
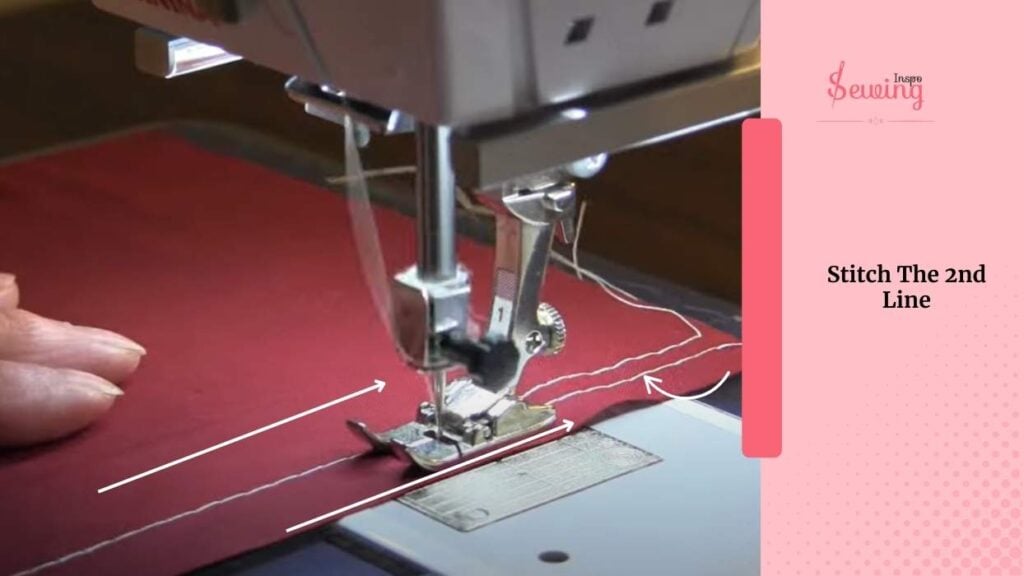
Stitch The 2nd Line
If you want more control and even gathers, this step is for you. Sew a second line of stitching about ¼ inch below the first one, running parallel along the same edge.
You’ll still keep the stitch length long and the tension the same. This second line helps your gathers sit straight and look more uniform.
It is especially if you’re attaching the gathered fabric to another piece like a waistband or bodice. It’s optional, yes, but seriously helpful.
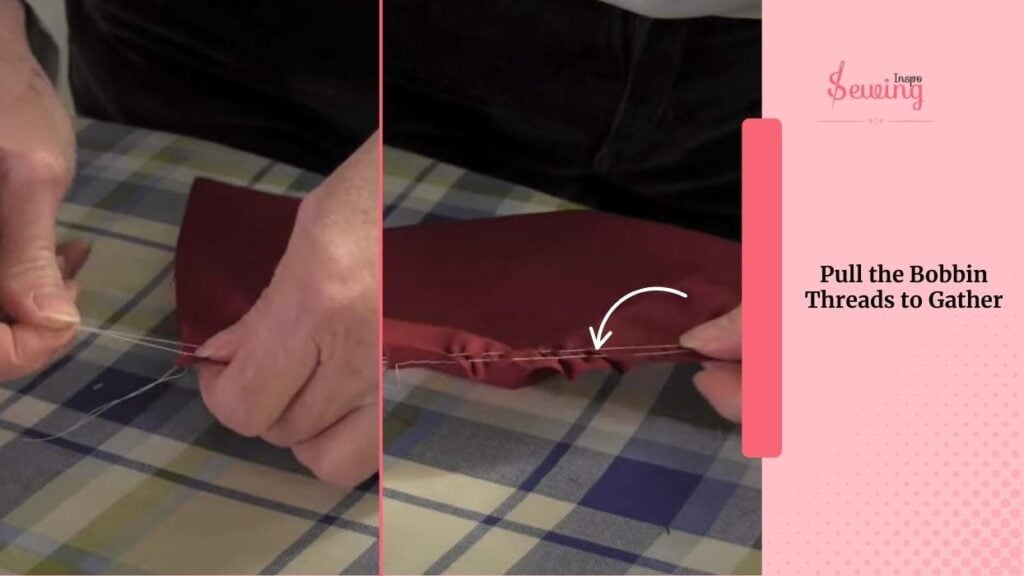
Pull the Bobbin Threads to Gather
Now comes the fun part—gathering! Flip your fabric to the back side and gently grab just the bobbin (bottom) threads.
Start pulling slowly and evenly.
As you tug, you’ll see the fabric begin to bunch up into beautiful ruffles. Don’t rush it—if you pull too hard, you risk snapping the thread (been there, done that 😅). Just keep working the gathers across the length of your seam allowance until the fabric shrinks down to the size you want.
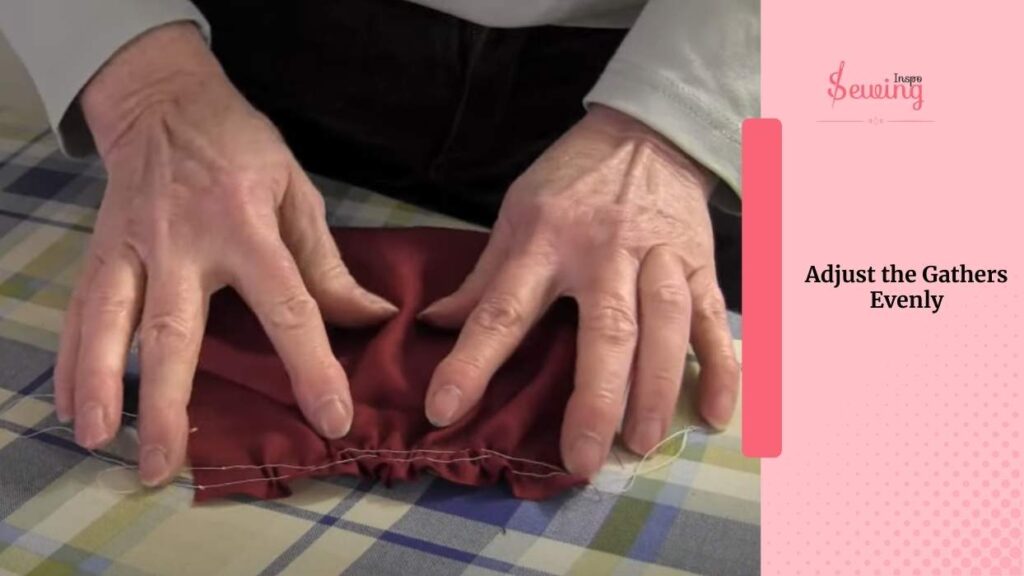
Adjust the Gathers Evenly
Once you’ve got the fabric gathered to the right length, it’s time to make it look neat. Slide the gathers gently along the threads to space them out evenly.
You want a nice, consistent “fluff” all the way across. No clumpy spots or bald patches. Use your fingers to spread and smooth them. This part is a bit like fluffing a pillow: just keep tweaking until it looks right to your eye.
Secure the Ends
When you’re happy with how everything looks, secure those gathers in place with a overlock stitch. You can tie the loose thread tails in a knot at both ends to hold the gathers.
Sew over the gathered area again with a regular stitch length if you’re attaching it to another fabric piece. This will lock them in place and keep them from shifting. And ta-da! You’ve got a perfectly gathered stitch.
Read what is a lockstitch sewing machine is if you wanna secure your fabric edge more strongly.
Gathering Stitch On Singer Sewing Machine
One of my students came up saying she is struggling with the singer machine. So I decided to show it to her.
I start by setting the stitch length to the longest option, usually around 4 or 5 mm, depending on the model. Then, I slightly loosen the upper thread tension. So, the thread doesn’t pull too tight. This helps the fabric gather smoothly as I sew.
Next, I stitch one or two straight lines along the edge of the fabric, leaving long thread tails at both ends.
When I’m done, I gently pull the bobbin threads to create even gathers, sliding the fabric along the threads until it looks just right.
If I want perfect, uniform gathers without pulling threads manually, I’ll sometimes pop on a gathering sewing foot.
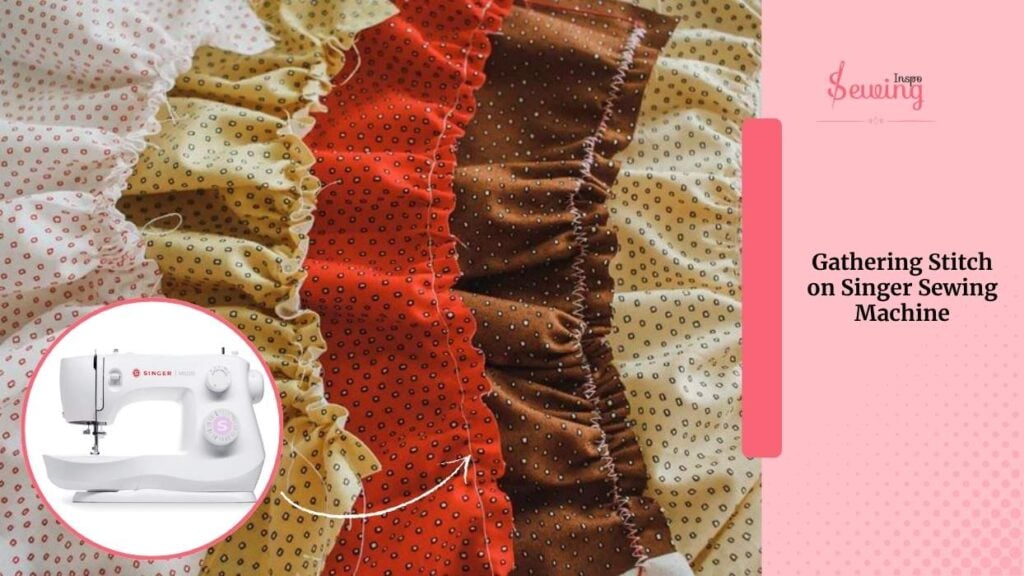
But honestly, the basic straight stitch works beautifully on any Singer machine once you get the feel for it.
Frequently asked questions
Should I backstitch at the beginning and end?
Nope! Don’t backstitch when sewing gathering stitches. You want to leave long thread tails so you can pull them later to create the gathers.
How do I avoid breaking the thread while gathering?
Pull the bobbin threads gently and evenly, and don’t tug too hard in one spot. Also, sewing two rows of gathering stitches instead of one helps distribute tension better and lowers the risk of breakage.
Why sew two rows of gathering stitches instead of one?
Two rows give you more control and help the gathers stay even. It also makes the fabric lay flatter when attaching it to another piece, like a waistband or yoke.
Conclusion
And that’s it! Once you get the hang of gathering stitches, you’ll love how easily they add texture and charm to your projects. It’s a simple trick that makes a big impact. It is perfect for shaking up those plain gathering stitches sewing machine stitches!


Leave a Reply