
When I 1st heard about edge stitching, I thought it was the same as topstitching. So I headed to do that when a friend stopped me, saying ‘ topstitch and edge stitch are total different thing’
I was like, hmm!! How are they different? She added, ‘Well, Edge stitching is a seam line finish that stays close to the edge, while topstitching is often for added durability and style. The technique is different, too.
Edge Stitching
To do edge stitching on a sewing machine, sew a straight stitch close to the edge of the fabric, typically 1/8 inch (3mm) from the seam.
Her explanation sounds so tempting that I had to dig more into it. Learn how to edgestitch.

Table of Contents
What Is An Edge Stitch In Sewing?
An edge stitch in sewing is a straight stitch sewn very close. It is usually about 1⁄8 inch (3 mm) or less from the edge of a fabric, seam, or fold. This is a perfect stitch to stitch an edge hem or seam and seam reinforcement.
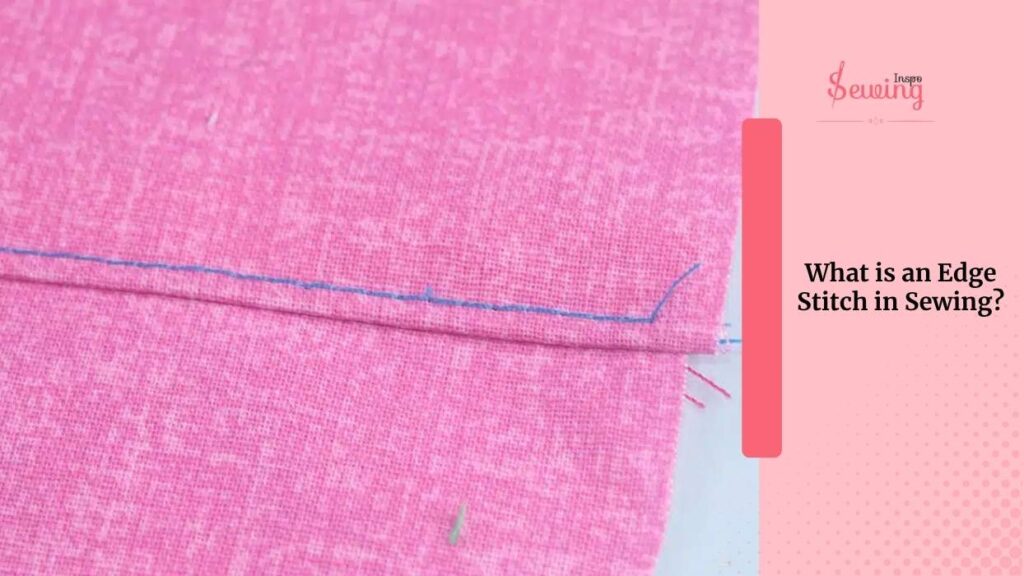
It’s often used for topstitching, hemming, or giving a clean, professional finish to garments and home decor. That’s the beauty of edge stitch sewing.
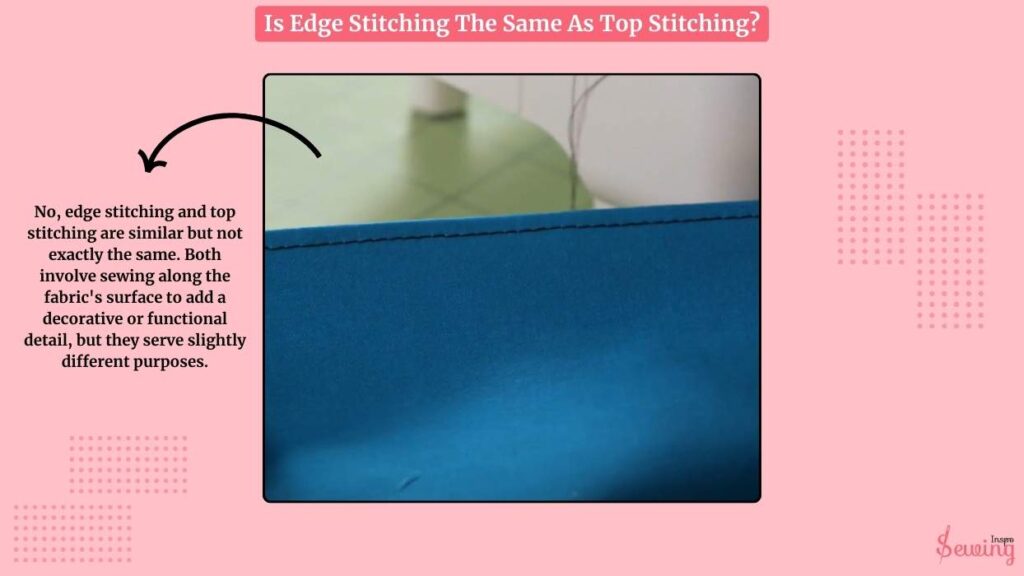
Is Edge Stitching The Same As Top Stitching?
No, edge stitching and top stitching are similar but not exactly the same. Both involve sewing along the fabric’s surface to add a decorative or functional detail, but they serve slightly different purposes, like picot stitching.
So, while both involve sewing along the fabric’s surface, edge stitching is more for finishing edges, while top stitching is typically for reinforcement or decoration.
Edge Stitching Vs Topstitching
Rather than the placement, there are many more differences between them too. For intense,
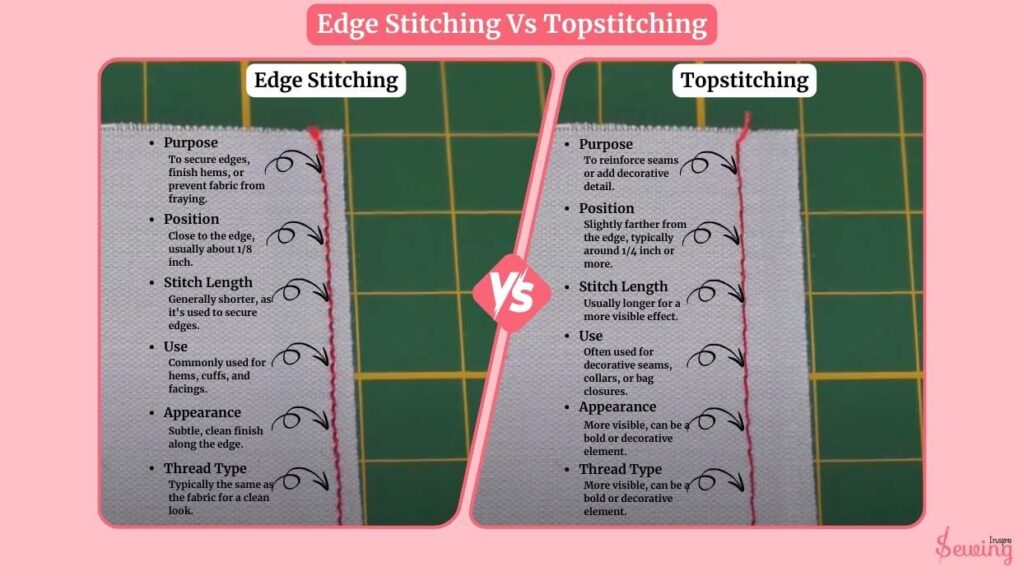
| Feature | Edge Stitching | Topstitching |
| Purpose | To secure edges, finish hems, or prevent fabric from fraying. This is perfect for garment finishing. | To reinforce seams or add decorative detail. |
| Position | Close to the edge, usually about 1/8 inch. | Slightly farther from the edge, typically around 1/4 inch or more. |
| Stitch Length | Generally shorter, as it’s used to secure edges. | Usually longer for a more visible effect. |
| Use | Commonly used for hems, cuffs, and facings. | Often used for decorative seams, collars, or bag closures. |
| Appearance | Subtle, clean finish along the edge. | More visible, can be a bold or decorative element. |
| Thread Type | Typically the same as the fabric for a clean look. | Can be heavier thread for a stronger, more visible stitch. |
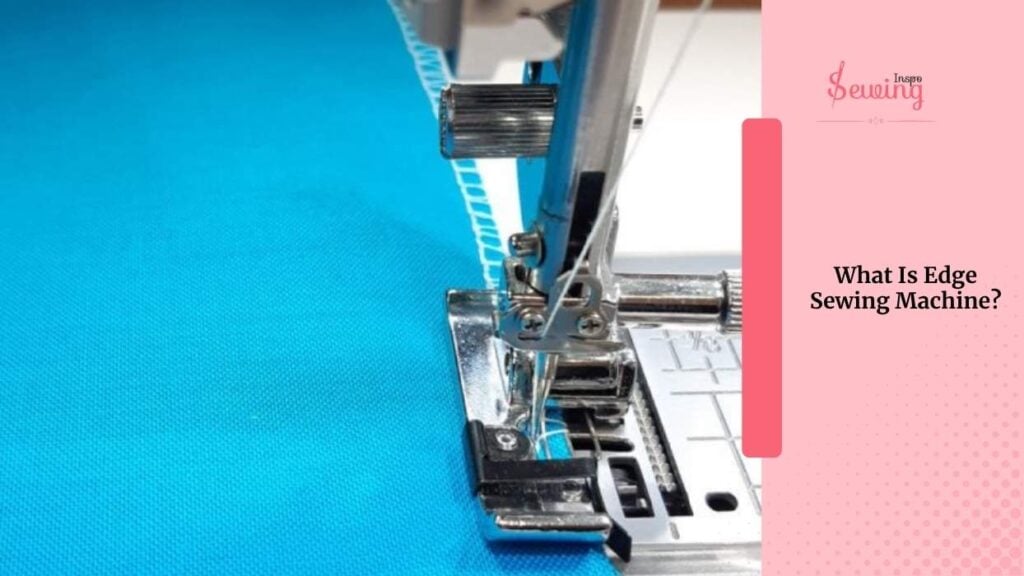
What Is Edge Sewing Machine?
An edge sewing machine is a specialised sewing machine designed to sew very close to the edge of the fabric. It’s commonly used for hemming, finishing seams, binding, or decorative stitching along edges. The machine ensures precision and uniformity. That’s makes a sewing machine for edges popular.
How To Do Edge Stitching Sewing Machine?
To do edge stitching with a sewing machine, follow the steps.
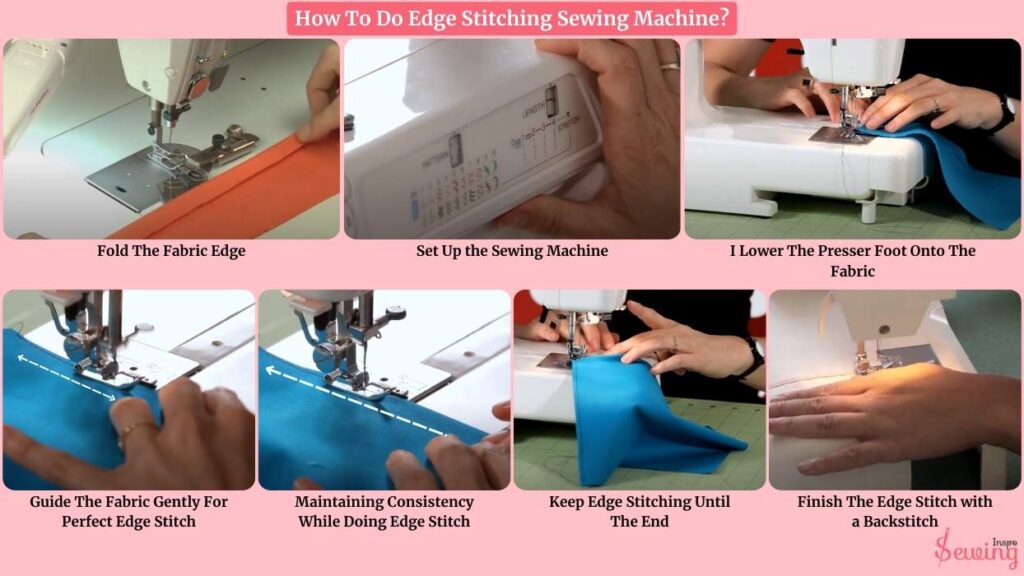
Fold The Fabric Edge
I always start by making sure my fabric is adequately prepared. If I’m working on a hem or a seam, I ensure it’s neatly pressed first. A good press helps keep everything in place and ensures the fabric lies flat.
So, my stitching doesn’t end up with unwanted wrinkles or puckers or cause gathering stitches.
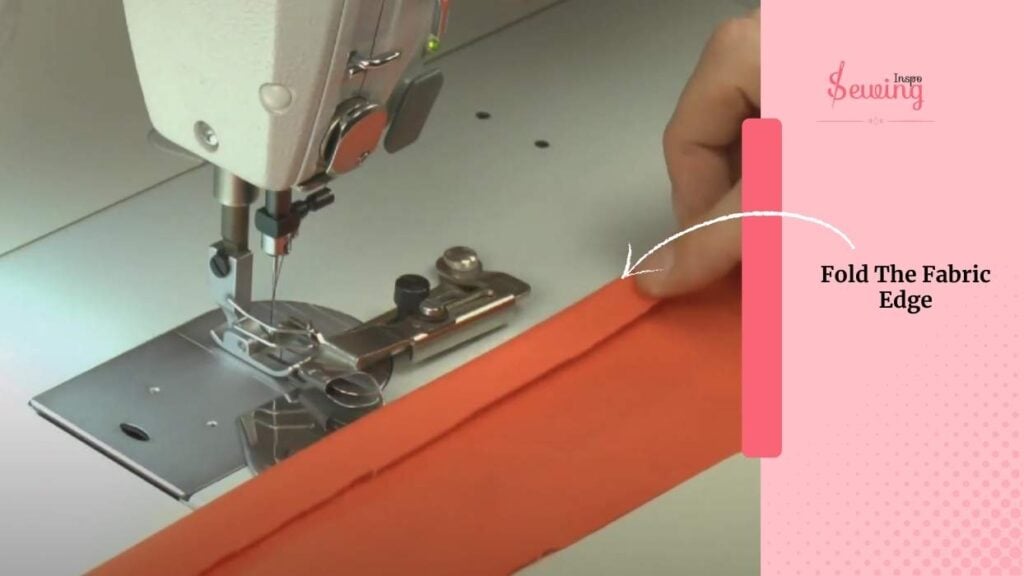
If I’m edge stitching along a finished edge, I’ll usually give the fabric a light press to flatten the edge first. This step is crucial to getting a clean, sharp stitch that looks professional. I mostly use this for machine applique stitches.
Set Up the Sewing Machine
Next, I get my sewing machine ready. I usually use a standard needle for regular fabrics, but for heavier materials like denim or canvas. I switched to a thicker needle to make sure it can handle the bulk. I chose a matching thread color.
But if I want the edge stitch to pop, I’ll opt for a contrasting thread for a little extra flair. The wrong step can cause the bottom stitch is loose on sewing machine, so be careful.
I set the machine to a straight stitch or running stitch, which is perfect for edge stitching.
For most fabrics,
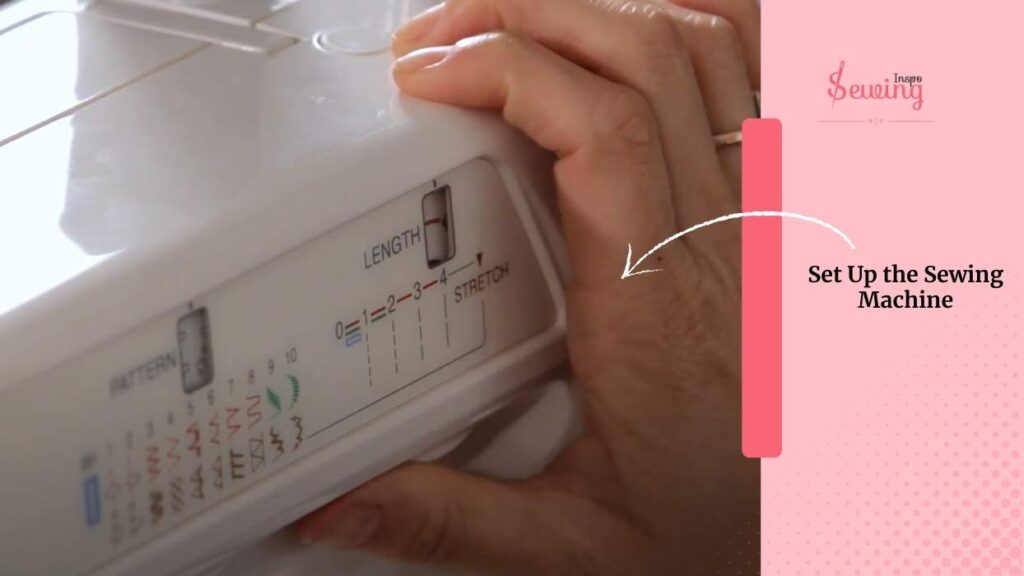
I keep the edge stitch length at about 2.5 mm, which is a good, medium setting. A shorter stitch might make it too tight, while a longer one might make it too loose.
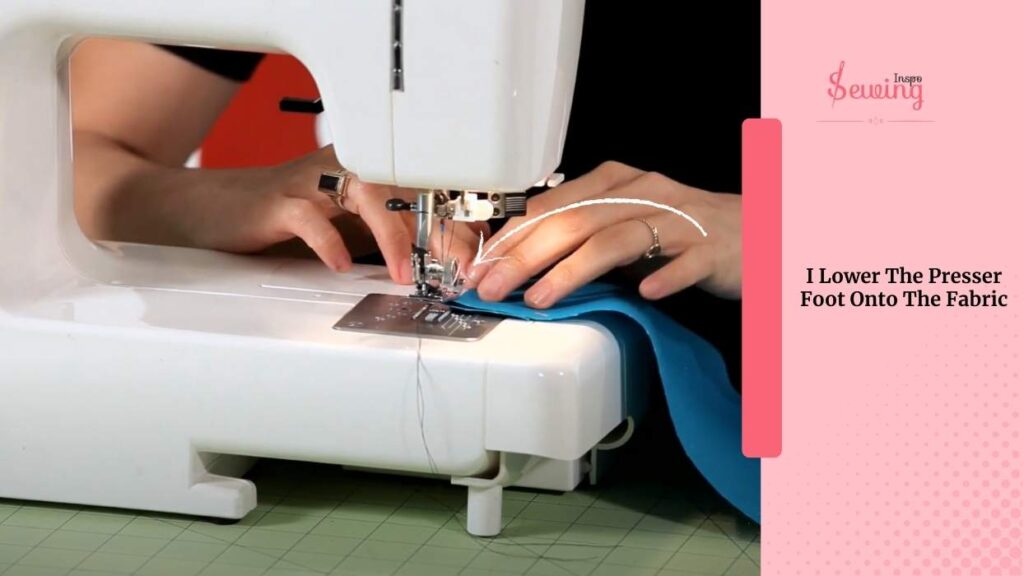
I Lower The Presser Foot Onto The Fabric
Now that everything is in place, it’s time to start stitching. I lower the presser foot onto the fabric to hold it in place.
At this point, I always double-check that my fabric is still aligned exactly how I want it. With the fabric ready, I begin stitching slowly just like blind stitch.
Edgestitch Foot
An edgestitch foot is different from a standard sewing machine foot. It has a guide—usually a small metal blade or ridge—that helps you sew straight, even stitches close to the fabric’s edge. A regular foot doesn’t have this guide.
So you need to grab that special foot.
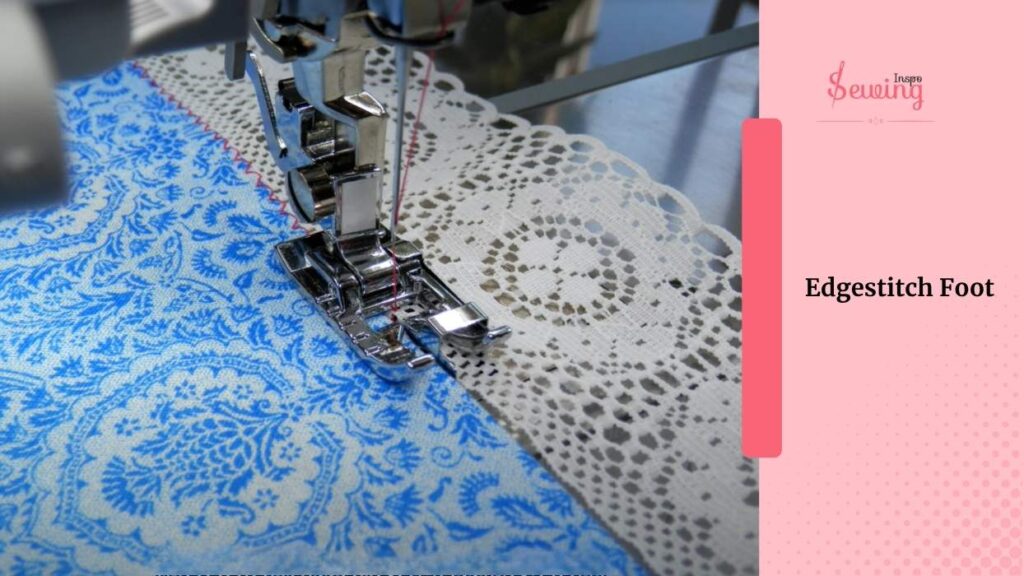
Also known as a stitch-in-the-ditch foot, the edgestitch foot is ideal for stitching precisely along edges, seams, or folds. It’s built-in guide keeps your stitches at a consistent distance from the edge. That’s why it can do the stitch so perfectly.
Guide The Fabric Gently For Perfect Edge Stitch
I keep my hands gently guiding the fabric, but not pulling on it. This ensures that the fabric feeds smoothly through the machine without causing any unevenness.
I keep the fabric straight and ensure the stitch line stays about 1/8 inch (roughly 3 mm) from the edge.
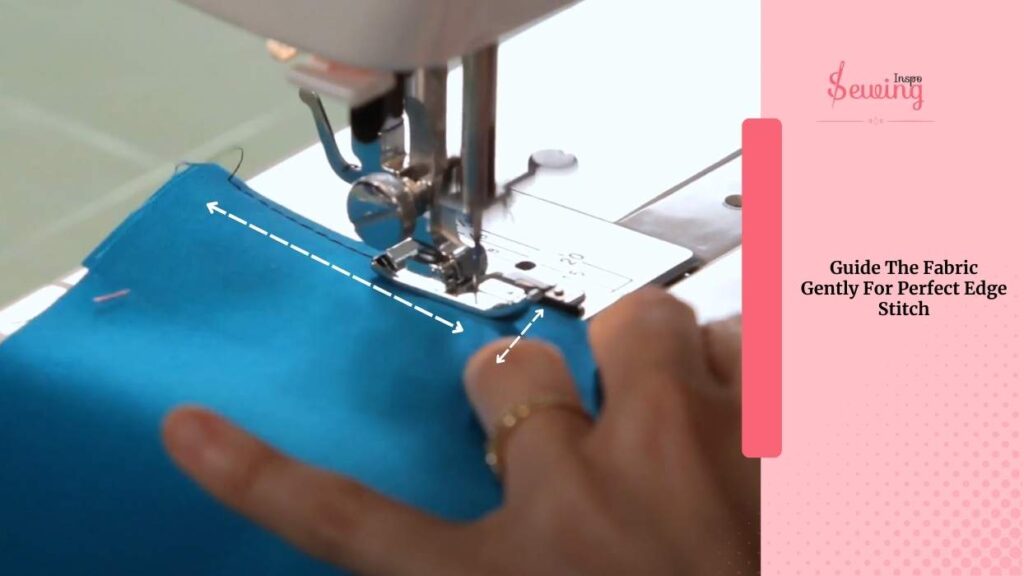
I don’t stress too much about achieving absolute perfection because slight variations can still look good, as long as the stitch stays relatively consistent. You can find it chainstitch machine.
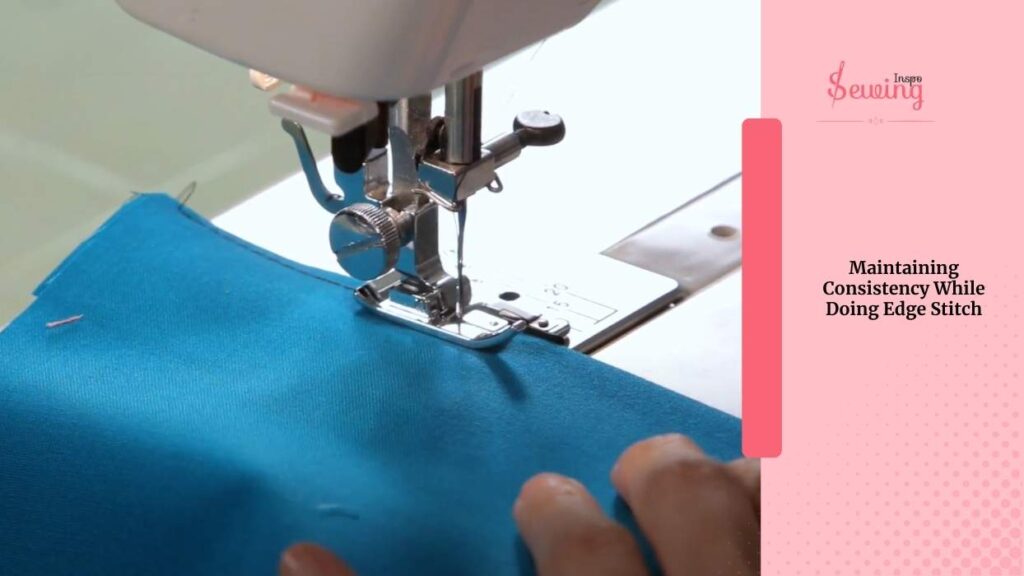
Maintaining Consistency While Doing Edge Stitch
The most important part here is maintaining consistency. I keep my eyes fixed on the edge. I am even making sure the distance between the stitch and the fabric edge remains even. You can do it on a serger or sewing machine.
To help with this,
I usually use the edge of the presser foot as a guide. The presser foot acts as a natural ruler and helps keep the fabric aligned as I sew, preventing the jumping stitch issue.
Keep Edge Stitching Until The End
Once you get into the rhythm, keep going. But if I’m stitching along a straight edge. It’s easier to maintain that even stitch. And if you want more secure then do a double stitch sewing
However, I go a little slower if I’m working on a curved edge or tacking on a sewing machine.
Curves can be tricky, but it’s all about gently guiding the fabric as I sew. I don’t try to force it, and instead, I make minor adjustments, slightly shifting the fabric as I go, keeping the stitch distance even and steady.
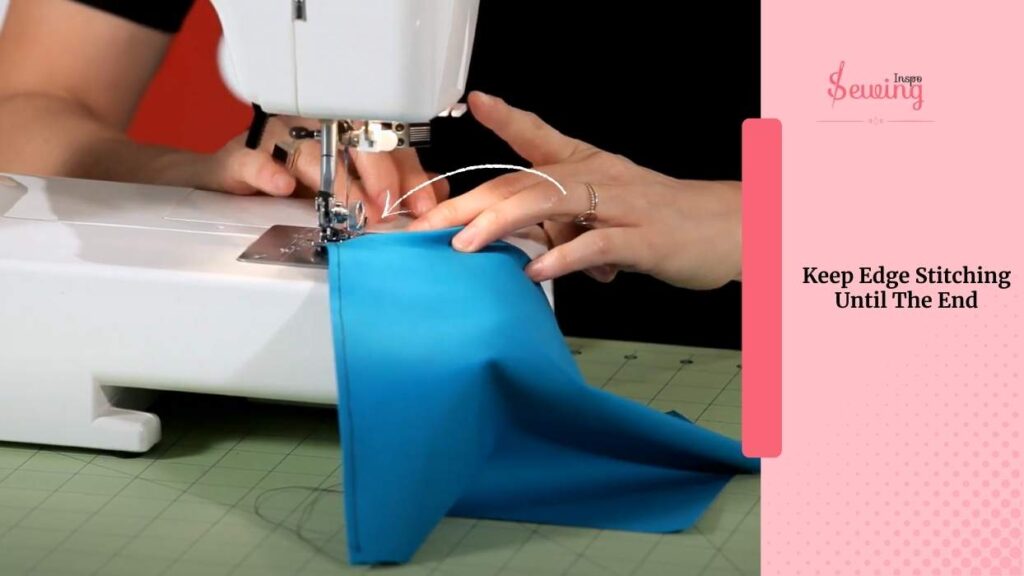
The fabric should flow naturally under the foot, and I avoid pulling or pushing it. But maintain the right thread tension.
This process might feel a little slow at first. But once you get the rhythm of it. The key is steady hands, a calm pace, and constant attention to the fabric’s edge to maintain that clean, professional stitch.
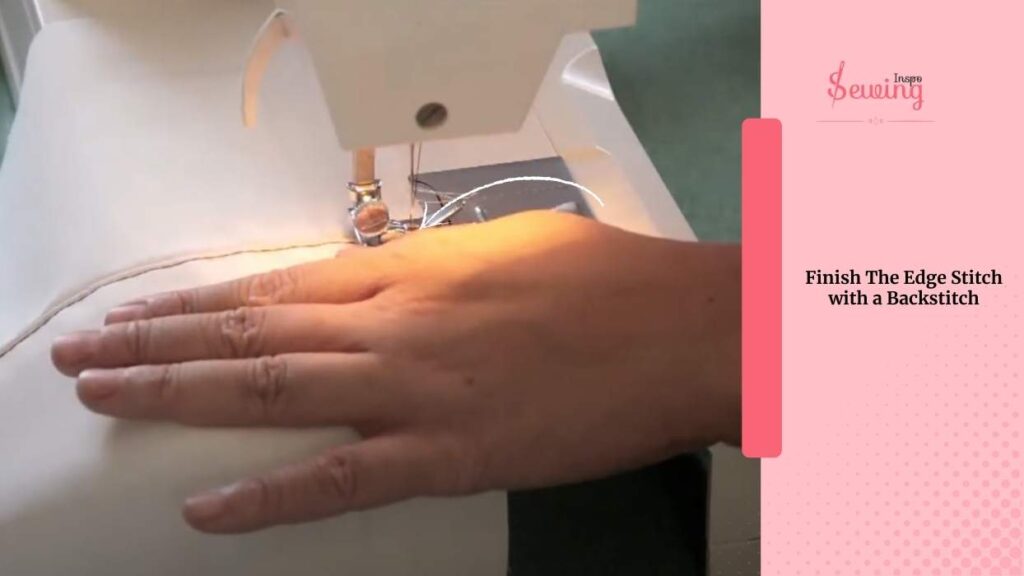
Finish The Edge Stitch With A Backstitch
When I reach the end of the seam, I make sure to backstitch a few stitches to lock the stitch in place. This helps prevent any unraveling at the ends. I lift the presser foot, cut the thread, and pull the fabric out of the machine.
The final step is trimming loose threads to ensure everything looks neat. That’s it
FAQ
What Stitch To Use For Edges?
The most common stitch used for edge stitching is the straight stitch. It’s perfect for creating clean, precise lines along the edge of the fabric. If you want the stitch to stand out more, you can use a contrasting thread color or even a zigzag stitch for more flexibility, especially on stretchy fabrics.
What Is The Stitch Length For Edge Stitching?
For most fabrics, a stitch length of around 2.5 mm works well for edge stitching. This is a medium-length stitch that provides a clean and sturdy finish without looking too bulky or too small.
What Foot To Use For Edge Stitching?
The best foot to use for edge stitching is the edge stitching foot or foot with a guide. This foot has a guide on the side that helps you sew precisely along the edge of the fabric. Alternatively, you can also use a standard presser foot if you don’t have an edge stitch foot, but it might require more attention to keep it aligned.
Now It’s Your Turn To Do the Machine
So, yes, that’s how edge-stitching sewing machines work. When I first tried one, it was as easy as pie.
So next time you wanna secure your fabric edge. Just do an edge stitch without a second thought.


Leave a Reply