
Scallop stitch! Isn’t that one of those tricky hand stitches people use in delicate embroidery? That’s what I always thought, too. The kind you have to do slowly, one curved loop at a time, with a needle and thread.
But you can do scallop stitch on a sewing machine, and it looks just as beautiful, sometimes even more precise.
Scallop Stitch
The scallop stitch is a built-in decorative stitch on many modern sewing machines. You can use it as a surface decoration or as a fancy way to finish raw edges, especially when combined with a satin stitch or stabilized with interfacing.
So if you’ve been avoiding scallops because you thought they were strictly for hand embroidery, it’s time to let your machine do the fancy work.
Let’s dig into how to use it. And how to make your projects look custom, clean, and professionally finished.
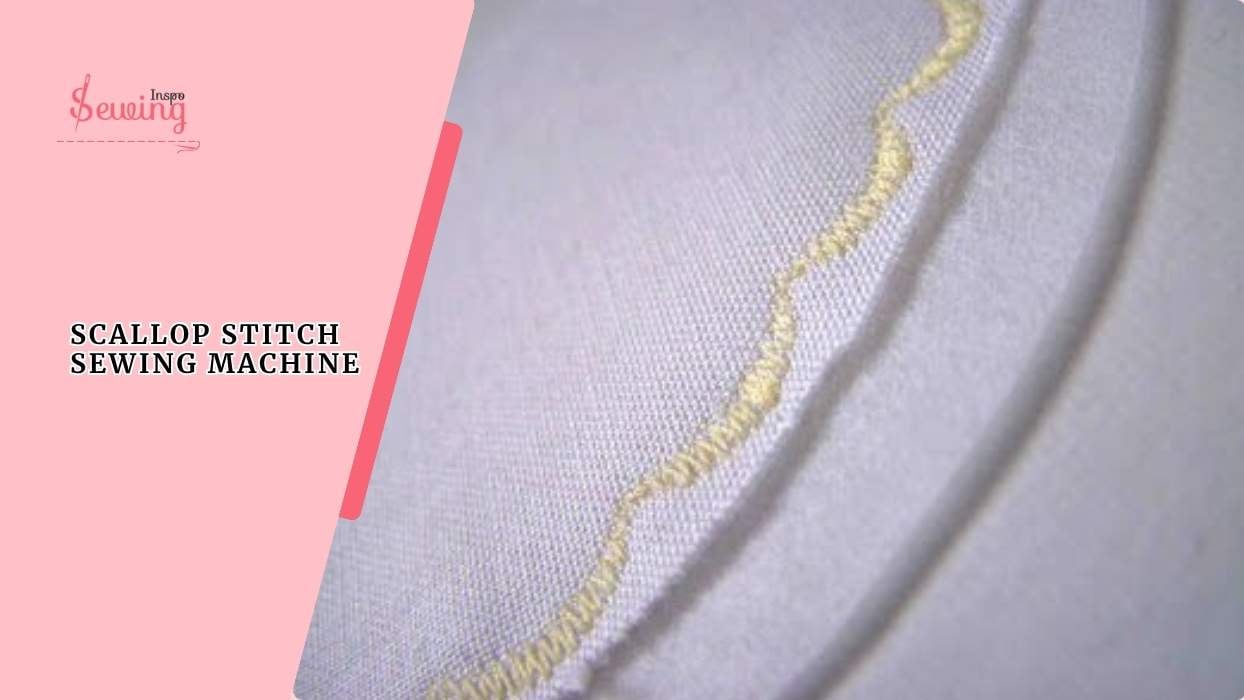
Table of Contents
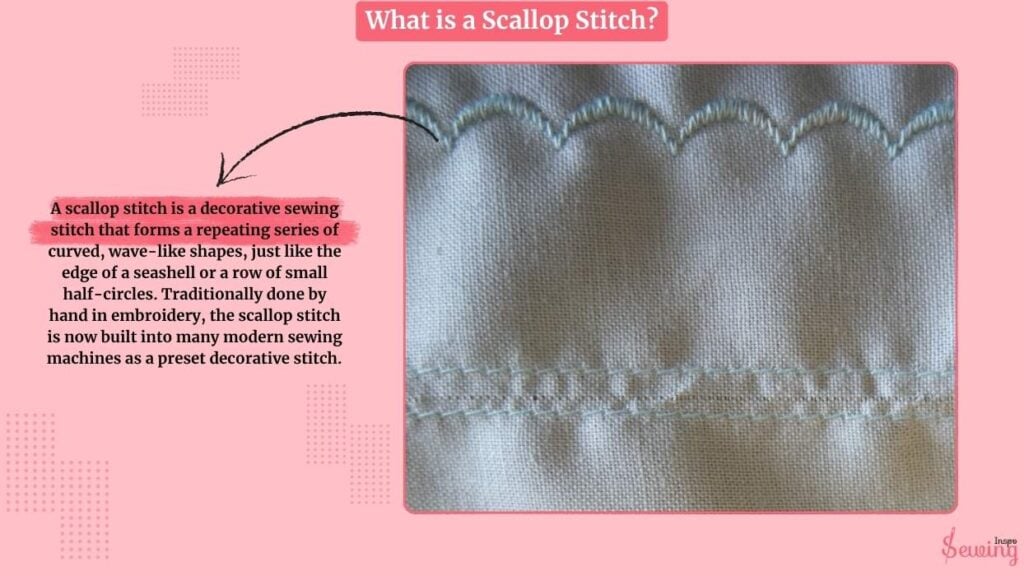
What Is A Scallop Stitch?
A scallop stitch is a decorative sewing stitch that forms a repeating series of curved, wave-like shapes, just like the edge of a seashell or a row of small half-circles.
Traditionally done by hand in embroidery, the scallop stitch is now built into many modern sewing machines as a preset decorative stitch, like Chevron Stitch.
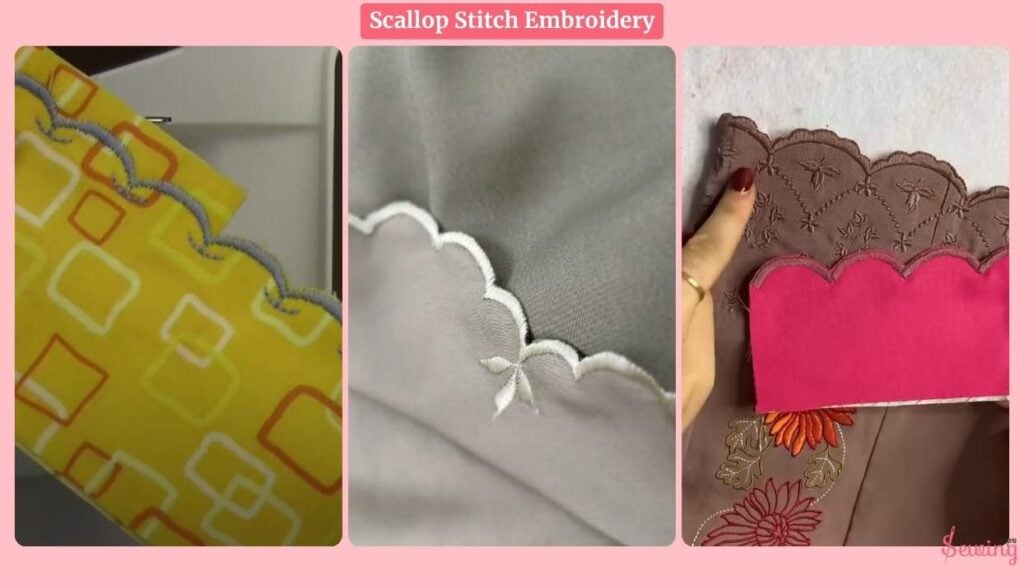
Scallop Stitch Embroidery
It’s not just for the edges. It also brings out the beauty of embroidery. Here is how it looks on embroidery.
Scallop Sewing Machine Usage
A scallop sewing machine is designed to create decorative scalloped edges on fabric. It produces a series of curved, wave-like stitches that add a stylish finish to hems, trims, and lacework.
- Finish hems with a decorative scalloped edge like an interlocking stitch on sewing machine.
- Embellish tablecloths, napkins, and curtains.
- Create lace or applique edges for garments.
- Add a decorative border on dresses, skirts, and accessories.
- Reinforce fabric edges while keeping them stylish.
How To Do Scallop Stitch By Sewing Machine?
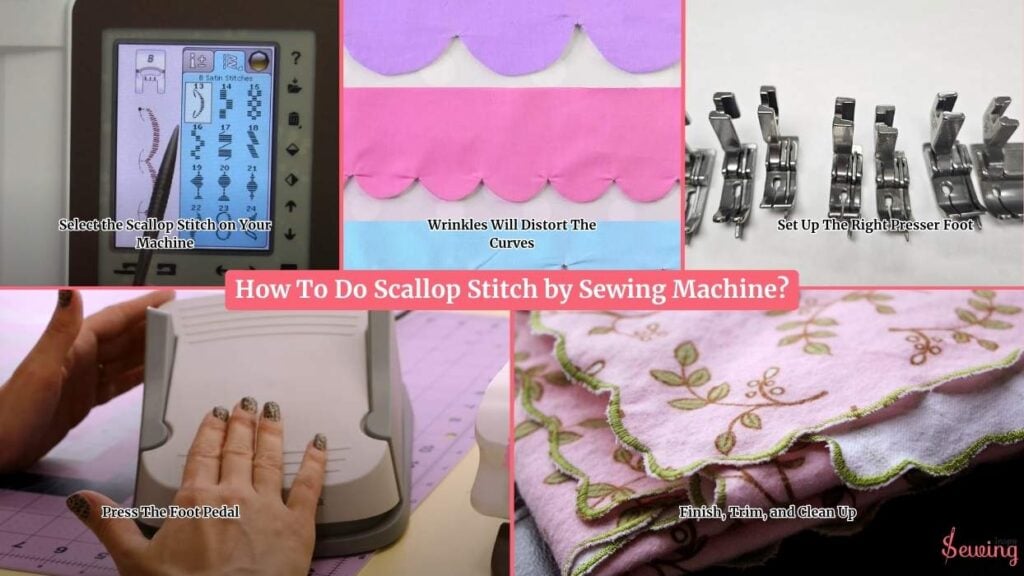
To do a scallop stitch on a sewing machine, follow the steps below,
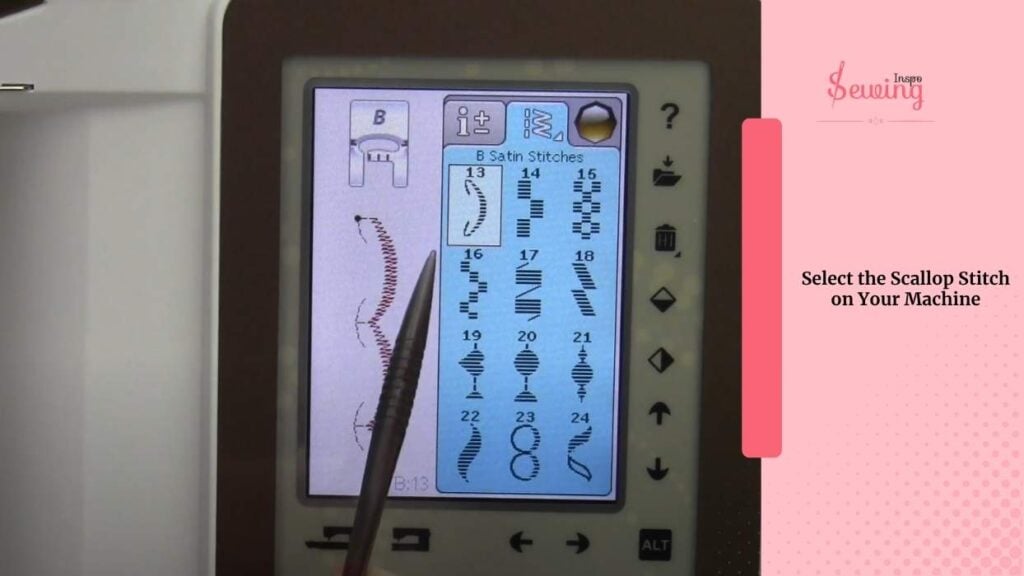
Select the Scallop Stitch on Your Machine
I turn on my machine and scroll through the decorative stitches. I’m looking for one that resembles half circles or small waves. Some machines label it with a number or icon (on mine, it’s stitch #32) as sewing machine symbols.
Now, I adjust the stitch width and length. For a smooth, defined scallop:
- Width: 5.0 to 7.0 (the higher, the wider the curves)
- Length: 1.5 to 2.0 (shorter gives tighter, smoother curves) I use this for a ladder stitch sewing machine
However, we won’t begin our real project yet. I grab a piece of scrap fabric to test it first, like feather stitch.
Wrinkles Will Distort The Curves
For neat results, your fabric should be. Wrinkles will distort the curves. Backed with stabiliser, especially if you’re using a lightweight cotton or linen. This is helpful for herringbone stitch, too.
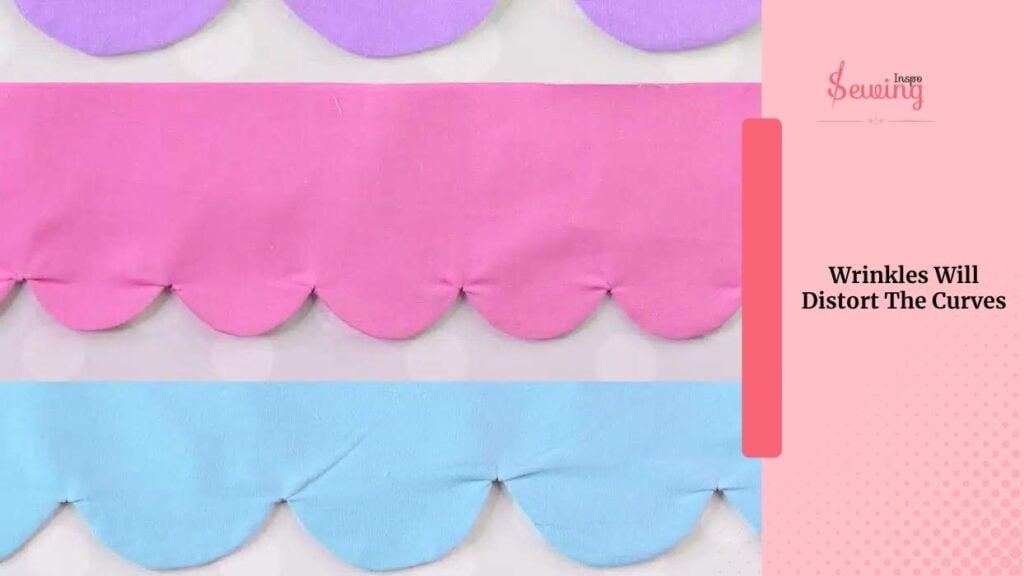
I use a tear-away or water-soluble stabiliser, which keeps the stitch nice and flat. I sometimes do this for the darning stitch, too.
If I’m planning to make a scalloped edge,
I mark a guideline near the edge (maybe ½” from the raw edge) using a fabric pen or chalk. This helps keep everything even and straight while I stitch. This makes it easy, like using a vintage chain stitch machine.
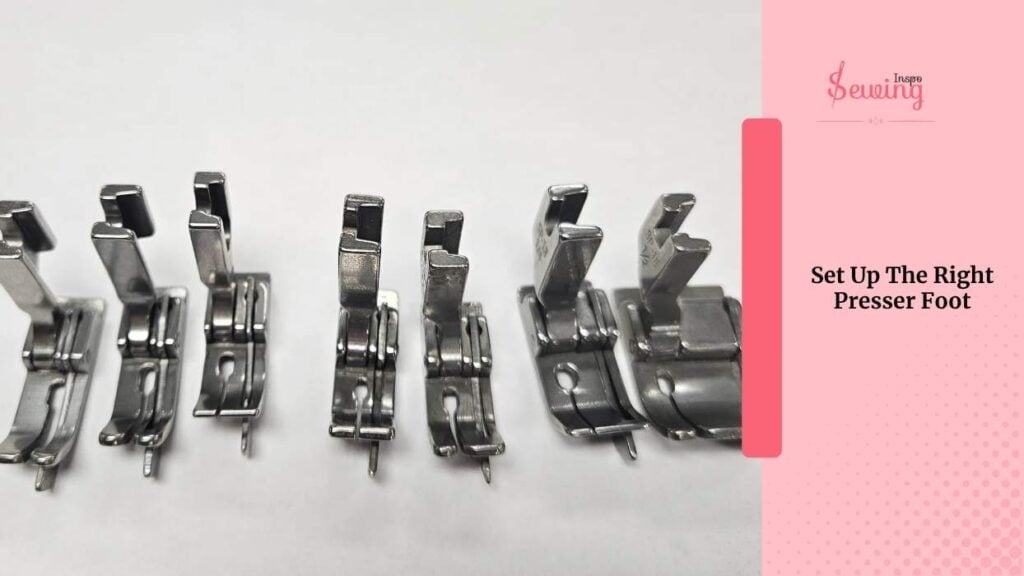
Set Up The Right Presser Foot
Now I place the fabric under the presser foot. I align the needle with my marked guideline or edge. I like to start a little inward so the scallops sit nicely on the fabric rather than floating off the edge.
Then I lower the presser foot and double-check:
- Is the fabric stabilized?
- Is the stitch selected?
- Is the thread tension okay?
Alright — deep breath. Let’s stitch.
Press The Foot Pedal
I gently press the foot pedal and let the machine begin. It sews a side-to-side motion in a curved shape. Don’t worry if it looks slow at first; it’s just building the pattern.
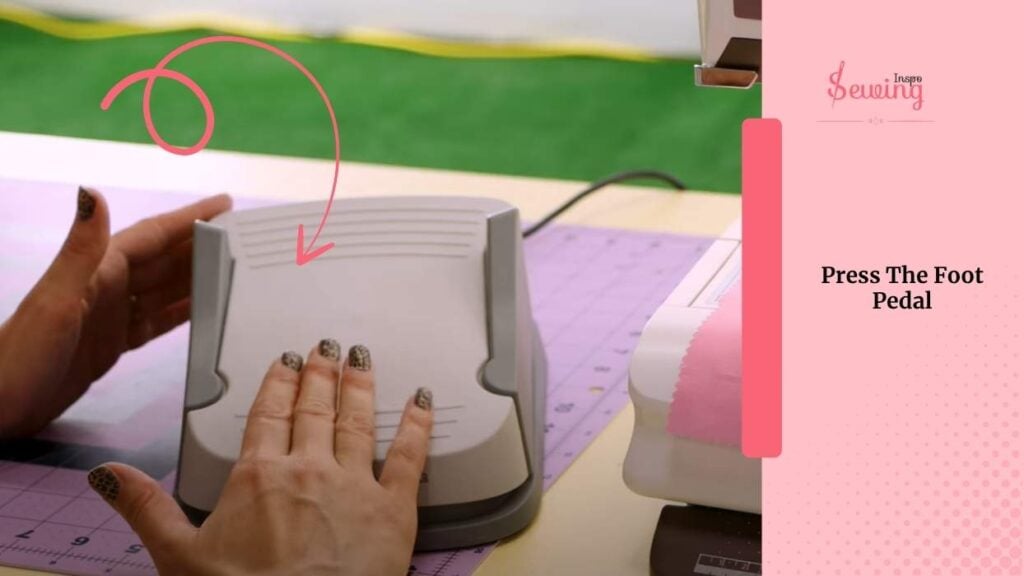
Important: I don’t pull the fabric. I keep my hands lightly guiding it straight ahead and let the machine feed it naturally. The curved shapes form better when there’s no tension.
As the scallops form, I watch for:
- Even tension — no loose threads or puckering.
- Smooth curves — if they look too jagged, I stop and adjust stitch length.
I keep stitching slowly until I reach the end of the line.
Finish, Trim, and Clean Up
When I’m done stitching, I lift the presser foot, pull out the fabric, and trim the threads neatly like you would do for topstitching. If I used a stabiliser, I gently tear or rinse it away, depending on the type.
If I made scallops on the edge of the fabric. I flip the piece over.
Use sharp scissors to carefully trim the excess fabric along the curves, following the scallop shape. This makes the edge look truly scalloped, rather than just stitched.
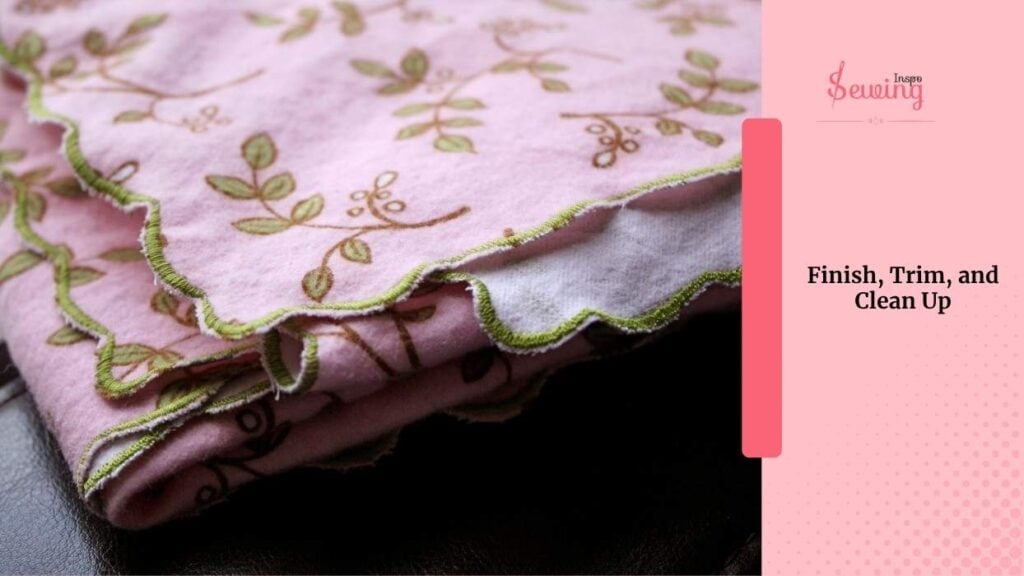
Pro tip: If your fabric is fraying, you can seal the trimmed edges with a little Fray Check or run a narrow satin stitch right over them for a polished look. That’s why it is one of my favorite types of stitching on sewing machine.
Scallop Stitch Pattern
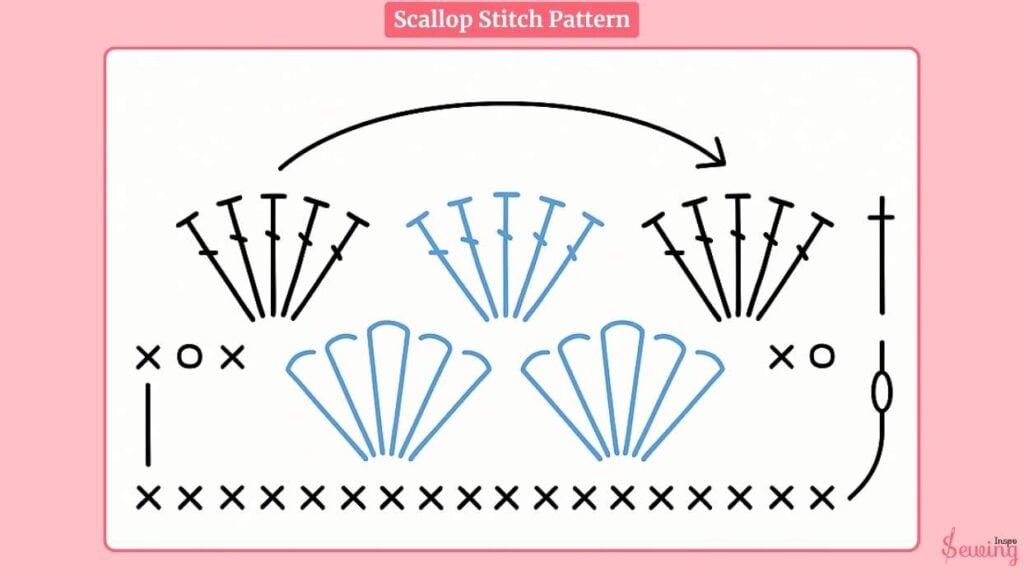
Sounds interesting, right? Then try those patterns. I’m on edge, and here is how it turns out.
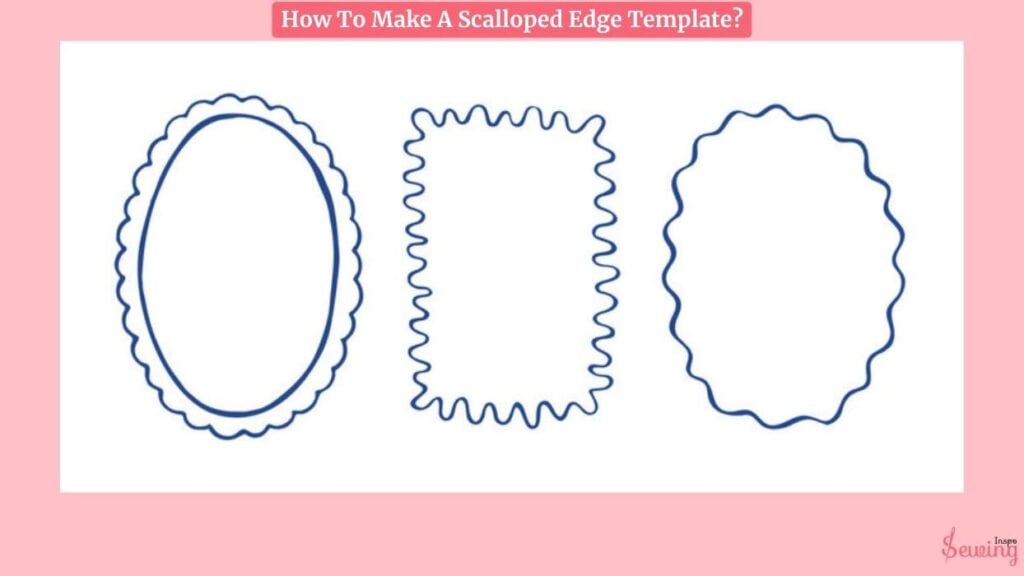
How To Make A Scalloped Edge Template?
I know the scalloped edge looks so interesting, but for a newbie, it’s so hard to do it. I mean, getting the shape right is a struggle. However, tension is not something you can easily overcome if you create a scalloped edge template.
To make a scalloped edge template,
Method 1: Freehand Scallops
This is the go-to option if you’re feeling creative or working on something with a more organic look.
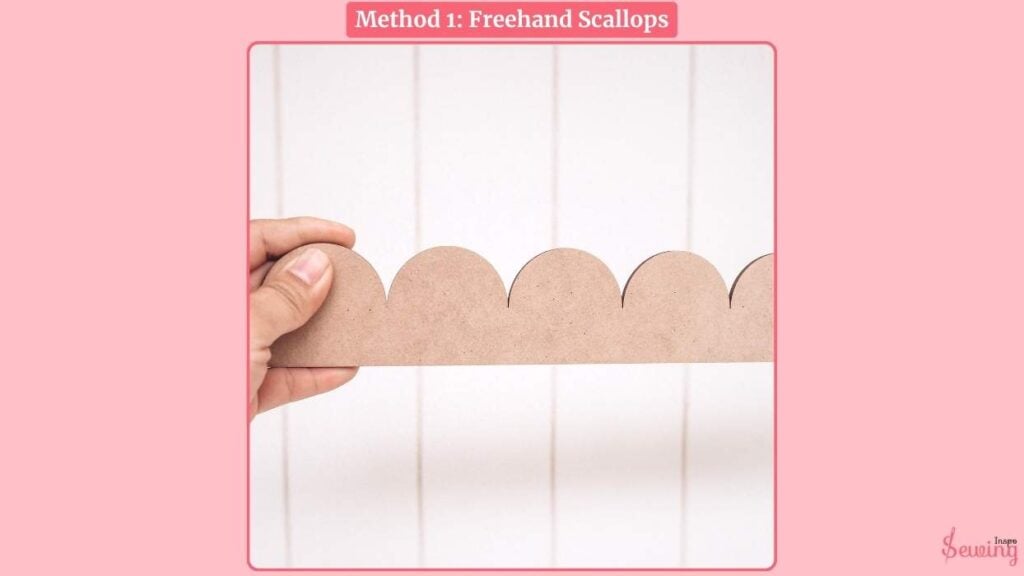
Step 1: Draw a Baseline
Grab a ruler and draw a straight horizontal line — this will be the bottom edge of your scallops.
Step 2: Sketch the Semi-Circles
Using a pencil, lightly draw overlapping semi-circles along the line. You can make them as big or as small as you want — just try to keep the height consistent.
Step 3: Adjust the Shape
If the spacing looks a little off, no worries! Erase and tweak until it feels even. Scallops don’t need to be perfect to look charming.
Step 4: Cut Out the Template
Once you’re happy with the shape, cut it out from your material (paper, cardstock, or even a cereal box works great). Now you’ve got a reusable template!
Method 2: Compass & Ruler for Precision Scallops
This method consistently yields clean, symmetrical curves.
Step 1: Decide on Scallop Size
Pick the radius of your scallops — something like 1″ or 1.5″ usually works well for hems or trims.
Step 2: Draw the First Half-Circle
Using a compass, place the point on the baseline and draw a neat semi-circle upward.
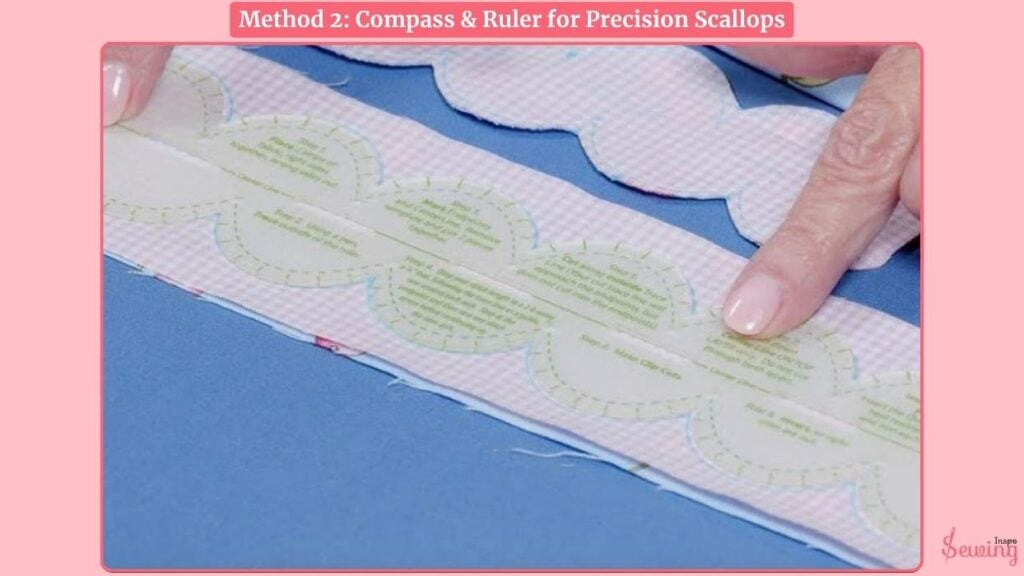
Step 3: Move and Repeat
Place the compass point where the last arc ended and draw the next one, slightly overlapping. Continue across the baseline until your row of scallops is complete.
Step 4: Cut Out Your Template
Cut along the curve to reveal a precise, even scalloped edge. You can now use this for tracing on fabric or other materials.
Method 3: Using a Pre-Made Template or Ruler
If you prefer a ready-made tool, this method’s for you.
Step 1: Choose or Buy a Template
Pick up a scalloped edge ruler or template from a sewing or quilting store — they come in various sizes and patterns.
Step 2: Align With the Fabric Edge
Place the template along the edge of your fabric or paper. Ensure it’s aligned evenly and not tilted.
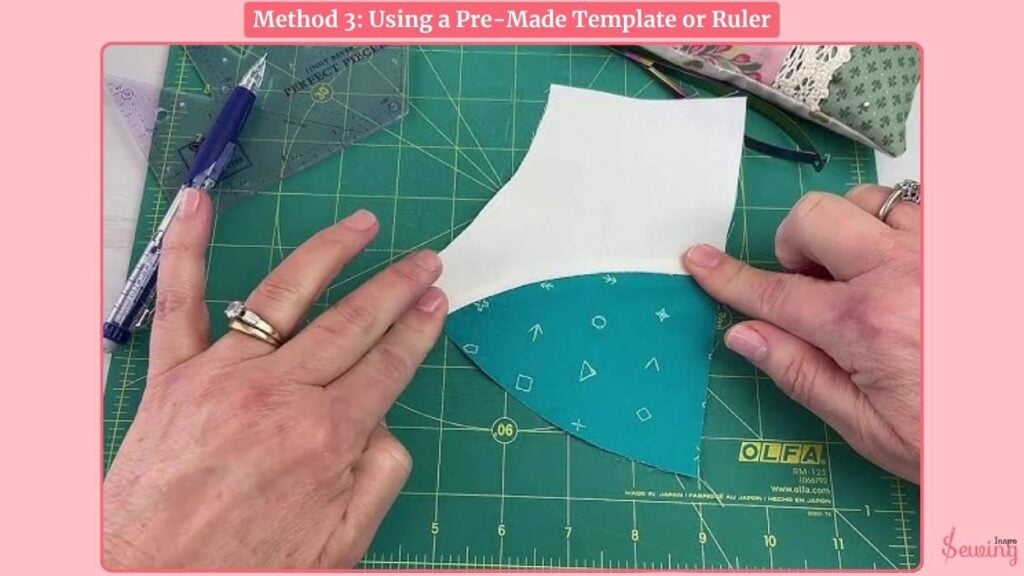
Step 3: Trace the Scallops
Using a fabric pen or tailor’s chalk, trace around the scalloped edge.
Step 4: Cut Along the Lines
Carefully cut out the traced scallops using sharp scissors or a rotary cutter for a smooth finish.
If you like this tutorial, then you would love to read Heirloom Sewing by Machine, too. Cause this stitch is also unique and gives off a royal vibe.
Chevron Stitch Is A Unique Version Of The Scallop Stitch
A chevron stitch is a sewing stitch that forms a series of “V”-shaped patterns, similar to a zigzag or arrow design. Here is how to do it-
- Making a 20″×20″ pillow (cut front panel 21″×21″ for ½″ seam allowance).
- Design: 6×6 grid → each square = 4″×4″ (includes ¼″ seam).
- Creates a 1″×1″ grid to guide the chevron pattern.
- Stitch upward along the ruler edge (bottom-left to first 1″ intersection).
- Reposition ruler downward to the right, forming a “V” shape.
- Continue up-down zigzag to create the chevron pattern across the block.
- Keep aligning the ruler and stitching consistent 1″ zigzags.
- Repeat until the entire block is covered in chevron peaks and valleys.
- Backstitch or tie off threads at the end.
- Press the block flat (no steam).
- If using a Mark-B-Gone pen, lightly spritz to remove grid lines.
Frequently asked questions
Can I use any material to make the template?
Yes, as long as it’s sturdy enough to trace. Cardstock, template plastic, or a recycled file folder all work well. For heavy use, opt for materials like acrylic or thin wood.
Do I need a special ruler to make scallops?
Not at all! While scalloped rulers exist, you can make your own with a compass and ruler, or draw them freehand. Pre-made rulers just make the process faster and more precise.
How do I add a seam allowance to a scalloped edge?
After tracing your scallops onto the fabric, you can trace a second line ¼” to ½” outside the scallops for your seam allowance. This helps if you’re turning and stitching scalloped hems.
Can I sew scallops by machine once I trace the edge?
Yes! You can follow the traced scallop line with a small zigzag or satin stitch, then carefully trim the fabric close to the stitches. Or, use a scallop stitch (if your machine has one) for a decorative finish.
You Did It!
And just like that, we’ve stitched a scalloped border by machine — no hand sewing, no stress. It’s perfect for:
- Baby blankets
- Pillow edges
- Aprons
- Tablecloths
- Necklines and sleeve hems
Next time, you can even try contrasting thread to make the scallops pop more. Or use metallic thread for a fancy touch.


Leave a Reply