
I used to play around with blanket stitch a lot in hand stitch because there were many versions of it. So when I switched to machine stitches, I kind of started missing blanket stitch.
The stitches seem easy, yet they are strong enough to hold the fabric together. I insisted on sitting there with a missing item. I went to search. And guess what I found? Yes, it is possible to blanket stitch on the sewing machine. And it’s super easy,
Blanket Stitch Machine
To do a blanket stitch on a sewing machine, select the blanket stitch setting, adjust width and length as needed, and guide the fabric edge under the presser foot.
Guess what I did next?? Yes, I try it on my blanket. Here is how blanket stitch on singer sewing machine went 😉
Table of Contents
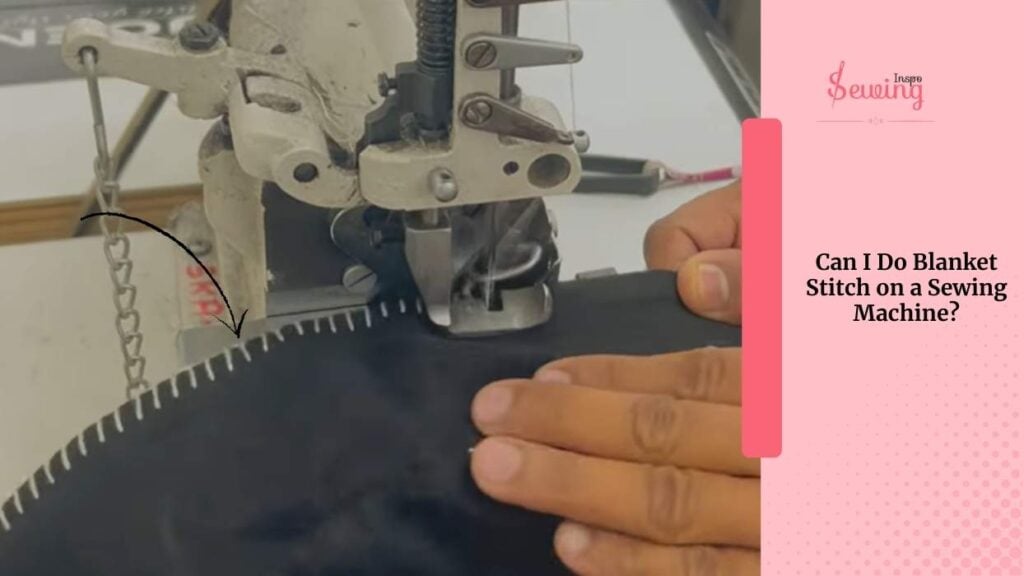
Can I Do Blanket Stitch On A Sewing Machine?
So, can a sewing machine do a blanket stitch?
Yes, you can do a blanket stitch on a sewing machine. Many machines have it built in. But sometimes it’s labeled as a blanket stitch, and other times as a buttonhole stitch. Alternatively, you can sometimes find it under decorative stitches.
It’s my favorite appliqué technique because it’s quick, decorative, and has a nice open look. It is perfect if you’re going for something a little rustic or “primitive.” The versious of blanket stitch can also be found in machine stitch too.
Here are the blanket stitch options I’ve figured out so far, about sewing machine blanket stitch,
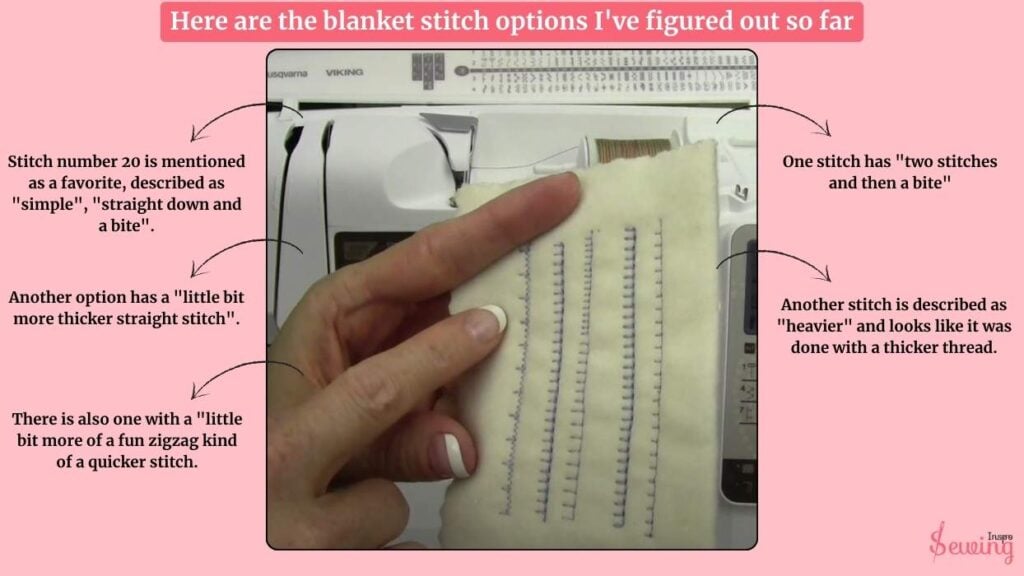
- One stitch has “two stitches and then a bite” This is kinda like zigzag stitch.
- Another stitch is described as “heavier” and looks like it was done with a thicker thread tension.
- Stitch number 20 is mentioned as a favorite, described as “simple”, “straight down and a bite”.
- Another option has a “little bit more thicker straight stitch”.
- There is also one with a “little bit more of a fun zigzag kind of a quicker stitch.
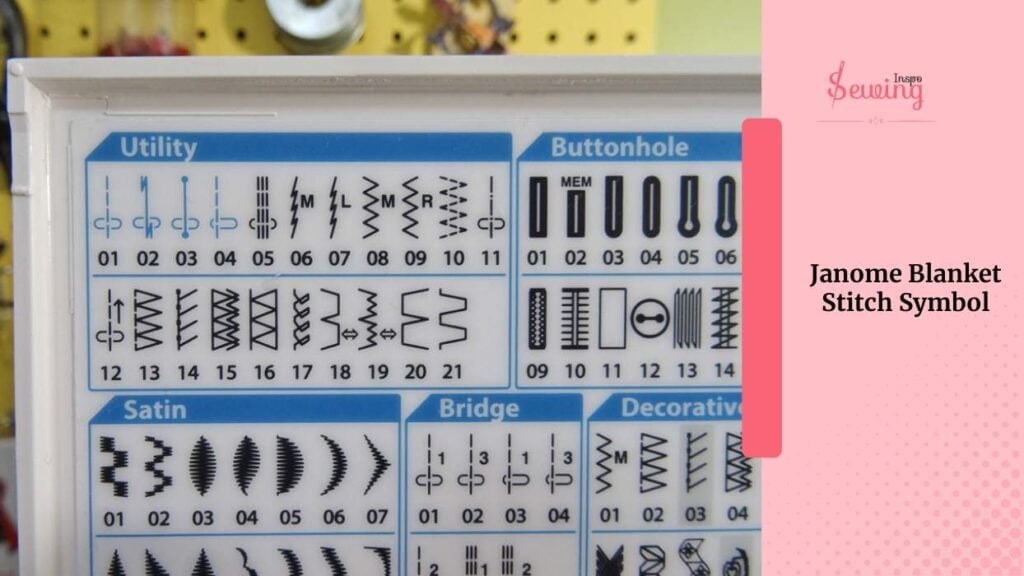
Sewing Machine Blanket Stitch Symbol
The blanket stitch symbol on a sewing machine usually looks like a straight vertical line with a right-angle “L” or small horizontal line branching off it. It’s almost like a sideways└” or a corner bracket. It mimics the hand-sewn look of the stitch, where each stitch loops over the edge of the fabric.
But it does not stay the same on every machine like stretch stitch. Depending on your machine model, it might be labeled something like:
- #38 on Brother machines on stitch selector dial
- #45 Janome blanket stitch symbol
- Or appear under decorative/appliqué stitch menus

That’s the blanket stitch symbol sewing machine in most machines. If you’re not sure, check your machine’s manual. It usually includes a little icon guide explaining what each stitch blanket stitch symbol means.
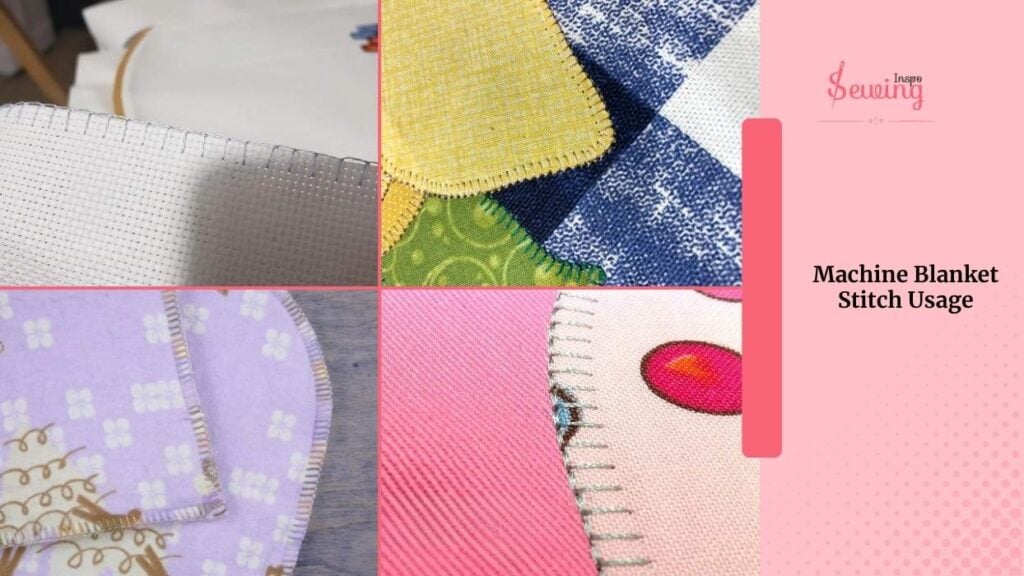
Machine Blanket Stitch Usage
The blanket stitch machine is one of those stitches that looks decorative but also serves a very practical purpose. It’s neat, versatile, and a huge time-saver compared to hand stitching.
Here’s where and how it’s commonly used:
- Appliqué work
- Edge finishing
- Decorative stitching
- Reinforcing seams
- Craft projects
Sewing Machine Blanket Stitch Symbol and Common Variations
The blanket stitch symbol on a sewing machine looks like small vertical lines joined to a horizontal base. Common variations include:
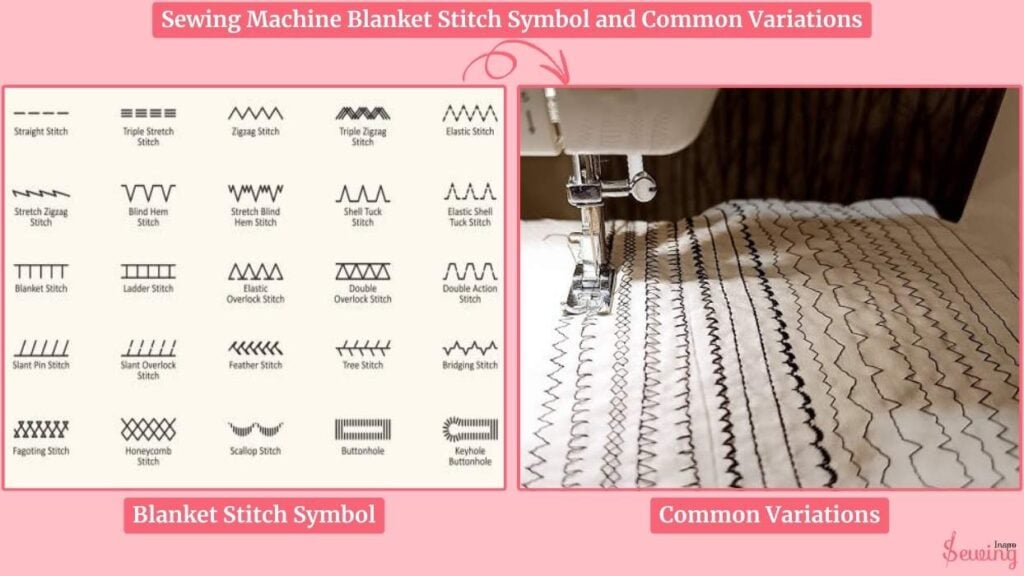
- Standard – Classic edge finish for appliqué and blankets.
- Narrow – Smaller, neater stitches for delicate fabrics.
- Wide – Bold finish for thicker fabrics.
- Reverse – Mirrored for opposite-edge stitching.
- Decorative – Added flair with extra bites or motifs.
These let you customize width, density, and style for both function and decoration.
Janome Blanket Stitch Symbol
On most Janome sewing machines, the blanket stitch symbol appears as a straight horizontal line with short vertical “teeth” or “bites” coming off one side.
On computerised Janome models, it’s often labelled with a small icon that looks like a sideways “E” or an uneven zigzag. Sometimes, there are multiple versions (narrow, wide, decorative).
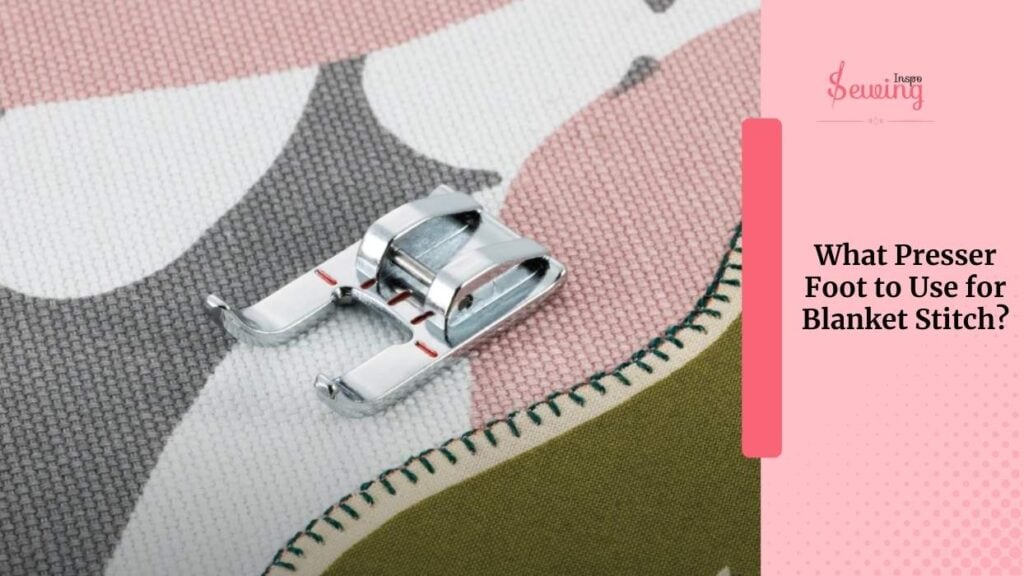
What Presser Foot To Use For Blanket Stitch?
I’ve found that using an open toe foot or a clear appliqué foot makes a huge difference when I’m doing a blanket stitch. This foot also helps me to quilt on the machine.
How? Well,
The open-toe foot gives me a totally unobstructed view. When I switch to the clear appliqué foot, I can see exactly where my needle position lands every time.
It really eliminates the guesswork. Both let me keep my stitches clean and precise.
How To Do A Blanket Stitch On Sewing Machine?
So to do a blanket on the sewing machine, follow the below 5 steps,
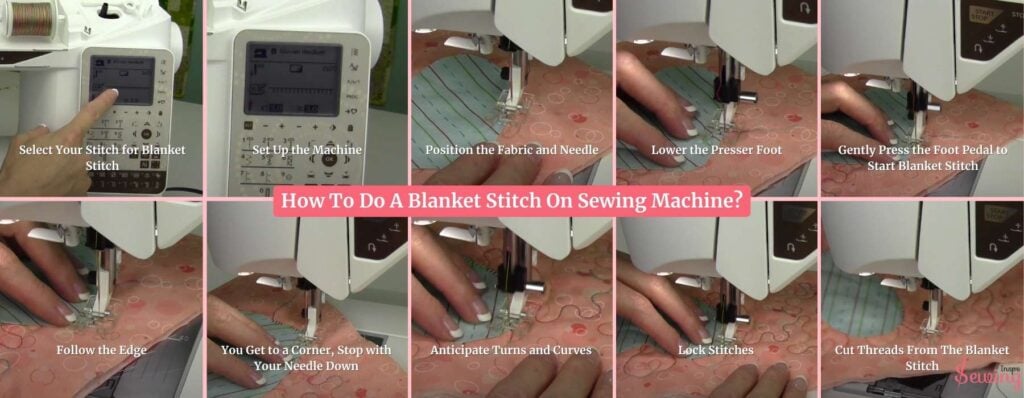
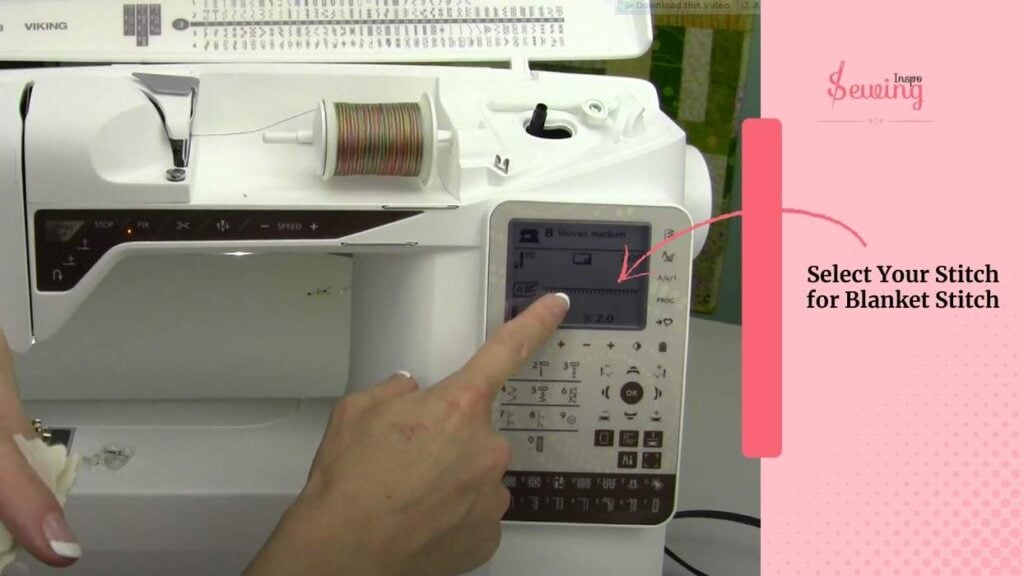
Select Your Stitch For Blanket Stitch
First, we’re picking the right stitch. On my machine, that’s stitch number 20, located in the second row of decorative stitches. You can use this stitch for a buttonhole stitch machine, too.
This stitch is perfect for appliqué because it mimics a hand-sewn look while securing the fabric edges nicely. Just press the stitch button or turn the dial to select it.
Set Up the Machine
My machine automatically set it to 2mm wide and 2mm long. That’s a decent place to start, but honestly, it felt a little too small and tight for anything bigger than a tiny applique piece. The stitches looked kind of lost next to the shape.
So, I bumped it up to 3mm wide and 3mm long, which looked way better and avoided jump stitches.
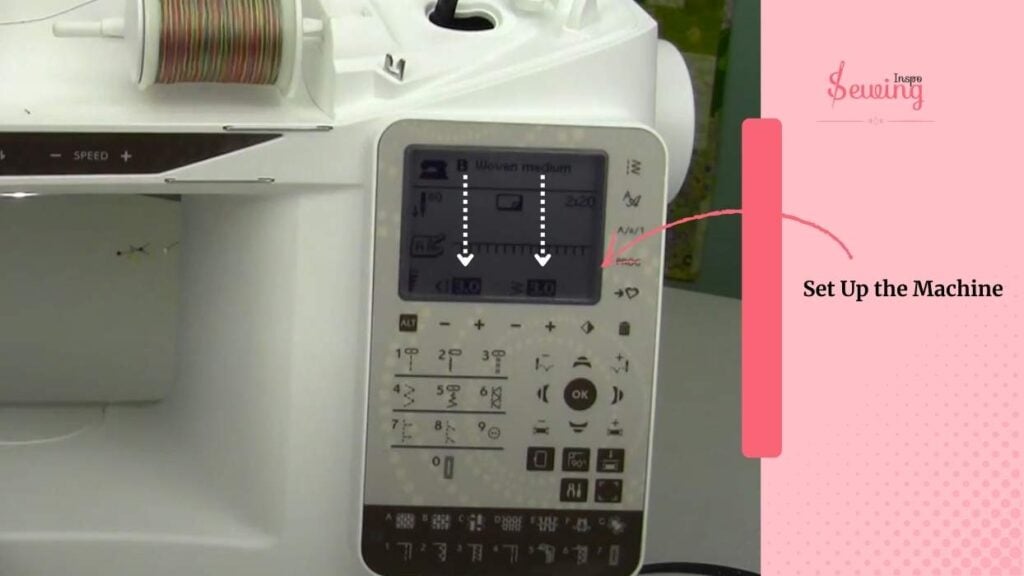
It gave the stitch more room to show off and felt much more in proportion with the size of my applique. If you’re just getting started, I’d say go with “three and three” and adjust from there based on what looks good on your project.
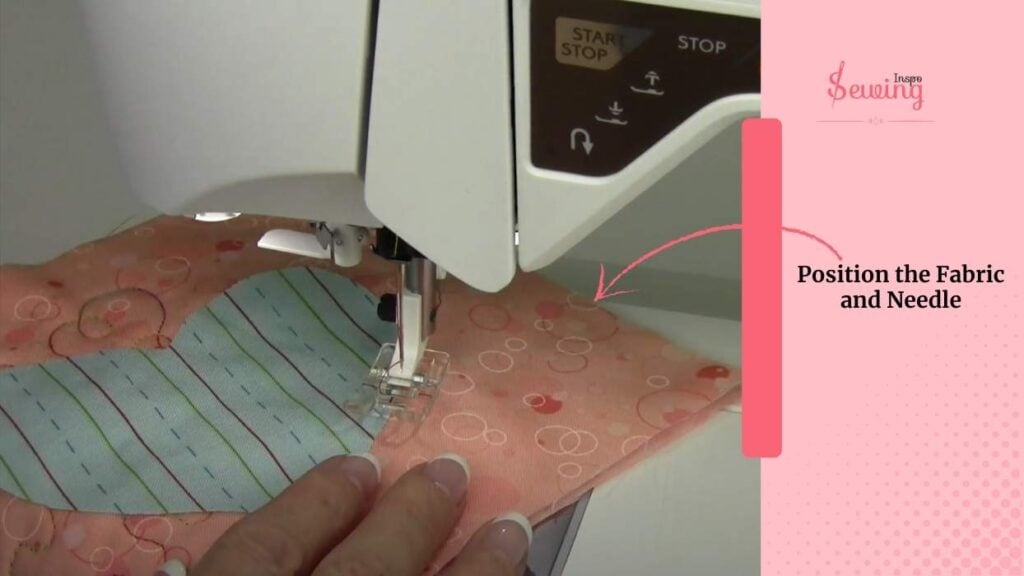
Position the Fabric and Needle
Now let’s get everything under the needle. Position your applique piece on the background fabric using fusible webbing or temporary fabric glue. It makes the embroidery work so much easier.
This keeps it stable. Then, place the fabric under the presser foot and slowly lower the needle using the handwheel. It’s to ensure it lands right beside the edge of your applique.
Why? Well cause,
You want the straight stitch to run alongside the raw edge, while the “bite” stitch jumps into the appliqué fabric. It’s the total opposite of a flat lock machine stitch pattern.
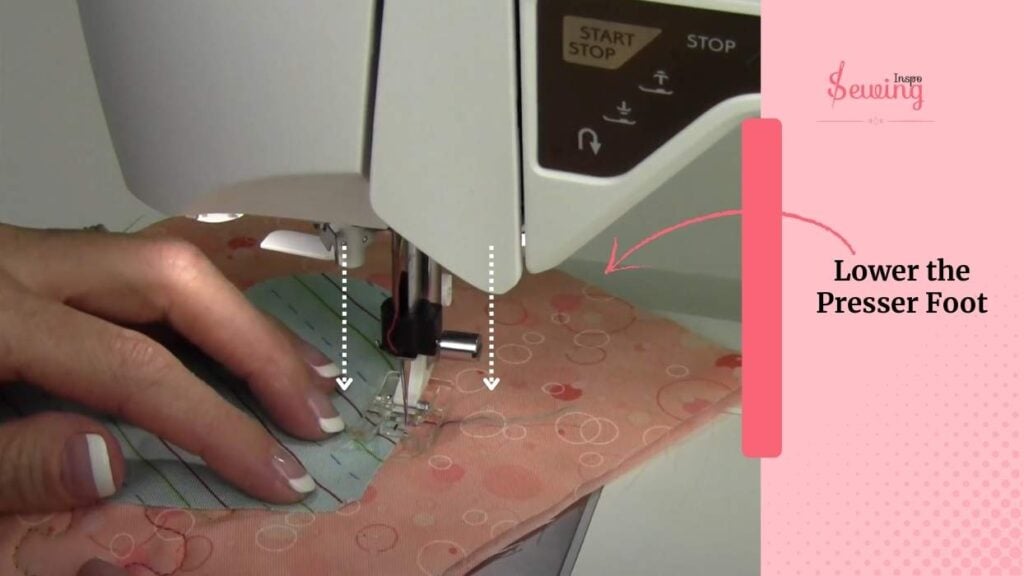
Lower the Presser Foot
This part is kind of tricky, so I use a clear or open-toe appliqué foot. This kind of foot gives you a wide-open view of the stitching area.
It is especially around tight corners or curves. Lower the presser foot gently to hold your fabric in place without bunching. That will make the perfect blanket stitch sewing machine.
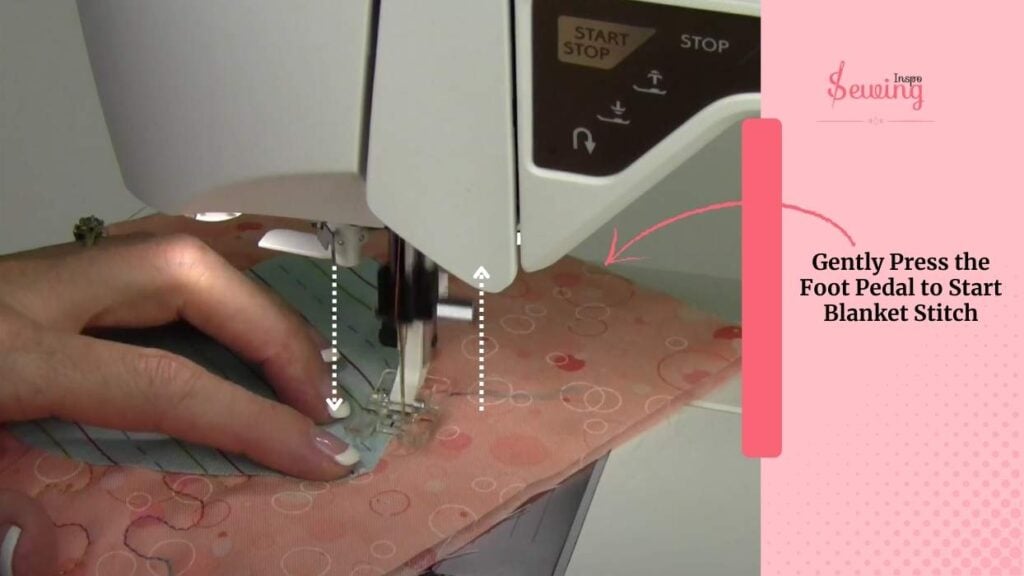
Gently Press The Foot Pedal To Start Blanket Stitch
Time to start stitching. Keep the sewing speed decent.
Gently press the foot pedal and let the machine begin. Most machines will automatically do a few locking stitches at the start, which is super handy.
This anchors your stitch so it won’t come undone later. Keep your hands lightly guiding the fabric.
Don’t pull or push, just steer.
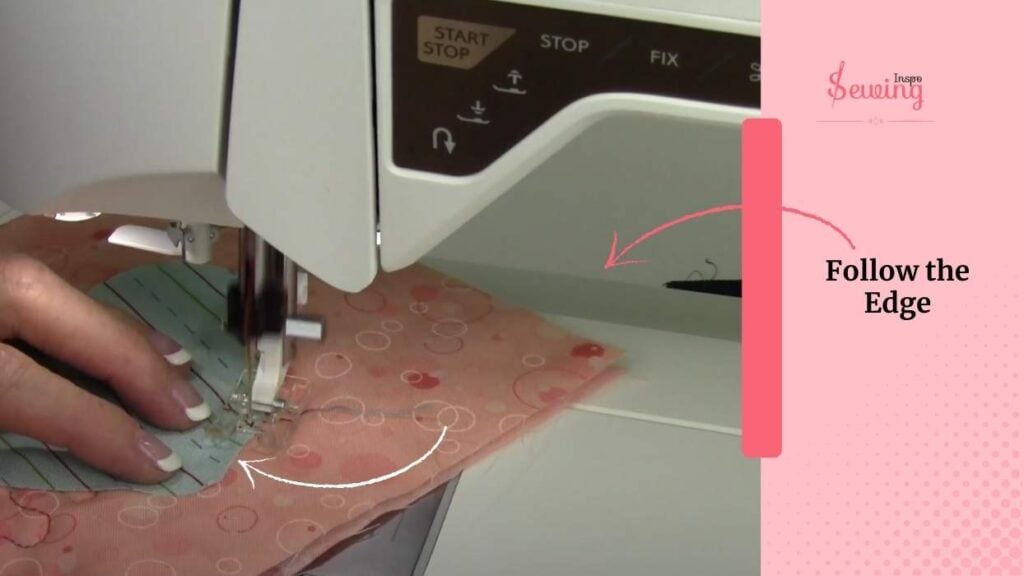
Follow the Edge
As you sew, your goal is to keep the straight part of the blanket stitch running parallel and just outside the edge of the applique shape, with the bite stitch hopping into the applique itself.
Keep your eyes on where the needle lands and use the edge of the foot or a guide marker to stay on track.
Take it slow — steady, even stitching looks much better than rushing.
You Get To A Corner, Stop With Your Needle Down
When you get to a corner, stop with your needle down in the fabric right at the corner point.
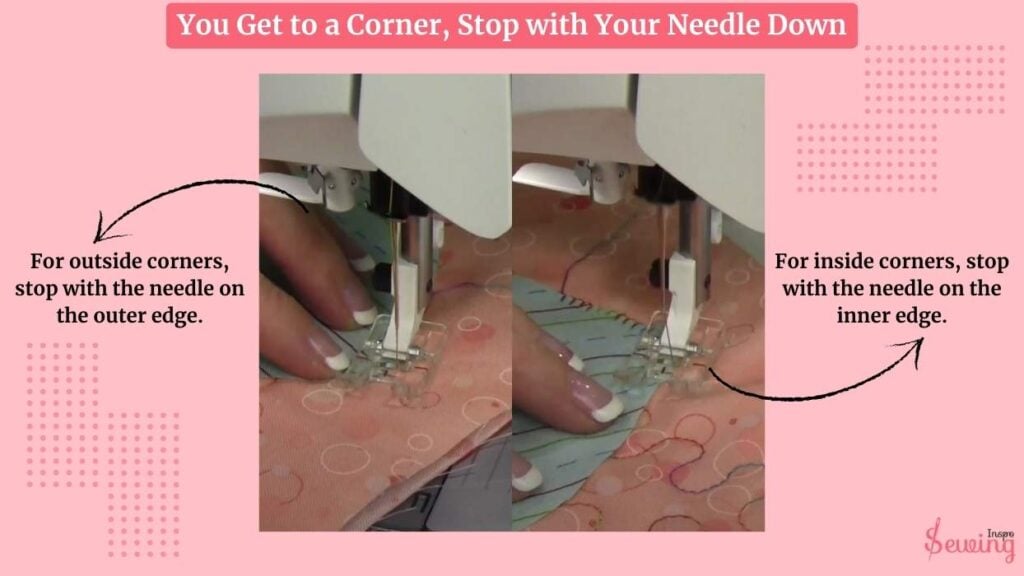
Now, turn your fabric just a little (about halfway, or 45°), take one stitch, then turn it the rest of the way (another 45°), and keep sewing along the next side.
- For outside corners, stop with the needle on the outer edge.
- For inside corners, stop with the needle on the inner edge.
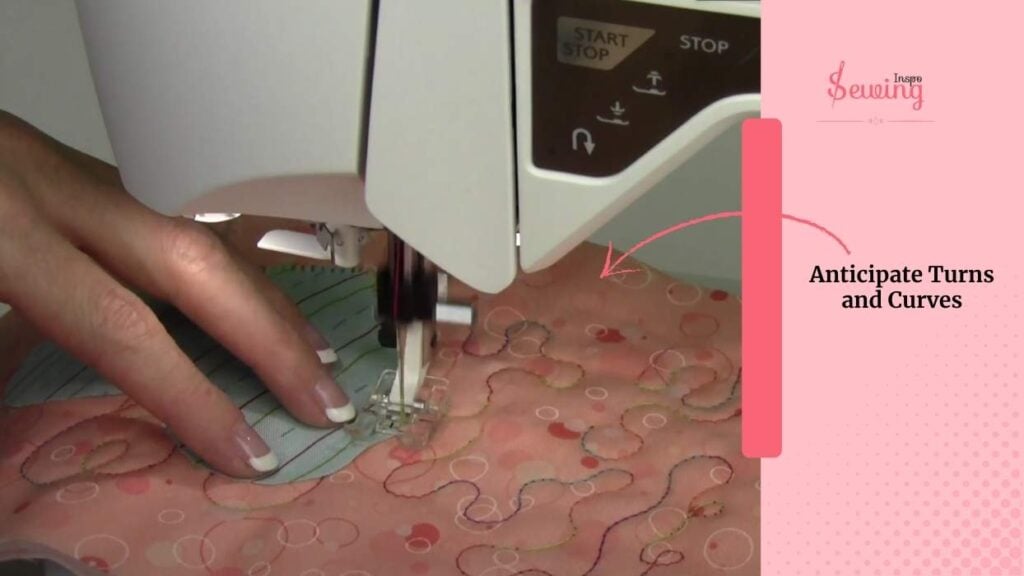
Anticipate Turns and Curves
Curves need lots of small turns to look smooth. As you’re stitching, stop every few stitches with the needle in the fabric, lift the presser foot just a little, turn the fabric slightly, and keep going.
Always stop with the needle on the outside of the curve when you turn.
These little pivots help your stitches follow the shape nicely without going off-track or making weird angles.
Warning:
Sometimes your machine might stop with the needle on the inside of the stitch during a curve. If that happens, tap the foot pedal once for a half-stitch so the needle moves forward, then tap it again to sink the needle on the outer side.
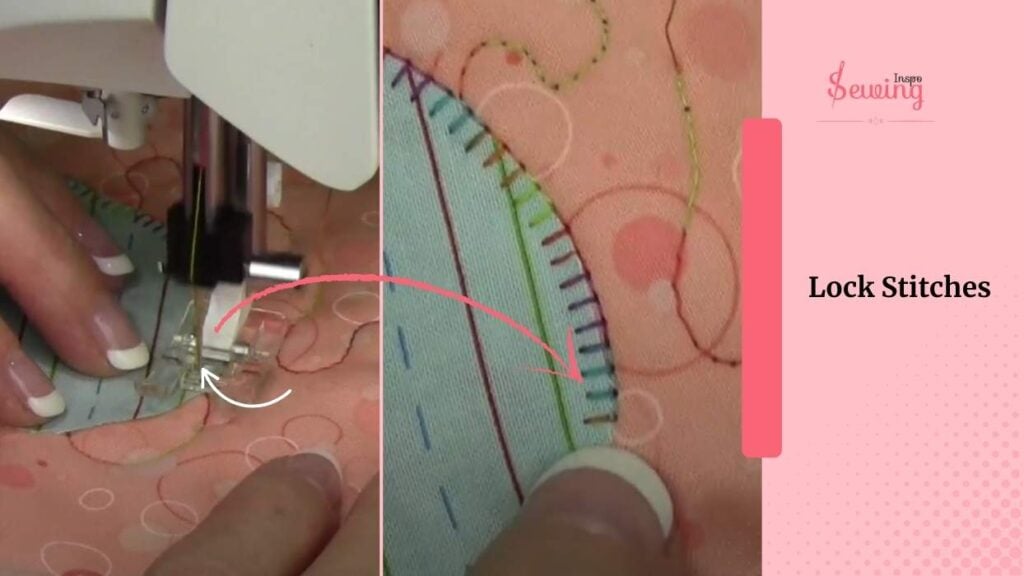
Lock Stitches
To secure your stitching, press the fix or reverse button at the end to create a locking stitch.
This holds everything in place without creating a bulky knot, and it’s essential if you’ll wash or handle the project a lot.
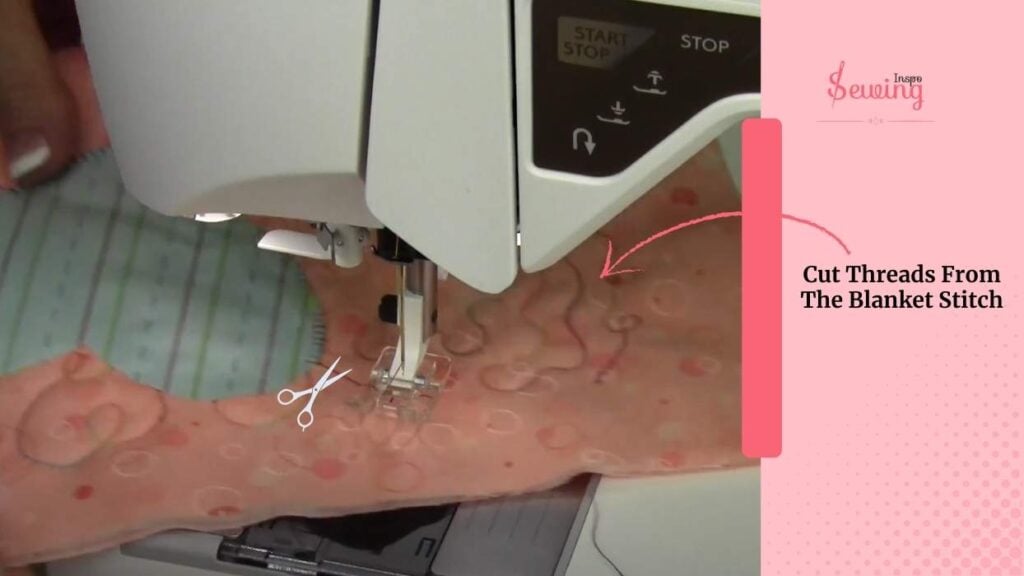
Cut Threads From The Blanket Stitch
Finally, hit the scissors button (if your machine has one) to cut the threads cleanly. Many machines even pull the thread tails to the back for you, leaving a tidy finish. If not, just gently pull the threads to the back and tie them off manually. Done!
That’s it! I got the stitch that I was missing so much. But I did it on a modern sewing machine. What about an old model Singer machine? Well, you can do that also. Let me show you how,
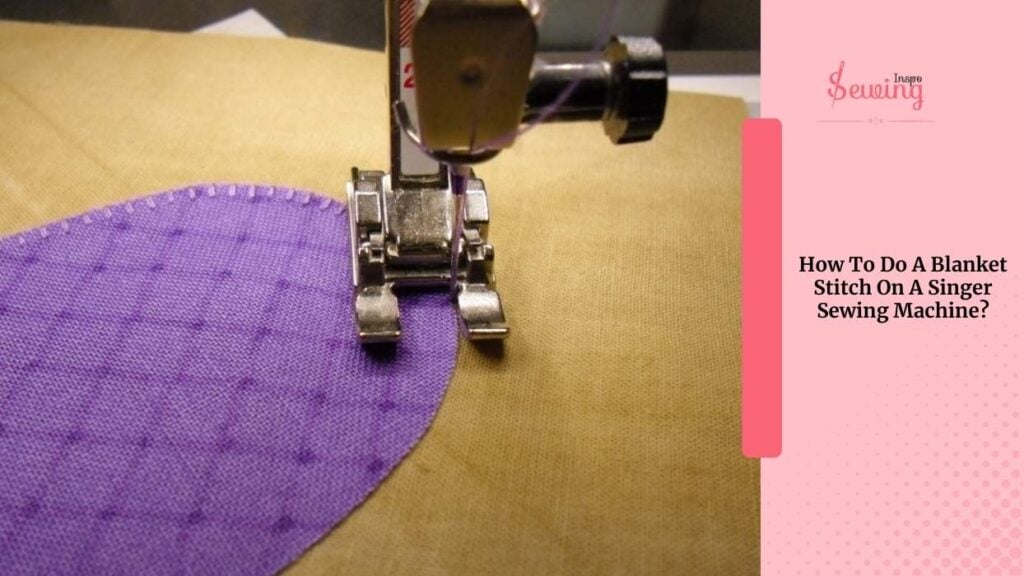
How To Do A Blanket Stitch On A Singer Sewing Machine?
The Singer machine is different from the modern one. But it’s not impossible to do a blanket stitch. Here is what you can do,
- A clear or open-toe foot gives better visibility.
- Set stitch width & length to around 3mm x 3mm for a balanced look.
- Align so the straight stitch lands beside the appliqué edge and the “bite” stitch jumps into it.
- Go slow, let the machine lock the starting stitches.
- Follow the edge smoothly; pivot slightly for curves, sharply for corners.
- Use the lock stitch button and trim threads neatly.
Blanket Stitch On Janome Sewing Machine
The blanket stitch on a Janome machine is a decorative stitch often used to finish raw edges or add a pretty decorative border to blankets, appliqués, and home decor projects.
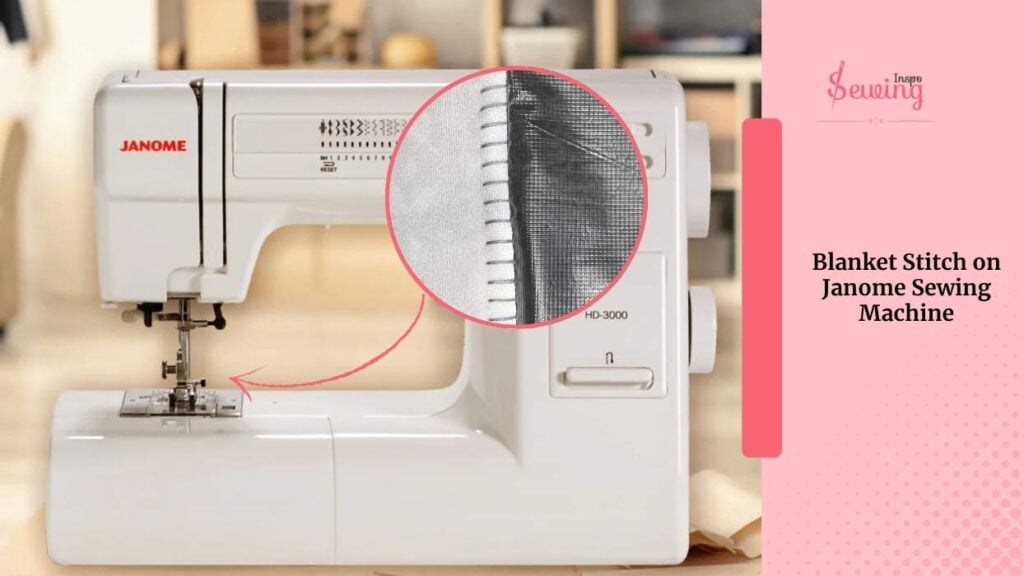
On your Janome, it usually looks like a series of evenly spaced “L” shapes or loops along the edge.
To use it, select the blanket stitch symbol on your machine, which automatically sets the width and length suitable for edge stitching. Place the fabric so the raw edge aligns with the guide, then sew slowly to keep the stitches even.
This stitch not only prevents fraying but also adds a polished, professional look to your projects.
A tip: practice on a scrap piece first to get the spacing and tension just right. It makes a huge difference in how clean and neat the final edge looks.
Blanket Stitch On Sewing Machine Pdf
If you are new to this stitch, those PDFs will simplify your life.
Blanket Stitch Sewing Machine Settings
I got so many comments about the settings so I thought why not clear it out once for good. Blanket Stitch Sewing Machine Settings:
- Stitch Width: Adjust based on fabric thickness and desired decorative effect (usually 3–5 mm).
- Stitch Length: Shorter for dense edges, longer for decorative spacing (around 1–3 mm).
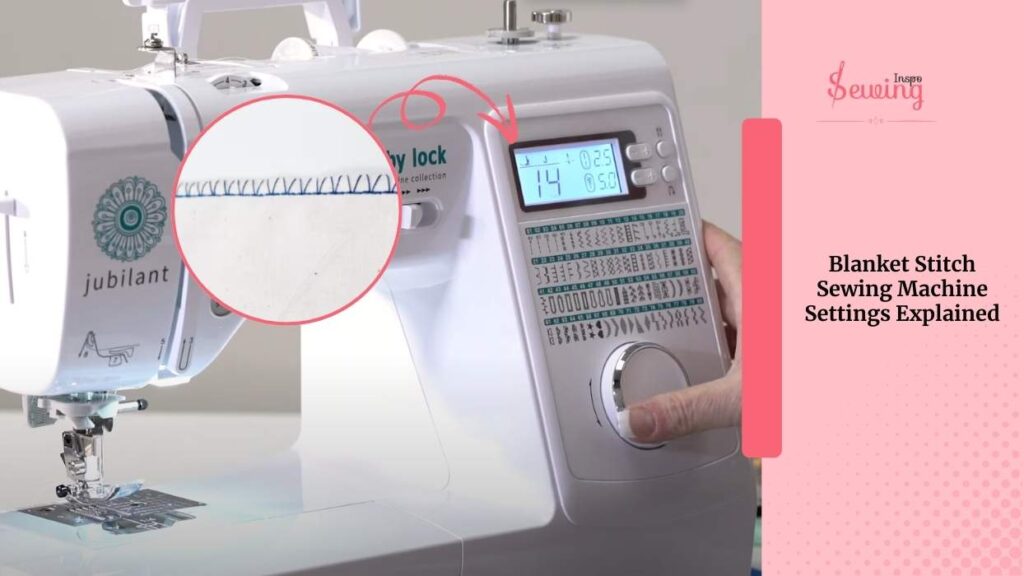
- Needle: Use a universal or sharp needle; for thicker fabrics, a denim or topstitch needle works best.
- Tension: Start with medium tension and adjust so the stitch lies flat without puckering.
- Foot: Use a zigzag or blanket stitch foot for consistent spacing along edges.
FAQ
Can I use the blanket stitch on curves and corners?
Yes! For curves, pivot slightly and often. For corners, pivot in two steps to get a clean 90° turn.
Do all Singer machines have a blanket stitch?
Not all, but most computerized or advanced mechanical models do. Double-check your model’s stitch options.
Sum Up
Doing a blanket stitch on your Singer machine is super doable—and it adds a polished, hand-finished touch to your appliqué. Once you get the hang of pivoting and stitch placement, it becomes a go-to technique for creative projects!


Leave a Reply