
Tailors tacking stitch is a loss-and-loop stitch used to mark sewing patterns in the fabric. Tailors commonly use it, which is why it got its name. It helps indicate important points. This tacking stitch uses exemple darts, pleats, pocket corners, and other design details. You can’t see these types of stitches every now & then cause it is removed once the pattern is done.
However, just because its name is Tailor’s Tacking Stitch, it doesn’t mean you can’t do it. You can also use it. Using this stitch to mark is a sign of professionalism. Will you stay a beginner all of your life? 😏 properly not right?
Here is how to do it-
A tailor’s tacking stitch is made by sewing long, loose stitches through layers of fabric and then cutting the threads between them to leave thread markers on a double layer.
Does it sound interesting? Sure it is! You will find it more interesting once you learn more about it. So, begin.
At A Glance:
- Tailor tack is a loose raw stitch. It’s like a tailors mark
- Tailor tack is a temporary stitch. That’s why it’s a favorite among tailors stitch.
- You can use this stitch to mark buttonholes and darts.
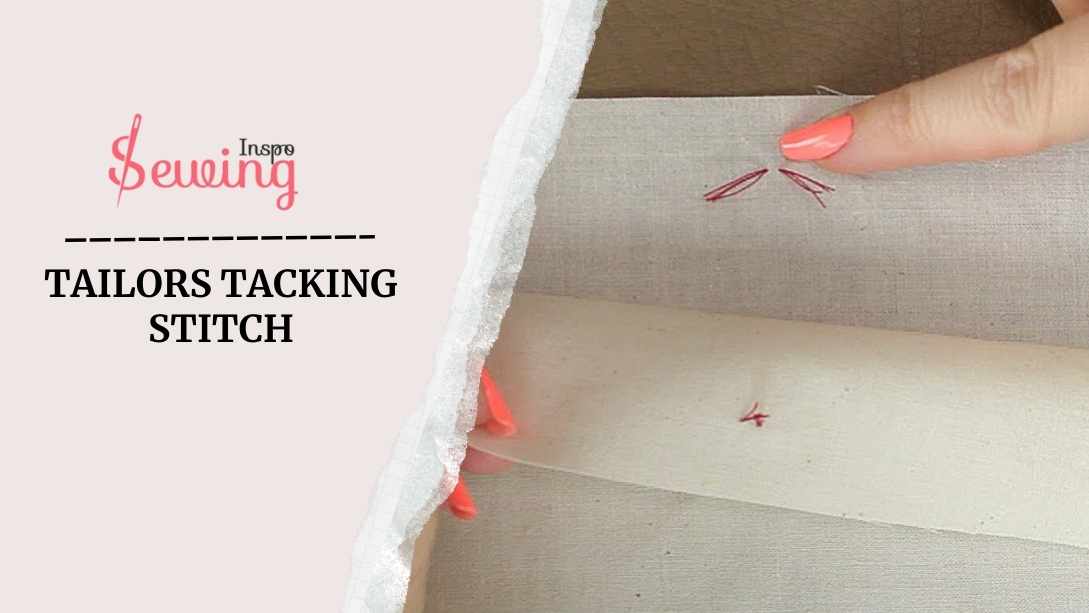
Table of Contents
Project Overview:
| Skill | Time | Tools |
| Professional | 2-3 Minute | 1¼ Long Sewing Needle & Double Strand Cotton Thread |
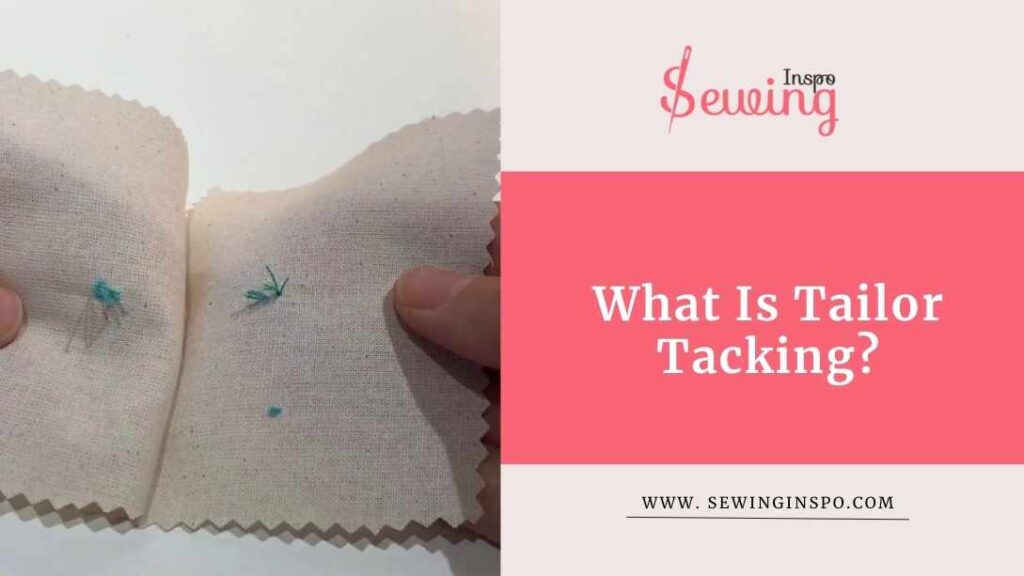
What Is Tailor Tacking Stitch?
Tailor tacks are loose, looped hand stitches commonly used in sewing patterns to mark specific points on your pieces of fabric. That’s why it’s also called tailor stitches or tailors mark.
Basically, it’s a way to transfer markings from your pattern onto your expensive fabric without using marking pens or chalk that might stain or be hard to remove. This is the easiest temporary stitch among the list of sewing stitches.
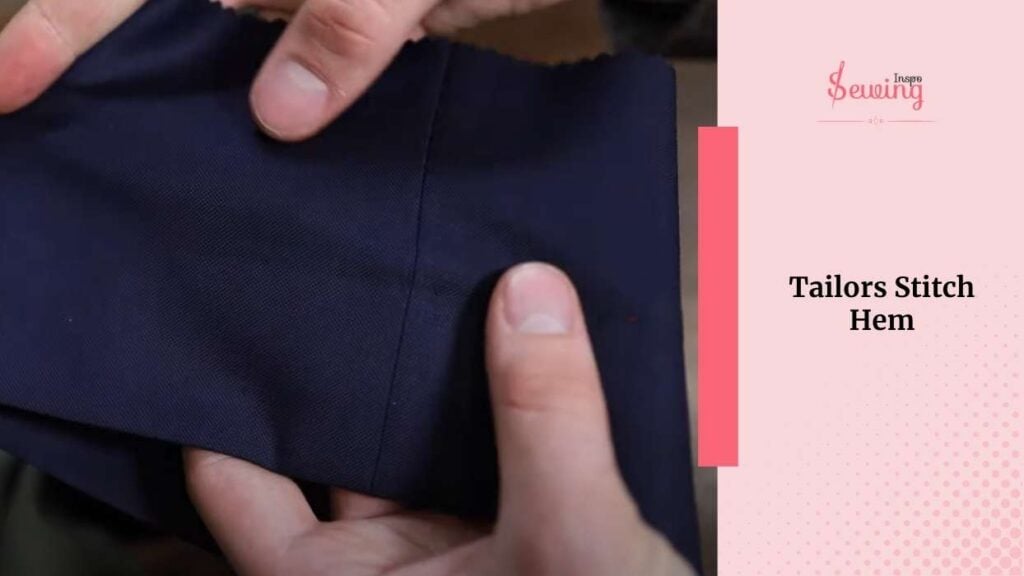
Are you curious about how tailor tack looks? Well, tailors stitch hem is kinda interesting,
Tailor tacking looks like a series of loose stitches made with a contrasting thread. Small, looped threads, like darts or pleats, stick out from the different types of fabric at key points. When you pull the fabric apart, the loops help keep the markings visible on both sides. These hand sewing stitches are a neat way to mark your fabric without leaving permanent lines or stains!
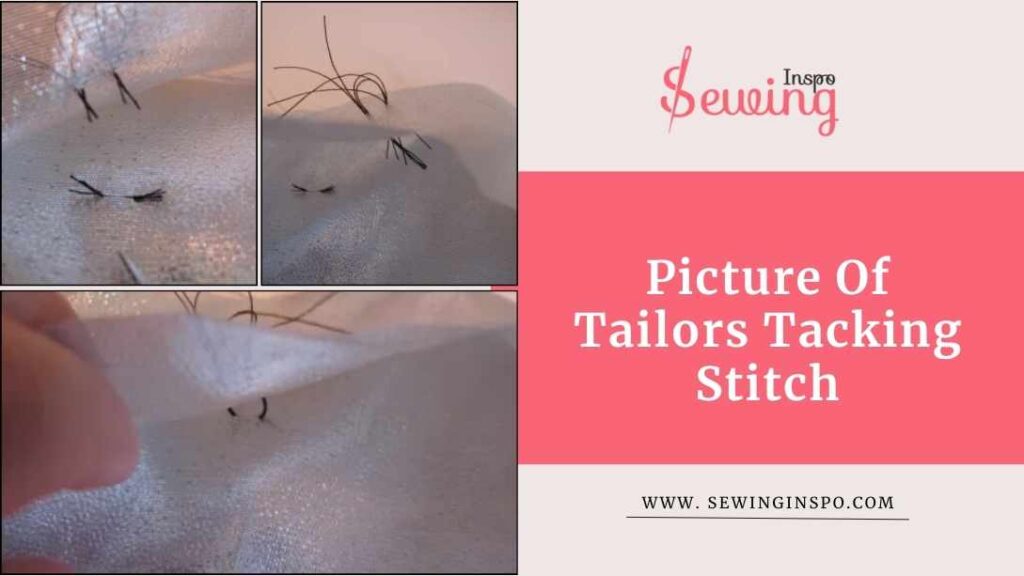
Picture Of Tailors Tacking Stitch
I know words won’t be enough to clarify your confusion. 😊So, I will not leave you with just a definition. Here are a few pictures of the tack stitch.
Is Tailor Tacking A Permanent Stitch?
No, tailor tacking is not a permanent stitch! It’s a temporary marking technique used to transfer pattern markings onto fabric. This type of tack stitch is meant to be loose and easy to remove.
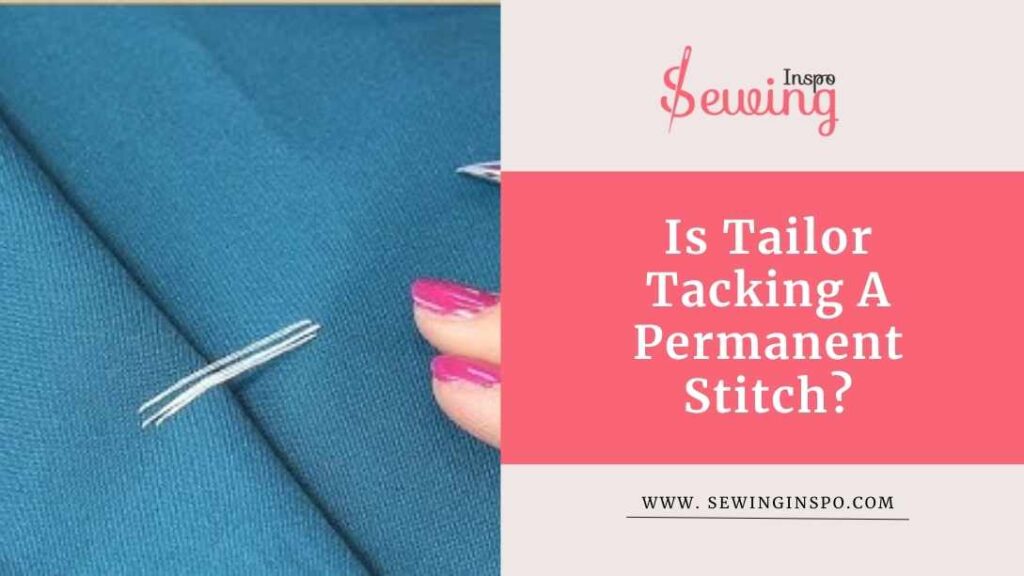
So, once you’ve finished your project or are ready to sew the darts, pleats, or buttonholes. You can simply pull out the threads without leaving any permanent marks. That’s what tailors stitching for. The tailors stitch line will only stay here for some time.
It’s a great way to ensure accuracy in your sewing without worrying about any lasting effects on your fabric! However, it’s not like a box stitch, so don’t put too much pressure on the tailor’s tack.
Examples Of Tailors Tacking Stitches
I even tried tailor tack for a few of my sewing works. Here is how it turns out
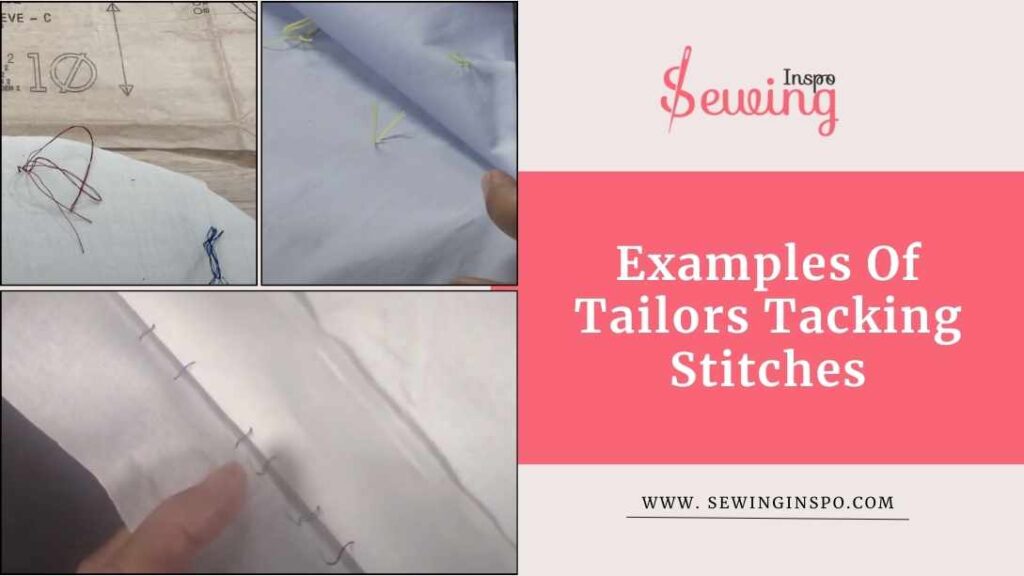
Here Is What Tailors Stitch Clothing Look Like


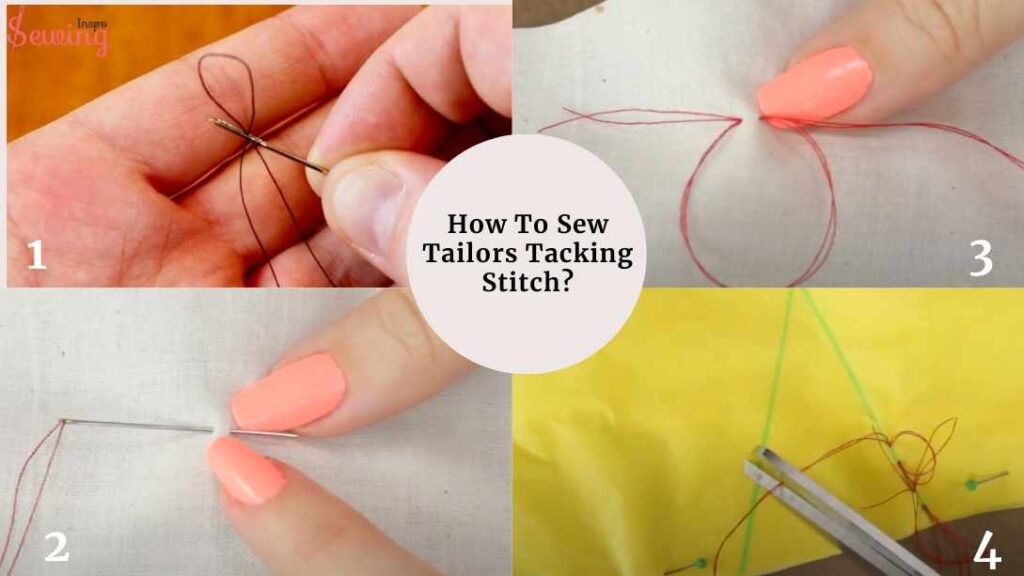
How To Sew Tailors Tacking Stitch?
To sew tailor tacking stitch, follow the 4 steps.
- Thread Your Needle
- Insert The Needle
- Stitch Through the Same Hole & Make A Loop
- Trim Of Thread
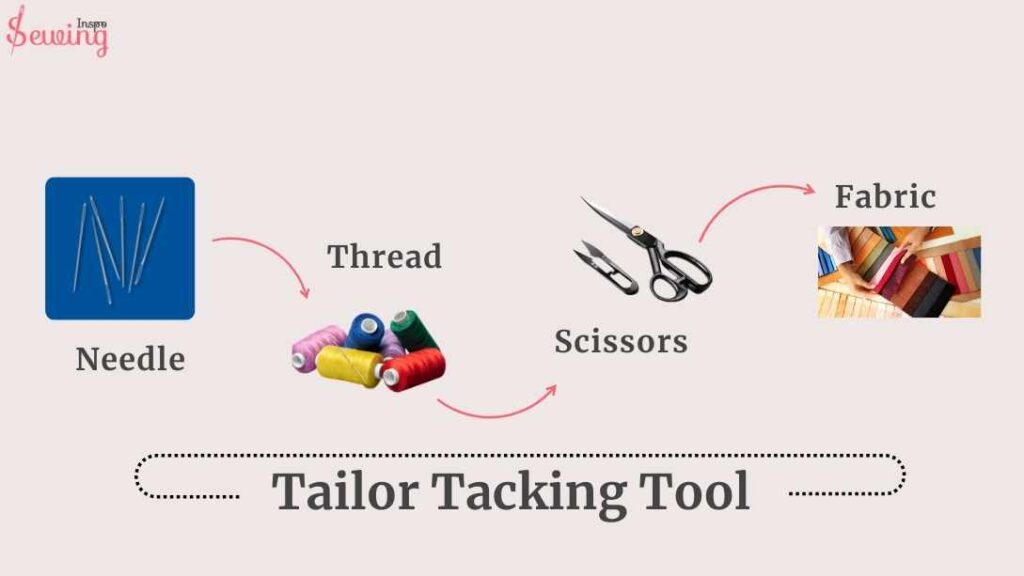
Tailor Tacking Tool
You don’t need a lot of fancy tools, but having the right ones makes the process easier. Here are the tools for tailor tacking:
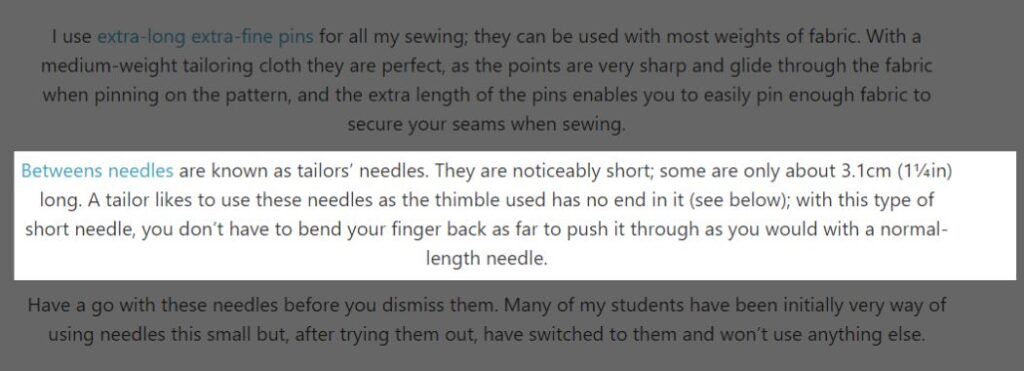
- Needle: A thinner & short 1¼ long needle is perfect for tailor tack.
- Thread: A double Cotton thread is a good choice for tailor tack.
- Scissors: A small pair of scissors will help you snip the thread loops cleanly.
- Fabric: The fabric you’re working with, whether lightweight or heavyweight, should be laid out flat.
Got all your tailor tacking tool? Great now let’s start tailor tacking stitch.
Thread Your Needle
Grab a needle 1¼ inches long and some regular all-purpose double thread that stands out against your fabric, something easy to notice.

Instead of just using 1 strand like you usually would for hand sewing, use 2 strands for tailor simple tacking stitch. Make sure they’re even. To do that,
Now at first, let’s start tailors tacking-
Hold them between your fingers, give them a nice grab, and make them even. The key here is not to tie a knot at the end because you need to cut it. That’s why it’s called tailors tacking.
Insert The Needle
Insert the needle through the single layers fabric, ensuring your stitch is about ⅛ an inch apart from where the needle comes in and where it comes out. It’s all about keeping those stitches nice and even, just like even tacking stitch steps. The total opposite of uneven tacking stitch design.

Pull the needle through and leave a tail hanging off the end. The thread tail should be about 1 to ½ inches and a half.
It’s better to leave a little extra 2-3 inch thread than to have it too short, just in case you need to pull it later. Let’s be safe on tailors stitch.
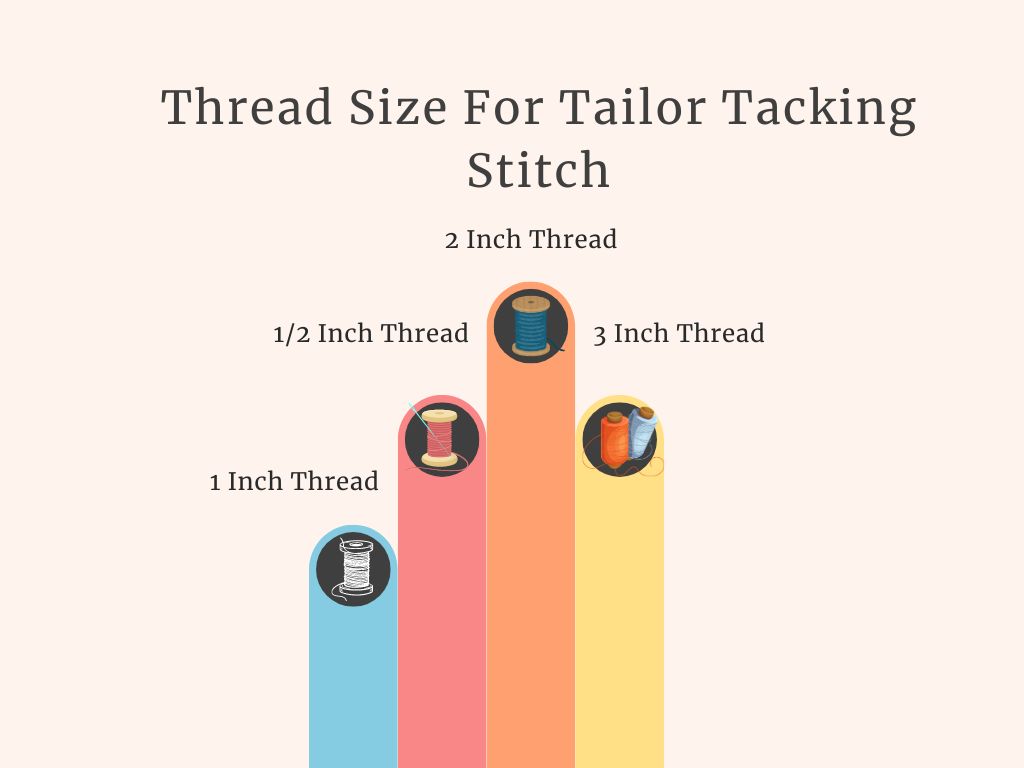
I normally use 3 inch thread for tailor tacking stitch. This is perfect for tailors tacks.
This way, you’re all set to keep those tailor tacks nice and secure! Just like French tack stitch. You can try this for diagonal tacking stitch, too.
Stitch Through The Same Hole & Make A Loop
So now, after you’ve pulled your thread through, go back through the same holes or as close as you can get. Just make sure to go in the same direction. This is where you’ll start to see that nice big looped stitch.
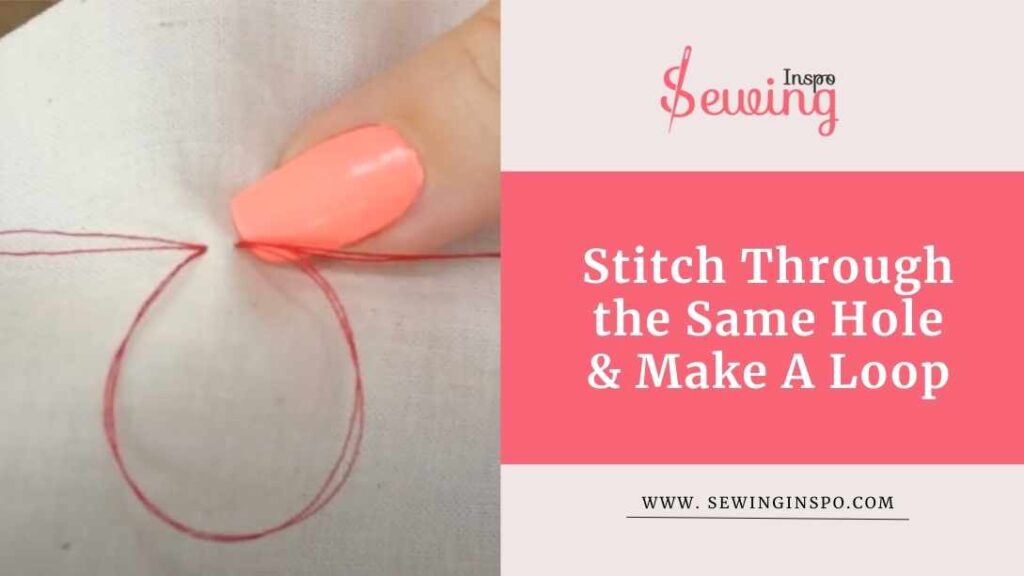
The loose loop stitch size should be 3 inches long, or make it as big as your finger for regular tacking stitches.
It’s important to keep it pretty loose, so don’t worry if the loop is a bit bigger than you expected. That’s totally fine! The size of the loop helps make it easy to see. The loop is the main thing of this stitch. So, make it as big as possible.
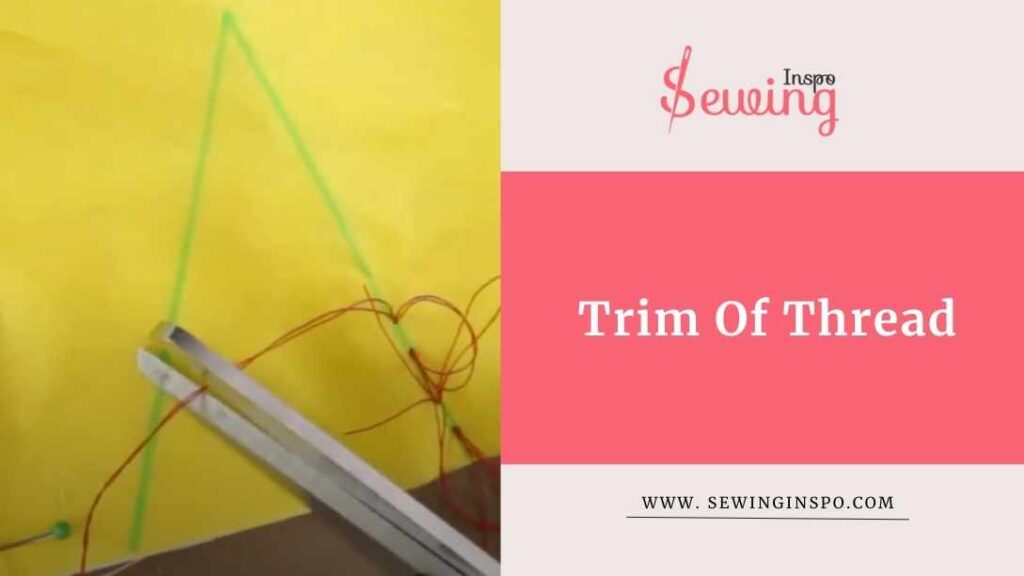
Trim Of Thread
Grab your scissors and carefully snip the thread. Make sure to leave those tails you’ve created. You want to leave about an inch or so on each side. Just make sure to trim neatly so that everything looks tidy.
And that’s it! You’re all set with your tailor tacks ready for the next steps in your sewing project!
This is just a type of tack stitch. If you wonder how to do a tacking stitch step by step, then read our article.
Tailor Tack To Mark Buttonholes
Tailor’s tacking stitch is commonly used to mark buttonholes. The technique is similar, but let me demonstrate it to you.
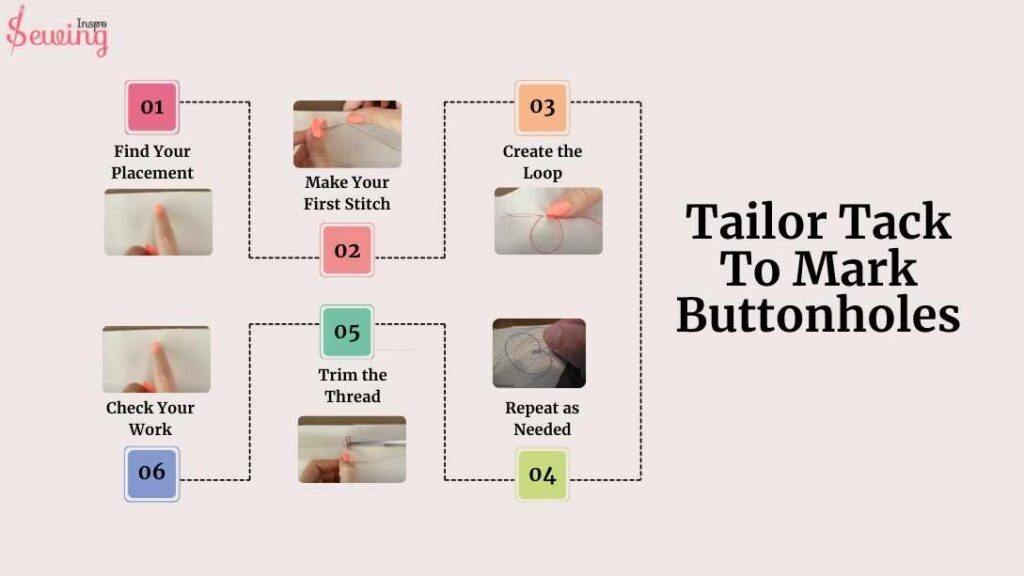
- Find Your Placement: First, figure out exactly where you want your buttonholes to go. Mark the centre spot for each buttonhole.
- Make Your First Stitch: Push your needle through the slippery fabrics at your marked spot. Pull it all the way through, leaving a little tail.
- Create the Loop: Go back through the same spot to create a big loop with your thread. You want it to be nice and loose just like you would do in slip tack stitch.
- Repeat as Needed: If you’re marking multiple buttonholes, repeat the process for each one, keeping the stitches even.
- Trim the Thread: Once you’ve finished marking all your buttonholes, trim the single thread, leaving enough tail on each one to grab onto later.
- Check Your Work: Ensure the markings are clear and secure before sealing your buttonholes.
That’s it! That’s how you can mark the tailor’s tacking stitch.
Tailor Tack On Dart
Want to mark your dart for a sewing pattern? Then tailor tack got your back there, too. Here is how to do it
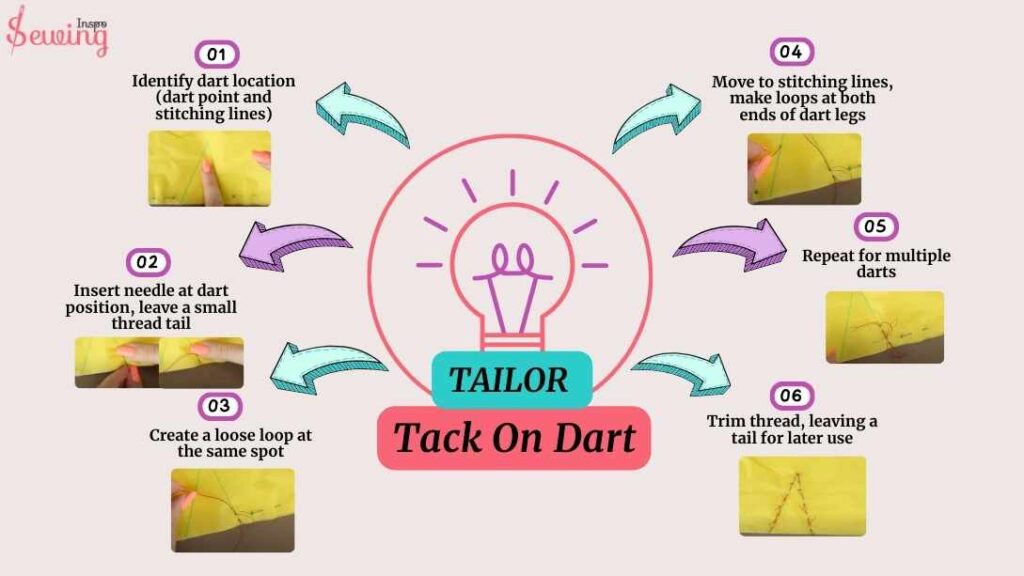
- Identify where your dart will be on your pattern. This usually includes the dart’s point and the stitching lines.
- Push the needle through the delicate fabrics at the dart positions, pulling the thread through while leaving a small tail.
- Return to the same spot to create a big loop with your thread. Keep it loose, so it’s easy to see and work with.
- Next, move to the dart stitching lines. Make similar tacks at both ends of the dart legs, following the same process to create loops at these points.
- If you have more than one dart, repeat this process for each one, ensuring all markings are clear and even.
- Once you’ve finished marking all your darts, trim the thread, leaving enough tail on each marking to grab onto later.
And there you have it! With your tailor tacks in place, you’ll have a clear guide for sewing those darts perfectly!
I tried to describe you in detail, but it is always better to have a visual, right? I know!
Tailor Tacks Tutorial
So Watch This Video To Have A Clear Idea
How To Sew Tailor Tacks
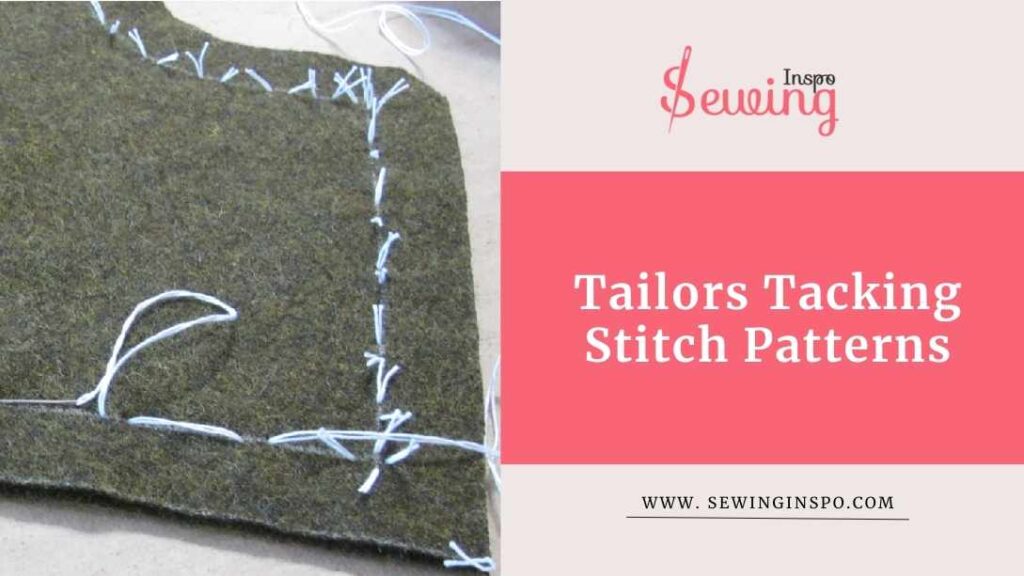
Tailors Tacking Stitch Patterns
I’ve experimented with various tailoring stitch patterns, and each one has its own benefits. My go-to is the basic loop stitch. It’s super simple and creates clear markings for darts and pleats. Here are a few of my works-
What Is An Alternative To Tailor Tacks?
Tailor tack is easy, but it still needs quite some time. You are lazy like me, then you want to avoid it sometimes. 😛 If you then congo, there are 4 alternatives to tailor tacks-
- Tracing wheel
- Pins and chalk or pens
- Fabric markers, crayons, pastels
- Doubled thread
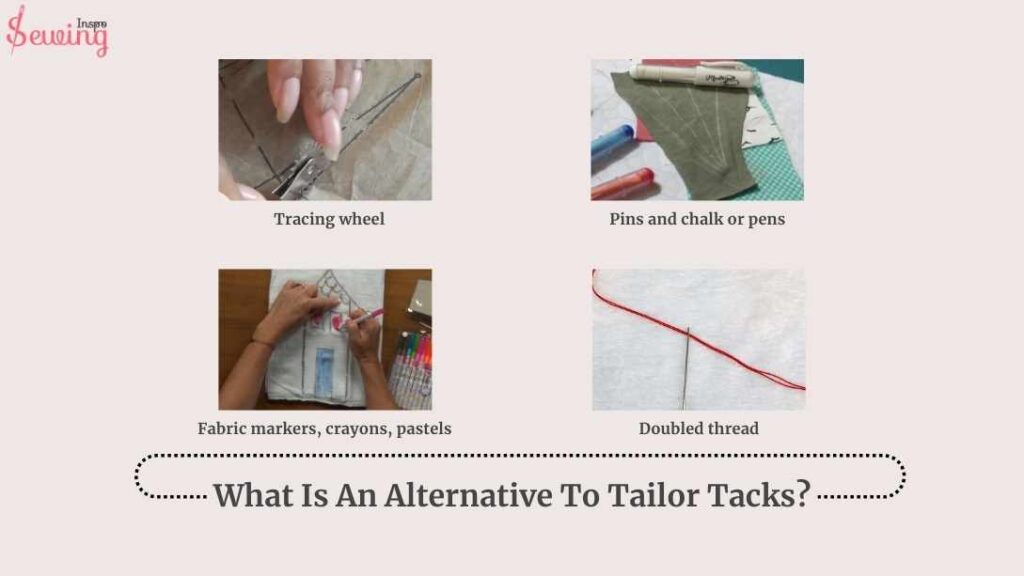
Alternatives to tailor tacking, like the tracing wheel. It allows quick marking by easily transferring pattern lines onto fabric for sewing without multiple stitches. Using pins with chalk or fabric pens offers a fast way to create accurate markings without the hassle of stitching.
On the other hand,
Fabric markers, crayons, or pastels make bold, visible marks that can be wiped away easily. You can try the bar tack stitch by hand, too.
Last but not the least,
The doubled thread allows for quick, temporary stitching without the extra steps. These options are perfect for busy sewists who want to save time while keeping accuracy!
Is Taylor Stitch Worth It?
Yes, Taylor Stitch is worth it if you value high-quality, durable, and sustainably made clothing. Their pieces are well-crafted with premium materials, but they come at a higher price. If you’re looking for long-lasting wardrobe staples, it’s a solid investment.
Frequently Asked Questions
Can I Use Tailor Tacking On All Fabrics?
Yes, tailor tacking can be used on most fabrics, but be cautious with delicate or sheer materials to avoid damaging them. Always test on a scrap piece first if you need clarification.
How Do I Remove Tailor Tacking?
Simply pull on the thread to release the tacks. Since they’re loose stitches, they should come out easily without leaving marks on the fabric.
Can Tailor Tacking Be Used For Other Sewing Techniques?
Yes, it can be used for various techniques beyond darts and pleats, such as marking buttonholes or placement for embellishments.
Summary
Tailors tacking stitch is a sewing expert way to mark things. You can try cheat code to save up your time. But I would recommend that you try tailor tack. Cause how long you wanna take sewing inspiration. You need to inspire people, too, right? So, take this chance to take out your name from the newbie page.


Leave a Reply