
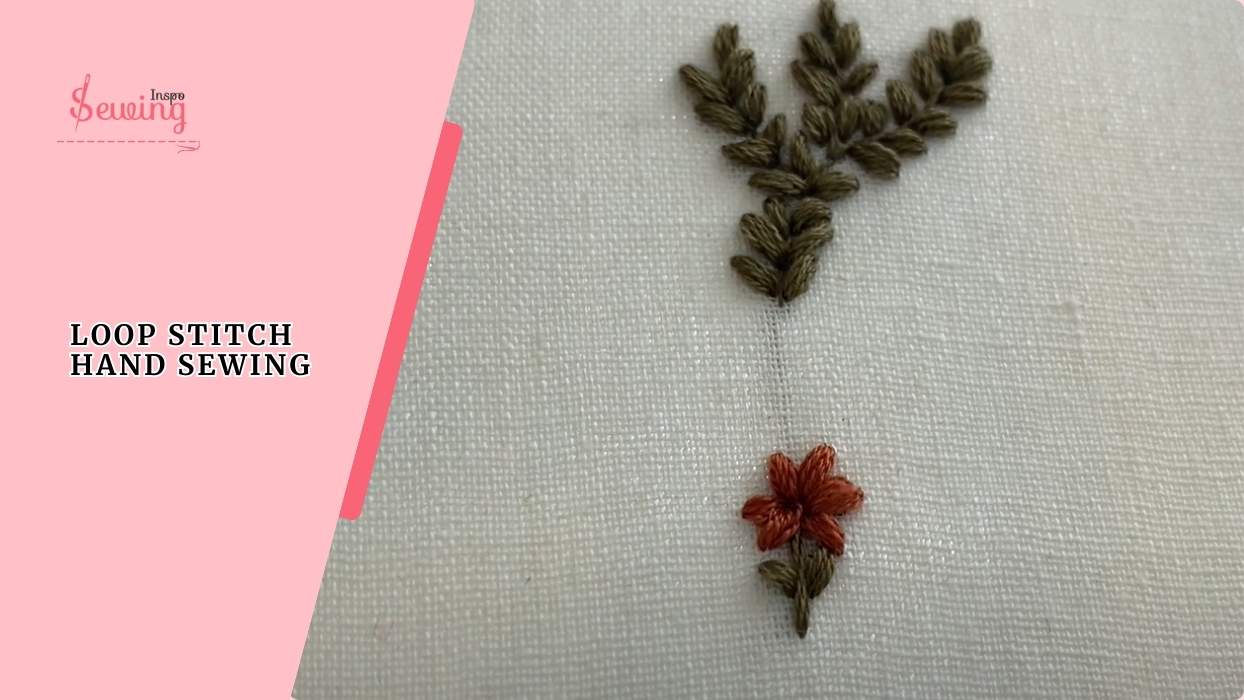
You’re sewing a little flower on a handkerchief. You want the petals to look soft and raised, not flat like a simple line stitch. Not all types of stitches can do it, but the loop stitch hand sewing can.
It’s one of those stitches that beginners can pick up quickly. It also gives advanced stitchers endless room for creativity. How does it work? Well, that’s easy too.
Loop Stitch
To do a loop stitch, bring the needle up, insert it back close to the starting point, catch the thread with the needle before pulling through, and a loop forms on the fabric.
Sounds stunning, right? It looks stunning too. Luckily, there are many varieties of it. Today’s session is wanna be all about that.
At a glance of loop stitch hand embroidery:
- Loop stitch is a looping stitch
- It creates a 3d effect.
- There are 3 types of loop stitch.
Table of Contents
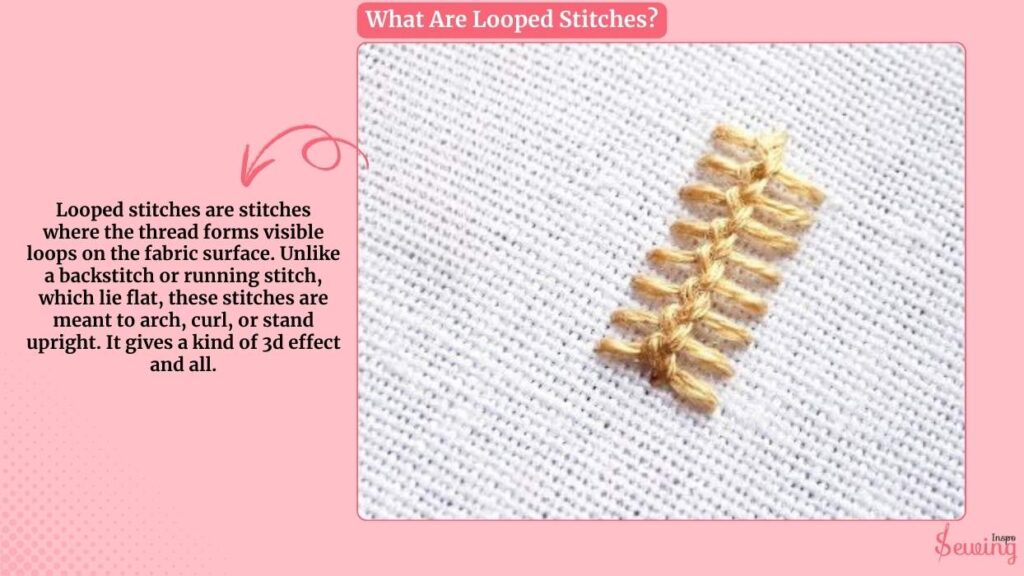
What Are Looped Stitches?
Looped stitches are stitches where the thread forms visible loops on the fabric surface.
Unlike a backstitch or running stitch, which lie flat, these stitches are meant to arch, curl, or stand upright. It gives a kind of 3d effect and all.
Types Of Loop Stitch With Picture
Based on the sewing technique, there 3 types of loop stitch,
- Normal Loop Stitching
- Running Loop Stitch
- Ladder Loop Stitch
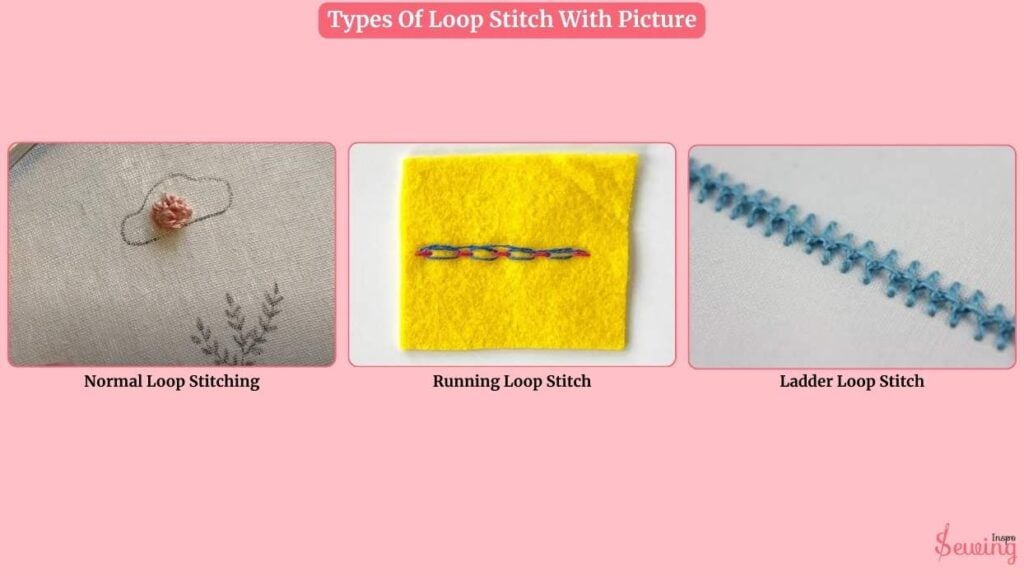
Each type of loop stitch brings its own “wow” factor once you know where to use it. You can use it for highlighting an edge, filling a design, or just giving your fabric a little extra texture.
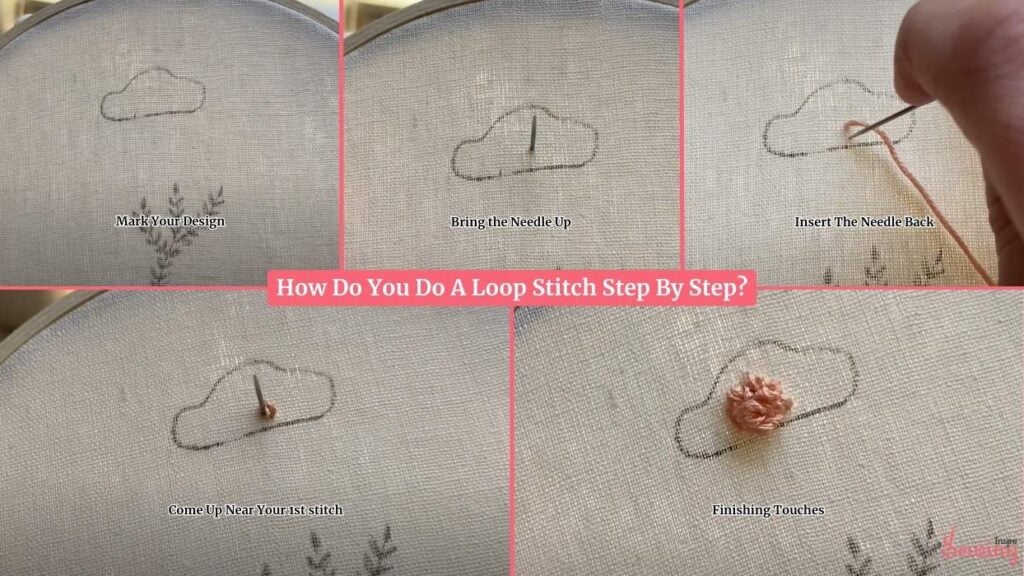
How Do You Do A Loop Stitch Step By Step?
Let’s start with a basic one. To do a loop stitch hand sewing, follow the 5 steps,
- Mark Your Design
- Bring the Needle Up
- Insert The Needle Back
- Come Up Near Your 1st stitch
- Finishing Touches
Mark Your Design
I like to start with a simple shape, a cloud, a circle, or a petal outline. You can draw it lightly with a water-soluble pen or chalk.
This gives you a guide to fill in without worrying about symmetry. I draw for doing chain stitch too it actually helps.

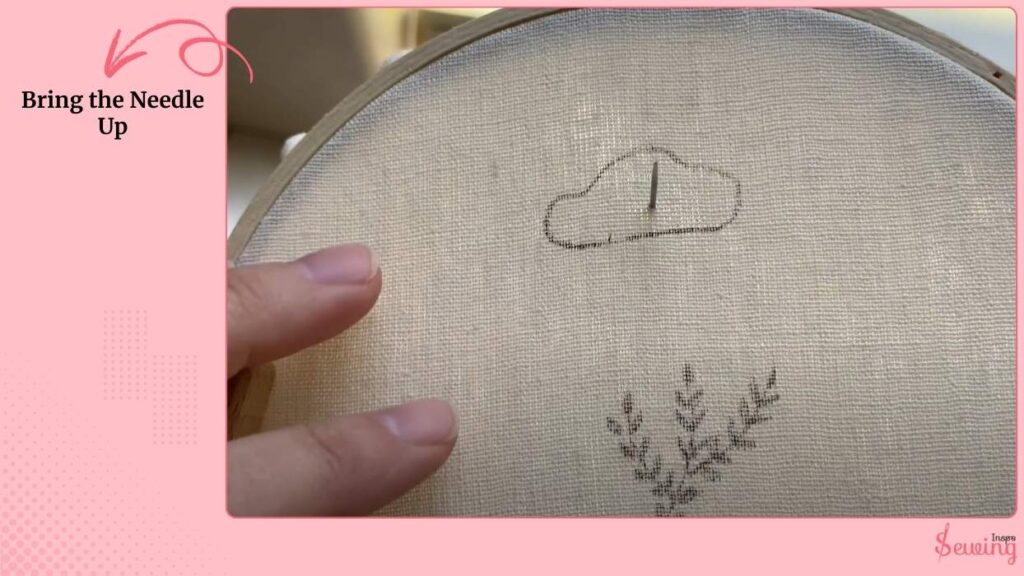
Bring the Needle Up
Start wherever you like inside your shape. Insert your needle from the back of the fabric and pull it up gently. I usually prefer a sharp embroidery needle, size 5–7, for six-strand floss for the loop stitch. If you’re working with finer thread, you can drop to size 8 or 9.
Hold the thread lightly so it can form a loop instead of being pulled tight immediately.
The angle of the needle matters. Keep it roughly perpendicular to the fabric, so the loop sits upright rather than flattening out.
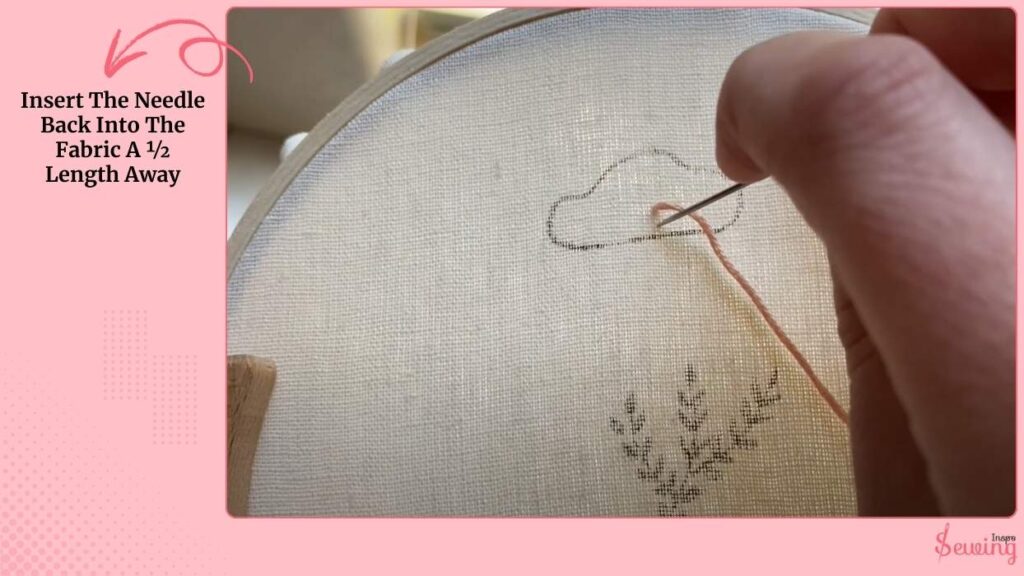
Insert The Needle Back Into The Fabric A ½ Length Away
Insert the needle back into the fabric a ½ inch length away. You don’t need a full stitch. Just enough to anchor the base. Before pulling the thread completely through, stop and let a loop rise above the fabric.
If the loop flattens, don’t worry. You can lift it with the needle and gently guide it back into shape.
This is where the loop stitch starts to shine. You can control the size of your loops for delicate petals or chunky clouds.
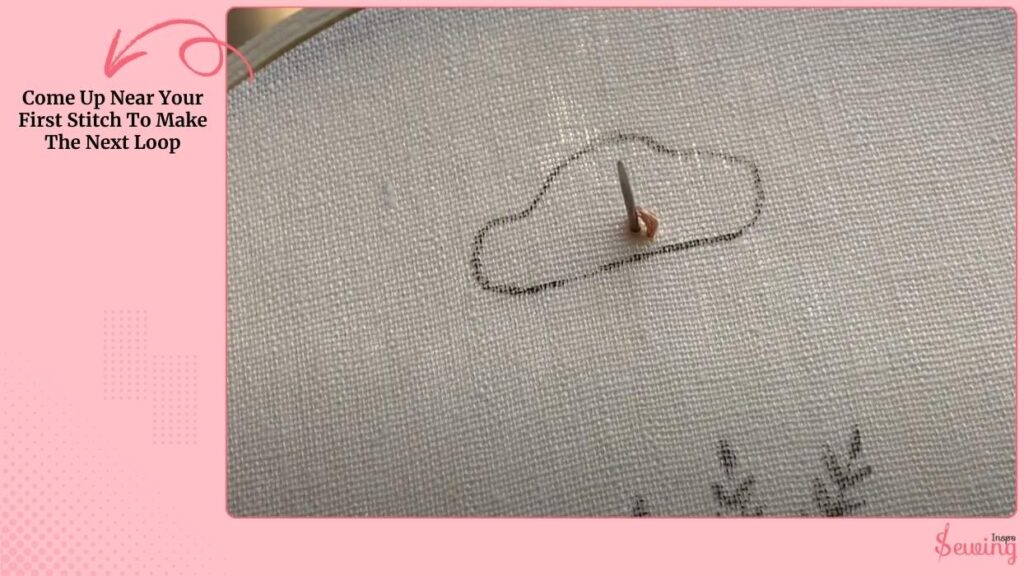
Come Up Near Your First Stitch To Make The Next Loop
Come up near your first stitch to make the next loop. Pull the thread until you feel it hit the back of the fabric kinda like hemming stitch.
Don’t tug too hard, or your previous loop will flatten. Repeat this process across your shape, weaving loops over and around each other for a textured, three-dimensional effect.
Expert Tip:
Changing directions and overlapping loops create a more natural, rich texture. For example, if you’re filling in a cloud or treetop, let loops crisscross slightly for volume.
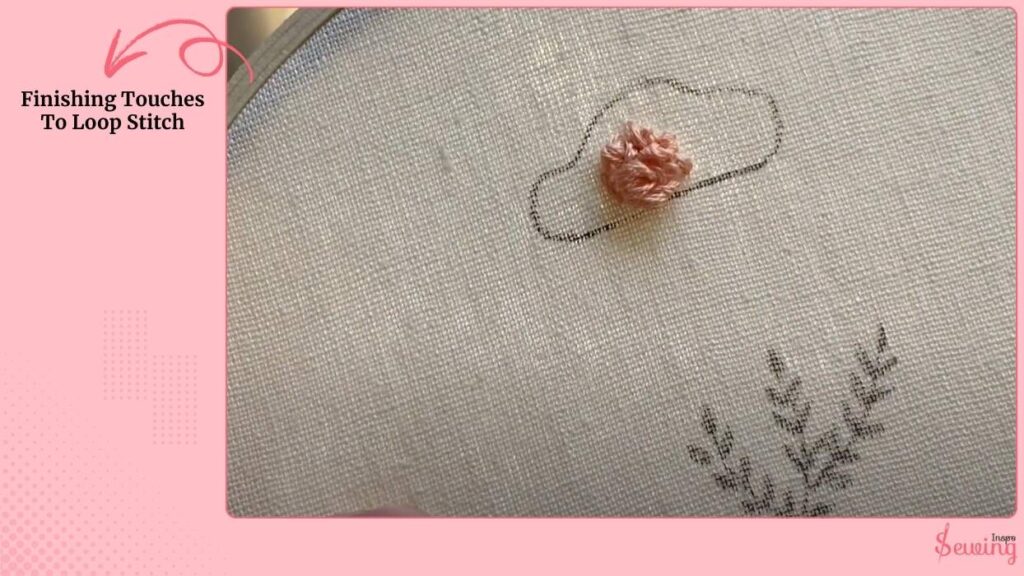
Finishing Touches To Loop Stitch
Once your area is filled, check for any loops that are too flat or uneven and lift them gently with the needle.
For extra detail, you can add French knots, different colors, or tiny overlapping loops to enhance dimension. Trim or hide thread ends neatly on the back.
Needle and Thread Tips for Perfect Loops
- Keep your thread untwisted as you work. Twisted floss can create uneven loops.
- Adjust the loop height by stopping at the right moment when pulling the thread; too tight = flat, too loose = floppy.
- Maintain consistent stitch spacing for a professional, polished look, but don’t worry about perfection. Loop stitch is meant to feel organic.
Running Loop Stitch
The running loop stitch is a beautiful twist on the classic running stitch. It’s perfect for creating a laced effect along edges or for filling larger areas with texture. I like to think of it as taking a simple line and giving it depth and elegance. Here’s how I do it:
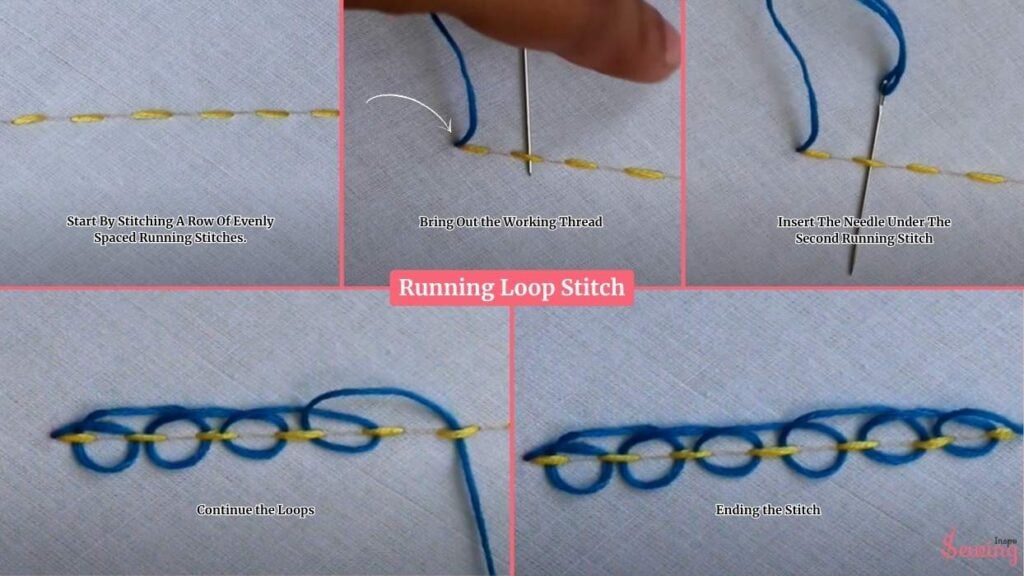
Start By Stitching A Row Of Evenly Spaced Running Stitches.
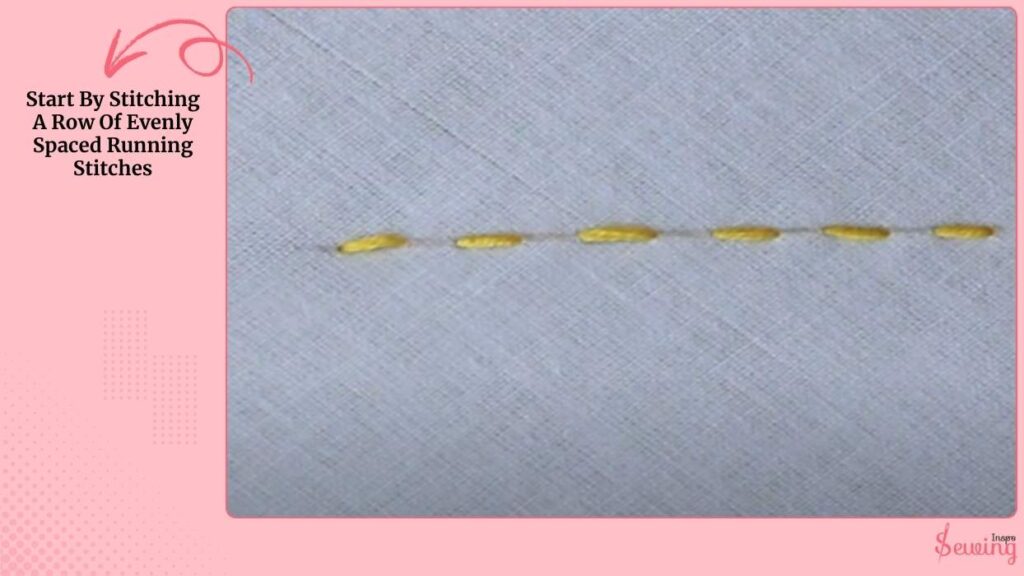
I usually keep the running stitches short and consistent. This ensures the loops sit neatly on top. For added effect, you can use a neutral thread for the base and a contrasting color for the loops.
Bring Out the Working Thread
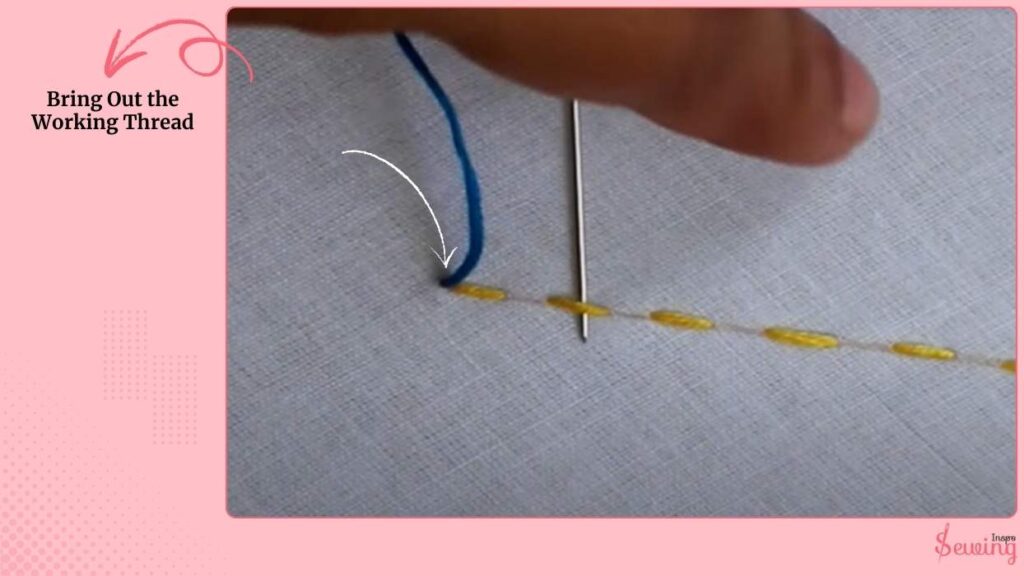
Take your second thread (preferably in a contrasting color) and bring it up at one end of your row of running stitches. This thread will form the loops over your base row.
Insert The Needle Under The Second Running Stitch
Insert the needle under the second running stitch from the top and then loop it under the first stitch. Pull gently to create a loop above the base stitches.
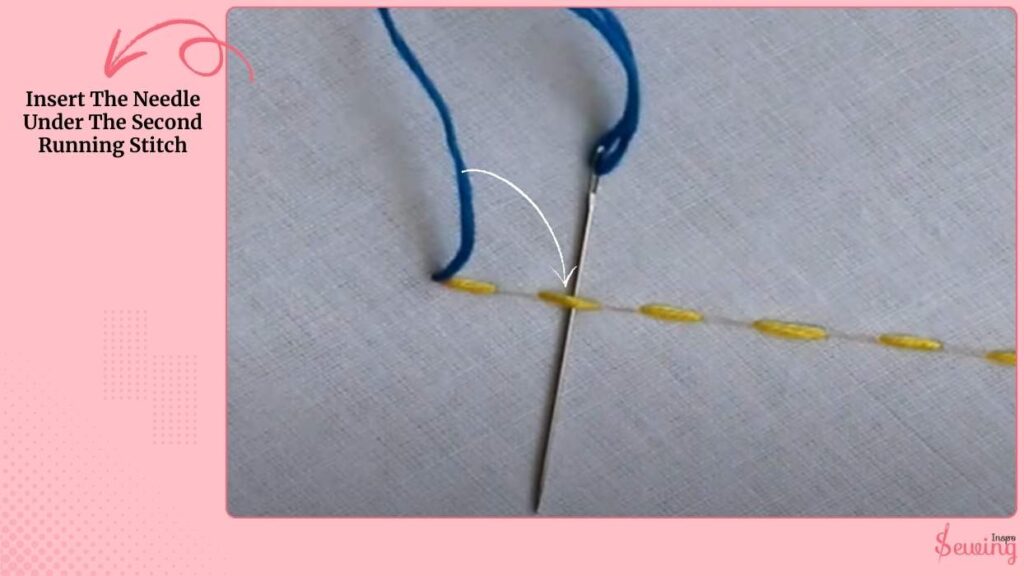
Keep the needle blunt side up to avoid snagging the fabric. This helps the loops sit smoothly.
Continue the Loops
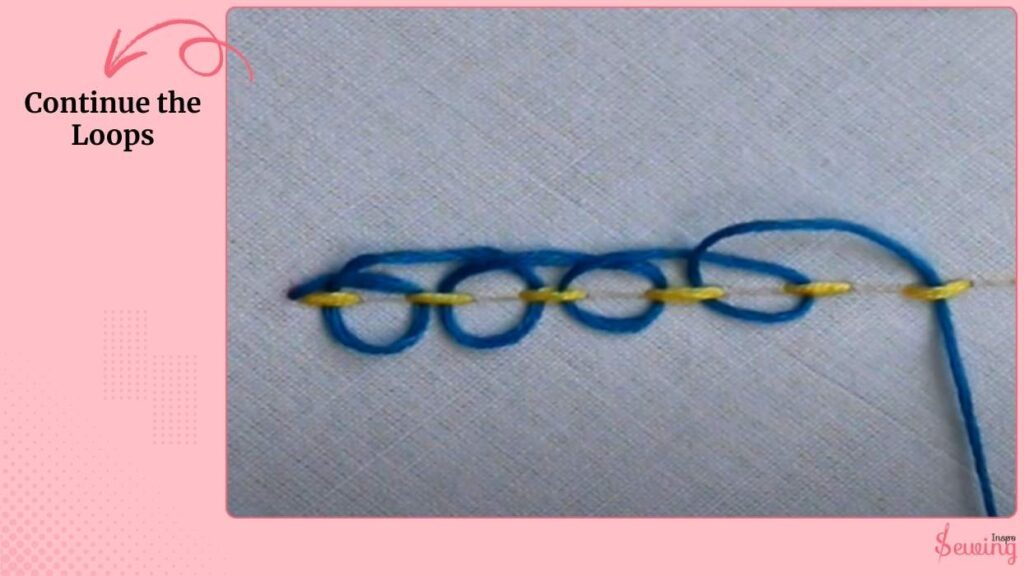
Move to the next stitch in the base row, going under the third stitch, then turning to loop under the second stitch. Repeat this process across the entire row. Each running stitch holds two loops, so you can cover a wider area efficiently.
Ending the Stitch
When you reach the end of the row, secure your thread neatly on the back of the fabric. You can continue onto a second row, offsetting the loops slightly for a fuller, laced effect if desired.

This running loop stitch is a fantastic way to take a simple running stitch and turn it into something decorative and functional. Use it on edges, along seams, or creatively to fill shapes. Once you get the rhythm, it’s smooth, relaxing, and visually striking.
Woven\ Ladder Loop Stitch
This variation of the loop stitch is perfect for creating a neat, textured ladder-like effect down the middle of your design. That’s why I like to call it ladder loop stitch I like working it from right to left, along two parallel guide lines. Here’s how I do it:
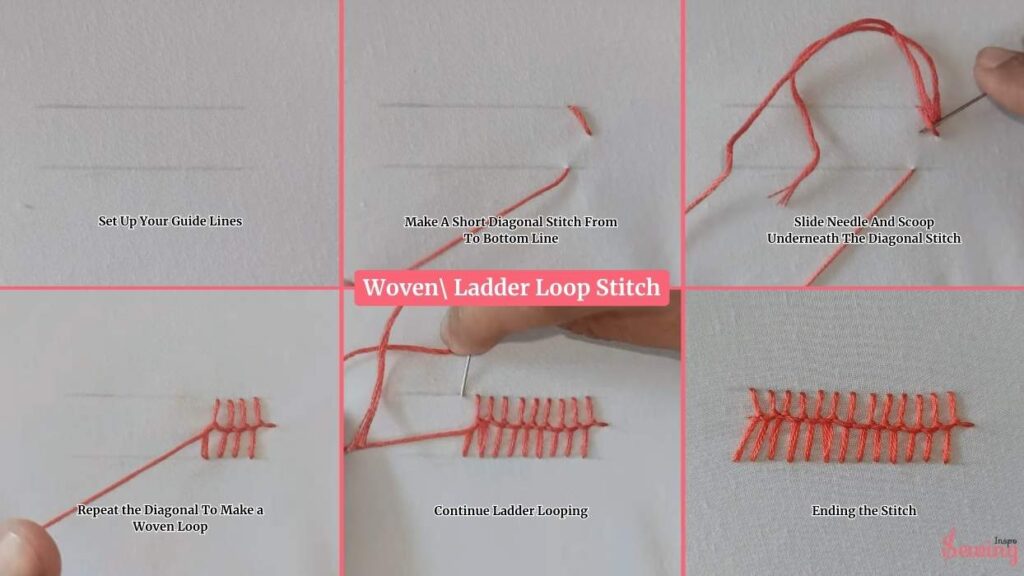
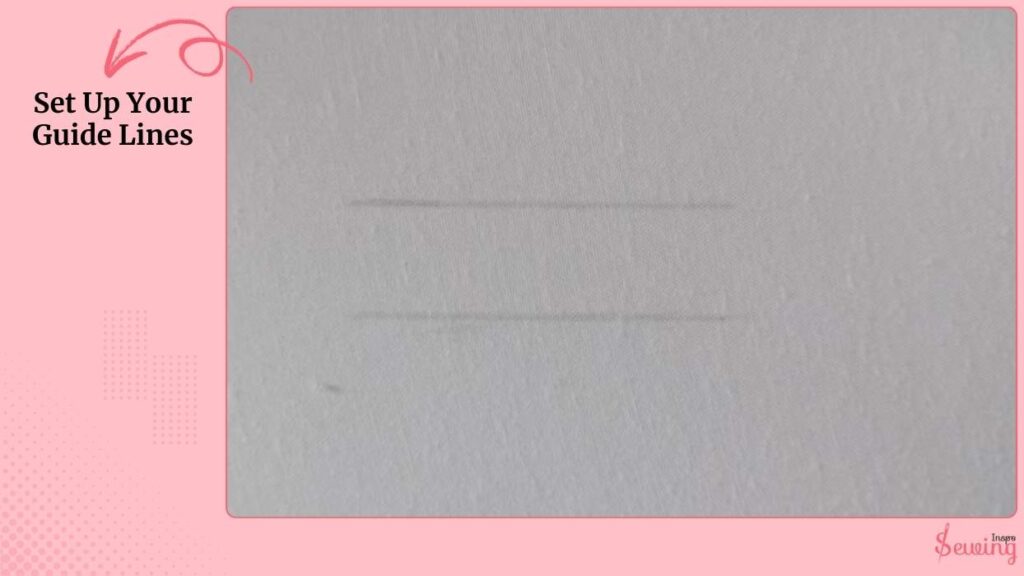
Set Up Your Guide Lines
Draw two parallel lines on your fabric. These will guide your loops and keep everything aligned. I usually use a water-soluble pen for this, so I can remove it later.
Then, bring your needle up at the center between these two lines. This gives your first stitch a balanced starting point.
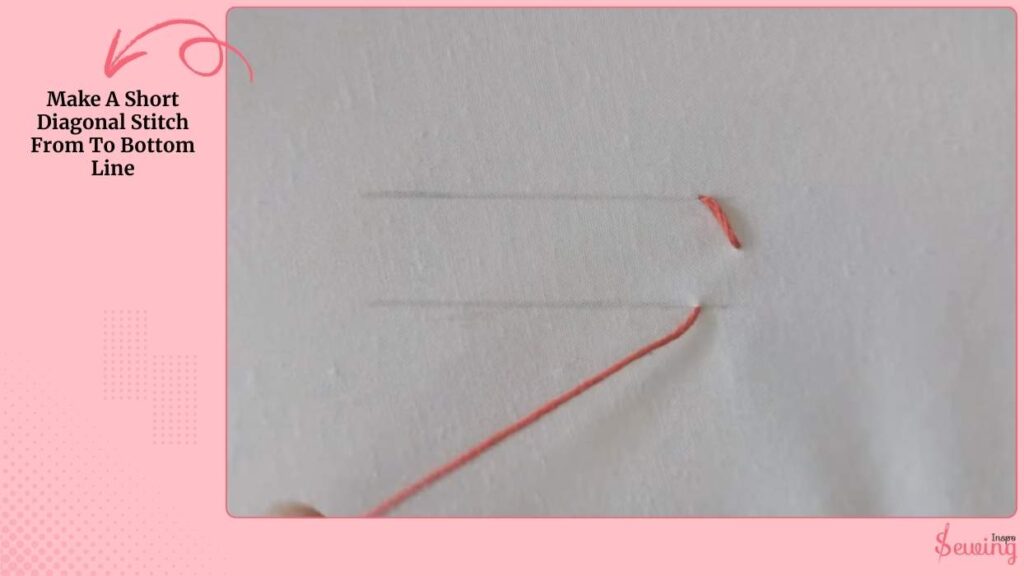
Make A Short Diagonal Stitch From To Bottom Line
From the top line to the bottom line, make a short diagonal stitch. The thread where you came up should remain centered. This will anchor your first loop. This stitch is the “spine” of your little ladder.
Pro Tip: Keep the tension gentle too tight and your loops flatten; too loose and they’ll flop.
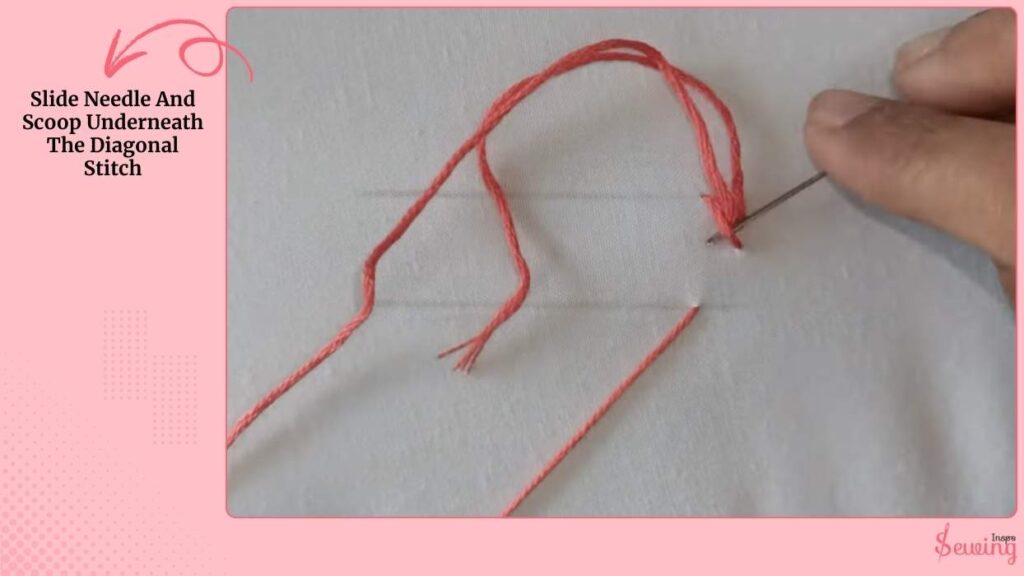
Slide Needle And Scoop Underneath The Diagonal Stitch
Take your needle and scoop underneath the diagonal stitch, then pull it up so it rests on top of the thread. This creates a little C-shaped loop around your diagonal stitch, giving it a woven look.
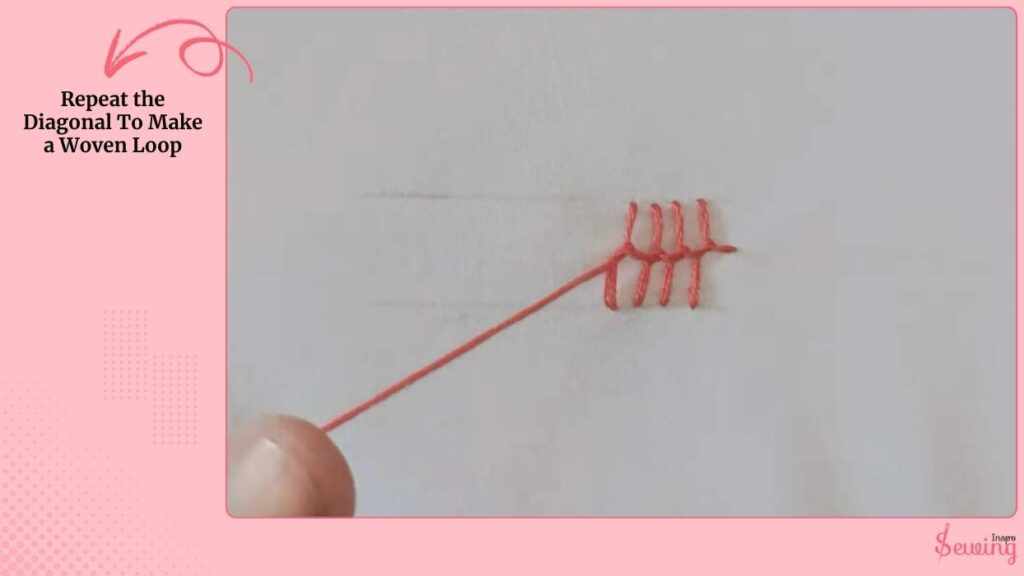
Repeat the Diagonal To Make a Woven Loop
Make another diagonal stitch from the top line to the bottom line. Again, scoop under the previous diagonal stitch and pull your thread through on top.
Continue this sequence down your guidelines. The loops will interweave along the center, creating that textured ladder effect.
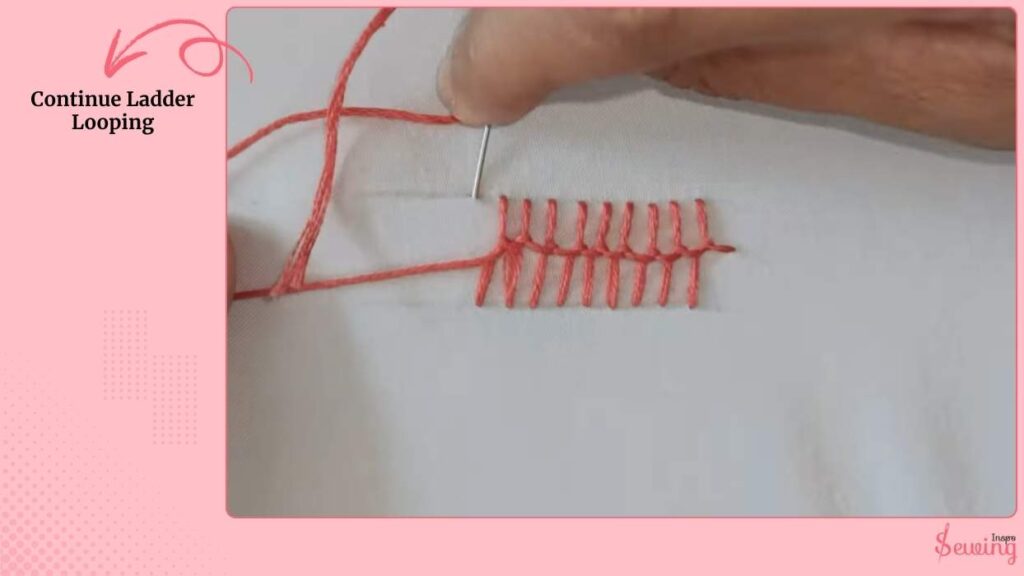
Continue Ladder Looping
Repeat the top-to-bottom diagonal + scoop-under loop process until you reach the end of your design. Make sure your loops are evenly spaced and the tension is consistent.
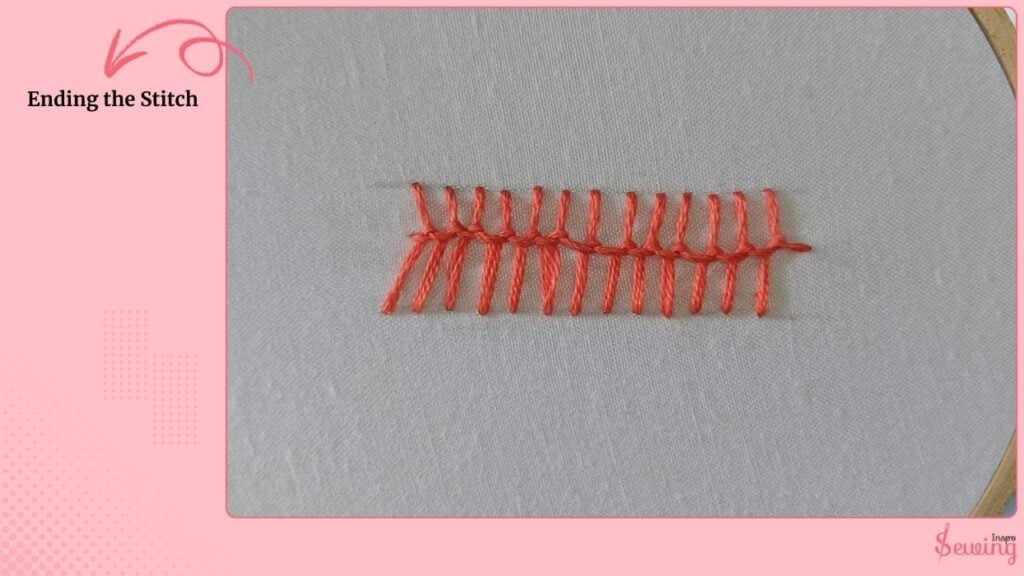
Ending the Stitch
To finish, make your last stitch slightly beyond the previous one, mirroring the first stitch. This keeps the design symmetrical and tidy, so your woven ladder looks seamless from start to finish.
This style creates Loop stitch embroidery designs. But with a little practice. It creates a clean, textured braid right in the center of your design. It’s perfect for decorative borders, abstract patterns, or even filling long shapes with a unique, 3D look.
FAQ
What projects use loop stitch?
Loop stitch is incredibly versatile. It’s commonly used in: Embroidery designs like flowers, clouds, grass, and tree tops—decorative edges or borders on handkerchiefs, clothing, or bags.
Which type of stitch has two loops?
The running loop stitch is designed so that each base running stitch holds two loops. This creates a laced effect, perfect for edges or filling larger spaces with even, decorative loops.
What is an example of a looped stitch?
A classic example of a looped stitch is the lazy daisy stitch, which forms a single loop for flower petals. Other examples include chain stitch, feather stitch, fly stitch, and the basic loop stitch itself.
Finally
Honestly, loop stitch has quickly become one of my favorite stitches. I love how it can turn a simple flower, cloud, or edge into something with real texture and personality. Once you get the hang of controlling your loops and tension.
It’s so satisfying to see your design come alive. Trust me, once you start adding loop stitch to your projects, you’ll wonder how you ever stitched without it!


Leave a Reply