
After learning the blanket stitch step from my grandma, my interest grew. ‘what is a blanket stitch? How and when do I use this? Questions like this pop up in my mind. So, I thought, why not research about it? Without brothering grandma, I started my research and found out.
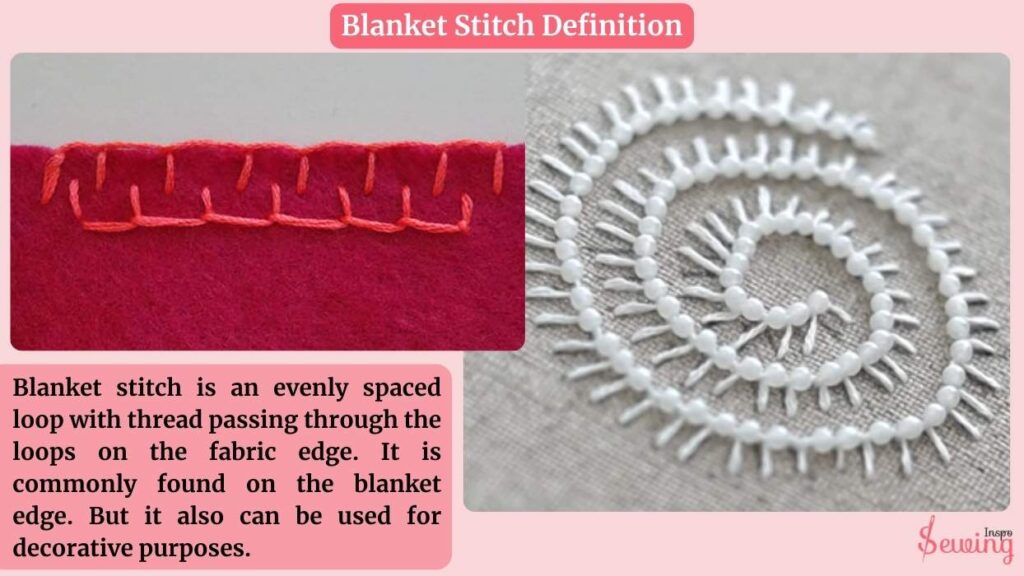
Blanket Stitch Definition
Blanket stitch is an evenly spaced loop with thread passing through the loops on the fabric edge. It is commonly found on the blanket edge. But it also can be used for decorative purposes.

But what does it look like? And where should a blanket stitch used? I have answered all your questions. Let’s find out the blanket stitch meaning.
At a glance:
- Blanket stitch is an evenly speed loop stitch along the edge of the fabric.
- Blanket stitch is used in blankets, quilts, or felt.
- Blanket stitch looks like a neat, evenly loop on the fabric.

Table of Contents
What Is A Blanket Stitch?
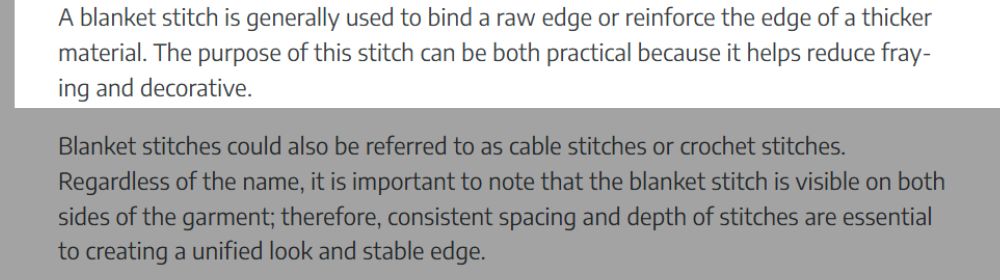
A blanket stitch is an evenly spaced loop along the edge of the fabric. It secures the raw edge. It’s perfect for stopping fabric from fraying and adding a nice decorative touch. You’ll often see it on blankets (hence the name), quilts, or even felt projects.
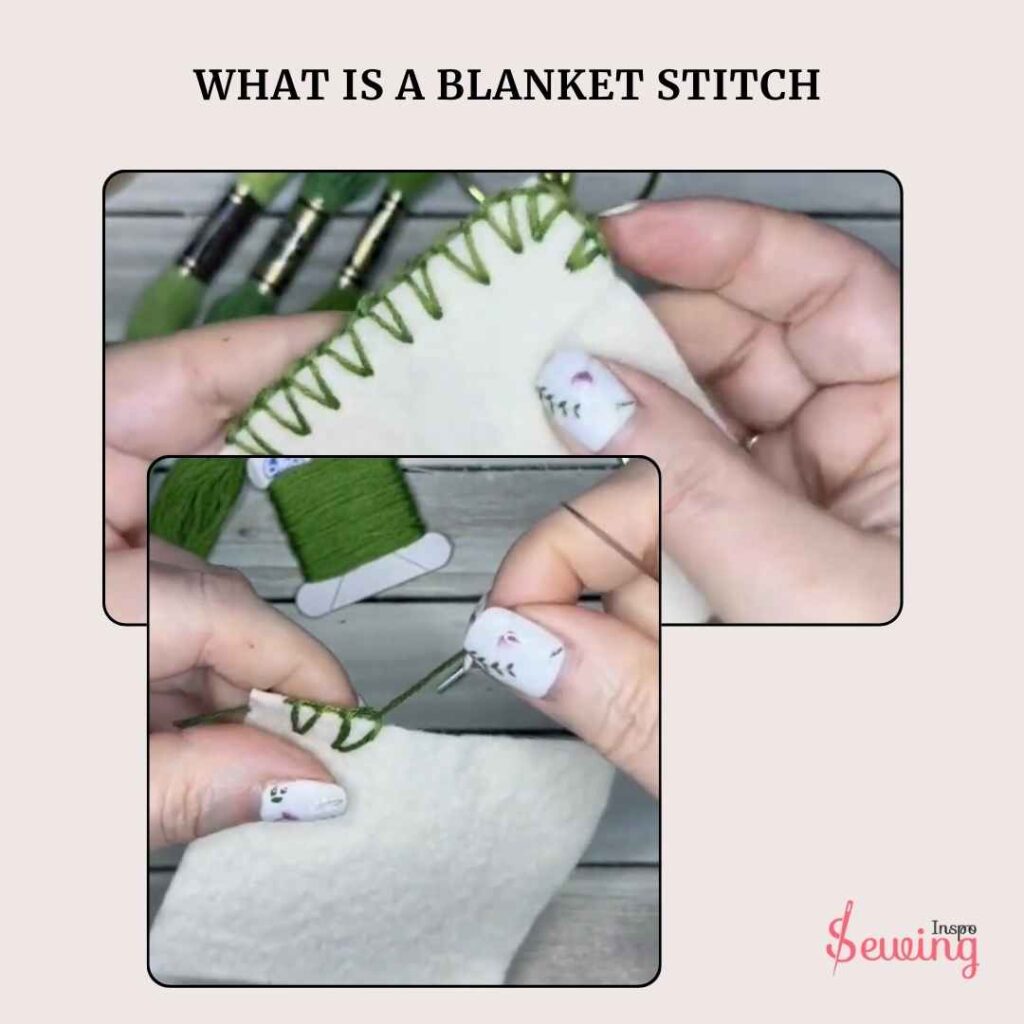
The blanket stitch has been around for a long time and can be done by hand or machine. Hand sew blanket stitch, often called a crochet stitch. When done by machine, the stitch is sometimes called a whip stitch or the Merrow Crochet Stitch.
This name comes from the first sewing machine created to sew this stitch. The Merrow Machine Company patented it in 1877.
Over the years, from 1877 to 1925, the machine and the stitch evolved, allowing manufacturers to make more goods using this versatile stitch. However, as time passed, the blanket stitch by hand gained popularity among stitchers.
Cause it is easy to make a blanket with. That’s why they invented different styles of it, too. Such as:
- Rolled
- Narrow
- Traditional
- Whipstitch

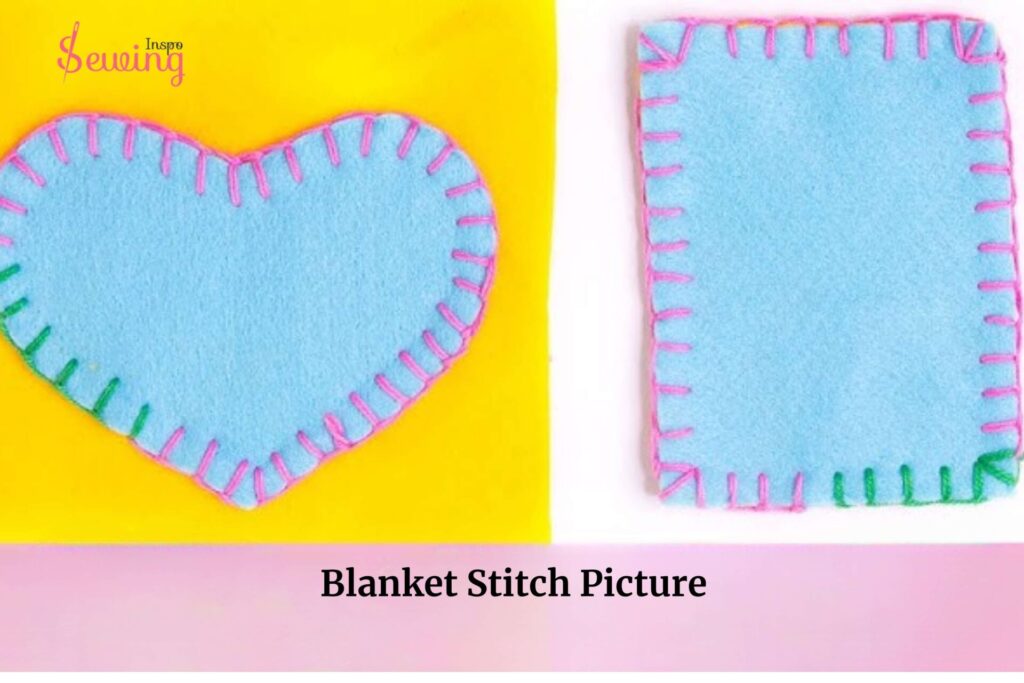
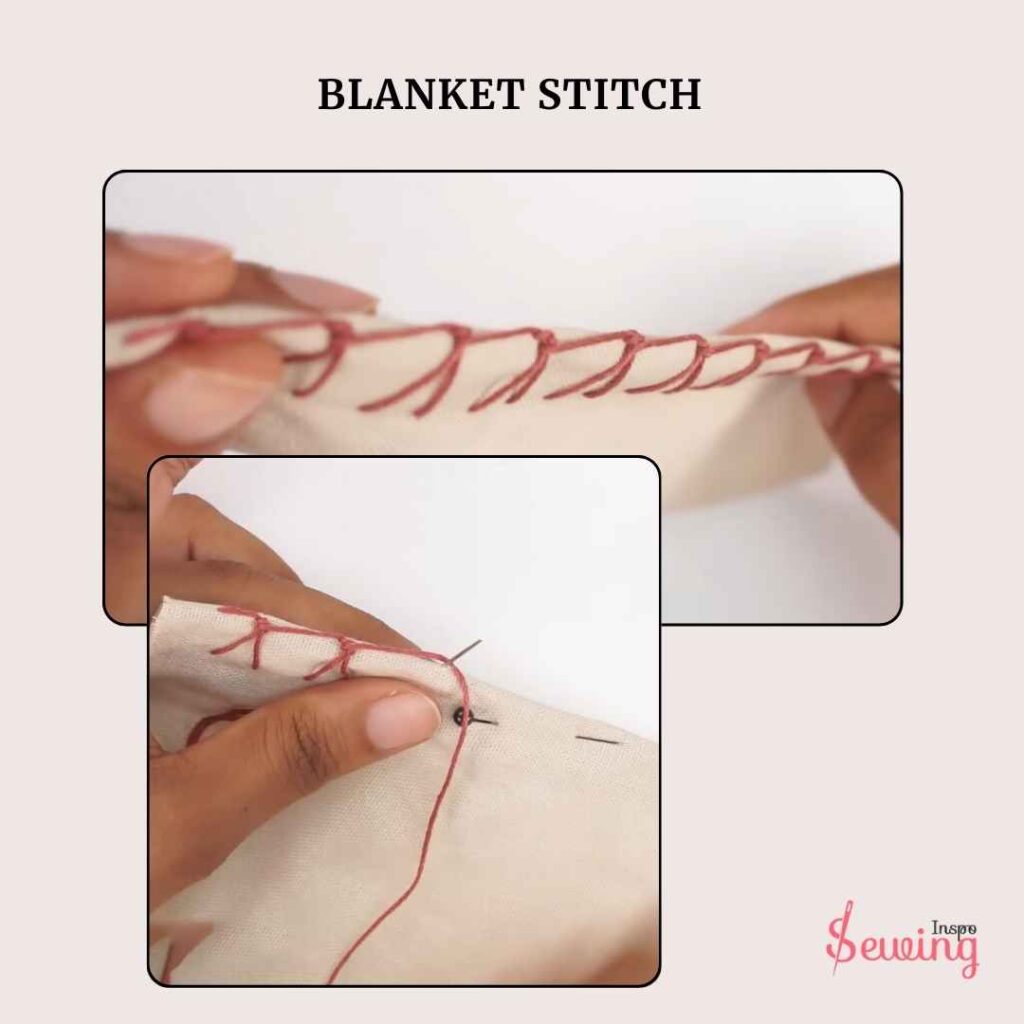
Blanket Stitch Picture
If you are confused, then here are some pictures of the blanket stitch from the sewinginspo album.
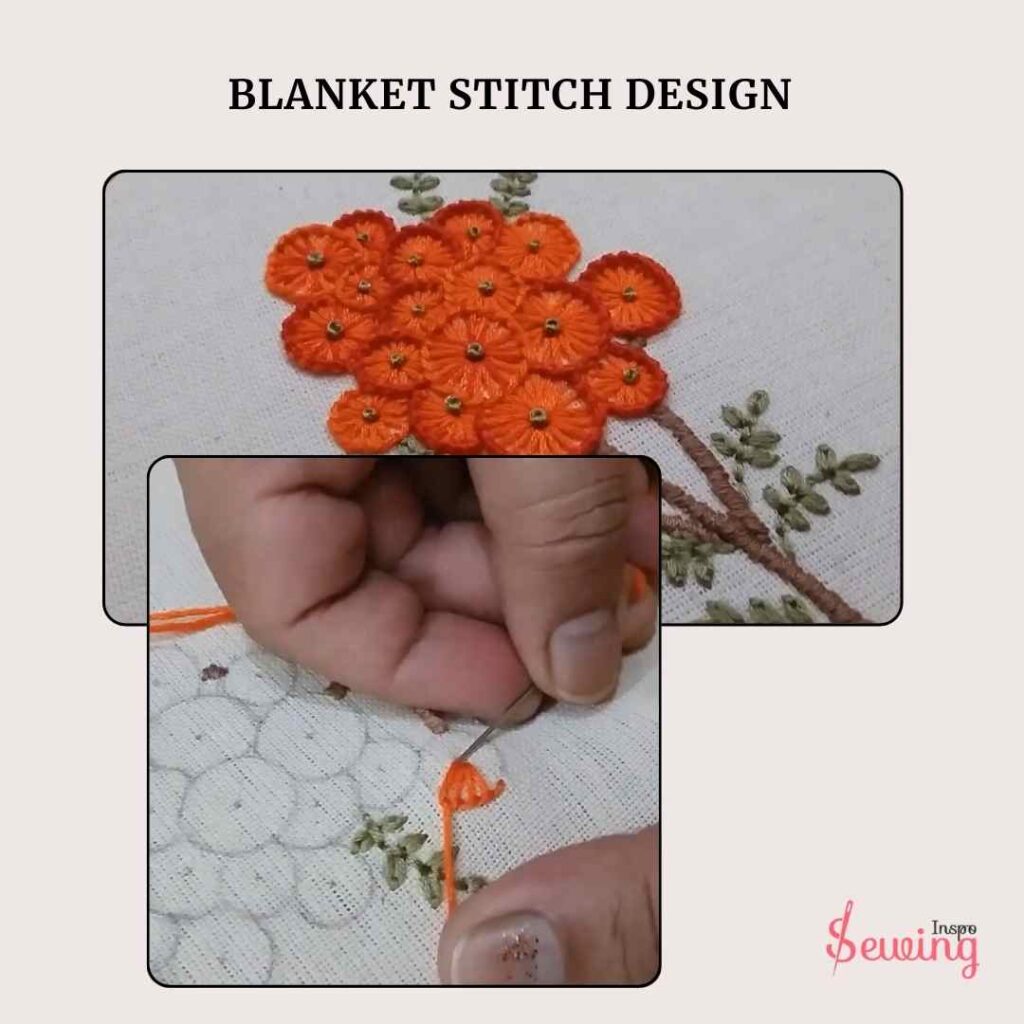
Blanket Stitch Design
This is a fun stitch, for sure. So, I did a few designs with it. Here, have a look. I hope this will work as your sewing inspiration.
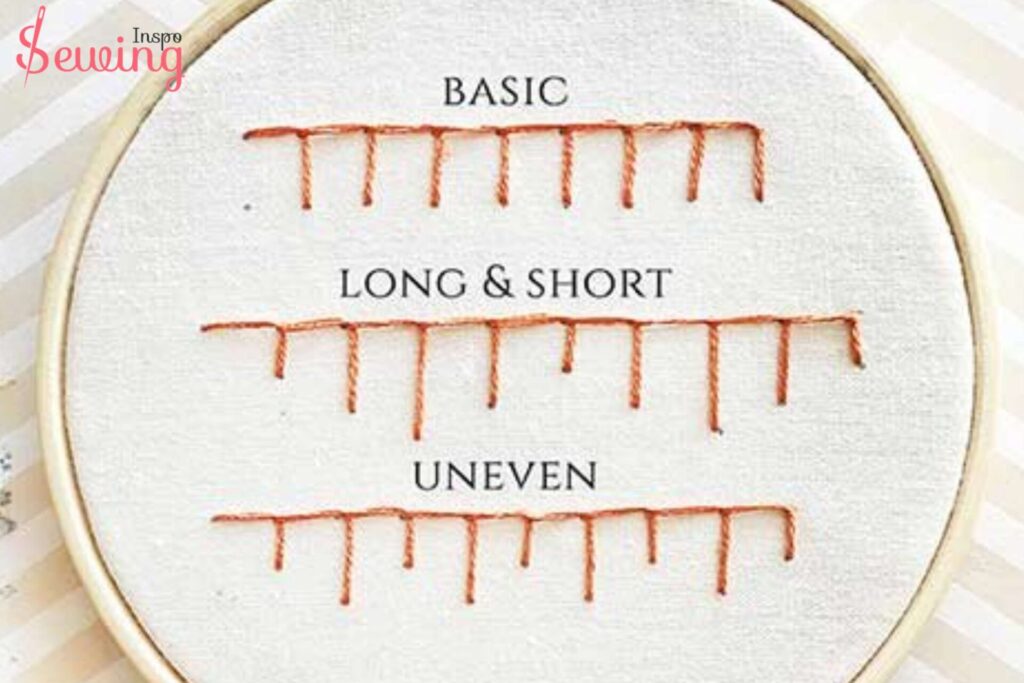
What Does A Blanket Stitch Look Like?
A blanket stitch looks like a series of neat, evenly spaced loops along the edge of a fabric. The stitches run perpendicular to the fabric edge, creating little “legs” that extend into the fabric while the loops form a continuous border along the edge.
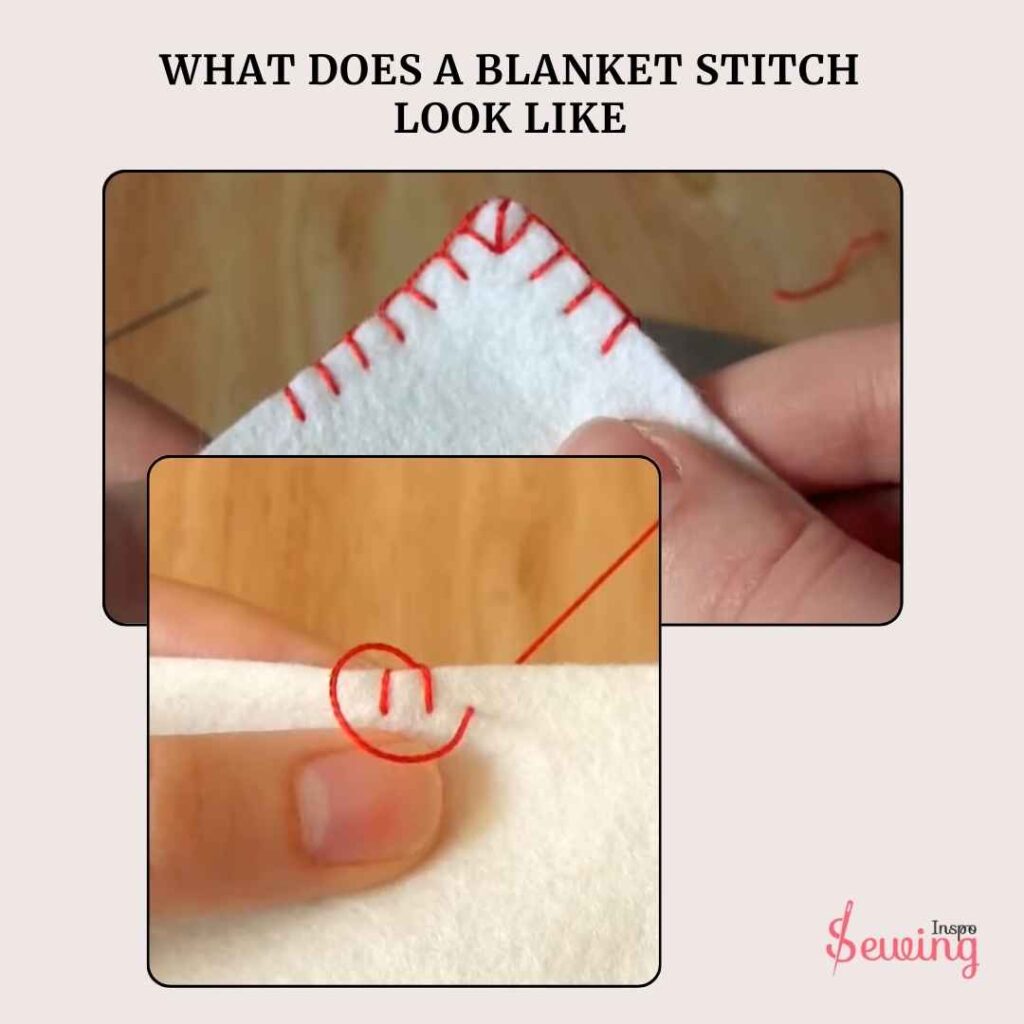
Depending on the design, the stitches can be as close or as wide apart as you like when done by hand. However, a blanket stitch usually is 5 millimetres long.
If you’re visualizing blanket stitch, think of a stitched border that’s both tidy and charming with a homemade, handcrafted vibe. But the look changes depending on types of blanket stitch.
But people often mix up blanket stitches with an overlock stitch. Cause both are done alone on the fabric edge, and both kinda overlap the fabric. But there are differences between blanket stitch vs overlock stitch.
Mainly, they differ,
The overlock stitch by hand involves wrapping the thread around the fabric edge to secure it and prevent fraying, while the blanket stitch creates evenly spaced loops along the edge for a decorative, neat finish.
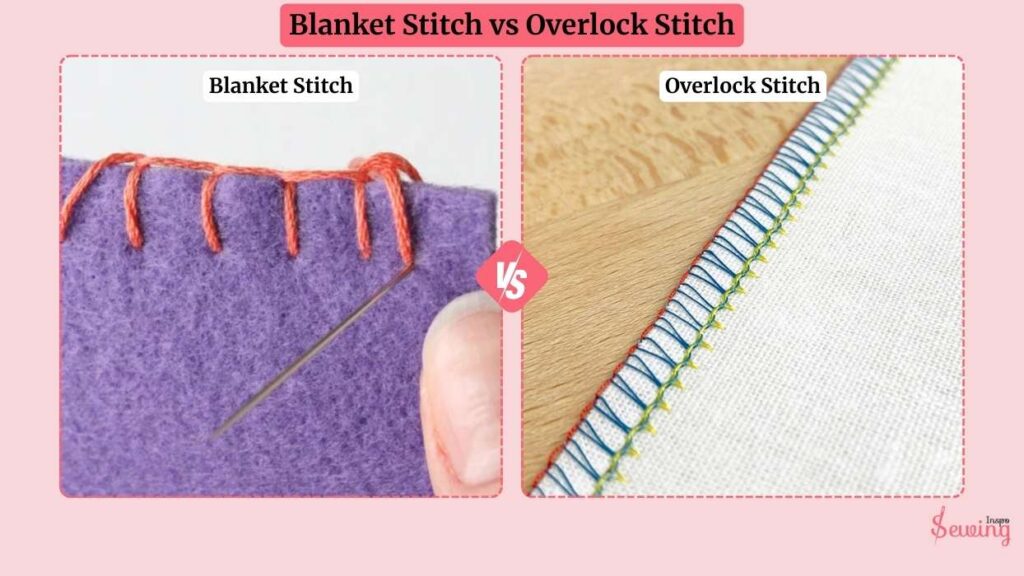
Overlock Stitch Vs Blanket Stitch
Some people confuse overlock and blanket stitch. But that’s not the case. They are both different. Here is how it differs,
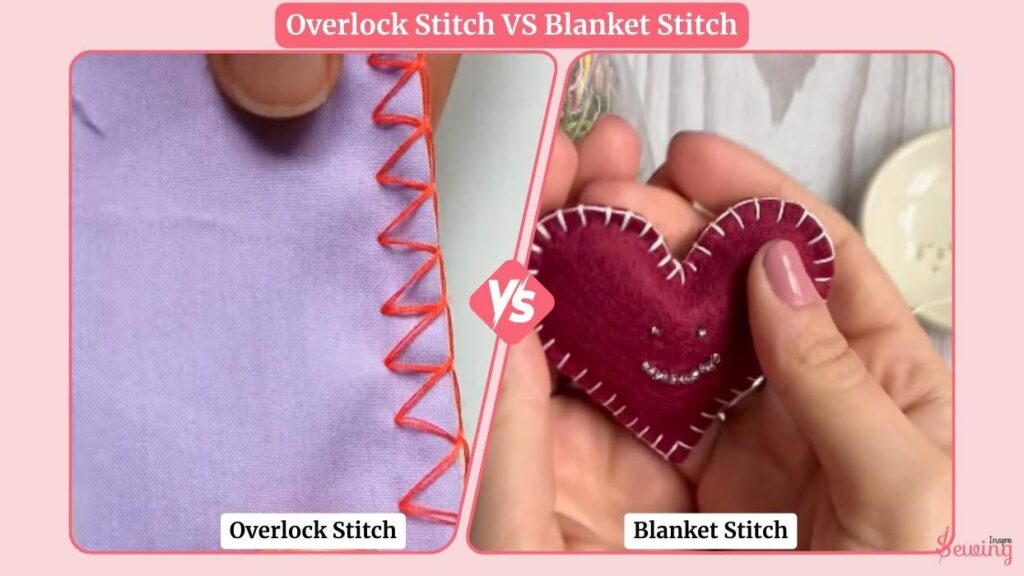
An overlock stitch finishes and trims fabric edges with multiple threads, while a blanket stitch decoratively secures fabric edges by hand or machine without trimming.
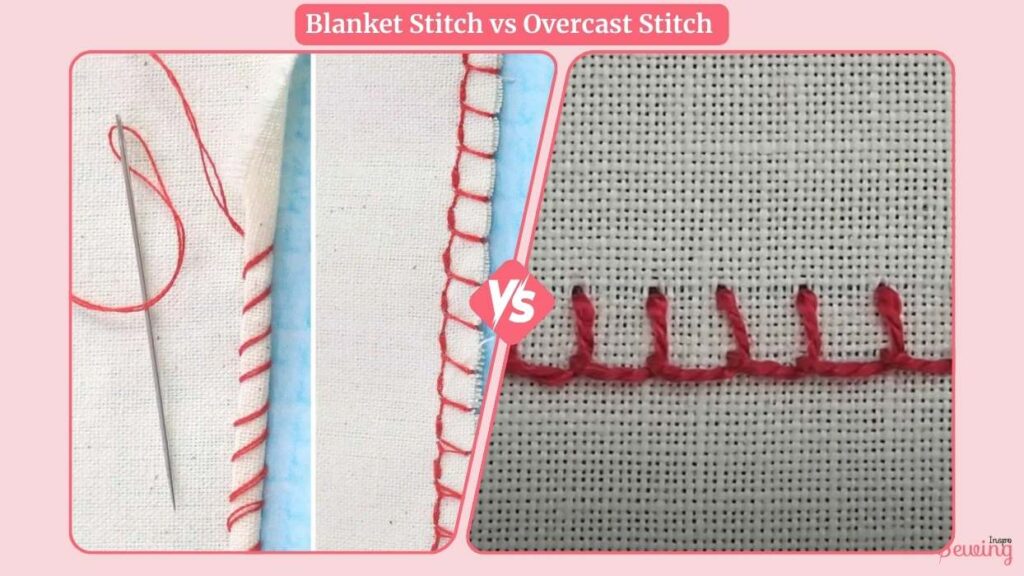
Blanket Stitch Vs Overcast Stitch
Some newbies also confuse these two stitches together because they kind of look the same on the edge of a blanket or fabric, but that’s not the case.
So, the main difference between blanket stitch vs overcast stitch is the technique-
The needle loop goes over the fabric in the blanket stitch, and the overcast stitch needle slips through the fabric.
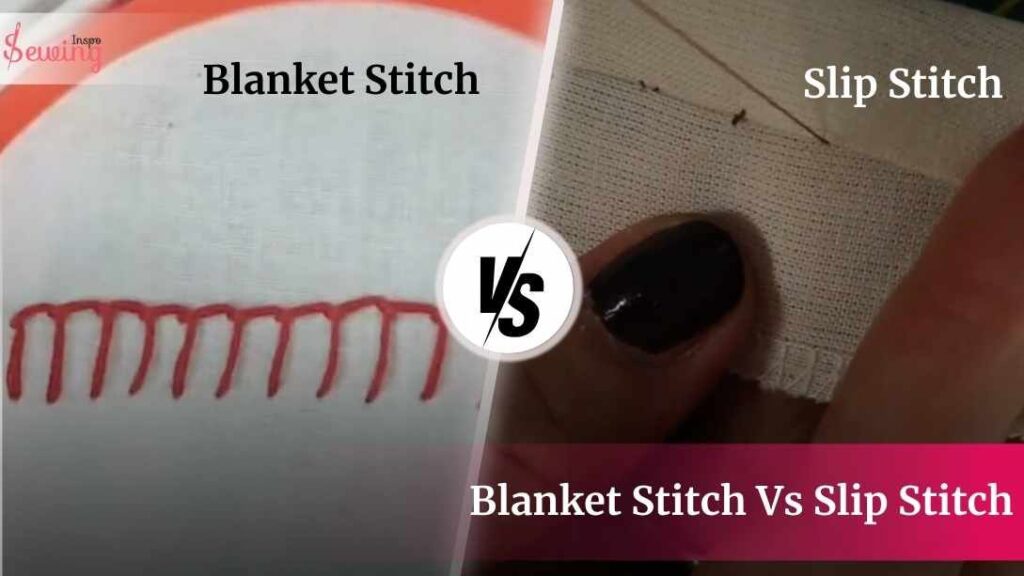
Blanket Stitch Vs Slip Stitch
Blanket Stitch is a decorative, visible stitch often used to finish edges on felt or appliqué projects.
It creates a looped border that adds charm and structure. Slip Stitch, on the other hand, is meant to be invisible.
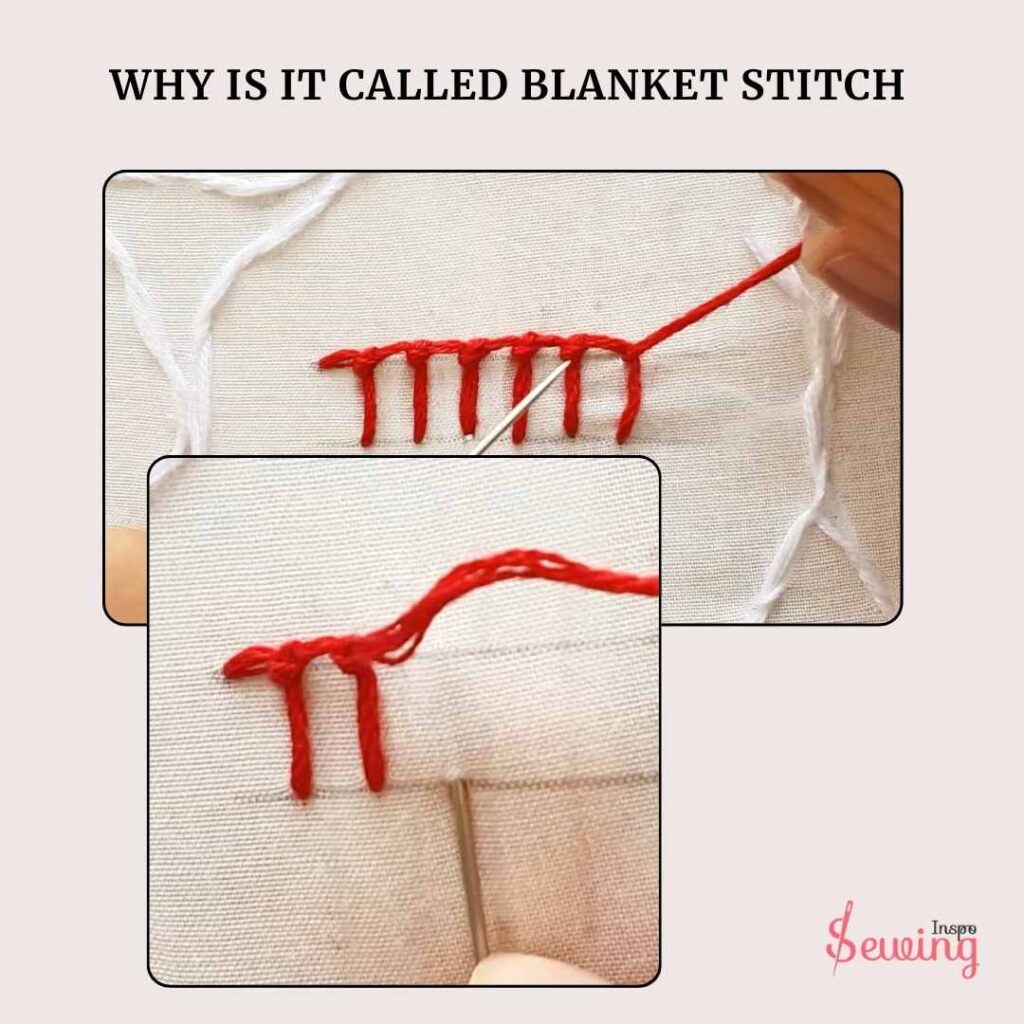
Why Is It Called Blanket Stitch?
The blanket stitch is called that because it was originally used to finish the edges of blankets. In the past, blankets were often made from wool or felt that tended to fray at the edges. That’s when blanket stitch comes to the rescue.
Also,
The name reflects its widespread use in traditional hand-sewing. It is mainly for large items like blankets. Over time, The stitch expanded beyond blankets and became popular for quilting, leather work, appliqué, and basket weaving. This is the most common blanket stitch uses.
However, since blankets were one of its first and most common uses, the name “blanket stitch” has stuck through the years.
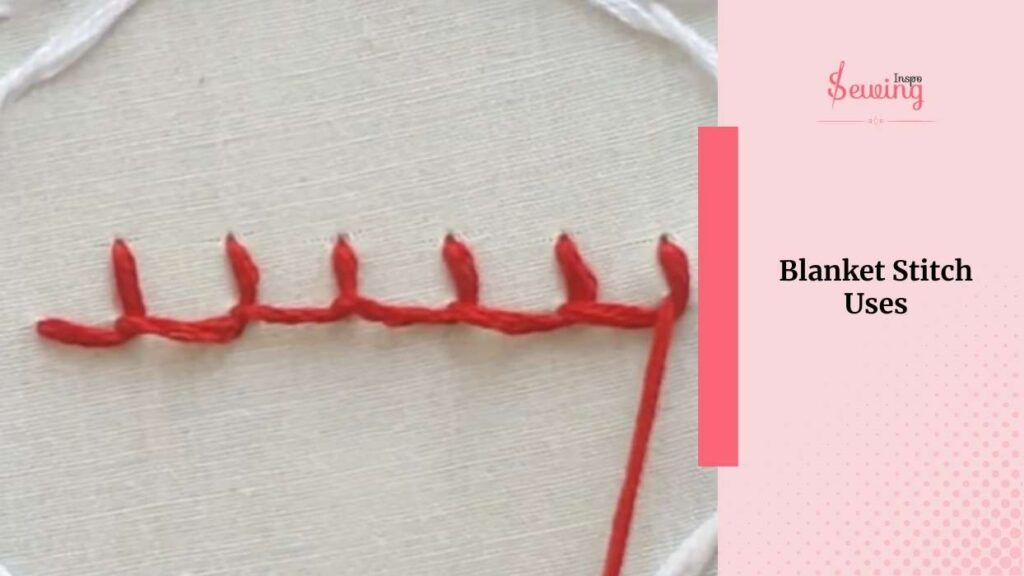
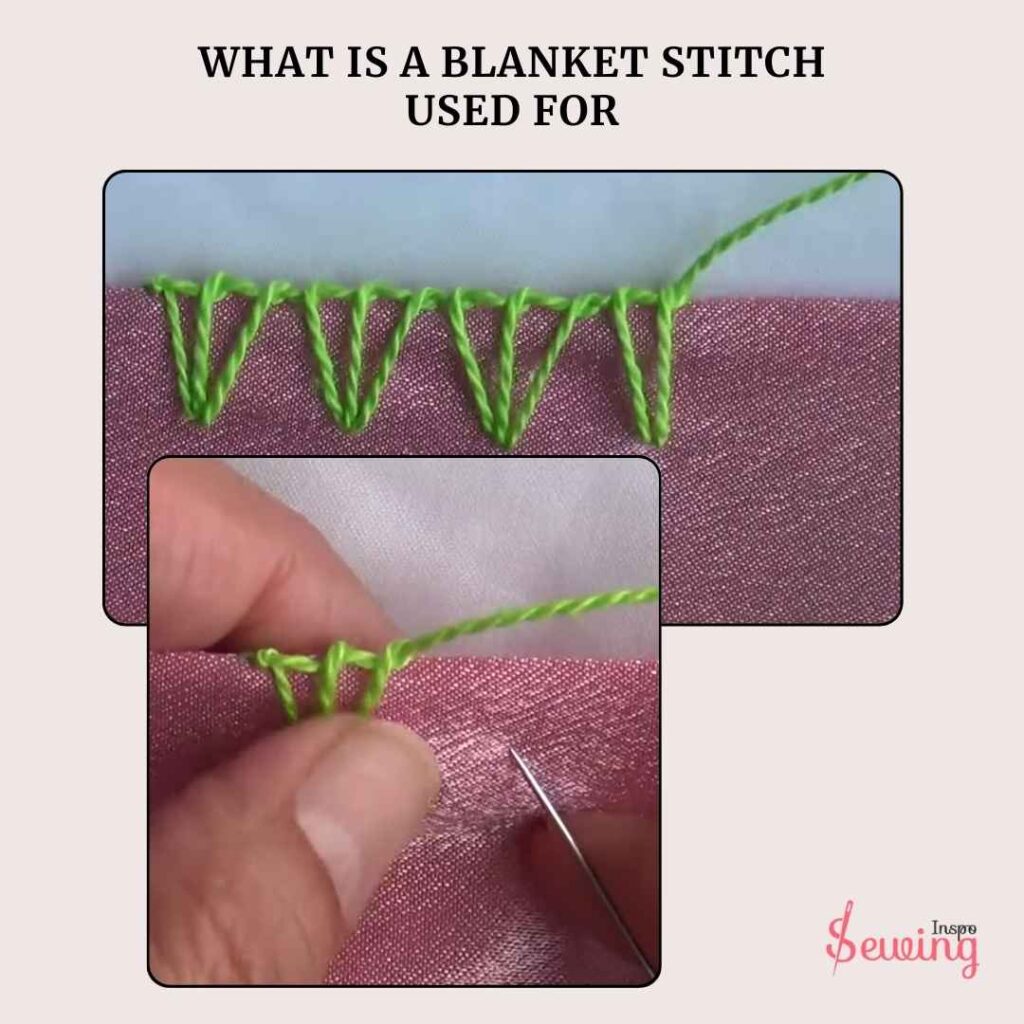
What Is A Blanket Stitch Used For?
The blanket stitch is super versatile and has a mix of practical and decorative uses. Blanket stitch is normally used to finish raw fabric edges.
Especially on things like blankets, quilts, or felt, because it stops fraying while adding a neat, handmade look.
You’ll also see it used to join 2 fabric pieces together. You can use a blanket stitch to craft toys or DIY projects. So yeah, blanket stitch embroidery is an easy way to play with this stitch.
Not just that,
Beyond fabric, it’s a go-to for sewing leather, a technique rooted in Indigenous American traditions, and even decorating basket rims. It can even get your back if you want to do some embroidery.
You can even use blanket stitch to add applique. Here is how to blanket stitch applique,
- Carefully place the appliqué piece on your base fabric, keeping your design layout in mind.
- Pin it in place to prevent shifting.
- Iron it at 350°F for 20 seconds or 375°F for 15 seconds to stick it securely.
- Push the needle up through the base fabric just below the appliqué’s edge and pull until the knot stops it.
- Bring the needle up again through the edge of the appliqué fabric, creating a small loop of thread above it.
- Insert the needle back down into the base fabric, a tiny bit below where you brought it up.
- Pull the thread to anchor the loop flat against the appliqué. Keep the tension gentle—not too tight, not too loose.
- Continue the process:
- Keep your stitches evenly spaced—about ⅙ inch from the edge for a clean look.
- If loops are loose, gently pull the thread tighter.
- If loops are too tight, give a little slack.
- Stay consistent in stitch size and spacing for a neat finish.
A fun fact is that blanket stitch isn’t just in the sewing world. It is even used in knitting and crochet. How? Let me tell you.
Another Use Is Blanket Stitch Filling
The most important use of the blanket stitch is that you can fill any pattern with the Scallops version of the blanket stitch. Here is how it can be done,
Draw your shape (like a half-moon) on the fabric.
- Outline the shape using Running Stitches, spacing them about ⅛ to ¼ inch apart.
- Fill the inside area with more Running Stitches to build a base.
- Start Blanket Stitching by pushing the needle from the outline to the back.
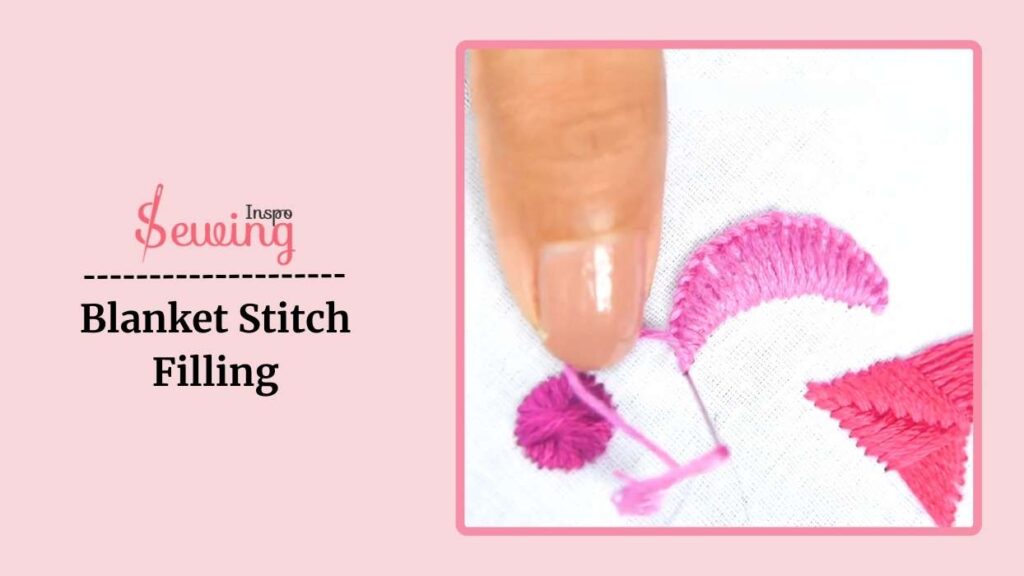
- Bring the needle under a running stitch, wrap the thread around the needle, and pull through to lock it.
- Repeat the process, filling the entire shape with scalloped blanket stitches.
Enjoy the beautiful, textured effect of your blanket stitch filling!
Blanket Stitch Uses Pdf
It’s normal to feel lost when you get sit down to do stitch. You don’t know what to do where to do. That’s where the pdf will help you out.
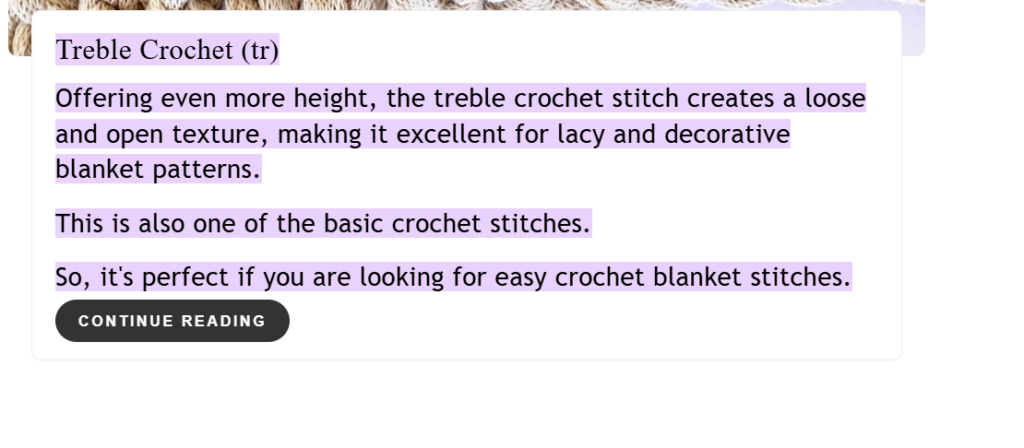
What Is A Blanket Stitch In Crochet?
The treble crochet stitch wraps the yarn around the hook twice before pulling it through the stitches, creating a longer stitch than single or double crochet. This results in a taller, more spaced-out stitch with a loose, textured look.
The treble crochet stitch adds extra height to your project. It creates a loose and airy texture.
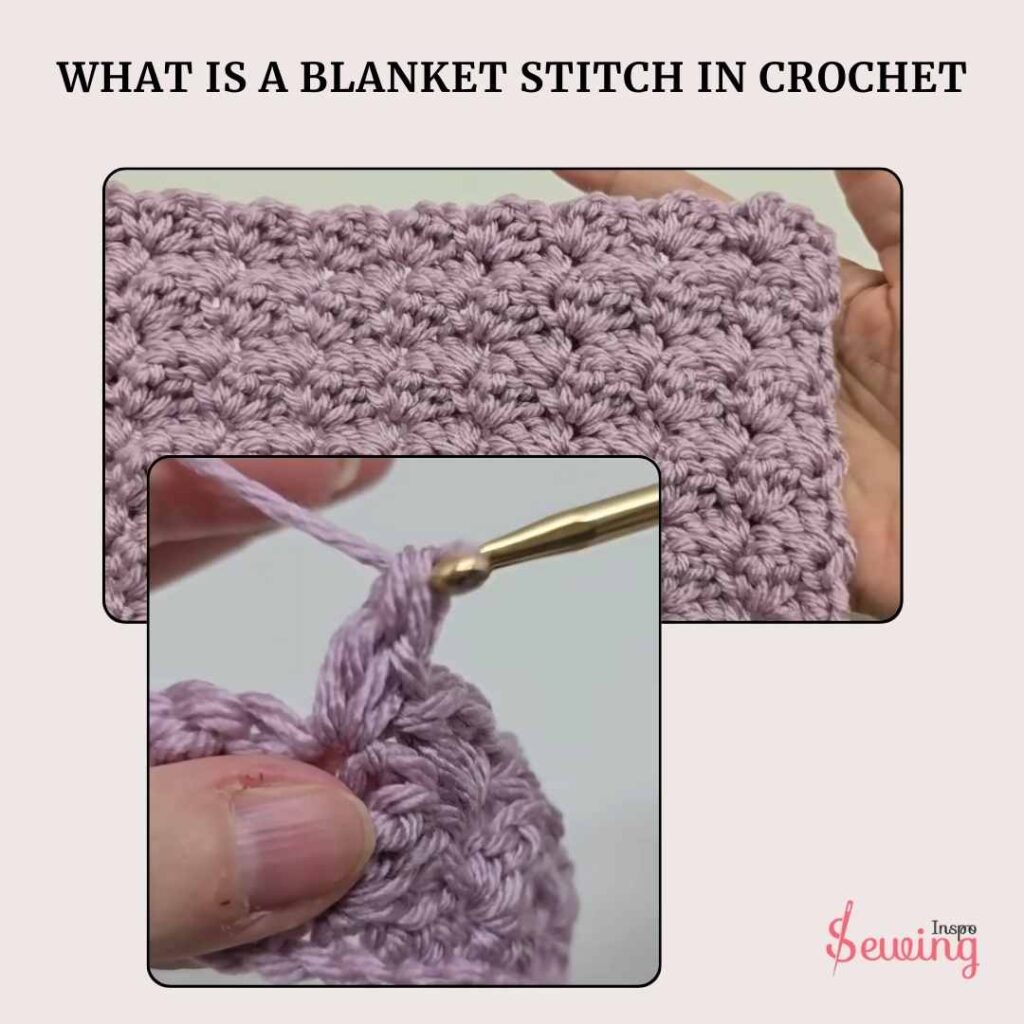
It’s ideal for making lacy, decorative patterns, especially for blankets. As one of the basic crochet stitches, it’s a great choice if you’re looking for easy yet beautiful stitches for your crochet blankets.
What Is A Blanket Stitch In Knitting?
In knitting, the blanket stitch creates a neat, looped edge along the border of your project. The look is similar to the hand-sewn blanket stitch or crochet blanket stitch, with evenly spaced loops forming a decorative border.

The loops typically sit just at the edge of the fabric, creating a clean, finished look that helps prevent the edge from curling or fraying. It’s a simple yet effective way to add texture and structure to your knitted piece, especially for blankets or scarves.
Does The Blanket Stitch Use A Lot Of Yarn?
Yes, blanket stitch does use more yarn or thread compared to some other basic stitches, especially if you’re working on long edges or using a dense stitch spacing. Since it loops around the fabric edge, it requires extra length to create those secure and decorative borders.
However, the amount of yarn used depends on factors like stitch size, spacing, and thickness of the thread.

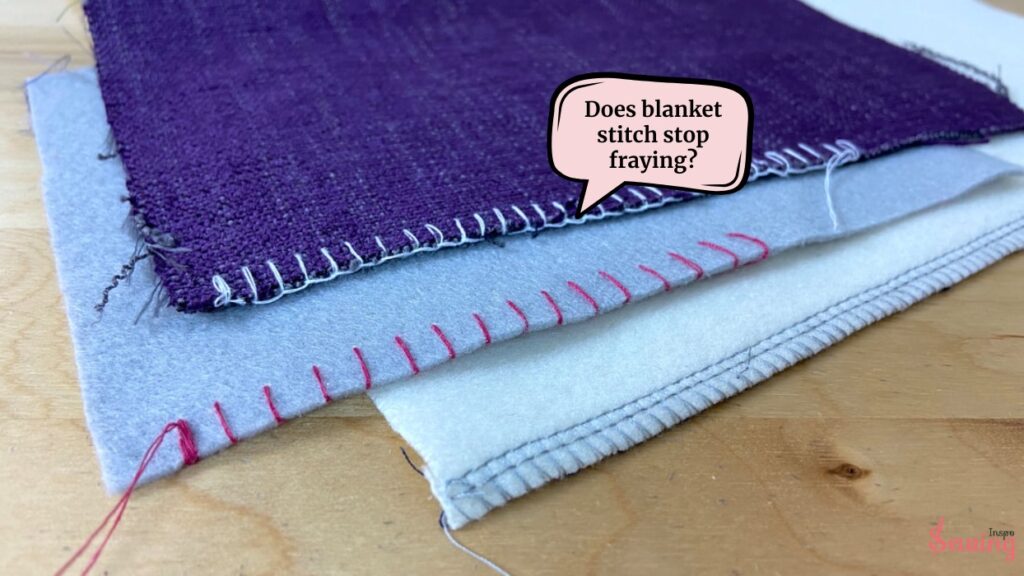
Does Blanket Stitch Stop Fraying?
Yes, the blanket stitch stops fraying. Its looped design creates a reinforced edge that secures the fabric. It is popular for finishing raw edges on projects like blankets, appliqués, and even clothing.
What Are The Pros And Cons Of Blanket Stitch?
After doing blanket stitch for so long, I figured out blanket stitch seams easily, but it also has cons. If you want to do it perfectly, you should know and overcome the cons alone. So here it is:
| Pros | Cons |
| Prevents fraying | Time-consuming (especially on large projects) |
| Decorative and charming | Requires precision for even stitches |
| Versatile (works on various fabrics) | It may not be as strong under heavy stress |
| Easy to learn and beginner-friendly | Not ideal for stretchy fabrics |
Frequently Asked Questions (FAQ’s)
What Is A Closed Blanket Stitch?
A closed blanket stitch is a variation of the traditional blanket stitch where the loops are sewn closely together without any spaces between them. This creates a more solid, continuous line of stitches along the edge of the fabric. It’s often used for finishing the edges of blankets.
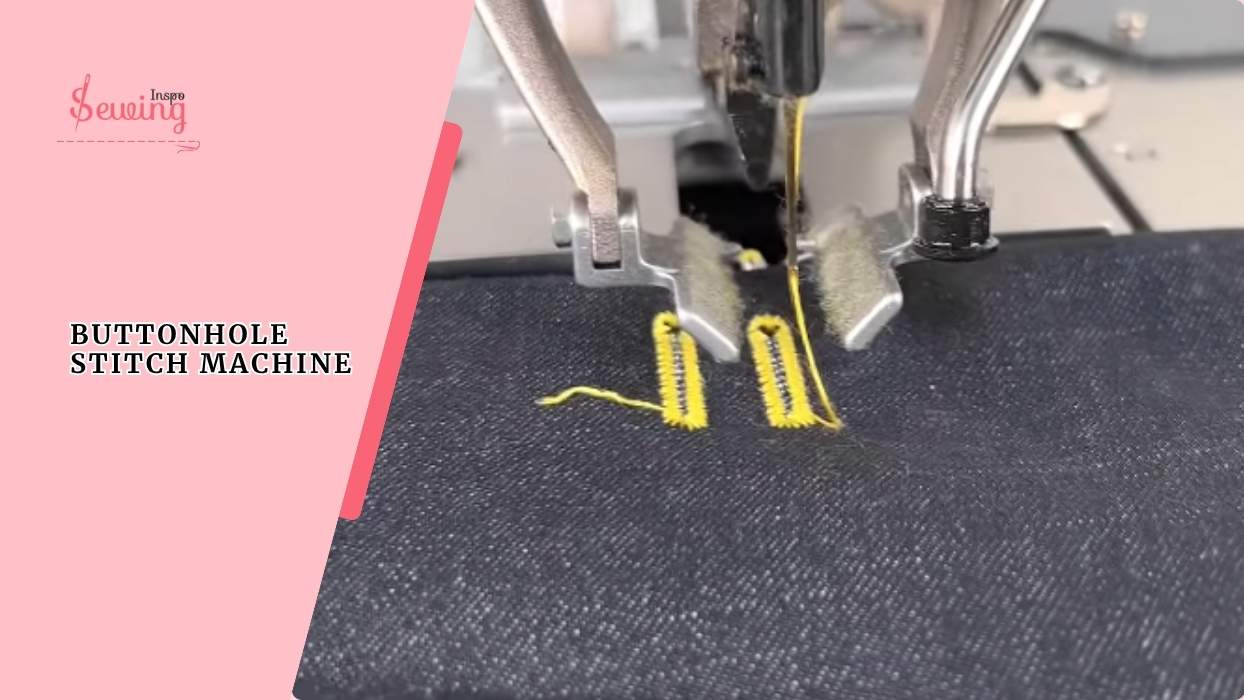
Can You Use A Sewing Machine To Do A Blanket Stitch?
Yes, you can use a sewing machine to create a blanket stitch, often called a “whip stitch” or “Merrow crochet stitch.” This is commonly used for thick fabrics or larger projects like blankets.
Is A Blanket Stitch The Same As A Whip Stitch?
While both are similar, a blanket stitch differs slightly from a whip stitch. The blanket stitch features a loop around the fabric’s edge, while a whip stitch generally does not form a loop and is more of a straight stitch used to join pieces together.
Outro
So yeah that’s what is a blanket stitch. It is the perfect stitch whether you’re finishing the edges of a cozy blanket or even incorporating it into embroidery. It’s easy to learn and adds a unique touch to your work. I hope this helps you feel more confident in using the stitch for your own creations—happy stitching!


Leave a Reply