
I still remember the first time I tried the half loop top stitch by hand. I was working on a small floral embroidery for a friend’s gift, and I wanted the outlines to feel delicate, almost like they were floating on the fabric.
At first, the tiny loops seemed tricky to control. But as I stitched, I realised how satisfying it was to see a simple line transform into a textured, decorative border.
Now you must be wondering how to do half loop top stitch? Well, it is easy. All you gotta do is,
Half Loop
To do a half loop top stitch by hand, bring the needle up through the fabric, make a small loop on the surface, and secure it with a tiny stitch at the loop’s end, repeating evenly along your line.
Once you get the rhythm, it becomes less about the technique and more about watching your fabric come alive under your needle.

Table of Contents
What Half Loop Top Stitch?
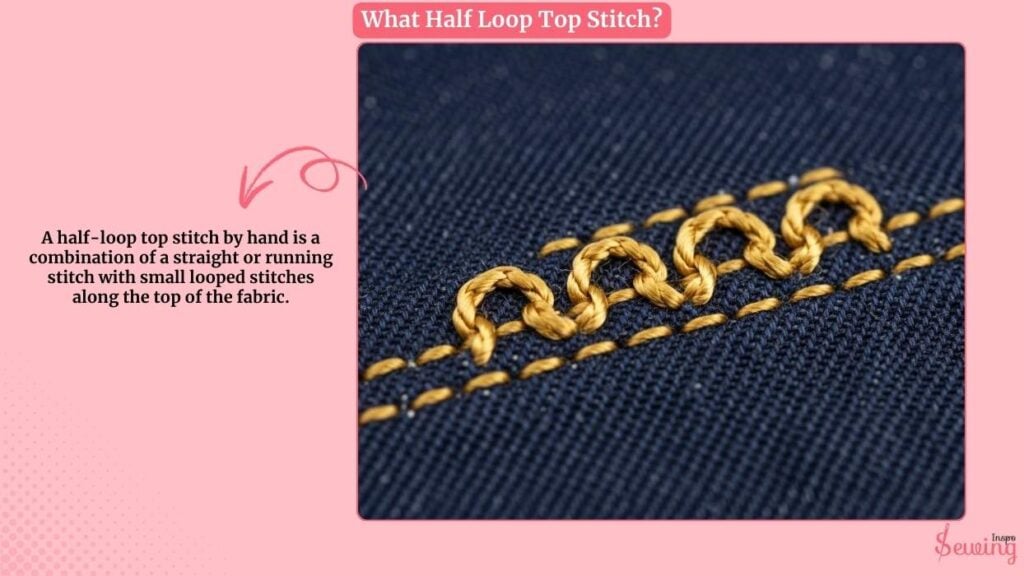
A half-loop top stitch by hand is a combination of a straight or running stitch with small looped stitches along the top of the fabric.
Unlike a full loop stitch, the loops only extend partially from the fabric surface. It gives a delicate, textured line that’s ideal for embellishment.
It’s often used for:
- Adding subtle decorative borders
- Outlining designs in embroidery
- Creating texture on lightweight fabrics
Basically, it’s a way to get the visual interest of loops without them protruding too much. It makes a neat and versatile option for hand-sewn details.
How To Do Half Loop Top Stitch?
To do a loop top stitch, follow the steps below-
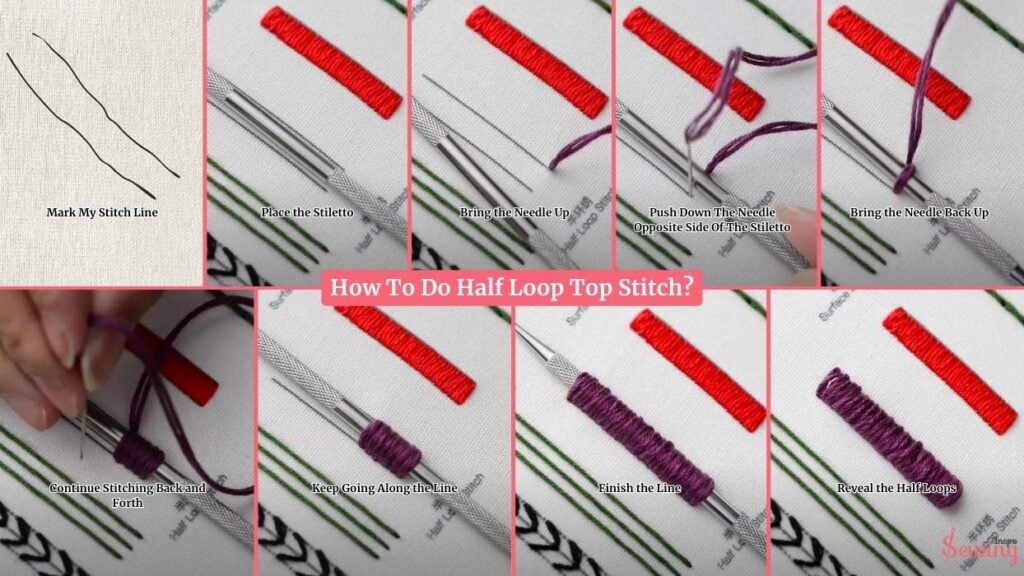
Mark My Stitch Line
I lightly draw a line on the fabric where I want my stitch to go. I use a fabric pencil because it’s easy to wash off later.
This line will be my guide so my stitches stay even and straight. This helps me do half loop top stitching on low viscosity rayon.

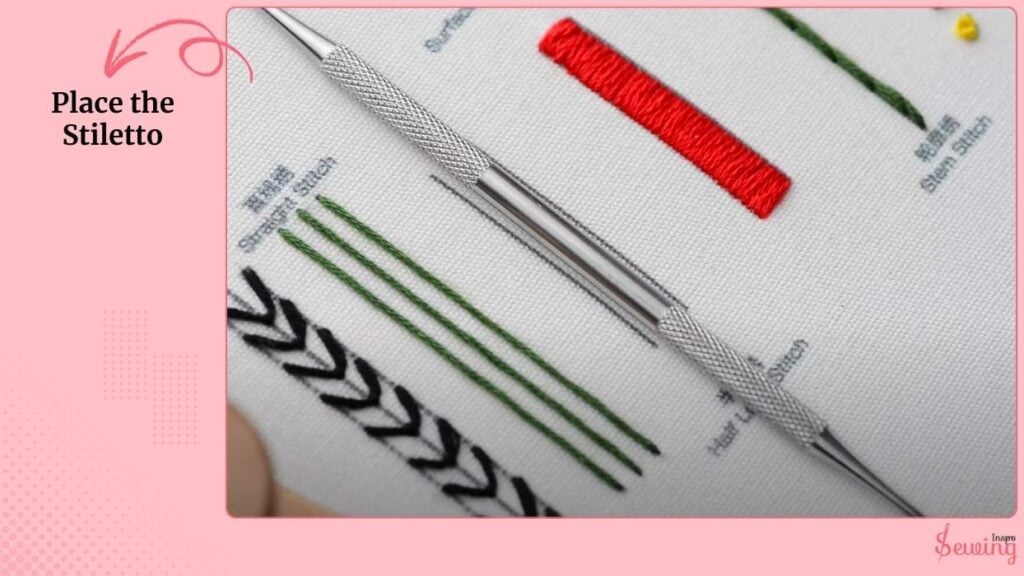
Place the Stiletto
Here’s where the stiletto comes in. I lay it neatly between the two lines. Think of it as a “fence post” that my thread will wrap around.
It gives me control, keeps my loops from collapsing, and helps every stitch look identical in size.
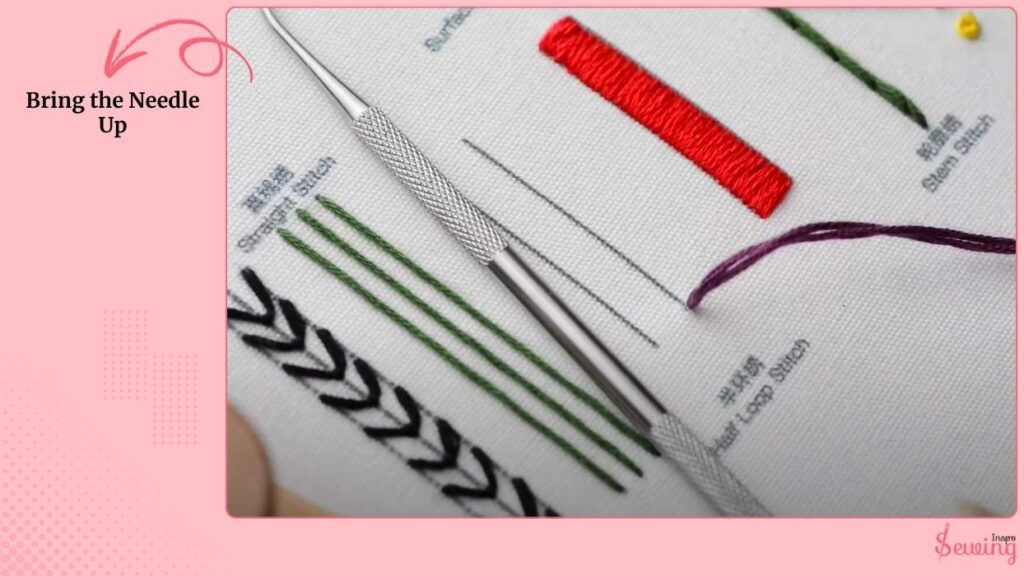
Bring the Needle Up
I push the needle up from the back of the fabric at the starting point of my first line. I pull the thread all the way through until the knot rests snugly on the underside.
I make sure the thread isn’t twisted before I move to the next step, because twists can make the loops look messy.
Push Down The Needle Opposite Side Of The Stiletto
Now, I push the needle down into the fabric on the opposite side of the stiletto. As I pull the thread over the stiletto, I let it drape gently across it.
Important: I don’t yank it tight. Instead, I leave just enough slack for the thread to sit loosely over the stiletto. This is what creates the raised loop later on.

Bring the Needle Back Up
With the first loop draped over the stiletto, I bring my needle back up through the fabric on the starting side again.
I keep the stitch close to the stiletto so there’s no gap. The needle comes up snugly against it, locking the first loop in place.

Continue Stitching Back and Forth
Now it becomes a rhythm:
- Needle down on the opposite side of the stiletto → pull across.
- Needle up on the near side of the stiletto → pull through.
- Repeat.
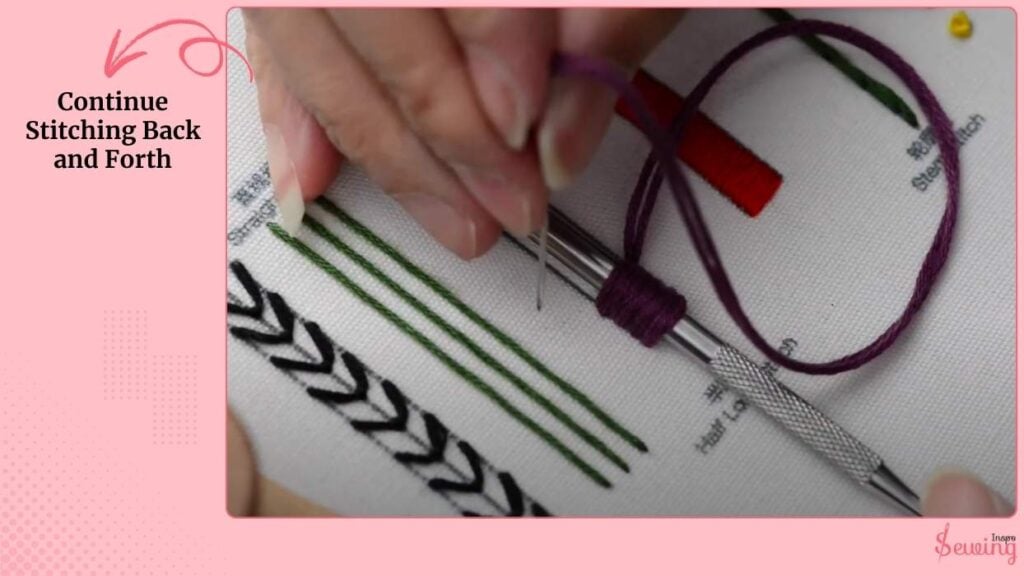
Each stitch hugs the stiletto, forming another loop. I keep them tight to each other with no gaps. Almost like a chain of loops climbing along the tool.
I check my tension often. If I pull too hard, the loops flatten. If I’m too loose, the loops sag unevenly. I find that sweet spot where the loops sit neatly but still have room to pop once the stiletto comes out.
Keep Going Along the Line
I continue this weaving motion, side to side, following my guidelines. I make sure:
- Each loop sits evenly on the stiletto.
- My stitches stay aligned with the drawn lines.
- My thread doesn’t tangle behind the fabric (I check every few stitches).

Sometimes I pause, smooth the loops gently with my finger, and then keep going.
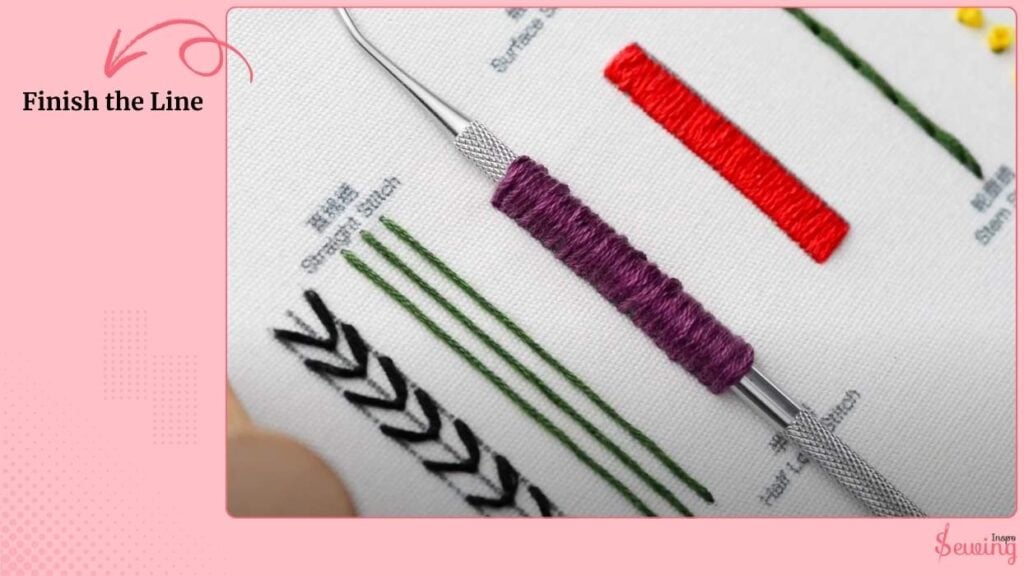
Finish the Line
When I’ve stitched to the end of my marked line, I secure the last stitch by making a tiny backstitch on the back side of the fabric.
This locks the thread so the loops won’t unravel.
Reveal the Half Loops
I carefully slide the stiletto out from under the loops. Instantly, a row of raised half loops appears across the fabric. They sit evenly spaced, neat, and decorative like a textured ribbon stitched right into the fabric.
I smooth them lightly with my finger, adjust any uneven ones, and admire the finished half loop top stitch.

Frequently asked questions
Do I need a stiletto for this stitch?
A stiletto makes it easier to keep loops even, but you can substitute with a knitting needle, skewer, or even a thick embroidery needle if you don’t have one.
How do I keep the loops even?
Mark two parallel lines before stitching and keep the stiletto steady. Also, try to pull the thread with the same tension each time.
Can I use regular sewing thread?
Yes, but embroidery floss or a thicker thread shows off the loops better. Regular sewing thread works, but the loops will be finer and less visible.
Conclusion
The half-loop top stitch looks fancy but is actually pretty easy once you get into the rhythm. With a stiletto you can create neat, raised loops that add texture and charm to any project.


Leave a Reply