
Sewing in leather is the most tricky work. Cause cords of leather are a thick fabric and it’s hard to do any kind of stitching there. But still, you do backstitch leather. But it is so simple.
So, if you wanna add some unique touch then back whip stitch leather is your catch.
To do that-

whip stitch leather
The back whip stitch in leather involves stitching backward through the same hole in a looping motion to create a secure, overlapping seam. This is basically the backward technique of leather whip stitch.
Wanna learn the technique in detail to get beautiful beloved leather items? Ok, let me share the whole Back whip stitch leather easy process.
Main Facts about leather whip stitch::
- The back whip stitch is a secure and stylish way to stitch leather.
- Start stitching from the rough side of the leather.
- Secure the last stitch by tying a knot.
Table of Contents
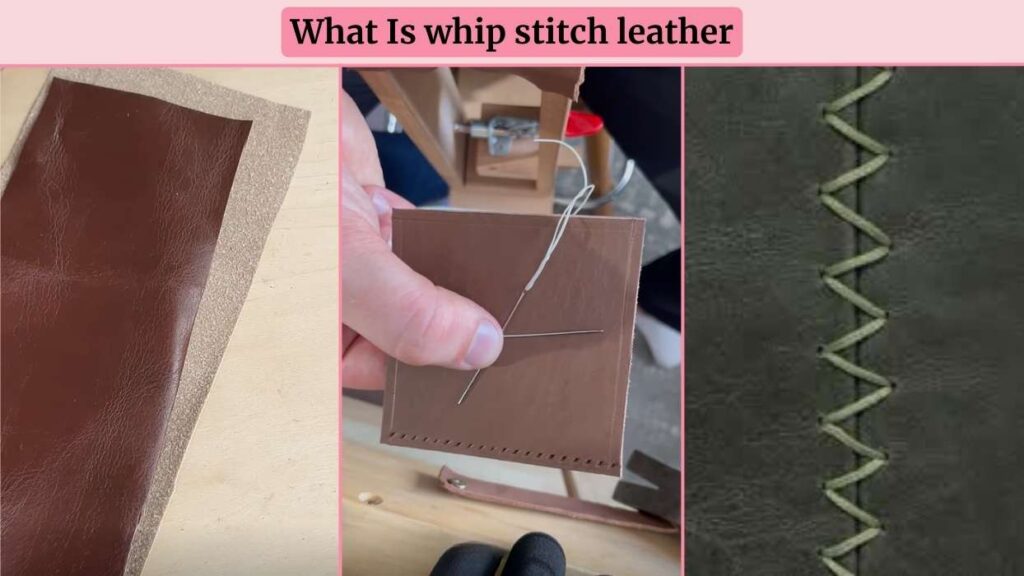
What Is Whip Stitch Leather?
A whip stitch is a straightforward, diagonal stitch technique commonly used to join two pieces of leather, creating a strong and neat seam.
This stitch is often used for leather crafting, such as wallets, belts, and bags. It provides a secure hold and a neat, decorative finish. It’s ideal for projects where you want both strength and a clean look along the seams.Just like whipstitch sewing works.
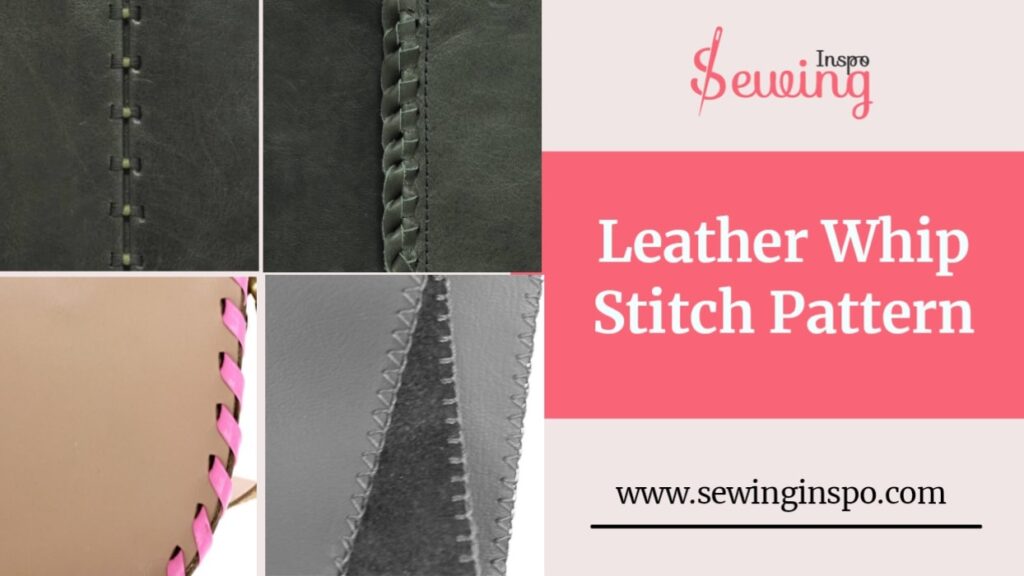
Leather Stitch Pattern
Making patterns in leather isn’t that easy. Cause the fabric is hard, you can’t do every pattern on it. But that doesn’t mean you can’t.
Here are a few patterns you can do with back whipstitch leather,

How To Do A Back Whip Stitch Leather?
To do a back whip stitch leather you need to follow 6 steps.
- Cut The Leather Lace
- Thread Lace In Needle
- Push The Needle Through First Hole
- Thread Over The Edge
- Keep Stitching With The Rhythm
- Finish Of Whip Stitch In Leather

Cut The Leather Lace
To cut leather lace, first, use a ruler and a sharp knife to mark the width of your Applications of Leather Lacing. Around 3/16 to ¼ inch works well for most projects. However, the length of the stitch can vary on projects.
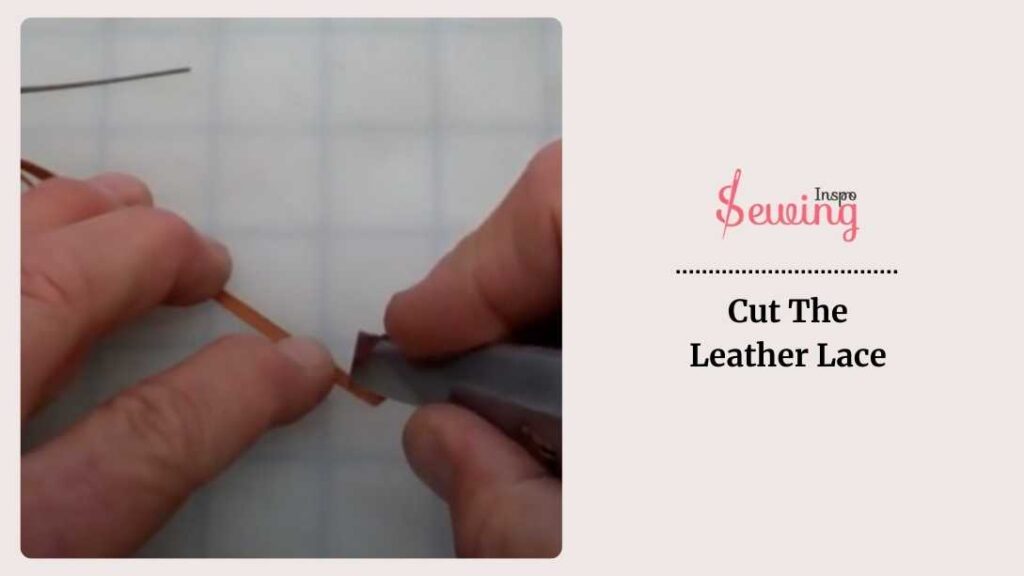
I prefer to use 3\13 inch leather lace for the back whip stitch. This size is also suitable for woven back stitch embroidery.

Then, make a small cut at the edge of the leather to begin your cut. Use a lacing cutter or a sharp blade to cut.
Make sure to maintain a consistent distance from the edge so the lace stays even. Maintaining this gap will help me make the perfect strong stitches for hand sewing.
Once you’ve cut your Laced leather belts, gently stretch them to even out any bumps. Then run it through your fingers or over a smooth surface to soften it. Near one end of the lace, make a small cut, about ¼ inch long. This thread ratio also works while doing a backstitch.
This will be your anchor point when you start lacing. If you’re going to thread the lace through a needle, taper the end into a point so it’s easier to thread. And just like that, your lace leather is ready to use.
Thread Lace In Needle
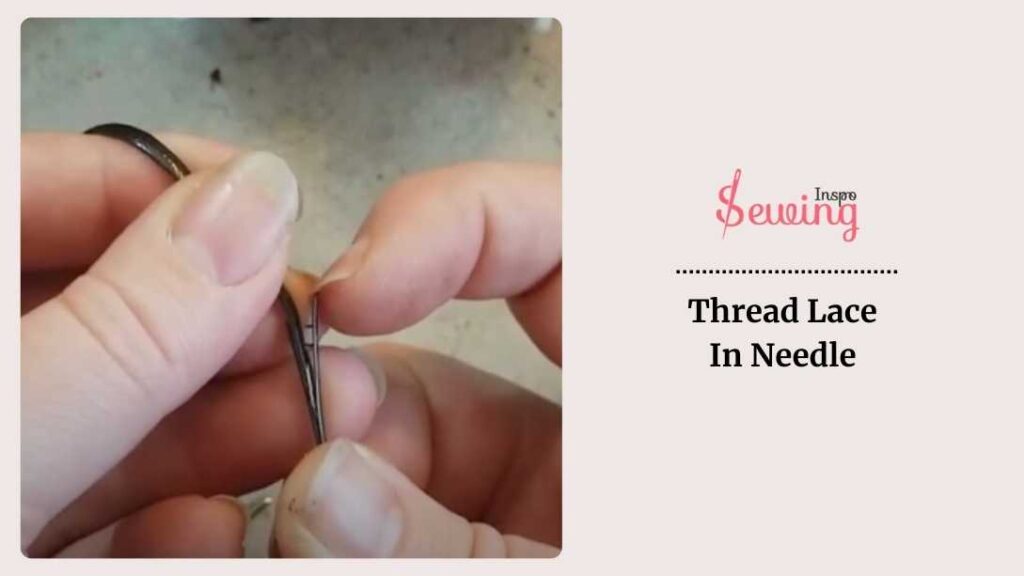
To make it easier, cut the lace into a little “V” shape. This shape is the perfect form of leather lacing. Then grab your pliers and gently lock the lace between leathers in place.

You can use this technique for whip back stitch too. Now, take the pointed end of the lace and thread it between the 2 sections of leather.
Don’t worry if it slips out a few times—it’s normal. Just be patient and keep at it. Your Leather whip stitch will come out perfectly.
As you push the lace through, you’ll notice the prongs opening up. Use your fingernail to help guide it along.
Now, make a small cut near the end of the lace. This is going to be your anchor point. If you’re using a needle, stick the longest end of the lace through the eye. It might take a little time to get the hang of it but with some practice.
Push The Needle Through First Hole
Alright, let’s get stitching! First, take a good look at your pieces of leather—you’ve got a rough side and a smooth side. Make sure the rough side is facing up.
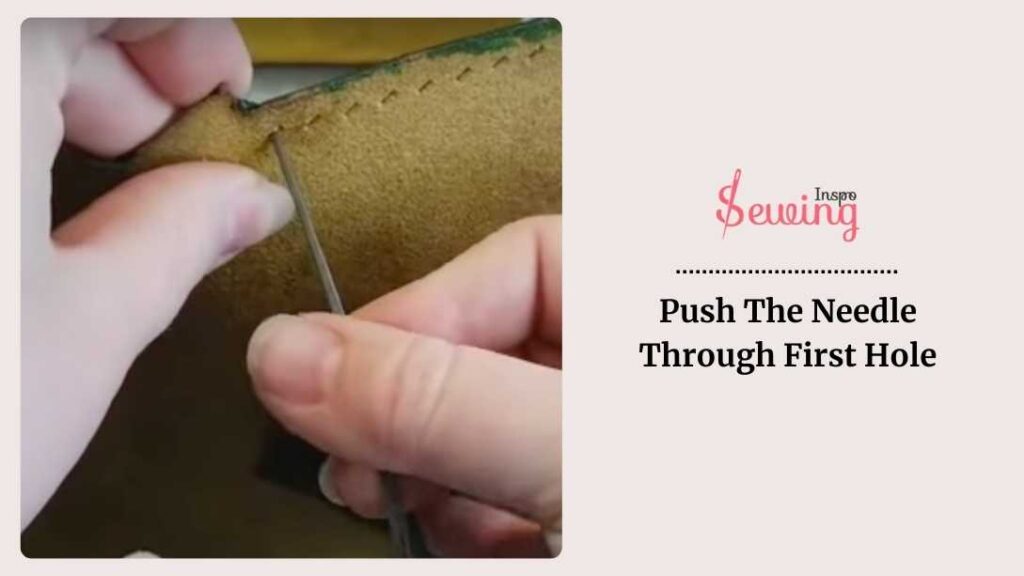
Now, grab your needle thread it through the 1st hole, and push it at 45 degree angle.
It is best to start from the rough side and go up between the 2 layers of leather. This is perfect lacing between leather. As you pull the needle through, keep the thread straight and leave a little bit at the end. This will act as your anchor. It’s like sewing something back together.
Thread Over The Edge
Next, bring the thread over the edge and into the next hole. Make sure it stays nice and straight like back tack stitch.
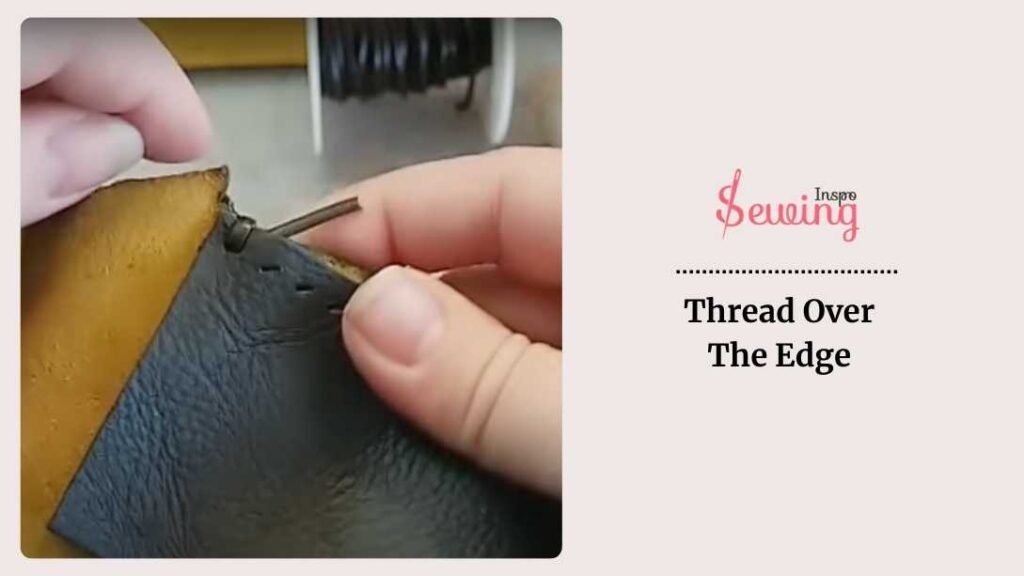
When you reach the next hole, guide the needle through the anchor slit you made earlier. You’ll see how the thread locks into place as you go.
Keep Stitching With The Rhythm
Now, just keep things consistent use your fingers to guide the thread and maintain even tension. How do maintain maintain even tension?

Well, according to quilting daily–
You need to use your thumb to control tension, remember not to lift it off the fabric. Instead, keep the thread under your thumb with gentle pressure. As you pull the thread through, it will naturally slip out from under your thumb.
It might take a bit of practice. But you’ll get the hang of it, and your stitches will look more and more uniform as you continue. Just keep moving around your project, hole by hole, wrapping the thread around the edge, and before you know it, you’ll have a beautifully whip-stitched piece.
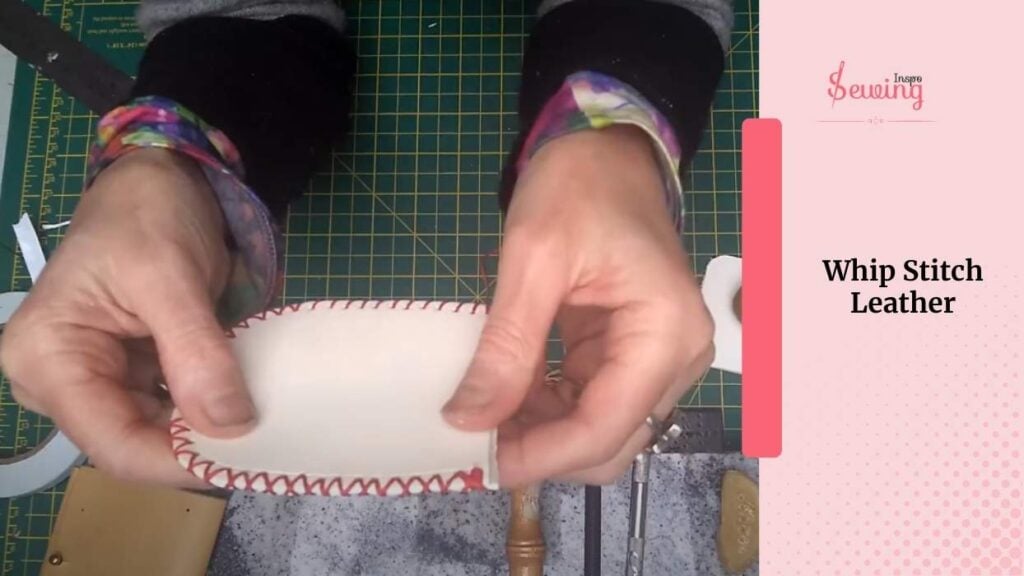
Finish Of Whip Stitch In Leather
To finish up your whip stitch, ensure your last stitch is tight and snug against the leather. Pull the leather needle through the last hole and insert it back through the same hole from the back side to create a small knot. That will secure your leather hand stitching patterns.

Next, tie a knot on the backside of the leather to secure the thread. You might want to double knot it just to be safe. Trim any excess thread, leaving a tiny tail. Use your lacing needles or a sharp tool to tuck the tail end under the stitches so it stays put.
And that’s it! That’s one of the best leather lacing techniques. If you wanna do Leather whip stitch by hand easily then this is your catch.
Watch The Tutorial
Leather lacing How to do the Whip Stitch
Back Whip Stitch Leather Pdf
I was explaining to you in depth in the above. But it will little bit easier if I can show you visually right? I know it will, so here is a step by step guide in pdf. You will learn easily with this leather hand stitching techniques pdf.
Leather Hand Stitching Techniques
Leather whipstith and back whip stitch are 2 easy ways to stitch leather together. But if you are in a hurry and need to leather stitch in the same strong way then you can apply this leather lacing techniques.

Leather Whip Stitch Pattern
The art of whip stitching! Here’s a detailed Leather Whip Stitch Pattern for you to master. Learn the craft step by step right here!
Frequently Asked Questions (FAQ’s)
What’s The Difference Between A Back Whip Stitch And A Regular Whip Stitch?
The back whip stitch involves stitching from the back side of the leather and then going back through the previous hole to secure the stitch. This creates a diagonal, crisscross pattern on the front side and a neat line on the back. A regular whip stitch typically just wraps around the edge finishing process without the backtracking.
What Type Of Thread And Needle Should I Use For Back Whip Stitching Leather?
For back whip stitching, use a strong, waxed thread that can withstand the stress of stitching leather. Thread options include polyester or nylon for durability. Your needle should be a leather or curved needle that is sturdy enough to handle the thickness of the leather and thread. A stitching awl or chisel can also help create uniform holes in leather for easier stitching.
Conclusion
Learning back whip stitch leather adds a touch of craftsmanship to your leather treasures. With a little practice, you’ll see your stitches become more consistent. It gives your leatherwork a professional edge. So grab your needle, thread, and leather, and start stitching. Your projects are about to look even better!😁
Any more questions? Then contact us we will clear out your doubts.


Leave a Reply