
A tie sewing pattern is a template that guides you in creating a necktie from fabric. It ensures the right shape, length, and proportions. It’s super helpful, like stick & stitch.
How? Well,
Necktie pattern lets you do the work instead of guessing measurements or freehand cutting. So that when you make a necktie to gift, the size isn’t messed up. Otherwise, it is so well stitched that people won’t stop pressing you.
But how to stitch tie sewing pattern? Well, it is easy too.
Tie Pattern
To stitch a tie sewing pattern, cut the fabric using the template, sew the pieces together with the lining and interfacing, then turn, press, and slipstitch the opening closed.
Sounds simple? Yes, it is, but there are still a few things to keep in mind. What are those? Let’s show it to you practically.
Table of Contents
At a glance
- Always press fold lines carefully for crisp, professional-looking edges.
- Hand-stitch the final opening invisibly for a clean finish.
- Choose the right fabric and interfacing to ensure the tie drapes nicely.
How To Make A Necktie From A Tie Sewing Pattern?
To make a necktie from a tie sewing pattern, follow the steps,
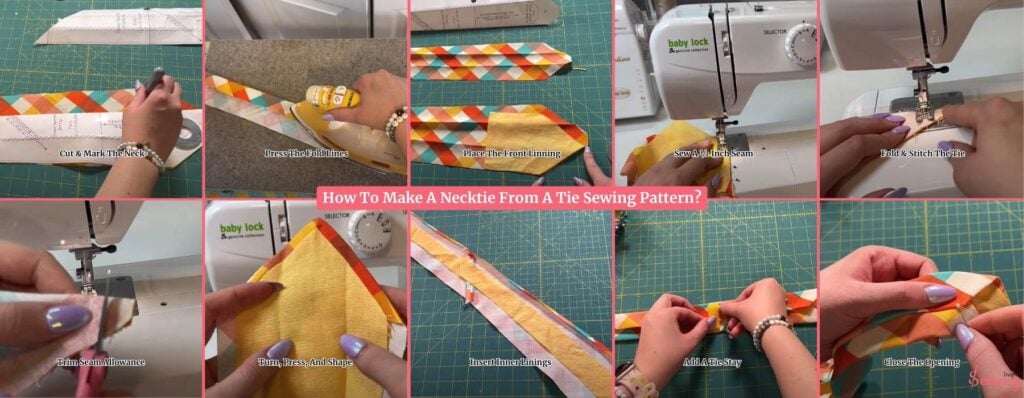
- Cut & Mark The Neck
- Press The Fold Lines
- Place The Front Linning
- Sew A ½ Inch Seam
- Fold & Stitch The Tie
- Trim Seam Allowance
- Turn, Press, And Shape
- Insert Inner Linings
- Add A Tie Stay
- Close The Opening
What I prep first
- Pattern cut to size for the tie length/width you want. Most adult ties finish around 57–58 inches long; widths vary by style.
- Main fabric, lining fabric (lightweight linen/cotton is nice), and interfacing. If your pattern asks for a tricot or lining strip, and twill tape for the tie keeper.
er. - Tools: pins, washable marking tool, ruler, sewing machine, iron, scissors, hand needle + matching thread, small cups for beads (jk, ignore that 😄).
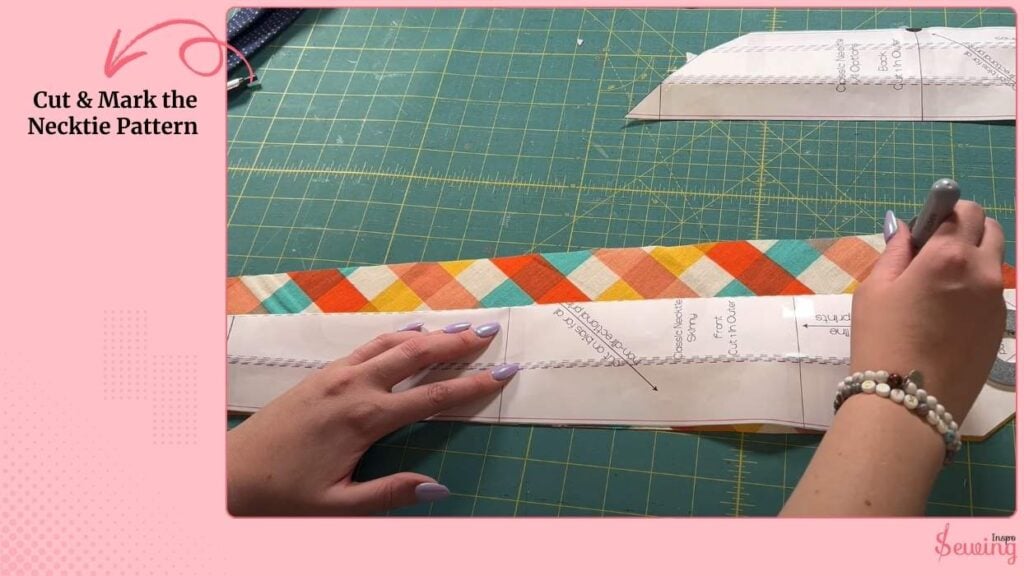
Cut & Mark The Necktie Pattern
Download the necktie sewing pattern PDF like cross stitch pattern & start by cutting out our pattern pieces and marking the fold lines.
A simple trick is to fold your paper pattern along the fold line. Then lay it on your fabric and mark along the edge with a washable pen or chalk. Just a few marks are enough to guide you.
Free Tie Pattern
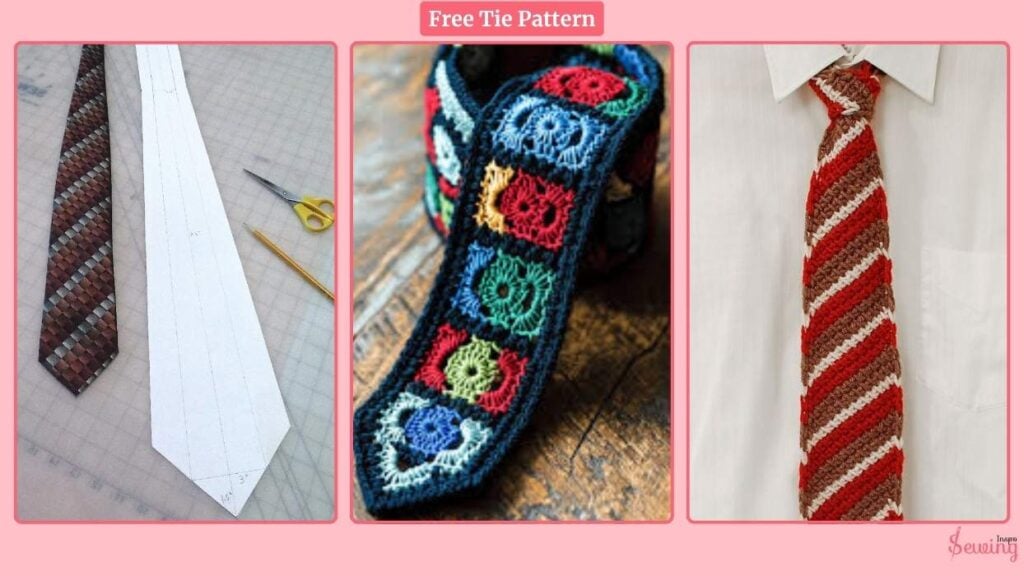
If you don’t know what to buy, then use those ideas
Press The Fold Lines
Fold each fabric piece to the wrong side along the marks and press firmly. Spend time here. A crisp fold makes everything easier. For pressing accuracy, hold the piece for a few seconds so the crease sets.
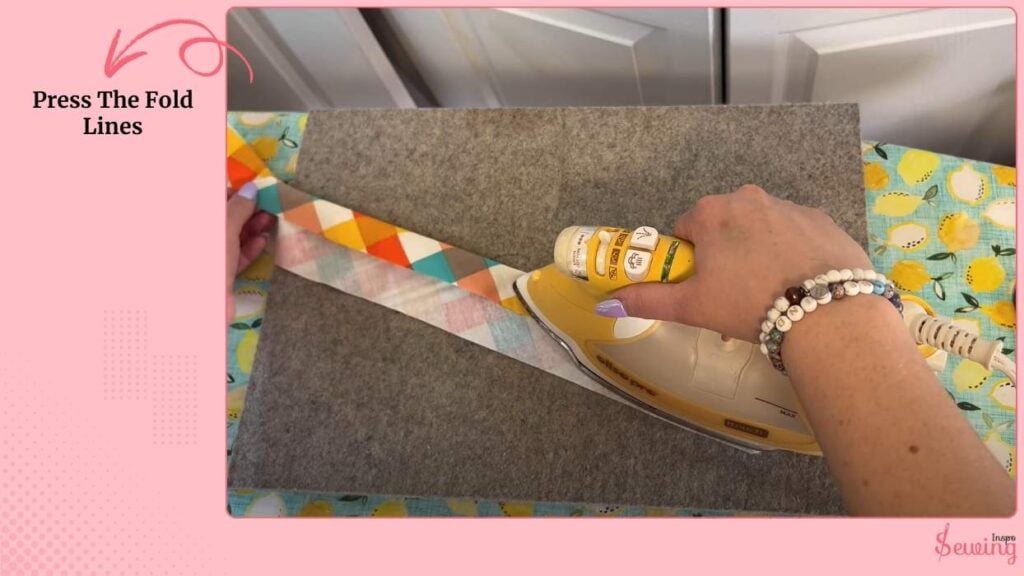
For most tie sewing patterns, the fold size is about ¼ inch (6 mm) when you’re pressing along the fold lines. This gives you a clean edge without adding too much bulk.
If your pattern already includes fold markings, follow those exactly. But if it doesn’t, stick with ¼ inch. It’s the sweet spot for keeping everything crisp and easy to sew, like chevron stitch patterns.
Place The Front Lining Piece Right Sides Together

Place the front lining piece right sides together with the main piece, aligning the long edge. But stopping about ¼ inch from the tip/end. This creates the correct interior allowance.
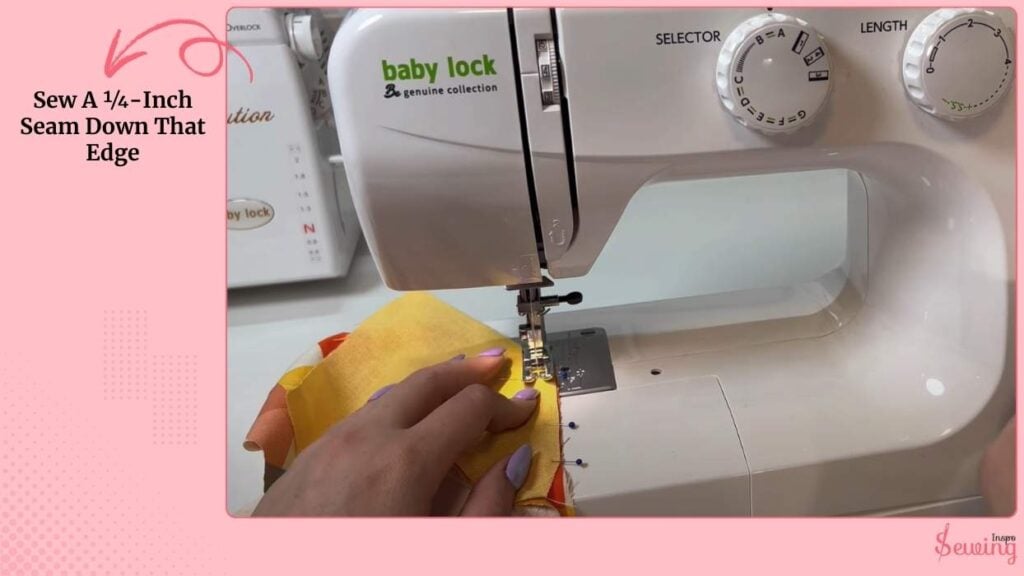
Sew A ¼-Inch Seam Down That Edge
Sew a ¼-inch seam down that edge, backstitching at the start. Stop the stitch about ¼” from the end so there’s a little gap. I do this for counted cross stitch patterns, too.
Don’t sew off the tip.
Repeat for the smaller back lining piece the same way. You’ll likely have some excess main fabric at the back; tuck that out of the way as you sew.
Fold & Stitch The Tie Pattern Across To Join
Fold the whole tie lengthwise (right sides together) so the front and back meet and the edges align. The pattern will show exact alignment like changing pattern.
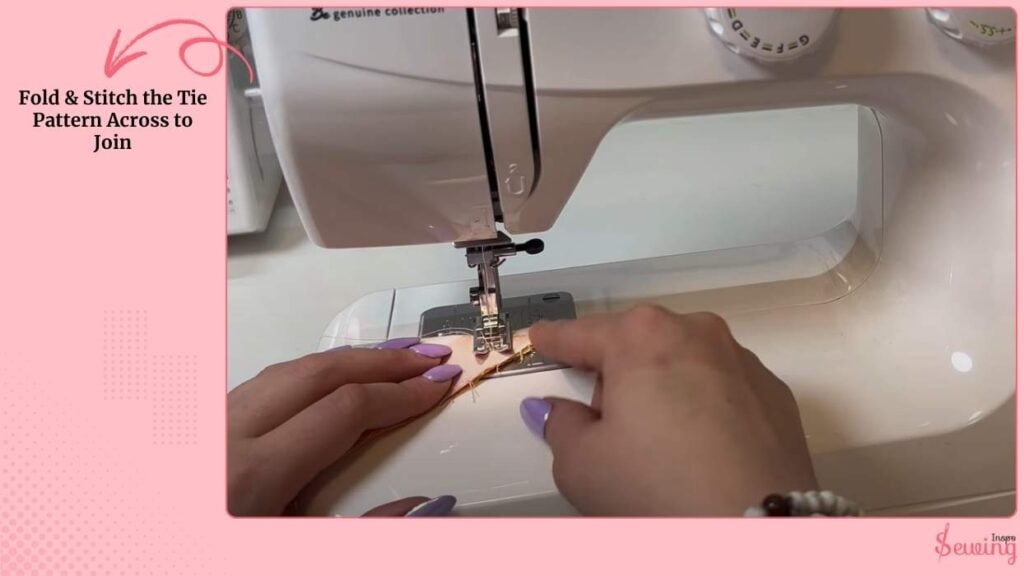
Sew across the tie at the point where the two edge seams meet, so the new seam intersects with the side stitching and closes any gaps. You can try this for the checker stitch pattern, too.
This prevents holes when you turn it. Backstitch at start and finish for strength.
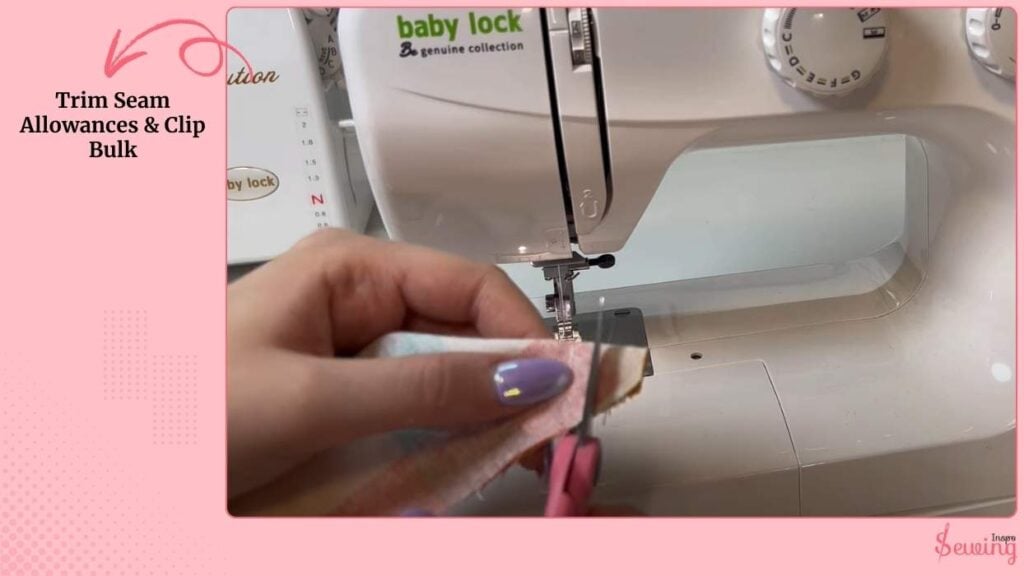
Trim Seam Allowances & Clip Bulk
Trim seam allowances where needed (especially at the narrow tip) to reduce bulk. I use this trick for wool stitchery patterns too.
At the point/tip, trim a small triangle or clip close to but not into the stitching (leave about 1–2 mm of stitch allowance) so the tip turns neatly.
Also, trim any extra loose threads.
Turn, Press, And Shape
Turn the tie right side out carefully. Use a blunt point turning tool or the handle of a wooden spoon to gently push out the tip. Press flat, then re-press the folded edges so the lining sits neatly inside.

If you folded previously, re-press those folds so the lining lies centered.
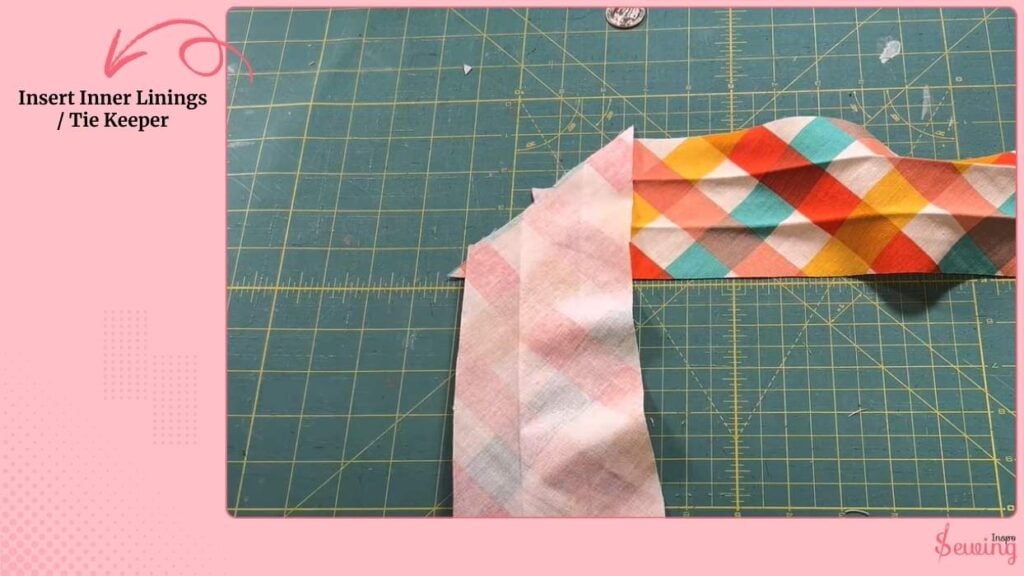
Insert Inner Linings / Tie Keeper
Slide the smaller back and front inner lining pieces inside the tie so they sit in the center where you ironed the fold lines. They should overlap slightly. That overlap is OK.
If you want, secure them by hand-tacking a couple of stitches where they overlap, or leave them unstitched if they fit neatly.
Add A Tie Stay
Add a tie stay (twill tape) on the back.

Position it where the narrow end will tuck under the wide end (pattern usually marks this).
If no mark, place it about 2–3 inches (5–8 cm) down from the narrow end so it catches the tip of the wide end. Sew it in (machine or hand) and trim to fit so it doesn’t stick out.
Close The Opening By Hand
For the final closing seam, I hand-stitch the opening invisibly-
Use a thread that matches, slip the needle under the folded edge, and pick up a few threads from the backing fabric (not all the way through). Take tiny, even stitches.
This is basically a ladder stitch / slip stitch. Pull snug so the seam disappears.
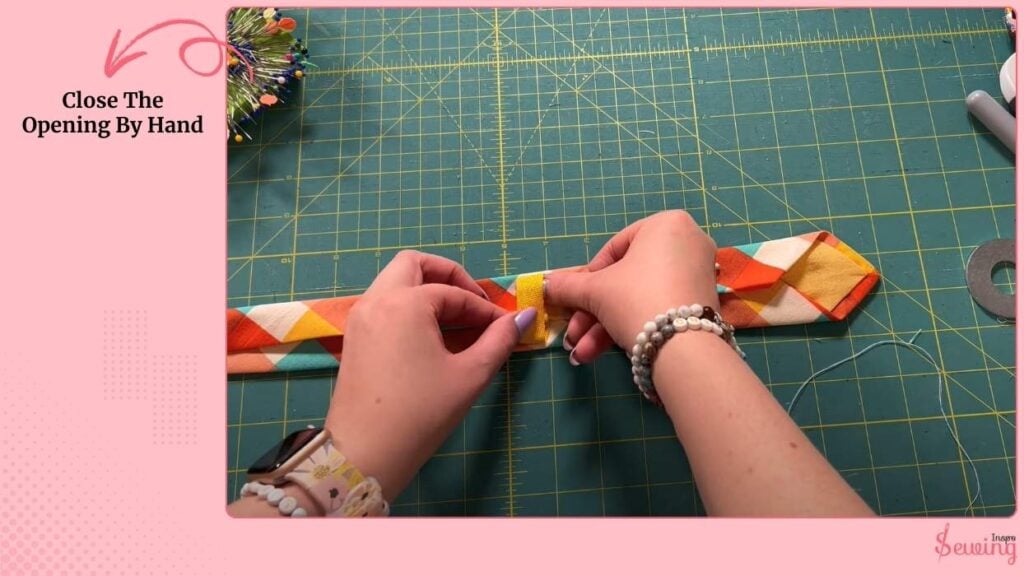
At either end, do a small bar tack or several tiny back-and-forth stitches to secure the ends where they’ll get stress.
Final Pressing & Finishing Touches
Give the finished tie a generous final press so all lines are crisp. Press the edges so the tie keeps its shape.
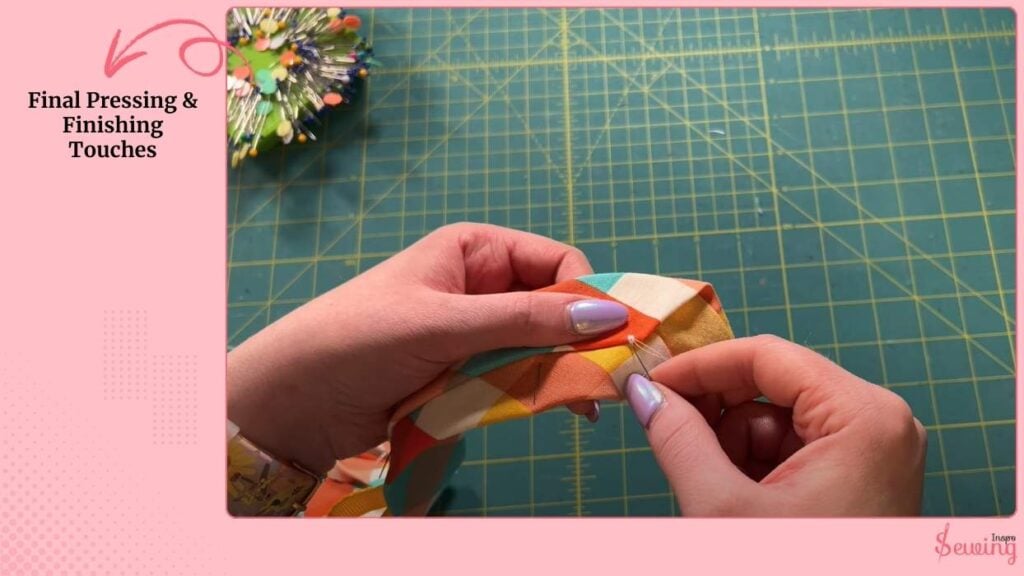
Trim any stray threads and check that the tie stay and stitched seams are secure.
That’s how to make a tie pattern.
Tie Sewing Pattern Pdf
This printable pattern makes it easy to create your own custom necktie at home. The design includes clear guidelines, seam allowance, and fold lines so you can follow along with confidence.
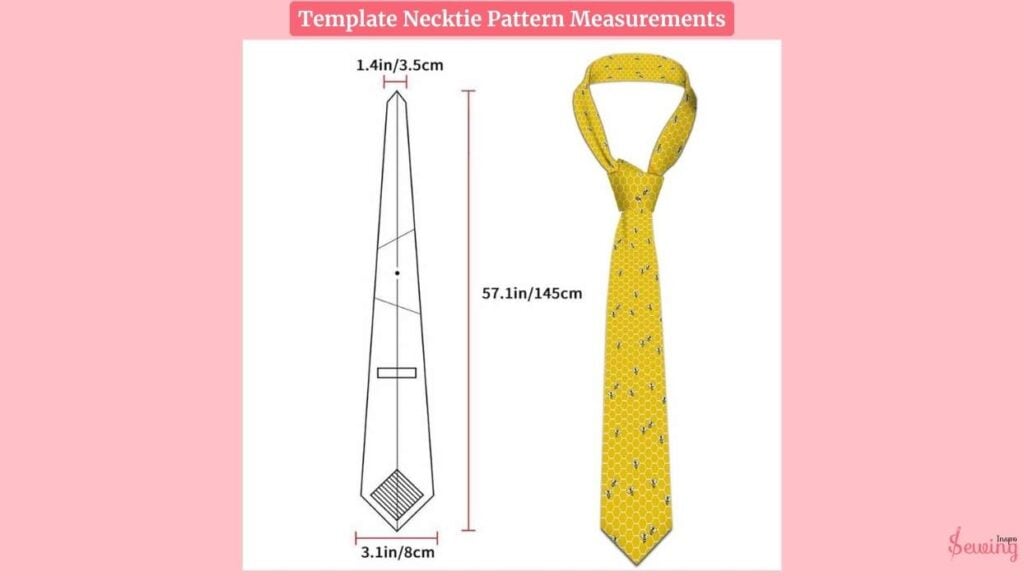
Quick Necktie Pattern Measurements
Necktie pattern sizes can change depending on age, style, and width preference (like skinny or classic).
For adults, ties are usually 62–65 inches long and about 2.5–3.5 inches wide at the widest point. A classic style, for example, might measure 58 inches long and 3.5 inches wide, finishing at around 56 inches once sewn.
However, a few things stay the same, for example-
- Seam allowance: Use ¼ inch (6 mm) unless your pattern states otherwise.
- Fold edge for hemming: fold about ¼ inch when creating the interior fold lines.
- Trimming tip: clip the tip triangle to reduce bulk. Don’t cut too close to stitches.
- Tie keeper placement: follow the pattern marking; if guessing, ~2–3 in (5–8 cm) from the narrow end works well.
All of that should be on the tie pattern. So you don’t need to remember all that.
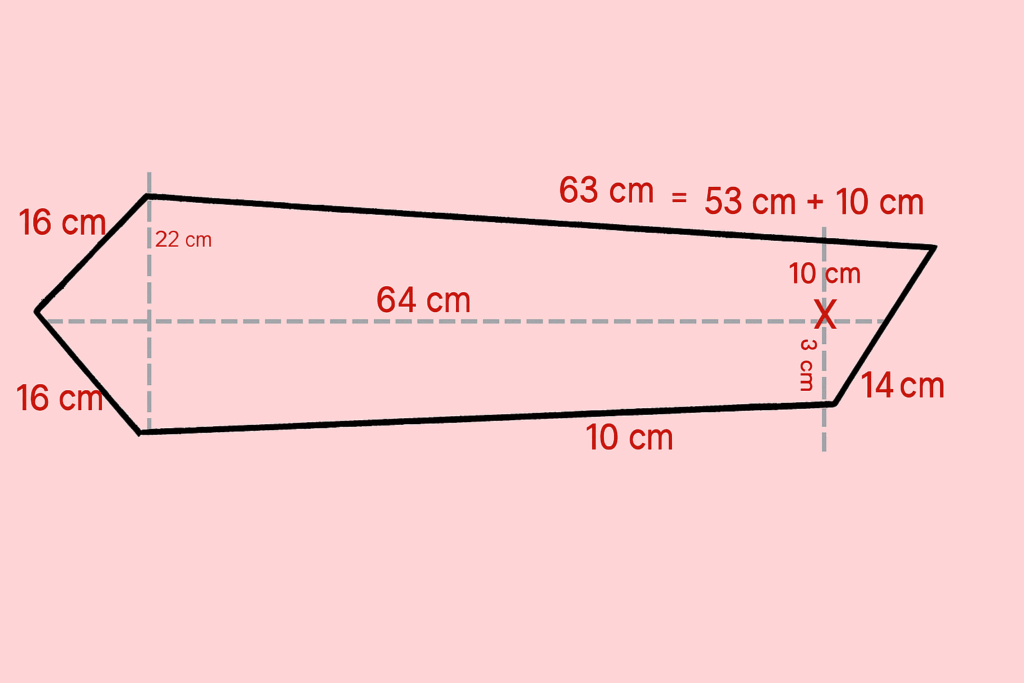
Template Necktie Pattern Measurements
If you want a very specific one, then use this as a a reference
Free Printable Tie Pattern
Just download, print, and cut the pieces to start sewing with this free tie pattern.

Frequently Asked Questions
What fabric works best for making a tie?
Silk is the classic choice because it drapes beautifully, but cotton, linen, and lightweight wool also work great for handmade ties. If you’re a beginner, start with cotton. It’s easier to cut and press.
Do I need interfacing for a tie?
Yes! Interfacing gives your tie structure and helps it hold its shape. Without it, your tie might look floppy or too casual.
Can I sew a tie on a regular sewing machine?
Absolutely. A basic sewing machine with a straight stitch is all you need. Just make sure to press carefully as you go for crisp edges.
Final thoughts
Take your time with the pressing and with the tiny hand stitches at the end. That’s what makes a homemade tie look professional. Once you do one, you’ll see how satisfying it is to turn a flat pattern into a smooth, wearable necktie.


Leave a Reply