
Stitching leather isn’t as easy as cross-stitch patterns. Cause leather isn’t soft like fabric. Not all needles can get through it. You need a specialty needle with a cutting or triangular point.
But still stitching patterns for leather is not childsplay. You need to be specific about the technique, too. Here is what you can do-
Leather Stitch Pattern
Mark your stitching line on the leather, punch holes evenly with a stitching chisel, and sew through each hole using a saddle stitch for a clean, durable finish.
But it’s not so easy to do it from the stretch. That’s where pattern templates help you out.
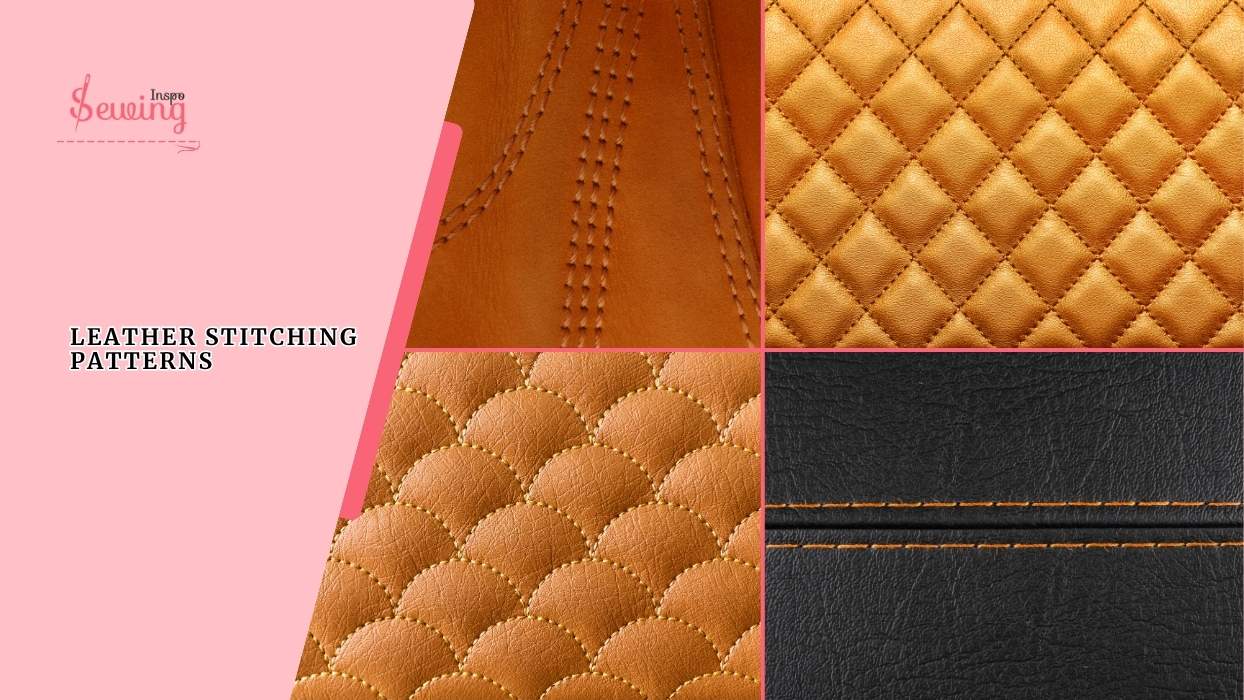
Table of Contents
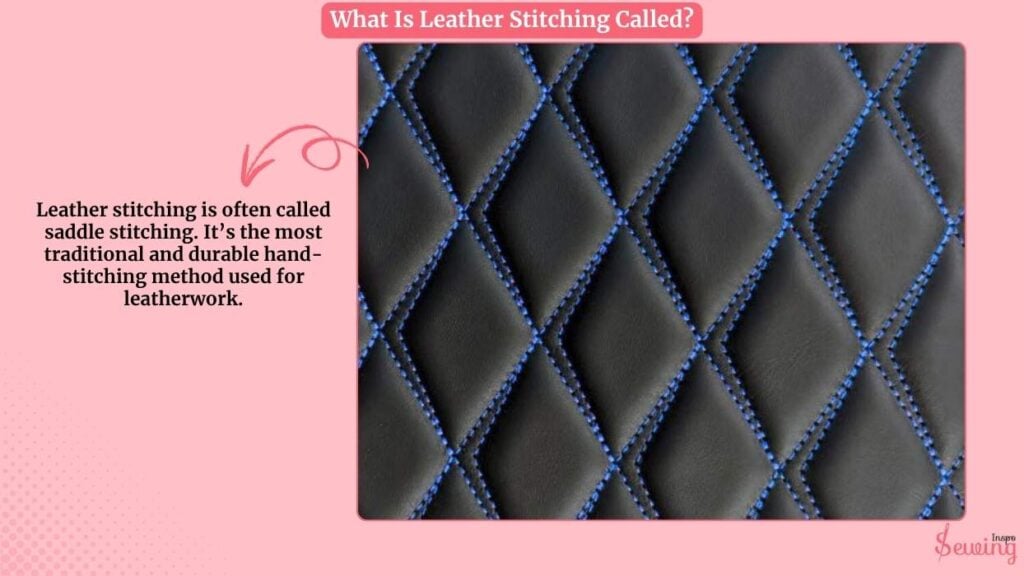
What Is Leather Stitching Called?
Leather stitching is often called saddle stitching. It’s the most traditional and durable hand-stitching method used for leatherwork.
It works on leather cause you use two needles and one thread, with each needle passing through the same hole from opposite sides.
This creates a strong, interlocking stitch that won’t unravel even if one side breaks.
Types Of Leather Stitching With Pictures
Along with saddle stitching, there are a few more types of leather stitching available. All those are suitable for leather because they are strong and durable. So, some best types of leather stitching are-
- Lock stitch
- Box stitch
- Running sitch
- Cross stitch
- Baseball Stitch
- Double Stitch
- Butt stitch
- Edge Lacing Stitch
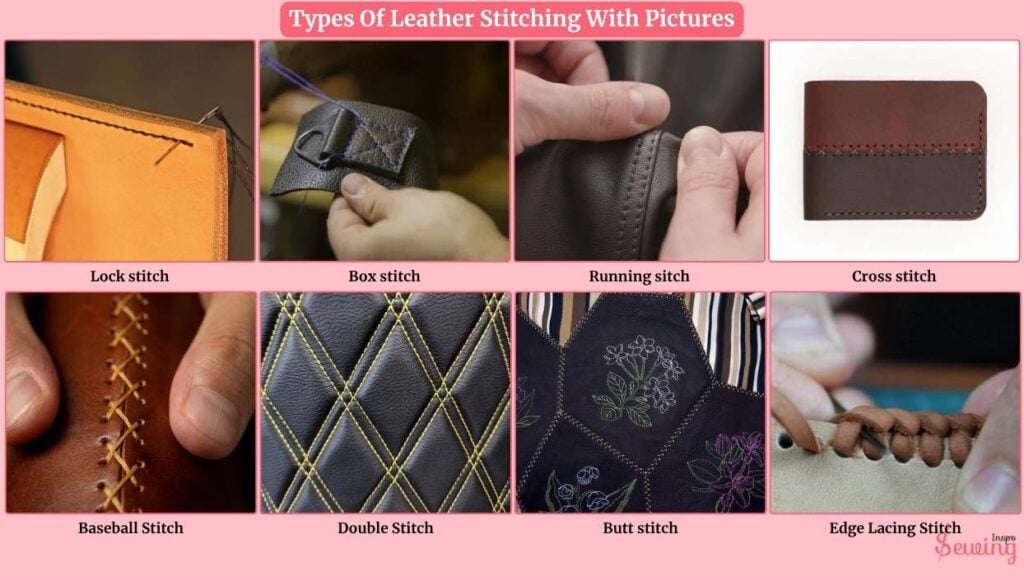
Each of them can bring out beautiful leather patterns. You just gotta do it the right way.
How To Do Stitching Patterns For Leather?
To do stitching patterns for leather, follow the steps with Easy stitching patterns for leather-
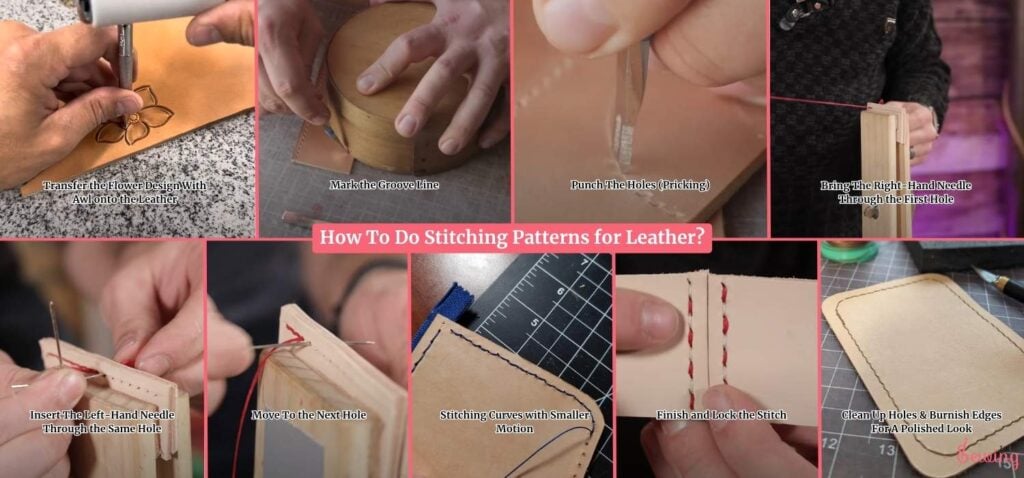
Transfer the Flower Design With Awl onto the Leather
I start by taping my flower pattern (printed or hand-drawn) on top of the leather. Then, using a stylus or awl, I trace over the outline firmly enough to leave a faint mark on the leather underneath.
Once the pattern is imprinted, I remove the paper.
The faint lines will be my stitching guide. This is where the groove line will go.

Mark the Groove Line
Now that my flower outline is visible, I grab my leather groover (also called a stitching groover). It looks like a small metal tool with a hooked blade and an adjustable arm.
Here’s what I do:
- Adjust the arm of the groover to about 1–1.5 mm from the flower outline
- Rest the guide arm against the traced flower line.
- Slowly pull the tool around the entire flower, following each petal curve carefully.
- Keep a steady hand. If you wobble a bit, don’t panic. You can smooth it later when stitching.
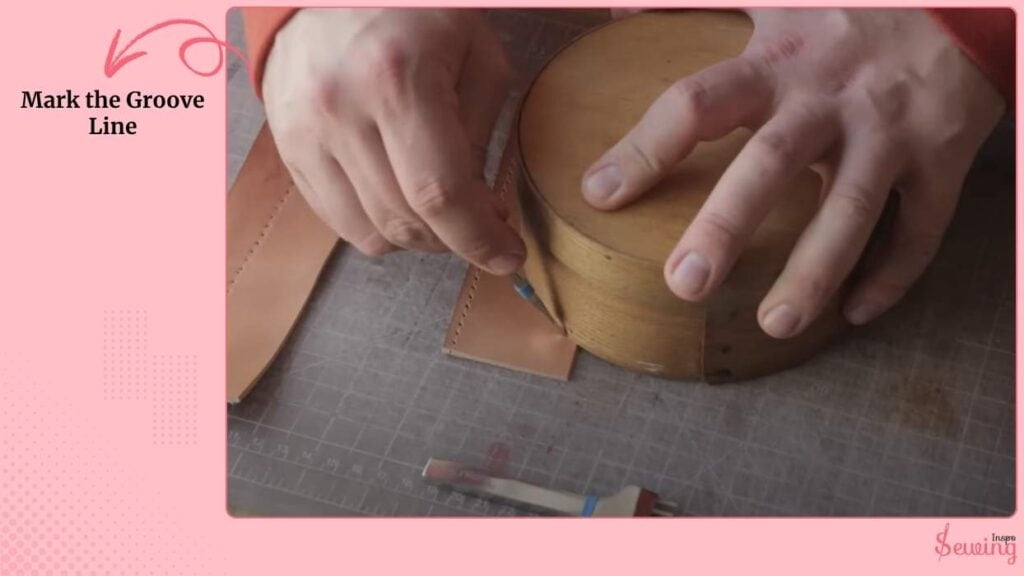
Now I’ve got a shallow groove line running neatly along my flower outline.
This groove acts like a track for your stitches, like stick & stitch. It hides them slightly below the surface, protecting them from friction.
Punch The Holes (Pricking)
I place the pricking iron (or wheel) along the line.
For curves like petals, I use a single pricking awl or a small 2-tooth chisel so the holes follow the curve smoothly. I hold the iron perpendicular and strike with a mallet:
- For tight inner curves, I work slowly and reposition the leather after each few strikes.
- I check spacing visually as I go. Uniform holes = uniform stitches. I use this for taddy bear stitching.
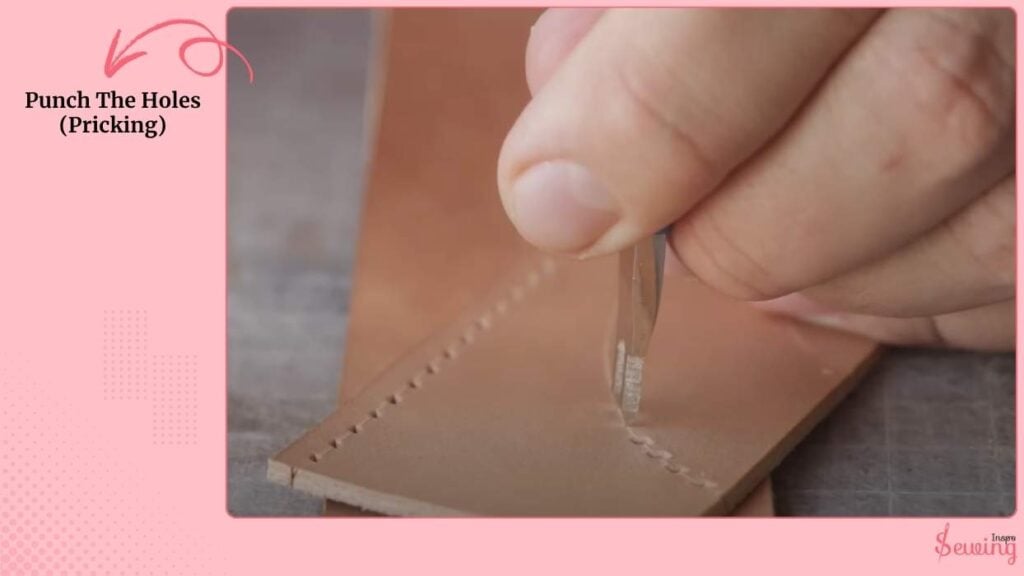
If I’m using a pricking wheel, I roll it slowly along the line and then use the awl to open each dot into a clean hole.
Bring The Right-Hand Needle Through The First Hole
I clamp the leather in a stitching pony so it stays stable. I start at a discreet point (back side of a petal).
Bring the right-hand needle through the first hole from the top side and pull until the knot or tail sits tight on the back.

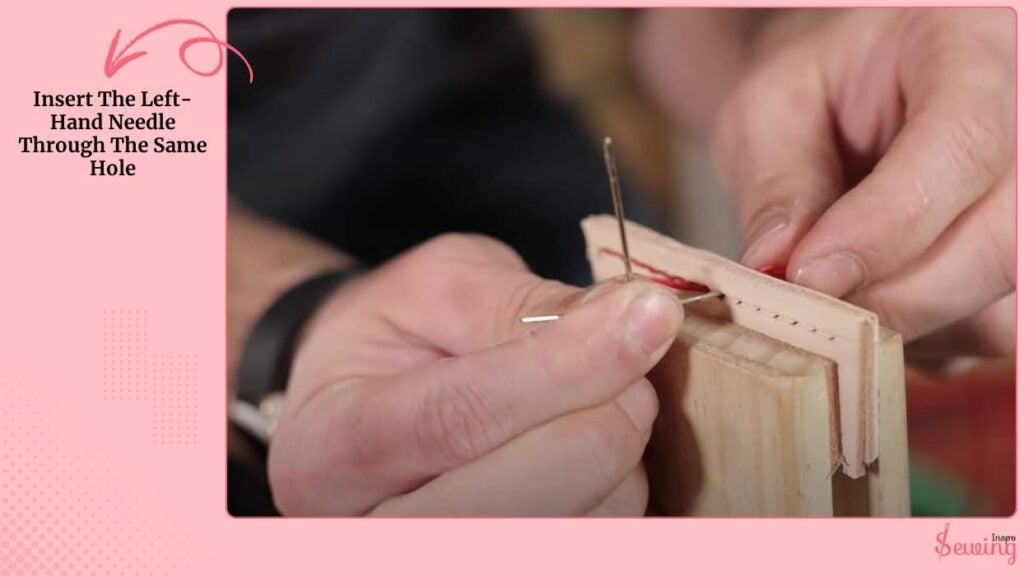
Insert The Left-Hand Needle Through The Same Hole
Insert the left-hand needle through the same hole from the bottom (opposite side), so both needles cross in the middle of the hole.
Pull both threads snug. Not tight enough to pucker, just enough to flatten the leather edge slightly. This is kinda like stitching diamond pattern.
Move To The Next Hole
Move to the next hole. Push the right needle through from the top, then push the left needle through the same hole from the bottom.
Repeat in a steady, even rhythm. Think pull, move, push, pull. It becomes meditative.
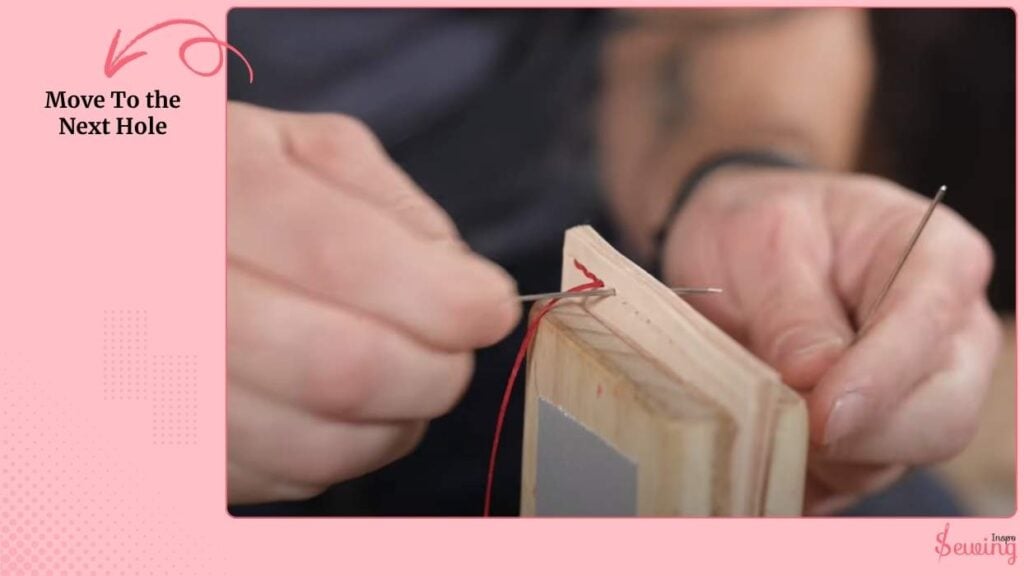
Important: Always keep even tension. If a stitch seems loose, I pull both threads together until tidy before moving on.
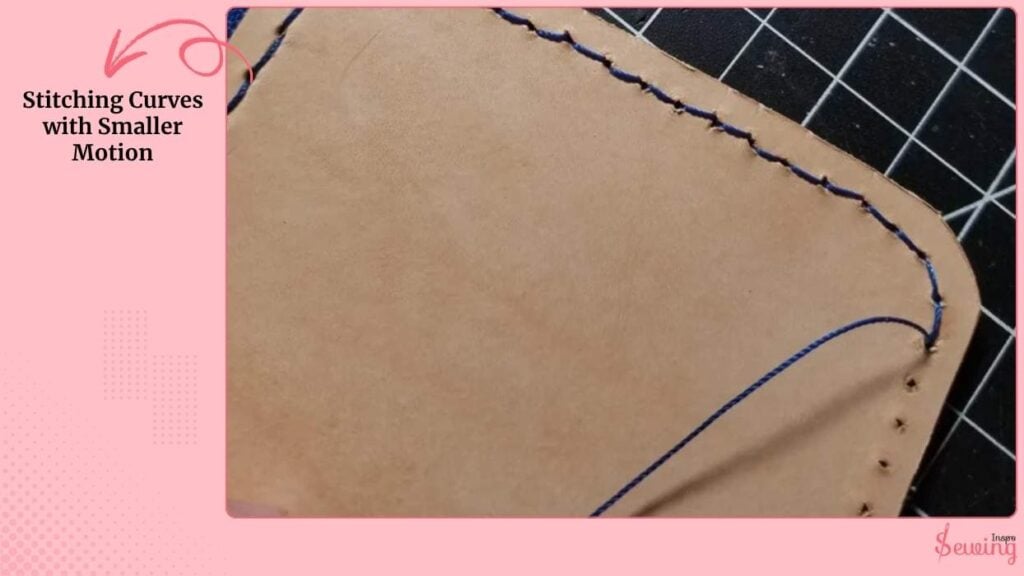
Stitching Curves With Smaller Motion
When I get to a sharp petal tip, I slow down.
Take smaller motions, push the needles straight through (not at an angle), and don’t over-tighten.
If the leather puckers, I back up one stitch, ease the tension, and re-seat the stitch.
For very sharp points, I may make the last two holes slightly closer to preserve the shape.
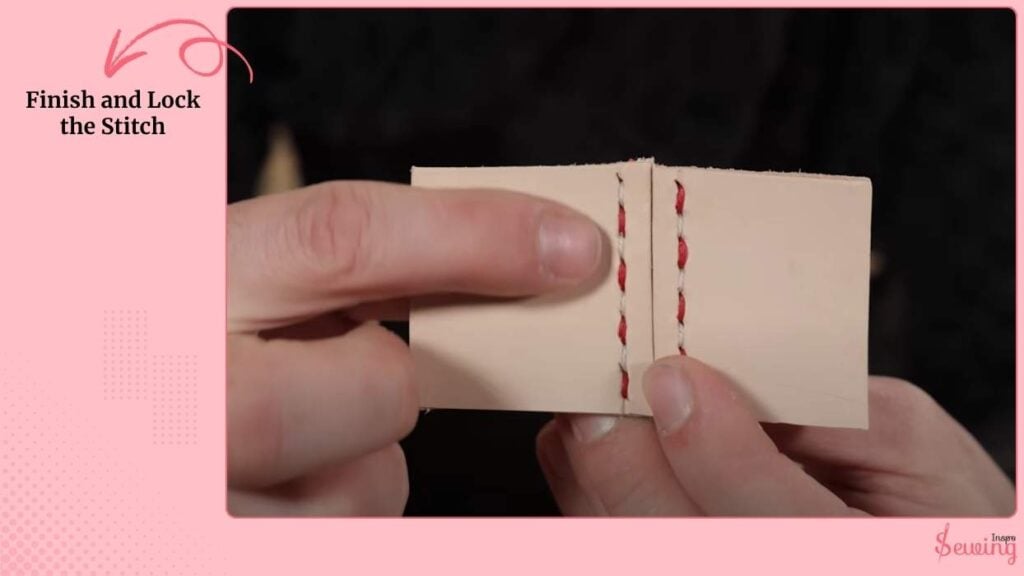
Finish and Lock the Stitch
Once I complete the flower outline, I backstitch two or three holes to lock the thread. Then trim the ends and tuck them under a nearby stitch or seal lightly with a touch of wax.
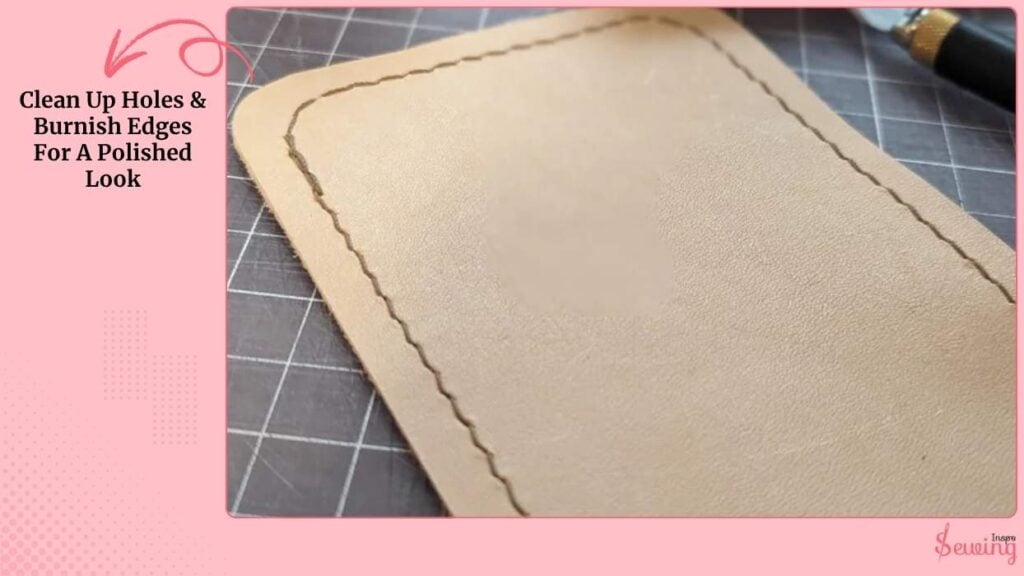
Clean Up Holes & Burnish Edges For A Polished Look
I gently sand the back side of the stitch line if any burrs show. For the flower edge, I bevel lightly, apply gum tragacanth or water, and burnish with a slicker until smooth.
This makes the stitched flower pop and the edge feel finished.
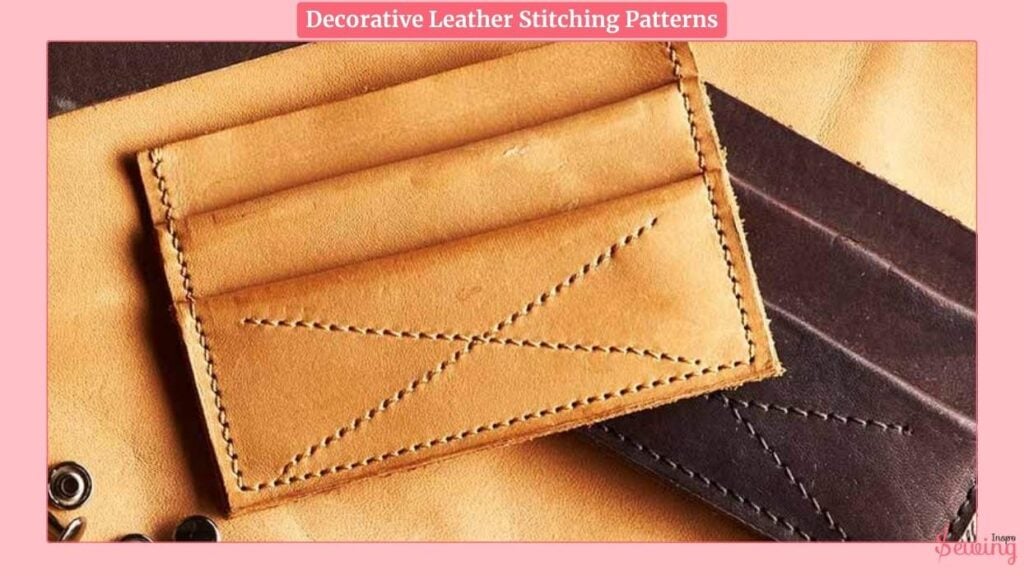
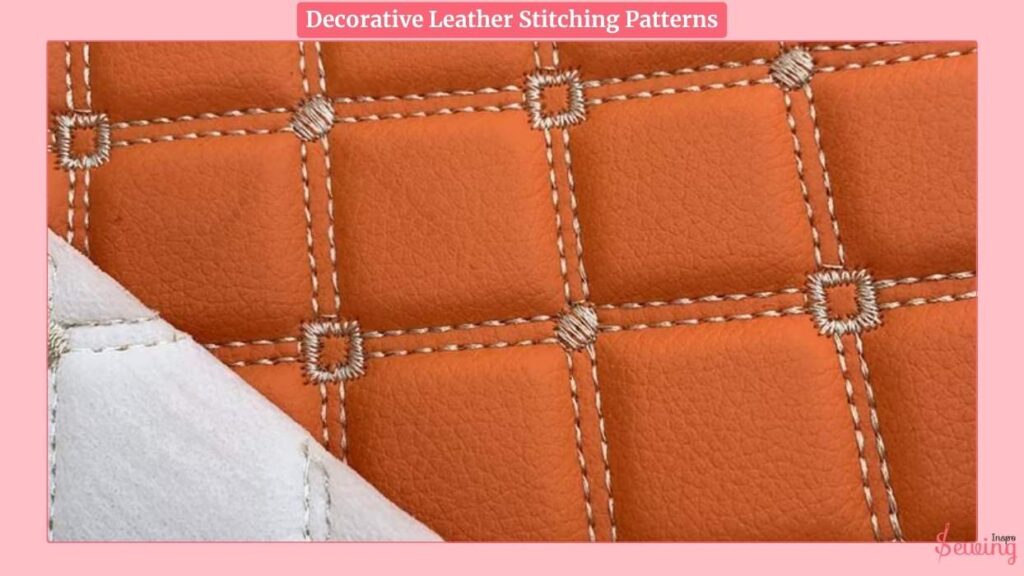
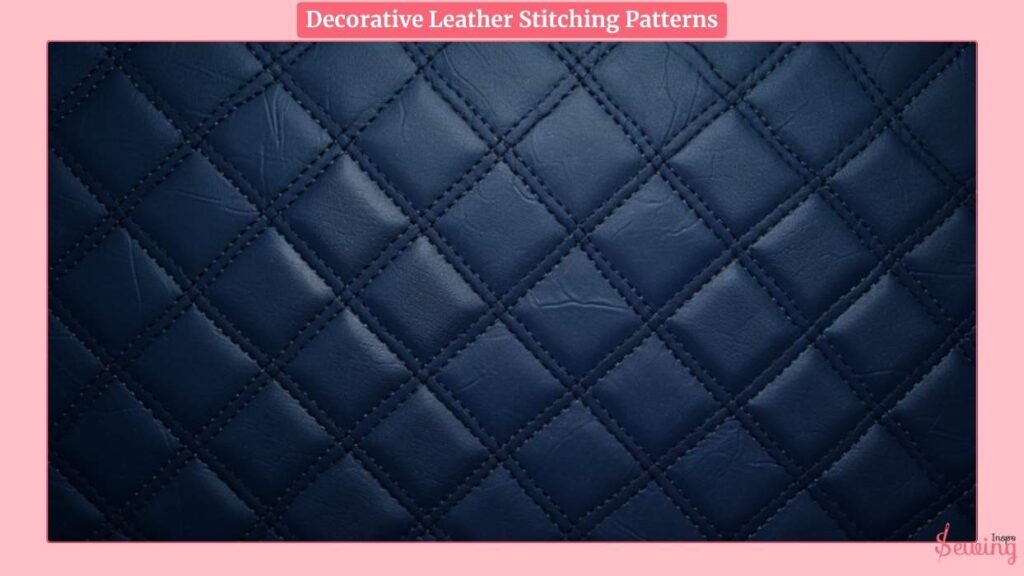
Decorative Leather Stitching Patterns
If you are new to leather stitching and don’t know where to begin, then you can practice on those-
Stitching Patterns For Leather Crafts PDF
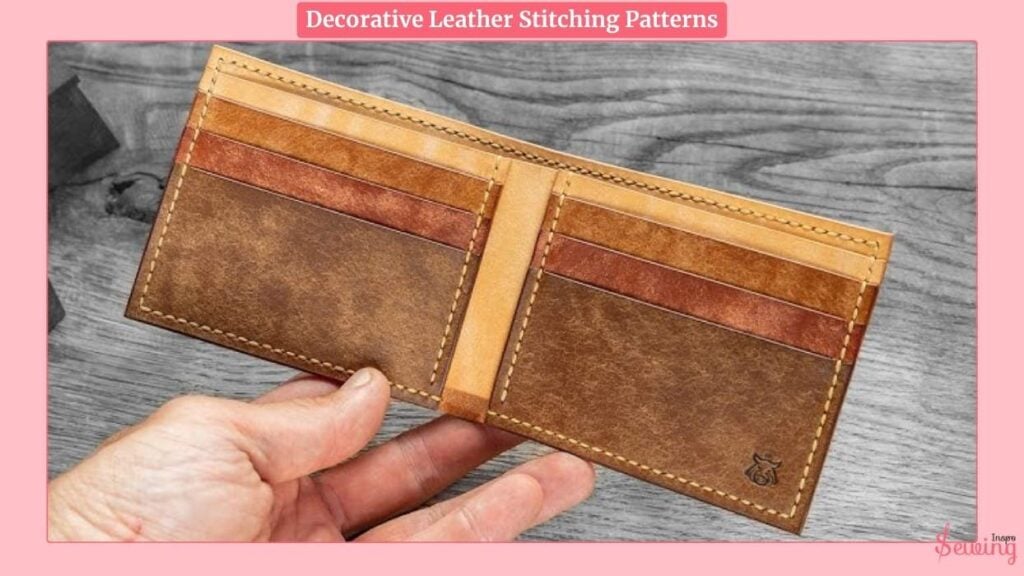
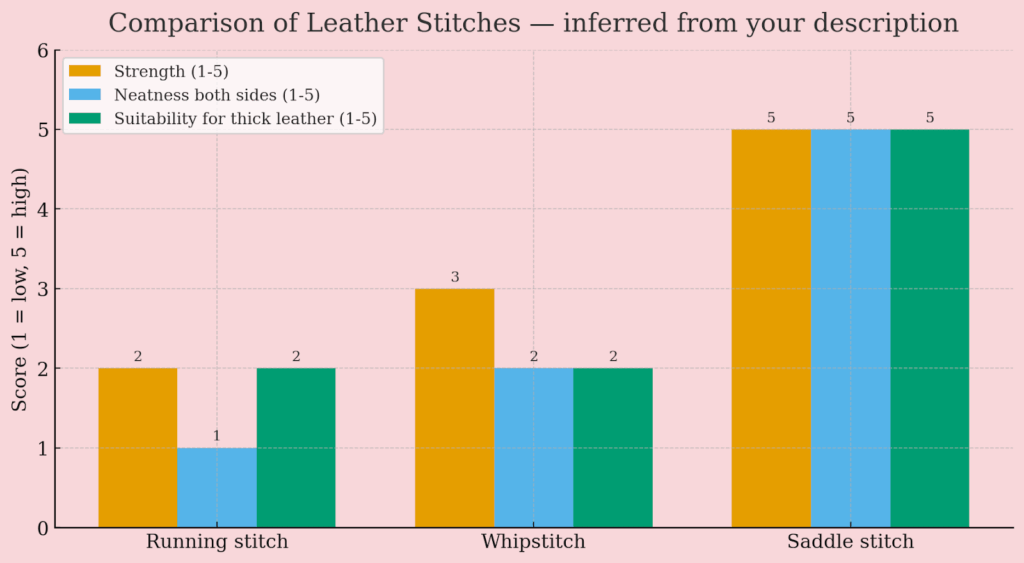
What Is The Best Stitch For Sewing Leather?
After trying almost every leather stitch. I found that the saddle stitch is the best by far.
When I first started, I used a running stitch because it was fast, but one tug and the seam came apart
Then I tried the whipstitch pretty. But too raised for smooth seams. Finally, I learned the saddle stitch, and it completely changed my work.
It uses two needles and one thread, weaving from both sides so each stitch locks in place. Even if one breaks, the rest hold firm.
The result? A clean, even seam that looks professional on both sides.
Why it’s the best:
- Strong and long-lasting. It won’t unravel
- Looks neat on both sides
- Great for thick leather projects like belts, wallets, and bags
If you want your leather projects to look and last, then do saddle stitch.
Frequently Asked Questions
What is the strongest stitching pattern?
The saddle stitch is hands down the strongest. It’s reinforced from both sides, so even if one stitch breaks, the rest stay locked. It is perfect for heavy-duty leatherwork like belts, wallets, and bags.
Should I use a thimble when stitching leather?
Absolutely. Leather is tough, and you’ll need to push your needle through thick layers. A leather thimble or sewing palm protects your fingers and helps apply steady pressure.
Why do my leather stitches look uneven?
That usually happens because of inconsistent hole spacing or uneven tension on your thread. Use a stitching chisel or pricking iron to make evenly spaced holes and pull your thread with equal strength on both sides.
Final inspection and care
I check every stitch for evenness, test the seam by flexing the leather lightly, and press if needed. If a thread looks loose I tighten that stitch and re-secure the tail. Then I admire the flower. It should be even, raised slightly, and sit neatly on the leather surface.


Leave a Reply