
When I first heard the word “purl,” I thought it was just for knitting. But guess what? You can actually mimic that lovely textured purl look in sewing, too.
And it’s way easier than it sounds. All you gotta do is-
To do a purl stitch in hand sewing, bring the needle up through the fabric, make a small loop on the surface, and insert the needle back near the starting point to form a raised, knotted loop.
It is perfect for outlines, decorative borders, or adding a bit of flair to your embroidery. It’s similar to the chain stitch but has a tighter, more raised look that really stands out.

Table of Contents
What Is The Purl Stitch?
The purl stitch is a decorative hand embroidery stitch that creates a series of small, twisted loops or “purls” along your fabric. It is like a chain stitch’s fancy cousin.
It gives that same linked look but with more texture and dimension, like cross stitch.
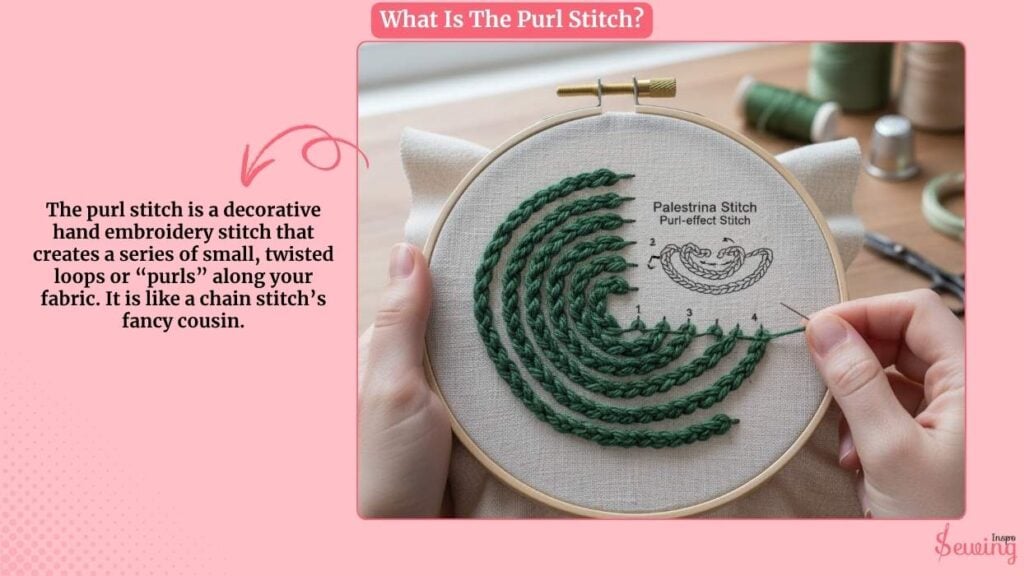
It’s often used for outlining shapes, adding texture to flower stems. That gives a design a rope-like effect. The stitch sits slightly raised on the fabric.
That’s makes it stand out beautifully in both fine embroidery and heavier decorative work.
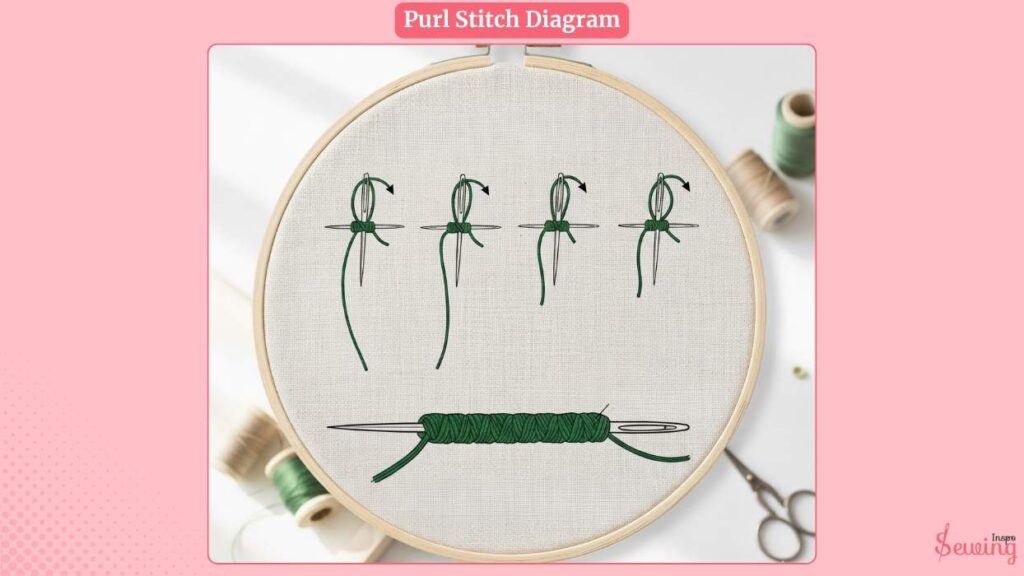
Purl Stitch Diagram
If you are unsure about what it looks like, then here is a glance at it-
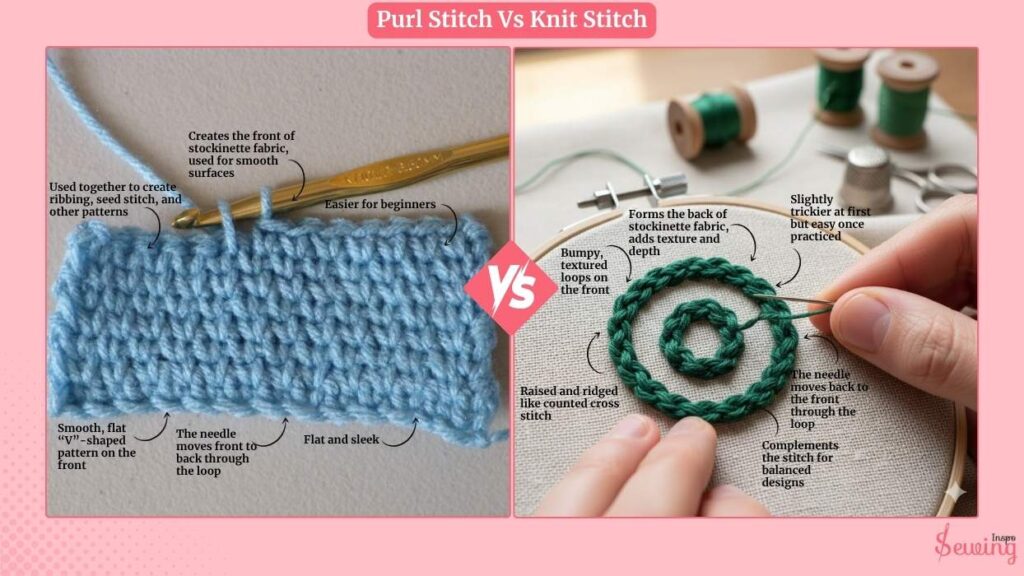
Purl Stitch Vs Knit Stitch
If you’ve ever dabbled in knitting or embroidery, you’ve probably heard both “purl” and “knit” tossed around. And they can sound a bit confusing at first. But here’s the difference in simple terms:
| Knit Stitch | Purl Stitch |
| Smooth, flat “V”-shaped pattern on the front | Bumpy, textured loops on the front |
| The needle moves front to back through the loop | The needle moves back to the front through the loop |
| Flat and sleek | Raised and ridged like counted cross stitch |
| Creates the front of stockinette fabric, used for smooth surfaces | Forms the back of stockinette fabric, adds texture and depth |
| Easier for beginners | Slightly trickier at first but easy once practiced |
| Used together to create ribbing, seed stitch, and other patterns | Complements the stitch for balanced designs |
Purl Stitch Instructions With Pictures
To do the purl stitch pattern, follow the steps-
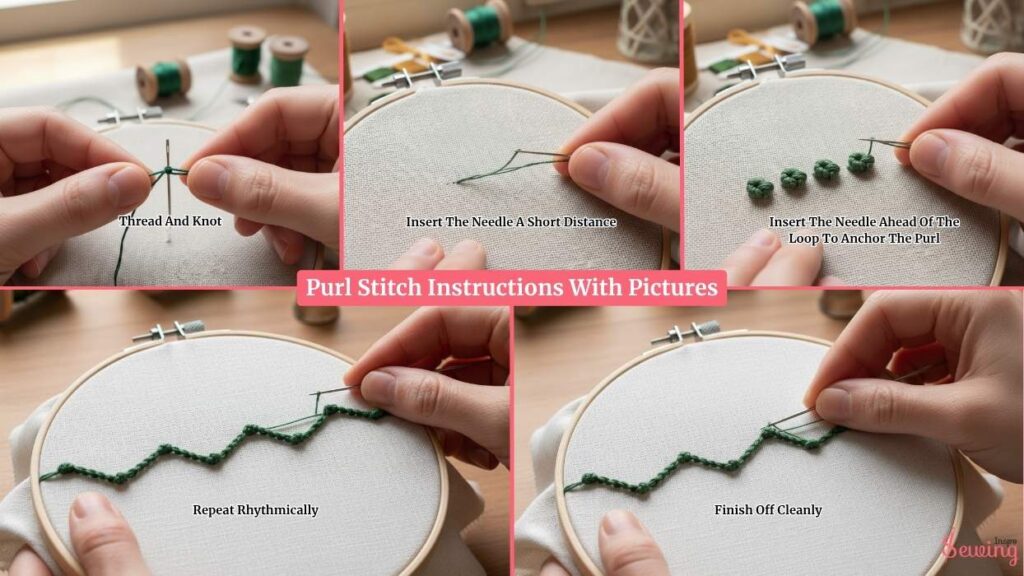
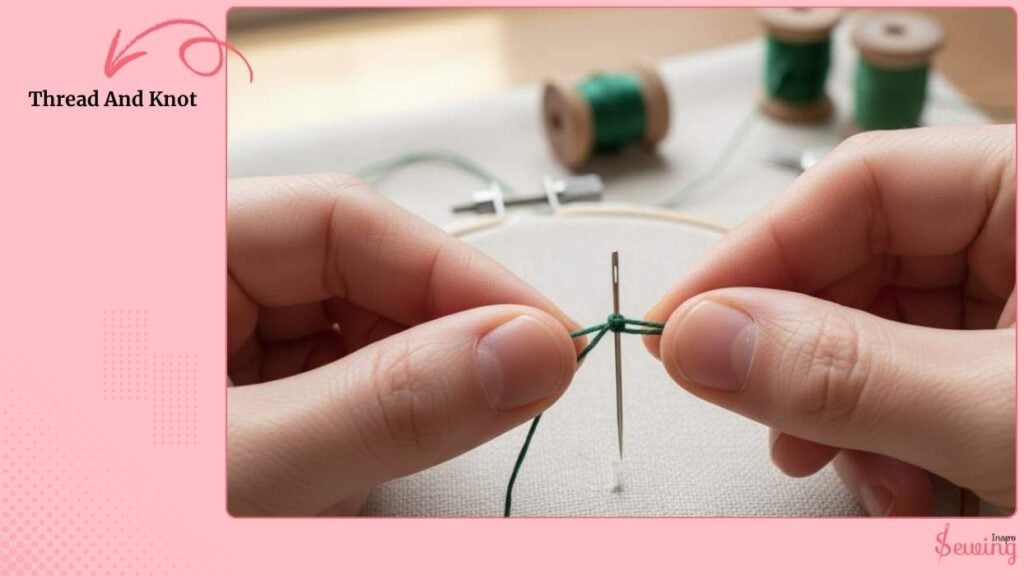
Thread And Knot
Thread your needle with the number of strands you want. Tie a small knot (or leave a 2–3″ tail and tack it under later) and bring the needle up through the fabric where your line begins.
Insert The Needle A Short Distance
Insert the needle a short distance along the guideline (about 2–3 mm, depending on the size you want).
Bring the needle back up very close to the starting point about 1–2 mm beside or slightly above the original hole.
But this time push the needle tip under the loop of thread you left on the fabric (so the thread passes under the needle point as you pull up).
Gently pull the thread until a small twisted loop (the “purl”) forms snug against the fabric.
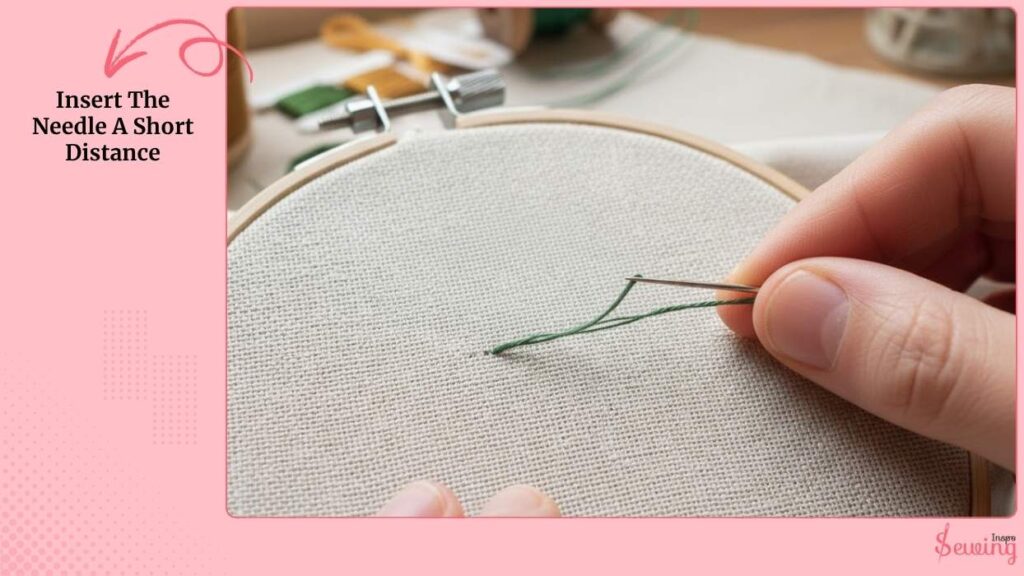
Tip: Hold the loop lightly with your thumb while pulling the thread to control the tightness.
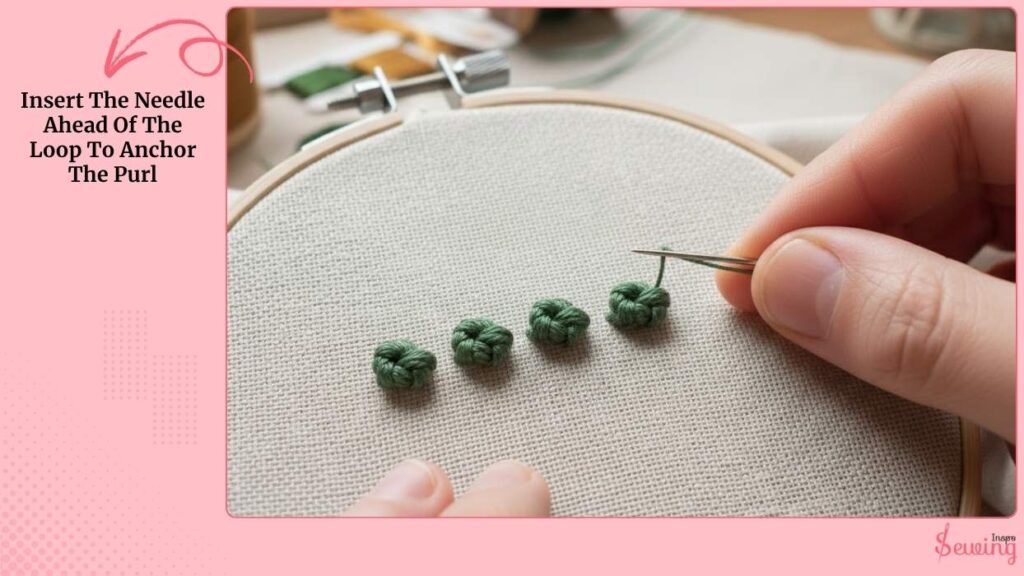
Insert The Needle Ahead Of The Loop To Anchor The Purl
Insert the needle just ahead of the little loop (about the same spacing as before) and bring it up slightly in front again.
Then slip the eye/point under the thread loop so the next purl will sit next to and slightly overlap the previous loop. Pull gently so the purl doesn’t collapse.
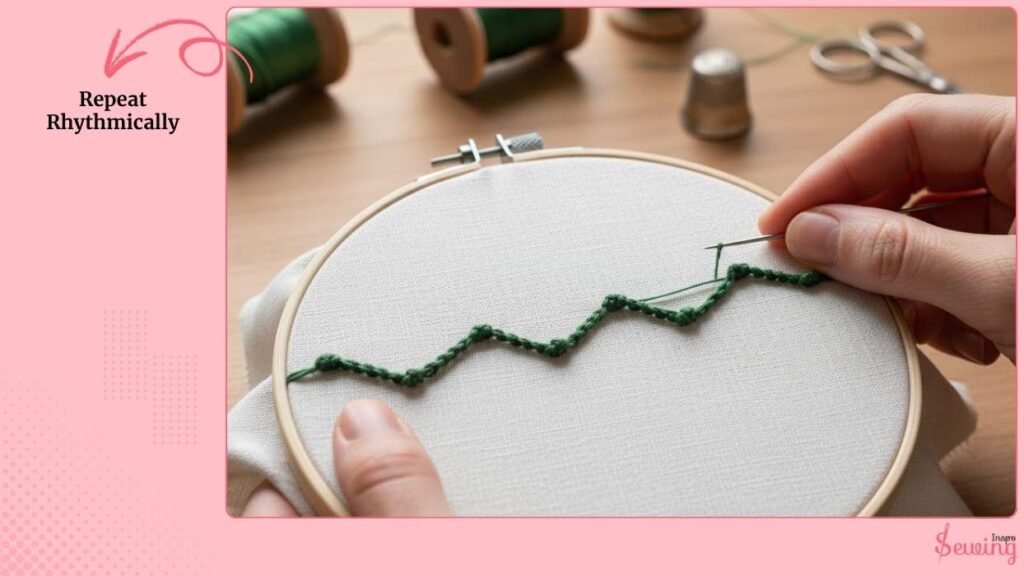
Repeat Rhythmically
Keep repeating: insert, come up under the existing loop, form loop, pull snug. Keep your spacing consistent. That’s what makes a neat rope or textured line. Think of it like marching: same stride, same tempo.
Spacing guideline:
- Fine detail: 1–2 mm between insertion points.
- Chunkier texture: 3–5 mm and use more strands.
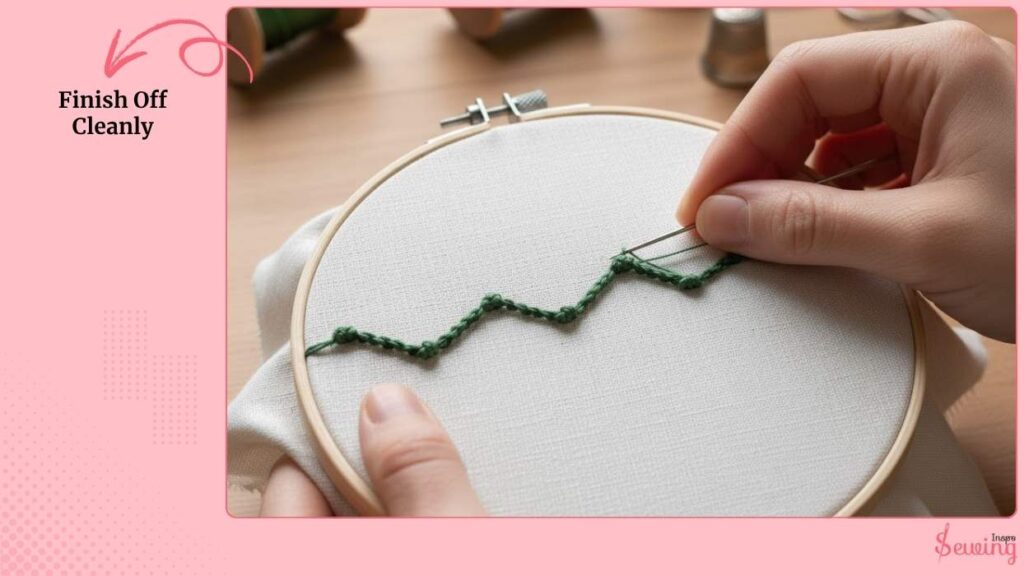
Finish Off Cleanly
When you’re done, take a small anchoring stitch behind the last purl (a tiny stitch through the fabric,
not visible on the front), run the needle under several nearby purl loops on the back to secure, and trim the thread close.
Purl Stitch Pattern In Sewing PDF
Purl Stitch Troubleshooting (the usual problems)
If you are new to this stitch pattern, then you may face some issues. Like-
- Loops collapse / flatten: You’re pulling too tight. Ease off and hold the loop until it’s anchored. I use this to make a tie pattern too.
- Loops too loose: Shorten the distance between insertion and coming-up points; use fewer strands.
- Uneven size: Keep consistent spacing and tension; mark your guideline with dots if needed.
- Thread twisting or kinking: Let the thread untwist occasionally; use shorter lengths (18–20″).
Final Tips I Always Use
I start with shorter thread lengths for less tangling. Then I use a hoop. The tension makes purls neater.
Practice tiny samples to learn your rhythm; purl stitch becomes meditative once you’re in the flow.

Leave a Reply