
Have you ever looked at a perfectly straight sewing machine stitch and thought, “How do I do that by hand?” Yep, I’ve been there too. So I ran to Grandma and asked how to hand stitch like a sewing machine.
She laughed and said, Hand stitching might not be as fast as a machine. But with the right technique, you can get that same neat, even, and strong line of stitches.
Hand Stitch Like Sewing Machine
To hand stitch like a sewing machine, use small, even running stitches with consistent tension and spacing for a neat, straight seam.
I was not satisfied enough, so Grandma decided to show me practically. Let’s see How to sew without a sewing machine or needle.
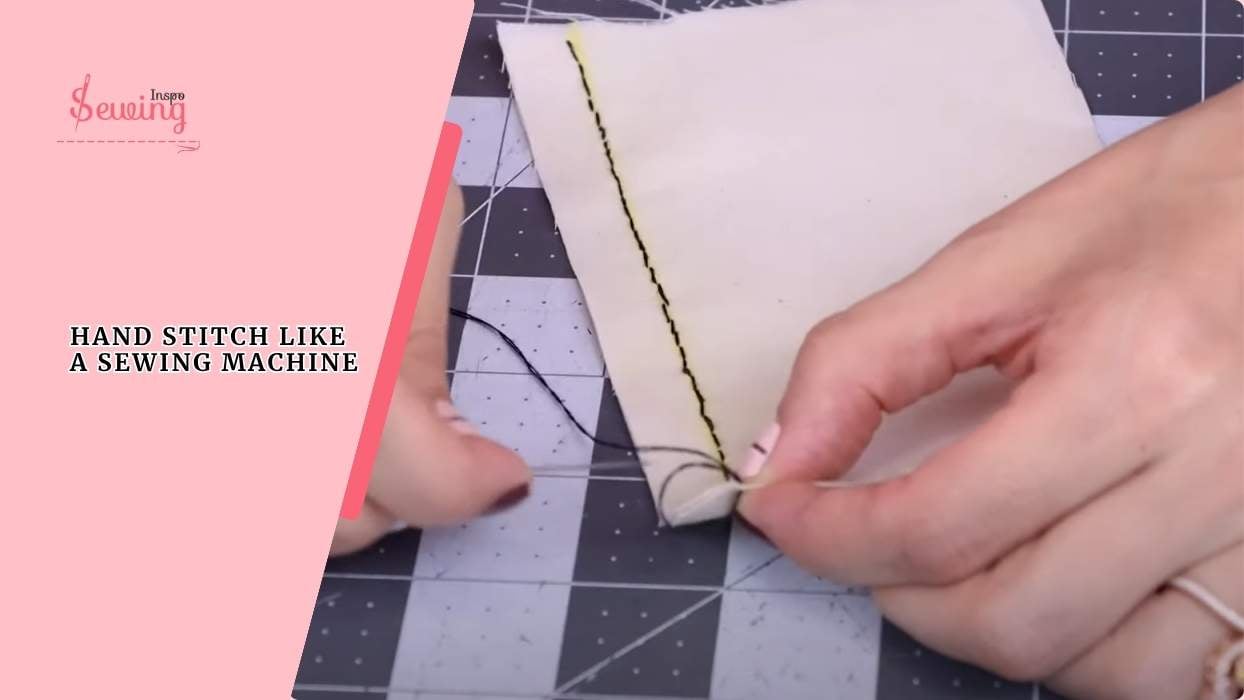
Table of Contents
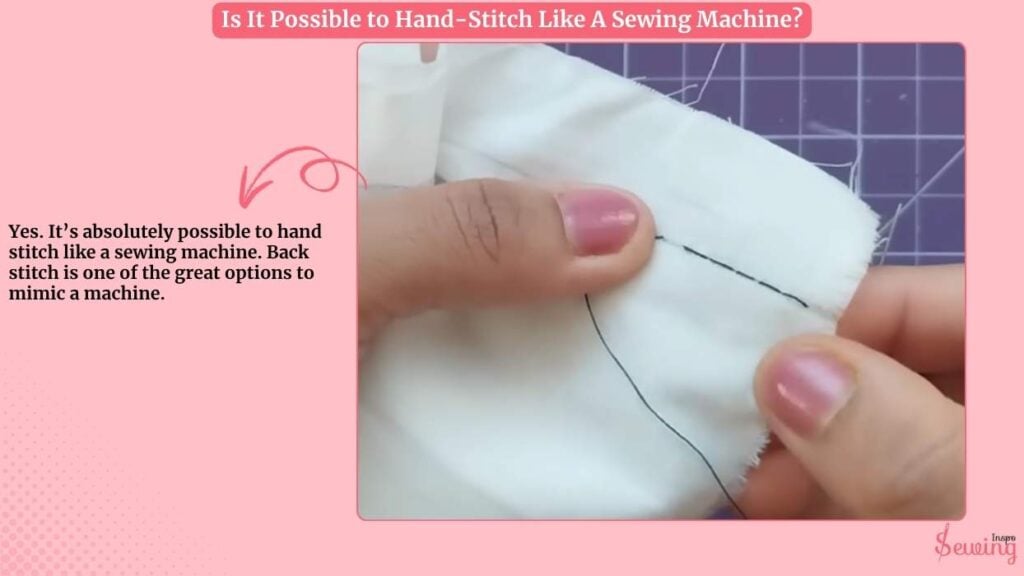
Is It Possible To Hand-Stitch Like A Sewing Machine?
Yes. It’s absolutely possible to hand stitch like a sewing machine. Back stitch is one of the great options to mimic a machine.
However, a sewing machine uses two threads (top and bobbin) to create a lockstitch, whereas hand sewing typically uses only one.
So you won’t get the exact same mechanism, but you can mimic the look and strength of machine stitches with the right hand stitch.
How To Hand Stitch Like A Sewing Machine?
To hand stitch like a sewing machine, follow the bellow steps-
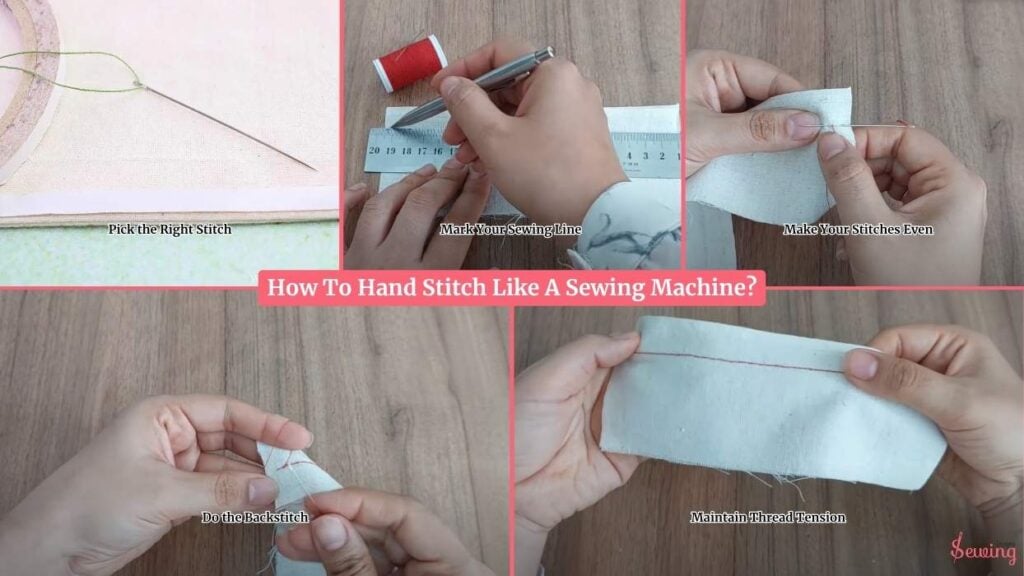
Pick the Right Stitch
If you want your hand stitching to look like a machine’s, the backstitch is the best choice for hand stitching like a sewing machine. But if you want something quick, then you can use running stitch.
The running stitch is quicker in and out, in and out. But it’s not as strong. Great for temporary seams or gathering fabric.
When I’m mending a seam on your grandpa’s shirt or stitching the hem of a curtain, I always use the backstitch. It locks every little gap and holds strong even after washing.
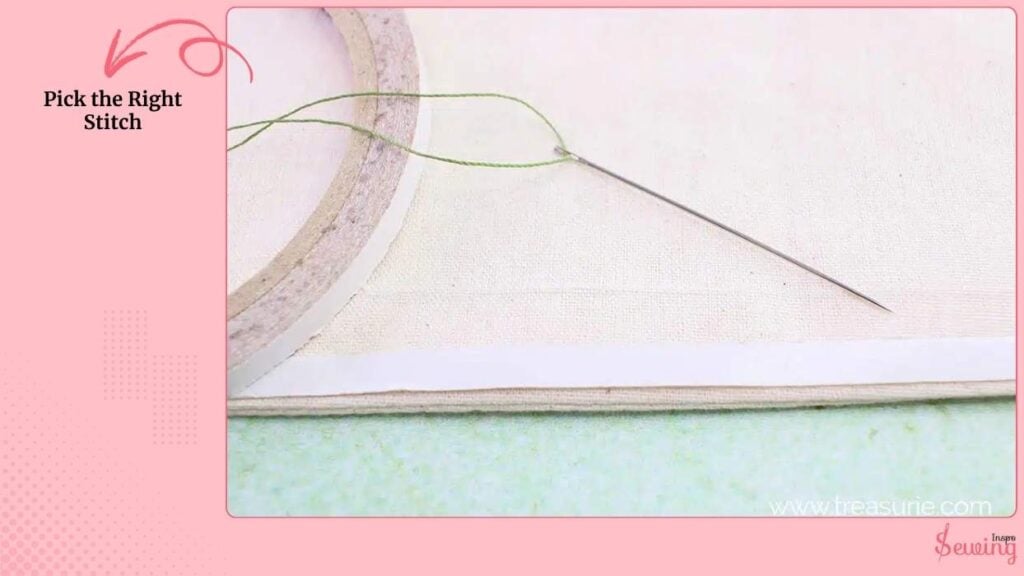
Grandma’s Tip: Always start your thread with a tiny knot or a small backstitch to anchor it before you begin sewing the main line.
Mark Your Sewing Line
Before you ever put the needle through, give yourself a little guide. Machines have presser feet to keep stitches straight. We’ve got chalk and rulers.
- Lay your fabric flat and smooth it with your hand.
- Use tailor’s chalk, a fabric pencil, or an erasable pen to draw a straight stitching line.
- For even more control, add tiny dots along the line where each stitch should be placed.
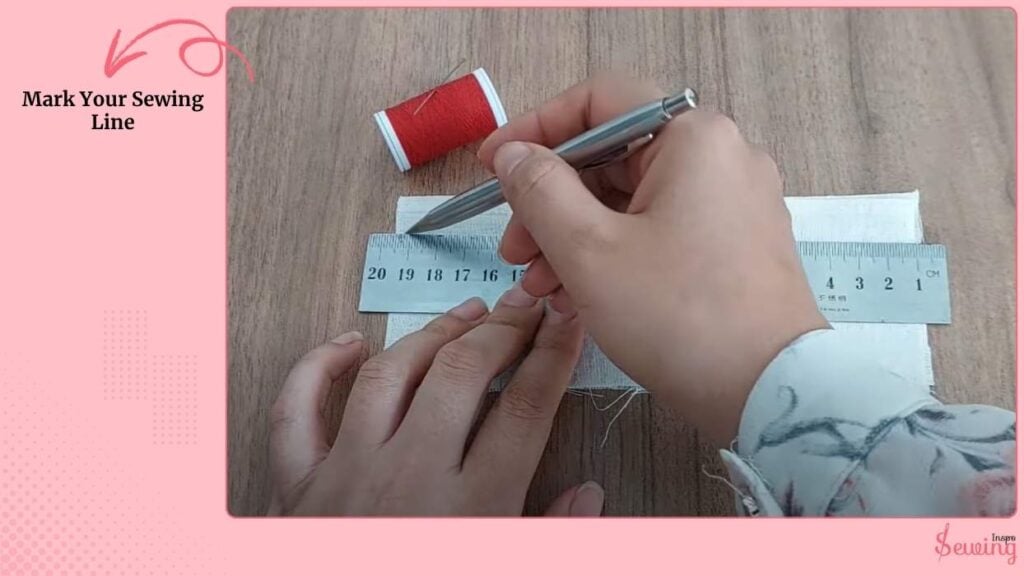
Think of it as connecting the dots with your needle. That way, every stitch lands evenly no zigzags or wandering lines.
Make Your Stitches Even
Machine stitches look neat because they’re perfectly even. So let’s mimic that by keeping our stitch length consistent.
It’s best to go for 2–3 mm per stitch if you’re sewing fine or medium-weight fabric.
If you’re unsure, then practice on a scrap piece first. Draw a few parallel lines and try to make each stitch land the same distance apart.
The motion should feel rhythmic in, out, pull, in, out, pull. Until your hand finds its natural pace.
If you’re quilting or sewing decorative seams, you can adjust the stitch length, but for straight seams, short and steady looks most professional.
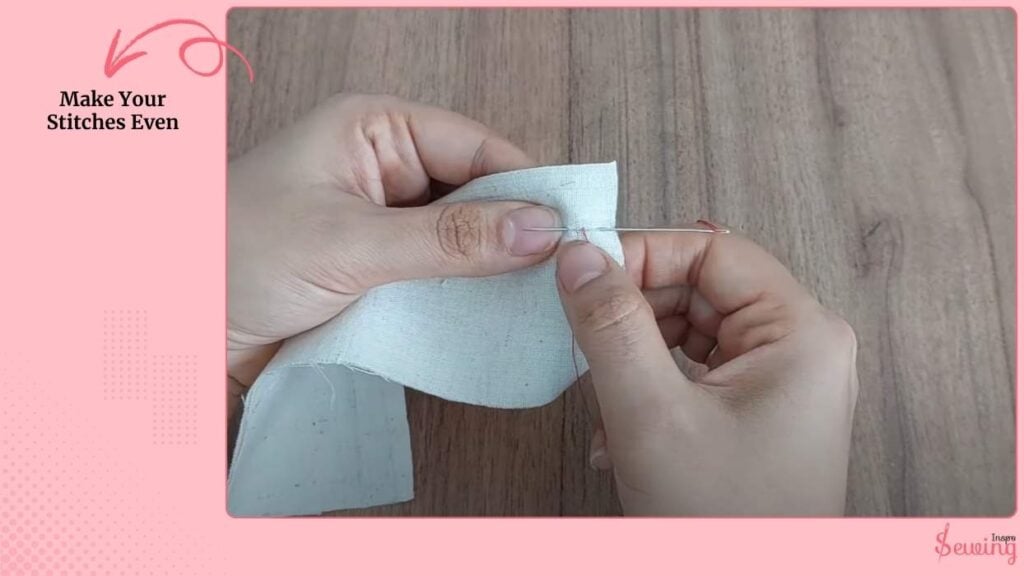
Grandma’s Tip: Count your stitches per inch (or per thumb’s width). The more consistent the count, the smoother your line will be, even with stretchy fabric.
Do the Backstitch
Now it’s time to do the main stitch. I choose the back stitch one. Cause it is the strongest stitch. Here’s how you do it:
- Bring the needle up through the fabric at point A
- Push the needle back down at point B, about 2–3 mm ahead.
- Bring it up again at point C, the same distance ahead of B.
- Now insert the needle back into point A. that’s what creates the continuous “machine-style” line.
- Repeat: up ahead, back into the last hole.
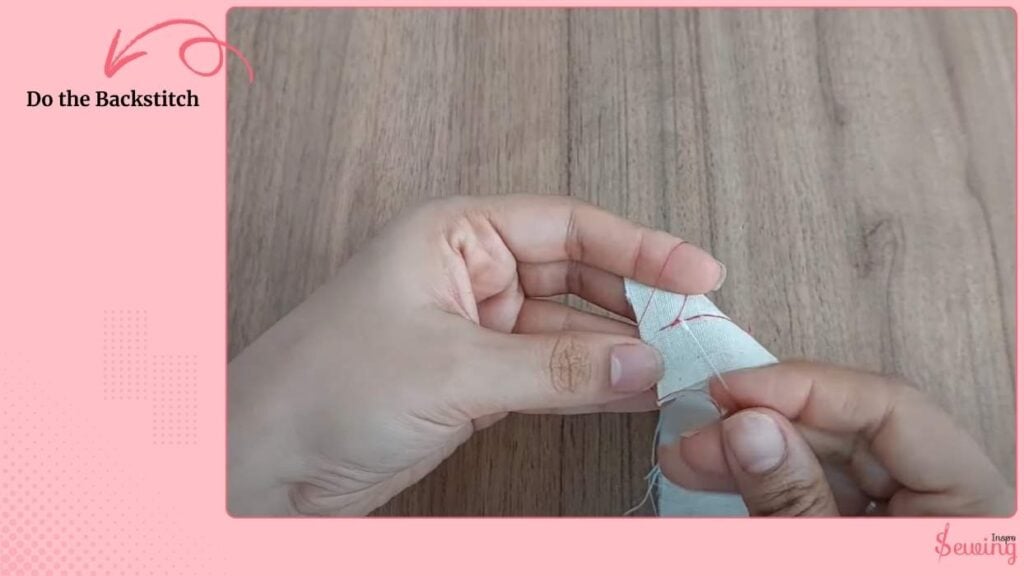
Watch as the stitches overlap slightly on the underside. That’s how you know you’re locking them in place. From the top, it’ll look like one smooth, straight line.
Grandma’s Tip: Use small, tight stitches for seams and longer ones for topstitching or decorative work.
Maintain Thread Tension
Pull too tight, and your fabric puckers; too loose, and it’ll look sloppy.
- Pull your thread just snug enough that the fabric lies flat after each stitch.
- Keep your left hand (or non-dominant hand) holding the fabric steady. Don’t stretch it, just support it.
- If the fabric starts to pucker, you’re pulling too hard. Loosen your grip slightly and let the fabric relax.
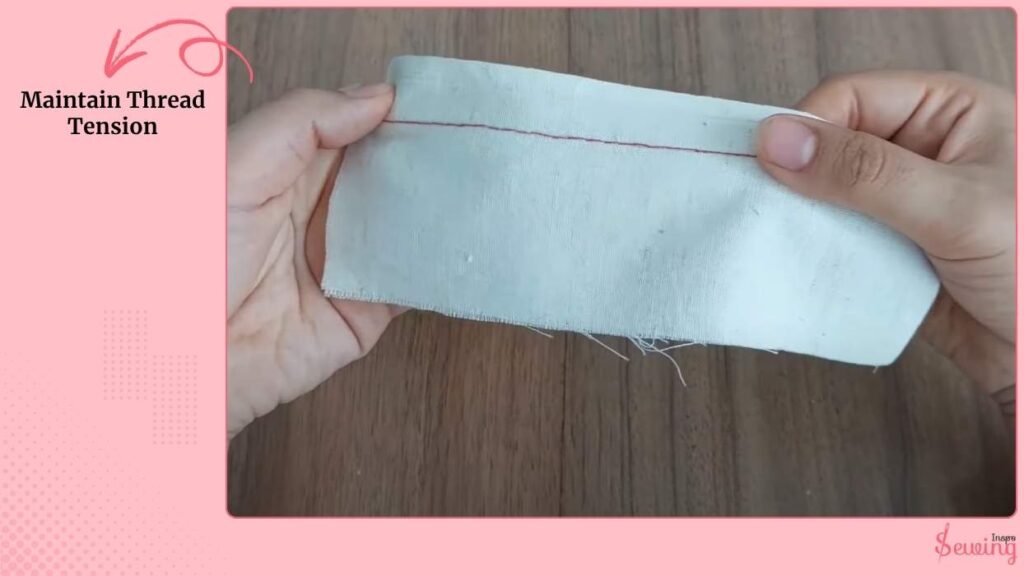
Over time, you’ll feel the tension just right not too tight, not too slack, just firm and smooth.
Frequently Asked Questions
Can hand stitching really look like a sewing machine stitch?
Yes! Using a backstitch with consistent spacing and proper tension can mimic the even, continuous line of a machine stitch.
How long should each hand stitch be?
Aim for 2–3 mm per stitch on medium-weight fabric. Shorter for fine fabrics, slightly longer for heavier fabrics.
Do I need special tools?
A thimble, sharp needle, and fabric marking tools help maintain accuracy and protect your fingers.
Conclusion
Hand stitching like a sewing machine is all about patience, rhythm, and control. But with a little practice, your hand-stitched projects will look polished, durable, and just as neat as a machine-made seam.

Leave a Reply