
I heard a lot about garter stitch in knitting and saw some designs too. Honestly, I loved the design. So I thought, ‘Is it only for knitting? Can’t I do a garter stitch pattern in sewing like purl stitch?’
So I go into the research and experiment mood. And found out that yes, you can mimic it. Ok, but HOW? I know you scream at yourself now.
Garter Pattern
To do a garter stitch pattern in sewing, you need to stitch parallel rows, quilting, or using gathering/pleating to create textured horizontal ridges.
It won’t be perfect like knitting. But it gives your project that garter-stitch vibe without touching a single needle.
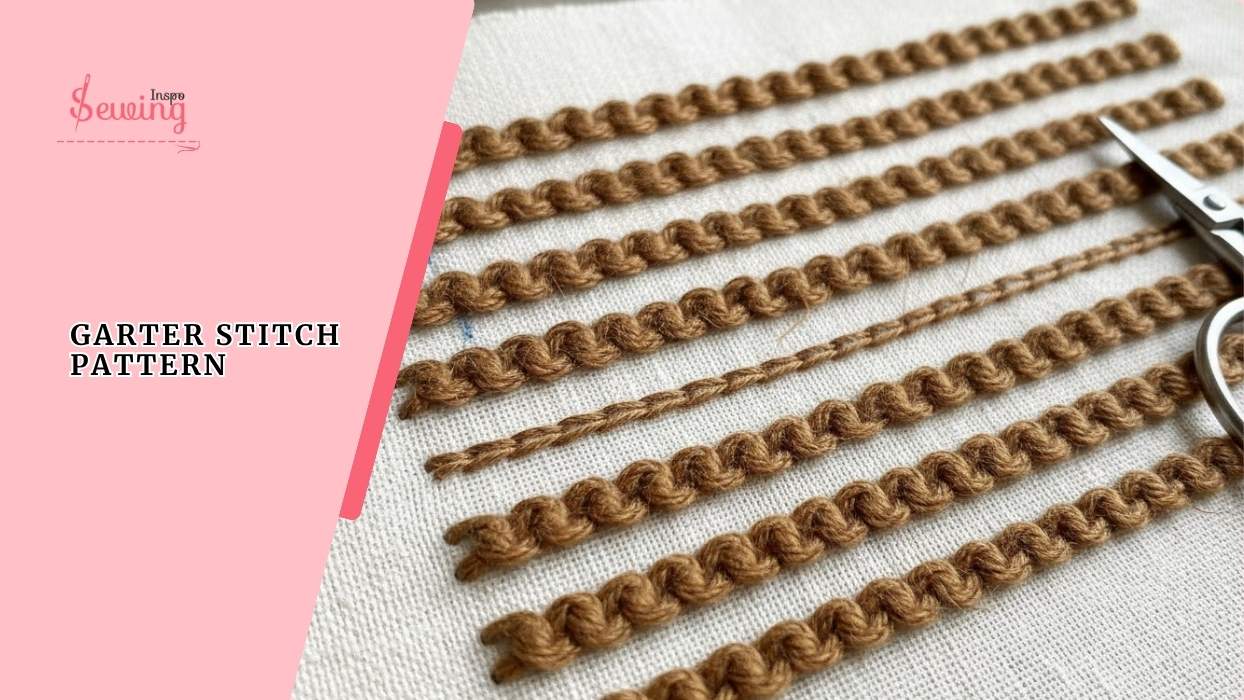
Table of Contents
How To Do Garter Stitch Pattern In Sewing?
So, to do a garter stitch pattern in sewing, follow the steps-
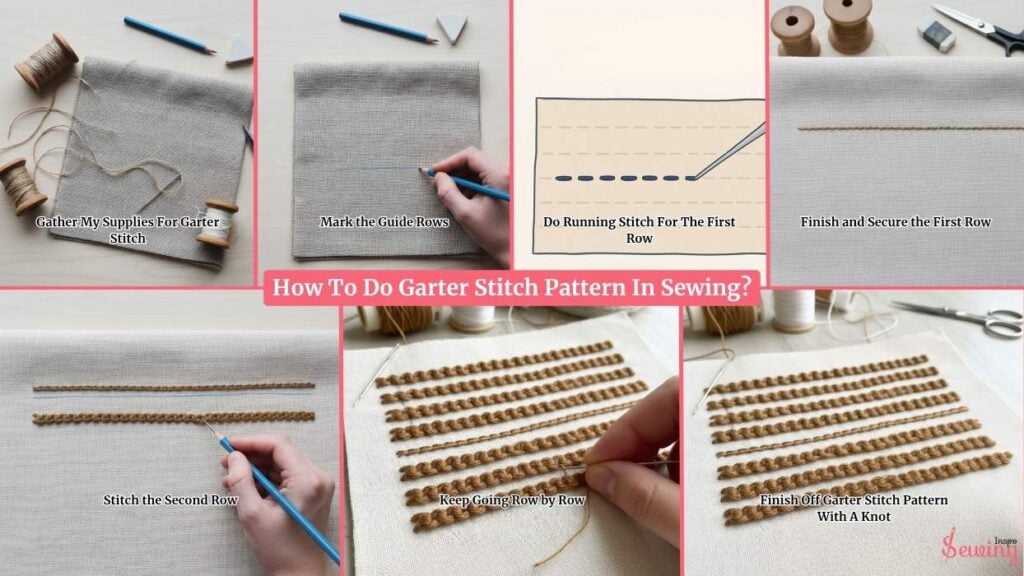
Gather My Supplies For Garter Stitch
First things first, I lay everything out on the table. I grab:
- A medium-weight fabric like cotton or linen. You don’t want something too thin, or the stitches won’t pop like seed stitch.
- I usually pick 2–3 strands so the bumps are noticeable. You can pick any color you like, but I love contrasting thread for a textured look.
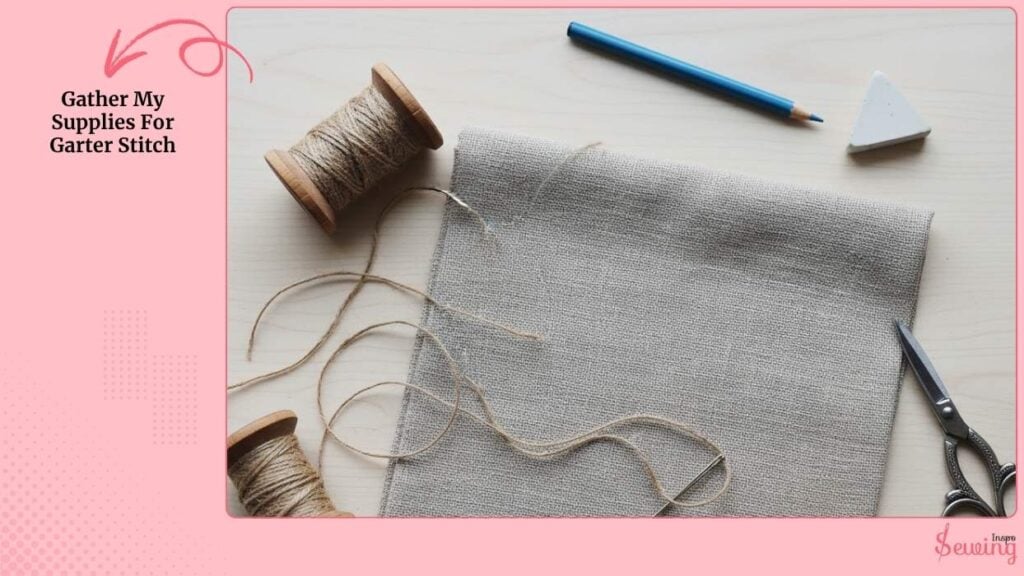
- Needle (sharp, medium size so it can go through the fabric without tearing it).
- Small scissors to snip threads.
- A fabric pencil or chalk to mark my rows.
I like to lay everything neatly so it’s all at arm’s reach. Makes stitching way more fun.
Mark the Guide Rows
Next, I take my fabric pencil and lightly draw horizontal lines across my fabric. These lines are just guides to keep my stitches straight.
I space them about 1/4 inch apart. Just enough to give that “bumpy garter stitch” effect. Don’t stress if your lines aren’t perfect; the texture will hide small imperfections.
I always tell my friends: This part is like drawing a roadmap for your stitches.
Trust the lines. They help a lot!

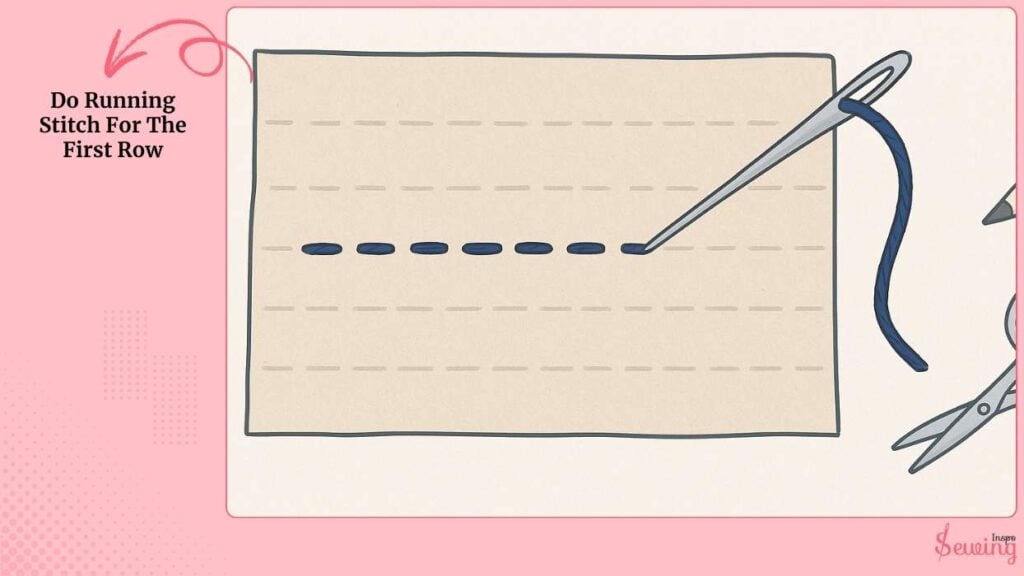
Do Running Stitch For The First Row
Alright, let’s stitch! I’m using a running stitch for this row. I do it to secure teddy edge, too. Here’s how I do it:
I poke the needle up through the back of the fabric at the start of my line. I make a short, even stitch across the line, then bring the needle back up after a small gap.
I repeat this until I reach the end of the line.
Tip: I try to make the stitches consistent in length, not too long, not too short. So, the row looks even.
Finish and Secure the First Row
Once I reach the end, I don’t just leave the thread dangling. I either:
- Tie a small knot at the back, or
- Run the thread along the back for the next row.
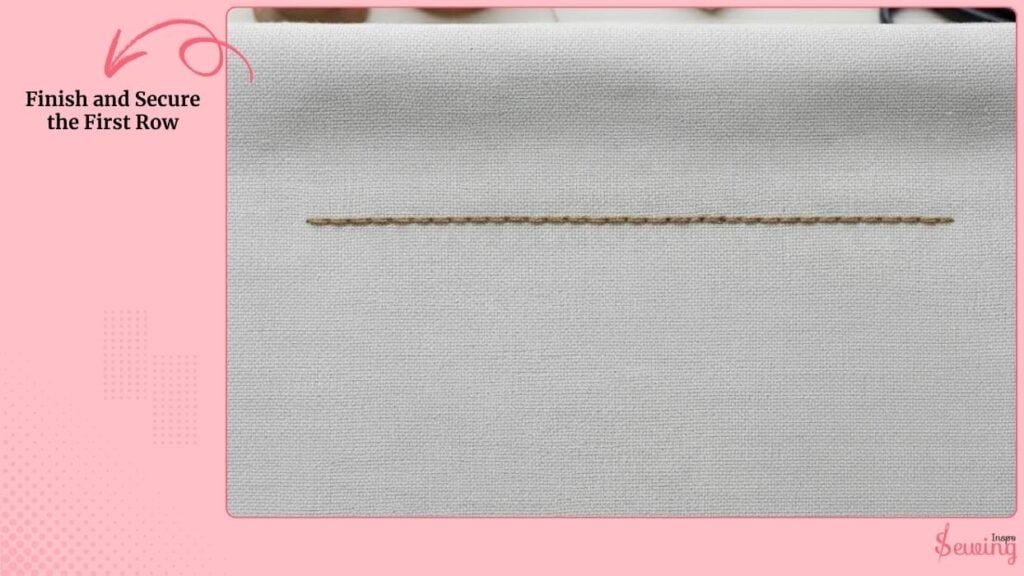
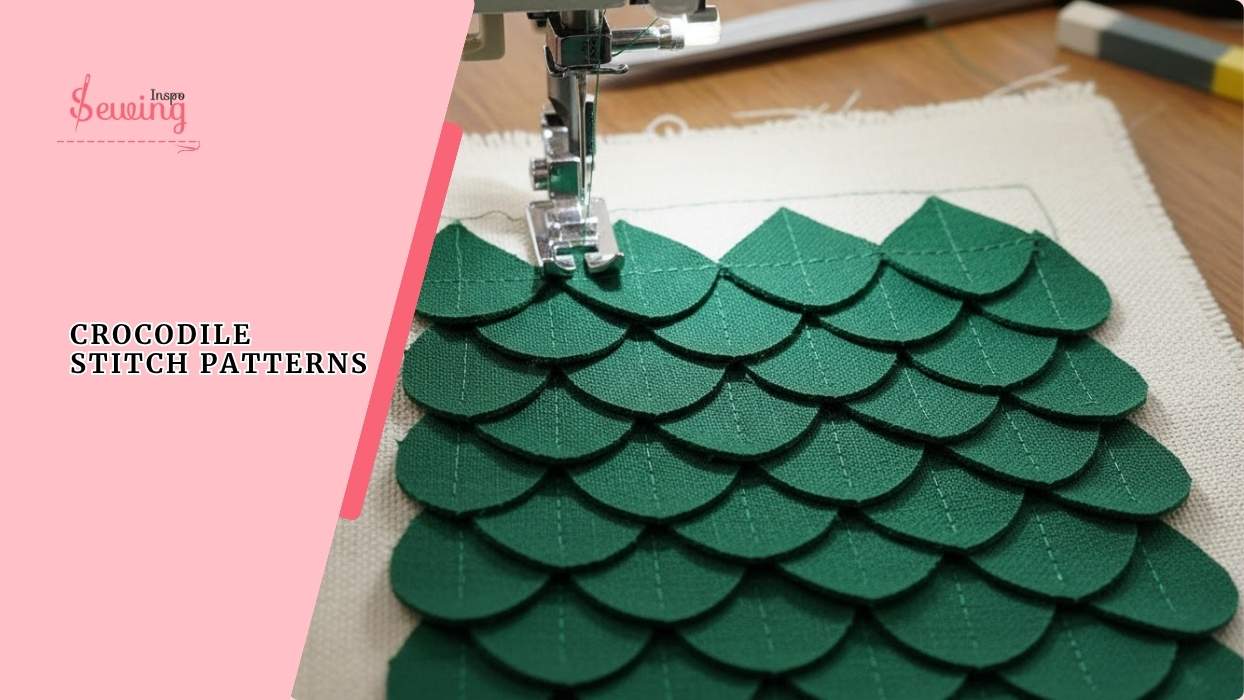
I like running it along because it keeps the back neat and saves time. I do this for crocodile stitch patterns, too.
I always show my friends: “Look! Even this first row already gives a little bumpy texture, kind of like knitting!”
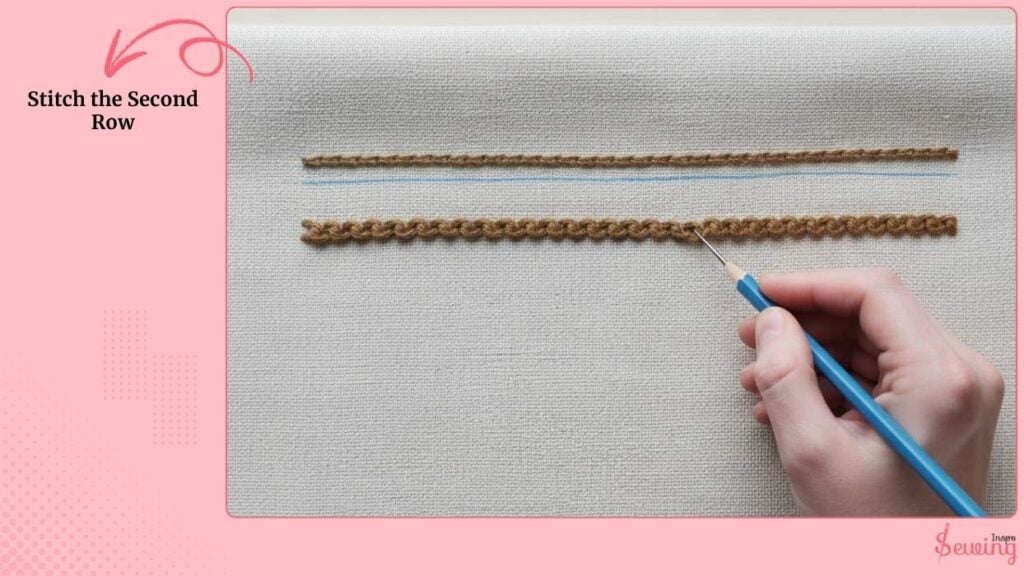
Stitch the Second Row
Now, we move down to the next guide line about the same distance as the gap in the first row. I repeat the same running stitch across. I notice the texture starting to form, row by row.
That’s where the garter stitch pattern comes to life. Those little ridges are stacking up.
If I want a slightly raised effect, I sometimes switch to a stem stitch for this row. It gives a rounded ridge, closer to real garter stitch.
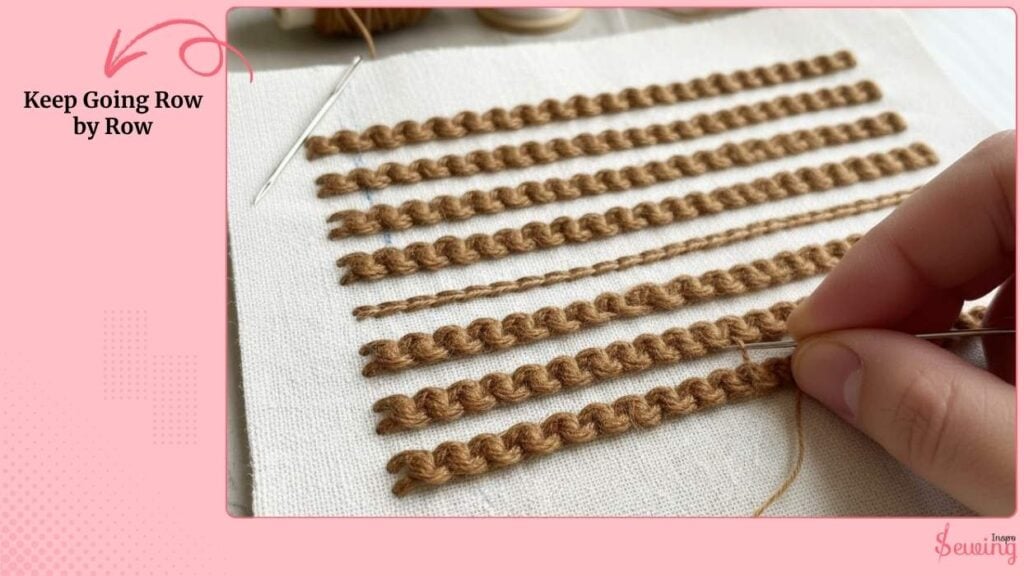
Keep Going Row by Row
This part is relaxing. I keep stitching row after row, following my guide lines. If I feel like the texture is too flat, I go over a row a second time with the same stitch.
I make sure my stitches are consistent. That’s the key for it to really look like garter stitch. It’s a kinda slow process, but it actually comes together once you get it like checker pattern.
Finish Off Garter Stitch Pattern With A Knot
Once I’ve stitched as many rows as I want:
- I carefully tie off the last thread at the back.
- Trim any extra thread.
- I smooth out the fabric and check the front. Those little “knit bumps” really stand out!
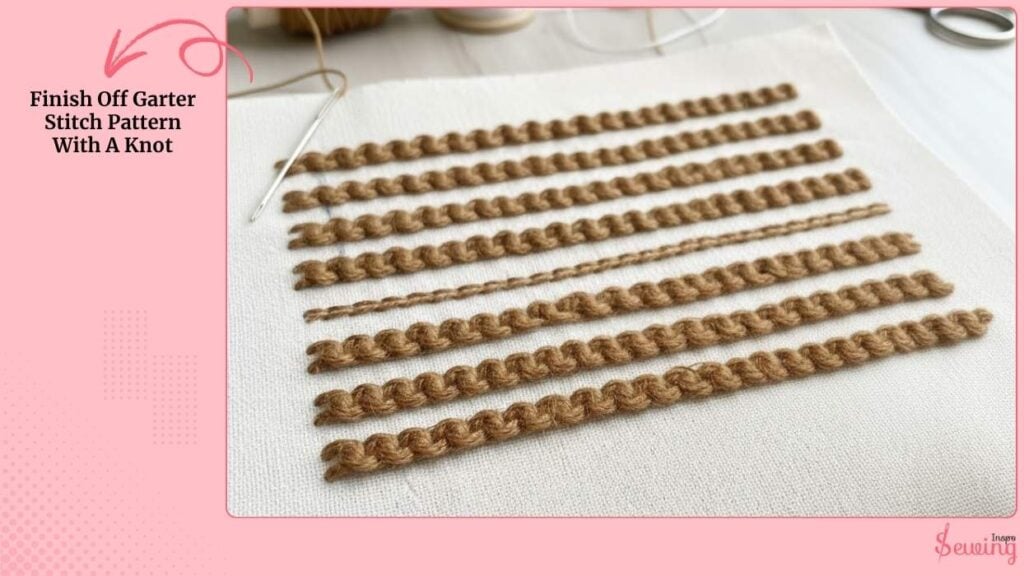
At this point, it looks just like knitting, but it’s all hand-stitched. And you made it yourself!
Frequently Asked Question
How do I make the stitches look even?
Use light guide lines with a fabric pencil and try to keep your stitch length consistent. If one row looks off, don’t worry. The texture helps hide small mistakes.
Can I make it look more “3D” like knitted garter stitch?
Totally! Use a thicker thread, two strands of floss, or even go over each row twice. A stem stitch instead of a running stitch can also create a slightly raised effect.
Is this stitch stretchy like knitted garter stitch?
Not really. Hand stitching won’t stretch like knitting, but it mimics the look perfectly.
Finally
So there you have it. Garter stitch pattern in sewing seams is impossible. But it’s not so impossible, actually.
You just need to twist the technique a little bit.

Leave a Reply