
Ever seen those gorgeous, scaly crochet designs and wondered, “Can I do that with sewing?” Well, the answer is yes… sort of! 😬
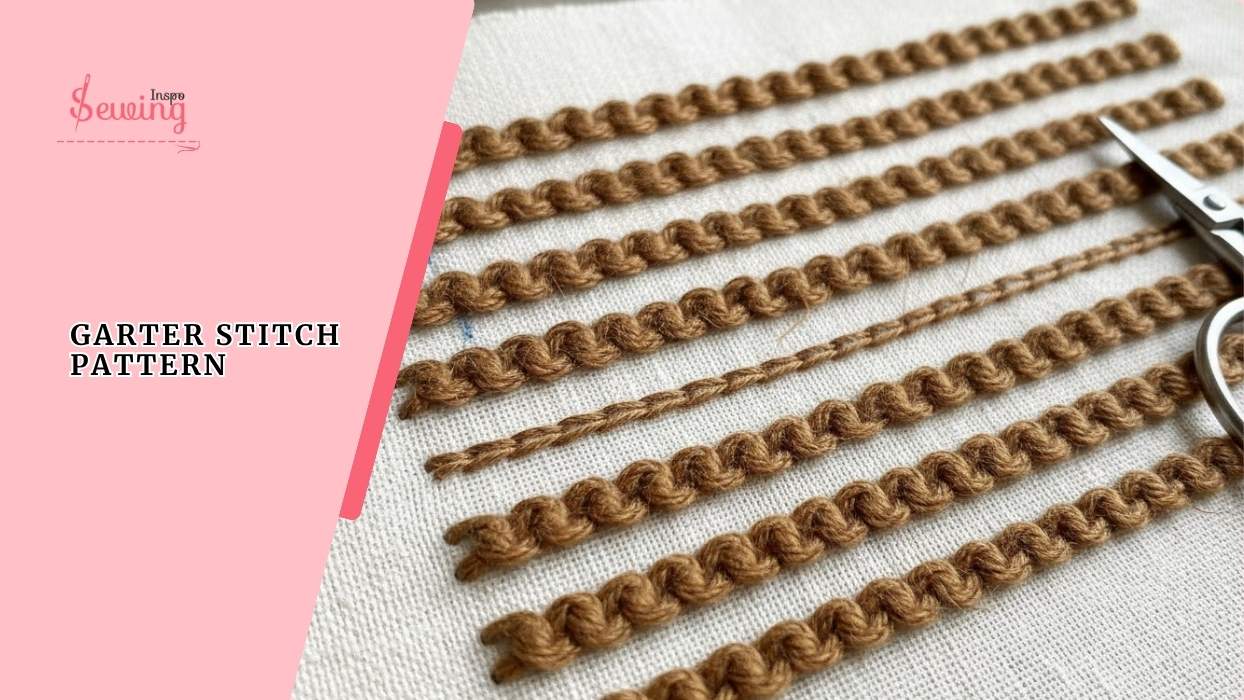
So, yes, crocodile stitch is originally a crochet technique. But you can recreate its textured look with fabric and a few clever sewing tricks, like a garter pattern.
Crocodile Patterns
You can recreate crocodile stitch patterns in sewing by layering and stitching overlapping fabric pieces to mimic the crochet scale effect.
It’s a fun, creative way to add 3D texture to bags, jackets, or even decorative pillows. No crochet hook required.
So, grab your scissors, some scrap fabric, and let’s bring those “scales” to life. Let’s try making a Simple crocodile stitch patterns in sewing.
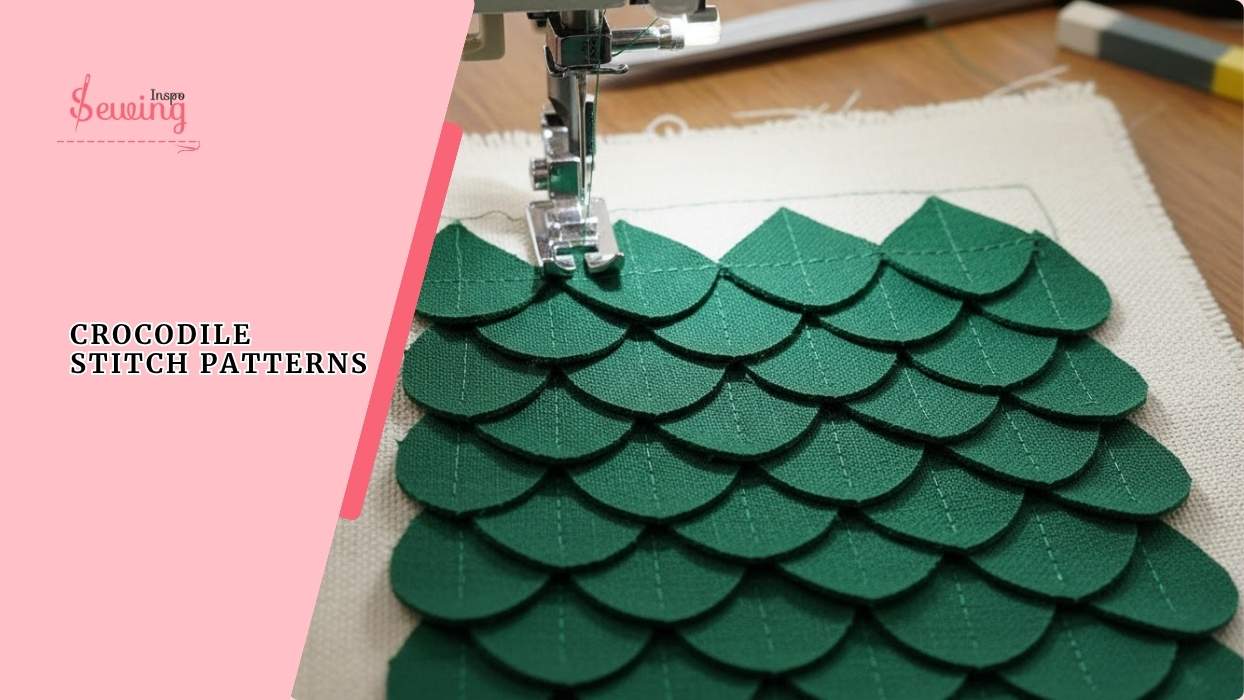
Table of Contents
How To Make A Crocodile Stitch Patterns In Sewing?
To do the crocodile stitch pattern in sewing, you need to do the following-
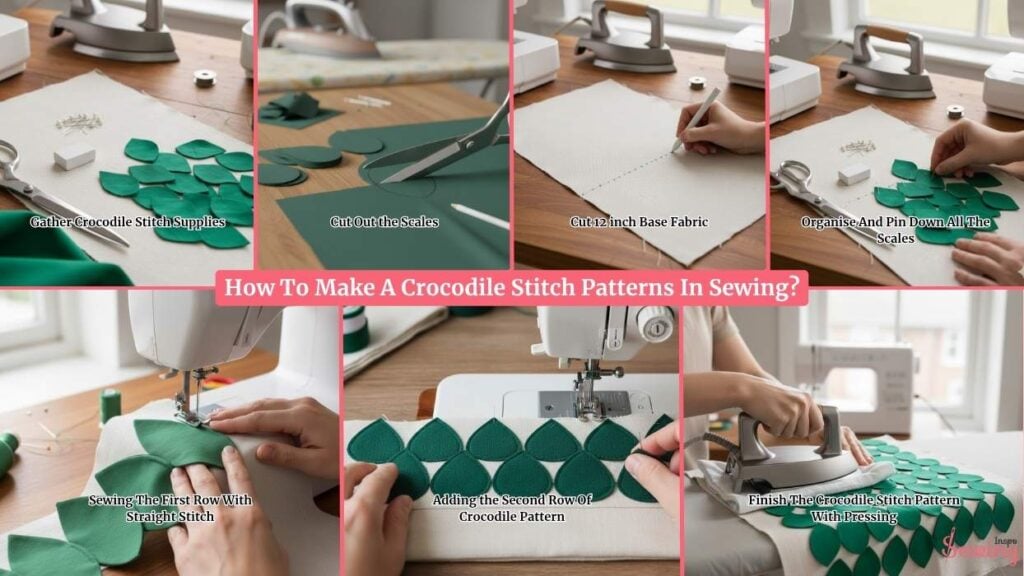
Gather Crocodile Stitch Supplies
Before I even turned on my sewing machine, I laid out everything I needed. Because trust me, once you start layering these little “scales,” it’s a mess if things aren’t within reach.
Here’s what I grabbed:
- My base fabric — I used medium-weight cotton, but linen or felt works too.
- Fabric for the scales — satin looks fancy, but I chose cotton scraps because I love the matte texture. I do this for diamond shape stitching too.
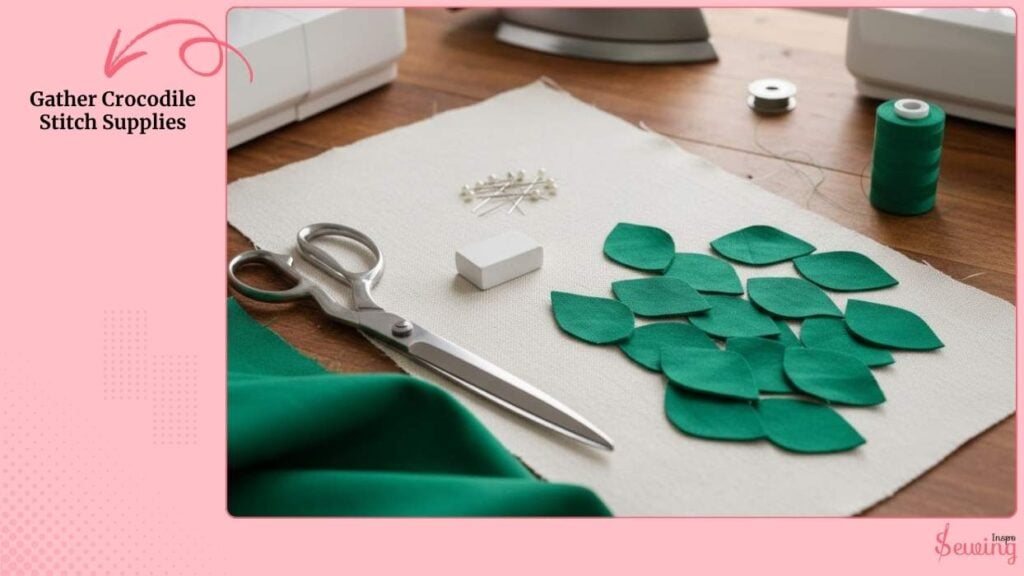
- Sharp scissors, tailor’s chalk, pins, and my sewing machine.
- Matching thread (or contrasting if you want the stitches to pop).
- And of course, an iron, because smooth fabric = neat results.
If you’re using soft fabrics like silk, it helps to add a thin layer of fusible interfacing to the back before cutting. It keeps the scales firm and crisp.
Cut Out the Scales
In crochet, the crocodile stitch looks like crocodile skin. That’s why it got its name.
But in sewing, you can’t do it. So you need to cut little fabric scales to mimic the look. I traced small teardrop shapes onto my fabric and started cutting.
- I kept each scale around 1.5 inches wide and 2 inches tall.
- For smaller projects like pouches or cuffs, I’d go smaller (1 x 1.5 inches).
- For something big, like a pillow cover, go up to 2 x 2.5 inches.
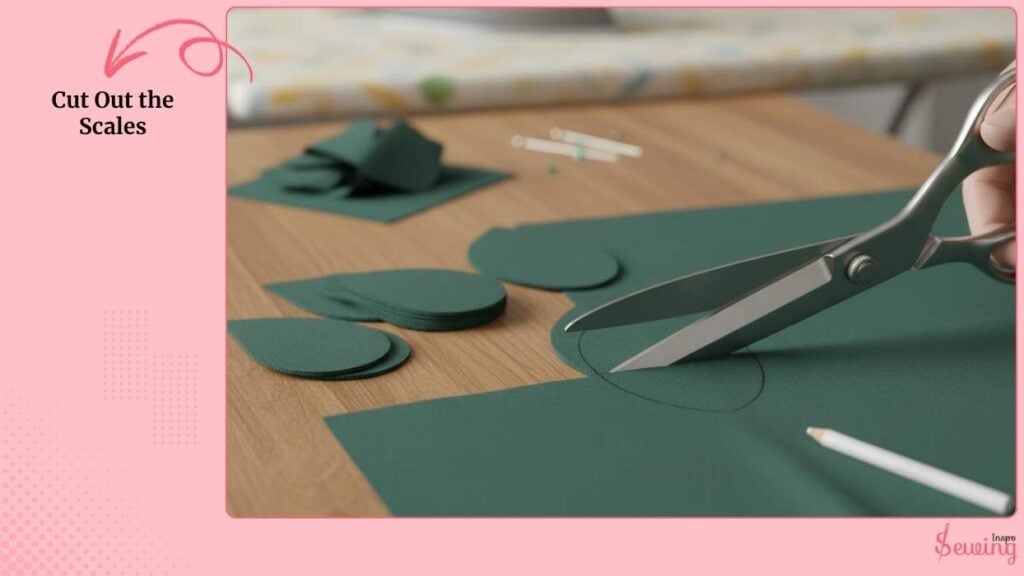
I cut around 30–40 scales for a 12×12-inch piece.
Once I was done, I gave each piece a quick press with my iron. It makes sewing them later so much easier since they don’t curl at the edges.
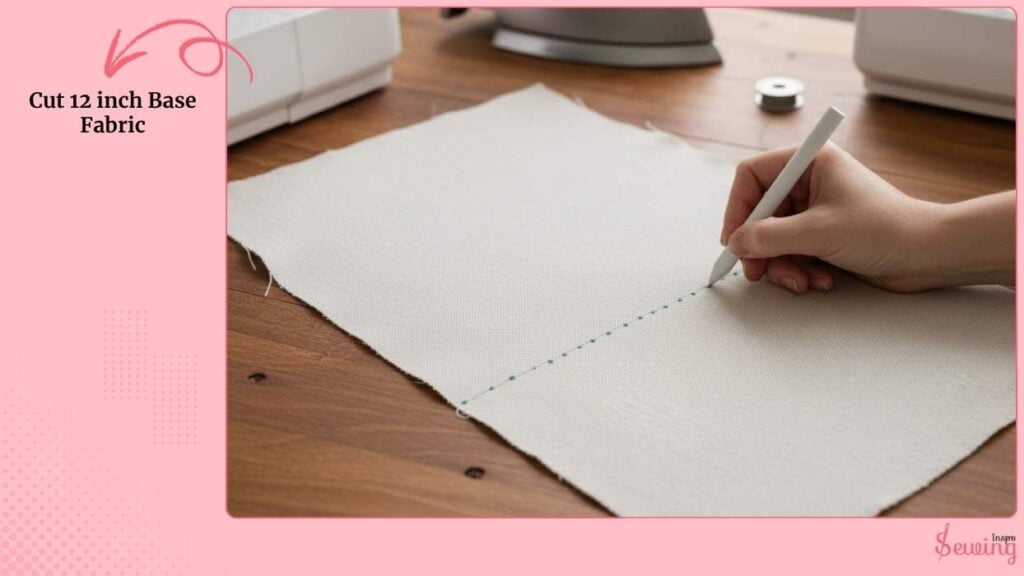
Cut 12 inch Base Fabric
I laid my main fabric flat on the table. Mine was a square piece, about 12 inches. Then I grabbed my tailor’s chalk and drew horizontal guide lines, roughly 1 inch apart.
This is where each row of scales will go.
To keep everything even, I also made tiny vertical dots along each line. It is kind of like grid points to mark where each scale would sit.
Before moving on, I pressed the base fabric again just to keep it flat and smooth. Like i did for purse making.
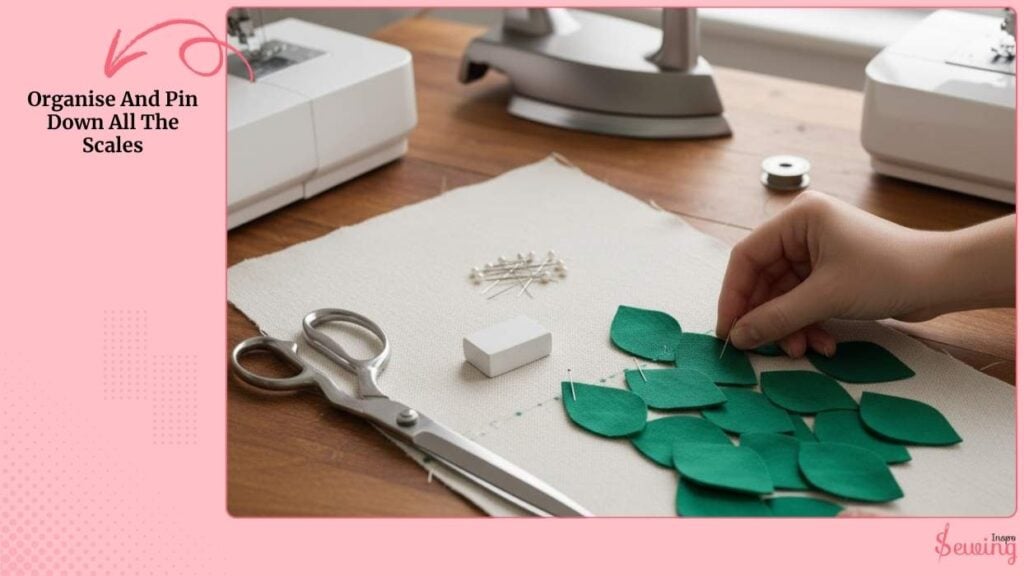
Organise And Pin Down All The Scales
I began from the bottom edge of my base fabric. I placed my first row of scales along the bottom line.
Each one overlapped the previous by about ½ inch.
I only pinned the top edge of each scale. I left the bottom part loose so it could flap up and give that dimensional, “scaly” look.
If you’re doing this for the first time, it helps to lay out a full row first before pinning. Just to check spacing and see how the overlaps look.
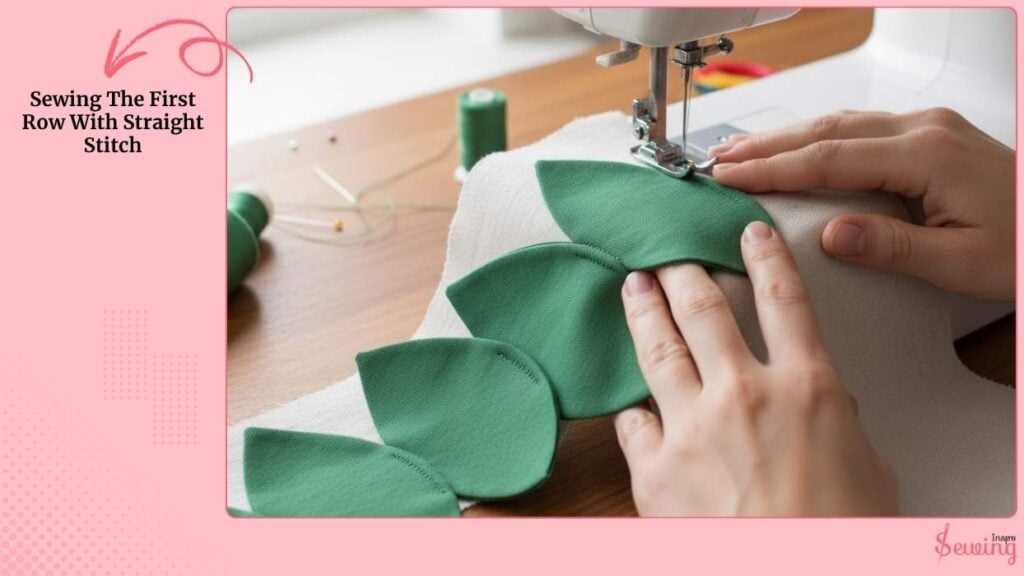
Sewing The First Row With Straight Stitch
I set my sewing machine to a straight stitch or running stitch, with a 2.0–2.5 mm stitch length. This stitch length is perfect for teddy stitching too.
Then I carefully sewed along the top edge of that first row of scales, about ⅛ inch from the edge.
The key is to sew slowly. You’re basically tacking down each scale just enough so it’s secure but still able to lift and layer later.
When I lifted the presser foot after the last scale, I could already see the fish-scale texture forming. So satisfying!
Adding the Second Row Of Crocodile Pattern
Once the first row was done, I moved ¾ inch up and started placing the next row. Here’s my trick:
- I made sure each new scale sat right in the gap between two scales from the row below.
- This creates that overlapping, crocodile-like texture.
I pinned the top edges again and stitched across using the same 2.5 mm length.
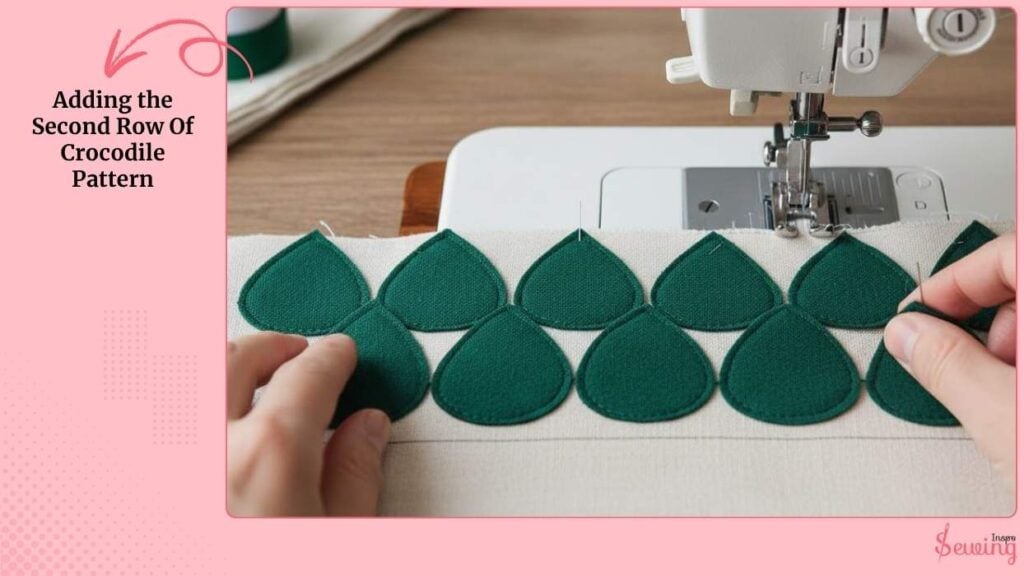
By the time I reached the third and fourth rows, it started looking like a 3D quilt. Super textured and eye-catching.
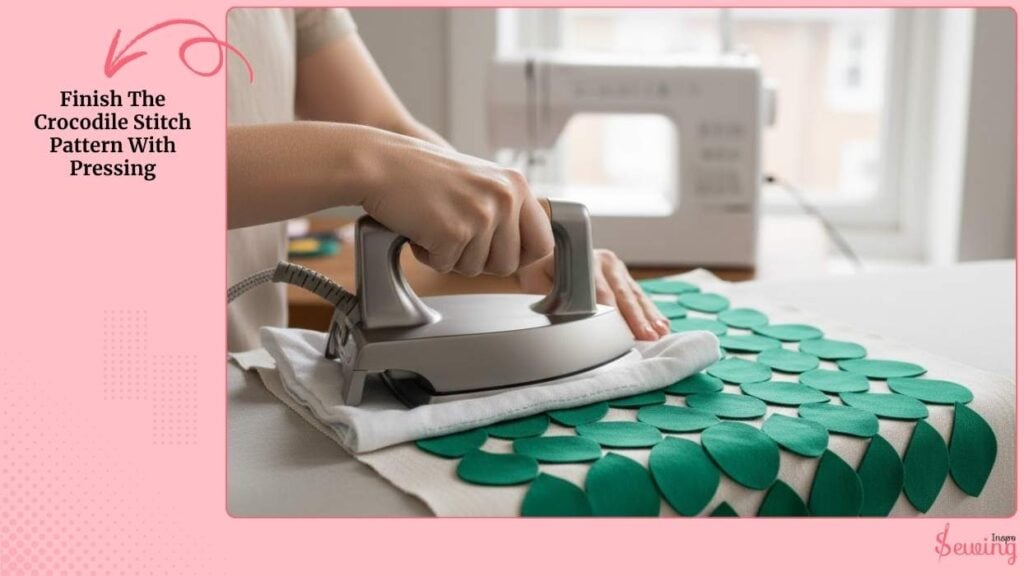
Finish The Crocodile Stitch Pattern With Pressing
After all my rows were done, I trimmed any loose threads and gently pressed the whole piece.
But I made sure to press from the back (or with a pressing cloth on top) so I didn’t flatten those pretty scales I worked so hard on.
Then, for a clean finish, I ran a topstitch around the edges using a slightly longer stitch length, around 3.0 mm.
That step’s optional, but it makes everything look more polished, especially if you’re turning this into a bag panel or cushion cover.
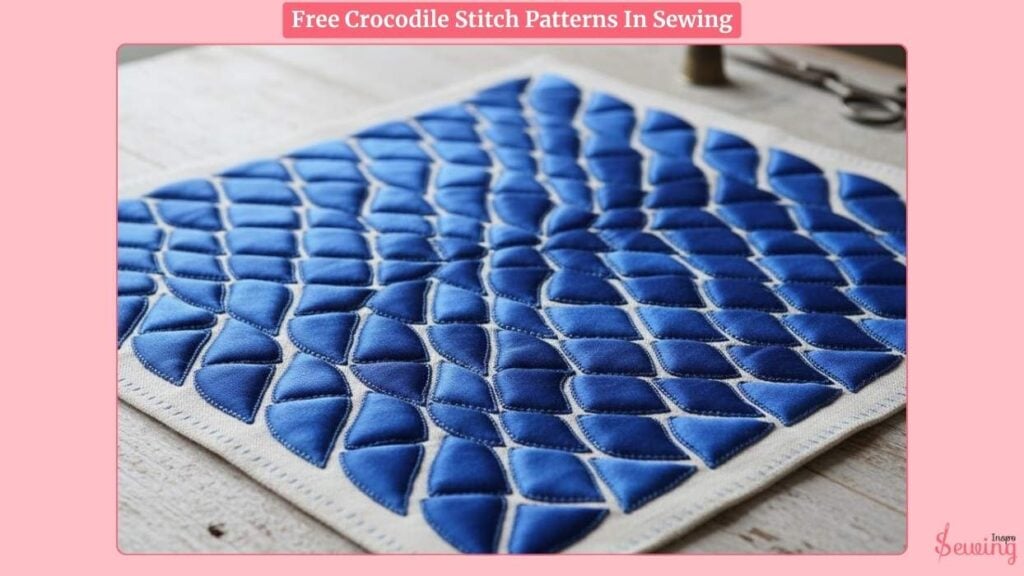
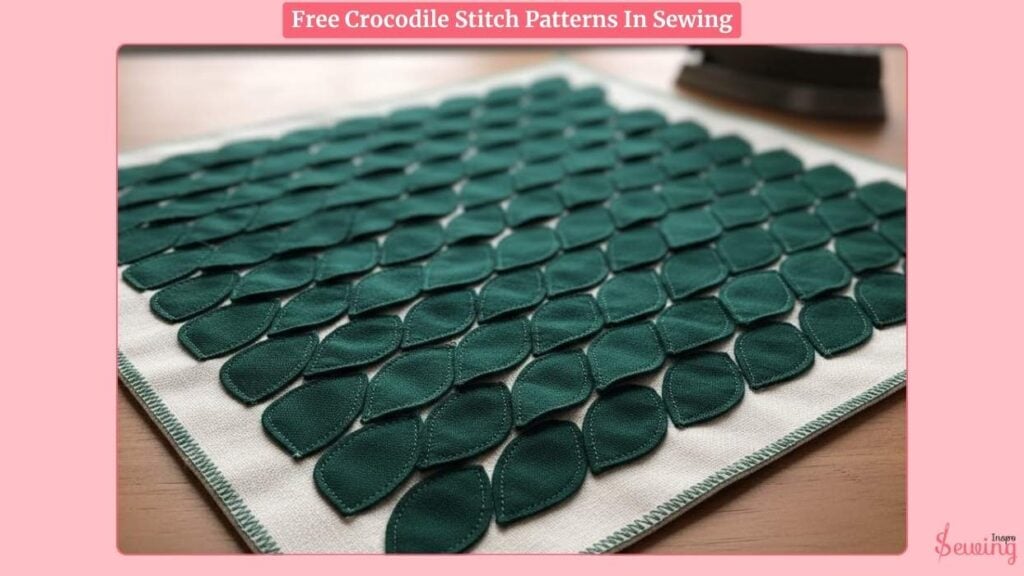
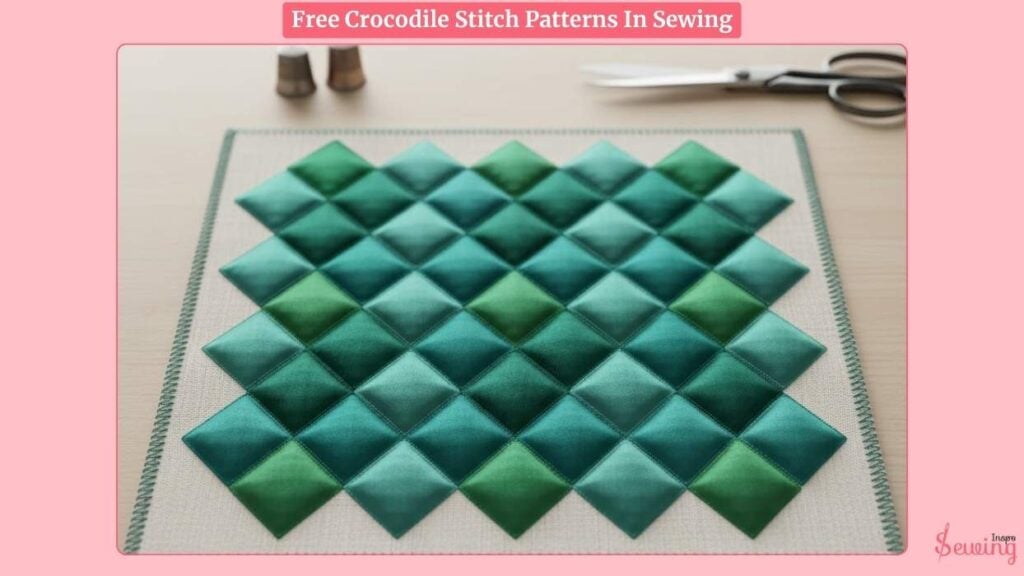
Crocodile Stitch Patterns In Sewing Pdf
Free Crocodile Stitch Patterns In Sewing
If you want to try this versatile stitch pattern, then try out those.
The Final Look
And there it was a textured, layered fabric that looked just like the crochet crocodile stitch but made entirely with sewing!
The texture feels almost sculptural, and if you use shiny fabric for the scales, it catches light in the prettiest way.

Leave a Reply