
I still remember the first time I saw a smocked dress. It was rows of tiny, gathered stitches forming delicate patterns across the bodice. It looked like magic to me. And for years, I thought smocking was something that could only be done by hand, one tiny stitch at a time.
But it’s not true.
Most modern sewing machines (and a little trick called elastic thread), you can actually recreate that classic smocked look right at home. No hand embroidery required. All you gotta do was,
Smock Stitch On Machine
To do a smocking stitch on a sewing machine, wind elastic thread in the bobbin, use regular thread on top, and sew straight lines to gather the fabric.
Sounds so interesting, so I demonstrated it to my sewinginspo class.
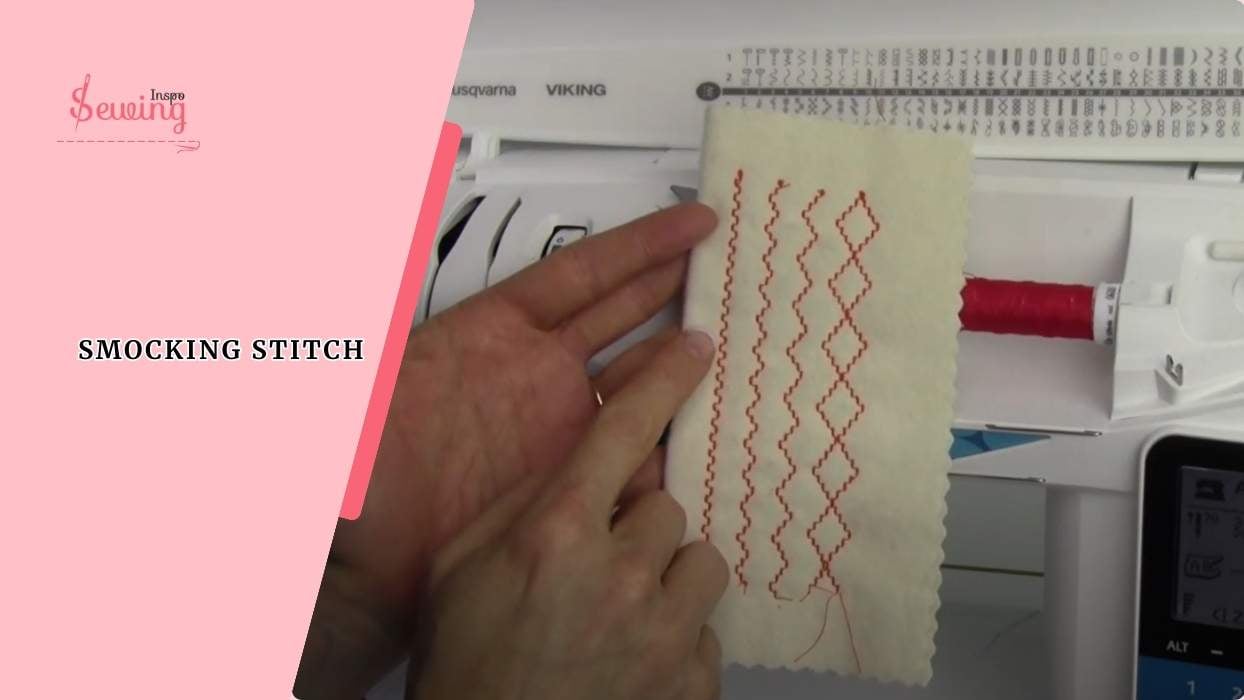
Table of Contents
What Is A Smocking Stitch On Sewing Machine?
Smocking stitch on a sewing machine is instead of stitching decorative gathers by hand; you use elastic thread in the bobbin to create stretchy, gathered rows of fabric.
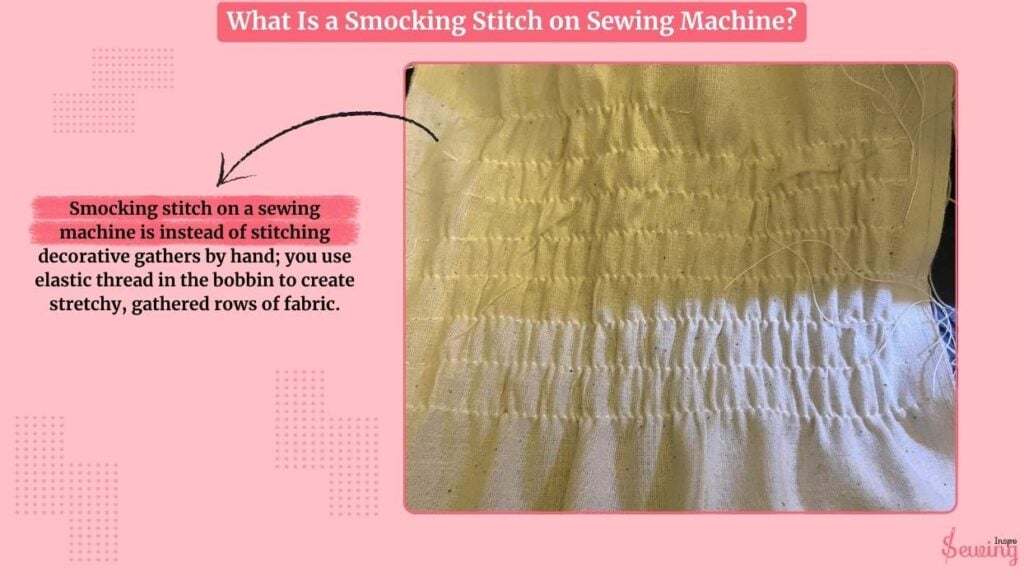
It’s not a specific “stitch” setting on your machine, but rather a method where you sew straight lines across fabric using:
- Regular thread on top
- Elastic thread in the bobbin
As you sew, the fabric gently gathers behind the presser foot, creating a soft, stretchy texture. It is perfect for waistbands, cuffs, bodices, or any area where you want both style and comfort.
How To Use Smocking Stitch On Sewing Machine?
To use the smocking stitch on a sewing machine, follow the steps,
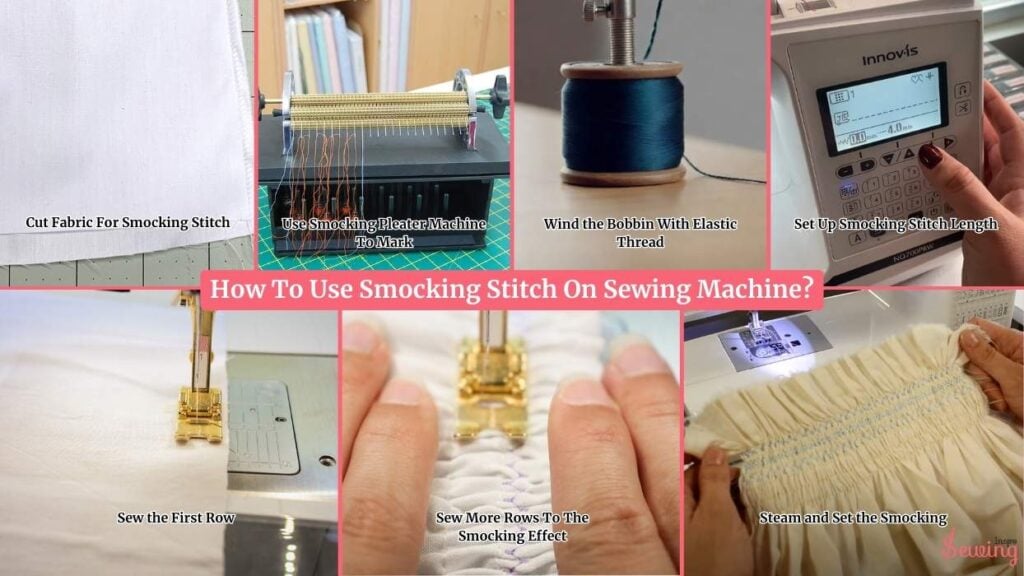
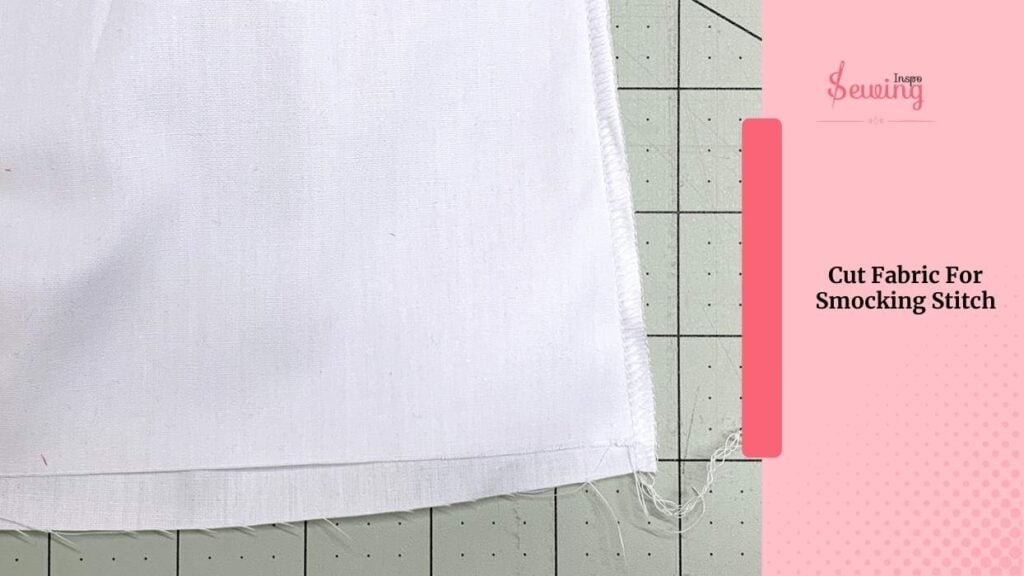
Cut Fabric For Smocking Stitch
Let’s start with a lightweight or medium-weight fabric, cotton lawn, voile, muslin, or even seersucker, which works beautifully. Heavier fabrics won’t gather well like Chevron Stitch.
Cut your fabric wider than the final size. It’ll shrink in width once gathered. So, give yourself room to work about 2x width of what you want when finished.
Lightly mark even horizontal lines across the fabric using a fabric marker or chalk. These will guide your rows of stitching. Space them about ½ inch apart or closer if you want a tighter gather.
Use Smocking Pleater Machine To Mark
So for this project, I only needed four needles, so I didn’t bother filling the whole pleater. But if you ever need all the rows smocked, you can totally fill it up. Just depends on your design.
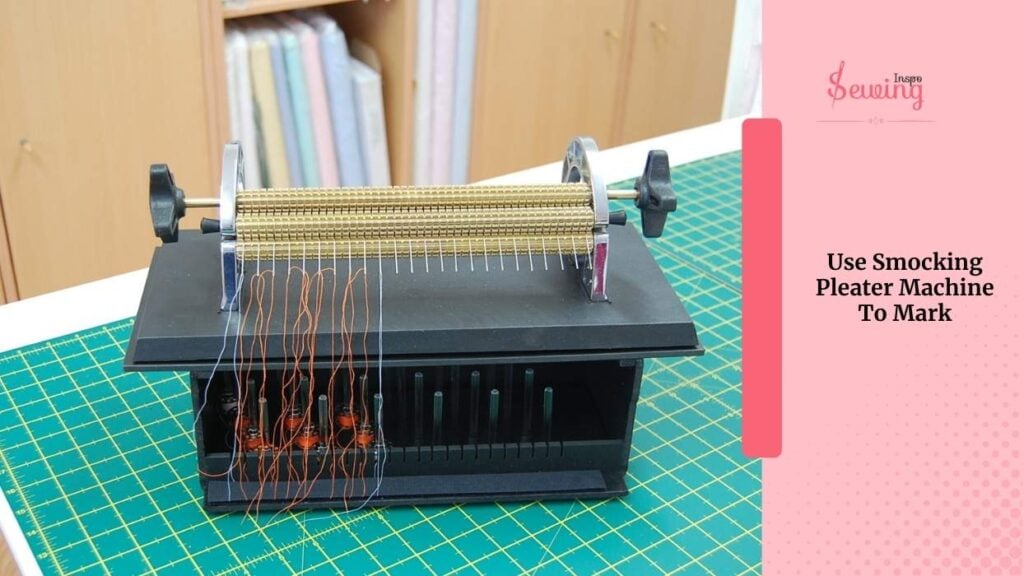
For this smocking project, I only needed four needles, so I slotted them into the pleater by unscrewing the sides, removing the top bar, and placing each needle into its notch with the curve facing down.
After screwing it back together, I cut four threads at 36 inches each (since my finished smocked section needed to be 26.5 inches) and tied knots at the ends to prevent them from slipping out.
I threaded each one through the needles, then fed my fabric between the pleater bars, no dowel, just guided it through slowly while turning the rollers and keeping the fabric smooth.
As it pleated, I made sure the threads stayed tangle-free and finally tied off the ends to lock in the pleats before gathering them to my target width.
Wind the Bobbin With Elastic Thread
You can not use a regular thread in the bobbin. You need to hand-wind your bobbin with elastic thread. Don’t stretch it or pull it tight. Just wind it gently and evenly like herringbone stitch.
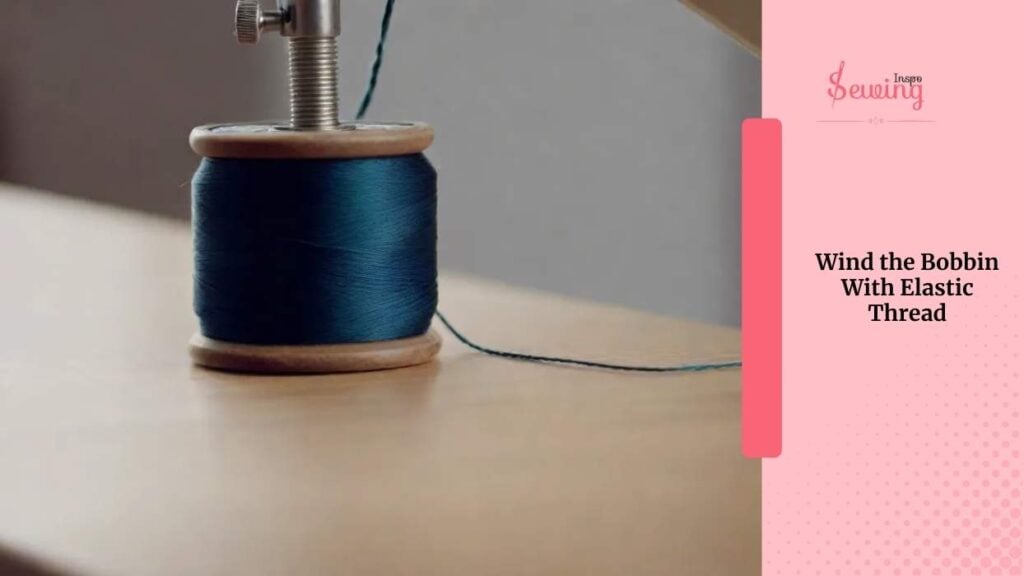
Then pop that bobbin into your machine like you usually would. On top, use your regular all-purpose thread. This combo is what gives the smocking its signature stretch.
Set Up Smocking Stitch Length

Set your machine to a straight stitch with a longer stitch length. I usually go for 3.5 to 4. Keep your thread tension at a normal setting for now (usually around 4), but be prepared to adjust if needed after a test row. Attach your all-purpose presser foot, and you’re ready to sew.
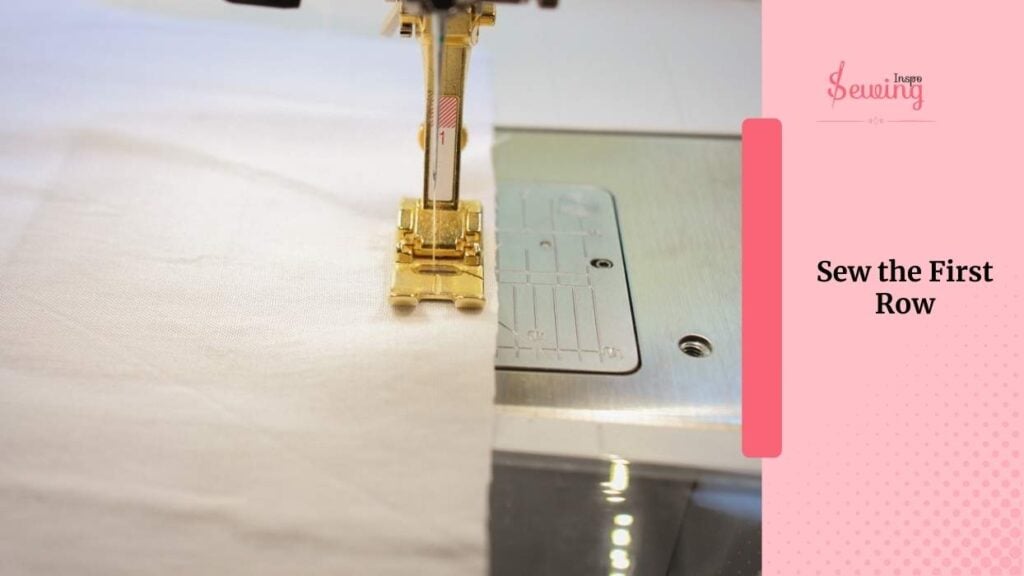
Sew the First Row
Start at the top marked line and begin stitching a straight row from one edge to the other. As you sew, you’ll notice the fabric starting to gather behind the presser foot. That’s the elastic thread doing its job!
Keep your stitching straight and steady. Don’t stretch or pull the fabric.
Just gently guide it through. Once you finish the row, leave long thread tails at the end in case you need to adjust the gathers later.
Sew More Rows To The Smocking Effect
Now sew more rows below the first one, following your guidelines. Keeping the rows evenly spaced ½ inch apart is a good starting point. With each new row, the gathers get tighter and the smocking texture becomes more pronounced. You’ll see the fabric shrink in width and take on that lovely, stretchy effect.
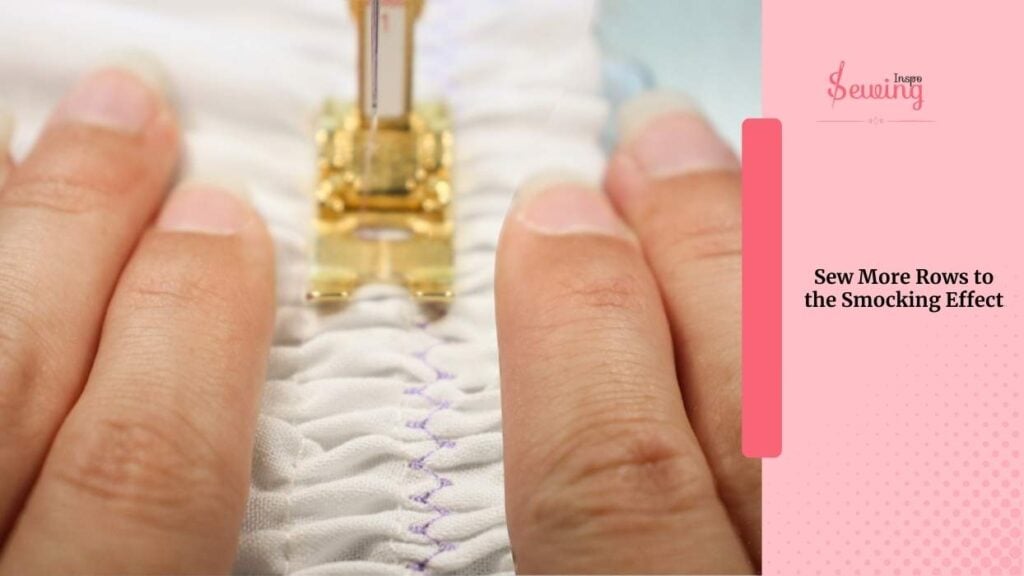
Tip: Backstitching isn’t necessary at the start and end of each row. In fact, it’s better not to, so you can adjust the gathering if needed.
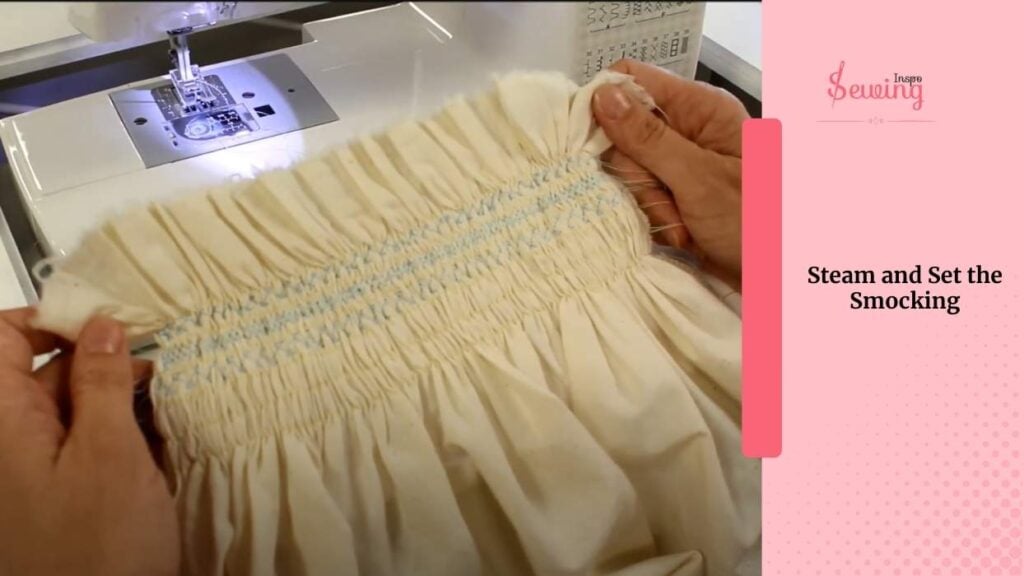
Steam and Set the Smocking
Once you’ve sewn all your rows, give the smocking a good blast of steam with your iron.
But don’t press it flat. It will be ruined cause it’s not a scallop stitch.
Just hover the iron over the smocked area and let the steam help “set” the elastic. This makes the gathers tighten up a bit more and lock into place. That’s where it differs in machine smocked and hand smocked.
You can now trim your fabric to size, finish your seams, or even add lining if it’s part of a bodice or waistband.
If you wanna a closer look at the tutorial, then watch this tutorial
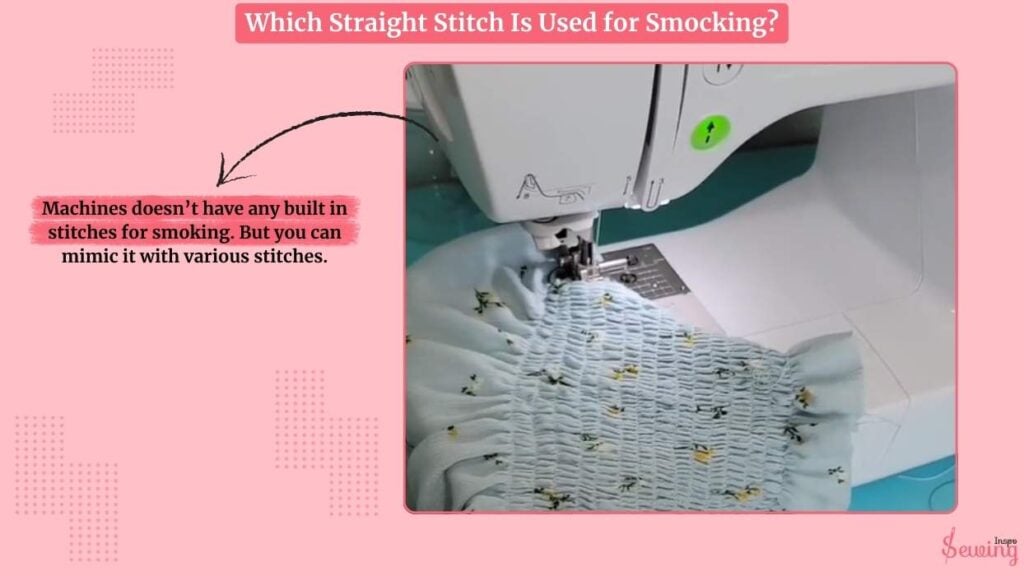
Which Stitch Is Used For Smocking?
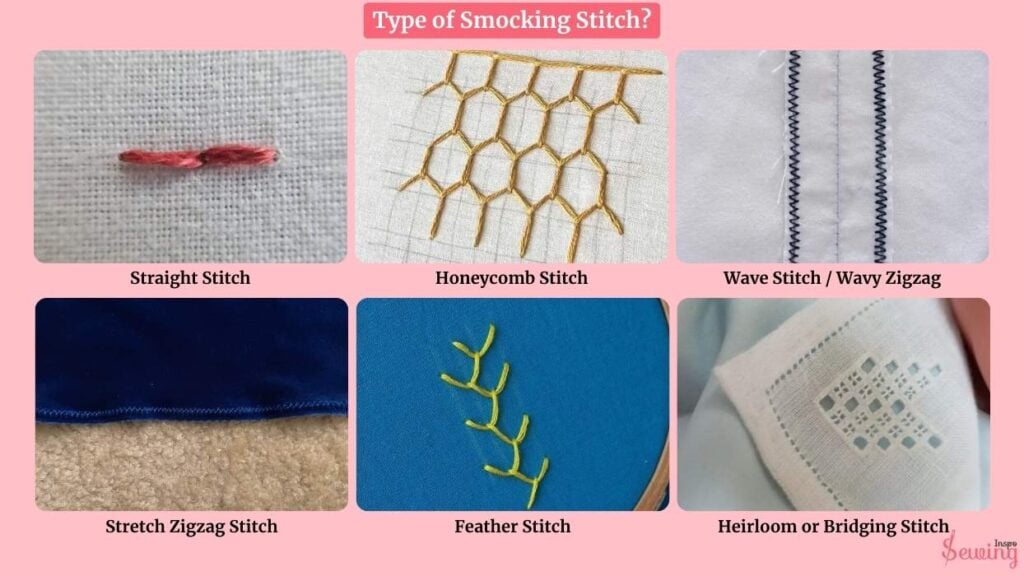
Machines doesn’t have any built in stitches for smoking. But you can mimic it with various stitches. For intense,
- Straight Stitch
- Honeycomb Stitch
- Wave Stitch / Wavy Zigzag
- Stretch Zigzag Stitch
- Feather Stitch
- Heirloom or Bridging Stitch
Not having built in stitch is beneficial in some way, right? You have so many options to choose from. But I liked to use a straight stitch to make a smocking stitch. It is simple, but effective. You don’t need any special decorative stitch just:
- A straight stitch (length 3–4 works well)
- Light to medium-weight fabric
- Elastic thread wound by hand on the bobbin
That’s it. Stitch multiple parallel rows, and you’ll have that beautifully smocked effect in no time.
How To Smock Fabric On A Sewing Machine?
Let me summarize the whole process to smock fabric on sewing machine-
- Wash and iron it to prevent shrinking later.
- Mark the areas you want to smock using chalk or a washable fabric pen.
- Use a smocking or zigzag stitch.
- Adjust the tension and stitch width according to the fabric type.
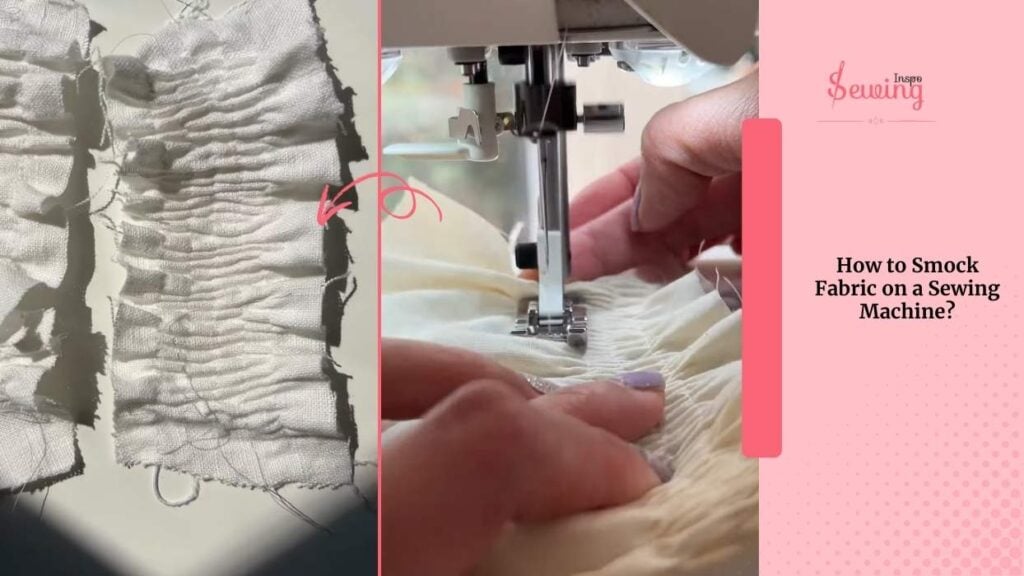
- Guide the fabric carefully under the presser foot.
- The stitch will create elastic, gathered pleats automatically.
- Test on a scrap piece first.
- Press lightly if needed, and your fabric is beautifully smocked and ready to use!
Frequently asked questions
Can I use any elastic thread for smocking?
It’s best to use high-quality elastic thread made specifically for sewing. Cheap elastic can break or lose stretch quickly.
Do I need a special presser foot for smocking?
No special foot is required. Your regular all-purpose foot works just fine.
What fabrics work best for machine smocking?
Lightweight to medium-weight woven fabrics like cotton lawn, voile, or muslin are ideal. Avoid heavy or very stretchy knits.
How do I prevent my fabric from puckering unevenly?
Make sure to sew slowly and keep the fabric flat without pulling it. Using stabilizer under very thin fabrics can help as well.
And You’re Done!
That’s how you create a machine smocking stitch. It is soft, stretchy, and so satisfying to make.
Whether you’re adding a smocked detail to a sundress, creating a cute baby romper, or just experimenting with texture, this technique is super versatile and way easier than it looks.


Leave a Reply