
I remember the first time I heard about “backstitching” on a sewing machine. I thought it was some fancy new technique, like zigzag, I needed to learn. 😂 Turns out, it’s just that simple trick to lock your stitches in place so they don’t come undone.
Here is how it’s done,
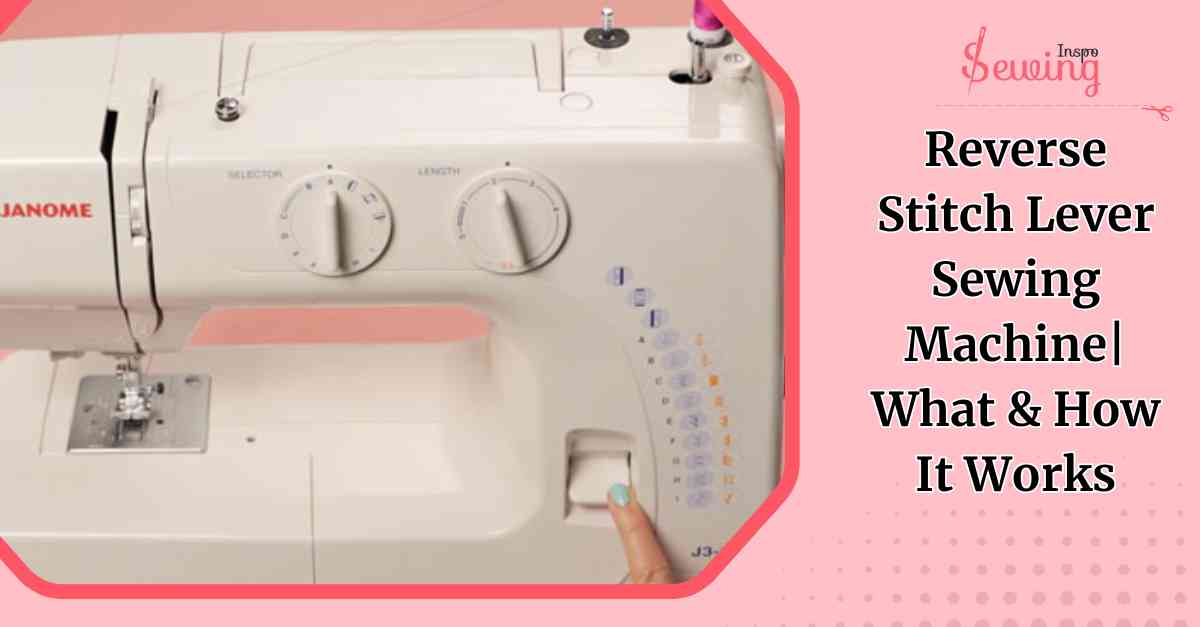
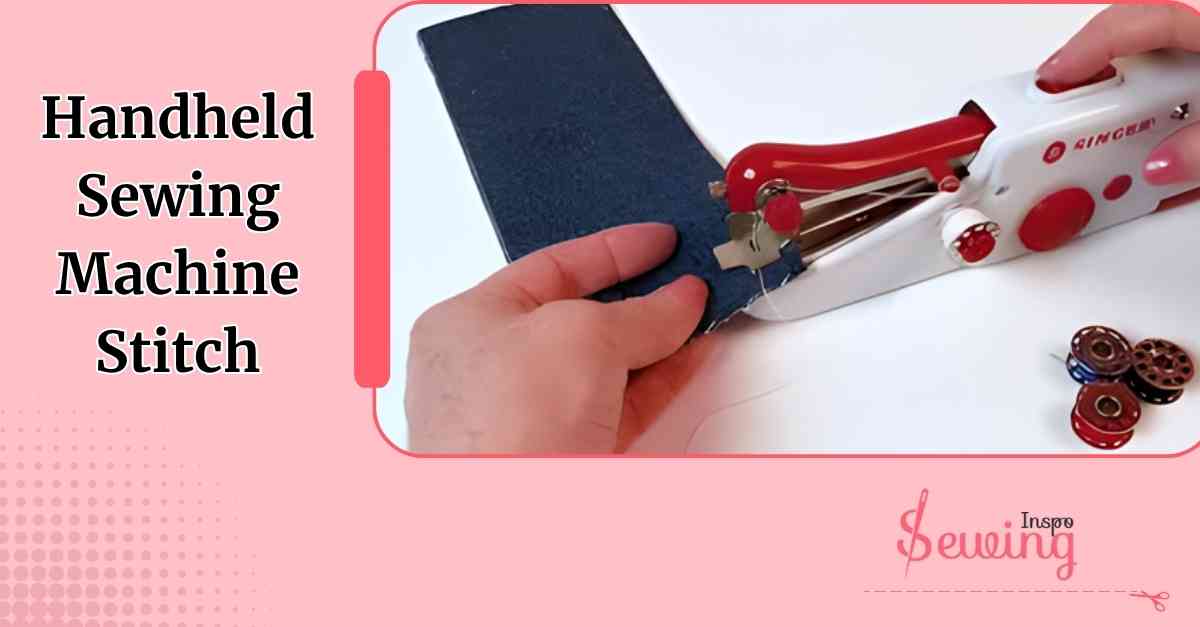
Back Stitch by Sewing Machine
To do a backstitch on a sewing machine, sew forward a few stitches, press the reverse lever to stitch backward over them, and then continue sewing forward again.
Once I got the hang of it, it felt like second nature. And trust me, it saves so much frustration later! But let’s get to know the back stitch sewing machine definition.

Table of Contents
What Is A Back Stitch On A Sewing Machine?
A back stitch on a sewing machine is when you sew forward for a few stitches, then hit the reverse button and sew backward over those stitches. It’s like taking a step back while stitching. Backstitch is needed to secure all types of machine stitches.
Basically, the opposite of a machine running stitch. It locks everything in place so your seams don’t start unravelling after you’ve spent hours making something beautiful. So it’s used to secure stitches like satin And if you are wondering how to end a stitch sewing machine then back stitch is the answer.
I didn’t realize how important it was until my first tote bag literally started falling apart at the seams. Lesson learned. Now, I always backstitch at the beginning and end of every sewing line. It takes like 3 seconds but saves so many headaches later!

This stitch helps you secure so many stitches, especially the overcast stitch. Backstitch is basically the safety ground of every stitch.
Reverse Button On Sewing
If you are new, asking ‘reverse stitch control definition’ isn’t surprising. The reverse stitch lever sewing machine was new to me.
Cause i was confused, like you, before. Basically,
The reverse button on a sewing machine allows you to stitch in reverse instead of forward. The reverse button typically resembles a small button with a U-turn arrow 🔁 or a straight arrow pointing backwards (←).
Depending on your machine model, it could be:
- A lever you hold down while sewing
- A push button you tap (often grey, black, or marked with a symbol)
- Or even part of a digital screen with a back arrow icon
But,
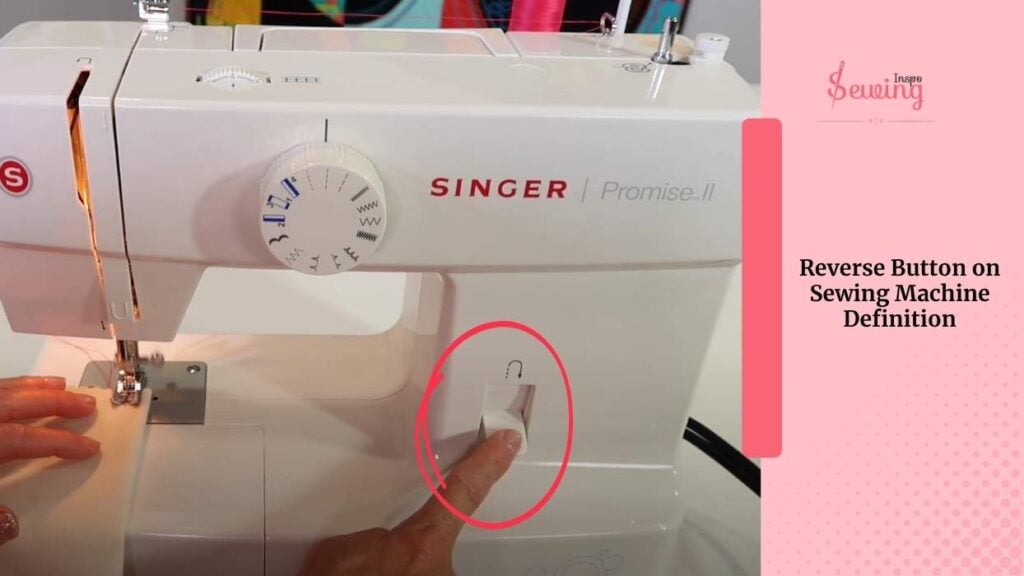
It’s usually found near the stitch length dial or front panel, super easy to reach while you’re sewing forward.
Can Every Machine Do Back Stitch On A Sewing Machine?
Actually, no, not every sewing machine can backstitch. 😯 Backstitch needs a special machine just like Chain stitch.
Most modern ones? Totally. They usually come with a little button or lever for it. But if you’ve got an older machine (especially one made before the 1940s) or some types of industrial machines, you might be out of luck.

Here’s why:
- Backstitching is kind of a “newer” thing — older models just weren’t built with that feature.
- Backstitching helps lock your stitches at the start and end so they don’t pull apart later. Super important for strength!!
- If your machine doesn’t do it, no panic — you can still secure seams by setting a tiny stitch length and sewing a few stitches in place.
- Industrial machines sometimes skip backstitch features because they’re built for speed, not fancy extras.
Moral of the story? Check your machine before you assume it can backstitch! But of course I won’t leave you hanging. Thinking about what sewing machine you need to buy. So here are a few machine lists that actually can backstitch.
- Back Stitch Singer Sewing Machine
- Back Stitch Lever Sewing Machine
- Automatic Back Stitch Sewing Machine
- Brother Sewing Machine
Back Stitch Symbol Sewing Machine
Got your machine, but what’s next? What is the backstitch symbol? 🤔 Don’t feel embarrassed, cause I was at your place once. That’s why I am here to clear up the confusion.
So basically,
The backstitch symbol on a sewing machine usually looks like a small “U-turn” or a backward arrow, kind of like your stitches doing a quick flip.

According to Copper Creek Patterns,
This symbol points you to the button, lever, or dial that makes your machine sew in reverse. It’s super handy because it helps you lock your stitches at the beginning and end of your seams so they don’t come undone later.

Now let’s get into how to back stitch sewing machine.
Back Stitch Button Sewing Machine
Now, after the symbols and all, comes another confusing part: buttons!? Like, where is the f**king button? 😑
Clam down. I’ll tell you, where is reverse button on sewing machine,
It’s usually super close to where your hands naturally sit when you sew. On most machines, it’s either a small lever or a button right above or near the needle area.
On newer machines,
It’s often a button you just press and hold to stitch backwards. On older ones, it might be a lever you push down and hold. Once you let go, the machine returns to sewing forward as normal.
Easy once you spot it.
But it can hide if you don’t know what you’re looking for!
How To Do A Backstitch On A Sewing Machine?
Now that you have everything, let’s get into real stitching, okay? So to do backstitch on a machine, you need to follow 6 steps,

The Reverse Button On Sewing Machine
Okay, first things first, before even starting, I made sure to find the reverse button (or lever) on my sewing machine.
It wasn’t hard to spot — usually, it’s right on the front where it’s easy to reach. Some machines have a big button, others a lever. Just like you would find a handle in a chain stitch machine

When I press and hold it, my machine stitches backwards. Simple!
Insert the Needle Properly Half an Inch Down For The Backstitch Sewing Machine
When I was ready to sew, I placed the needle about half an inch down from the top edge of the fabric.
I wanted a little space to backstitch into without falling off the edge — trust me, that happens if you’re too close.

Press the Reverse Button and Stitch Backward
Next, I pressed the reverse button and gently pressed the presser foot pedal.
The machine started stitching backwards, and I stitched right up to the very top edge of my fabric.

Release the Reverse Button and Stitch Forward
As soon as I hit the top, I released the reverse button and stitched forward again, going directly over my backwards stitches.
This double stitching locks everything in place beautifully. The formation of the backstitch sewing machine is so satisfying.

Keep Sewing Until You Reach the Bottom And Done With Back Stitch Sewing Machine
I kept sewing forward normally until I reached the bottom of my seam. Easy peasy, straight line sewing!

Backstitch Again at the End of the Seam
At the bottom edge, I pressed the reverse button again and stitched backward for about half an inch, just like I did at the top. Then I let go of the reverse button and stitched forward again to finish cleanly at the edge.
And that’s it you got a backstitch within a few seconds. That’s how to do a backstitch on a sewing machine.

Back Stitch Singer Sewing Machine
Ok, so above I demonstrated the modern machine. But how about the old Singer sewing machine?
You knew the sewing machine that our grandmother used.

Can you backstitch on that? Yes, you can! My grandma used to have one of those. So I tried it a few times. Here is how I did it,
- First, I begin sewing as usual. I stitch along my fabric, just like I would for any project.
- After I’ve sewn 2-3 stitches and want to create a reverse stitch, I gently lift the sewing foot.
- I do this by using the presser foot lever on the side of my machine. It’s a super simple step, but key for this technique!
- With the foot lifted, I carefully pull the fabric toward me.
- This motion moves the fabric in the opposite direction, setting me up for that reverse stitch effect.
- When I’m ready to finish, I do the same thing—lift the foot slightly, pull the fabric back, and sew over my previous stitches again to secure the end.
And that’s it! That’s how I do reverse stitching on my classic sewing machine. It’s actually pretty easy once you get the hang of it. If you have any questions or want more tips, just let me know in the comments below.
I would love to guide you on how to backstitch sewing machine or any other stitch.
Back Stitch On Sewing Machine Is Loose Issue Solved!
When I first started stitching, I noticed something super frustrating — my backstitches were coming out loose and sloppy. 😣 Not exactly what you want when you’re trying to lock seams tight!

At first, I thought I was bad at it, but after a bit of troubleshooting, I figured it out. Here’s exactly what I did to fix it:
I Checked the Thread Tension of The Backstitch Sewing Machine
The first thing I tried was adjusting the top thread tension. I tightened the tension dial just a bit, then ran a test seam on a scrap piece. That alone made a huge difference!
I also checked the bobbin tension. It turned out to be loose. A thread tension setting of around 4-5 is perfect for backstitch.
I Double-Checked the Bobbin
Next, I popped open the bobbin case.
Made sure the bobbin was seated correctly. Rethreaded it carefully through the bobbin tension spring. Also checked that the bobbin was wound nice and even — no weird bumps or loose loops.
(And yes, I was using the right bobbin for my machine that matters more than I thought!)
I Looked at the Needle Of The Back Stitch Sewing Machine
My next thought? The needle may be the problem. I took it out and… yep, it was slightly bent. (Whoops!)
I swapped in a fresh needle that matched my fabric, and that helped the stitching look so much better.
I Checked the Thread
I realized I had been using an old, random thread from a drawer. Big mistake.
I switched to a good-quality polyester thread that matched my fabric weight and rethreaded the machine carefully. I ensure it was threaded through every guide and tension disc.
And yes, so that’s how I got everything right with backstitching now.
Where Is The Backstitch Button On A Singer Sewing Machine?
I got some sms asking for the reverse button on the singer sewing machine. So i thought add the answer here,
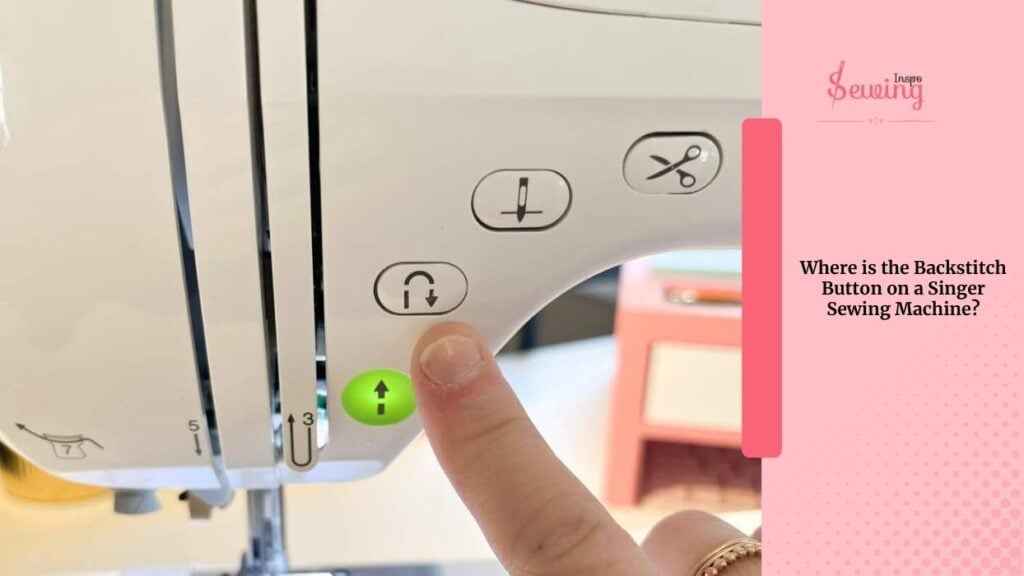
On most Singer sewing machines, the backstitch button (or lever) is right at the front. It is usually above or below the stitch length dial. And it’s marked with a reverse arrow (↩).
How To Back Stitch on a Brother Sewing Machine
Frequently Asked Questions
Is backstitching really necessary?
Yes, in most cases. Without backstitching, your seams may start to pull apart, especially if the fabric is under stress.
Where is the backstitch button on a sewing machine?
Usually right on the front of the machine. It’s often a large button or lever with a symbol that looks like a U-turn arrow. When you press and hold it, your machine sews backward.
Can every sewing machine do a backstitch?
Not all. Most modern machines have a backstitch feature, but really old vintage models or some industrial machines might not. (They were built more for speed, not fancy features.)
Outro
That’s my back stitch sewing machine story.
That’s yours? Wanna share your experience?If yes, then comment below. Sewinginspo loves to hear from you.

Leave a Reply