
A long and short tacking stitch is a stitch of different lengths. This kind of basting stitch creates a flexible pattern that moves easily with the fabric. It is used to hold fabric layers in place before the final sewing. But hearing the name for the first time made it difficult. But trust me, it isn’t! 😁
Here is how to do it-
Long And Short Tacking Stitch
To do a long and short tacking stitch, first, bring your needle up at the starting point. Make a long stitch, then a shorter one next to it. Repeat between longer and shorter stitches as you continue along the desired line.
This technique adds texture and can outline or fill shapes in embroidery. Getting curious about it, right? Ok, let’s learn what kind of stitches are there.
Main Points of long and short tacking stitches:
- Long tacking is a long, loose, straight stitches.
- A short tacking stitch is a tacking stitch that is short.
- The main difference between long and short tacking stitches is size.
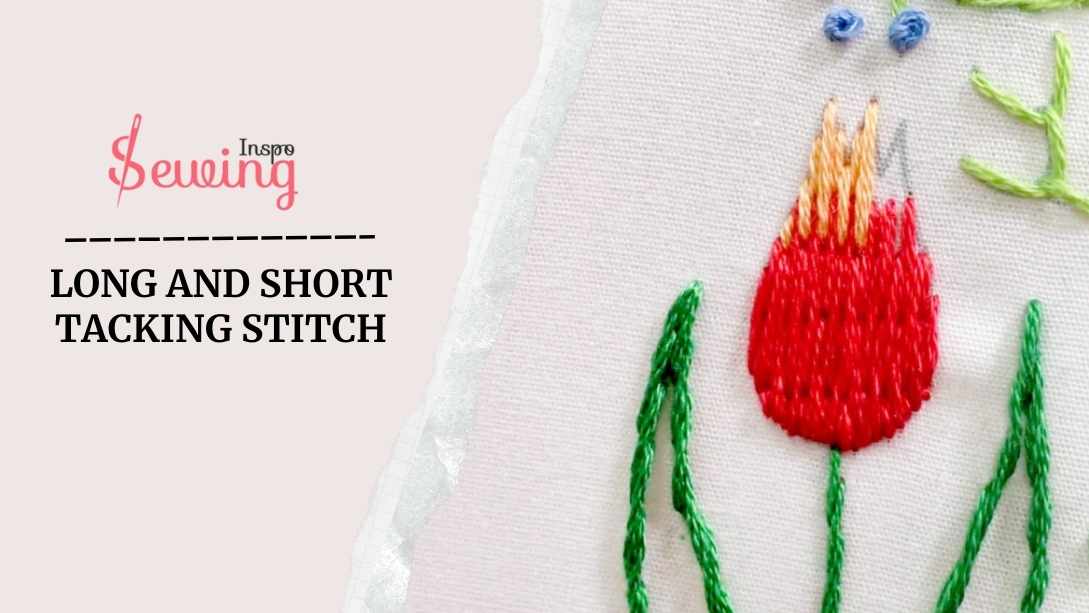
Table of Contents
Project Overview:
| Skill | Time | Needle | Thread |
| Entry | 2-3 Minutes | 5 Size | 6 Strands Of Tapestry Silk Thread |
What Is Long Tacking Stitch?
A long tacking stitch is a loose loop stitch. It is pretty simple and looks neat. It has a long vertical stitch spaced evenly, usually about ½ inches apart, but you can adjust the length according to your project. However, it is very different from Slip tacking stitch patterns.
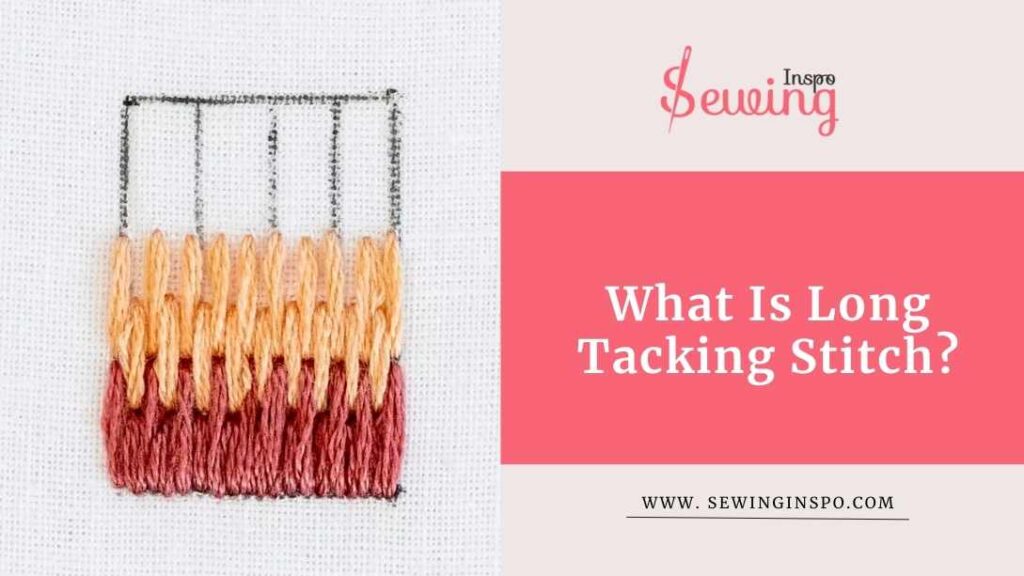
This simple tacking stitch sits on top of the fabric, pulling the layers together without locking them in place so you can easily remove them later. This creates a tidy line that adds a little texture to your design.
This isn’t any kind of strong stitches, but it works as a decorative stitch and sometimes as a temporary stitch.
Long Tacking Stitch Patterns
Long tacking stitches can be used to make many patterns. Talking about them may make you think they’re kind of like diagonal stitches. But if you have seen a picture of diagonal tacking stitches, then you would know they’re totally different. It is better than a bar tacking stitch.
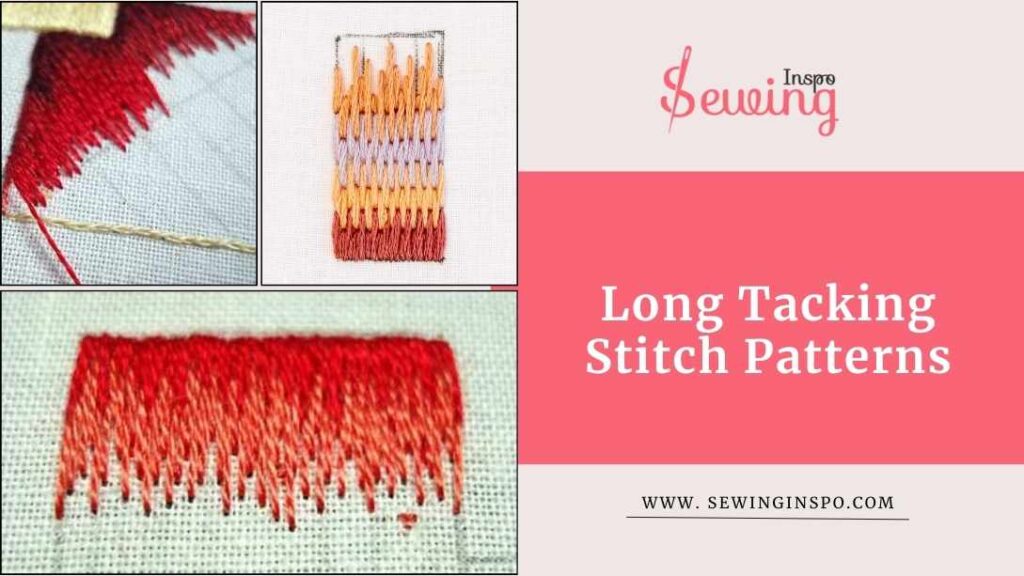
I loved how the long, evenly spaced stitches created a clean, tidy look. The patterns were easy to follow, and I could adjust the stitch length to match my project perfectly. Here are a few I have tried so far-
What Is Short Tacking Stitch?
The short tacking stitch is a small, evenly spaced stitch used to hold layers of fabric together or mark lines temporarily. It is shorter than the long tacking stitch, typically about a quarter of an inch or less.
This may remind you of Tailors tacking stitch patterns, but they are different. The technique looks totally different from it.
The short tacking stitch is great for keeping fabric in place while you sew more permanent stitches or for marking patterns and outlines in embroidery.
What Is The Difference Between Long Tacking Stitch And Short Tacking Stitch?
The main difference between long and short tacking stitches is their size.
One is long, and one is short. Rather than that, there are a few more differences too, such as:

| Feature | Long Tacking Stitch | Short Tacking Stitch |
| Stitch Length | Longer stitches, about 4–5 millimeters. That’s the perfect length for a tacking stitch by hand. | Shorter stitches, about 2-4 millimeter’s are perfect for the small stitch technique. |
| Spacing | Typically spaced farther apart | Usually spaced closer together like a small bite. |
| Use | Used for securing fabric layers temporarily or outlining designs, it can also be used as permanent stitching. | Used for holding fabric in place or marking patterns |
| Appearance | Creates a more visible line with a bit of texture | Creates a neater, less pronounced line kinda like an invisible stitch. |
| Ease of Removal | Easy to remove, but may be more noticeable | Very easy to remove and less visible |
| Applications | Great for holding larger pieces together or creating bold outlines | Ideal for precision work or detailed marking |
Procedure To Do Long And Short Tacking Stitch By Hand
To do long and short tacking stitches, you need to follow 5 steps:
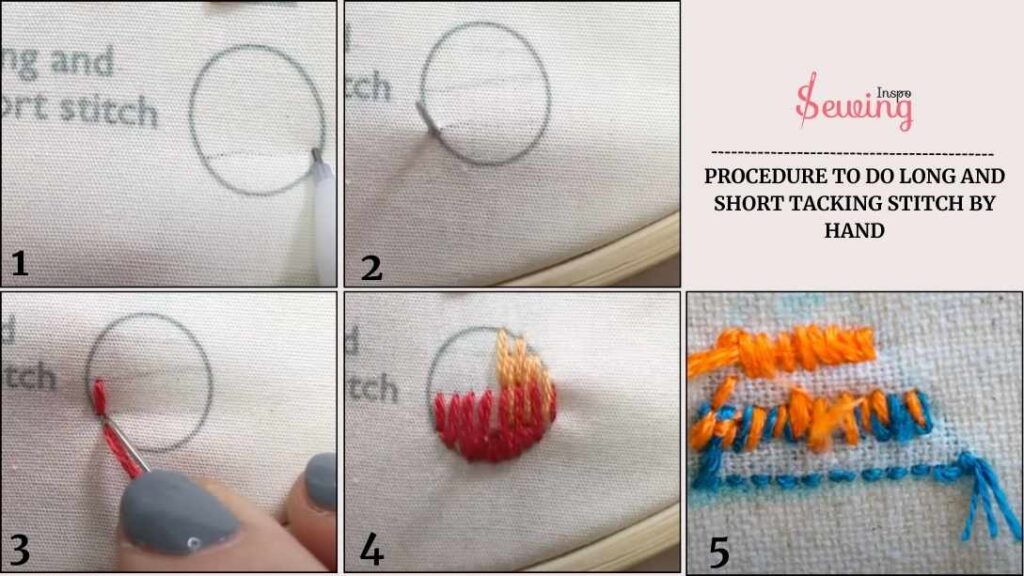
- Mark Your Stitch Line
- Insert The Needle From the Wrong Side Of the Fabric
- Position Your Needle A Short Distance
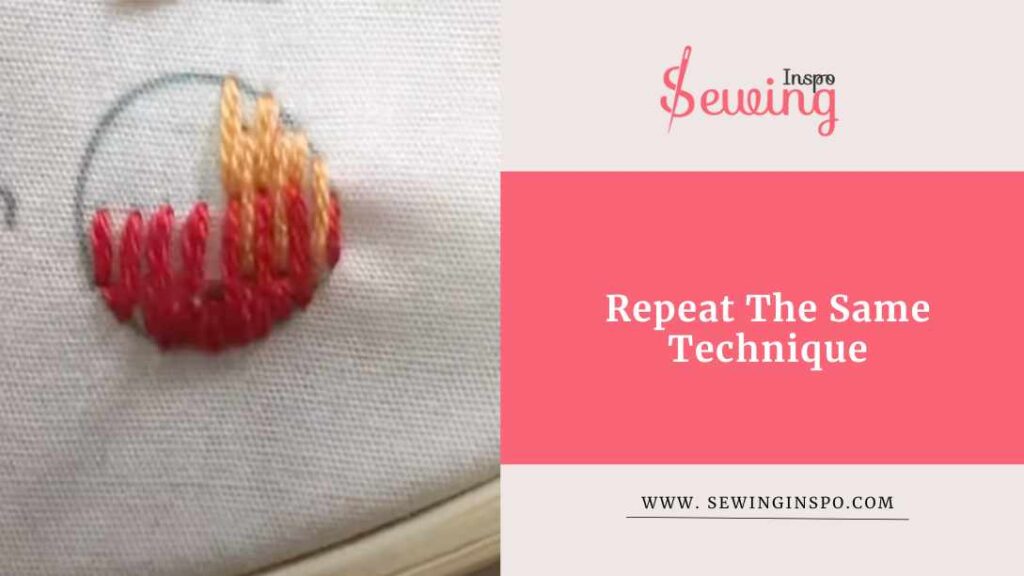
- Repeat The Same Technique
- Make A Small Knot And Secure The Stitch
Mark Your Stitch Line
If you want your stitches to follow a specific path, like along a seam line or pattern, marking your fabric first is helpful. You can use a fabric marking tool like
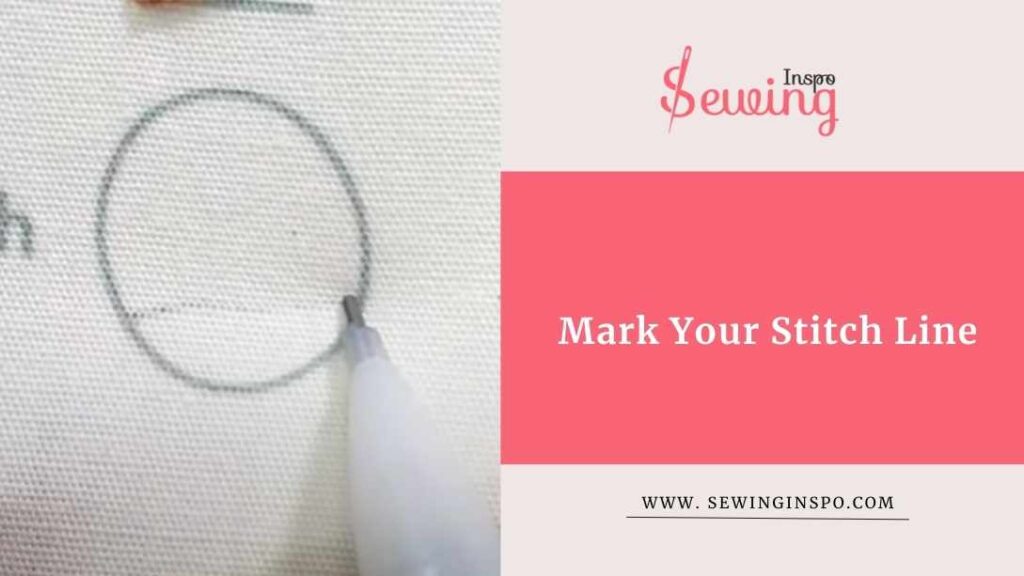
- Tailor’s Chalk
- A Water-Soluble Pen
To tack with long stitches This line is your stitch direction to tack with long stitches. So, you can keep everything straight and even. It’s especially useful when working on long seams or curves, where getting off track is easy. That’s when you can get perfect use of tacking stitch.
This line will help you do long and short stitch easily.
Insert The Needle From the Wrong Side Of Fabric
When you’re ready to start your first long stitch, bring your 5—size needle up from the back of the heavier fabrics, just like you would while doing a bar tack stitch by hand.
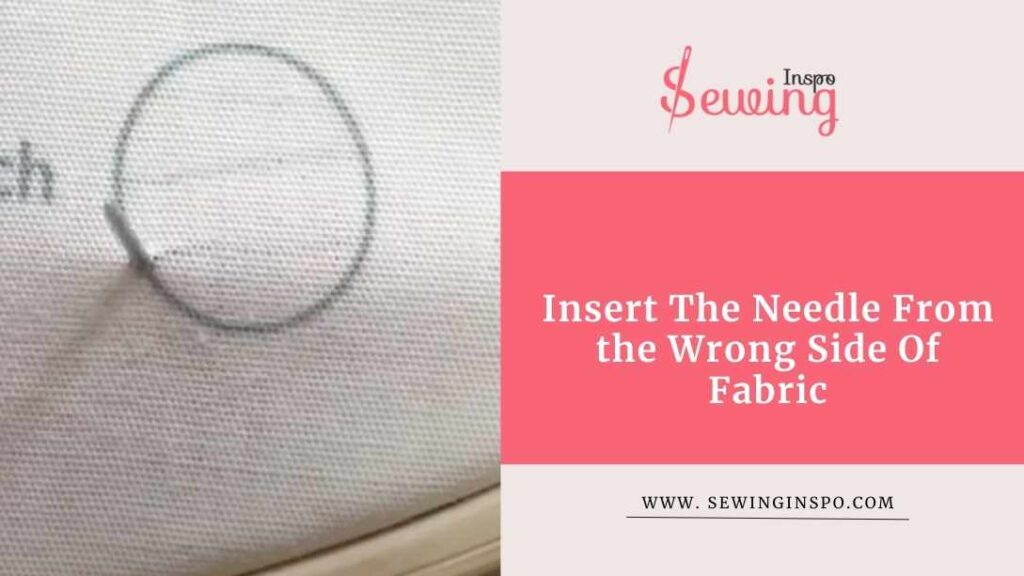
To do this, insert the needle underneath and pull it through until the knot or end of the single thread stops at the back. Your needle should now be on top of the fabric piece.
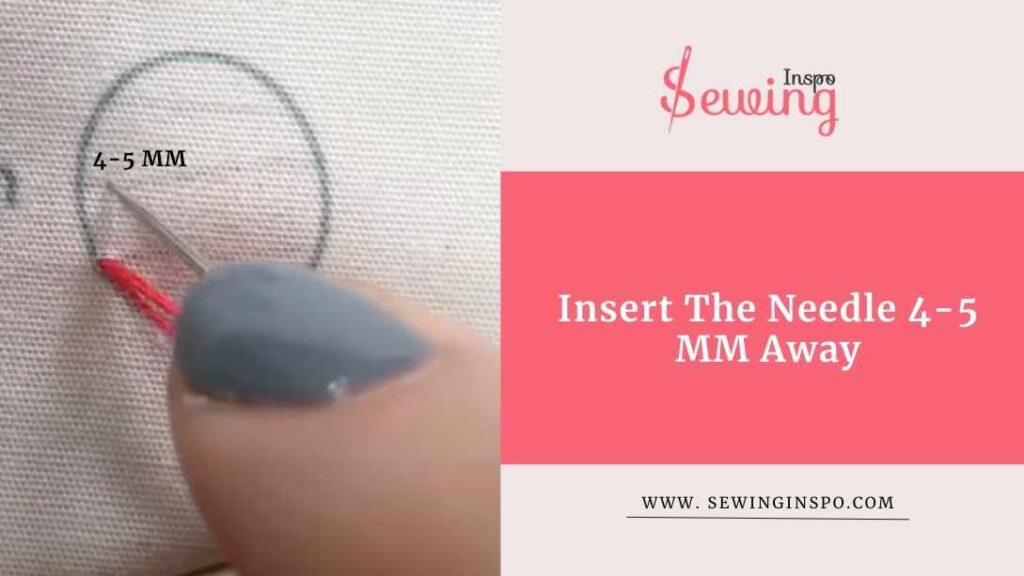
Insert The Needle 4-5 MM Away
Next, to make the long stitch, push the embroidery needles back into the fabric edge about 4-5 mm away from where it came up. That’s why I sometimes call it the large bite stitching technique.
The length depends on the project. But half an inch is a good starting point. Pull the embroidery thread through so the stitch lays flat on the fabric without loops or slack. That’s your first long tacking stitch!
Position Your Needle A Short Distance
Now that you’ve made your long stitch, it’s time to move on to the short stitch. Position your needle a short distance from the end of the long stitch—about a quarter of an inch away. like small bites,
Then,
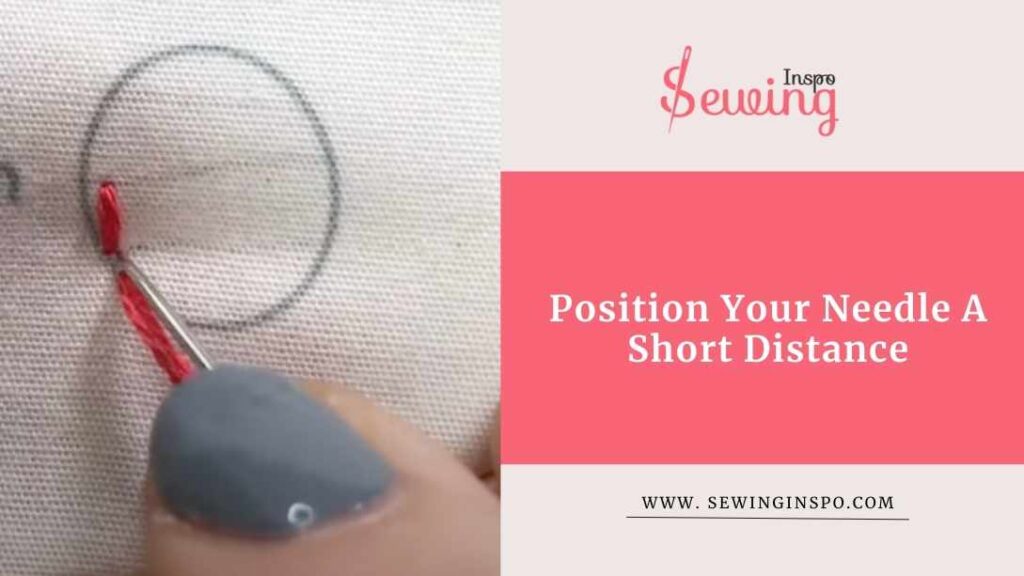
Pull your needle up through the fabric again, just like you did with the long stitch. Just like other types of tacking stitch, the needle should now be above the fabric.
Next, insert the needle back into the fabric close to where the thread came up—keeping this stitch shorter, about a quarter of an inch. That’s the 1st small stitch technique.
After pushing the needle back through the fabric, pull the thread until the stitch lays flat on the fabric, just like before. Make sure there’s no slack so the stitch stays in place.
Repeat The Same Technique
Repeat the stitch between long and short stitches. This creates a balanced pattern that helps secure the fabric while adding texture. This short stitch will sit next to the long one, maintaining that nice alternating rhythm. Just like you would do while making a knot in a french tack stitch.
Keep repeating this process—long stitch, short stitch—until you reach the end of your line. It’s like doing thread painting.
With each long and short tacking stitch, I find a rhythm that dances across the fabric, telling stories of creativity and craftsmanship
Make A Small Knot And Secure The Stitch
First, turn your pieces of fabric over so the back is facing up. Now, insert your needle under a nearby stitch, pulling the thread through but leaving a small loop.
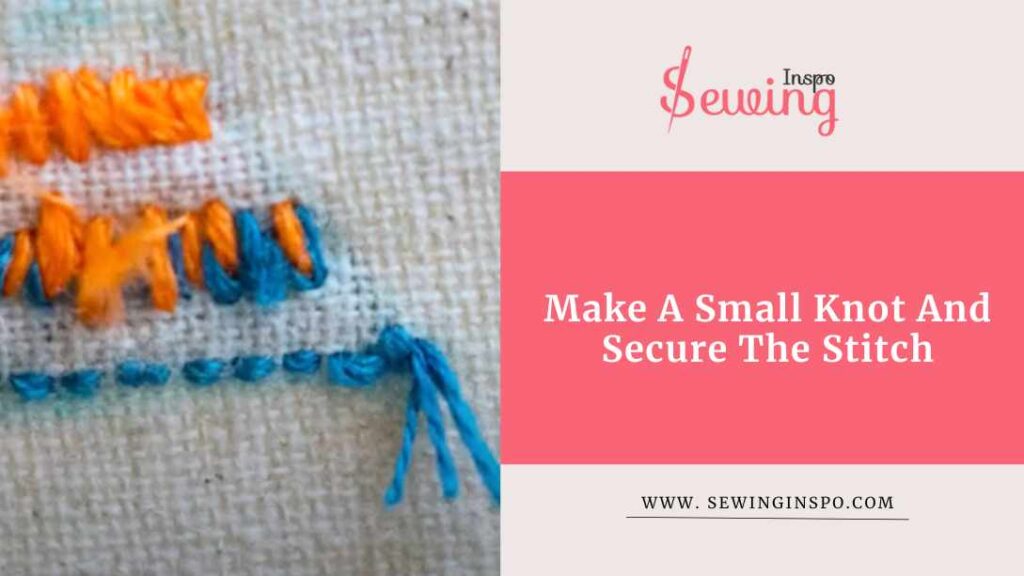
Before pulling the thread, pass the needle through that loop and gently tug to tighten the knot.
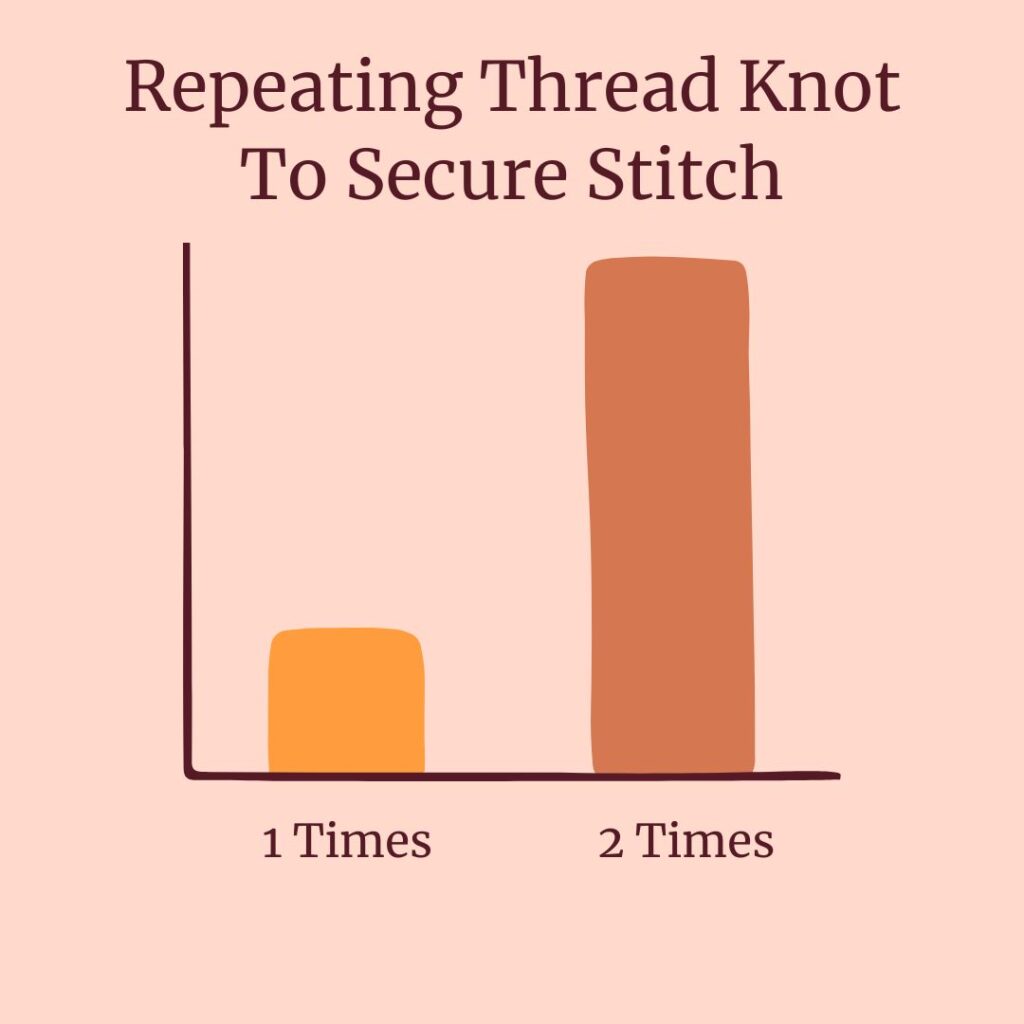
Repeat this process 1 or 2 times to ensure the knot and the hand sewing stitches.
It’s best to tie the knot 2 times for final stitching.
After the knot is tight, trim extra embroidery floss close to the knot, but be careful not to cut too close to avoid unravelling.
This small knot will keep your tacking stitches in place. It gives you a neat, finished look.
That’s it! That’s how you can do long and short tacking stitch. Easy, right? No? 😑then watch this video. I hope this will clear out your confusion.
How To Quick Video Tutorial
Long and Short Stitch- hand embroidery stitches for beginners
Long And Short Tacking Stitch Pdf
If the instructions and video aren’t enough, download this step-by-step PDF. Sew while watching this stitch.
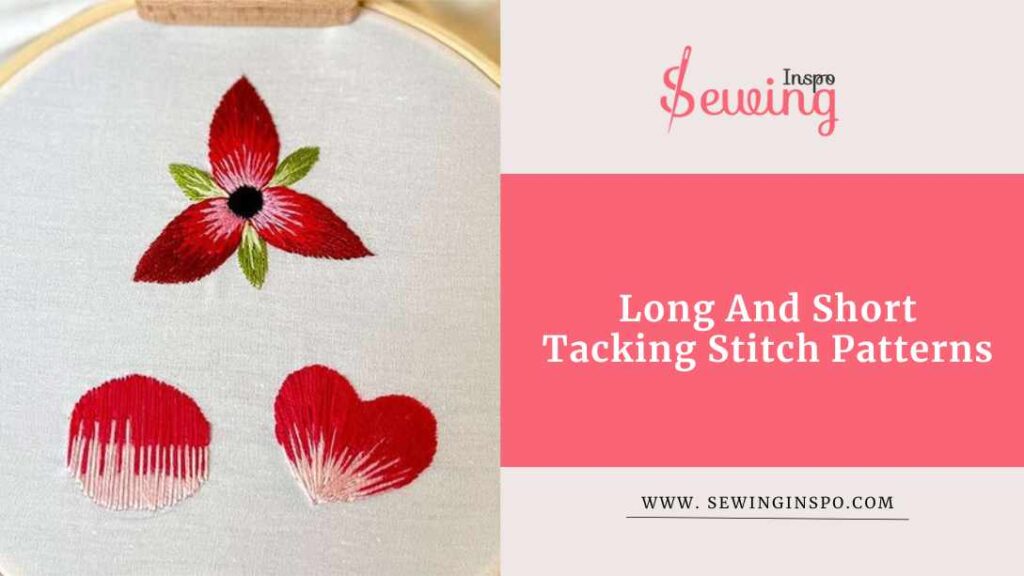
Long And Short Tacking Stitch Patterns
I recently tried out a few long and short tacking stitch patterns,
and they turned out to be really useful and fun! Here’s what I did:
Long And Short Tacking Stitch Embroidery
I recently tried combining long and short tacking stitches in one of my embroidery projects, and it turned out to be such a fun and versatile technique! What I loved most was how these stitches allowed me to work quickly but still have control over the details.

Like life, embroidery balances long and short moments—each stitch creates a beautiful tapestry.
Long and short stitches are just like balancing stitches. Plus, since tacking stitches are temporary, it was super easy to adjust things if I wanted to tweak the pattern or placement as I went along. Here’s how it went. It is not easy like uneven stitch design but it’s worth a shot.
ut it’s worth a shot.
Long And Short Embroidery Stitch
I even did long and short tacking on some patterns. Wanna see it? Here have a look,

Frequently Asked Questions
What Is The Purpose Of Long And Short Tacking Stitches In Embroidery?
Long and short tacking stitches typically hold layers of fabric in place or temporarily outline shapes. In embroidery, they can add texture and dimension or serve as a guide for more detailed stitches. They’re also easy to remove once they’re no longer needed.
Can I Use Long And Short Tacking Stitches For Permanent Designs?
While tacking stitches are generally temporary, you can leave them in as part of your embroidery design to add texture or create a unique look. The alternating long and short stitches can give a dynamic, layered effect.
Outro
Long and short tacking stitches are a fun way to do embroidery or even temporarily hold fabric. It is pretty simple, too, right?
So, why not try it out? Try it and share your sewing projects with me!
Let your stitch work as sewing inspiration.

Leave a Reply