
If I search for types of tacking stitches, even the tacking stitch will pop up first. And I searched about even the tacking stitch basting stitch coming up 😑 I saw the list of sewing stitches, but still, I was confused. Google made me think they’re sometimes the same and sometimes different.
The more I searched, the more confused I became. So, I went to grandma, told her my struggle and asked her what is even tacking stitch.
She said,
Even Tacking Stitch
Even a tacking stitch is a temporary hand stitch used to hold layers of fabric together before permanent stitching. It is typically made with long, loose stitches for easy removal. It is also known as even basting stitch.
Basting stitch is another name for tacking stitch. That’s why it pops up every time you search about even tacking stitch. Let me tell you more about it. Let’s learn what is evens.
Main Point:
- Even tacking stitches and basting stitches are the same thing.
- It got its name from its even-looking feature.
- There are 4 types of even tacking stitch.
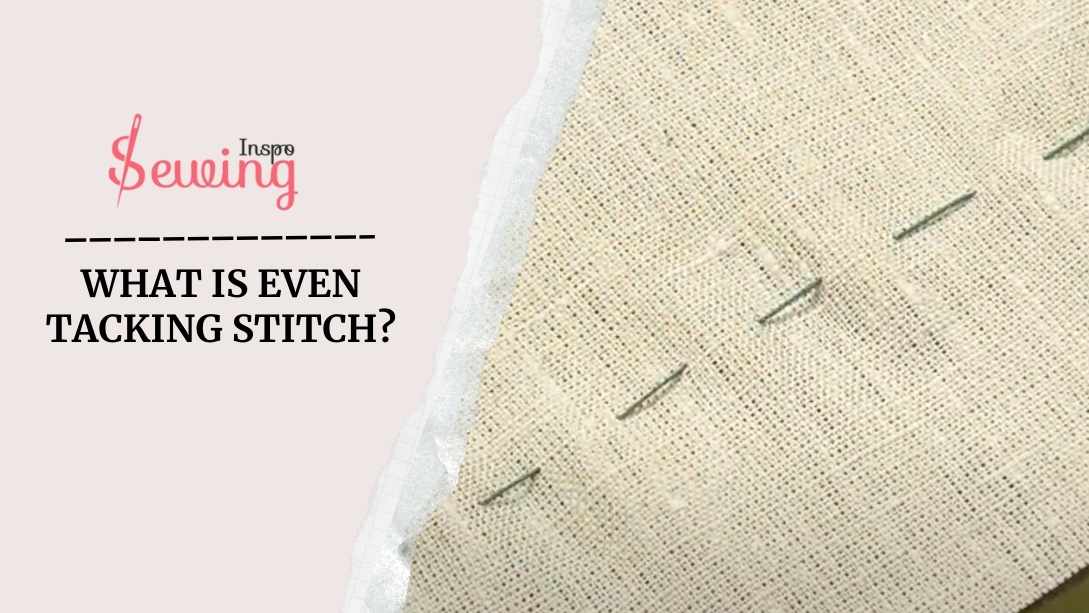
Table of Contents
What Is Even Tacking Stitch?
An even tacking stitch is a temporary, large stitch that holds fabric pieces together before final sewing. It got its name because it looks ‘even’ on both sides. It is the total opposite of uneven tacking stitch. That’s where the difference in even and uneven stitches comes. Sometimes it is also called even basting.
It’s usually done by hand with a long-running stitch It is easy to remove later. You can say it is the temporary stitch of all 20 types of stitches. It helps keep your fabric in place without pins, especially for tricky or delicate materials. That’s the even stitch definition.
Think of it as a placeholder. There to keep things steady while you work on the real seam ripper. That’s the real use of even tacking stitch.
Or you can see the simple tacking stitch images to see the difference between normal tack stitch and even tack stitch. It’s so different from tailor tack stitch.
What Is The Purpose Of Even Tacking?
The purpose of even tacking is to hold layers of fabric together with evenly spaced stitches temporarily. Other than that, even tacking stitch is even used for
- Checking fit
- Providing structure
- Distributing fabric
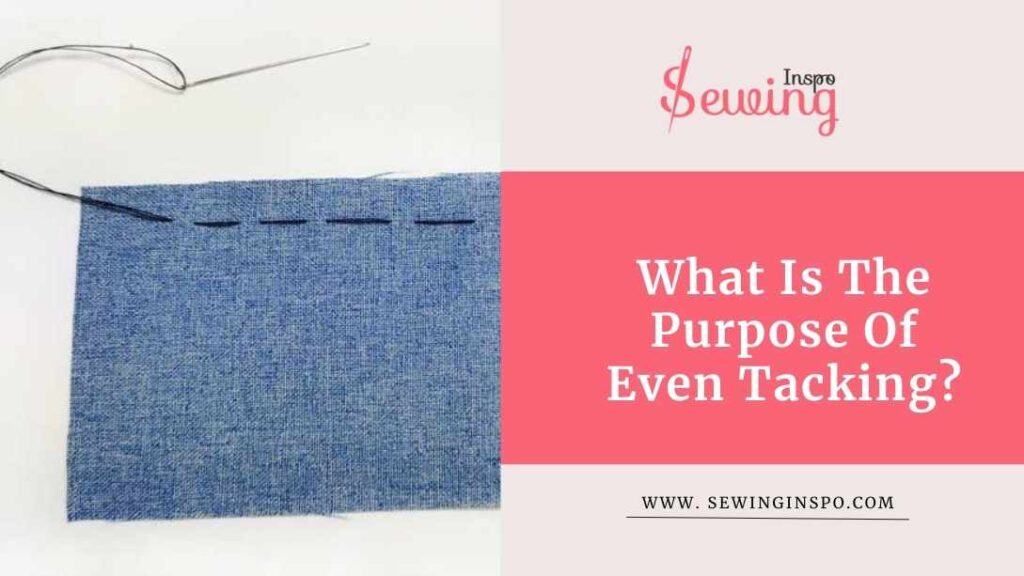
These uniform-length stitches help keep fabric layers aligned without shifting while you work on the final hand sewing stitches. Even tacking is great for handling seams with extra fabric, helping you spread that fabric out evenly. That’s why it is called even stitches.
It gives you more structure and control, which really comes in handy on curved seams and round edges. It’s also helpful for checking the fit of a cloth. It’s like your sewing safety net! If you wanna more strong things, then try bar tack stitch.
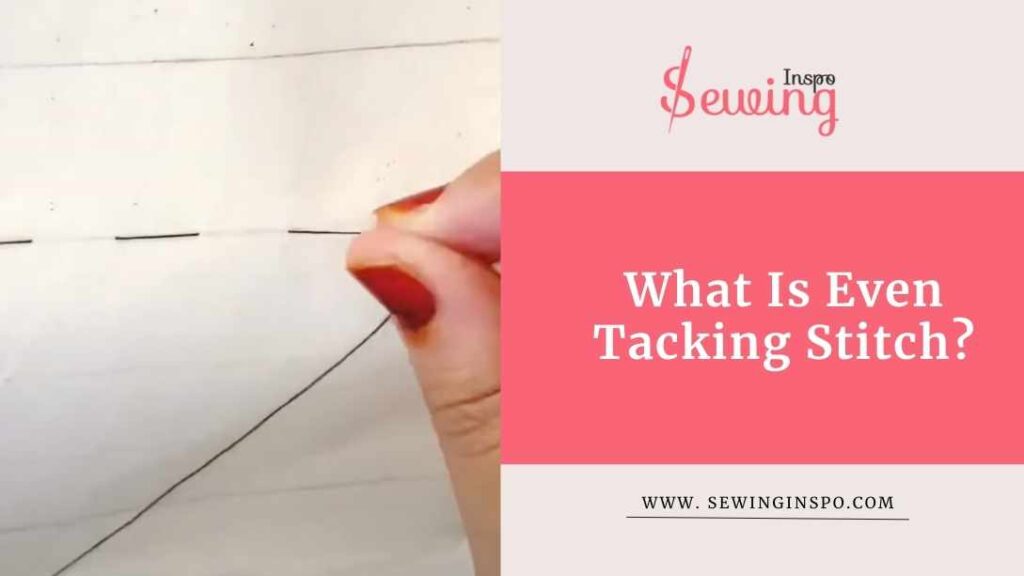
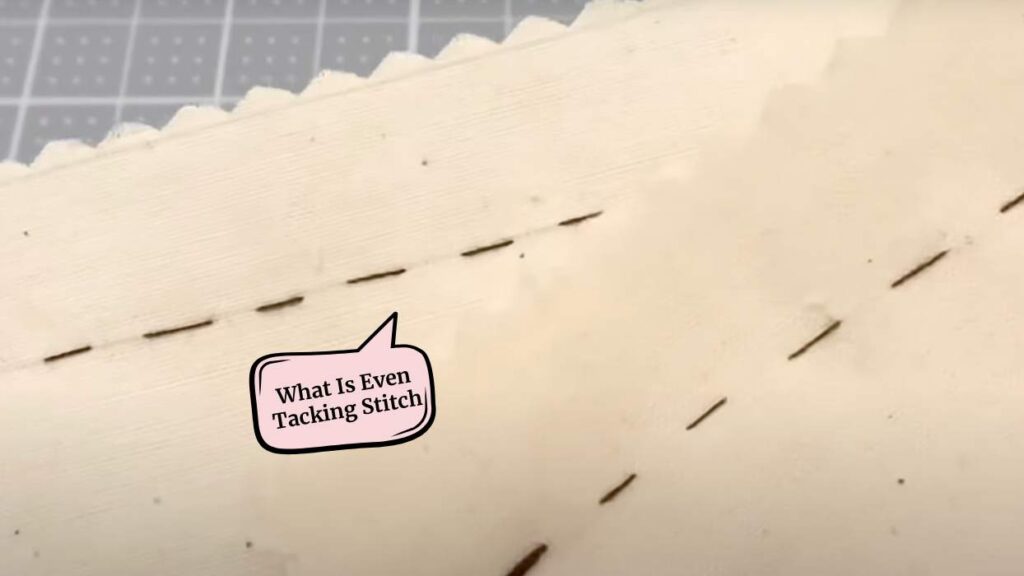
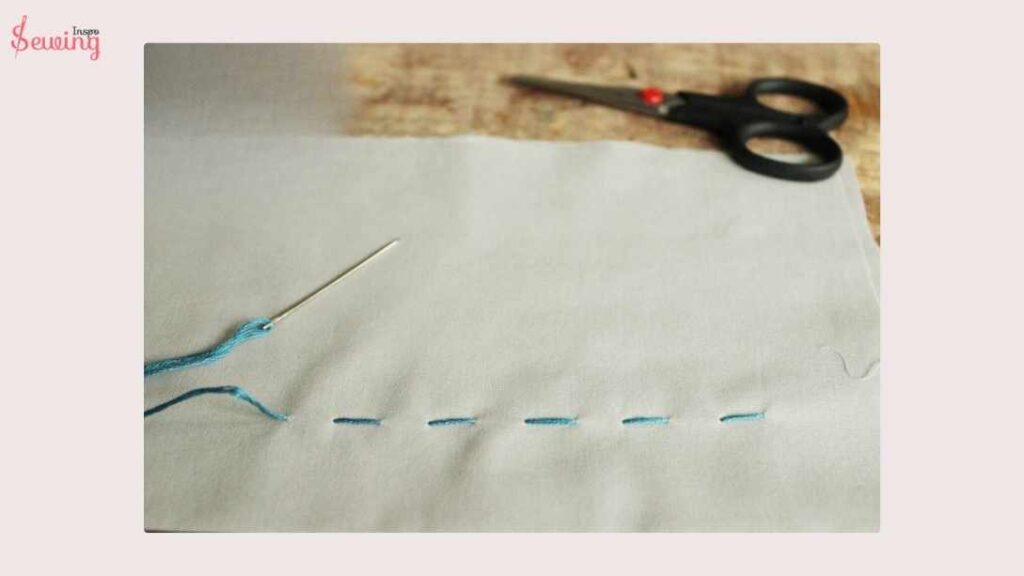
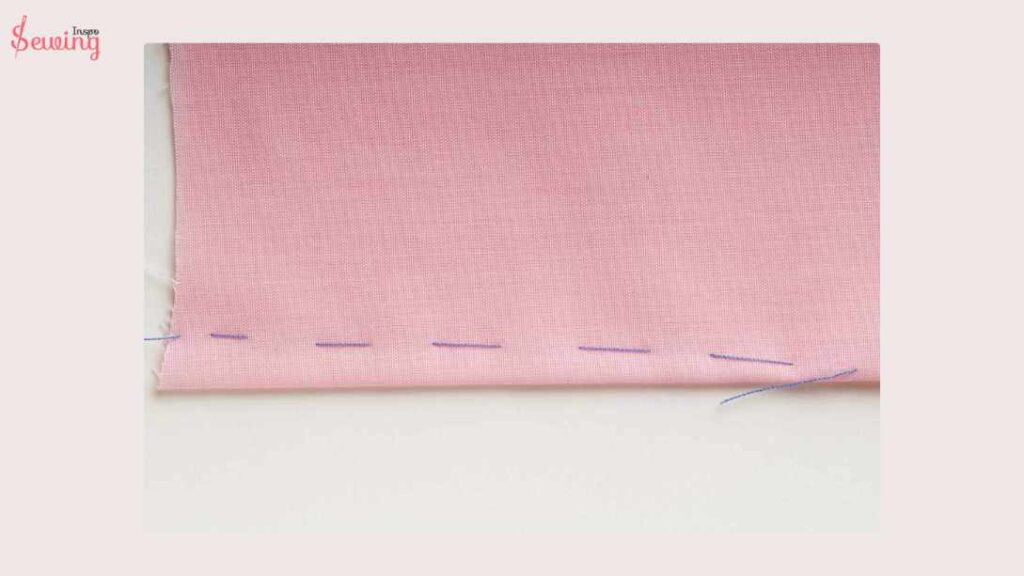
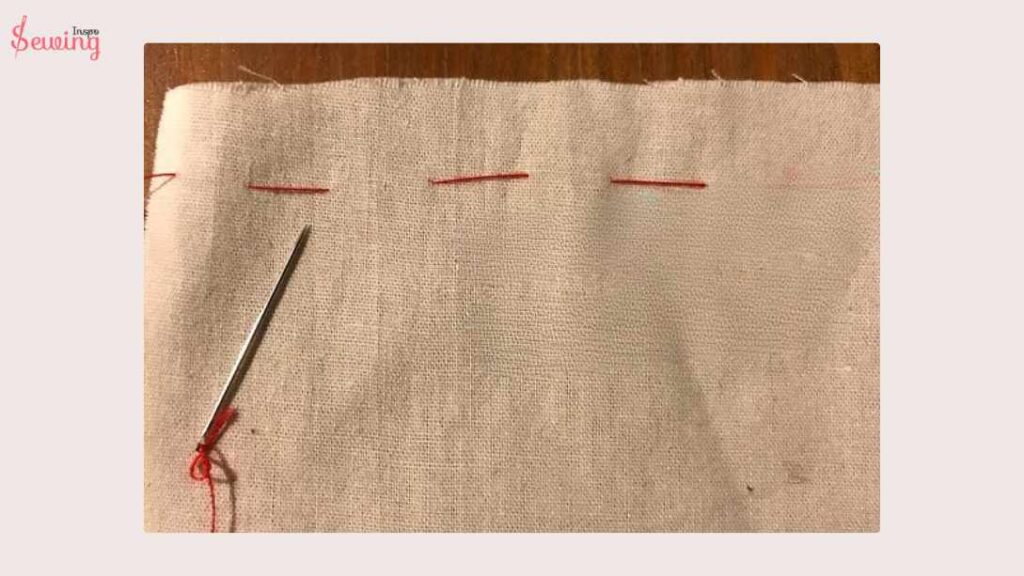
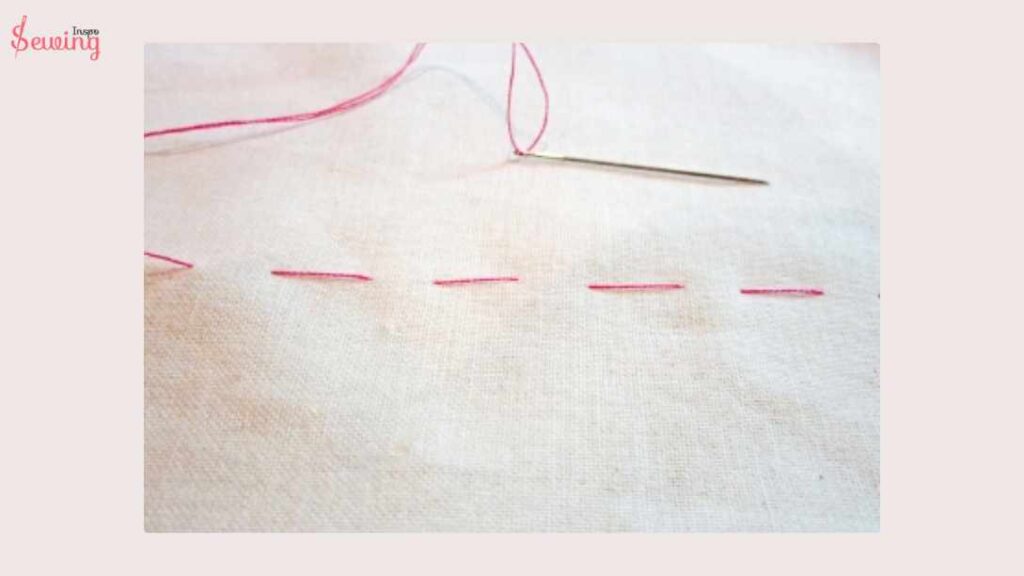
Even Tacking Stitch Images
If all the definitions aren’t enough and you are still confused, look at my picture here. Those even tacking images will clear some things for you.
How To Do Even Tacking Stitch?
Now that you know about the stitch, you must want to know how to do it. So here is a glance of it,
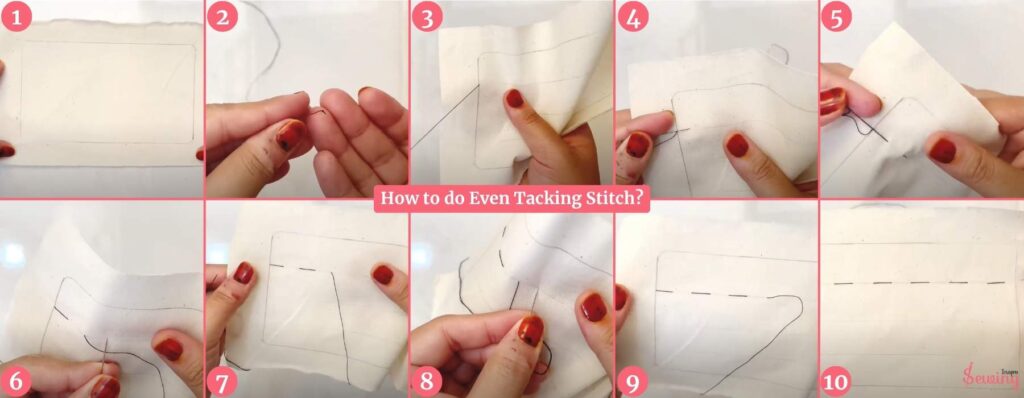
- Use about 10 inches of silk thread for best results. Thread your needle and tie a small knot at the end. That’s perfect for diagonal basting.
- No need for fancy thread—this is a temporary stitch!
- Make straight stitches about ¼ to ½ inch long by moving your needle in and out of the fabric in a smooth, even motion.
- Keep them neat and evenly spaced—no diagonal or curved lines here.
- Don’t pull the thread tight. Let small loops rest gently on the surface so the fabric isn’t cinched. This makes it easy to remove later.
- At the end, leave a 2-inch tail, tie a gentle knot by looping and passing the needle through, and snip the thread
- It will leave a bit of slack to prevent the fabric from unraveling.
And that’s it! That’s how you get a perfect, even tacking stitch.
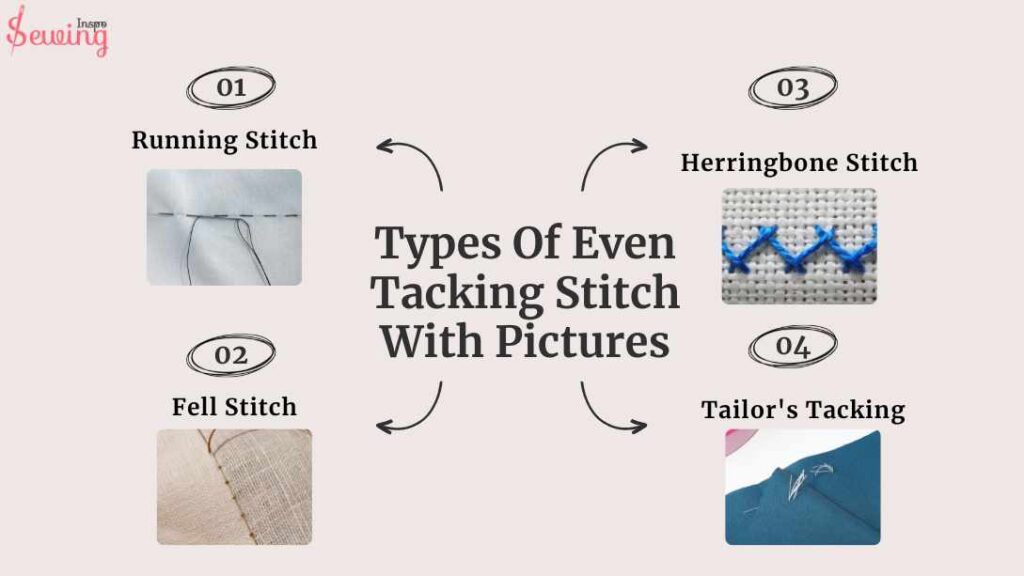
Types Of Even Tacking Stitch With Pictures
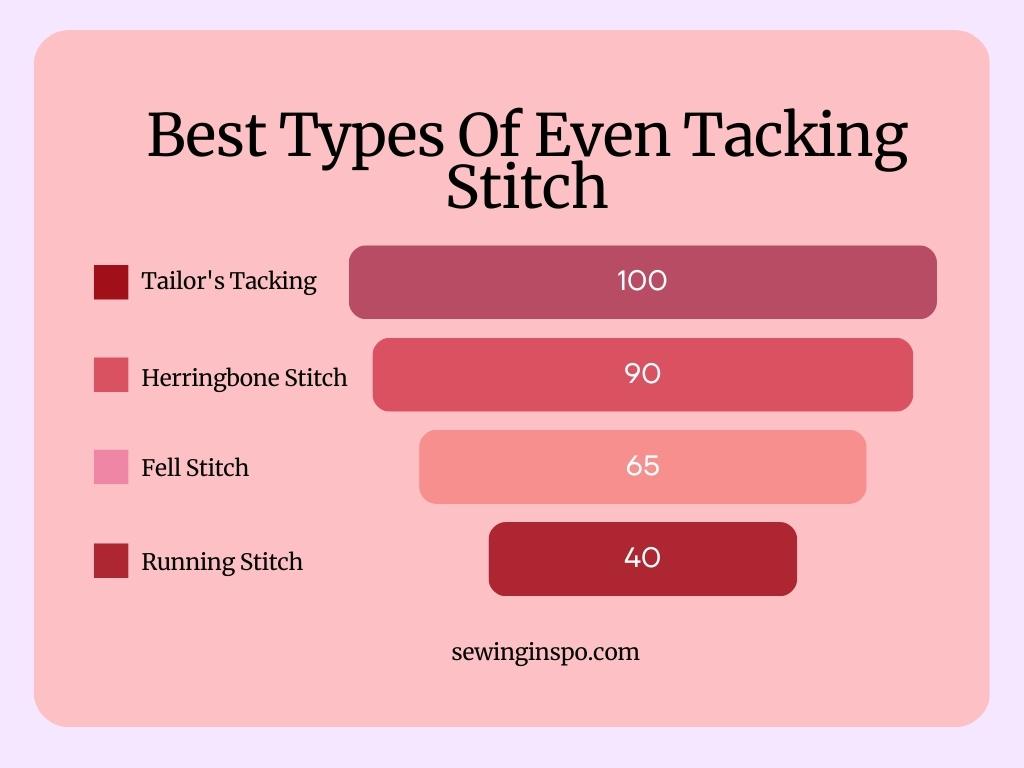
Even though tacking stitches may seem easy, there are also some types of stitches other than even tacking stitches. There are 4 types of even tacking stitch, such as:
- Running stitch
- Fell stitch
- Herringbone stitch
- Tailor’s tacking
Running stitch
So, let’s start with the running stitch. This is probably the simplest and most common stitch among hand basting. It’s made by sewing small, evenly spaced stitches in a straight line, creating a perfect loose loop stitch. This is the easiest one among types of even tacking stitches.
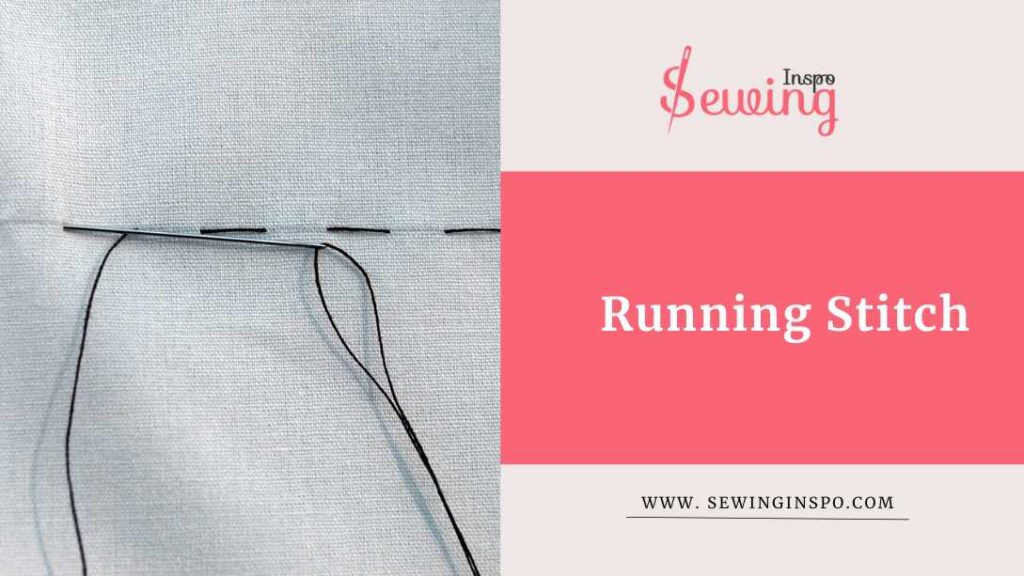
Think of it like a dotted line you’re just connecting the dots! This vertical stitch is perfect for temporarily tacking pieces of fabric together, especially when you want to keep everything aligned while you work. It is kind of like a diagonal stitch but a straight version.
Running even tack stitch is great for holding things in place before you start sewing. It’s super easy to remove later. That’s why I use this even stitch for temporary work.
Fell stitch
A fell stitch, or even-tack stitch, joins two layers of fabric while keeping the stitches hidden on one side, giving a nice, clean finish. This will help you to make a clear permanent stitches.
It’s often used for hems or seams where you want that extra strength without the messy look. But it isn’t for decorative purposes.
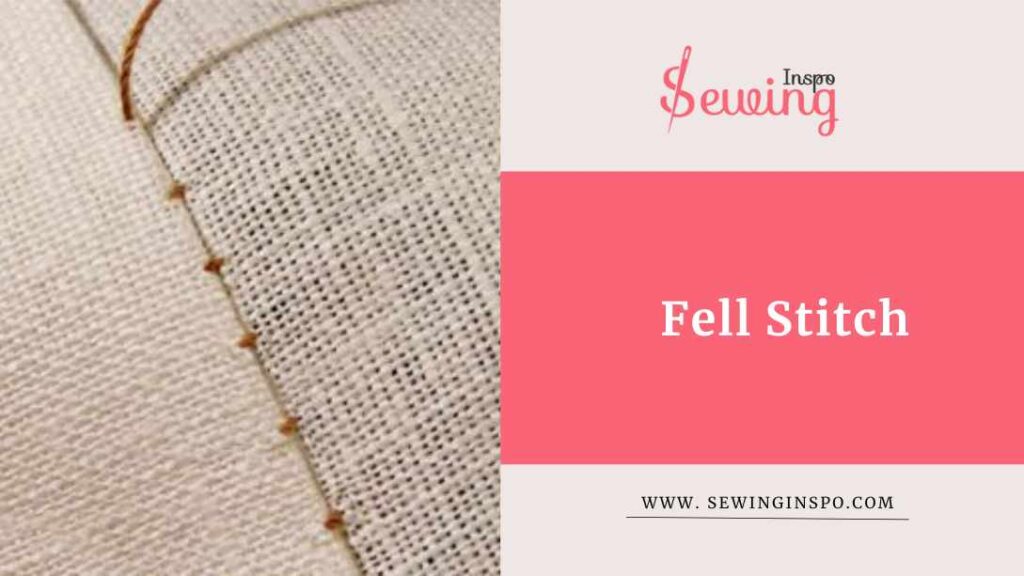
The fell stitch secures the layers and adds a professional touch to your projects. This is the way to go when you want to make your sewing look polished!
Herringbone Stitch
Herringbone stitch is all about style. It creates a lovely zigzag pattern that resembles a fishbone (hence the name). It’s perfect for tacking but also has a decorative flair.
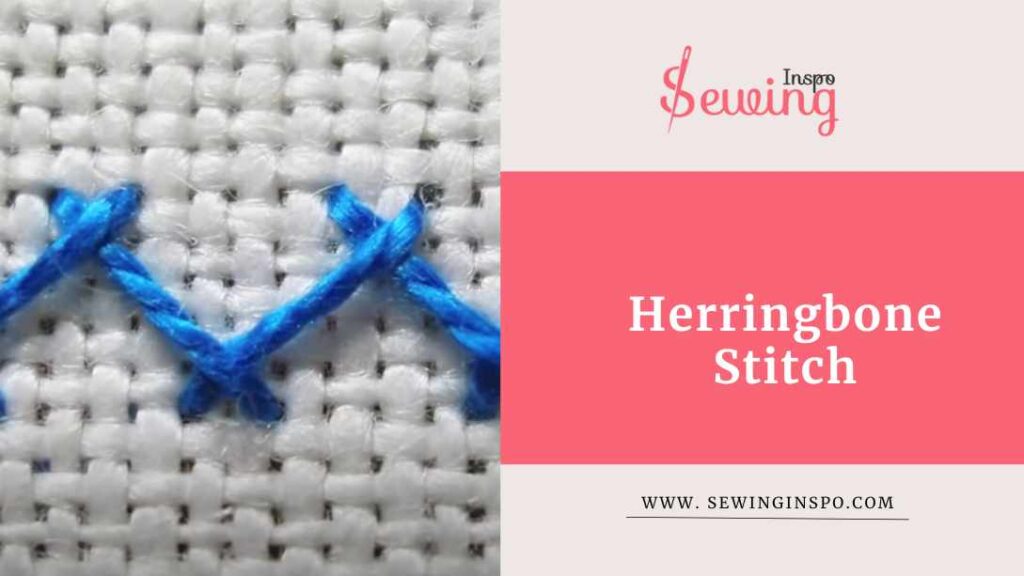
Herringbone, even tack stitch, adds interest to your sewing. It provides a secure hold while allowing some flexibility, which is especially useful for areas that need a bit of give, like curves or fabric edge.
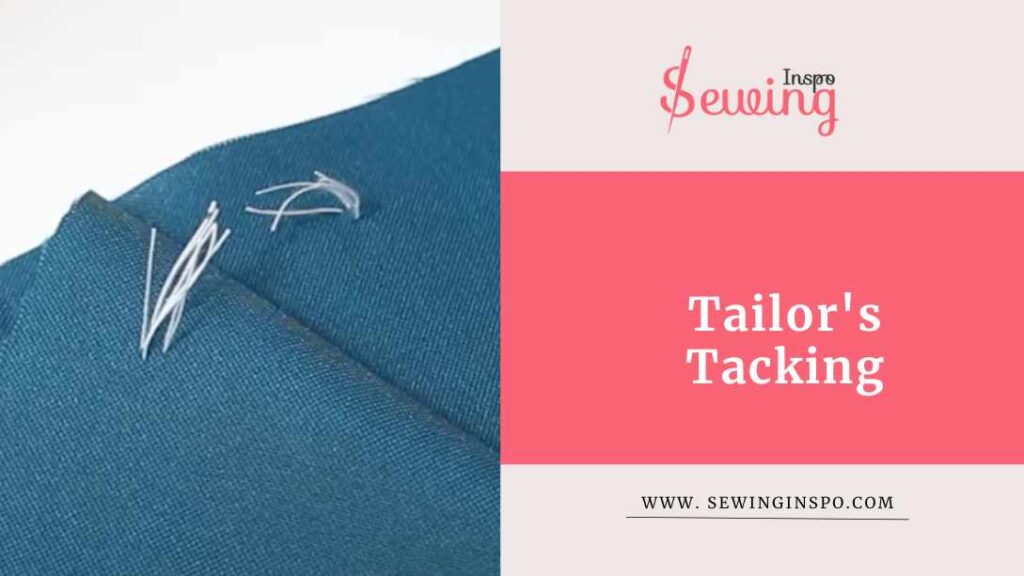
Tailor’s Tacking
Tailor’s tacking is used for fitting and marking. It’s usually made with a long, loose stitch and often in a contrasting thread. This type of hand tacking stitch makes it easy to see where you’ve tacked.
Tailor’s tacking is great for checking the placement of patterns or aligning fabric pieces before you commit to the final stitches. It helps you get everything just right, ensuring a perfect fit before you sew things down for good. This is kind of like the arrowhead tack stitch & French tack stitch.
Each stitch has unique benefits, so you can choose the right one based on your project needs! But I was wondering what grandma’s favorite stitch is, so I asked her.
I think tailor tacking stitch is the best and easiest type of even tacking stitch.
Whether you’re looking for simplicity, strength, style, or precision, there’s an even tacking stitch. Happy sewing to even tacking stitches.
Is Even Basting Stitch Strong?
Even basting\tacking stitches are not meant to be strong or permanent. They are long, evenly spaced stitches used to temporarily hold fabric layers together, mark hems, or guide sewing.

Because they’re easy to remove, they provide stability for fitting or alignment. But shouldn’t be relied on for strength—final stitching is needed for durability.
Frequently Asked Questions (FAQ’s)
How Do You Differentiate Between Even Tacking And Running Stitches?
Even tacking stitches are evenly spaced and temporarily hold fabric pieces layers together. In contrast, running stitches vary in spacing and length and are used for sewing seam lines or decorative effects. Even tacking focuses on consistency, whereas running stitches are more versatile, like uneven basting stitch.
What Is The Difference Between Even And Uneven Stitch?
Even stitches have consistent spacing and length, providing a neat appearance. Uneven stitches vary in length and spacing, adding texture and a more relaxed look. Even stitches are for precision, while uneven stitches are often a stylistic choice.
Ending
After listing what is even tacking stitch I left with so much knowledge about it.
Grandma has always been my sewing inspiration. Whenever I feel stuck, I run to her.
Do you also have someone you can run to whenever you face trouble in sewing?


Leave a Reply