
Ever tried hemming something by hand and ended up with a mess that screams “homemade disaster”? 😅
That’s when I discovered the catch stitch. It’s a clever little crisscross stitch that’s nearly invisible on the outside. But it’s strong enough to hold bulky or stretchy hems in place, so think coats, skirts, knits, and anything with drama.
The best part?
You don’t need 10 years of experience. If you can thread a needle and sew an “X”, you’re halfway there. Yes, it’s that easy.
So basically,
To catch stitch by hand, use a small running stitch along the edge of the hem, catching only a few threads of the fabric on the inside so it’s nearly invisible on the outside.
Let’s walk you through exactly how to do a catch stitch by hand, share what to do, and what not to do. So, let’s go.
Main Facts:
- Make small stitches from right to left on the top row and to the right on the garment fabric.
- Spaced 3/8 to 1/2 inch apart, and small stitches were taken in the hem about 1/8 inch down from the edge.
Table of Contents
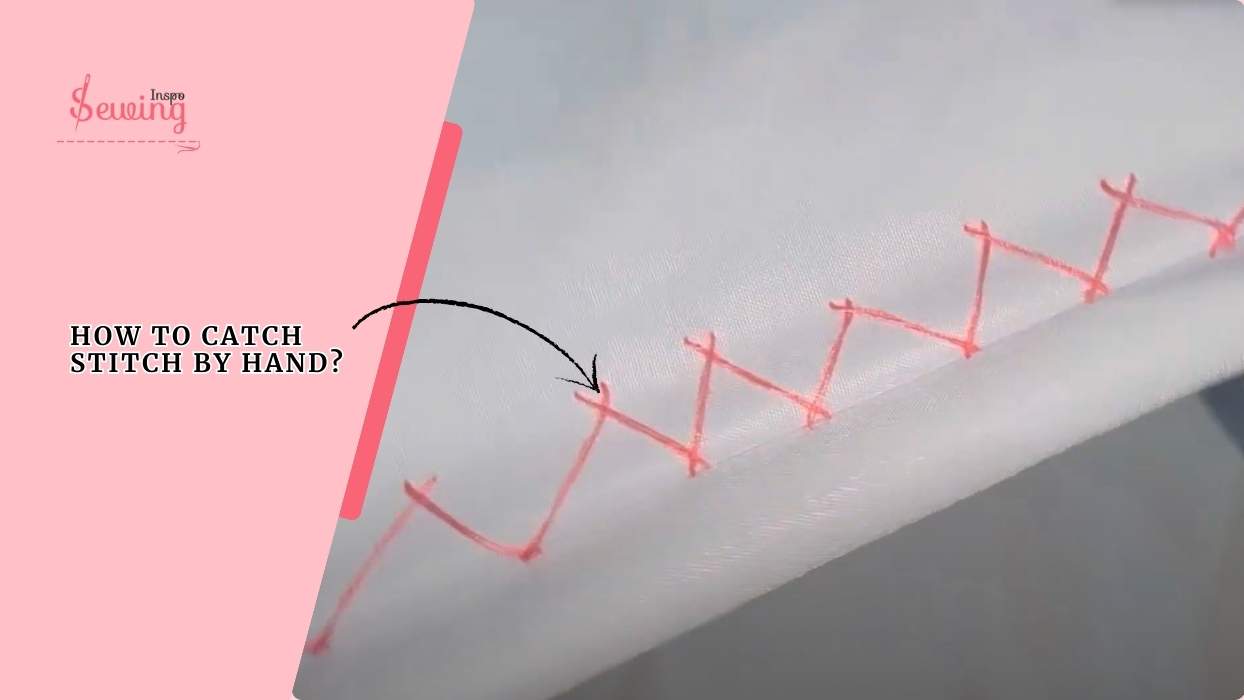
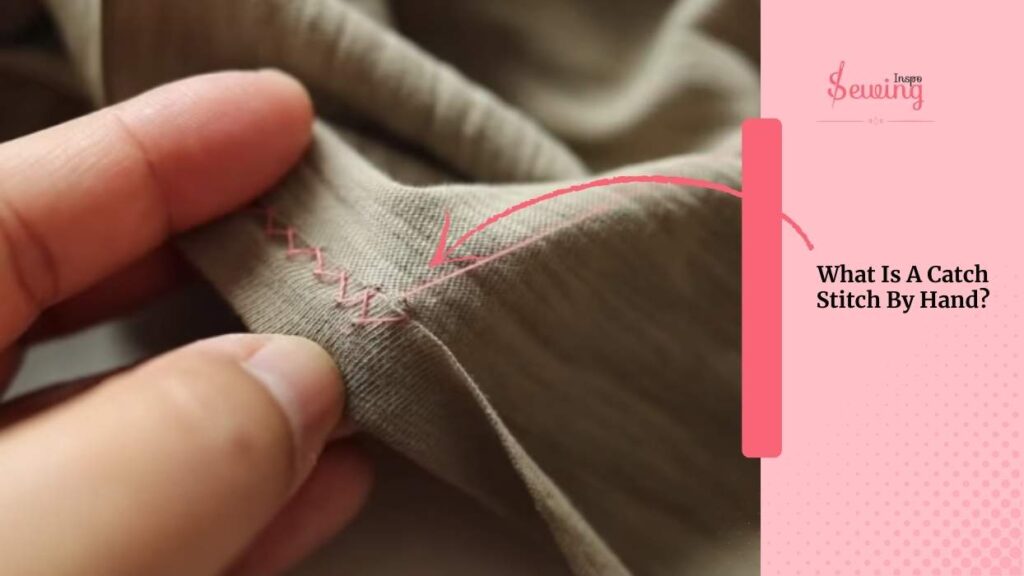
What Is A Catch Stitch By Hand?
A catch stitch by hand is a tiny, criss-cross “X” shape on the inside of the fabric, while staying nearly invisible on the outside. This is also called herringbone stitch, cat stitch, and hem stitch.
This kinda reminds me of step stitching.
You use it when you want the hem to be flexible. It sometimes works like a blind stitch, too. But catch stitch still holds strong without showing messy stitches on the outside. That’s the catch stitch meaning. It kind of looks like a half-way cross stitch.
Catch Stitch By Hand Pattern

Here is what the stitch looks like in a pattern form!
How To Catch Stitch By Hand For Beginners?
To do a catch stitch by hand, you just need 6 steps.
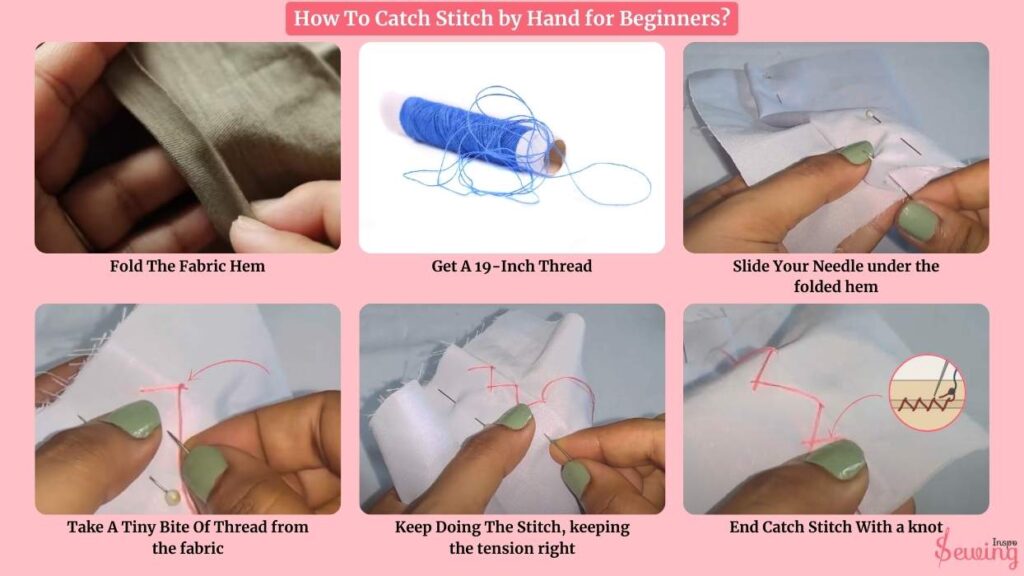
- Fold The Fabric Hem
- Get A 19-Inch Thread
- Slide Your Needle under the folded hem
- Take A Tiny Bite Of Thread from the fabric
- Keep Doing The Stitch, keeping the tension right
- End Catch Stitch With a knot
Fold The Fabric Hem By ½ Inch
I’m folding the fabric’s edge to hide the raw part and give it structure. So, lay your fabric flat and fold up the raw edge by ½ inch (or 1 cm). Press it with an iron. Ironing helps me to do a blanket stitch too.
Fold it again to 1″–2″. Press again so it holds that shape. I use this trick for stretchy hand stitch, too.
But I was doing it in slippery fabrics, such as satin or silk, so getting hold of it was a little hard. That’s why I used a dab of a little glue stick (washable, of course!) inside the fold to hold it steady while stitching.

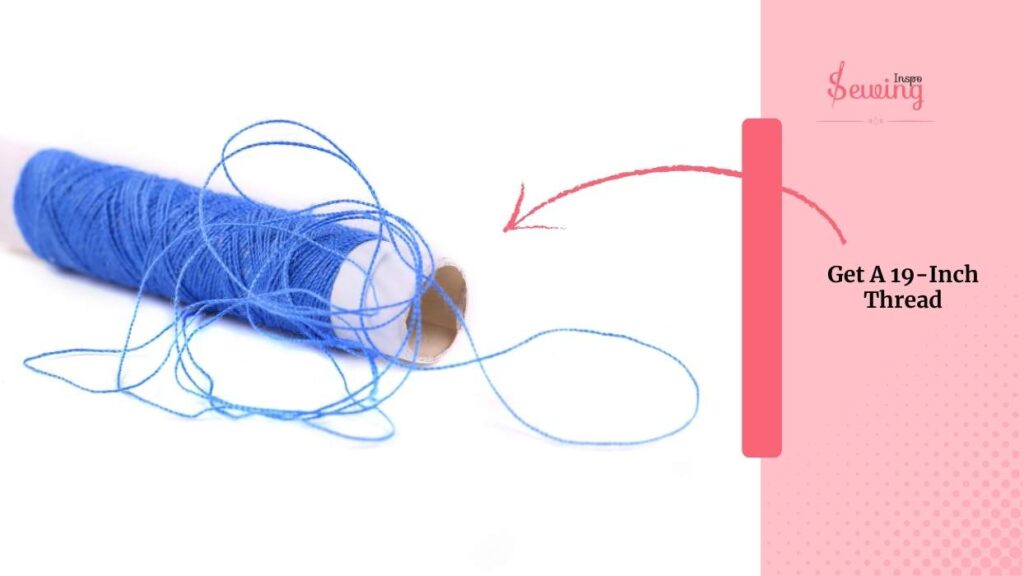
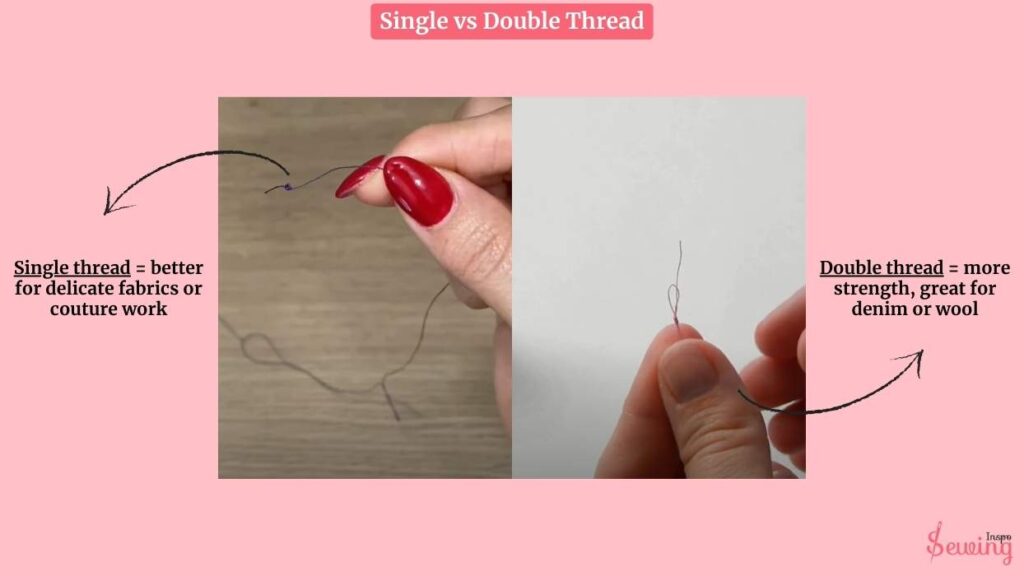
Get A 19-Inch Thread
I cut 18–24 inches of thread, not too long or it’ll tangle. Then thread your needle and tie a knot at the end.
That’s what most people do. But I usually double the thread. Cause it gives me extra security. Here is what Single vs Double Thread does,
- Double thread = more strength, great for denim or wool.
- Single thread = better for delicate fabrics or couture work.
Slide Your Needle Into The Fold Of The Hem
Slide your needle into the hem’s fold — from the inside — so the knot stays tucked inside.
Angle the needle slightly upward, about 30 to 45 degrees, like you’re slipping it just under the skin of the fabric fold. You’re not going deep — you’re gliding through the “fat” of the fold, not piercing through to the outside.
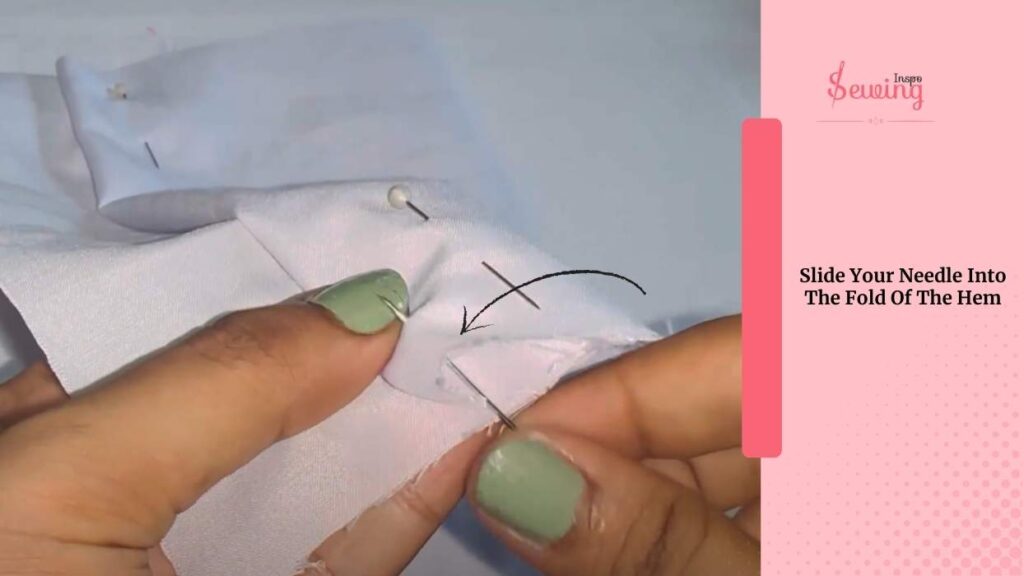
Push the needle in about ¼ inch (6mm) along the fold. This gives your knot a little runway before the real stitching starts. Pull the thread through gently. As you do, your knot should disappear. Doing it kinda reminded me of a ladder stitch diagram.
Take A Tiny Bite Of The Fabric To Create A Catch Stitch
Take a tiny horizontal stitch (literally 2–3 threads!) on the garment body. Just above the folded hem. Move your needle left, and take a diagonal stitch into the folded hem — go in about ¼ inch from the edge.
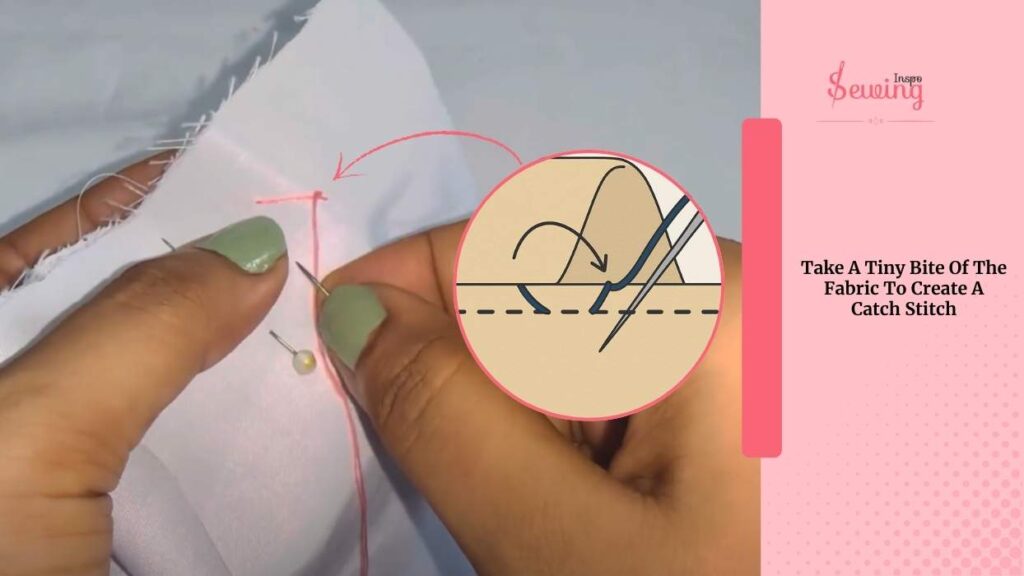
Repeat — stitch on the garment, stitch on the fold—back and forth in a criss-cross or “X” pattern.
Tip:
It’s better to work right to left because you’re working right to left, but your needle always points left. This feels weird at first, but trust me, it gives your stitches stretch and flexibility. This works best for me while doing embroidery stitches.
Keep Doing The Stitch But Control The Tension
Once you’ve inserted the needle into the fabric and taken your next diagonal stitch, pull the thread slowly until the stitch just lays flat, not tight, not loose. You should see the little “X” form on the inner fabric.
But there should be no puckering, pulling, or visible dimples on the outside. Try to keep the thread floating above the fabric just enough that it doesn’t bunch the fabric. A light “hug”, not a squeeze.
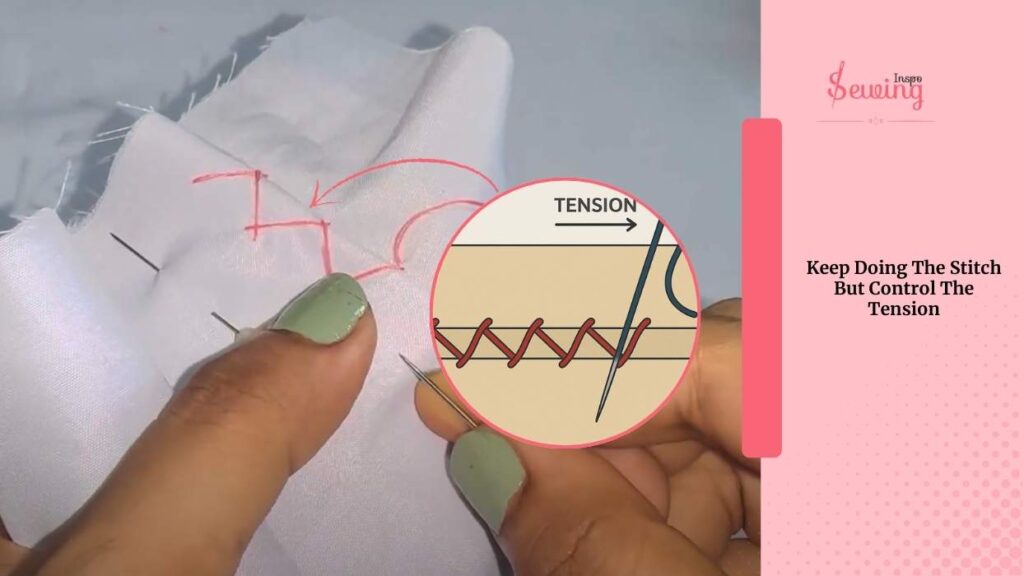
To do that, space matters. As you work:
- Keep your “X” stitches ¼ inch to ½ inch apart (6mm to 12mm).
- Use your pinky or needle to lightly mark spacing, or lightly dot a guide with a washable pen or chalk for perfect alignment.

This spacing keeps the hem flexible and also helps it move naturally with the fabric. Uneven stitches can pull, twist, or ripple the fabric.
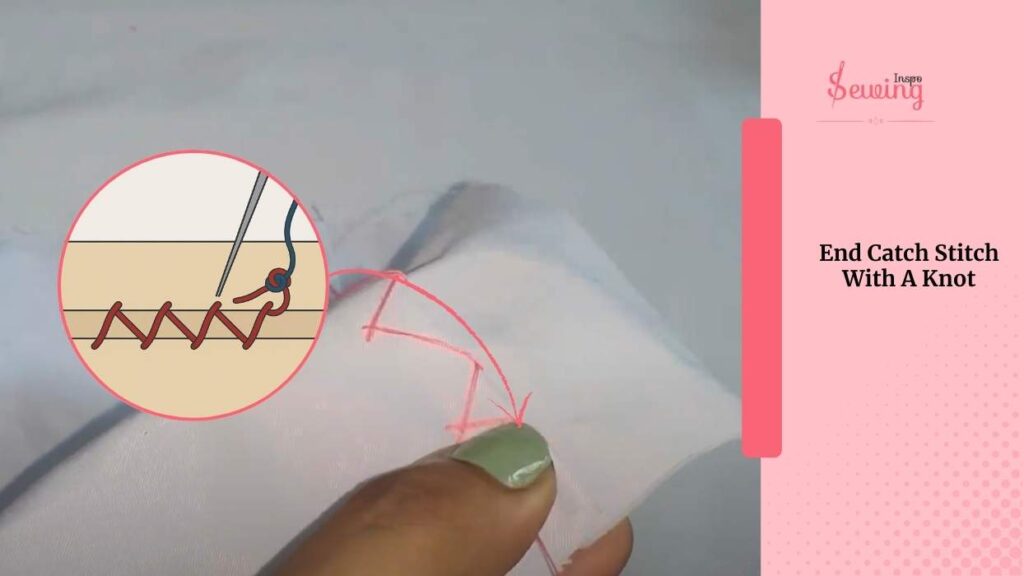
End Catch Stitch With A Knot
When you reach the end, insert your needle under a nearby stitch and make a small loop. Pull the needle through the loop twice to make a secure knot. Hide the tail inside the hem fold and snip off the excess thread.
That’s it! You got a catch stitch within 2 minutes. Now you’re a hem that won’t budge — and no one will know you did it by hand.
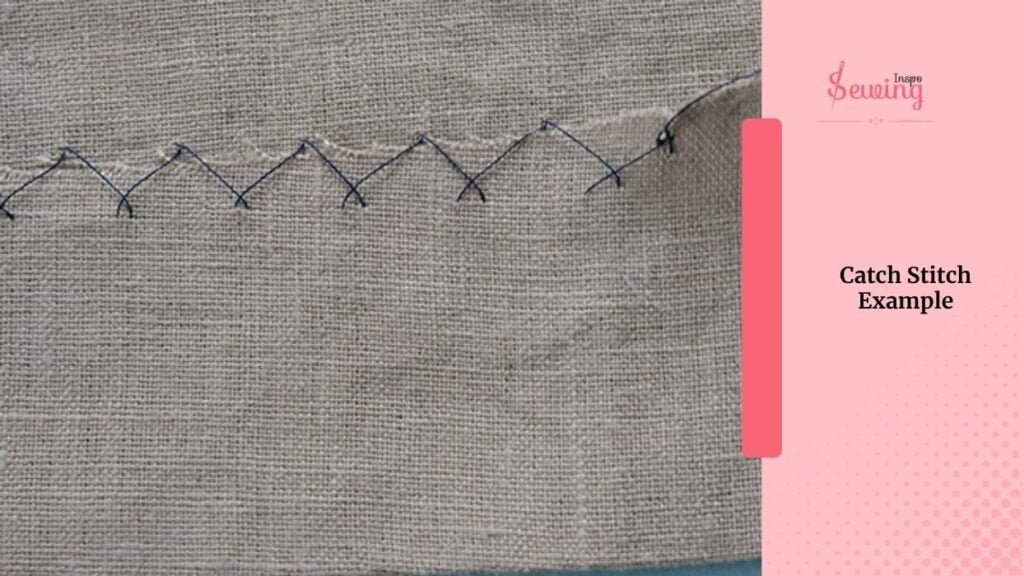
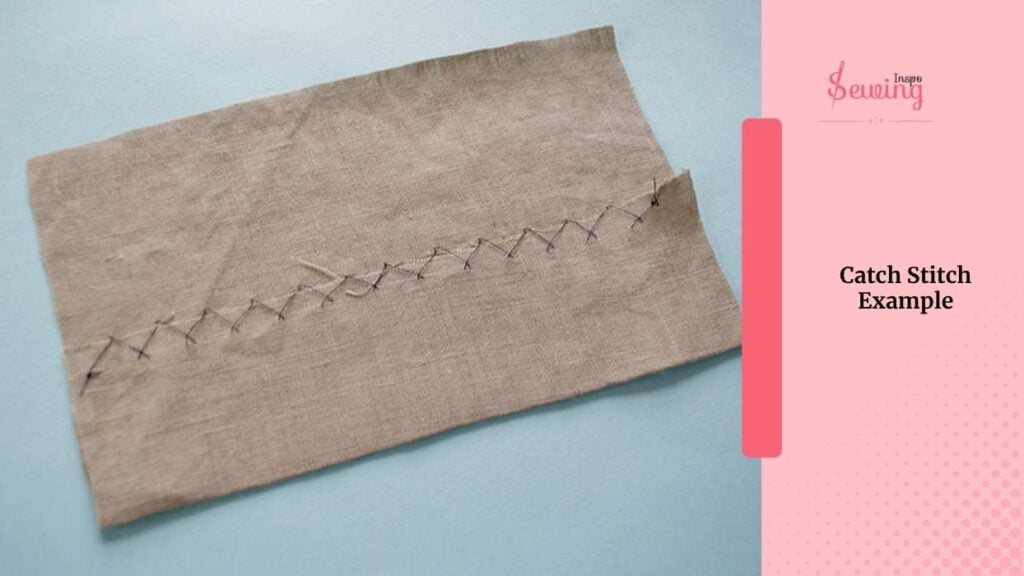
Catch Stitch Examples
If you still can’t figure out catch stitch then here have a look at this-
Catch Stitch By Hand Tutorial
If you are confused about any steps then watch this tutorial
Catch Stitch Tutorial – How to hem trousers with a herringbone stitch
Is Catch Stitch Hand Sewing Hard For Beginners?
Not really! The catch stitch might look a bit tricky at first because of its crisscross pattern, but it’s actually beginner-friendly once you get the rhythm.
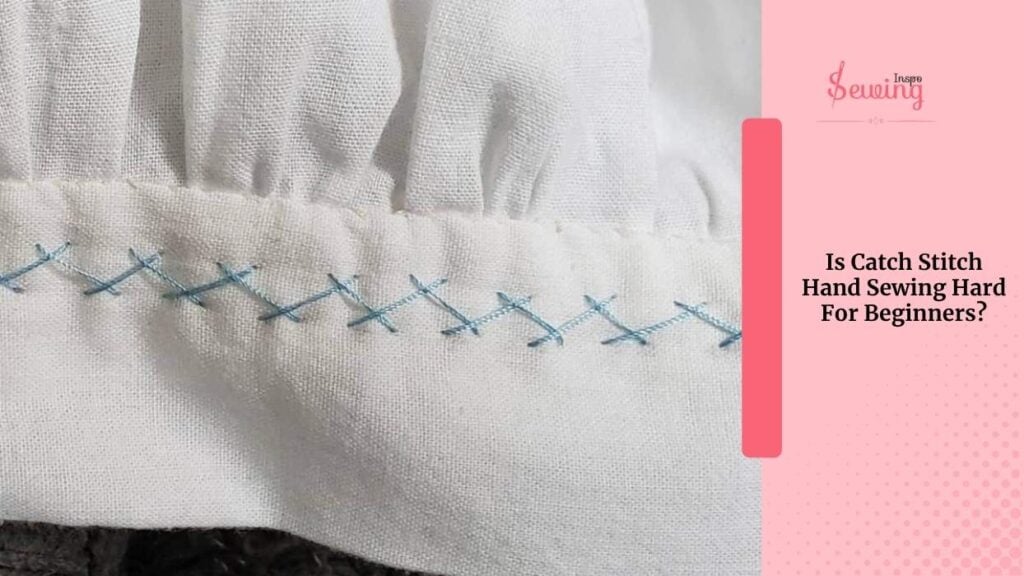
After a few tries, your hands naturally fall into the motion.
Small diagonal stitches back and forth. It’s forgiving, flexible. That’s why catch stitch hem is perfect for finishing edges neatly without showing much on the front side.
My Style Of Doing A Catch Stitch
I love to experiment and find something different about each thing. So, one day, I sat down to experiment with catch stitch, too. And I found two different ways to do it, too.
- Micro Catch Stitches
- Larger Catch Stitches
Those are not so different from the actual catch stitch. But still the approach is kinda different. Here is how,
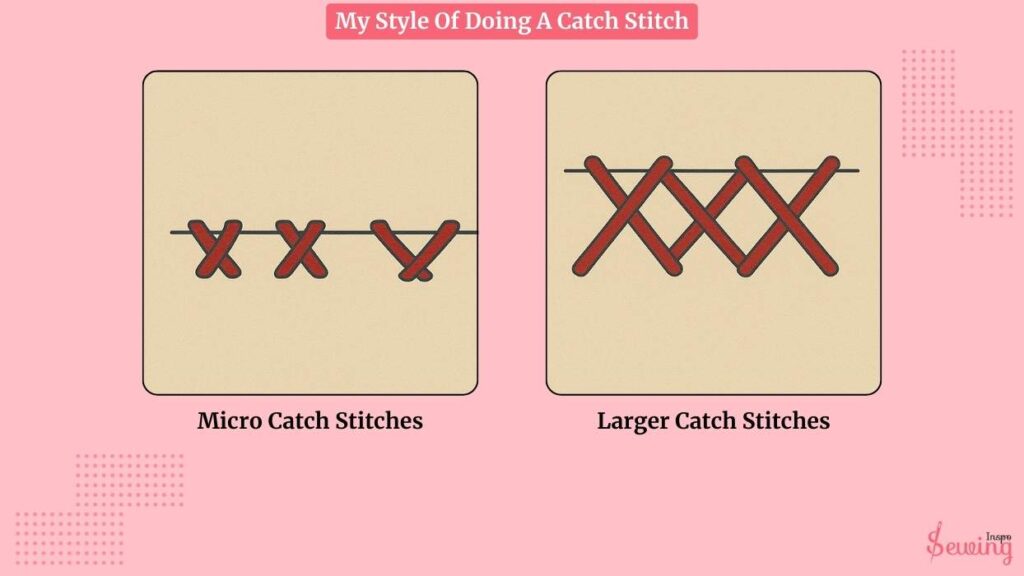
Micro Catch Stitches
Tiny, almost invisible “X” stitches that glide across your hem like they’re barely there. They’re precise, clean, and perfect for delicate projects. I mostly used them in a thin fabrics (chiffon, silk, lightweight cotton)
How I do it:
- Single thread (always!)
- Fine needle (size 9 or 10)
- I keep my outer stitch as small as 1–2 threads wide — microscopic!
- The spacing is tight — about ¼ inch apart
- I barely tug on the thread — it’s more like placing the stitch than pulling it
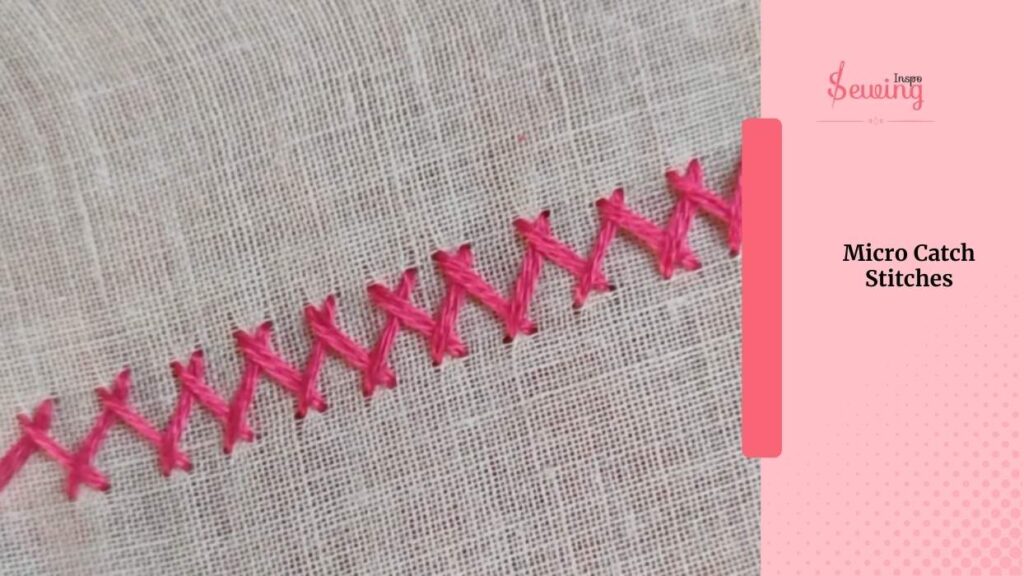
This version takes longer, but it looks insanely polished—like, “Did a robot do this?” kind of clean.
Larger Catch Stitches
Bigger, looser catch stitches that are faster to sew and stronger for thick fabrics. Still invisible. But with more oomph. I mostly use it in Wool skirts, canvas bags, and denim projects
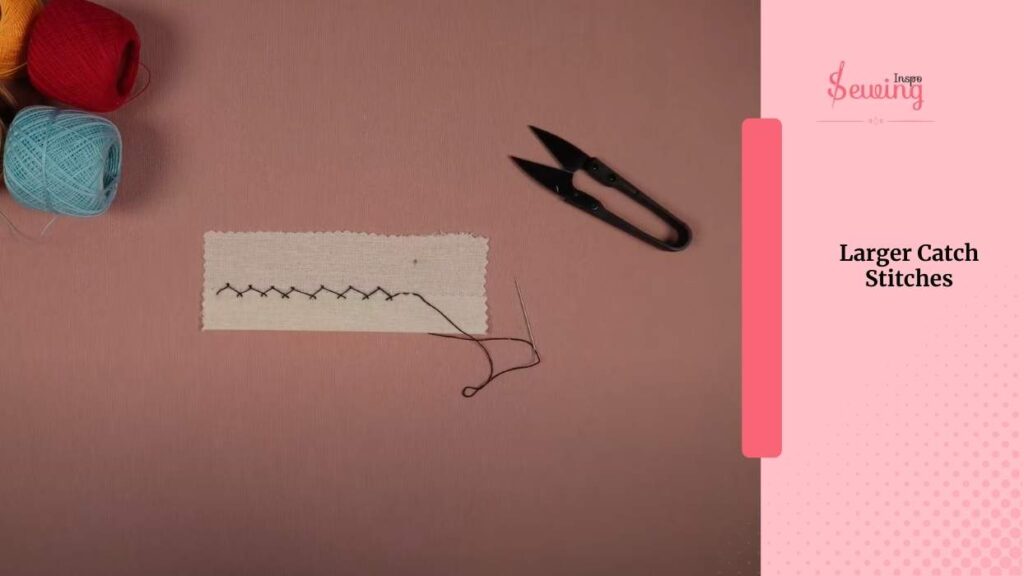
How I do it:
- Double thread or thicker thread (sometimes embroidery floss)
- Medium or heavy-duty needle (size 6 or 7)
- Outer stitch still stays small (about 2–3 threads), but…
- I stretch the “X” across a wider gap — about ½ inch to ¾ inch
- I pull the thread slightly firmer to anchor the hem better
If you want speed and structure, this is the move. Especially when the fabric would laugh at a delicate stitch.
Frequently Asked Questions
How To Sew Herringbone Stitch By Hand?
To sew a herringbone stitch by hand, start by bringing the needle up from the back of the fabric at the beginning of your line. Insert the needle diagonally across to the opposite side, then bring it back up a short distance away. Continue this pattern, alternating sides and creating a slanted, interlocking pattern resembling the bones of a fish.
What Does “Catch Stitch” Mean In Sewing?
In sewing, a catch stitch is a hand-sewing technique used to secure two layers of fabric together with a bit of give, allowing for flexibility. It’s often used for hemming or attaching linings.
When Should You Use A Catch Stitch?
Catch stitch is used for hemming a cloth. This stitch has your back when dealing with thicker fabrics, knits, or tricky curved hems. Those criss-cross moves? They give you some extra stretch and keep everything looking smooth. These stitches are strong and bendy, and you can barely spot them from the outside. If you are considering repairing darning holes, this isn’t your stitch. This is more of a decorative purpose.
Warp Up
Understand how to catch a stitch by hand now?
Yes, grandma, I know now!!
But do you know?? If yes, then comment down with one of your sewing projects.


Leave a Reply