
Trust me, I thought buttonhole stitch was just for buttons. But the more I learn about all the types of buttonhole stitches, the more I am amazed. You can do stunning embroidery with them! The other perfect embroidery stitch is the buttonhole wheel stitch.
There are 5 types of buttonhole wheel stitch, other than traditional ones too,
Such as-
- Whipped Buttonhole Wheel
- Barred Buttonhole Wheel
- Inside-Out Buttonhole Wheel Stitch
- Buttonhole Wheel Cup Stitch
- Half Buttonhole Wheel Stitch
Those are advanced level one. But the traditional wheel buttonhole stitch is easy.
Here Is How You Can Do It-
To create a buttonhole wheel stitch, mark a small circle on your fabric, bring your needle up from the back along the outline while forming a loose loop, and continue doing it until the end.
That’s the basic one and a short description. Don’t you want to know other types? I know you do! Let’s get into it. I’ll start with whipped buttonhole stitch.
At A Glance:
- Wheel buttonhole stitch is a wheel form of stitch.
- There are 5 types of buttonhole wheel stitch.
- A barred Buttonhole Wheel is a wheel with a border.
- Buttonhole Wheel Cup Stitch is a 2d version of wheel buttonhole stitch.

Table of Contents
How To Do Buttonhole Wheel Stitch By Hand? (Whipped Buttonhole Stitch)
To do a whipped version of buttonhole wheel stitch by hand, you need to follow 5 steps:
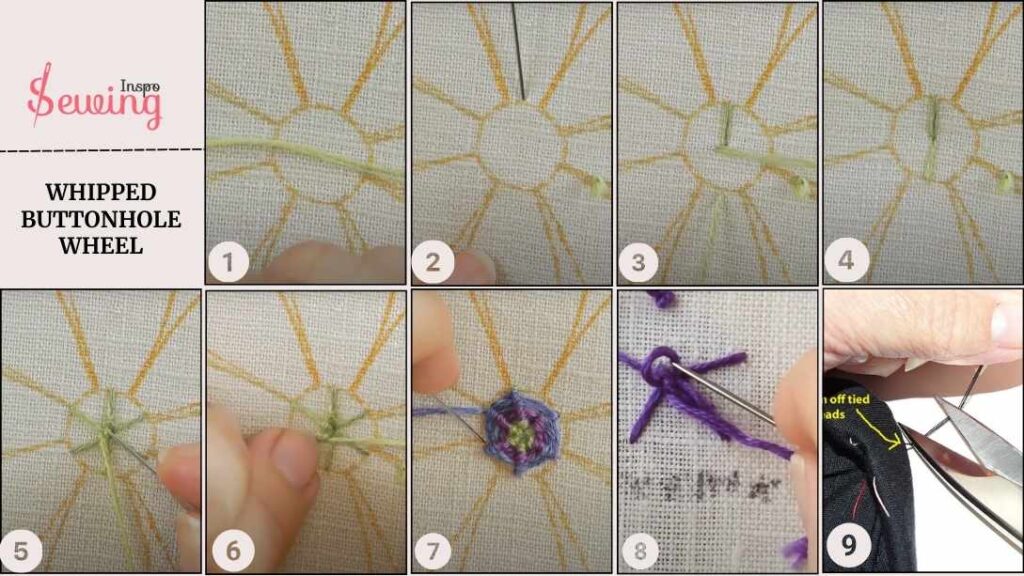
- Draw Your Circle
- Add The Spokes
- Come Up Close To The Center (Between Two Spokes)
- Slide Your Needle Under The First Spoke
- Keep Whipping Around
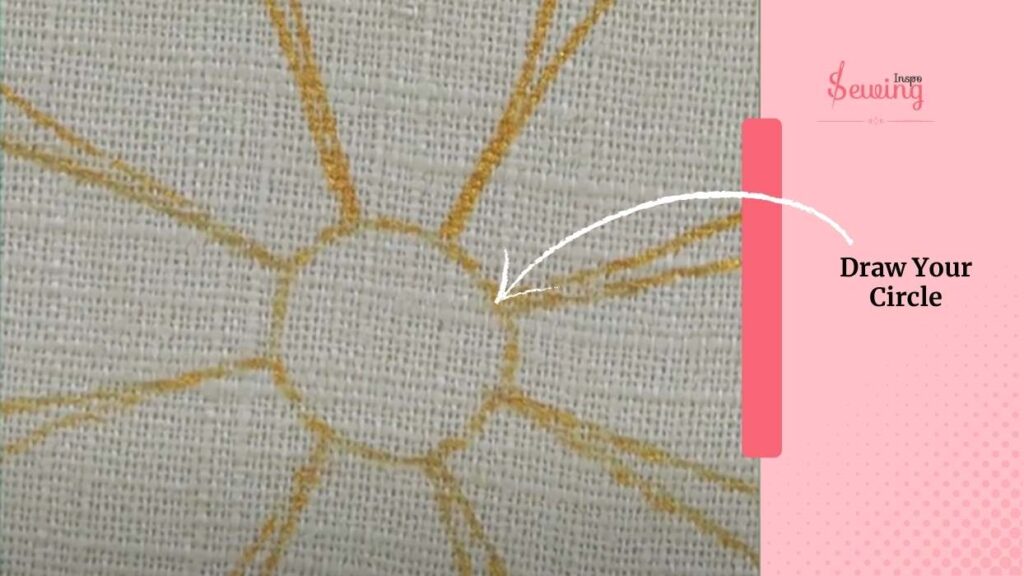
Draw Your Circle
Start by drawing a small circle where you want your whipped wheel to go.
It doesn’t need to be perfect — about the size of a dime or a quarter is a good beginner size.
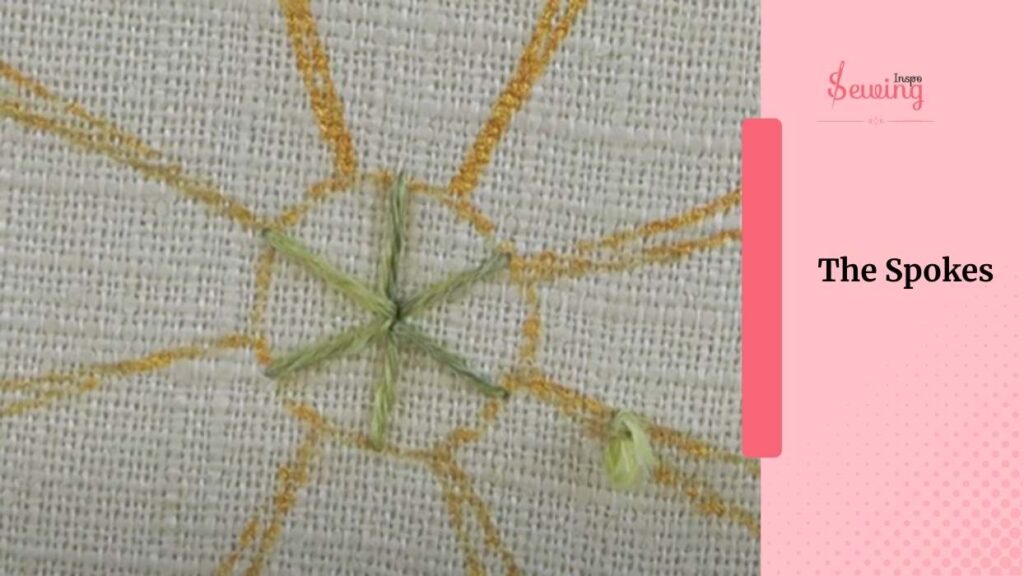
Add the Spokes
Now we will make the wheel’s spokes. The straight stitches radiate from the centre like a sunburst.
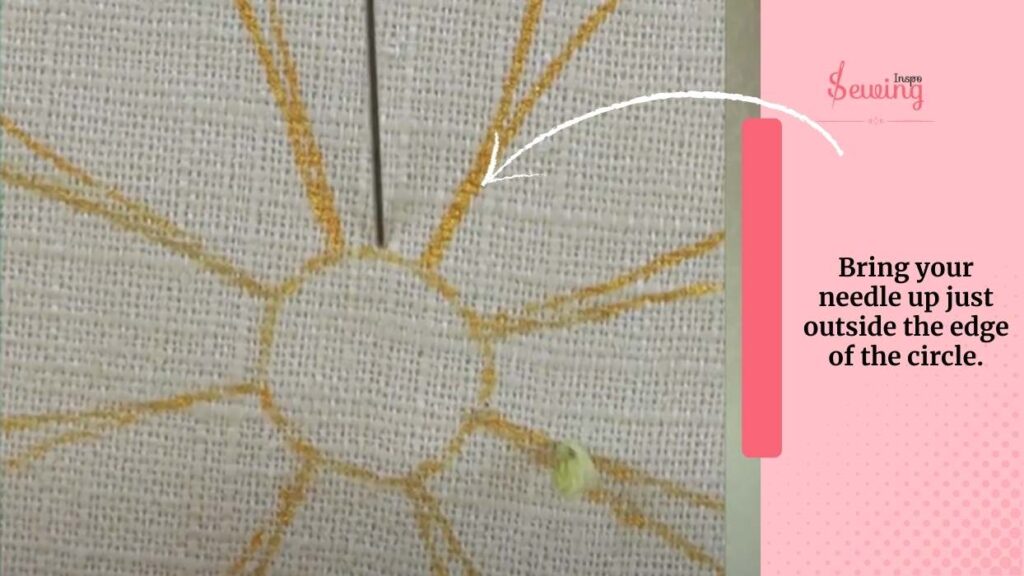
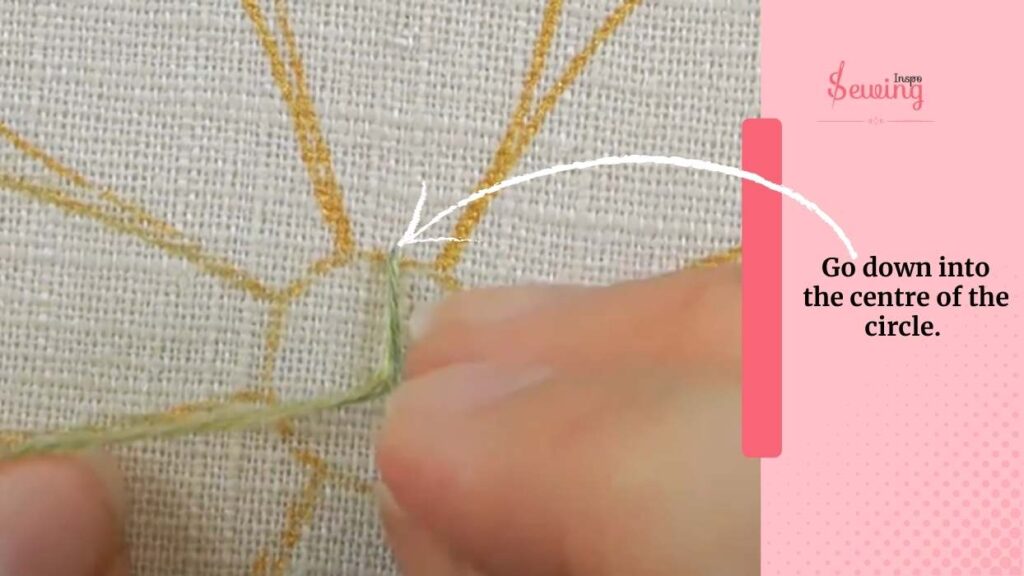
Bring your needle up just outside the edge of the circle.
Oh, and btw I’m using lamer thread. Which is 50% wool & 50% acrylic. It is the best combination for wheel buttonhole stitch.
Go down into the centre of the circle. That’s your first spoke. Do the opposite side: come up on the opposite edge and return to the centre. This will form a detached buttonhole stitch effect.
Repeat this process until you have 6–8 evenly spaced spokes. By the end it should look like this 👇
The awesome part? Unlike a woven wheel, you don’t need an odd number of spokes. Even numbers are fine here!
TIP: You don’t need to measure — just eyeball equal spacing. You can divide the circle into halves, thirds, and then fill in the rest.
Come Up Close To The Center (Between Two Spokes)
Thread your needle with the same thread or a different colour if you want a contrast. Come up close to the centre (between two spokes). Be careful not to split through any threads already there. This kinda reminds me of Open Buttonhole Filler Stitch.
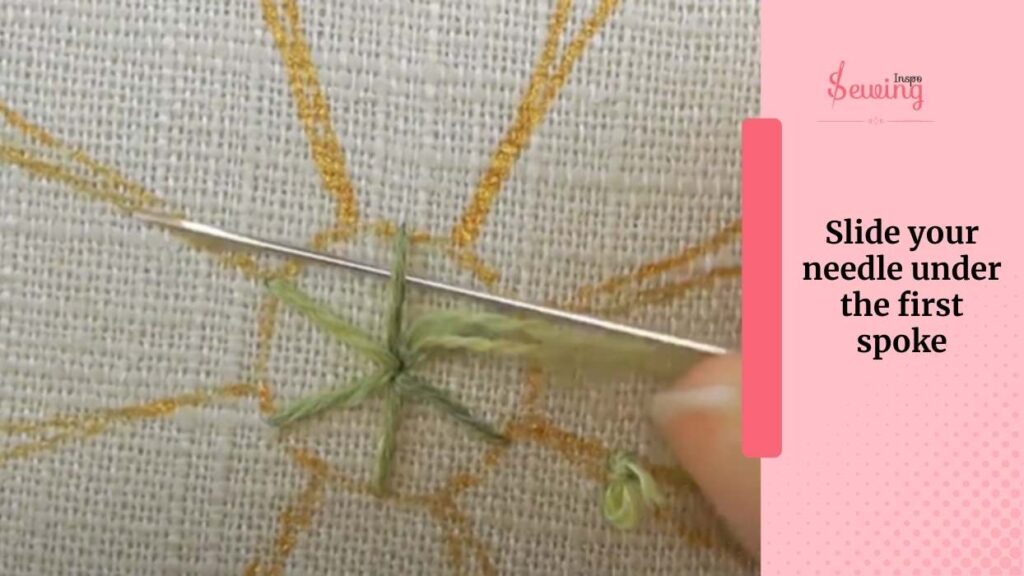
Slide Your Needle Under The First Spoke
Slide your needle under the first spoke — not through the fabric, just under the spoke thread. Wrap the thread around the spoke: loop it back toward where it came from, then slide under the same spoke again to “whip” it.
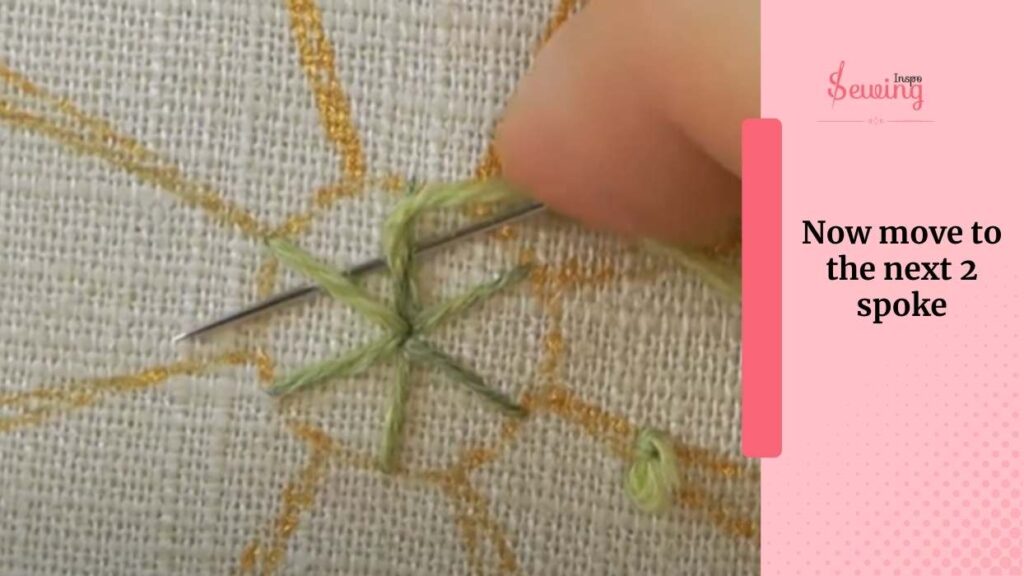
Now move to the next 2 spoke, slide under it, wrap around it, then move on. You’re going under – back over – under each spoke in a spiral motion.
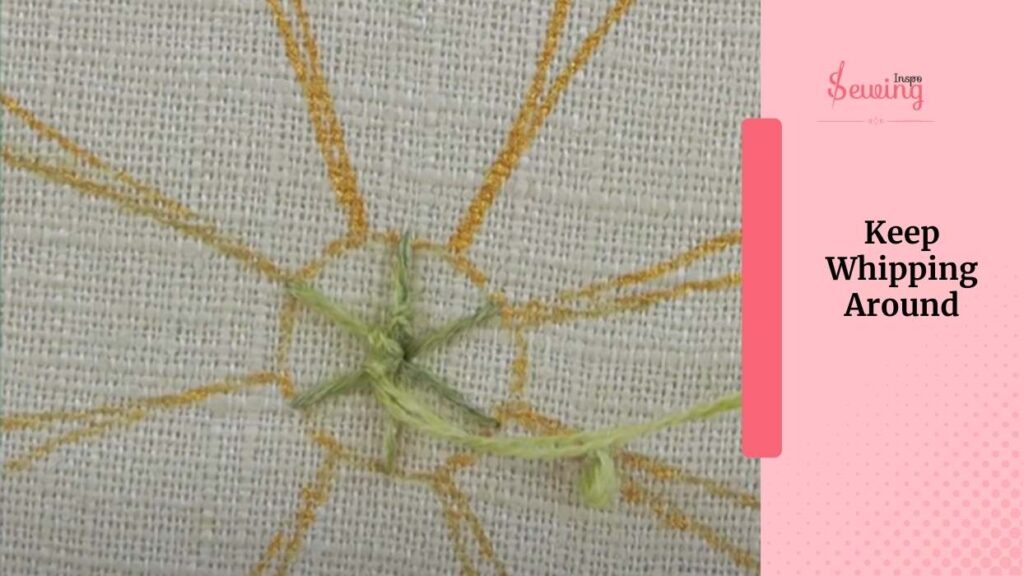
Keep Whipping Around
Keep going around the circle, whipping each spoke in order. Use a gentle tension to pull your wraps toward the center.
Don’t worry if your center looks messy. The stitches will naturally cover it as you build the spiral.
TIP: If the needle gets hard to pass under the spokes near the center, use the eye of the needle instead of the point. It won’t catch on threads as easily.
That’s it! By the end, you will have a whipped buttonhole stitch. Now, if you want to twist things up, use a different color and keep whipping.
A Cheat Bit (Finishing the Edge)
If you’ve whipped to the edge but some gaps remain, or if your circle isn’t perfect, here’s a trick:
- Instead of wrapping under the spokes, just make straight stitches across the empty spaces — like you’re satin stitching in between.
- It fills the gaps without needing to keep sliding under tight threads.
No one will ever know — and it looks exactly the same!
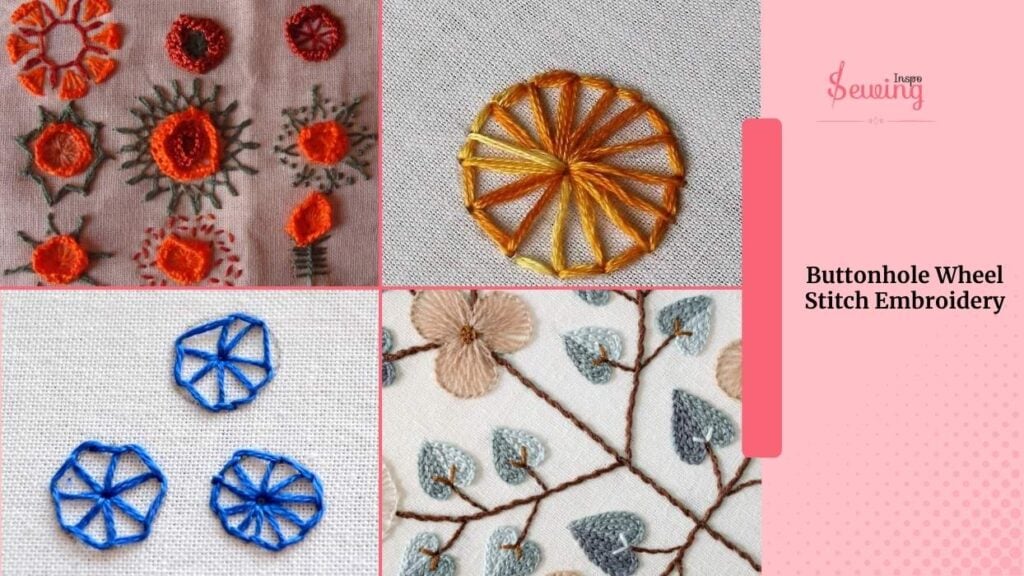
Buttonhole Wheel Stitch Embroidery
I did some button wheel stitch & here is how it turns out-
Buttonhole Wheel Stitch Pdf
Buttonhole stitch keeps surprising me. The more I learn, the more unknown facts I discover. And it’s hard to keep track of. So, I have made a PDF that includes everything about the wheel buttonhole stitch. Here I am giving it away: download it and save it. It’ll help you someday these images will help you recognize buttonhole stitch these images will help you recognize buttonhole stitch.
Frequently Asked Questions
How Does The Buttonhole Wheel Stitch Differ From A Buttonhole Stitch?
While the basic buttonhole stitch is used for edges and straight lines, the buttonhole wheel stitch arranges these stitches in a circle. This technique allows you to create circular, radial patterns, adding a dimensional element to your design.
Where Can I Use The Buttonhole Wheel Stitch?
This stitch is great for adding embellishments to fabric, creating floral designs, or adding texture to larger embroidery pieces. It’s often used in hand embroidery projects for pillows, clothing, bags, or any fabric project that needs a decorative element.
What Type Of Fabric Is Best For A Buttonhole Wheel Stitch?
The buttonhole wheel stitch works well on medium to heavy-weight fabrics, as these can hold the shape of the stitch without puckering. Fabrics like linen, cotton, and Aida cloth are great options.
Sum Up
The buttonhole wheel stitch can add such a charming, handmade touch to your projects! It’s versatile, fun to learn, and a great way to add dimension to your embroidery. Try it, and watch how these little wheels add so much personality to your work! Happy stitching! Have more questions? Then contact us.


Leave a Reply