
Randomly, I picked a cloth from Grandma’s sewing table to see its stitches. I saw a stitch holding the fabric layer as I turned the cloth. It looks like a bar tack stitch but insists on being attached to the fabric lying outside. And in some clothes, it held 2 fabrics together.
Grandma said it is a French tack stitch. I got more curious and asked again what types of stitches it was. And how to do it. She said,
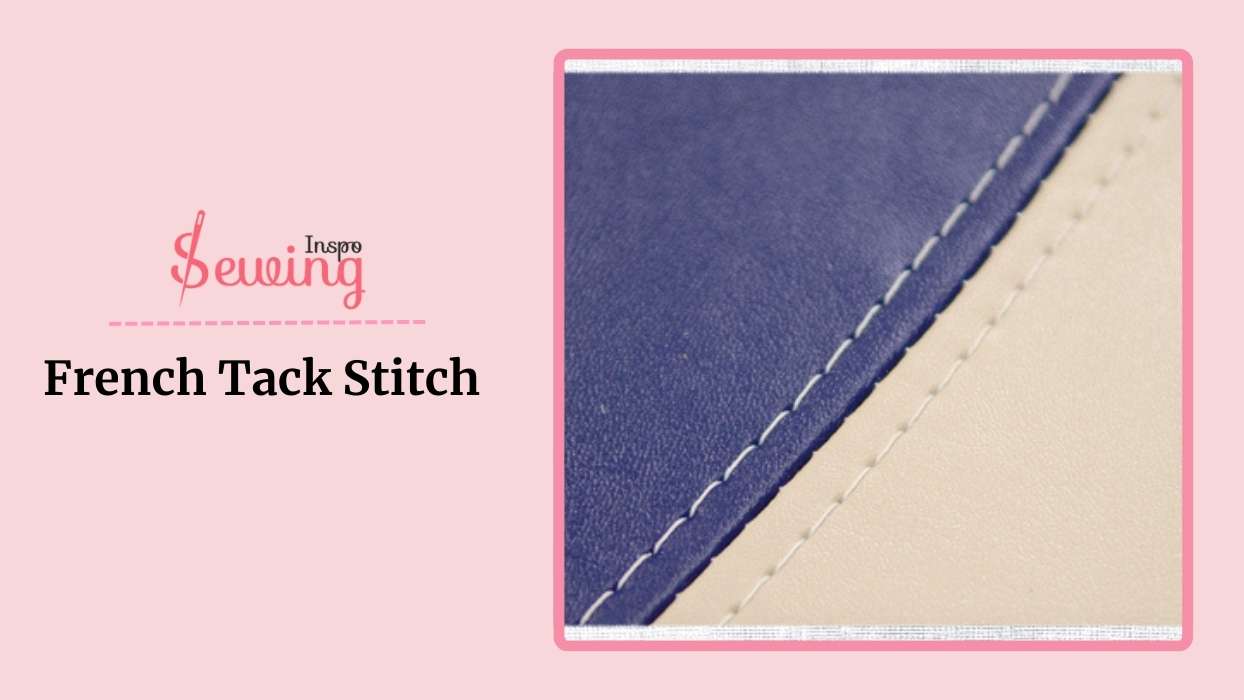
French Tack Stitch
A French tack stitch is a loose, looped hand stitch used to connect fabric layers or linings flexibly. To make a French tack stitch, anchor the thread at two points, then weave loose, looped stitches back and forth between them until firm.
This is mostly used as tack down stitch. Interesting right? Yes, it is! So, then, let’s learn more about this type of tack stitch.
How To Do French Tack Stitch By Hand?
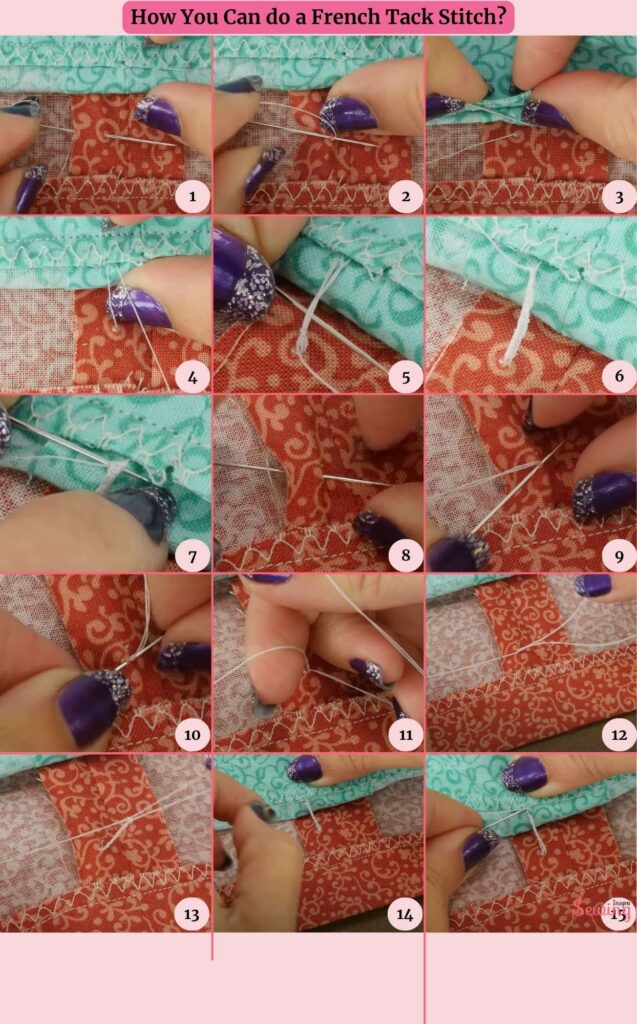
To do french stitch sewing, you need to follow 5 steps.
1: Cut Down The Thread For Tack Down Stitch
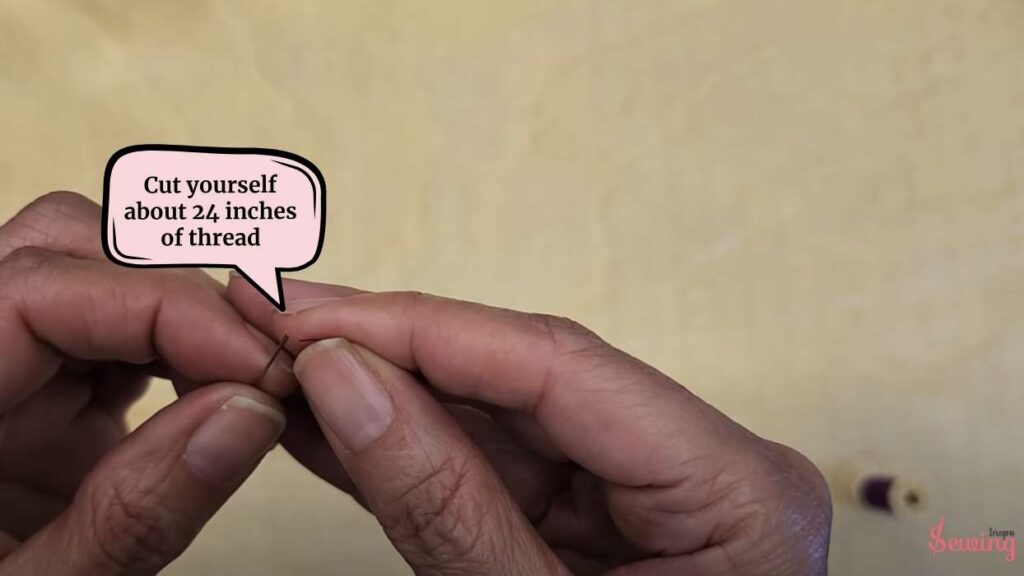
First, cut yourself about 24 inches of thread. You don’t need to measure it exactly. Just take a guess; you just did it in tailor tack.
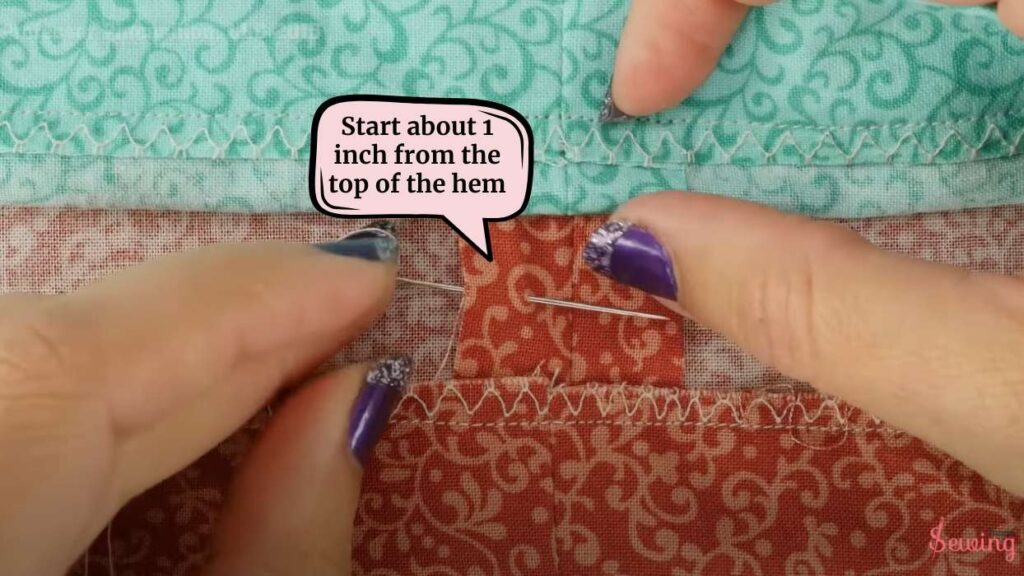
2: Push The Needle Through 1st Fabric
Start about 1 inch from the top of the hem. This will make a perfect tack down stitch on the seam allowance. That’s the main uses of stitches.
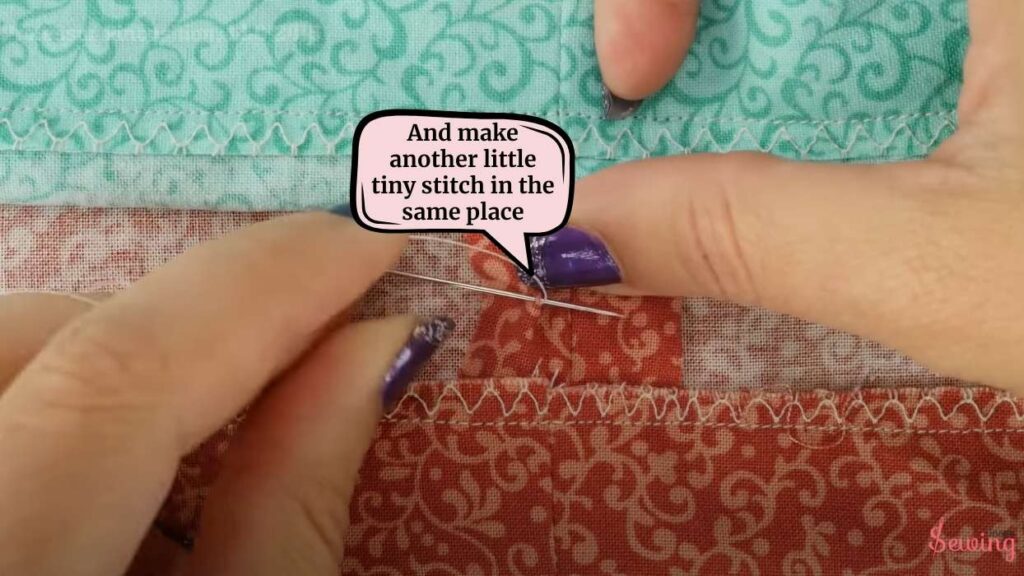
And make another little tiny stitch in the same place. like any other tailors stitch.
Don’t worry too much about where you stick that needle. It doesn’t have to be perfect, just close enough. This creates the perfect pin tack stitch.
Make sure the knot stays hidden on the back, okay?
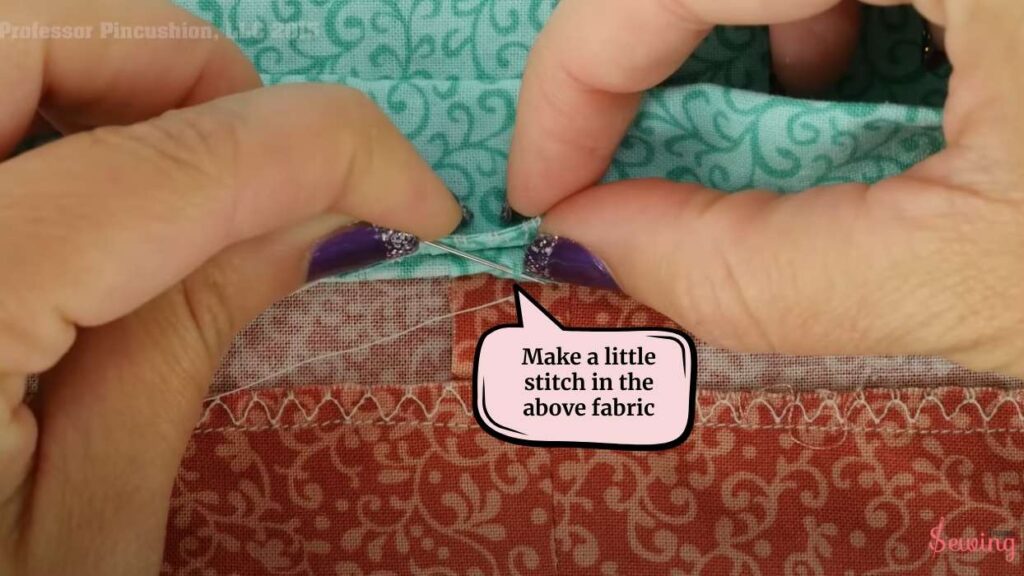
3: Roll Up The Fabric And Make A Stitch For The Tack Stitch
Roll up the fabric nap and make a little stitch in the above fabric nap. But I didn’t pull the stitch all the way through. Cause I’m not trying to lock both fabrics together. This will keep your embroidery design locked.
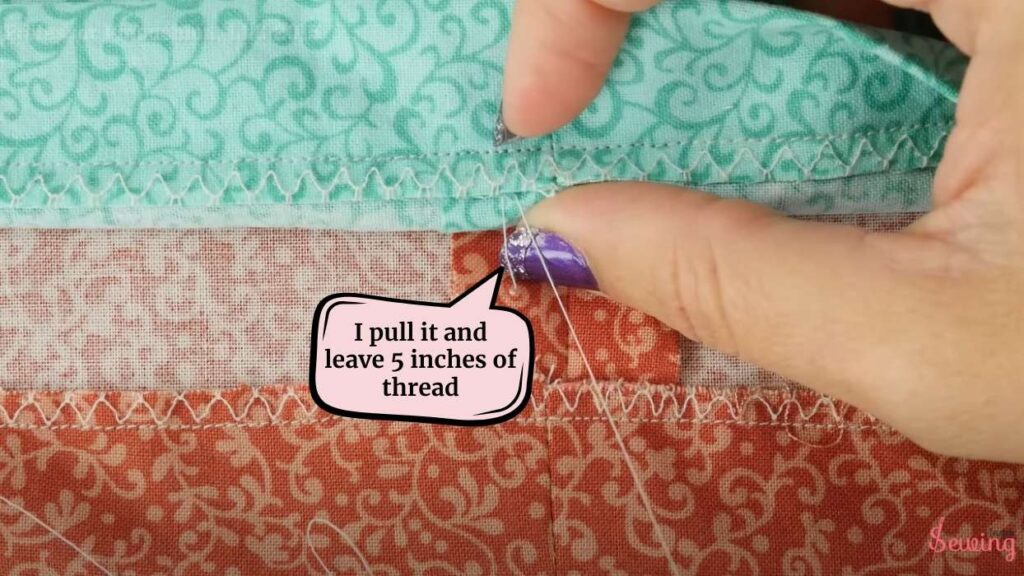
I pull it and leave 5 inches of thread. I pull this through finger under there so you can ensure that the whole thing doesn’t get pulled too tight. You need to keep it loss so that you can remove it easily.
4: Keep Doing The Knot
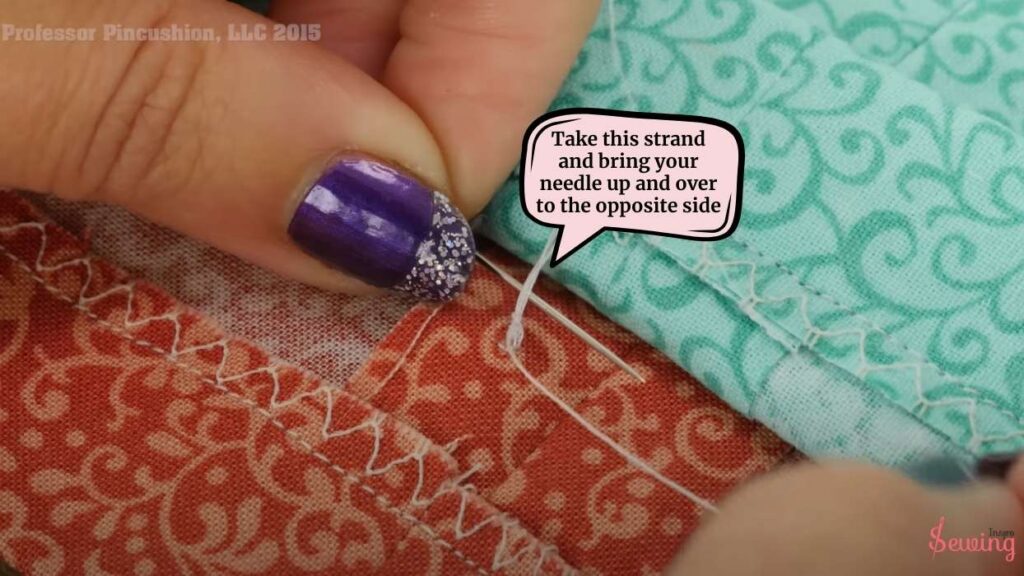
Now i keep doing this 4\5 times. This will make the long stitch.
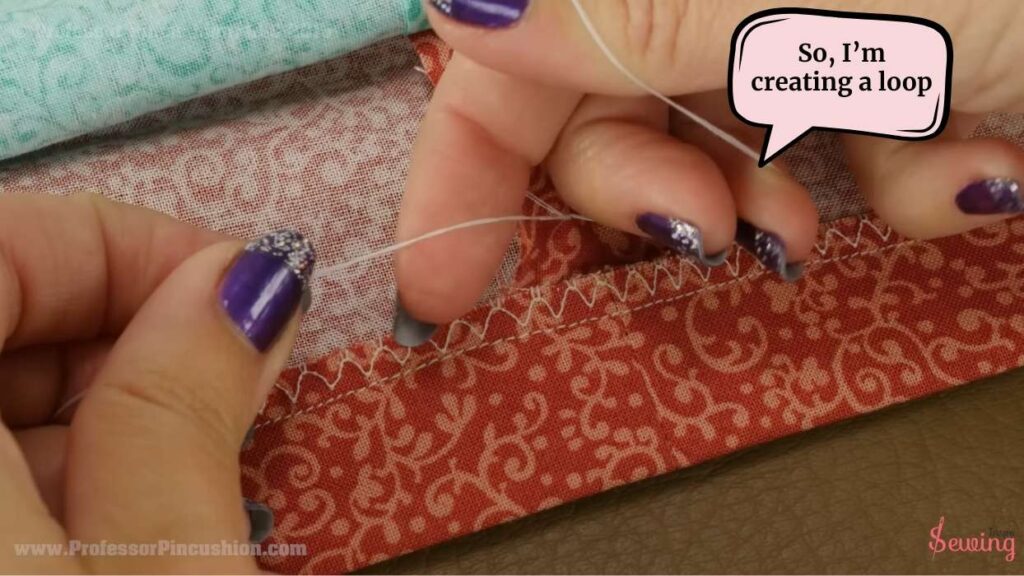
I will take this strand and bring your needle up and over to the opposite side. So here’s my needle; you can see my thread is going around it.
5: Slind The Needle, Tack Down Stitch
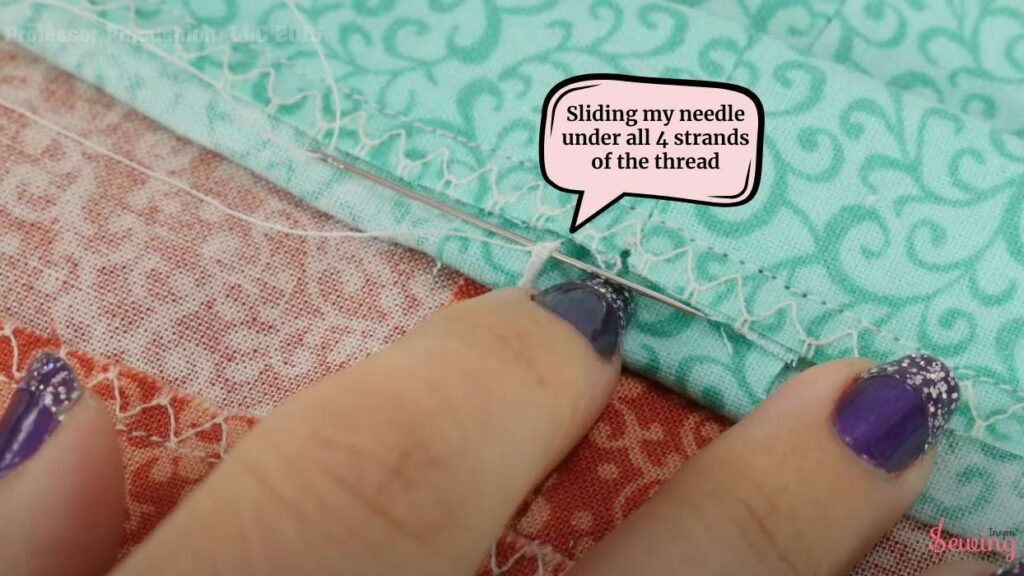
I’m still holding the needle in my right hand. I’m sliding my needle under all 4 strands of the thread.
And,
then I’m coming up, so it’s going over this thread here, so I’m creating a loop, then I’m gonna slowly pull it and make a knot. Now, keep making the knot. I use this trick for an even basting stitch.
I’m making about 12 knots, but trust your instincts if it looks good to you. Keep those knots snug but not strangling the thread, alright?
That’s how you can do a French tack stitch. Isn’t it easy to track down? Now, try it on your own and share it with sewinginspo.
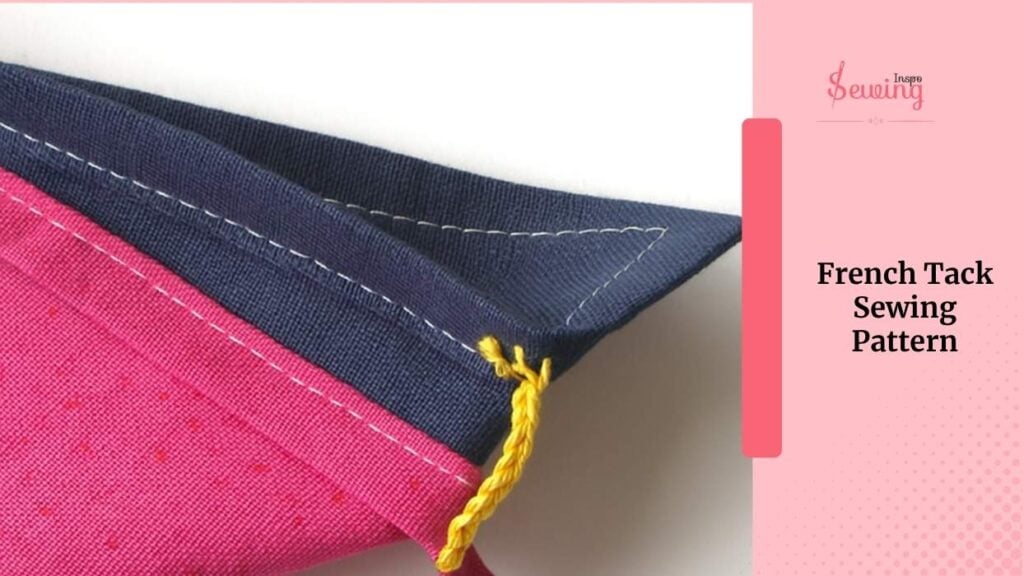
French Tack Sewing Pattern
If you’re looking at a French tack sewing pattern, it likely refers to instructions or placement guides within a garment pattern where you need to add this detail, usually between the side seams or hems. It’s functional, invisible from the outside, and adds a neat finishing touch!
I even tried it in a different way, and here is how it looks,


Leave a Reply